“From Vegan-a-Go-Go. They didn’t give specifics for the type of flour or the type of milk, I chose whole wheat flour & almond milk this time, in order to get the right nutritional data…..it sounds like nearly any flour or milk would work. Haven’t tried yet….but plan to!”
Ready In:
30mins
Ingredients:
11
1 1⁄3
cups whole wheat flour (or sub flour of your choice)
1⁄2
cup sugar
1
teaspoon baking powder
1
teaspoon baking soda
1⁄2
teaspoon salt
3⁄4
cup oat bran
1⁄2
cup chopped walnuts
2
ripe bananas
1⁄3
cup canola oil (or any light oil)
1
teaspoon vanilla extract
2⁄3
cup almond milk (any vegan milk will do)
directions
Preheat oven to 375 degrees F/190 degrees Celsius In a large bowl mix together the first 7 ingredients.
In a smaller bowl, mash up the bananas quite well then add in the oil, vanilla and milk.
Combine the banana mixture with the flour mixture and blend until “just” mixed.
Spoon into a lightly oiled muffin tin and bake for 15-20 minutes.
Questions & Replies
Got a question?
Share it with the community!
Want a Second Helping?
Sign up for our newsletter to get recipes, easy dinner ideas, tasty treats and more delivered straight to your inbox.
To withdraw your consent or to learn more about your rights, see the Privacy Policy.
RECIPE SUBMITTED BY
I first discovered recipezaar?when googling for some recipe that I can’t even remember now.??Before long I was?totally addicted and still?find it such a helpful resource for all sorts of things. People have really great ideas on this site, good senses of humour and, well, good recipes.
Published: · Modified: by Alissa Saenz · This post may contain affiliate links · 20 Comments
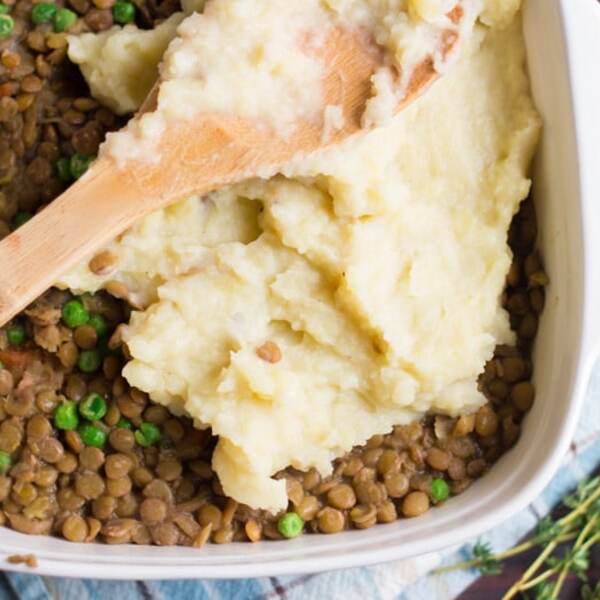
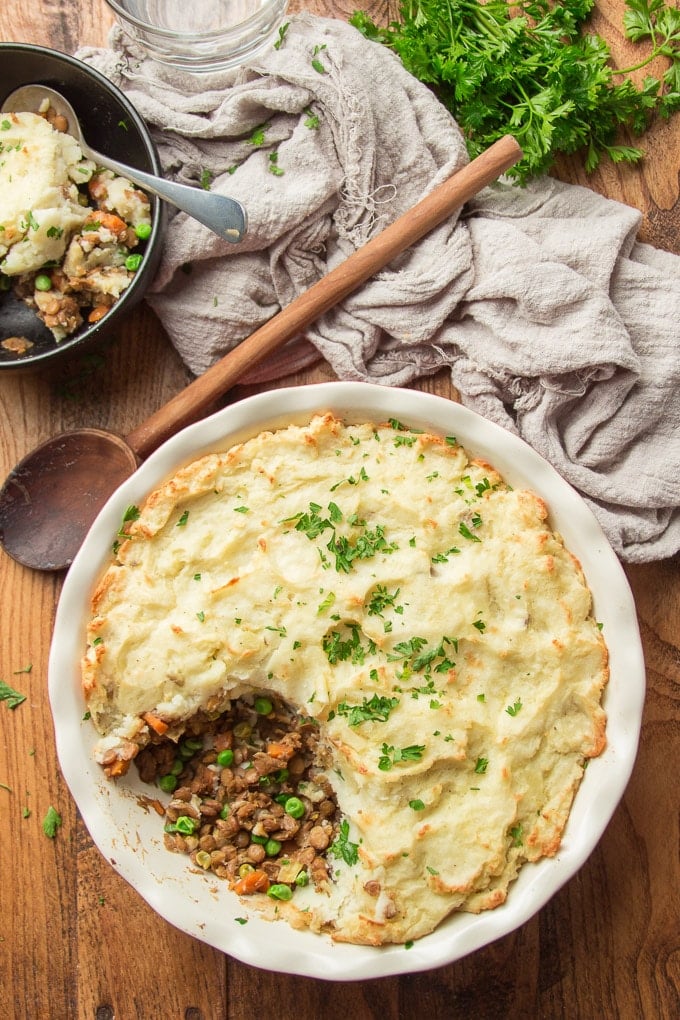
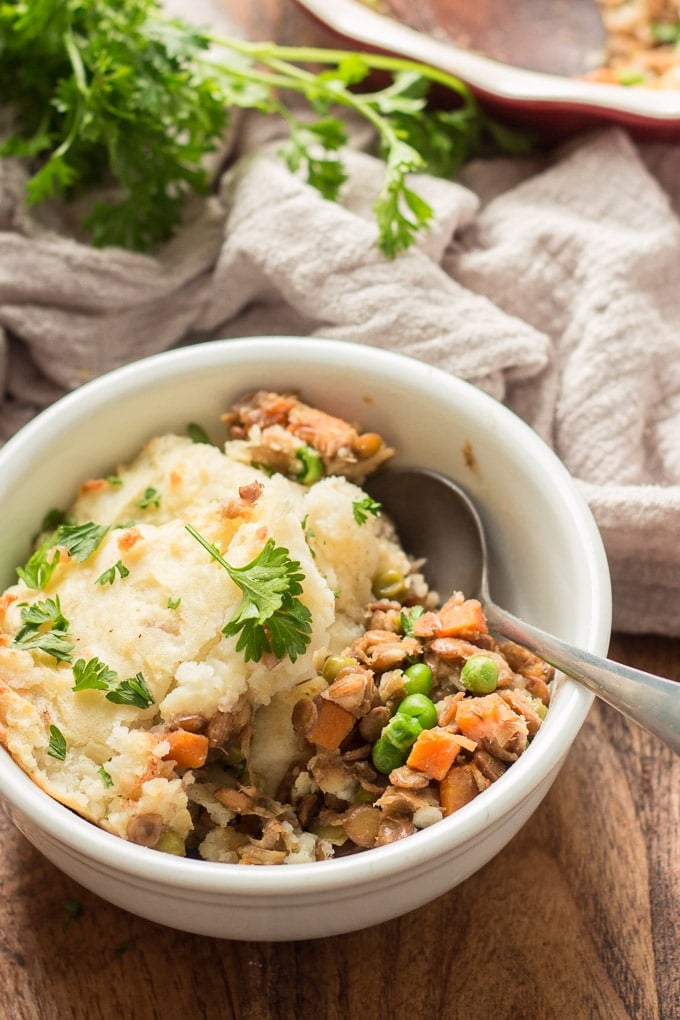
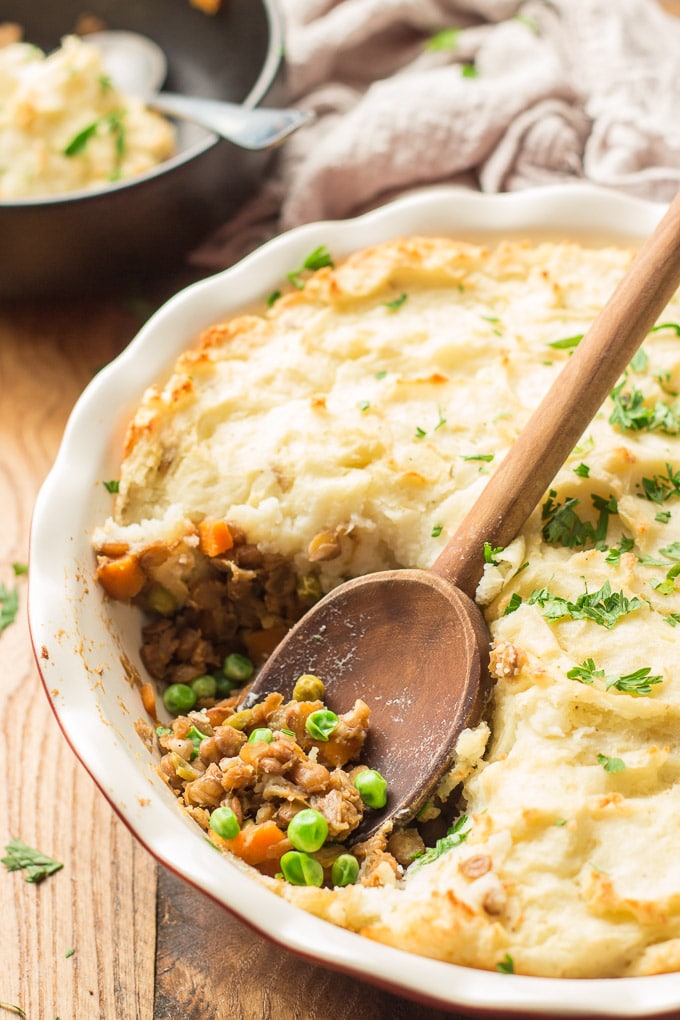
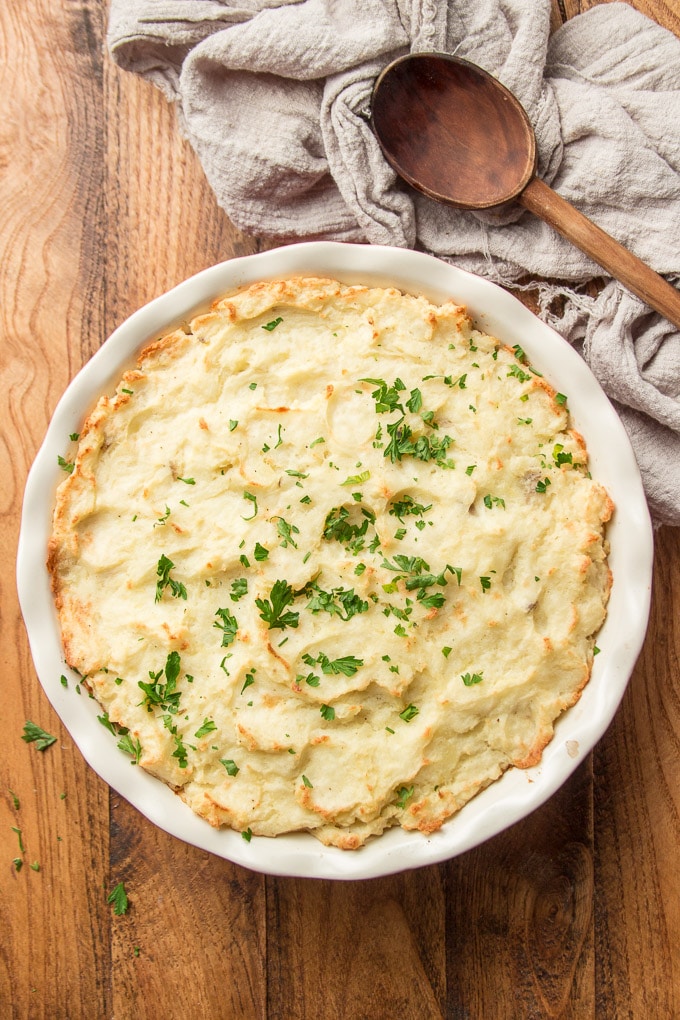
This hearty vegan shepherd’s pie is made with a base of savory lentils simmered up with a touch of whiskey and topped off with a crust of creamy garlic mashed potatoes. The ultimate vegan comfort food main dish!
Have you ever had shepherd’s pie? Or cottage pie, shepherd’s pie’s cousin? I was actually unfamiliar with the dish until just a few years ago, until one day my husband asked if he could make a meatless shepherd’s pie with some leftover mashed potatoes we had.
I can be a little bit of a control freak in the kitchen, so instead of letting him go ahead and make one, I went and made it myself. I’ve tweaked and perfected the recipe since then, and I’m pretty confident at this point that I’ve finally created the best vegan shepherd’s pie ever (or vegan cottage pie, if that’s how you prefer to think of it!).
I used one of my favorite meat swaps for the base of this vegan shepherd’s pie: lentils. My secret ingredient for infusing the lentils with lots of savory flavor is whiskey.
I’m not much of a drinker at all, and whiskey in particular I find pretty unpleasant in liquid form…but cook off that alcohol and what’s left is a rich, woodsy flavor that’s perfect for seasoning up veggie shepherd’s pie like this one.
Jump to:
What You’ll Need
How to Make Lentil Shepherd’s Pie
Leftovers & Storage
Vegan Shepherd’s Pie Tips & FAQ
More Savory Vegan Pies
Vegan Shepherd’s Pie
What You’ll Need
Okay, so you’ll need more than just whiskey and lentils to make this one. Here’s the full list!
Olive oil. Feel free to substitute your favorite high-heat oil.
Onion.
Leek.
Carrots.
Garlic.
Whiskey. You’re welcome to leave this out if you prefer, but it adds a wonderful smoky, savory flavor.
Thyme. Fresh or dried works!
Vegetable broth. I use Better Than Bullion’s roasted vegetable flavor.
Lentils. Brown lentils are the “meat” in this vegetarian shepherd’s pie. You can substitute green lentils if you like — they might take a bit longer to cook.
Vegan Worcestershire sauce. Annie’s, Edward & Sons, and Whole Foods brands are all vegan.
Red wine vinegar.
Liquid smoke. Some people love this, some hate it, so it’s an optional ingredient.
Frozen peas.
Salt and pepper.
Potatoes.
Non-dairy milk. Just about any kind will work, as longs as you use something unflavored and unsweetened.
Vegan butter. Look for brands like Earth Balance or Miyoko’s.
How to Make Lentil Shepherd’s Pie
The following is a detailed photo tutorial on how to make this dish. Scroll to the bottom of the post if you’d prefer to skip to the recipe!
Make the Filling
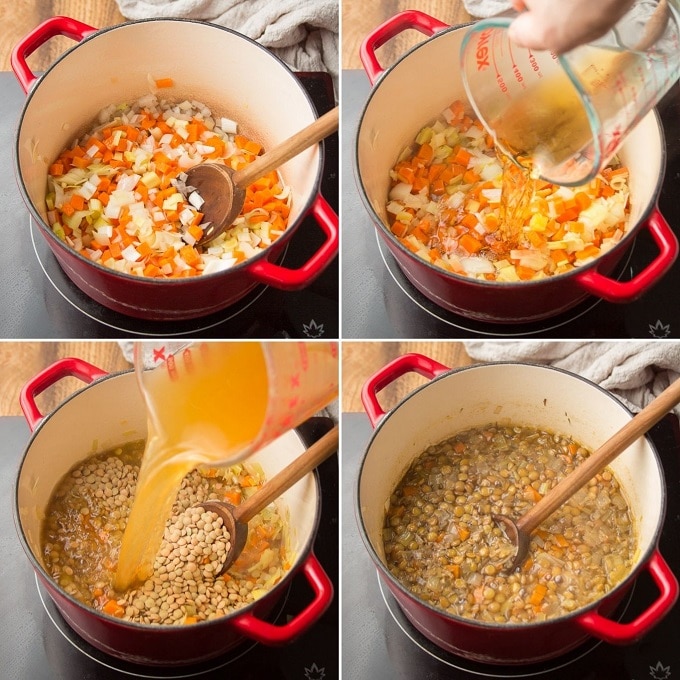
Heat up some oil in a large pot, then add diced onion, leek, carrots, and garlic. Sweat the veggies for a few minutes until they begin to soften up, making sure to stir them occasionally.
Now stir in whiskey and thyme. Add the whiskey carefully and make sure your heat is low when you do so — there’s always a risk of alcohol catching fire if it’s too hot! Bring the liquid to a simmer and let it cook most of the alcohol cooks off.
Stir in the broth and lentils.
Let everything simmer until the lentils are tender.
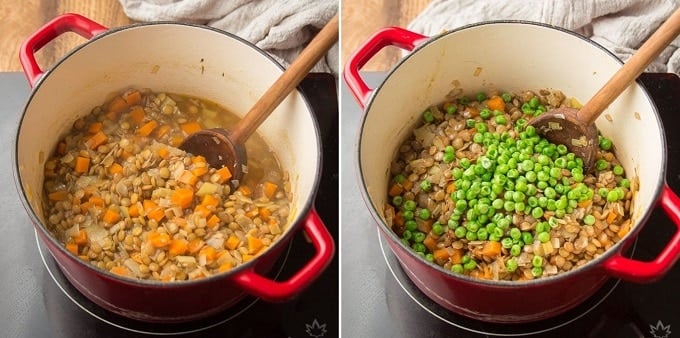
When the lentils have finished cooking, drain any excess liquid, then season them with some red wine vinegar and liquid smoke.
Stir in some thawed frozen peas, then add salt and pepper to taste.
Make the Crust and Assemble the Lentil Pie
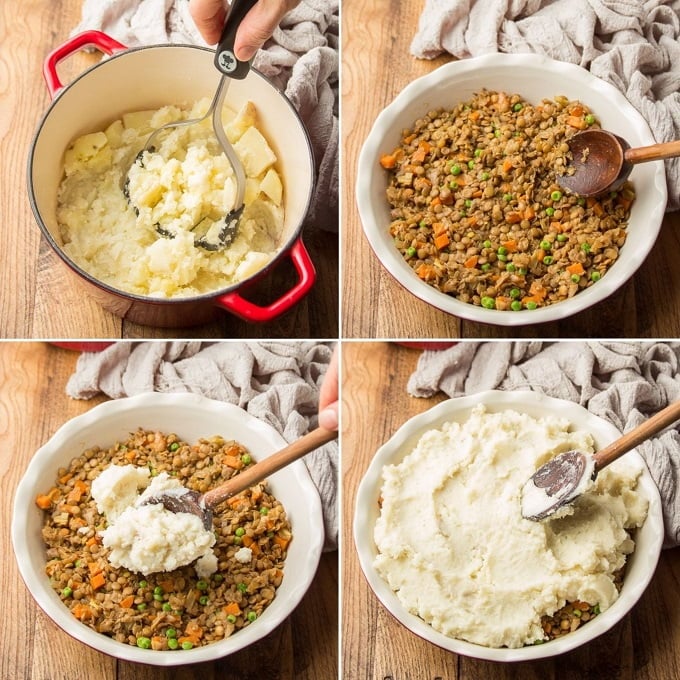
You can boil the potatoes for the crust while the lentils cook. When they’re done, mash them up with some non-dairy milk, vegan butter, and garlic, then season them with salt and pepper.
Spread the lentil mixture into a pie or casserole plate.
Spoon the mashed potatoes over the lentil filling.
Smooth the top out with a spoon.
Now pop your pie into the oven and bake it until the crust shows crispy browned spots!
Tip: To take your vegan shepherd’s pie to the next level, slather it with homemade vegan gravy.
Leftovers & Storage
Leftovers are best stored in the original dish that was used for baking, covered tightly with plastic. They’ll keep in the fridge for about 4 days, or in the freezer (if sealed really well) for about 2 months.
Vegan Shepherd’s Pie Tips & FAQ
Is this dish gluten-free?
It is!
Can this pie be made without alcohol?
Yup! Just omit the whiskey and skip steps 3 and 4 of the recipe. You can add the thyme when the vegetable broth goes in.
Can the filling be made with red or green lentils?
Green will absolutely work (I’ve done it!), although the simmer time in step 6 may be a bit longer. I don’t recommend using red, as the texture wouldn’t work well for this dish.
More Savory Vegan Pies
Vegan Chicken Pot Pie
Vegan Cheese & Onion Pie
Chickpea Ragoût Pot Pie
Vegan Potato Leek Quiche
Like this recipe? If so, be sure to follow me on Facebook, Pinterest or Instagram, or subscribe to my newsletter. And please stop back and leave me a review and rating below if you make it!
Vegan Shepherd’s Pie
This hearty vegan shepherd’s pie is made with a base of savory lentils simmered up with a touch of whiskey and topped off with a crust of creamy garlic mashed potatoes.
Course Entree
Cuisine American, British
Prep Time 20 minutesminutes
Cook Time 1 hourhour
Total Time 1 hourhour20 minutesminutes
Servings 6
Calories 361kcal
Author Alissa
Ingredients
For the Lentil Base
1tablespoonolive oil
1small onion,diced
1leek,white and light green parts only, cleaned and chopped
2medium carrots,diced
2garlic cloves,minced
½cupwhiskey
1tablespoonfresh thyme leaves,or 1 teaspoon dried
2 ½cupsvegetable broth
1cupdried brown lentils
1tablespoonvegan Worcestershire sauce
1teaspoonred wine vinegar
½teaspoonliquid smoke(optional)
½cupfrozen peas,thawed
Salt and pepper to taste
For the Garlic Mashed potatoes
1 ½poundsrusset potatoes,peeled and cut into 1 to 2 inch chunks
½cupunflavored non-dairy milk,plus more as needed
3garlic cloves,minced
2tablespoonsvegan butter(olive oil works too)
Salt and pepper to taste
Instructions
Make the Lentil Base
Coat the bottom of a medium saucepan with olive oil and place over medium heat.
When the oil is hot, add the onion, leek, carrots, and garlic. Sweat the veggies until onions are softened, about 5 minutes.
Stir in the whiskey and thyme. Raise the heat and and bring the liquid to a simmer.
Continue simmering until most of whisky has evaporated, about 3 minutes, stirring occasionally.
Stir in vegetable broth and lentils, then raise the heat and bring the liquid back to a simmer.
Lower the heat and allow the mixture to simmer, uncovered, until the lentils are tender but not mushy, about 25-30 minutes. Stir the pot occasionally and add a bit of water if it reduces too much. Remove from heat and drain any excess liquid when done cooking.
Remove the pot from heat and drain any excess liquid when done cooking.
Stir in the Worcestershire sauce, vinegar, liquid smoke and peas. Season with salt and pepper to taste.
Make the Mashed Potatoes
While the lentils simmer, place potatoes into a large pot and cover them with water.
Place the pot over high heat and bring the water to a boil. Lower the heat and boil the potatoes until fork tender, about 15 to 20 minutes. Do not overcook the potatoes.
Remove the pot from heat and drain the potatoes into a colander.
Return the potatoes to the pot and mash them with a potato masher. Stir in the milk, garlic and butter. You can add more milk if needed to reach your desired consistency, but you want to keep the potatoes relatively thick. Season with salt and pepper to taste.
Make the Shepherd’s Pie
Preheat the oven to 400º. Transfer the lentil mixture to an 8 inch by 8 inch baking dish or deep dish 9-inch pie plate. Gently press down into a uniform layer with a spoon or spatula.
Top the lentil mixture with mashed potatoes, smoothing them out all the way to the edges to create a seal.
Bake the pie until brown spots form on top, about 30 minutes.
Remove it from oven and allow to sit for 10 minutes before serving.
Notes
This dish firms up as it sits, so it’ll be a soft casserole straight from the oven, and a very sliceable pie after a few hours in the fridge.
Hi, I’m Alissa! I’m a former attorney turned professional food blogger. I love creating vegan recipes with bold flavors! You can read more about me here.
I’d love to connect with you on Facebook, Instagram, or Pinterest.
Hey and Welcome to Orchids + Sweet Tea! A place for those who love to savor the flavor and nourish their soul—–one meal at a time. All recipes are bold and unique in flavor with simple steps for you to re-create for your entire family to enjoy! Plus, honest + transparent convos about life + faith.
Watch Now
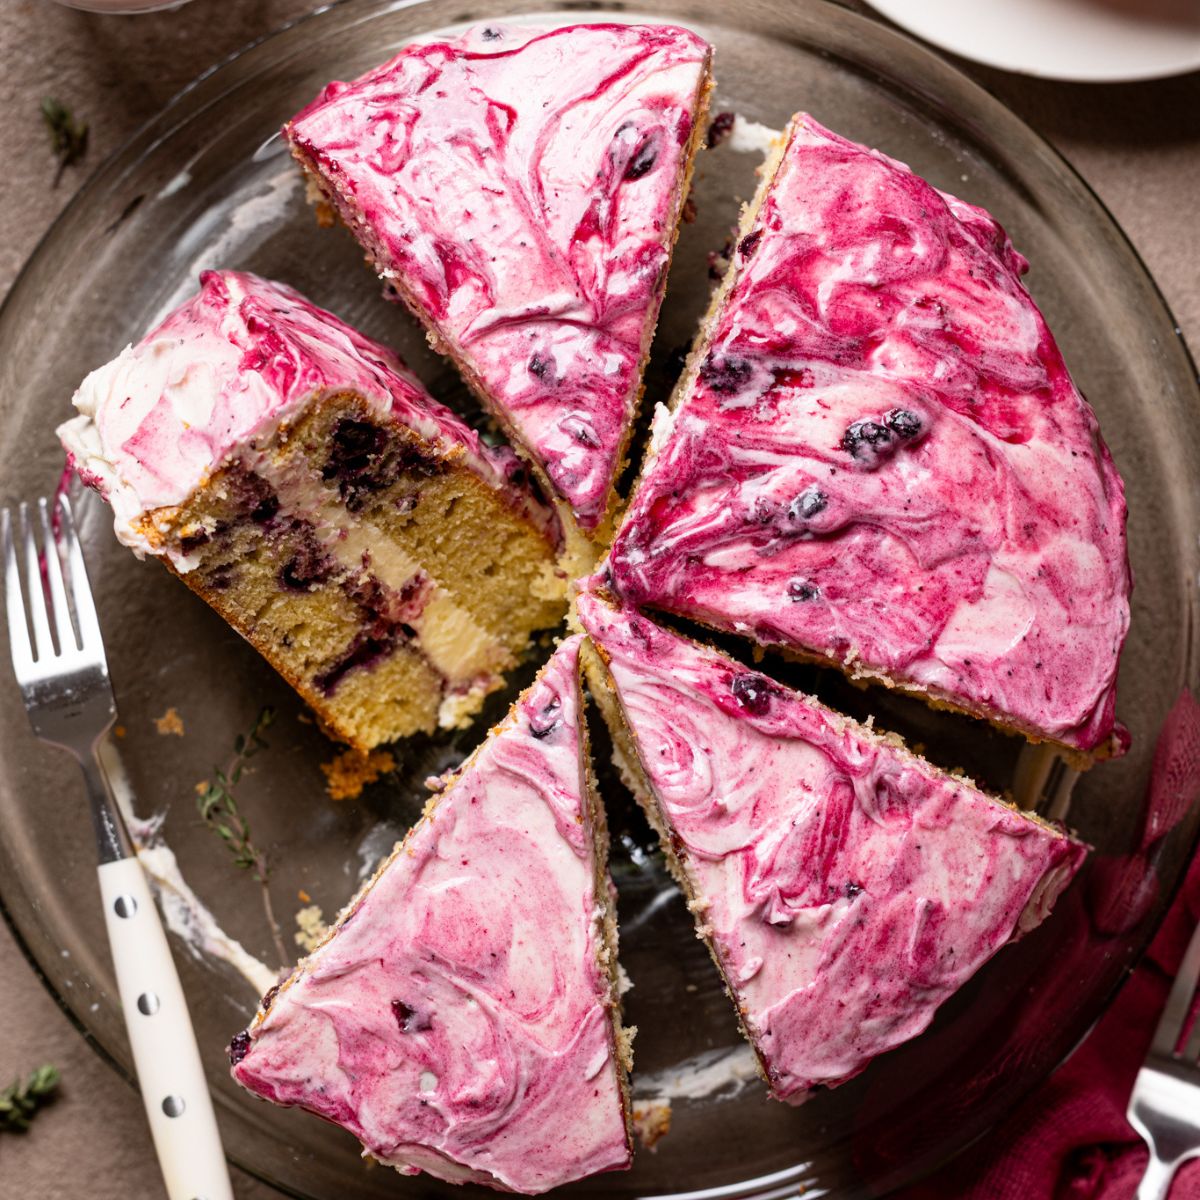
Lemon Blueberry Olive Oil Cake
This Lemon Blueberry Olive Oil Cake is super moist, dense, and fluffy. The zesty lemon and olive oil mix perfectly with the sweet blueberries, giving it a great tart-sweet balance. It’s the kind of treat everyone in the family will love, no matter the occasion! Vegan + Gluten-free option.
Hey, Welcome!
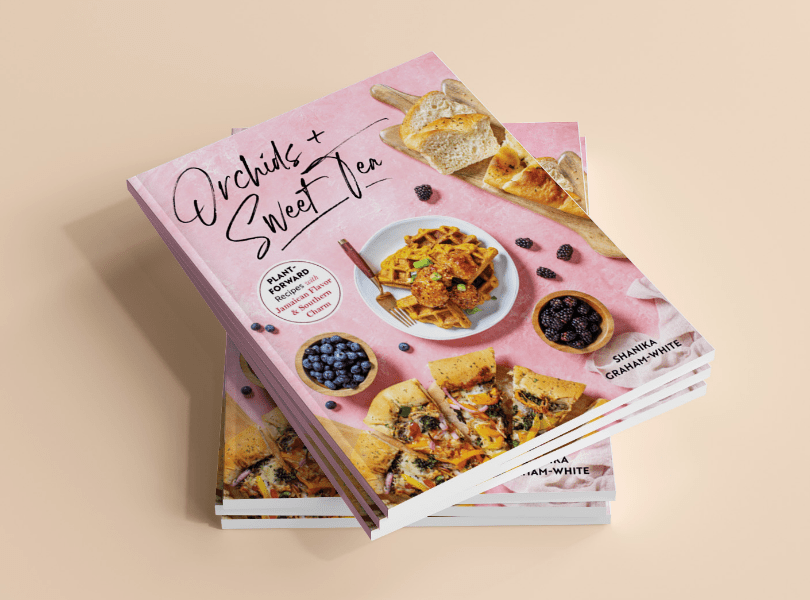
I’M SHANIKA, FOUNDER OF ORCHIDS + SWEET TEA!
Here, you’ll find food options that delve into my Jamaican + Southern backgrounds as well as ingredient swaps/substitutes to offer you the ability to eat healthier while ensuring that EVERYONE in your family can eat + enjoy every bite (some Dairy-Free, sprinkles of Gluten-Free, an explosion of Vegan, and Vegetarian dishes).
Savor the Flavor, Nourish the Soul, One Meal at a time.
Whether you’re a home cook or a skilled chef, the more than 120 recipes in this book will help you make everyday comfort food recipes to nourish your family as well as unique, artful dishes for special occasions that call for more flare.
Hello my Steemian friends. Time is passing by so quick. Been on Steemit for 68 days already and I had a good time and good memories being here since day 1.
I remember my post “Vegan chocolate Cake” which made $31.05 for the first time upvoted by @dtube (All thanks to), another post “Filipino- Style Chicken Adobo” which made $57.39 again upvoted by @dtube and lastly my “Buckwheat Pizza” post which made $68.92 upvoted by @curie and the big whales. I was all happy and excited I earned something without even having a single steem power that time.
And yes, I quit my nursing job for only making like $150 per month which is not quite fulfilling and sustaining for me. Then I chose to focused on pursuing my dream, to become a photographer and Steemit is my homeplace for that.
I started taking photos of the dishes I made and shared it here and on and on I kept learning and improving also by the help of my fellow Steemians and the #Steemitbloggers community. I salute you guys!
The good thing about Steemit is that big whales are searching for minnows who have quality posts that needs to get noticed and they upvote it. Through this, they’re helping the community to grow by rewarding the content creator and consumer with steem dollars which is a good thing. Yah, better than facebook, where big guys got paid by selling our private information (sneaky).
How about you? How is your Steemit journey so far?
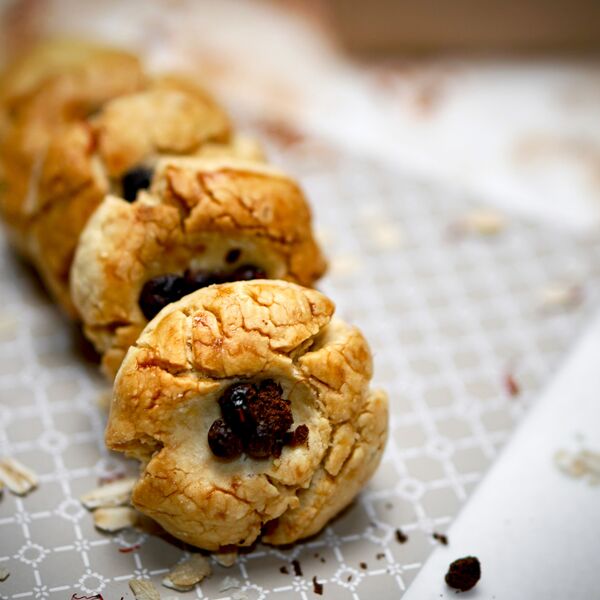
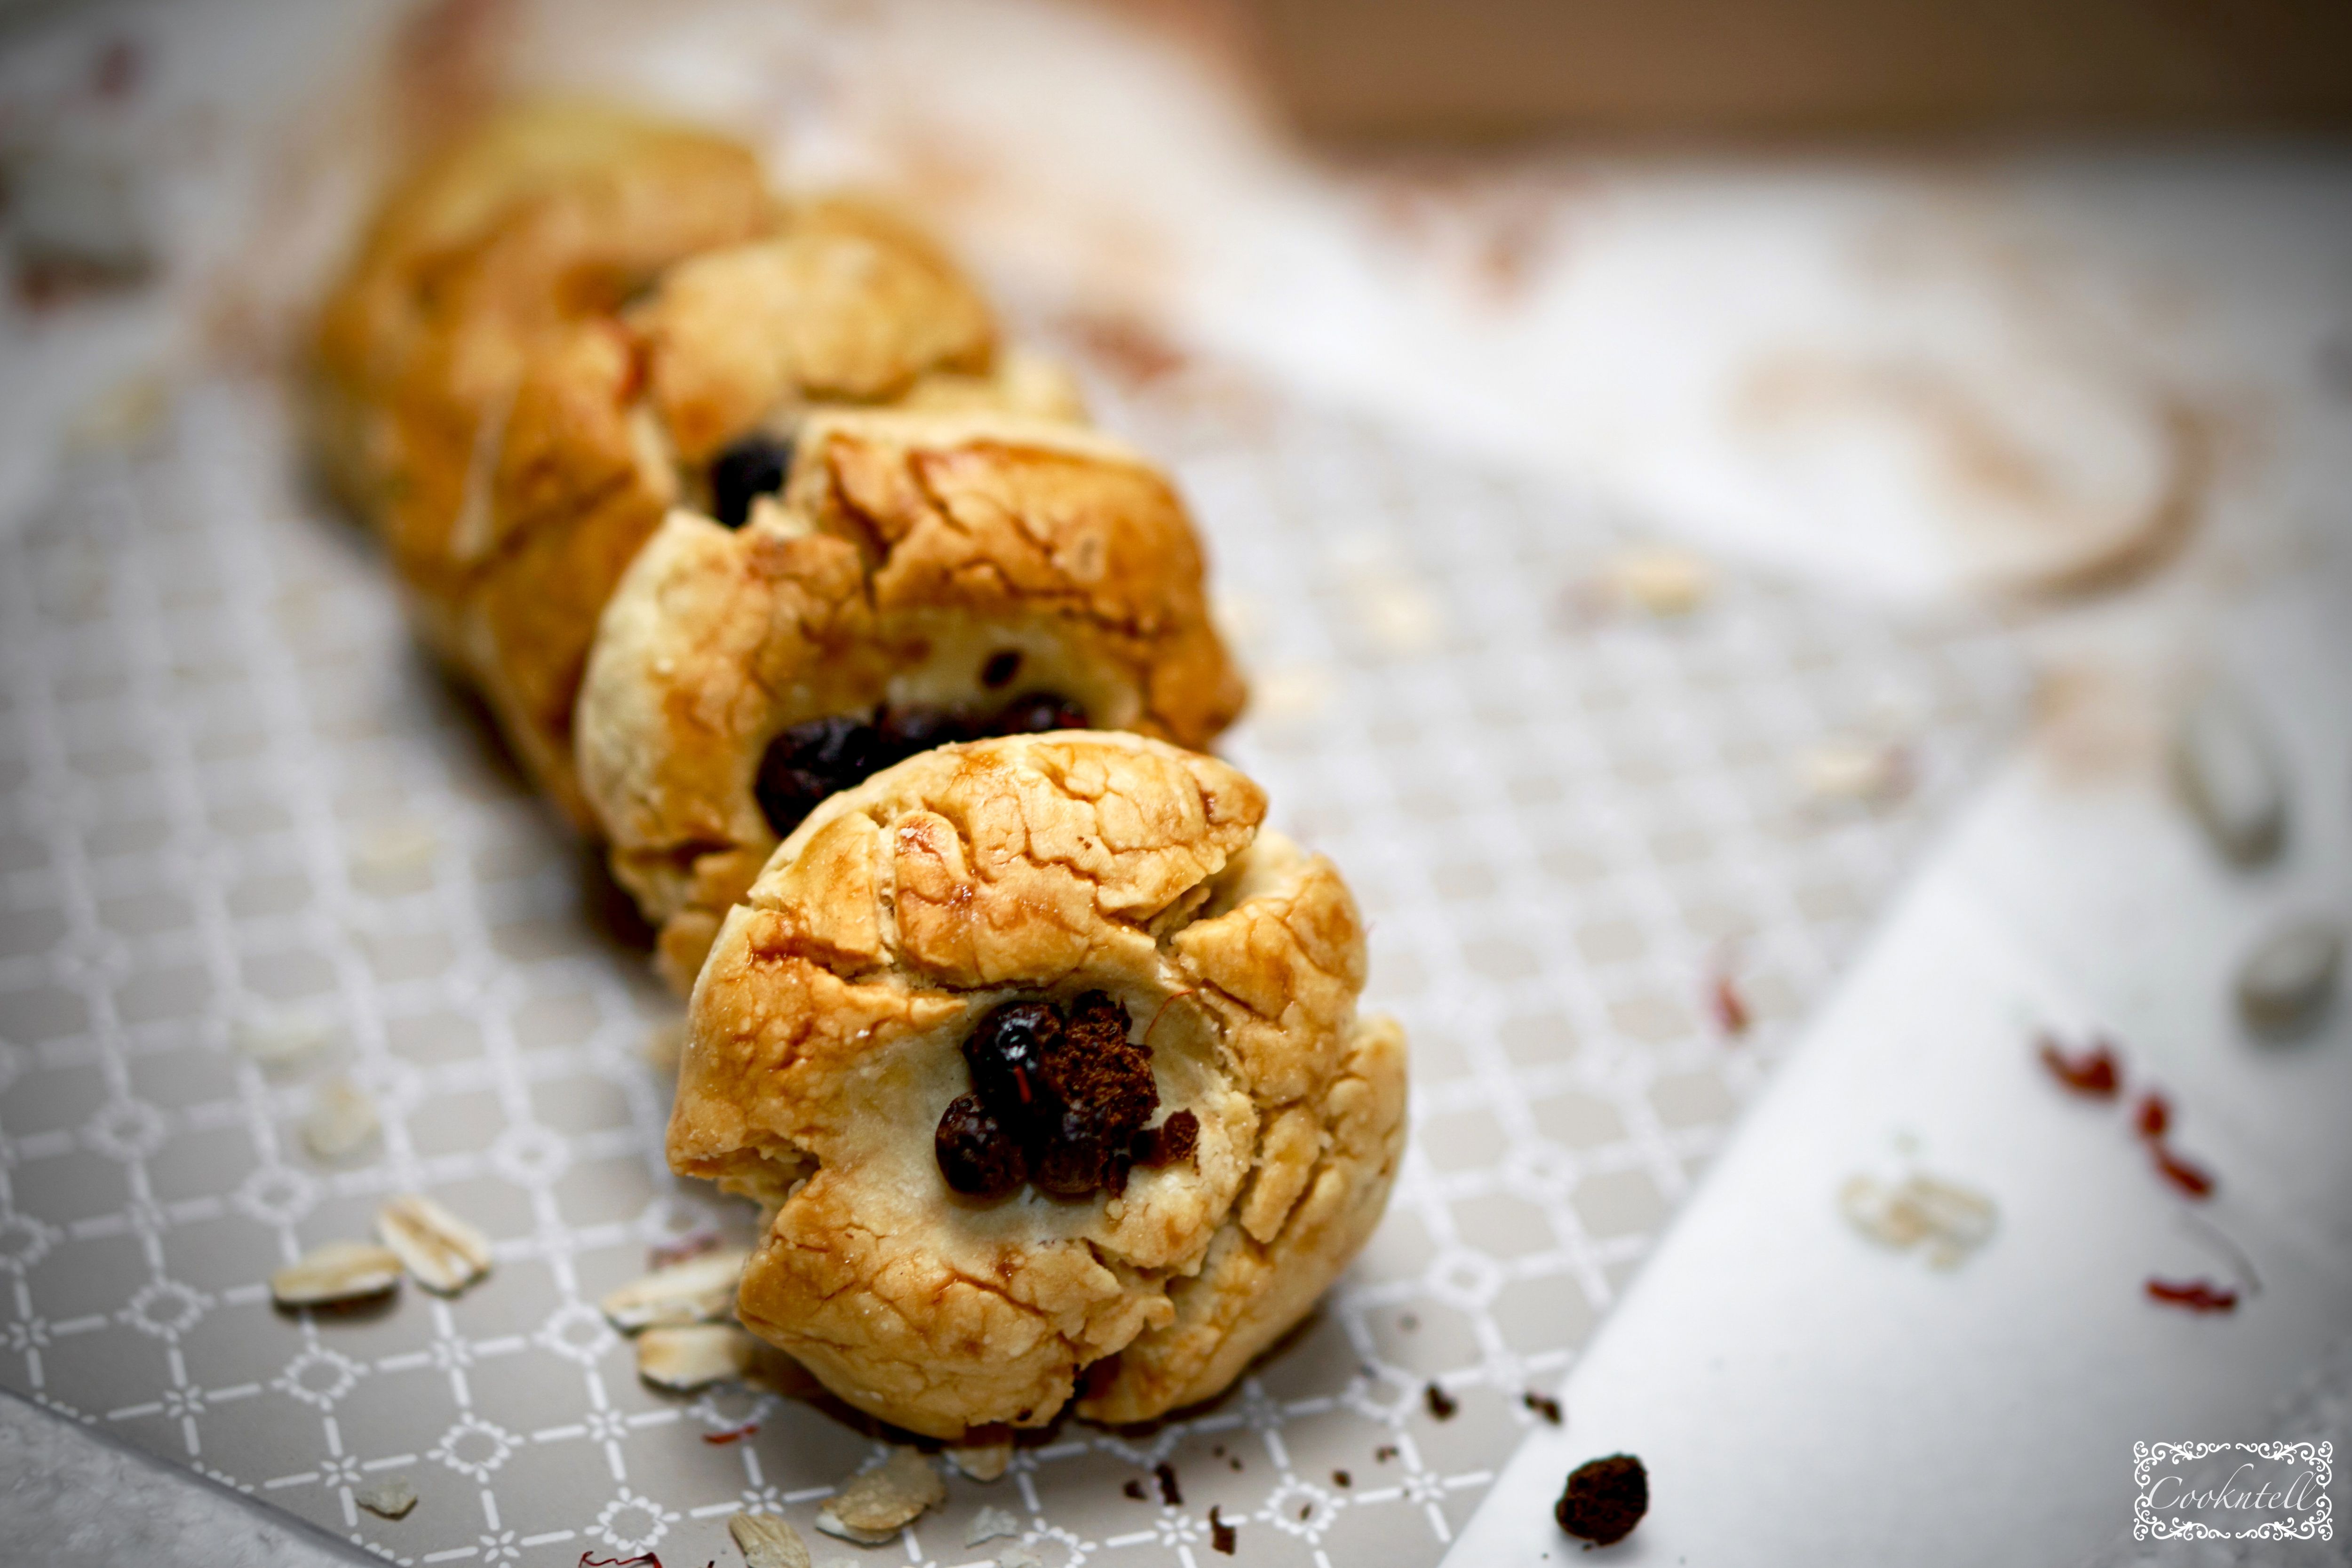
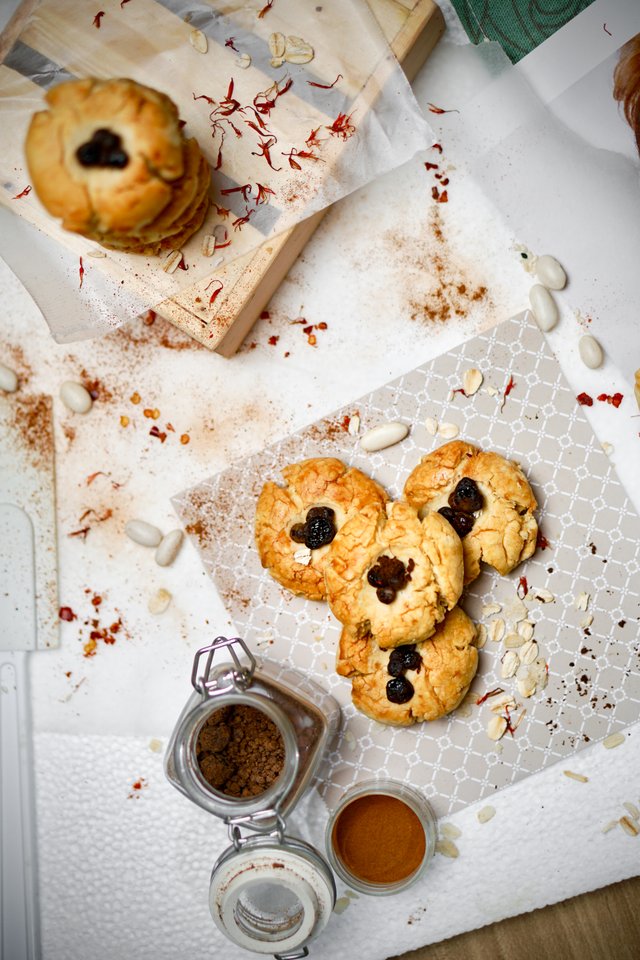
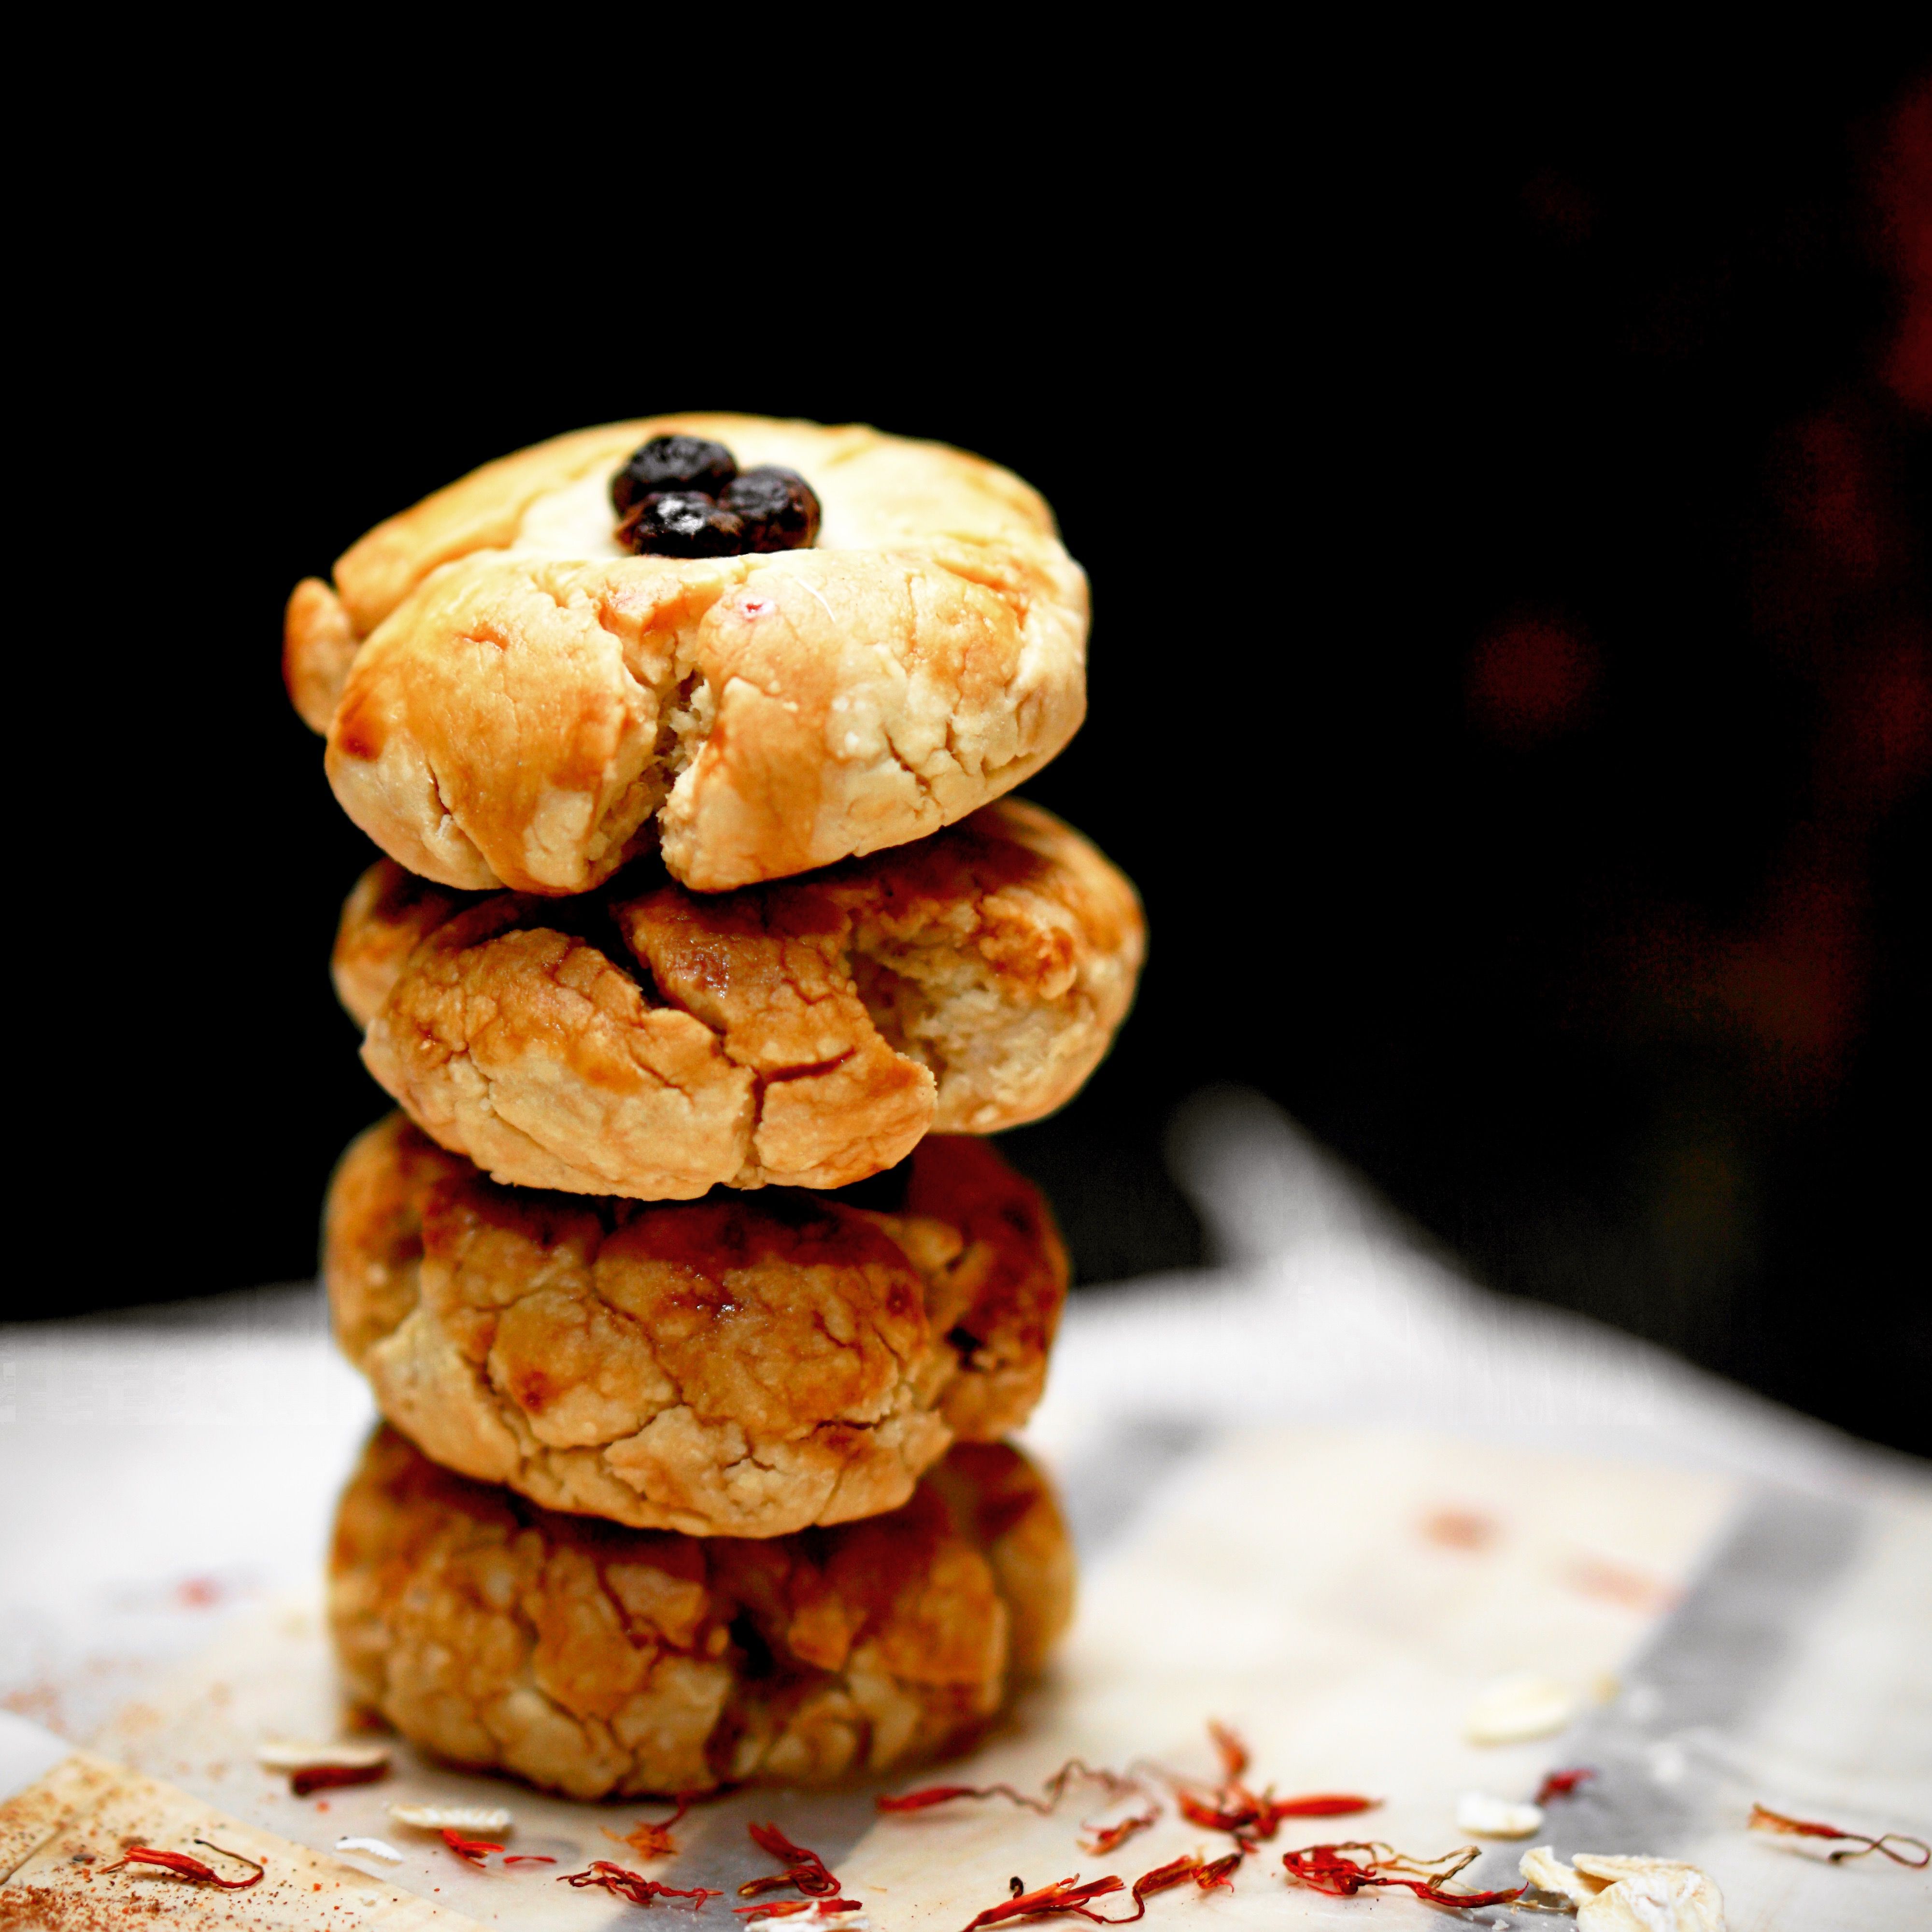
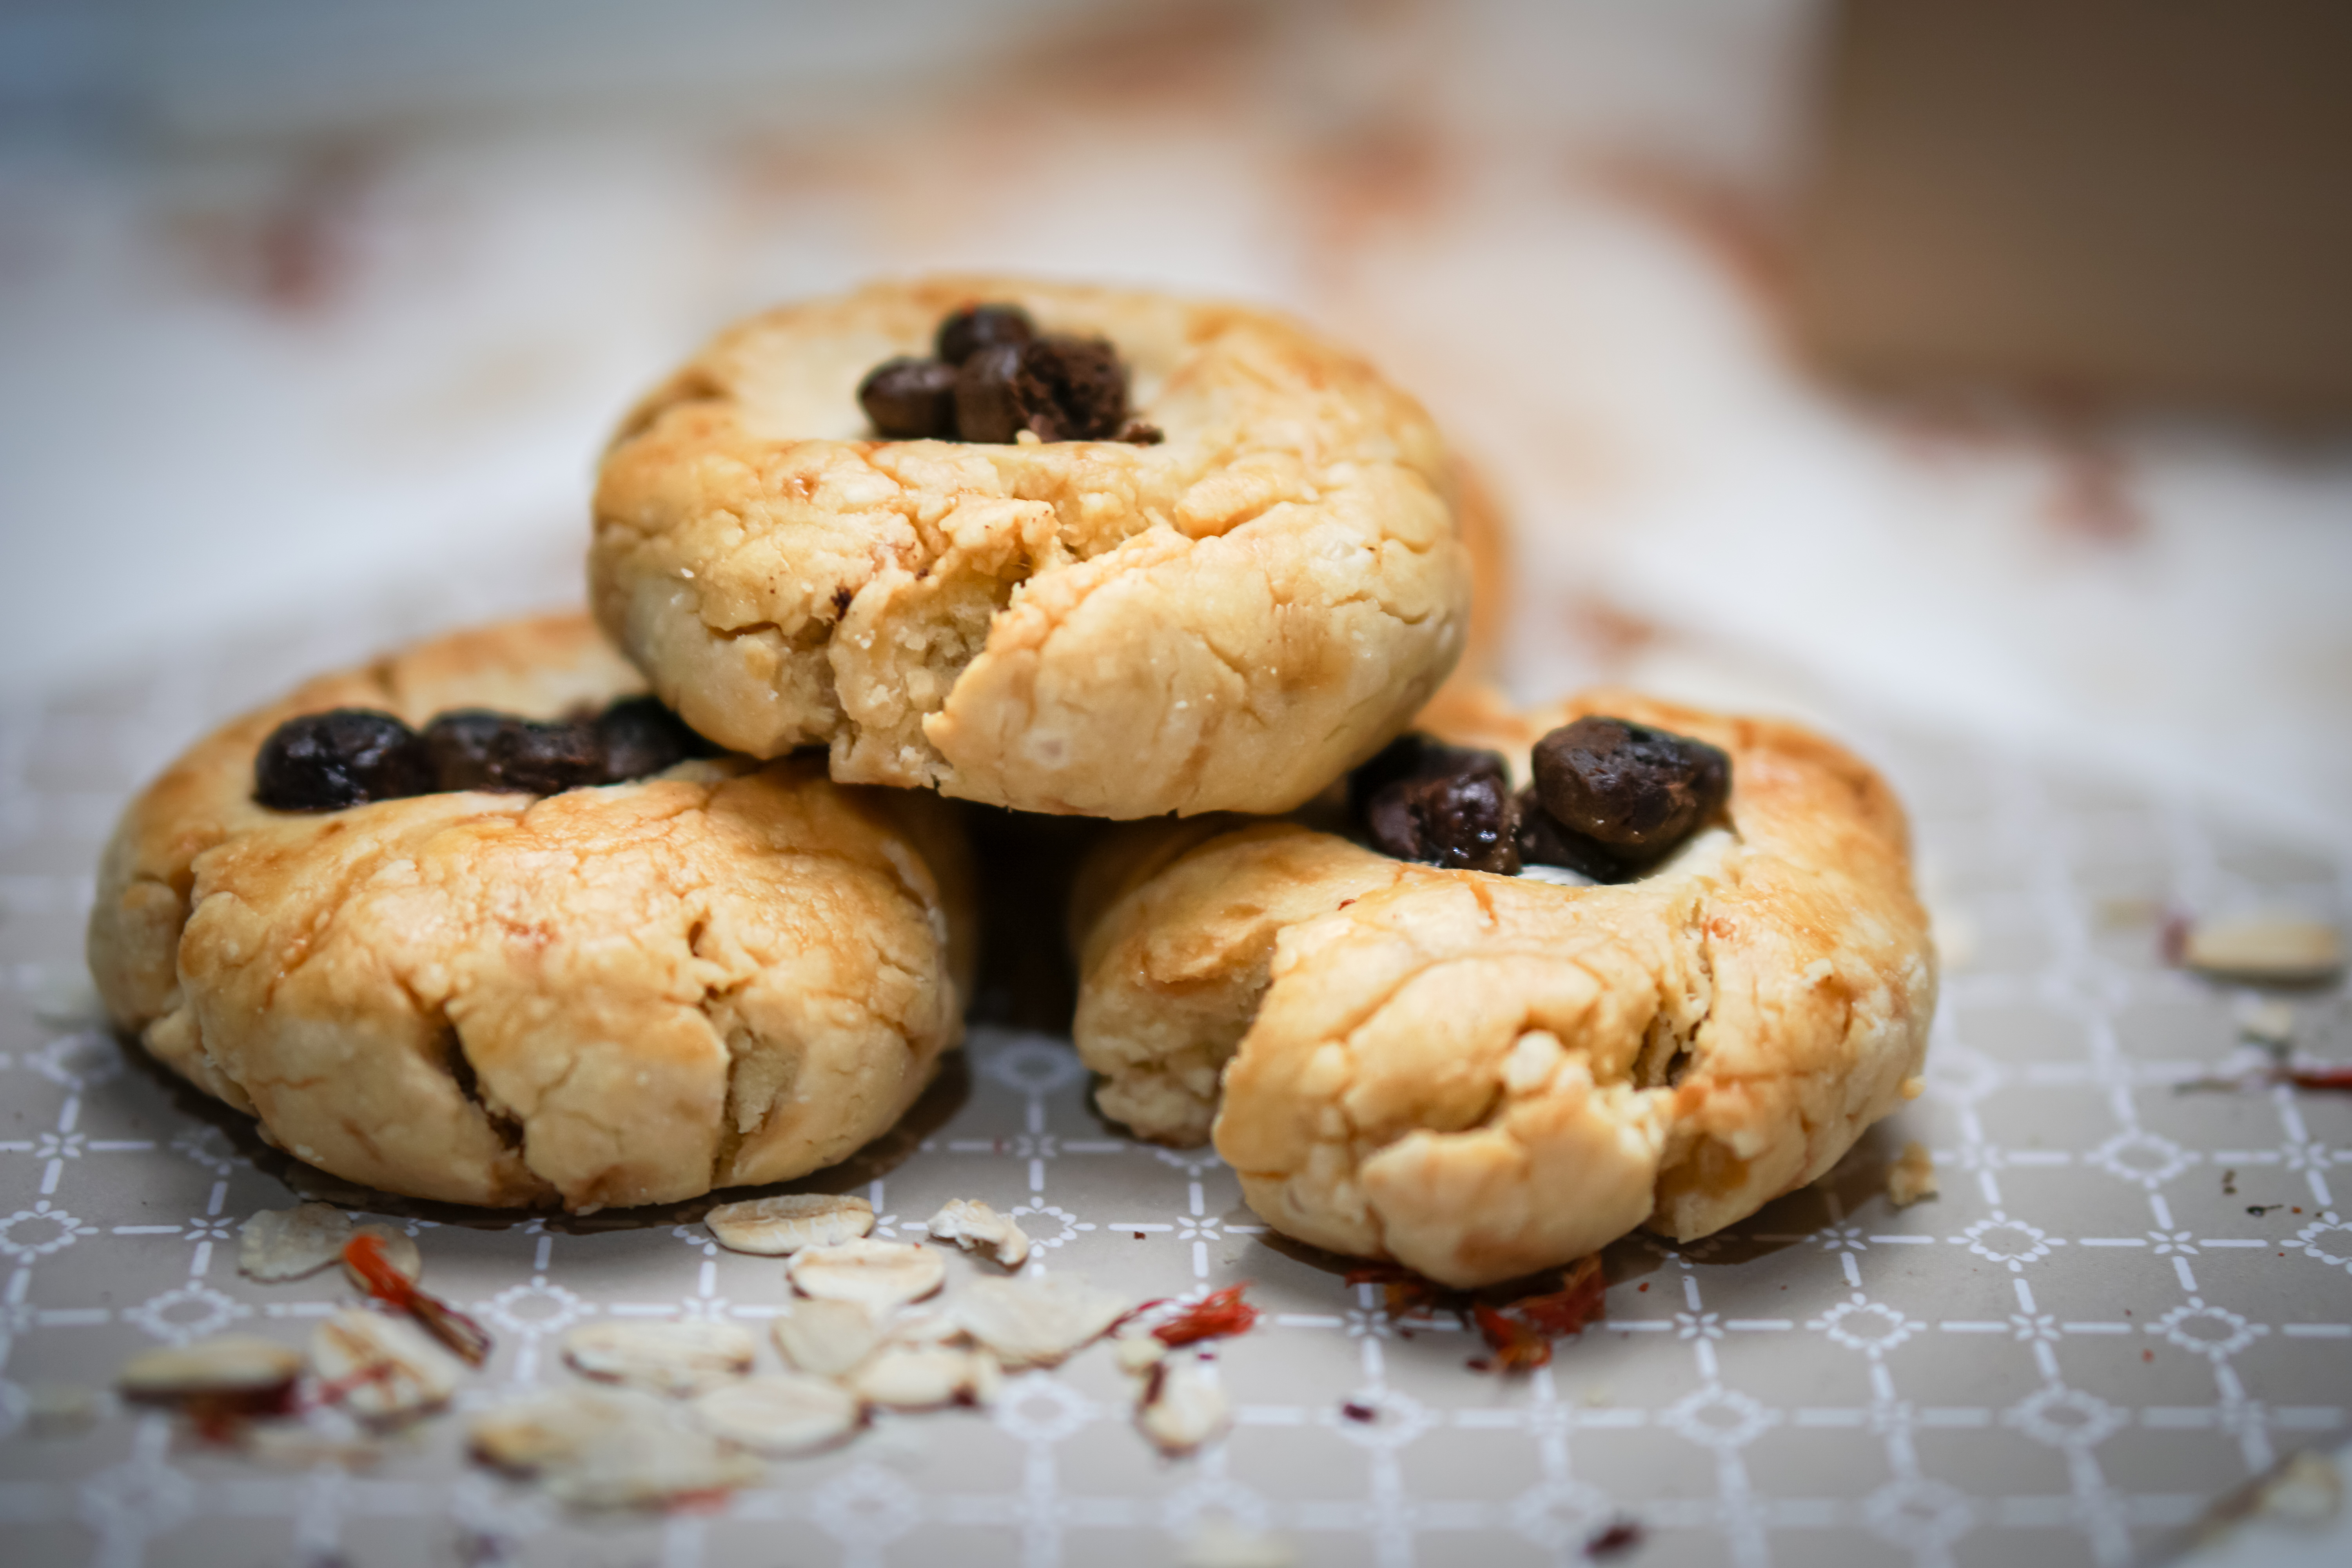
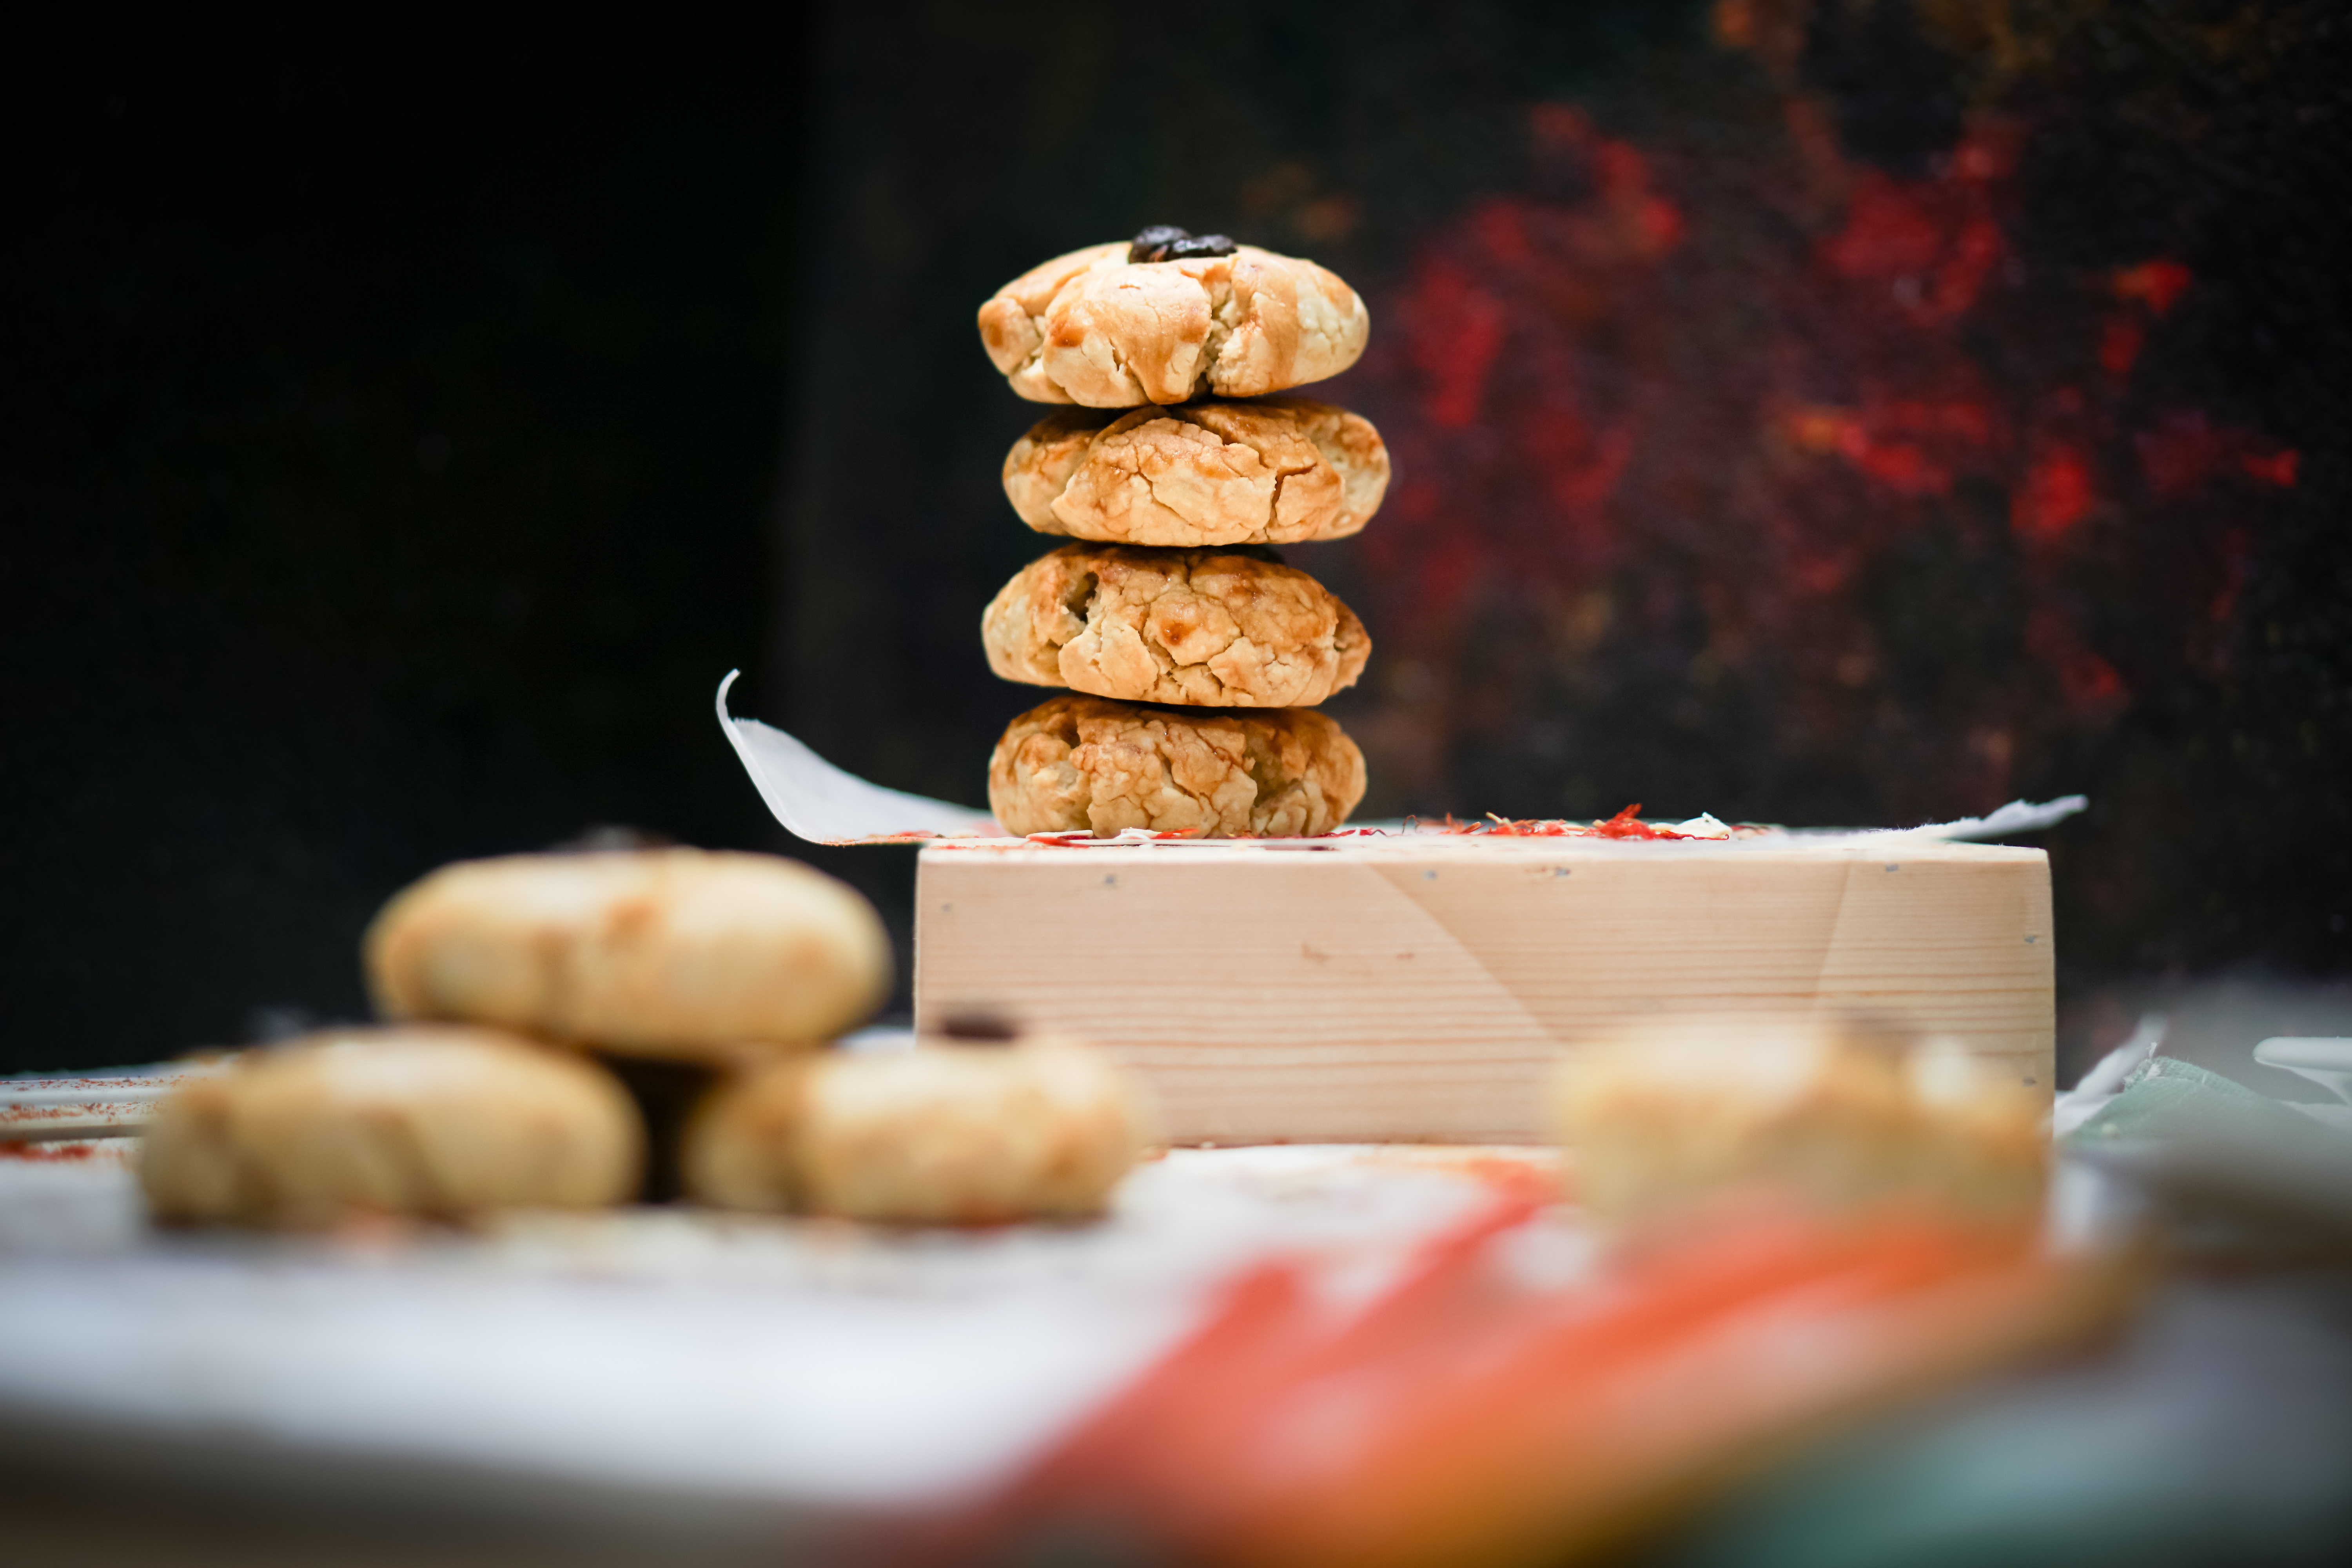
Alright, as a celebration fro my 68th day on Steemit, I wanna share with you my very simple, easy and quick butter scones recipe.
INGREDIENTS
2 1/2 cups cake flour
1 cup vegan butter
2 tbsp kosher salt
3 tbsp coconut sugar
1 egg
1/4 cup cold water
2 tbsp vanilla2 tsp baking powder
1 tsp baking soda
3 tbsp vegetable oil
DIRECTIONS
In a mixing bowl, sift together cake flour, baking powder, baking soda, salt and coconut sugar.
Preheat oven to 350 F or 150 C.
Add vegetable oil, carefully mix it with flour. Add vegan butter and using your hands, gently crumble it and mix together with flour until small crumbs are formed.
Whisk egg with water and pour it to flour mixture. Knead with hands for 5 mins and divide the dough into 12 equal pieces.
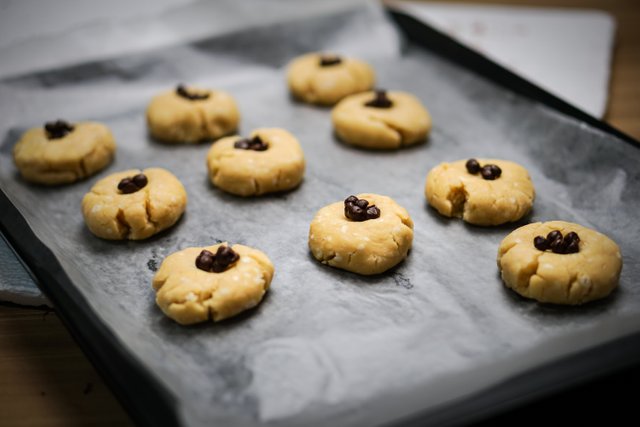
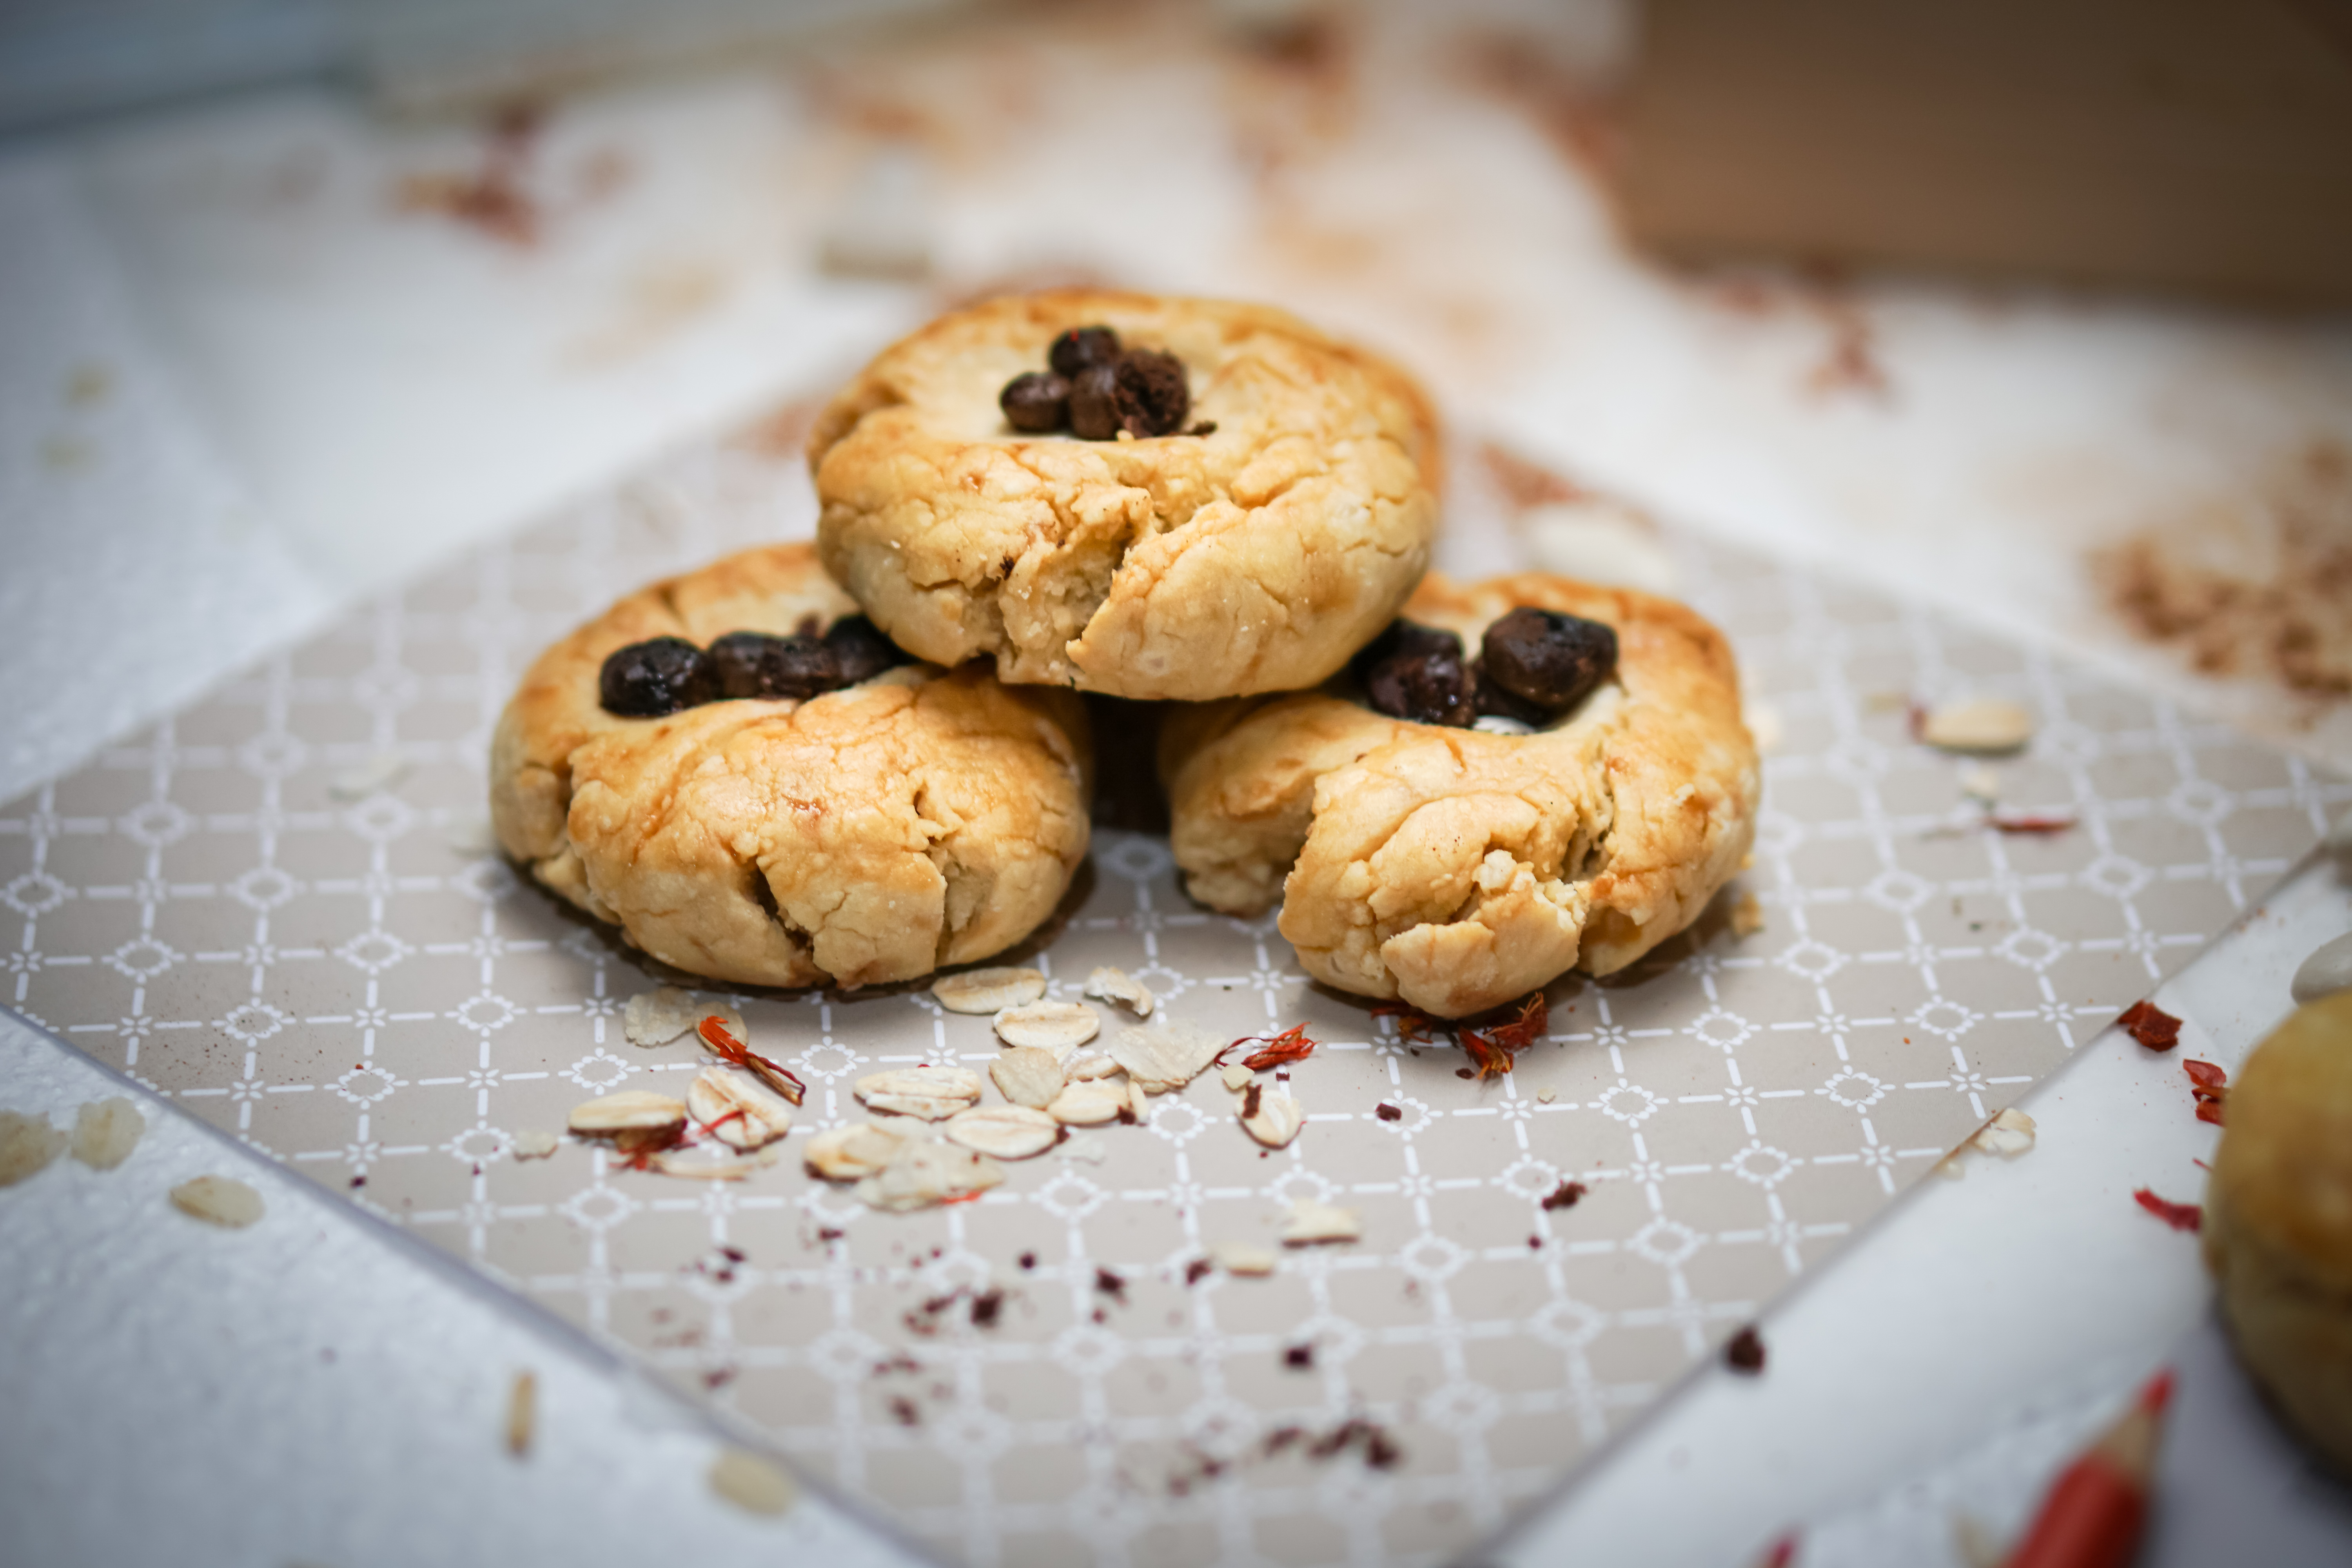
Using a rolling pin, roll each dough and form small balls. Flatten out the balls to form round cookie shapes. With your thumb, press the center down to form a well and add toppings if desired. w
Using egg white or milk, wipe top portion of the scones to produce a brownish and crisp scone top.
Set aside and cover for 15 mins.
Bake for 45 mins or until golden brown and crisp.
Serve with tea or milk.
Thanks again for visiting my blog! If you’ve enjoyed and found this post valuable and if you would like to see more of my cookntell posts daily, then your upvote would be much appreciated!
🙂
See you on the next cookntell.
Love,
Jayne
FOLLOW@cookntell
For my daily Cookntell food photography follow at my social sites:
OCD NOMINATION OF THE DAY/“Be Awesome Dragonfruit Smoothie
THE DAILY SNEAK/The Ultimate Chocolate Avocado Tart
DAILY HIT PARADE FOR NEWCOMERS/The Famous Filipino-Style Chicken Adobo
DAILY TRUFFLE PICKS: THE TOP 10 TRUFFLES/Chocolate Chunk Cacao Wafers ICE CREAM with Almonds and Walnuts VIDEO
THE BEST FOOD POST/Dark Chocolate Vanilla Cookies
THE BEST FOOD POST BY “RED FISH”/Pomegranate Choco Millet Cookies/VIDEO
DAILY PAYOUT STATS REPORT/Vegan Chocolate Cake
Watch More of My Recipe VIDEOS!
I have to be honest with you guys. I don’t really call it vain but I am just addicted to watch my food videos. It feels like a meditation for me. It is basically the sound and art in the kitchen. The sound of the fork, the spoon, the knife, the cutting board, the water, the mixing, the squeezing, the blending and everything in it sounds like in a grand symphony: a kitchen live music. For me, it is just sooo soothing. It’s the reason why I put audio on my videos so you guys can experience a different way to watch too. So I wanna share with you some of videos here:
“Mango Float” Creamy Icebox Cake
Vegan Almonds Avolato
Sakura Sweet Rolls
Baked Chicken Parmigiana
Dark Chocolate Vanilla Cookies
Pomegranate Choco Millet Cookies
Mozzarella Burst Garden Special Buckwheat Pizza
The Ultimate Chocolate Avocado Tart “Quick & Easy”
Vegan Chocolate Cake “Guilt Free”
The Famous Filipino Style Chicken Adobo
Chocolate Chunk Cacao Wafers Ice Cream with Almonds & Walnuts
If you’d like to know more about me, here is my Steemit “Introduce Yourself post.
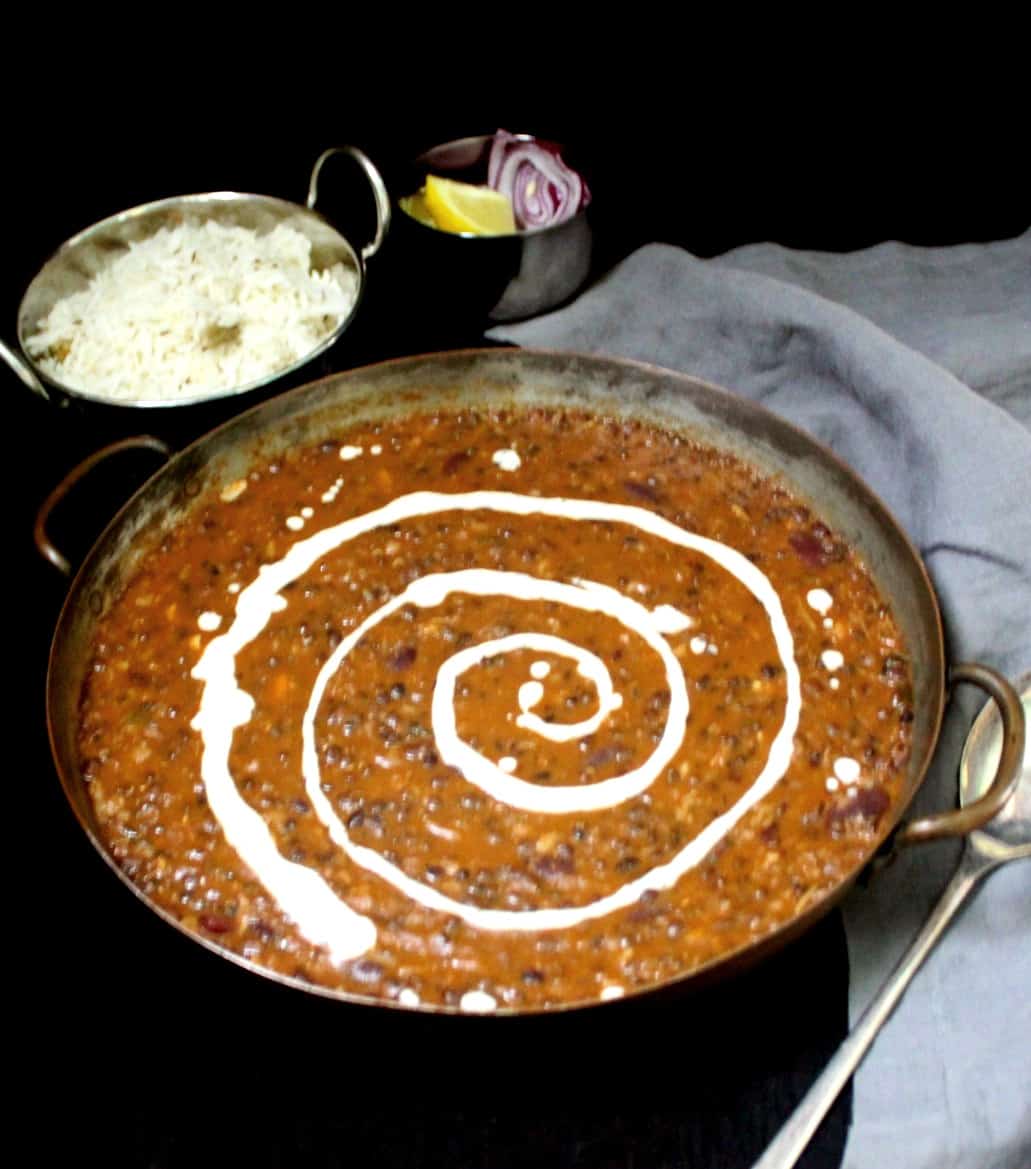
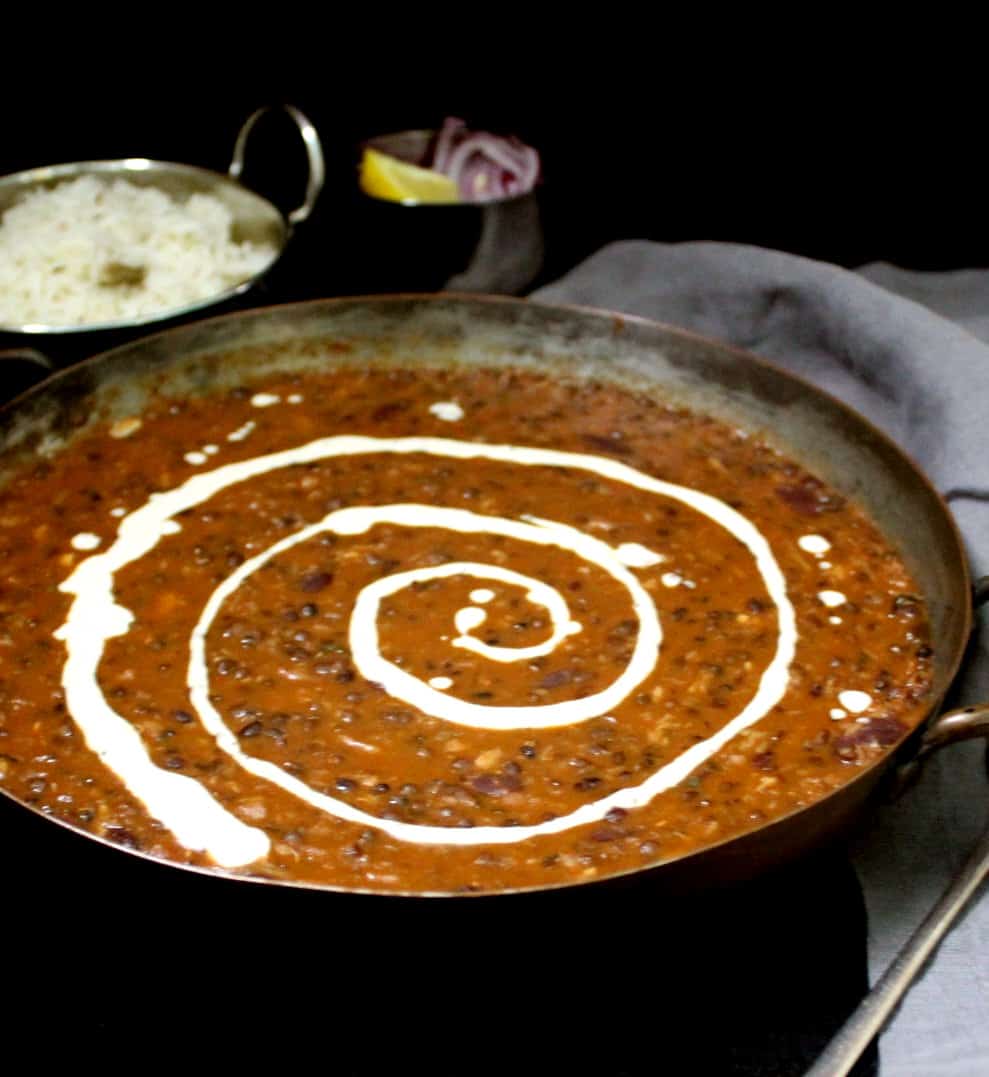
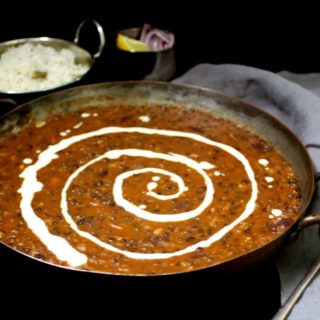
Dal Makhani is a North Indian restaurant style dish of creamy lentils flavored with butter and garnished with cream. My vegan dal makhani is dairy-free and it needs just 10 pantry ingredients, but it tastes traditional and authentic.
There are perhaps a million recipes for Dal Makhani on the internet – a testament to how beloved this Indian dish is. This is a smooth, creamy, buttery dal that you’ll frequently find on a restaurant menu, and the story goes that it was originally served in dhabas – tiny north Indian roadside eateries that sprung up to serve hungry truckers with food that was immensely tasty and often rich with butter and cream.
The butter (“makhan” in Punjabi) and cream are what make dal makhani so delicious. The spices are mild but the flavor is complex and bold with notes of spicy, sweet, tangy and bitter.
Veganizing dal makhani is not difficult, but you do need to make sure you are substituting with the right ingredients because the butter and cream play such a pivotal role in flavoring the dish. The tendency among many vegan cooks is to substitute the butter with something else that’s creamy, like coconut milk, but that just creates a dish with an overwhelmingly coconutty, not buttery, flavor. (Read more on how to veganize Indian dishes here).
For the most authentic-tasting vegan dal makhani, use vegan butter and cashew cream. Together, they add the same rich, smooth taste and, at just 131 calories a serving, they keep the dal makhani very healthy.
How to make vegan Dal Makhani
In Indian kitchens, the lentil that goes into every dal recipe is chosen for a specific reason, and for a Dal Makhani, that special lentil is whole black urad dal or saboot urad, also known as black gram dal (read more about Indian lentils and beans in my guide to Indian pulses). This is a rounded lentil, ivory-white on the inside with a thin black skin on the outside, and it has a somewhat nutty flavor and a smooth, slightly slippery texture when cooked that gives this dal just the right finish. It is delicious in this spicy urad dal recipe. You can make this dal makhani with the split white urad dal, used in idlis and dosas, if you don’t have the whole lentil, but you won’t get quite the same texture.
If you don’t have the urad lentils, use whatever you do have. Green or brown lentils, French puy lentils, or even Beluga lentils, which bear a skin-deep resemblance to saboot urad, are all okay.
Many Punjabi cooks, but not all, add some rajma, or red kidney beans (also a legume or pulse that’s eaten widely in the Punjab) to their Dal Makhani. I like adding some rajma to my recipe as well, mainly because it gives a nice variation with its slightly al dente texture that contrasts nicely with the creamy richness of the dal. But if you don’t have red kidney beans, leave them out, that’s fine too.
There’s no onion in this recipe, and it’s not needed, but if you want to add it, add finely chopped onions to the lentils while you’re cooking them.
The only real time investment you need to make for this recipe is the cooking of the lentils and beans. While I am guilty of cooking my lentils in the pressure cooker when I am in a hurry, for your makhani to have a texture that’s as close as possible to the real thing, you should cook the lentils on the stovetop for at least an hour to an hour and a half or however long it takes for them to become creamy. This is not hands-on time, so you can definitely put the lentils on the stove and go do something else. Just remember to check on the lentils once in a while to be sure that they haven’t dried out. Add more water if they have. Keep in mind the kidney beans will take longer than the black lentils to cook, but that’s okay–you want the lentils to be creamy and mashable and the beans to be just tender.
Other than the lentils, all you’ll need for this recipe are garlic, ginger, paprika (or degi mirch, a bright-red, mild to hot chili pepper powder used in Punjab and available at Indian grocery stores anywhere), tomato puree, kasoori methi (dry fenugreek leaves), vegan butter and cream. There’s no need to add garam masala or turmeric, even if you have them around.
You can use canned tomato puree in this recipe, or you can use fresh, pureed tomatoes. Both work just as well.
Add the cashew cream at the tail end of cooking. If you can’t eat nuts, or don’t want to use cashews, use pumpkin seeds and make a cream by blending the seeds with water.
Serve
Serve vegan dal makhani with a vegan naan or an easy Jeera Rice or both. You can also pair it with a soft, flaky roti.
If you’re making this a special meal, serve alongside a creamy, leafy curry, like Vegan Palak Paneer with Tofu or Sarson ka Saag. Add a Vegan Cucumber Raita on the side. Wash it all down with vegan Mango Lassi.
More vegan north Indian recipes
Love creamy Indian dals? You might also enjoy chaunsa dal, vegan Instant Pot dal makhani and spicy urad dal.
Vegan Dal Makhani
Vaishali · Holy Cow Vegan
Vegan dal makhani is a dairy-free version of the popular Indian restaurant dish, dal makhani. This easy recipe needs just 10 pantry ingredients and it tastes so delicious and authentic.
Prep Time 10 minutesmins
Cook Time 20 minutesmins
Dal cooking time 1 hourhr30 minutesmins
Total Time 2 hourshrs
Course Dal
Cuisine North Indian
Servings 10servings
Calories 131kcal
Instructions
Place the urad dal and rajma together in a large bowl and wash in three to four changes of water, rubbing the beans to remove all the dirt that may be sticking to them. Finally, top the beans with water by at least three inches. Let the beans soak at least eight hours or overnight.
Place the drained beans and lentils in a large stockpot along with 1 teaspoon of garlic and a bay leaf, if using. Cover by at least an inch and a half of water and bring them to a boil. If you see a white, frothy layer accumulate on top, skim it away. Cover and cook the lentils for an hour and a half or until the black lentils are really tender and the kidney beans are cooked but not falling apart.
Place 1 tablespoon of garlic and the ginger in a mortar and pestle and crush into a coarse paste. Set aside.
Blend the cashews with ¼ cup of water into a very smooth cream. Set aside.
Heat the oil in a saucepan. Add the ginger-garlic paste, saute until the garlic begins to turn blonde, then add in the paprika and the kasoori methi. Stir quickly and immediately add the tomato puree.
Cook the tomato puree for five minutes, stirring frequently. Stir in the sugar and add the cooked dal along with the liquid it was cooked in. If it looks like you have too much liquid, hold some back and add according to the consistency you want. If there’s too little liquid, add water to thin the dal out.
Bring the dal to a boil, cover, turn down the heat, and let it cook for five minutes. Use a potato masher or a heavy ladle to mash some of the lentils so the consistency gets creamier. Stir in the vegan butter and salt to taste. Add the cashew cream.
Check seasoning and add more salt if needed. Turn off the heat and serve hot or warm before serving.
Tried this recipe?Let us know in the comments below!
About Vaishali
Hi! I’m Vaishali, a journalist turned food blogger. At Holy Cow Vegan I share easy, tasty recipes made with clean, wholesome ingredients that the entire family can enjoy.
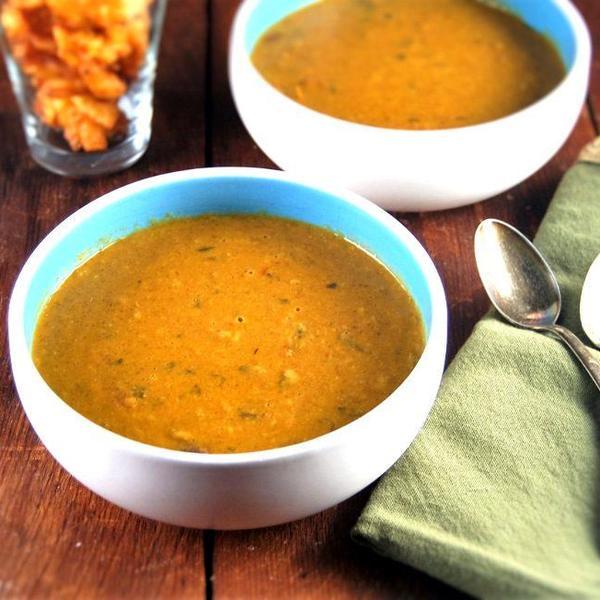
Salad is the perfect dish for summers. As the sun dazzles down and the temperature rises, you crave for something that is not only fulfilling but refreshing as well. In such a situation, the best option you can get is having a bowl of cold and delicious salad waiting for you to dig in. You might have tried various types of salads, but this pasta salad recipe is the best one out there.
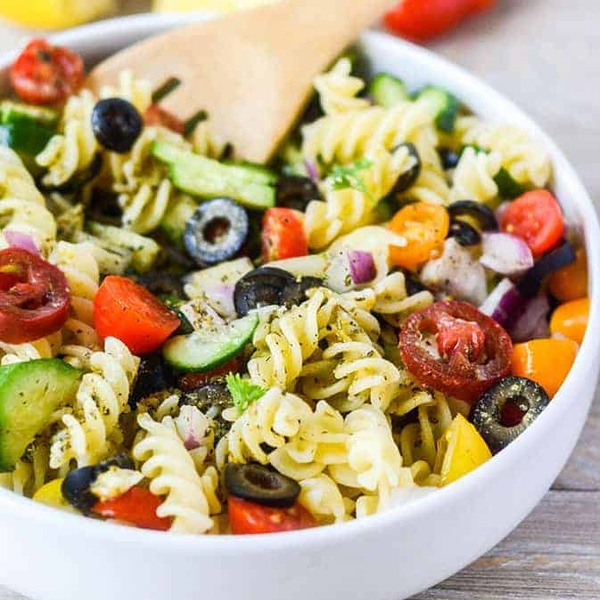
Vegan Italian Pasta Salad
This vegan pasta salad recipe with Italian dressing is super delicious. It is a vegan and dairy-free pasta salad that is the perfect choice for you if you are vegan. And even if you are not, it is still full of nutritional benefits and utterly delicious.
Jam-packed with flavor, this pasta salad is vibrant, tasteful, and a perfect treat for your lunch and parties. Give yourself a healthy treat with this refreshing and flavorsome salad.
FOR THE FULL LIST OF INGREDIENTS, SCROLL TO SEE THE RECIPE CARD AT THE END. BUT BEFORE YOU SCROLL CHECK IMPORTANT INFORMATION THAT IS INCLUDED IN THE BLURB.
It’s coming to the end of summer and time to get ready for your Labor Day weekend cookout. This Vegan Italian Pasta Salad is easy to prepare and it’s the kind of side dish that can pretty much go with most dishes.
It tastes delicious as is but you can add your favorite protein to take it to another level. I have added baked tofu, vegan mozzarella, and vegan sausage to it and it is usually gone in no time. For a creamier dressing try my Vegan Macaroni Salad.
Tips For the Perfect Vegan Pasta Salad
If you are looking for a top-notch vegan Italian pasta salad that will make your mouth water, here are a few tips and tricks you need to keep in mind when preparing it.
Tip 1: For the perfect pasta in your salad, you should cook the pasta 2 minutes more than the package suggests. As the pasta firms up when you rinse it with cold water so, make sure you take care of the cooking time. The perfectly cooked pasta will give your salad a perfect texture.
Tip 2: once the pasta is done, don’t leave it under the cold water tap for rinsing; instead, give it a quick rinse by passing it through the cold water once. If you rinse it for a longer time, you will get rid of all the starch, and the dressing won’t stick to it. This way, you won’t get flavors in every bite, and the pasta will stay bland.
Tip 3: once you add dressing over pasta, make sure you toss it well. Next, don’t serve it immediately. Instead, please place it in the refrigerator for at least 2 hours so that the flavors get into the dish.
Tip 4: if you think the red onions will overpower the whole salad by its strong flavor, don’t skip it altogether. Instead, soak the onion in salted water for 10-15 minutes before chopping it. The salted water will tame the strong flavor of onion, and you won’t have to worry about it overpowering the whole pasta salad.
Storing the Italian Pasta Salad
The best thing about this Dairy-free pasta salad is that you can make it on the weekend, and it will pretty much last the whole week. So, if you are a busy person or an employed person, this vegetarian Italian pasta salad is a perfect option for a lunch box.
The only thing you have to keep in mind is that you store it in an airtight container in the refrigerator. This was it is good to go for almost 5 days. Furthermore, you can also make the pasta salad dressing and refrigerate it separately. This way, you can enjoy it on any of your favorite salads.
Ideas For Customization
The thing about salads is that you can customize them according to your likings. The same is the case with this vegan pasta salad. You can add different vegetables like bell peppers, sun-dried tomatoes, jalapenos, and much more. It’s entirely up to you how you want to try new textures and flavors in the salad. As soon as the dressing is on point, it is going to taste awesome. That’s for sure!
Vegan Italian Pasta Salad Ingredients
Here is a quick look at the different ingredients and how they add flavors and textures into the salad:
Pasta: Pasta sets the base for the salad. It adds texture and body to the salad. Its chewiness goes perfectly well with the crunchiness of the vegetables. Furthermore, pasta holds the dressing by soaking it up.
Onion: Red onions not only taste great but add a great crunch to the dish. They also make the dish look colorful with their purplish color. Red onion is also very beneficial for health.
Cucumber: Cucumber adds freshness to the whole dish. It is crunchy and gives a refreshing feel to the whole dish making it a perfect salad for summer.
Tomatoes: for this salad, I use grape tomatoes. These are small oval-shaped tomatoes that taste almost like cherry tomatoes. Again these add flavor as well as color to the salad. If you can’t find grape tomatoes, you can also use cherry tomatoes for the purpose.
Olives: olives taste delicious. They have a distant tangy and a bit bitter yet a very strong flavor. You can add either green or black olives by chopping them or keeping them whole after removing the pit.
Vegan mozzarella: Pasta salad tastes super delicious with mozzarella. Even if you are vegan doesn’t mean you can’t enjoy cheese. You can find a vegan version of mozzarella known as the vegan mozzarella. Add mini balls to your salad, and give it an awesome texture.
Olive oil: Olive oil is the base for the dressing. It gives the dressing a creamy texture.
Lemon juice: lemon juice gives the dressing a tangy flavor. You can also use vinegar instead of lemon juice.
Maple syrup: Maple syrup adds sweetness to the dressing or, in other words, to the whole salad. It gives the salad an interesting dimension in terms of flavor.
Nutritional yeast: For the vegan Italian pasta salad, nutritional yeast is an awesome ingredient. It is an inactive or dead yeast that has many benefits. It adds nutrients, minerals, and vitamins to the salad.
Basil leaves: Basil leaves have a vibrant color and an amazing aroma. They have a distant herbaceous flavor that adds freshness to the salad.
Italian seasoning: Now, no vegan Italian pasta salad is complete without Italian seasonings. These seasonings add Italian flavors to the salad and give it the kick it needs.
Vegan Italian Pasta Salad Dressing
The dressing is what sets the flavor for the salad. This dressing is made from a couple of ingredients that contribute to the flavors. As you taste the dressing, you will get a tangy, garlicky, and sweet flavor along with herbs. You can either prepare this dressing by placing the ingredients in the Mason jar or by pulsing it in the blender. Either way, you will get a delicious and refreshing flavor for your pasta salad. Lastly, the addition of nutritional yeast makes it a perfect vegan recipe. With the nutritional yeast, you get the healthy benefits of the ingredients as it adds in protein, vitamins, or minerals to the main dish.
How To Make Vegan Pasta Salad?
This Vegan Italian Pasta Salad is very easy to prepare. I used Heartland Gluten Free Fusilli, which is made from non-GMO corn and rice. It cooked al dente and really held its shape well. I made a homemade Italian dressing using ingredients that are easy to find.
I added maple syrup as the sweetener in the dressing and used extra virgin olive oil, lemon juice, fresh garlic, and Italian seasoning. The dressing tasted fresh, zesty, and alive. I added fresh tomatoes, cucumbers, and onions.
Making veggie pasta salad with Italian dressing is super easy. You can do the preparation in 3 simple steps. In the first step, you can boil the pasta. In the second step, you can chop all the vegetables. Whereas in the third step, you can prepare the salad dressing. Lastly, you will combine everything and mix well, until all the ingredients are drenched in the dressing.
This vegan Italian pasta salad recipe is super simple to make. It can’t get any easier than this!
Vegan Labor Day Recipes:
Mac and Cheese
Potato and Cauliflower Salad
Corn Muffins Recipe (Vegan, Gluten-Free)
If you enjoyed this post and would love to see more, join me on Youtube, Instagram, Facebook & Twitter!
Get discounted copies of my cookbook here.
Also please leave a star rating 😉
Need some encouragement on your Healthier Steps journey?
Join our Facebook groups, sharing lots of delicious vegan and gluten-free recipes, health tips, etc., from our members. Please join us and invite your friends to Gluten-Free and Vegan For Beginners and Vegan Recipes With Love.
Want to Save This Recipe?
Enter your email & I’ll send it to your inbox. Plus, get great new recipes from me every week!
By submitting this form, you consent to receive emails from Healthier Steps.
1poundfusilli pasta
1/2red onionchopped
1/2cupblack olive slices
1cucumberchopped
1pintgrape tomatoeshalved
1/2cupolive oil
1/4cuplemon juice
3clovesgarlicminced
2teaspoonsmaple syrup
2teaspoonsItalian seasoning
2teaspoonsnutritional yeast flakes
2tablespoonsfresh basil leaveschopped
2tablespoonsparsleychopped, extra for garnish
1/2teaspoonsalt
1/2cupvegan mozzarella cubesoptional
Bring a large pot of water with about 1 teaspoon salt to boil on medium-high heat. Add fusilli pasta and stir; cook pasta according to package directions. While pasta is cooking, prepare Italian dressing and other ingredients.
Place all the ingredients for the dressing in a mason jar and shake well. Set aside.
Drain pasta, rinse with cold water, and place into a large bowl.
Add onion, olive, cucumber, tomato, and salad dressing, mozzarella and toss to coat.
Keep refrigerated and allow flavors to mingle for a couple of hours before serving.
Hi, I’m Michelle, I’m the voice, content creator and photographer behind Healthier Steps. I share vegan and gluten-free recipes because of past health issues. My goal is to help you make healthier choices and show you how healthy eating is easy and delicious.
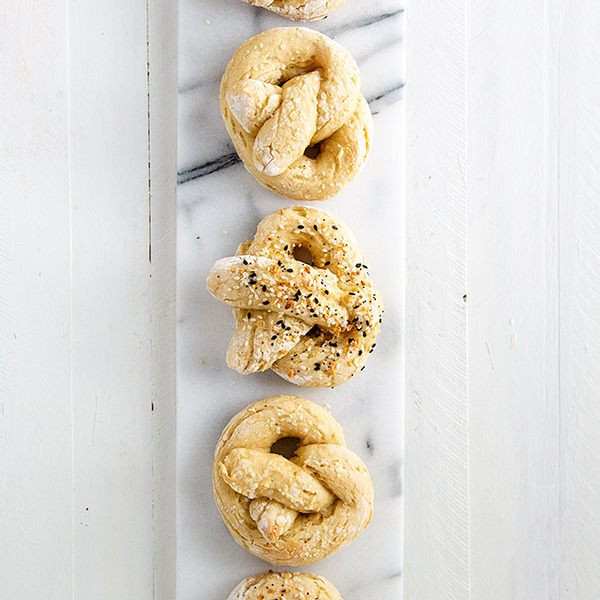
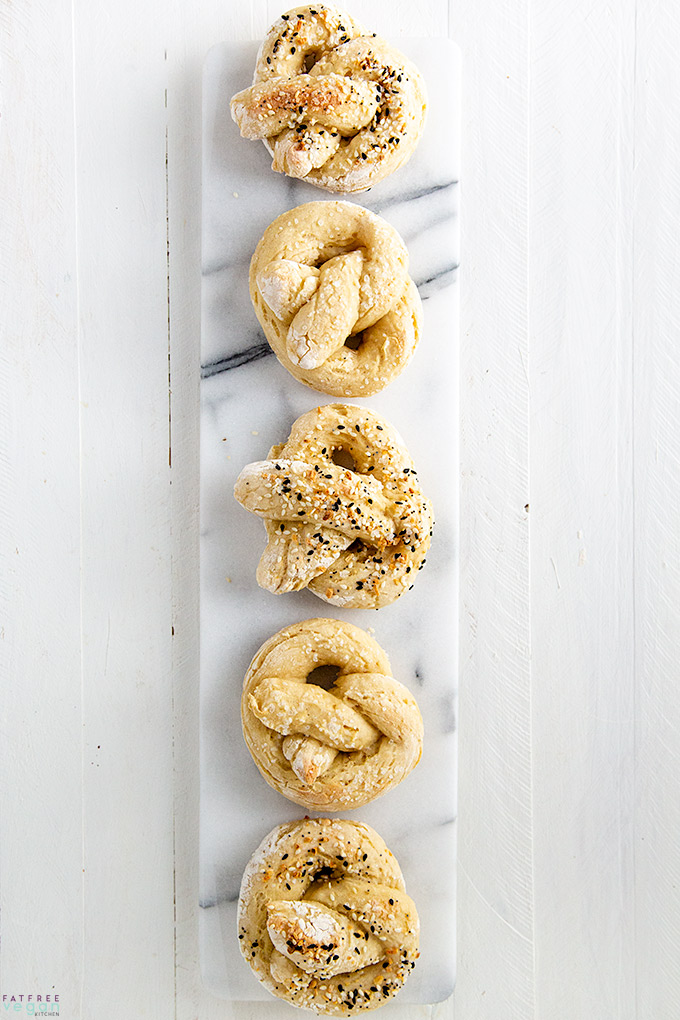
High in protein, low in fat, these vegan soft pretzels are hearty and delicious. You can be enjoying them in less than an hour!
Happy 2019! I’m really off to a late start this year thanks to a lot of non-edible stuff happening in my life. Some of it involves saying goodbye to one canine family member and hello to a new one.
As you long-time readers know, I consider this a “blog” in its original meaning of “web log:” An online account of my life, especially, but not exclusively, the part of it that takes place in my kitchen. Many of you have seen my daughter grow from a 9-year old child to a senior in college and have been here with me as I went through everything from cursed vacations to cancer.
But I understand that there are those that want to skip all the chit-chat, and for those I offer this link to skip right to the info about the recipe:
Skip the Dogs, Take Me to the Cooking!
For those of you who are still with me, I have to break the sad news that we lost Bandit in November. There’s no easy way to describe what happened, but it boils down to he was staying with a sitter, got out of the yard, and was attacked and killed by at least one other dog.
As you can imagine, we were grief-stricken and traumatized. I couldn’t fully enjoy the holidays because of the pain of losing him and the thought of what he must have suffered. This wasn’t the kind of news I wanted to burden my readers with right in the middle of the holidays, so I didn’t mention his death in my newsletter. I still can’t write about him without breaking down.
Foxley didn’t understand what had happened to Bandit, and we could tell that he missed his big brother. So toward the middle of December we started looking for a new dog to adopt, and we found Salem through the same Pomeranian rescue that had given us Bandit and Foxley. Because of the timing, we had to wait until after Christmas to meet Salem, but when we did, it was love at first sight:
Salem was a stray on the streets of Texarkana (sounds like the beginning of a country and western song!) We don’t know anything about his background, but the vet that examined his teeth estimated him to be around five years old. He was definitely somebody’s baby at one time because he’s fully housebroken, knows what a pet door is for, and will sit and offer his paw on command. He loves long walks and treats (too much) and has a few pounds to lose to be in better health. Foxley, after some initial jealousy, LOVES him and can’t stop licking him. He’s been a wonderful addition to our household.
So there you have the Voisin Pet Update. If you want more dog and cat-related news, be sure to follow Foxley on Facebook and Instagram. (He posts a little more often than I do!)
I’ll now get to the business at hand, making these easy pretzels.
First a confession that is going to irritate some people: For the past year, I have been following Weight Watchers. I don’t talk about it because I don’t want to endorse it or any other diet, but I’m not going to apologize for it, either. I’m doing what works for me to regain my health when nothing else did. I’m down 55 pounds and 30 cholesterol points and back to a regular blood pressure. It’s been easy to do as a vegan and works well with whole-foods plant-based eating.
Anyway, if you wondered why I’ve been putting Weight Watchers points on recipes and started a category for Zero Point Recipes, that’s why.
Because if this, I’ve been hanging out in Weight Watchers groups and learning some of the standard “low-points” recipes. One of them is a 2-ingredient dough that can be used to make bagels, pizza crust, and pretzels. The non-vegan version uses self-rising flour and fat-free yogurt. On WW, fat-free yogurt is a “free” food, meaning you don’t have to count it toward the points you’re allowed each day. There is no corresponding vegan yogurt that’s fat-free, so vegans often substitute silken tofu, which is also zero points.
I decided to try substituting silken tofu in this pretzel recipe, and it worked great.
Now, before someone jumps in to tell me, yes, real pretzels are yeast-raised; these baking powder pretzels are a quick bread, and because of that their flavor may be more like a biscuit than a traditional bread. But they were delicious enough for me to consider them a real treat. And vegan Weight Watchers will be interested in knowing that each vegan soft pretzel is 3 points.
How to Make These Easy Vegan Soft Pretzels:
Making these pretzels is pretty simple, but to guide you through the process, I took photos of each step.
First, blend the tofu with a little lemon juice (exact amounts are in the recipe below) until it’s completely smooth. The lemon juice adds some of the tanginess that yogurt would have and silken tofu doesn’t. I used a food processor because I thought getting the tofu mixture out would be easier than from the container of my Vitamix. Next time I will use my Vitamix to get it silky smooth without the starting, stopping, scraping down, and repeating that I needed to do in my food processor.
Pour the blended tofu into a bowl and add the flour (self-rising or a mix as noted in the recipe below.) Mix it well, turn it out onto a floured board, and kneed a few times until it sticks together. Cut it into 5 equal pieces.
Roll each piece of dough between your hands to form 5 ropes of dough between 12 and 14-inches long.
Form each rope of dough into a pretzel shape. Make an “O” with a twist at the top. Then twist again and bring the ends over the “O.”
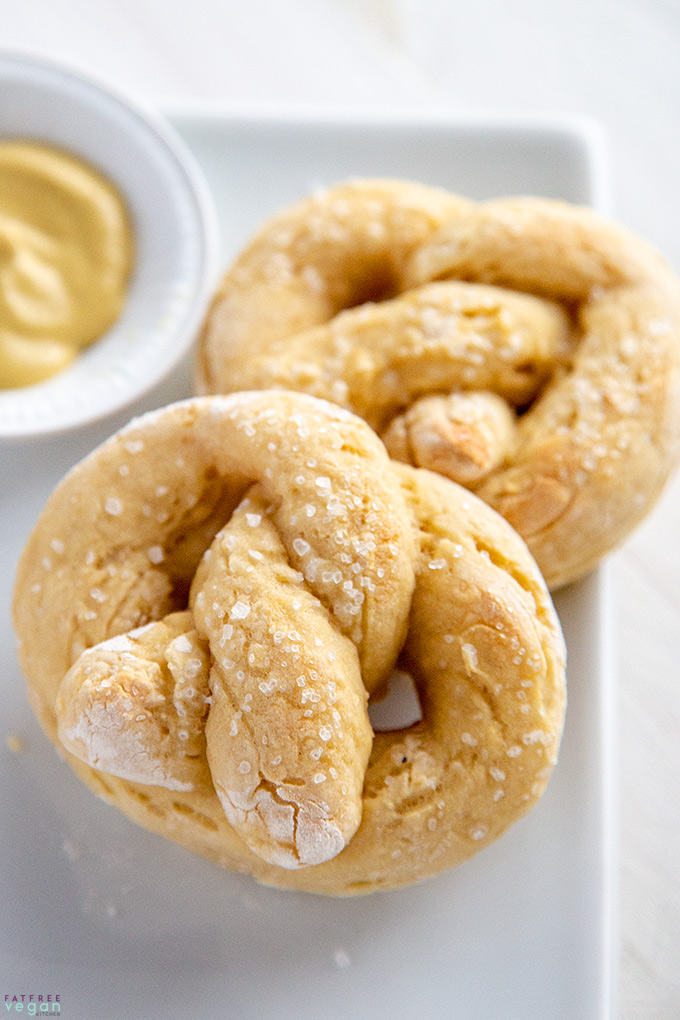
Place the pretzels on a parchment-covered baking sheet. Brush each one with a little aquafaba (liquid from cooked or canned chickpeas) and sprinkle with coarse salt or Everything Bagel Sesame Seasoning. Bake in a preheated oven as directed below. At the end of the baking, turn your oven to broil to slightly brown the tops and watch constantly . Don’t leave or they may burn!
Serve with mustard or your favorite pretzel condiment!
I used unbleached white flour with baking powder and salt added, but you can make these even more easily by using self-rising flour. I’ve included instructions for both. White whole wheat flour may also work, but I haven’t tested them using it.
Easy Vegan Soft Pretzels
In less than an hour, you can be enjoying these light, oil-free pretzels. They’re the perfect snack for Weight Watchers or any low-fat vegan diet.
1 1/4cups unbleached flour(or self-rising flour and omit baking powder and salt)
1 1/2teaspoonsbaking powder(omit if using self-rising flour)
1/2teaspoonsalt(optional if using self-rising flour)
2tablespoonsaquafaba(liquid from canned chickpeas)
coarse salt
Everything Bagel Seasoning(optional)
Instructions
Place the tofu and lemon juice in a blender or food processor. Blend until completely smooth, stopping to scrape down the sides of the container to get all the bits blended. (Skip this step if using plant-based yogurt.)
Place the flour in a mixing bowl. If you’re using plain flour, add the baking powder and salt and mix thoroughly. Pour in the tofu mixture and mix until a soft dough forms.
Turn the dough out onto a floured board and knead gently about 10 times or until the dough holds together. Divide it into 5 equal pieces.
Preheat oven to 350F.
Lightly flour your hands. Roll each piece of dough between the palms of your hands until a rope begins to form. Put it down on on the floured board and roll it back and forth between your hands until it’s between 12 and 14 inches long (longer is better.)
Form the rope of dough into a pretzel shape (see photo above) and place it on a baking sheet lined with parchment paper. Repeat with all the pieces of dough. Brush the tops lightly with aquafaba and sprinkle with coarse salt or Everything Bagel seasoning.
Bake at 350F for 22-25 minutes. Then, leaving the pretzels in the oven, turn the oven to broil and WATCH THEM until the tops begin to lightly brown, 2-3 minutes. Be careful not to burn them. Remove from oven and serve warm.
Refrigerate any leftovers. May be reheated in a toaster oven.
Notes
Using silken tofu, each pretzel is 3 points on Weight Watchers Freestyle program. Using yogurt will increase points, calories, and fat.
Nutrition Facts
Easy Vegan Soft Pretzels
Amount Per Serving (1 pretzel)
Calories 152 Calories from Fat 9
% Daily Value*
Fat 1g2%
Saturated Fat 0g0%
Sodium 423mg18%
Carbohydrates 26g9%
Fiber 1g4%
Protein 8g16%
* Percent Daily Values are based on a 2000 calorie diet.
Nutritional info is approximate.
I baked the pretzels on the Bake setting in my Breville Smart Oven Air. The air fryer setting might also have worked. If anyone tries air frying them, please let me know what settings worked for you.
I’m eager to try this dough as a pizza crust and perhaps as a bagel or bun. I’ll update the post to let you know how that goes.
Please Pin and share:
I participate in Amazon’s affiliate program; if you buy something through one of my links, I may receive a small commission. I’m not affiliated with Weight Watchers in any way, other than being a paying customer.
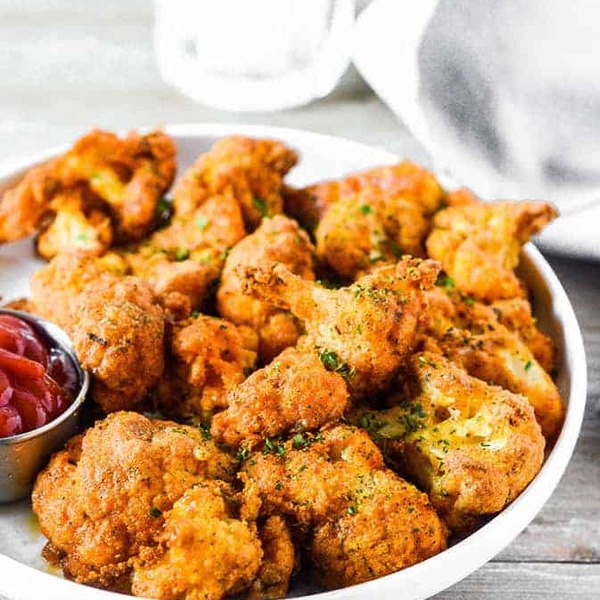
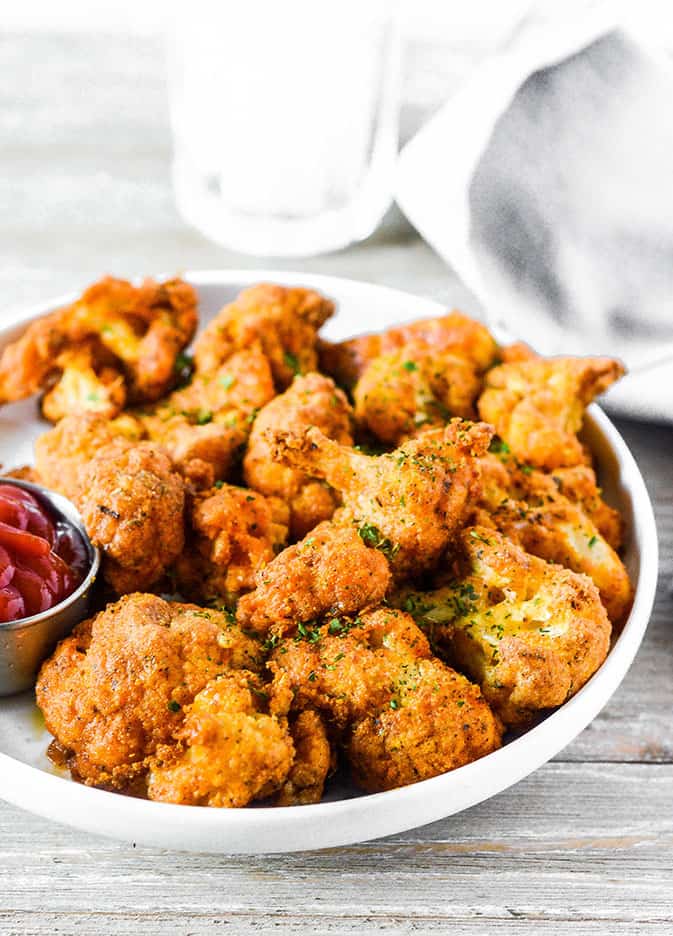
The flavor is amazing, and they are perfect as an appetizer or smothered with your favorite sauce as a main course!
Also, try Baked Tofu Nuggets.
Feeling for some delicious cauliflower nuggets? These are full of flavor and also coated with gluten-free breading. My family enjoyed this recipe very much.
It is easy to make! I left the yeast flakes as optional for those who are on a yeast-free diet but yeast flakes really enhance the flavor!
Ingredients For Cauliflower Nuggets
Cauliflower Florets: The star of the dish, cauliflower florets are cut from the head of the cauliflower and serve as a nutritious and versatile base. They have a mild, slightly nutty flavor that adapts well to various seasonings, making them perfect for nuggets.
Vegan Mayonnaise: This egg-free alternative to traditional mayonnaise adds creaminess and binds the other ingredients together. It helps in creating a moist texture inside the nuggets while allowing the outer coating to crisp beautifully.
Gluten-Free Flour: A key ingredient for those avoiding gluten, this flour is used to help form the outer crust of the nuggets. It provides structure and ensures they hold together during cooking.
Nutritional yeast flakes: These flakes add a cheesy, umami flavor without any dairy. Nutritional yeast is also packed with nutrients, including B-vitamins, making it a favorite in vegan cooking.
Onion Powder:Provides a concentrated burst of savory flavor, enhancing the nuggets’ taste without using fresh onions.
Garlic Powder: Similar to onion powder, garlic powder provides a rich, aromatic flavor that is essential for creating a depth of taste in the nuggets.
Ground paprika: This spice adds warmth and a vibrant color to the nuggets, imparting a subtle sweetness and smokiness that complements the cauliflower.
Italian Seasoning: A blend of dried herbs including oregano, thyme, basil, and rosemary, Italian seasoning brings a classic Mediterranean flair to the dish, enriching the nuggets with a herby zest.
Turmeric Powder: Known for its bright yellow color and anti-inflammatory properties, turmeric adds a mild, earthy flavor and a beautiful golden hue to the nuggets.
Sea Salt: A sprinkle of sea salt enhances all the flavors in the nuggets, helping to balance the spices and the natural taste of the cauliflower, making each bite perfectly seasoned.
How to Make Cauliflower Nuggets?
Preheat the oven to 400°F. Line a baking sheet with parchment paper and set aside.
Place cauliflower florets in a bowl, toss with mayonnaise, and set aside.
In a small bowl, combine flour, yeast flakes, onion powder, garlic powder, paprika, Italian seasoning, and turmeric powder. Mix well.
Dip cauliflower florets in breading, place them on a baking sheet, and repeat until all florets are coated.
Bake for 30 minutes, turning halfway. Delicious served with ketchup or barbecue sauce.
Other Vegan Recipes To Try
Vegan Chicken Nuggets
These cauliflower nuggets are packed with flavor! They are perfect as an appetizer or as a side dish! The best time to serve them is right away while they are still hot! I prepare them last, baking while assembling a salad, setting the table, and making final touches before guests arrive.
Update: I feel so honored because my cauliflower nuggets were included in the menu of the Vegetarian Society of DC (VSDC) Thanksgiving Dinner last year. This event is hosted annually, where vegetarians and non-vegetarians come together to give thanks and enjoy vegetarian dishes.
The event also features an influential keynote speaker and entertainers. I hope to go to this special event someday.
Get discounted copies of my cookbook here.
Fortunately, because of the ads on our website, readers and subscribers of Healthier Steps are sponsoring many underprivileged families.
Want to Save This Recipe?
Enter your email & I’ll send it to your inbox. Plus, get great new recipes from me every week!
By submitting this form, you consent to receive emails from Healthier Steps.
1poundcauliflower florets
1/4cupvegan mayonnaise
3tablespoonsbrown rice flouror your favorite gluten free flour
1tablespoonnutritional yeast flakes
1teaspoononion powder
1/2teaspoongarlic powder
1/2teaspoonground paprika
1teaspoonItalian seasoning
Pinchturmeric powder
sea saltto taste
Preheat oven 400°F. Line baking sheet with parchment paper and set aside.
Place cauliflower florets in a bowl, toss with mayonnaise and set aside
In a small bowl combine breading ingredients brown rice flour, yeast flakes, onion powder, garlic powder, paprika, Italian seasoning, turmeric powder and mix well.
Dip cauliflower florets in breading and place on baking sheet, repeat until all florets are coated.
Bake for 30 minutes turning halfway. Delicious served with ketchup or barbecue sauce.
Hi, I’m Michelle, I’m the voice, content creator and photographer behind Healthier Steps. I share vegan and gluten-free recipes because of past health issues. My goal is to help you make healthier choices and show you how healthy eating is easy and delicious.