Blog

  • Gingerbread Rice Krispie Treats (gluten-free, refined sugar-free, vegan option)

    Gingerbread Rice Krispie Treats (gluten-free, refined sugar-free, vegan option)

    recipe image

    · 12 Comments

    A close up of bars

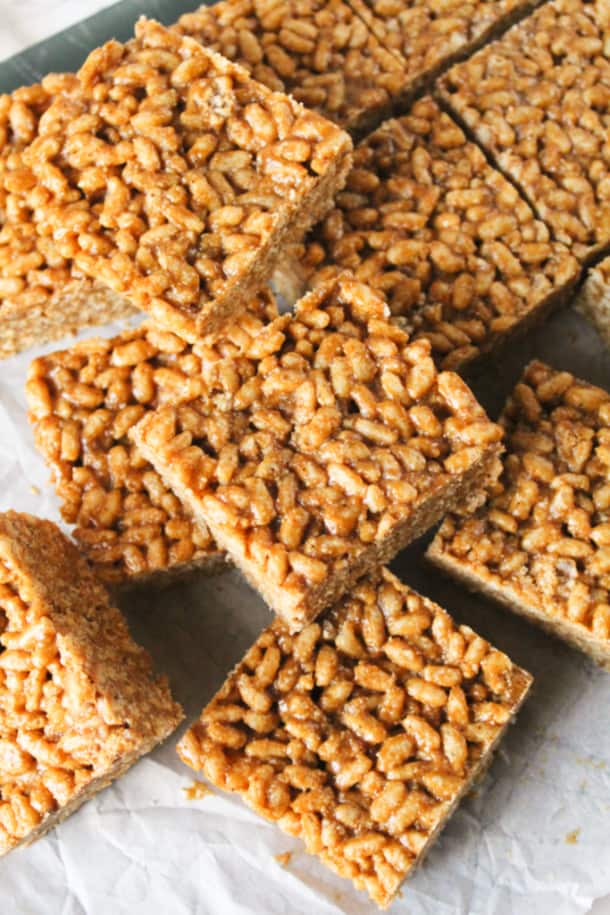
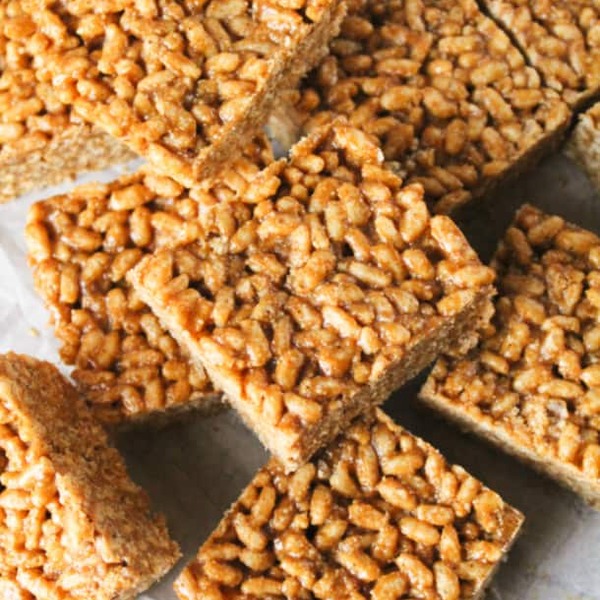
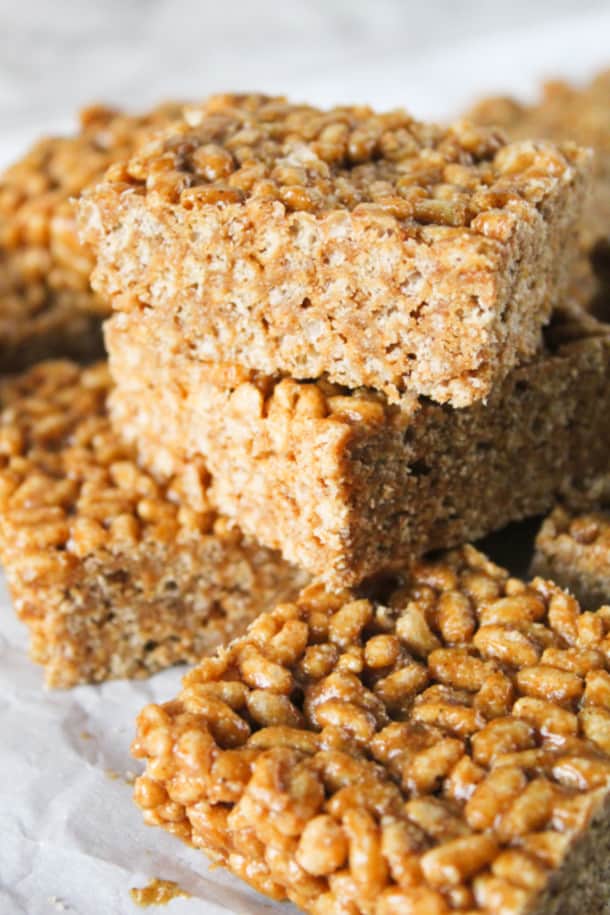
    A healthier spin on the classic Rice Krispie treat, with the addition of warm spices and molasses, these Gingerbread Rice Krispie Treats are a chewy, no bake, easy recipe to make that everyone will enjoy!

    Are you looking for a fun, new recipe for the Holidays that your kids will love?

    Maybe you want the recipe to be a little healthier? I’m always on the search for fun new desserts, and it’s a big bonus if they are made a little healthier too. 

    These Gingerbread Rice Krispie Treats are IT!

    The classic Rice Krispie Treat was given a makeover; no longer loaded with marshmallows and butter, these Gingerbread Rice Krispie Treats are instead made with cashew butter and honey, for a dessert that’s made with more real food ingredients.

    The only problem is, I’m having a hard time naming them, going back and forth between Gingerbread Scotcharoos and Gingerbread Rice Krispie Treats! Why??

    • Scotcharoos are typically made with peanut butter, butterscotch, chocolate and NO marshmallows
    • Rice Krispie Treats are typically made with butter and marshmallows, and no nut butters
    • However, both desserts contain the classic rice krispie cereal and are loaded with chewy, sugar-y goodness

    These Gingerbread Rice Krispie Treats have NO marshmallows, but contain nut butter. So, what the heck should I call them?! After much contemplation, I decided to go with “Gingerbread Rice Krispie Treats” because I think the term “Rice Krispie Treat” is used more universally.

    It was for me at least! Once upon a time I thought I was eating Rice Krispie Treats my entire childhood…

    Side view of a stack of rice krispie treats

    I guess it doesn’t matter much what you call them after all.. what matters most is that these Gingerbread treats are DELICIOUS.

    So, why should you make these Gingerbread Rice Krispie treats? 

    These Gingerbread Rice Krispie Treats are:

    • Gluten-free (made with gluten-free rice krispie cereal)
    • Refined sugar-free (only 1/2 cup of honey or maple syrup)
    • Made with ZERO corn syrup, marshmallows or butter
    • Filled with molasses, cinnamon, ginger, nutmeg, allspice and cloves
    • No bake, quick AND easy to make

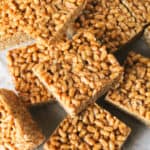
    Chewy and spiced, these Gingerbread Rice Krispie Treats are a fun spin on the classic rice krispie treats, done in a healthier, Holiday-flavored way.

    I brought some of these Gingerbread Rice Krispie Treats to a friend recently, who had just had a baby. Along with a batch of my Banana Bread Breakfast Cookies, she was set up with a healthy breakfast and a dessert to get through the week. Turns out she isn’t a big baker, so her request for me was some yummy baked goods 🙂

    Not long after I gave them to her I got a text, it was the “omg… so good” text that always makes me smile 🙂

    That’s why I love to bake. I love to bring that “omg… so good” feeling to other people when they eat the food I make. I love taking care of people and being a part of them enjoying the simple things in life, like a good breakfast cookie or rice krispie treat.

    Gingerbread Rice Krispie Treats sprinkled around on parchment paper with a bite taken out of one

    I hope you make these Gingerbread Rice Krispie Treats this Christmas and get that same “omg… so good” reaction! 🙂

    Here’s to yummy Christmas treats and smiling faces with full tummies, whether you know what to call a dessert or not! 😉

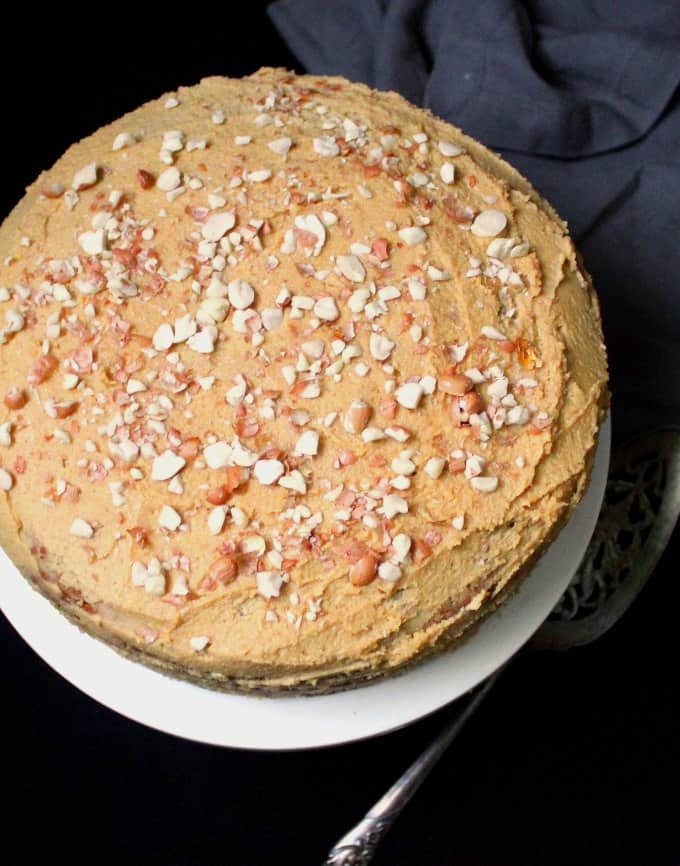
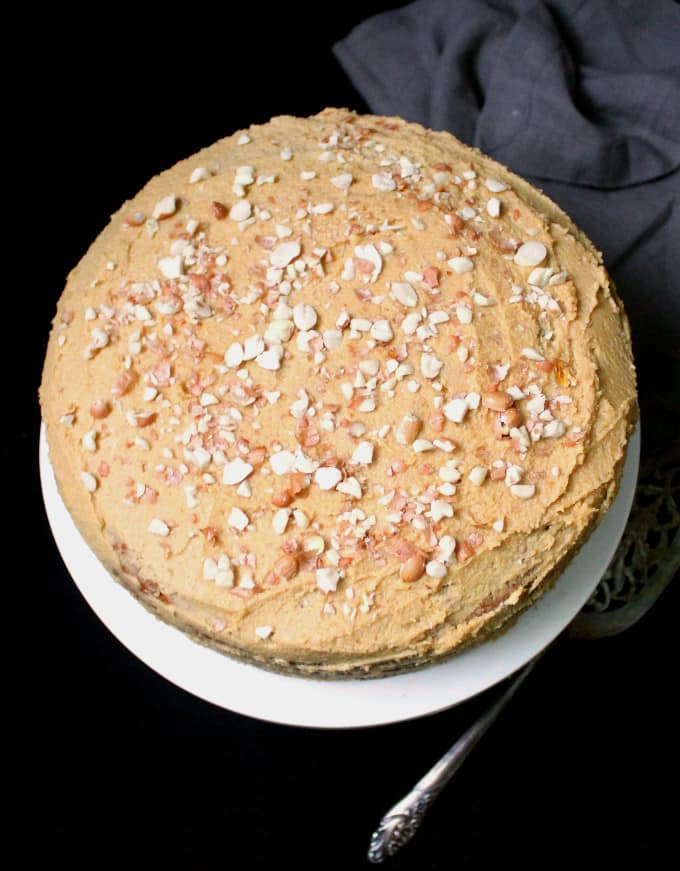
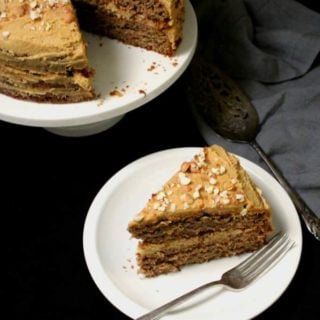
    Looking for other fun, easy, Christmas Treats? Check out my Mexican Hot Cocoa Cookies and Gingerbread Cake.

    A close up of bars

    Gingerbread Rice Krispie Treats (gluten-free, refined sugar-free, vegan option)

    Servings: 12 bars

    Calories: 221 kcal

    Ingredients

    • 4
      cups
      rice krispie cereal (gluten-free)
    • 1
      tsp
      cinnamon
    • 1
      tsp
      ginger
    • 1/2
      tsp
      allspice
    • 1/2
      tsp
      nutmeg
    • 1/2
      tsp
      cloves
    • 1/4
      tsp
      salt *see notes
    • 1
      cup
      cashew butter
    • 1/2
      cup
      honey (or maple syrup if vegan)
    • 3
      tbsp
      molasses
    • 1
      tsp
      vanilla

    Instructions

    1. Line a 9×9 pan with parchment paper with the edges sticking out on either side, to easily remove the Rice Krispie Treats later.

    2. To prepare, in a large mixing bowl, pour in your 4 cups of rice krispie cereal.

    3. In a separate, small bowl, combine your spices (cinnamon, ginger, allspice, nutmeg, cloves and salt) and stir till they’re well mixed. 

    4. In a small pot, add your cashew butter, honey, and molasses, and stir till well combined. While stirring, bring the mixture to a low simmer and then immediately take off the heat and stir your vanilla and small bowl of spices into your wet ingredients.

    5. Pour your wet ingredients over your rice krispie cereal and stir together well, until all of the cereal is well covered with the mixture.

    6. Pour your gingerbread rice krispies into your pan and spread them evenly across your pan, so the top is smooth and as flat as possible. I like to use a spatula to spread the rice krispies around, and if your spatula sticks too much you can spray it with non-stick spray.

    7. Place your gingerbread rice krispie treats into your fridge and let them cool for at least an hour. Remove from your fridge, take your gingerbread rice krispie treats out with the edges of your parchment paper, and cut them into 12 bars.

    8. Devour!

    Recipe Notes

    *If your cashew butter is unsalted, I would recommend adding the 1/4 tsp of salt. If your cashew butter is salted, you may want to leave the salt out.

    Read More

  • Instant Pot® Vegan Korma

    Instant Pot® Vegan Korma

    recipe image


    Cook Mode
    (Keep screen awake)

    Ingredients


    Original recipe (1X) yields 4 servings

    • 1 red onion, quartered, divided

    • 1 green bird’s eye chile pepper, stemmed

    • ½ cup water, divided

    • ¼ cup raw cashews

    • 2 cloves garlic

    • 2 tablespoons tomato paste

    • 1 (1 inch) piece fresh ginger

    • 5 whole cloves

    • 3 green cardamom pods

    • 1 black cardamom pod

    • 1 bay leaf

    • 1 teaspoon cumin seeds

    • ¼ teaspoon whole black peppercorns

    • ¼ teaspoon ground coriander

    • ¼ inch cinnamon stick

    • ¼ cup light vegetable oil

    • 8 ¾ ounces cauliflower, cut into large pieces

    • 5 ¼ ounces broccoli, cut into large pieces

    • 2 tomatoes, cut into large chunks

    • 1 cup canned chickpeas (garbanzo beans), drained with liquid reserved

    • 1 carrot, sliced

    • 1 red bird’s eye chile pepper, chopped

    • ½ tablespoon garam masala

    • ½ teaspoon ground turmeric

    • ¼ teaspoon chili powder

    • 1 cup baby spinach leaves

    • 1 cup full-fat coconut milk

    • ½ cup vegan yogurt

    • 2 ounces roasted cashews, chopped

    • ½ cup chopped fresh cilantro

    Directions

    1. Blend 1/4 of the onion, green chile pepper, 1/4 cup water, cashews, garlic, tomato paste, and ginger together in an electric blender, adding extra water if necessary, until paste is creamy and has the consistency of a pesto. Set aside.

    2. Combine cloves, green and black cardamom pods, bay leaf, cumin seeds, peppercorns, coriander, and cinnamon in a mortar. Smash using a pestle to break open spices slightly, 3 to 4 times. Thinly slice remaining onion quarters.

    3. Turn on a multi-functional pressure cooker (such as Instant Pot®) and select Saute function. Add smashed spice mixture and toast until fragrant, about 30 seconds. Pour in oil followed by cashew pesto, onion slices, cauliflower, broccoli, tomatoes, chickpeas, carrot, red chile pepper, garam masala, turmeric, and chili powder. Stir. Cancel the Saute function. Close and lock the lid.

    4. Select high pressure according to manufacturer’s instructions; set timer for 5 minutes. Allow 10 minutes for pressure to build.

    5. Release pressure using the natural-release method according to manufacturer’s instructions, 10 to 40 minutes. Unlock and remove the lid. Stir in spinach and mix to help wilt. Stir in coconut milk and yogurt. Mix and serve with roasted cashews and cilantro on top.

    Nutrition Facts (per serving)

    544 Calories
    39g Fat
    45g Carbs
    13g Protein
    Nutrition Facts
    Servings Per Recipe
    4
    Calories
    544
    % Daily Value *
    Total Fat
    39g
    50%
    Saturated Fat
    16g
    79%
    Sodium
    449mg
    20%
    Total Carbohydrate
    45g
    16%
    Dietary Fiber
    12g
    42%
    Total Sugars
    8g
    Protein
    13g
    26%
    Vitamin C
    90mg
    99%
    Calcium
    125mg
    10%
    Iron
    6mg
    32%
    Potassium
    1069mg
    23%

    * Percent Daily Values are based on a 2,000 calorie diet. Your daily values may be higher or lower depending on your calorie needs.

    ** Nutrient information is not available for all ingredients. Amount is based on available nutrient data.

    (-) Information is not currently available for this nutrient. If you are following a medically restrictive diet, please consult your doctor or registered dietitian before preparing this recipe for personal consumption.

    Read More

  • Gluten-Free Vegan Chocolate Pudding Pretzel Pie

    Gluten-Free Vegan Chocolate Pudding Pretzel Pie

    recipe image

    Gluten-Free, dairy-free pie has a REAL-DEAL chocolate pudding! Nobody will guess this amazing dessert is dairy-free! 

    This pie has been a long-time reader and family favorite recipe since I published it back in 2016. It was updated with new photos and step-by-step instructions in February 2024.

    You might also like this dairy-free banana cream pie, dairy-free fondue or dairy-free fudge.

    When people ask me for a gluten-free and dairy-free dessert, I point them to this recipe! It’s easy to make with a crushed pretzel crust and SO delicious with the real-deal chocolate pudding filling!

    Thousands of people return to my site every year to make this pie for the holidays!

    Why I love this recipe

    • Made-from-scratch pudding – This is a real-deal, homemade chocolate pudding pie with rich chocolate flavor. (The best part: NO avocado, banana, tofu, or sweet potato as a main ingredient!) It tastes SO much better than any storebought pie, boxed pudding pie, or typical vegan pie. Sometimes simple ingredients deliver the best results!
    • Perfect for guests with food allergies – This eggless pudding pie is completely vegan, dairy-free, and gluten free! It’s an amazingly easy gluten free dessert to satisfy your sweet tooth, especially if your guests have gluten intolerance or a variety of food allergies/restrictions. Bake it for a holiday, birthday party, or another special occasion!
    • Sweet and salty – Everyone loves the combination of a crunchy pretzel crust and rich chocolate pudding! It’s perfectly sweet and a little bit salty. It really is one of the best vegan gluten free desserts you’ll ever try!

    Ingredients You’ll Need

    Here are a few notes on the key ingredients to make this delicious vegan dessert.

    overhead shot of ingredients to make gluten-free dairy-free dessert
    • Gluten-free pretzels: Be sure to use gluten-free pretzels to ensure this pie is gluten-free. Check out this article on are pretzels gluten-free!
    • Coconut milk: I find that canned coconut milk gives good results and works much better than boxed coconut milk.
    • Chocolate: You’ll want to use dairy-free chocolate chips to keep this delicious dessert dairy-free and vegan. Otherwise, you can use a chopped semisweet or bittersweet chocolate bar.

    How to Make Gluten-Free Vegan Dessert

    how to make the pretzel crust for this gluten-free dairy-free dessert

    Make the crust. Place the pretzels in a Ziploc and crush into very small pieces (You can also use a food processor). Pour into a bowl and add the brown sugar and vegan butter. Stir to combine.

    how to bake the crust and make the pudding for this gluten-free dairy-free dessert

    Bake the crust. Pour the gluten-free vegan dessert crust into the prepared pan and press into an even layer. Bake for 10-12 minutes until toasted. Let cool for 15-20 minutes before filling.

    For favorite gluten-free recipes, try these gluten-free chocolate chip cookies, gluten-free banana bread and gluten-free brownies.

    how to make the gluten-free dairy-free dessert pudding

    Make the pudding. In a heavy-bottomed saucepan, whisk together the dry ingredients for this gluten-free vegan dessert, including cocoa powder, cornstarch, cane sugar and pinch of salt. Over medium heat while whisking, add the coconut milk and almond milk. Whisk until totally smooth. Continue to whisk until the mixture comes to a gentle boil. Once the mixture bubbles continue to whisk and cook for another 2 minutes until thick. Remove from the heat and stir in the chocolate chips, vanilla, and vegan butter (if using). Pour into a bowl and let cool to just about room temperature, stirring often.

    Make the ganache. Melt the chocolate and coconut oil together in the microwave at 50% power for 30-45 seconds, stopping to stir every 15 seconds. Stir until totally smooth.

    Assemble the pie. Pour and spread the ganache over the bottom of the prepared gluten-free vegan dessert crust. Let set slightly before adding the pudding. Pour the pudding into the crust. Smooth, then refrigerate until set, about 2 hour or up to 12 hours. For the topping, place the CocoWhip in a bowl and use a hand mixer to whip until smooth, about 10-20 seconds. Spread over the pie and garnish with chocolate curls. Serve and enjoy this easy recipe for any special occasion!

    Storage Instructions

    To store: Store this gluten-free vegan dessert in an airtight container or covered in plastic wrap in the fridge for up to five days.

    To make in advance: Make, assemble, and chill the gluten-free vegan dessert pie as usual, but wait to add the CocoWhip topping and chocolate curls until just before serving. It’s the best way to ensure the whipped cream doesn’t deflate!

    Recipe Tips

    • MAKE-IT NUT-FREE: Use boxed coconut milk in place of the almond milk in this gluten-free vegan dessert. (But do not use boxed coconut milk in place of the canned coconut milk.)
    • If you prefer, you can just make the pudding and serve it on its own with CocoWhip! It’s one the best vegan dessert recipes when you want something simple!
    • Remember to use gluten-free pretzels and dairy-free chocolate chips to ensure this pie is gluten free dairy free.

    For the Crust:

    • 5 1/2 ounces gluten-free pretzels (crush slightly to fit in the measuring cup if measuring instead of weighing) about 3 1/2 cups
    • 1/4 cup brown sugar
    • 6 tablespoons vegan butter melted

    For the Chocolate Pudding:

    • 1/4 cup unsweetened cocoa powder
    • 1/4 cup cornstarch or arrowroot powder
    • 1/2 cup organic cane sugar
    • pinch of salt
    • 13.5 ounces canned (not boxed) coconut milk
    • 1 cup unsweetened almond milk
    • 2/3 cup dairy-free chocolate chips
    • 1 tsp vanilla extract
    • 1-2 tablespoons vegan butter optional

    For the Ganache:

    • 3 ounces semisweet or bittersweet chocolate bar or 1/3 cup dairy-free chocolate chips
    • 2 teaspoons coconut oil

    Make the crust:

    • Preheat the oven to 350F. Lightly grease a 9-inch pie pan with cooking spray.

    • Place the pretzels in a ziploc and crush into very small pieces. Pour into a bowl and add the brown sugar and vegan butter. Stir to combine.

    • Pour into the prepared pan and press into an even layer. Bake for 10-12 minutes until toasted. Let cool for 15-20 minutes before filling.

    Make the pudding:

    • In a heavy-bottomed saucepan, whisk together the cocoa powder, cornstarch, cane sugar and pinch of salt. Over medium heat while whisking, add the coconut milk and almond milk. Whisk until totally smooth.

    • Continue to whisk until the mixture comes to a gentle boil. One the mixture bubbles continue to whisk and cook for another 2 minutes until thick. Remove from the heat and stir in the chocolate chips, vanilla, and vegan butter (if using). Pour into a bowl and let cool to just about room temperature, stirring often.

    For the ganache:

    • Melt the chocolate and coconut oil together in the microwave at 50% power for 30-45 seconds, stopping to stir every 15 seconds. Stir until totally smooth. Pour and spread over the bottom of the prepared crust. Let set slightly before adding the pudding.

    • Pour the pudding into the crust. Smooth, then refrigerate until set, about 2 hour or up to 12 hours.

    • For the topping, place the CocoWhip in a bowl and use a hand mixer to whip until smooth, about 10-20 seconds. Spread over the pie and garnish with chocolate curls. Serve and enjoy!

    MAKE-IT NUT-FREE: Use boxed coconut milk in place of the almond milk. (Do not use boxed coconut milk in place of the canned coconut milk.)

    Calories: 500kcal | Carbohydrates: 58g | Protein: 3g | Fat: 30g | Saturated Fat: 18g | Cholesterol: 1mg | Sodium: 443mg | Potassium: 222mg | Fiber: 2g | Sugar: 31g | Vitamin A: 480IU | Vitamin C: 0.5mg | Calcium: 88mg | Iron: 3.7mg

    This post contains affiliate links to my favorite products.

    This Gluten-Free Peanut Butter Pie from Gluten-Free on Shoestring also looks delicious!

    This No-Bake Dirt Pie from Cotter Crunch is also Vegan and Gluten-Free and looks fabulous.

    This post may contain affiliate links. Please read our disclosure policy.

    Categories: Dairy-Free Recipes, Egg-Free Recipes, Favorites, Gluten Free, Gluten-Free Desserts, Gluten-Free Holiday Recipes, Gluten-Free Thanksgiving Recipes, Latest Recipes, Nut-Free, Soy-Free, Vegan

    Hi, I’m Erin!

    BS Food Science,

    MS Nutrition

    I believe you can make amazing, gluten-free food with everyday ingredients that everyone will enjoy. I’m here to share my tried-and-true recipes with you!

    You may also like

    Read More

  • Vegan Sweet Potato Maple Bourbon Cake

    Vegan Sweet Potato Maple Bourbon Cake

    recipe image

    by Lauren Hartmann 10 Comments

    This post sponsored by JORD Wooden Watches. The coolest watches of all time! 

    The Holidays are creeping ever so close. What are my 2 favorite things about the holidays you ask? Number 1: Giving gifts,(more specifically, super cool watches). Number 2: Food, obviously(more specifically, delicious cakes). Seriously. There is nothing I find more satisfying than giving other people amazing gifts and giving the food I make. So today, we are going to talk about cake and the perfect gift. This vegan sweet potato maple bourbon cake is the best cake. Period. 

    The best gift? The wooden watches from JORD! I took gifting to a whole new level this year, by giving my husband this beautiful Dover series Ebony and Copper wood watch! They create custom sizing for you, and you can even get them engraved! My husband literally gasped when he opened the watch box, and he doesn’t get that excited about much! He also said I had totally outdone him this year, and he needed to rethink his gift idea! Here is the link to his watch! 

    He put it on immediately and won’t take it off! They have perfect women’s watches and the most unique men’s watches I have ever seen. If you are interested in making your loved ones just as happy as I made mine, here is the link to the men’s shop! Here is the link to the women’s shop! The most exciting part about this whole thing(besides the cake recipe) is that JORD was kind enough to give all my readers a Holiday instant coupon! You can go to this link, and get an instant 25% off. That is crazy awesome! The instant 25% off code ends December 19th, 2017. So you have plenty of time to shop!

    So back to cake! My other favorite thing! Mashed sweet potatoes, maple syrup, bourbon and some pecans. What could possibly be better? This cake is incredibly easy, and will ruin you for all other holiday cakes! You can drizzle it with more maple syrup or a vanilla glaze. Beautiful and impressively scrumptious, you know, to impress your picky judgmental aunt.  

    Vegan Sweet Potato Maple Bourbon Cake

    Print Recipe

    The perfect dessert for your vegan holiday meal! Sweet potatoes, maple syrup, bourbon and pecans! 

    Prep Time 15 minutes

    Cook Time 50 minutes

    Total Time 1 hour 5 minutes

    Instructions

    • Preheat oven to 325 degrees.

    • In a large mixing bowl, using a hand mixer or stand mixer, whip together the brown sugar and vegan butter until fully combined and fluffy. 

    • Now add the maple syrup, sweet potato and vanilla. Continue to whip until fully combined and there are no chunks of sweet potato in the mixture. Set aside. 

    • In a medium sized mixing bowl, sift together the flour, baking powder, cinnamon, nutmeg, cloves and salt. 

    • Now add the dry mixture to the wet a little at a time, alternating with the almond milk. Using your mixer on low to combine. Once all of the almond milk is added, add the bourbon. 

    • When all of the dry mixture and the almond milk and bourbon have been added, make sure everything thing is fully combined. Then fold in 1/2 cup of the pecans. 

    • Now spray a bundt pan with non stick spray( or whatever pan you plan to use) then sprinkle the remaining 1/4 Cup of pecans on the bottom. Pour the batter on top and smooth out. 

    • Bake at 325 degrees for 50-60 minutes or until a toothpick comes out clean. Let cool, invert onto serving plate. Top with more maple syrup or a vanilla glaze. Or just vegan whipped cream! 

    Notes

    I like to spray my bundt pans with non stick spray and then sprinkle them with flour and coat the bottom and sides pouring out the excess. It makes the cake come out of the pan perfect every time!

    If you don’t want to use bourbon, I would suggest apple juice or apple cider.

    The pecans are optional, but they taste amazing!

    Reader Interactions

    Trackbacks

    1. […] 9. Sweet Potato Maple Bourbon Cake […]

    Read More

  • Vegan Shepherd’s Pie

    Vegan Shepherd’s Pie

    recipe image

    “I got this recipe from an episode of Good Eats. It of course wasn’t vegan, so I made it vegan and made a couple adjustments to the measurements. I must say, this dish was so amazing that I ended up dreaming about it! The fresh herbs, the sauce, the fluffy potatoes… it’s heaven in a baking dish. Thank you Alton Brown! (and btw, regular Worcestershire sauce is not vegan, but you can find vegan sauce at specialty stores. I used The Wizard’s Organic Original Vegan Worcestershire Sauce. Also, Mornistar’s crumbles are no longer vegan, so use Boca or equal amounts of seitan pulsed in a food processor.)”

    Ready In:
    1hr 15mins

    Ingredients:
    21

    • For the potatoes

    • 3

      russet potatoes, cubed (leave the skin on!)
    • 1

      garlic clove, crushed
    • 14

      cup soymilk
    • 3

      tablespoons vegan margarine


    • salt and pepper
    • For the filling

    • 2

      (12 ounce) packages Boca meatless ground burger
    • 1

      onion, chopped
    • 2

      carrots, peeled and diced small
    • 3

      garlic cloves, minced
    • 3

      tablespoons canola oil
    • 2

      teaspoons fresh rosemary, chopped
    • 1

      teaspoon fresh thyme, chopped
    • 1

      large sage leaf, chopped
    • 12

      teaspoon salt
    • 12

      teaspoon fresh ground pepper
    • 2

      tablespoons all-purpose flour
    • 1

      cup vegetable broth
    • 2

      teaspoons tomato paste
    • 1

      teaspoon Worcestershire sauce
    • 1

      (14 ounce) can peas
    • 1

      (14 ounce) can corn

    directions

    • Start by putting the cubed potatoes and crushed garlic clove in a pot and fill with enough water to cover. Sprinkle a bit of salt in, as well. Bring to a boil and cook for about 10-15 minutes until the potatoes are fork-tender. Drain the potatoes (including the garlic) and mash with the salt, pepper, soy milk and margarine. Taste and add more seasonings or margarine if needed.
    • While the potatoes are cooking, prepare your filling ingredients and preheat the oven to 400°F.
    • Heat the oil in a large pan over medium heat. Add the onions and carrots and cook for 3-4 minutes, until they begin to soften and the colors become more vibrant.
    • Add the garlic and stir until fragrant, 1-2 minutes.
    • Add the crumbles and stir until defrosted and they begin to brown. Sprinkle with flour, salt and pepper and stir until evenly distributed. Whisk together the tomato paste and the vegetable broth and add to the pan along with the Worcestershire sauce and fresh herbs. Stir well, cover, and turn down the heat. Let simmer for 10-12 minutes until the sauce has thickened.
    • Pour the filling mixture into an 11×7 glass baking dish. Drain the peas and corn and add to the pan. Mix well to combine and smooth out.
    • Using a rubber spatula, dollop the potatoes over the top of the filling. Carefully spread the potatoes out over the filling, making sure to form a seal all around the edge of the baking dish to prevent the filling from bubbling over. Bake on the middle oven rack for 25 minutes, until the potatoes begin to turn golden brown. Let the pie cool for about 10-15 minutes before serving.

    Questions & Replies


    Got a question?


    Share it with the community!

    Want a Second Helping?

    Sign up for our newsletter to get recipes, easy dinner ideas, tasty treats and more delivered straight to your inbox.

    To withdraw your consent or to learn more about your rights, see the Privacy Policy.

    RECIPE SUBMITTED BY

    “>

    I’ve been vegan since February of 2005, and I was vegetarian for almost a year before that. I love cooking vegan food. People always ask me, “What do you eat?” or, “Doesn’t being vegan make it harder to cook?” Nope! In fact, I’ve found that going vegan opened up a whole new world of cooking for me. I’ve tried ingredients I otherwise never would have heard of, and found vegan products that are even better than their non-vegan counterparts. I love creating new dishes and recipezaar has been a wealth of inspiration.

    Photo Sharing and Video Hosting at Photobucket

    View Full Profile

    Read More

  • Banana Cake

    Banana Cake

    recipe image

    A tender, delicious and healthy vegan banana cake with vegan peanut butter frosting. The cake is made with whole wheat flour and has the goodness of bananas and applesauce baked in. On top goes a yummy peanut butter vanilla frosting that’s to die for.

    A top shot of a slice of vegan banana cake with peanut butter frosting on a white plate with a fork and the full cake on a cake stand in the back

    If you love vegan banana bread, you will love this vegan cake loaded with bananas and topped with a creamy peanut butter icing. In our home, we call this cake the Elvis Cake. And it really is all that.

    A big slice of vegan banana cake with peanut butter frosting on white plate wiht fork.

    The rock ‘n’ roll legend’s love for food was well-known, and the infamous peanut butter and banana sandwich he adored, dubbed the “Elvis,” is the stuff of  food excess lore. But there’s nothing unhealthy about this cake. In fact, it is probably as healthy as cake can get, because it’s made with all whole wheat and naturally sweetened with coconut sugar or turbinado sugar.

    Besides you already know that bananas, packed with potassium, magnesium, fiber and many more nutrients, are really good for you. And who doesn’t have overripe bananas sitting in their kitchen during these dog days? Put them to good use.

    Photo of vegan banana peanut butter cake on cake stand.

    The cake has a very moist, airy crumb and every bite bursts with startling banana flavor. I made just enough peanut butter frosting to get a nice, satisfying layer between the two tiers and on top, but if you are the sort who likes gobs and gobs of frosting on their cake, double the recipe. Do keep in mind that peanut butter– although healthy– is high in fat.

    The first time I made this cake eight years back and shared it with you, I struggled with a personal food quirk — a big one. I absolutely love peanut butter and can eat it out of the jar by the spoonful (I do.). But I hate it vigorously and vehemently when it’s combined with anything sweet. I cannot stand peanut-butter-and-jelly sandwiches, I don’t dare go near a peanut butter cup, and if you’re my friend you would know better than to buy me peanut-butter candy

    But in this recipe, the peanut butter is absolutely amazing. So much so that this is one of the cakes I bake the most, and it is also a cake many of you have written to tell me how much you love. In fact, one of the reasons I wanted to bring it back to the front of the blog, and update with new photos and text, is because a couple of people recently wrote to say they couldn’t find the recipe anymore and wanted to know where it was. Although I don’t usually take old recipes down, some can get lost amidst all of the nearly 1,000 posts that are now on the blog.

    On to the cake, then. I hope you love it as much as we do, and if you make it, be sure to come back and tell me about it.

    Ingredients

    • Whole wheat pastry flour. You can sub half unbleached all purpose and half whole wheat flour if you prefer.
    • Bananas. These should be as ripe as possible. Sweeter is better.
    • Peanut butter. Use smooth preferably, I think this makes the nicest frosting.
    • Vegetable oil
    • Baking powder
    • Baking soda
    • Sugar. I use either coconut sugar or turbinado. Any other kind is fine, but unrefined sugars like these are better for you than white sugar.
    • Powdered sugar or confectioners’ sugar
    • Nondairy milk (I use almond)
    • Vegan Butter
    • Pure Vanilla Extract

    More vegan cake recipes

    You might also like vegan apple cake and vegan orange cake.

    Vegan banana cake on cake stand with server next to it and a gray napkin.

    Recipe card

    A top shot of a slice of vegan banana cake with peanut butter frosting on a white plate with a fork and the full cake on a cake stand in the back

    Vegan Banana Cake with Peanut Butter Frosting

    Vaishali · Holy Cow Vegan

    A tender and delicious and actually healthy vegan banana cake with vegan peanut butter frosting. The cake is made with whole wheat flour and has the goodness of bananas and applesauce baked in. On top goes a yummy peanut butter vanilla frosting that’s to die for.

    Prep Time 20 minutes

    Cook Time 30 minutes

    Total Time 50 minutes

    Course Cake/Dessert

    Cuisine American

    Servings 20 slices

    Calories 333 kcal

    Instructions 

    Make the vegan banana cake:

    • Mix the nondairy milk with the apple cider vinegar and set aside for a minute.

    • Combine the flour, baking soda, baking powder and salt in a bowl.

    • Beat together the oil and sugar with a handheld mixer or in a stand mixer or with a whisk for about two minutes.

    • Add the nondairy milk and beat until just mixed.

    • Add the mashed bananas and applesauce and beat in. Make sure there are no big lumps.

    • Add the flour to the sugar-banana mixture in two batches, mixing well after each addition until the mixture is smooth. Don’t overdo it.

    • Line the bottom of two 9-inch cake pans with parchment or wax paper. Oil and flour the pans.

    • Divide the batter equally between the two pans and bake 25-30 minutes in a 350-degree oven until a toothpick inserted in the center of each cake comes out clean.

    • Place on a rack to cool, about 10 minutes. Unmold, peel off the parchment paper, and leave on the rack to cool thoroughly before frosting.

    Make the vegan peanut butter frosting:

    • Have the peanut butter and vegan butter at room temperature. Place them in a bowl and mix with a handheld or stand mixer or whisk until everything’s combined and smooth.

    • Add the sugar ½ cup at a time, beating in well after each addition. Confectioner’s sugar can lump up sometimes, in that case pass the sugar through a sieve. If the frosting feels stiff, add in some nondairy milk, a tablespoon at a time, beating after each addition, until you have a smooth, frosting-like consistency

    Assemble the cake:

    • Place one cake on a cake stand or flat dish. Put about ⅓rd of the frosting (recipe follows) in the center of the cake and using a spatula spread it evenly across the surface.

    • Carefully place the second cake on top of the first one. Put the remaining icing in the center of the cake and evenly frost the top and sides.

    • Garnish with chopped, roasted peanuts.

    Nutrition Information

    Serving: 1sliceCalories: 333kcalCarbohydrates: 45gProtein: 6gFat: 16gSaturated Fat: 7gSodium: 193mgPotassium: 322mgFiber: 3gSugar: 27gVitamin A: 266IUVitamin C: 3mgCalcium: 51mgIron: 1mg

    Tried this recipe?Let us know in the comments below!

    About Vaishali

    Hi! I’m Vaishali, a journalist turned food blogger. At Holy Cow Vegan I share easy, tasty recipes made with clean, wholesome ingredients that the entire family can enjoy.

    Reader Interactions

    Read More

  • Sweet Mustard Baked Beans

    Sweet Mustard Baked Beans

    recipe image

    Amazingly satisfying Sweet Mustard Baked Beans. Easy and homemade they are full of incredible flavors, super tasty, entirely vegan and gluten free.

    Sweet Mustard Baked Beans | #vegan #contentednesscooking #glutenfree

    The idea of baked beans came to my mind recently, when I was invited to a party. Don’t get me wrong, a hummus like this Olive Hummus [vegan, gf] is one of my big favorites and will always be it.

    But I was looking for something new to bring to this gathering. So these Sweet Mustard Baked Beans were my plan.

    I actually hadn’t planned to post this here on the blog, but it turned out so amazing that I just have to share it with you all of you guys. Try and you know about the flavor sensation of these Sweet Mustard Baked Beans.

    They are truly mouthwatering, creamy, protein rich, super simple, seriously this is something I would eat not only on gatherings or potlucks. It’s made for you once you tried it, you don’t wanna share.

    Sweet Mustard Baked Beans | #vegan #contentednesscooking #glutenfree

    How to make Baked Beans?

    I used canned beans simply for time saving reasons. But if you want you can use dried beans, soak and cook them according to the manufacturer’s directions.

    After cooking you can add them to a casserole dish. Traditional flavors include brown sugar, pork, and bacon. One has to mix everything and bake for at least 2 hours or a bit longer until you reach the right texture.

    You see, with these ingredients baked beans aren’t plant based. They are often made with meat, but if you give my Sweet Mustard Baked Beans a try you won’t miss the meat at all.

    Sweet Mustard Baked Beans | #vegan #contentednesscooking #glutenfree

    They were devoured from everyone. No matter if vegan, vegetarian, meat or seafood lover. There is something for everyone.

    You see, if you use canned beans you can save a good amount of time. No soaking and cooking required before you can get straight to combining all your ingredients in a casserole and bake them for 30 minutes, as we will do.

    If you don’t want to bake the beans, you can also make these in a sauce pan over a stove top. Cook for around 15 minutes.

    Sweet Mustard Baked Beans | #vegan #contentednesscooking #glutenfree

    As well, you can make these in a slow cooker. You won’t believe me I’m one of those guys who never used a slow cooker or owned one. But it will work!

    Just make sure to double the ingredients and cook it for around 6 hours on low setting or 3 hours on high setting.

    There are many different methods, which as always depend on your taste and preference. So try for yourself and find your favorite method.

    For me I used the oven, or if I’m absolutely lazy the casserole over stove top. Because in 15 minutes they are done and ready – that is a great deal.

    Sweet Mustard Baked Beans | #vegan #contentednesscooking #glutenfree

    How to make this Sweet Mustard Baked beans

    It’s really easy to make. Transfer drained Cannellini beans into a casserole dish, and add all the other ingredients –  except for the parsley which you will need for garnish.

    Mix everything really well with a spatula or your hands. Bake for 30 minutes at 415°F, covered with aluminium foil.  When done, top with parsley, serve on plates or straight from the casserole.

    These make a great dairy free appetizer, lunch dinner or even snack. Delicious on it’s own or serve with some bread, or with some Cilantro Lime Cauliflower Rice.

    For real the best baked beans. Yes better than any versions I tried before pre vegan days.

    Sweet Mustard Baked Beans | #vegan #contentednesscooking #glutenfree

    What kind of beans use for baked beans?

    My favorite are white cannelloni beans but you can also use great northern beans or navy beans.

    Cannellini beans are large and have a shape like kidney beans. They have a hint of earthy and nutty taste, and creamy flesh which is why these are my favorite.

    Great Northern beans are smaller than Cannellini beans and have a more grainy texture plus a nutty dense flavor. They look like white lima baby beans.

    Navy beans are small, cook relatively fast and also known as Boston beans.

    All of these bean types are high in protein which makes them a great plant based protein resource. Also rich in fiber and antioxidants.

    Sweet Mustard Baked Beans | #vegan #contentednesscooking #glutenfree

    Give these Sweet Mustard Baked Beans a try. You won’t turn back, so good.

    Snap a picture show me your excitement on Instagram or Facebook.

    Cheers, Florian.

    Ingredients

    • 2 14 oz cans white Cannellini beans
    • 4 cloves garlic pressed and peeled
    • 1 batch Mustard Sauce from my Vegan Lentil Burger
    • 1 batch 3 ingredient Vegan Cheese Sauce, prepared
    • salt, pepper to taste
    • 1/4 cup fresh parsley, finely chopped, for garnish

    Instructions

    1. Transfer drained Cannellini beans into a casserole dish, and add all the other ingredients –  except for the parsley which you will need for garnish.
    2. Mix everything really well with a spatula or your hands. Bake for 30 minutes at 415°F, covered with aluminium foil.  When done, top with parsley, serve on plates or straight from the casserole.
    Nutrition Information:

    Yield: 8

    Serving Size: 1 cup


    Amount Per Serving:

    Calories: 236Total Fat: 8gSaturated Fat: 1.6gTrans Fat: 0gUnsaturated Fat: 1.9gCholesterol: 0mgSodium: 494mgCarbohydrates: 34gFiber: 6gSugar: 7gProtein: 10g

    Read More

  • Apricot/Blackberry Crisp

    Apricot/Blackberry Crisp

    recipe image

    When you have no job and summer fruit aplenty…

    IMG_0519IMG_0531

    I’d say it’s pie time we do some baking!  [har har har] 

    In this case, an apricot/blackberry crisp was on the menu.

    *Note: to make this recipe vegan, substitutions are indicated in parenthesis (ie exchange the butter for Earth Balance and the brown sugar for turbinado sugar). 

    Step 1: Wash, pit, and chop 12-15 apricots (into bite sized pieces)

    IMG_0533IMG_0532

    Step 2: Prep crumble crust (fruit topping) in separate mixing bowl

    IMG_0534

    • 1/3 c. butter or margarine (sub Earth Balance for vegan recipe)
    • 1/2 c. packed brown sugar (sub turbinado sugar for vegan recipe)
    • 3/4 c. oats
    • 1/4 c. flour

    Step 3: Mix together dry ingredients.  Blend in butter until mixture forms small clumps.

    Step 4: Add 2 containers of washed blackberries to chopped apricots, along with:

    • 1/2 cup sugar (sub 1/3 cup agave nectar for vegan recipe – I use Xagave)
    • 3 T cornstarch
    • 1 tsp vanilla

    Make sure to first mix sugar and cornstarch to remove any lumps and then add vanilla and gently stir it into the fruit. 

    IMG_0535

    Step 5: Place fruit mix into a lightly buttered (or vegetable sprayed) 9 x13 baking dish.

    IMG_0537

    Step 6: Add crumble topping to cover the fruit.

    IMG_0539

    Step 7: Bake in 375 degree oven for about 45 minutes, until topping is lightly browned and fruit is cooked and bubbling up through the topping.

    IMG_0540

    Step 8: Remove and wait patiently for the crumble to cool.

    IMG_0541

    It may feel like time is standing still…

    IMG_0542

    But it’s better than burning off your taste buds altogether.

    IMG_0543

    When the aroma gets to the point of intoxicatingly delicious…so much so that you can’t stand it any longer…serve it up!

    IMG_0544

    Step 9: Enjoy!

    IMG_0545

    Now that’s a summer dessert that is too good to pass up!

    Related Posts Plugin for WordPress, Blogger...

    Read More

  • Vegan Tahini Dressing

    Vegan Tahini Dressing

    recipe image

    A vegan tahini dressing with just 3 ingredients, which you can use almost anywhere! It’s delicious as a salad dressing on a simple green salad, or use it in a falafel wrap, or drizzled over roasted vegetables like cauliflower or carrots.

    Submitted by
    dudey

    Updated on August 22, 2022


    Cook Mode
    (Keep screen awake)

    Ingredients


    Original recipe (1X) yields 6 servings

    • ¼ cup tahini

    • 2 tablespoons lemon juice, or more to taste

    • ¼ teaspoon salt, or to taste

    • 2 tablespoons warm water, or as needed

    Directions

    1. Mix tahini, lemon juice, and salt in a bowl until smooth and well incorporated. Stir in warm water, 1 tablespoon at a time, to achieve a drizzling consistency. Adjust dressing with more salt or lemon juice as desired.

    Cook’s Notes:

    To make a creamier dressing, you can add 1 to 2 tablespoons of vegan plant-based yogurt.

    Using warm water instead of cold or room temperature water ensures the dressing is easier to stir and doesn’t solidify.

    Nutrition Facts (per serving)

    60 Calories
    5g Fat
    3g Carbs
    2g Protein
    Nutrition Facts
    Servings Per Recipe
    6
    Calories
    60
    % Daily Value *
    Total Fat
    5g
    7%
    Saturated Fat
    1g
    4%
    Sodium
    109mg
    5%
    Total Carbohydrate
    3g
    1%
    Dietary Fiber
    1g
    3%
    Total Sugars
    0g
    Protein
    2g
    3%
    Vitamin C
    2mg
    3%
    Calcium
    43mg
    3%
    Iron
    1mg
    5%
    Potassium
    47mg
    1%

    * Percent Daily Values are based on a 2,000 calorie diet. Your daily values may be higher or lower depending on your calorie needs.

    ** Nutrient information is not available for all ingredients. Amount is based on available nutrient data.

    (-) Information is not currently available for this nutrient. If you are following a medically restrictive diet, please consult your doctor or registered dietitian before preparing this recipe for personal consumption.

    Read More

  • This Savory Vegan Spaghetti Squash And Quinoa Waffle is an Autumn Delight

    This Savory Vegan Spaghetti Squash And Quinoa Waffle is an Autumn Delight

    recipe image

    Savory Vegan Spaghetti Squash And Quinoa Waffle Recipe
    iStock/Qwart

    This savory vegan waffle recipe combines the best of both worlds: warm comfort and guilt-free noshing.

    Don’t you just love it when you can take a beloved comfort dish and turn it “healthy” or, rather, less of a burden on your health? This savory spaghetti squash and quinoa waffle recipe is vegan, gluten-free, and sugar-free. And, how about the taste, you ask? On. Point.

    These waffle fritters are bursting with flavor but aren’t compromising their content because of it. The savory twist makes these waffles fit for breakfast, lunch, or dinner.

    Preparation

    Easy to put together, yes, but the recipe does require a bit of foresight. The spaghetti squash needs to be roasted for one hour prior to preparation and you’ll also need pre-cooked quinoa, so make sure to keep these in mind. It helps to roast the squash in the evening the day before you plan to make the recipe. Meanwhile, you can either use store-bought nut milk or make your own almond milk for this recipe.

    Other necessary items are a waffle iron. If you have no waffle iron, you can easily cook the fritters in a patty-like shape in a saucepan on the stove top.

    Vegan Spaghetti Squash And Quinoa Waffle Recipe

    Serves 4

    Ingredients

    • 1 large spaghetti squash
    • 1/4 cup cooked quinoa
    • 1/4 cup coconut milk (the thickest part)
    • 1/4 cup vegan milk (almond milk, rice milk, etc.)
    • 1 tablespoon coconut oil
    • Juice of one lime
    • 1/4 cup gluten-free flour
    • 1/2 teaspoon ground cumin
    • Salt and pepper to taste
    • Chopped fresh chives for garnish

    Directions

    Preheat the oven to 400 degrees Fahrenheit. Cut the squash in half, lengthwise. Place cut side down on a parchment-lined rimmed baking sheet. Roast until squash is tender when pierced with a knife, about one hour.

    In a medium bowl, add the squash, quinoa, coconut milk, nut milk, coconut oil, and lime juice. Mix until evenly combined before folding in the flour and spices.

    Heat up the waffle iron and grease it lightly with coconut oil. Once hot, add in the batter in batches and press the iron, letting the waffle fritters cook for about one to two minutes before opening the iron and serving the waffles. Continue this cooking process until the batter is finished.

    Serve the waffles alone with a garnish of chopped fresh chives,or pair them with this vegan white cheese party dip.

    Related on EcoSalon

    Can Quinoa Be a Local Food

    There’s Quinoa in Your Cocktail: Foodie Underground

    Four-Cheese Garlic Spaghetti Squash

    Read More