If you’re like me you’re a sucker for a good grilled cheese sandwich (vegan, of course). And you probably are like me, because I don’t think I’ve ever met a single person who was like, “nah, I don’t like those.” That’s because there’s absolutely nothing to dislike about it. You have awesome, gooey cheese with a bread delivery system so it doesn’t run down your hand and get onto your shirtsleeve. It’s brilliant! Plus, add a little mayo to the outside of said bread like I did in this version of the sandwich and you’re in comfort food heaven.
But why stop there? Sure, if it ain’t broke don’t try to fix it. But what about enhancing it? That’s what I tried to do with this delicious Caprese Salad Grilled Cheese. It’s the same amazing sandwich you know and love, but with a little extra pizazz.
My experience with the caprese salad doesn’t extend beyond wedding hors d’oeuvres and maybe its availability at the Whole Foods salad bar, but when I came across it recently the mozzarella really stood out and got me to thinking about how I could adapt it somehow. And whenever I think about cheese, I immediately default to the grilled cheese sandwich. So I tried a few things and ended up with this recipe, which I love and will probably now make at least once every week. I didn’t go the vegan mozzarella route with this because while I do enjoy the various brands of that, I think Field Roast’s Creamy Original Chao Slices are the perfect “cheese” for a sandwich like this. They’re creamy, melt incredibly well and just taste super good. And when you partner them with all the other ingredients—including balsamic mayo—in this sandwich it’s a little taste of heaven.
Let me know what you think of the recipe in the comments below after you’ve made it, and please use the social media buttons to share it!
Caprese Salad Grilled Cheese
This recipe combines the delicious flavors of Italy’s favorite salad, the Caprese, with the ultimate comfort food, grilled cheese.
Prep Time5 minutesmins
Cook Time15 minutesmins
Total Time20 minutesmins
Course: Sandwich
Cuisine: Italian
Yield: 1sandwich
Author: The Nut-Free Vegan
Ingredients
1tspbalsamic vinegar
2Tbsp.vegan mayonnaise
1Tbsp.olive oil
2slicesof breadI used sourdough, but whatever you prefer will work
2–3 slices of Field Roast Creamy Original Chao Slices or your preferred vegan mozzarella
2thick tomato slices
4basil leavescut
Instructions
Mix balsamic vinegar with mayonnaise and coat one side of each slice of bread.
Heat oil over low heat in frying pan and add one slice of bread, mayonnaise-side down.
Layer “cheese,” tomato and basil onto bread and top with remaining slice—mayonnaise-side up.
Cook until cheese begins to melt and bread turns brown, about 5 minutes. Turn sandwich over and repeat.
Nutrition
Serving: 1g
Reader Interactions
This site uses Akismet to reduce spam. Learn how your comment data is processed.
Super tasty, low-fat vegan spaghetti is a celiac-friendly Italian dish.
Submitted by tjnurs
Published on March 9, 2020
Cook Mode (Keep screen awake)
Ingredients
This recipe was developed at its original yield. Ingredient amounts are automatically adjusted, but cooking times and steps remain unchanged. Note that not all recipes scale perfectly.
Original recipe (1X) yields 1 servings
1largezucchini
½cupvegetable broth, or as needed, divided
1smallonion, diced
1 ½tablespoonstomato paste
1smalltomato, diced
1smallportobello mushroom, cubed
1tablespoonminced garlic
2teaspoonsdried oregano
1teaspoondried thyme
½teaspoondried tarragon
½teaspoondried marjoram
½(12 ounce) packageveggie meat substitute (such as Yves® Ground Round)
2cupsfresh spinach, roughly chopped
Directions
Cut zucchini into noodles using a spiralizer fitted with the large shredding blade. Set aside.
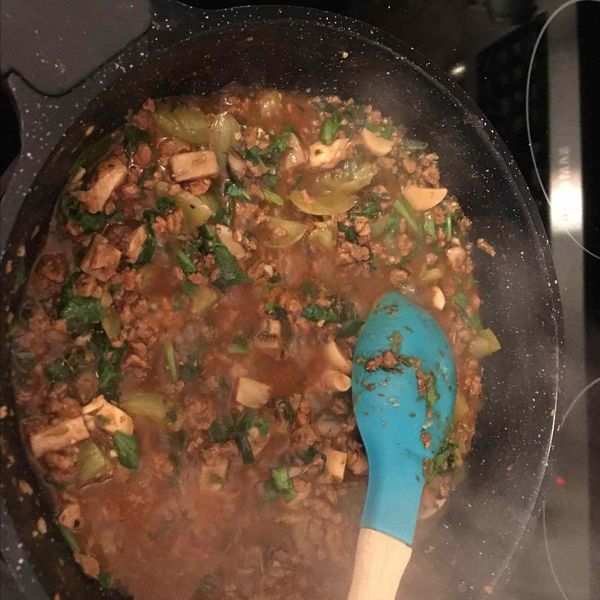
Combine 1/4 cup broth, onion, and tomato paste in a large saucepan over medium heat. Cook until onion begins to soften, about 3 minutes. Add tomato, mushroom, garlic, oregano, thyme, tarragon, and marjoram. Cook until the mushroom just begins to soften, about 3 minutes more.
Stir veggie meat, spinach, and remaining 1/4 cup broth into the pan with the mushroom mixture. Add an additional 1/4 cup broth if the pan seems dry. Cook and stir until vegetables are tender and sauce is beginning to thicken, about 10 minutes.
Stir zucchini noodles into the pan with the sauce and cook to desired firmness, 3 to 5 minutes more.
Cook’s Notes:
Don’t have a spiralizer on hand? Using a vegetable peeler: Apply light pressure with a vegetable peeler along the sides of the zucchini for wide, fettuccine-like slices. Or use a grater: Roughly shred the vegetable lengthwise against a box grater. Press away excess liquid. Noodles will be shorter.
Try mushroom broth, if you prefer.
Nutrition Facts (per serving)
443
Calories
10g
Fat
53g
Carbs
43g
Protein
Nutrition Facts
Servings Per Recipe 1
Calories 443
% Daily Value *
Total Fat
10g
13%
Saturated Fat
0g
2%
Sodium
1189mg
52%
Total Carbohydrate
53g
19%
Dietary Fiber
19g
67%
Total Sugars
20g
Protein
43g
86%
Vitamin C
110mg
122%
Calcium
302mg
23%
Iron
9mg
51%
Potassium
2736mg
58%
* Percent Daily Values are based on a 2,000 calorie diet. Your daily values may be higher or lower depending on your calorie needs.
** Nutrient information is not available for all ingredients. Amount is based on available nutrient data.
(-) Information is not currently available for this nutrient. If you are following a medically restrictive diet, please consult your doctor or registered dietitian before preparing this recipe for personal consumption.
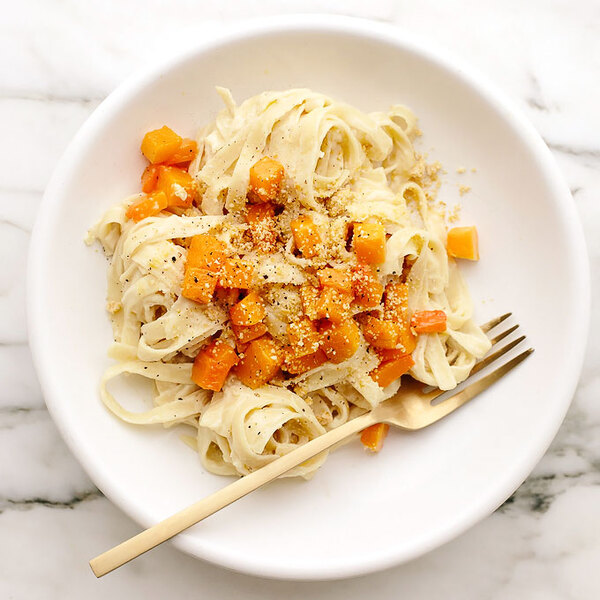
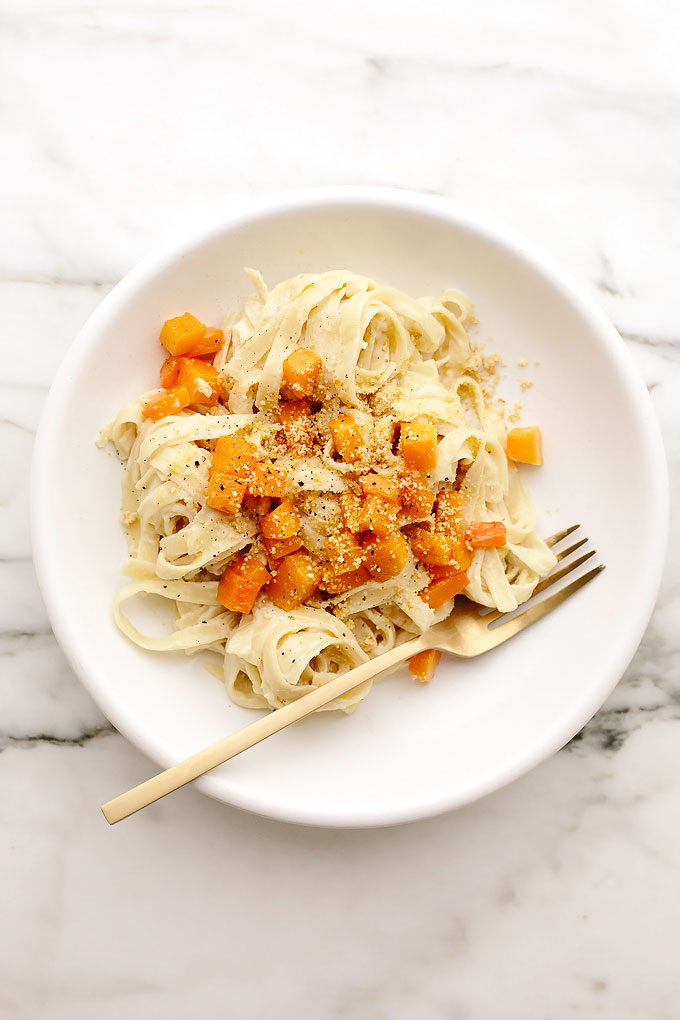
This vegan roasted butternut squash fettuccine alfredo is creamy, satisfying, and packed with feel-good ingredients. A simple, garlicky vegan cauliflower-cashew alfredo sauce is tossed with heaps of warm fettuccine. The pasta is then topped with roasted butternut squash and a sprinkle of vegan parmesan.
Clearly, I’ve got pasta on my mind these days. Or at least I did when I was writing and testing January’s recipes back in November.
Honestly though, it’s a rare week in my life when a pasta craving doesn’t strike at least once, especially during the winter months.
However, given that it’s January and people are often looking for healthful, extra-nourishing meals this time of year, this vegan fettuccine alfredo is designed to be both comforting and nutrient-dense.
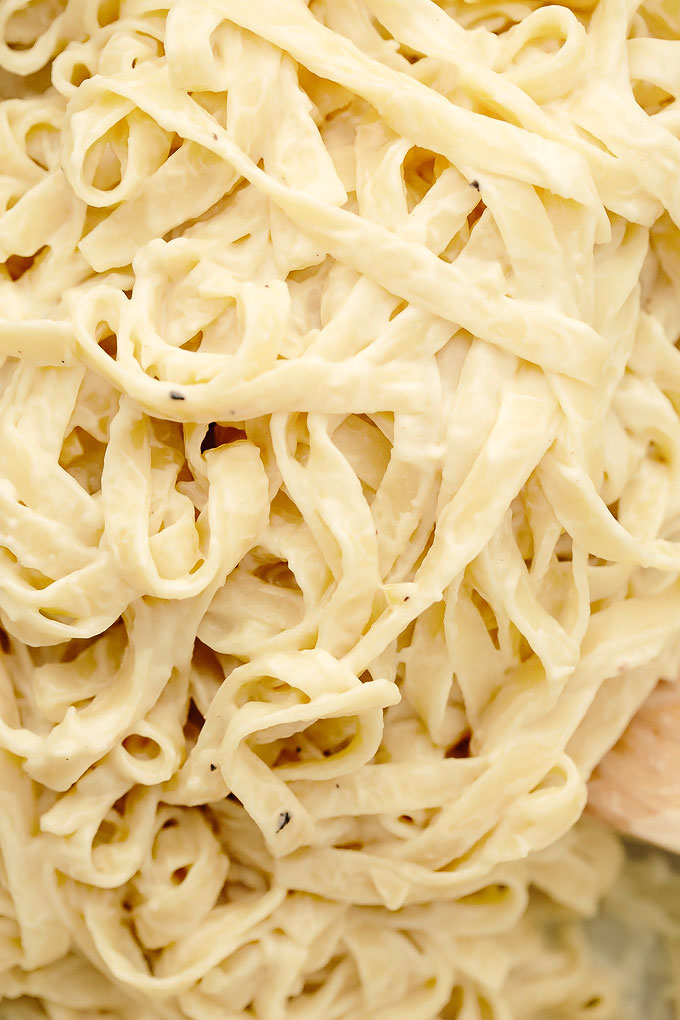
The vegan alfredo sauce is a simplified and adjusted version of the sauce from this lemon-pepper pasta. Boiled cauliflower and raw cashews still serve as the base, only the amount of nutritional yeast is upped to create a richer parmesan flavor, the amount of cashews are increased just a pinch to create a creamier sauce, and the lemon juice is dropped in favor of a more subtle tang from a splash of apple cider vinegar.
Also, filtered water is used in place of plant-based milk. This is because filtered water guarantees a more reliable and consistent flavor from one home to the next. Unfortunately, some brands of plant-based milk add “natural flavors” to even the unsweetened “plain” versions of their milk, and I’ve found that those particular types of plant-based milk can introduce an undesirable sweetness into dishes like this one and mess with the overall flavor.
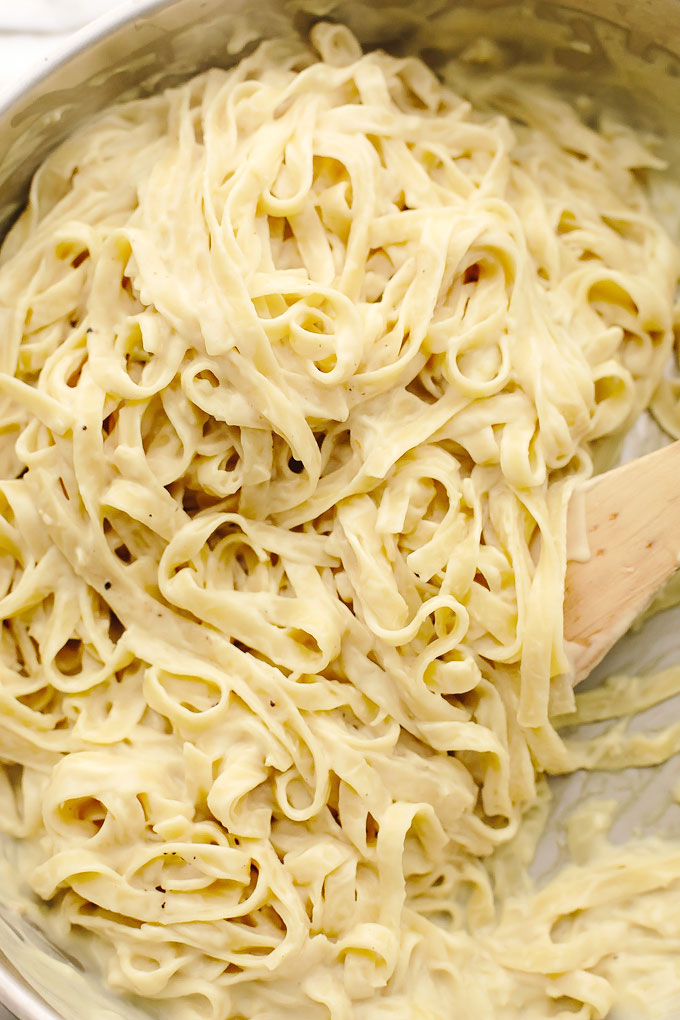
Even with water, this sauce turns out so rich and creamy that you won’t notice the absence of plant-based milk. I mean, look…
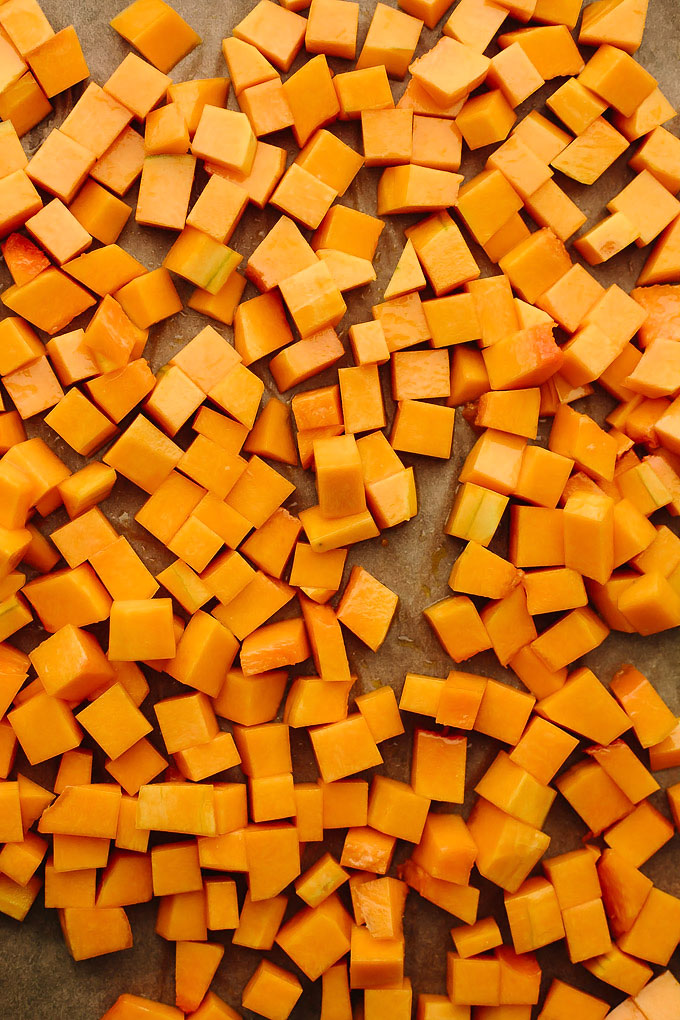
To make this vegan roasted butternut squash fettuccine alfredo, you’ll start by roasting a butternut squash.
A small to medium butternut squash is plenty for this recipe, but feel free to use a large one if you’d like extra.
Peel, seed, and cube the butternut squash and add it to a lined baking pan with a drizzle of olive oil.
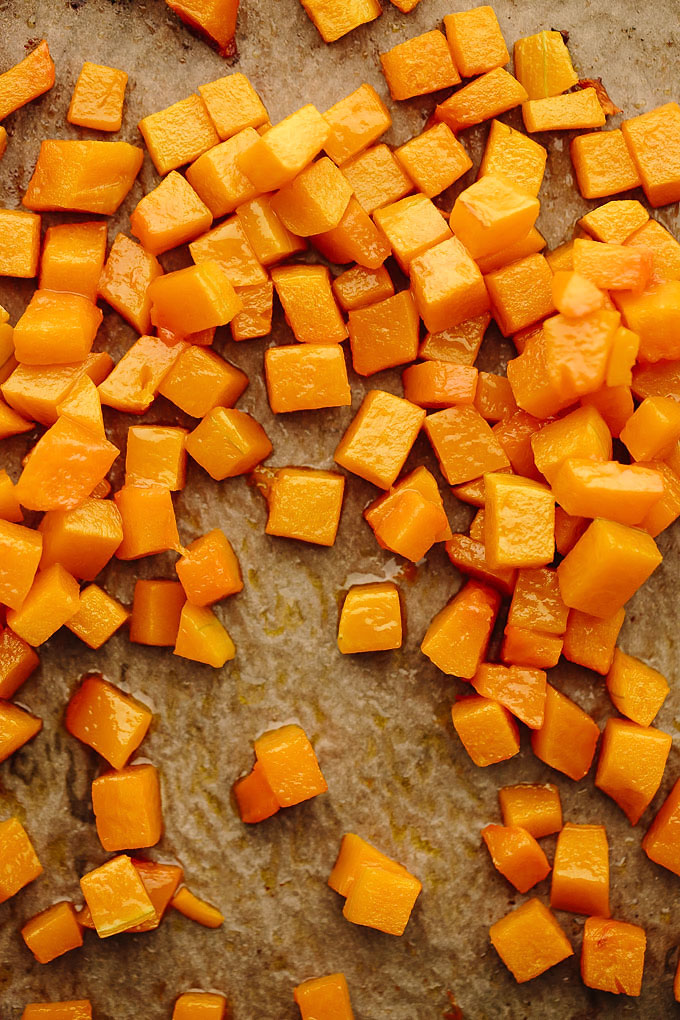
Toss to coat and roast the squash for 25 minutes, or until it’s soft and tender but not yet mushy. You want it to be soft and silky but not so soft that it mushes into the pasta.
As the squash roasts, you’ll cook 12 ounces of fettuccine or other ribbon-like pasta.
Then, you’ll get to work on the sauce.
To make this simple cauliflower-cashew alfredo sauce, you’ll start by boiling about 2 cups of fresh cauliflower florets.
Once the florets are fork-tender, add them to a blender along with filtered water, raw cashews, nutritional yeast, apple cider vinegar, salt, and pepper. Blend on high for two minutes, or until you have a super smooth and creamy sauce.
Then, add about six cloves of minced garlic to a large sauté pan with a bit of olive oil. Sauté the garlic for just a minute or two, or until it softens and mellows. Then, stir in the cauliflower-cashew sauce and simmer for just a minute, or until the sauce begins to thicken.
Next, add the cooked pasta to the pan and toss to coat. If you’d like, you can thin the sauce with a bit of reserved pasta water.
Taste and generously season with sea salt and black pepper.
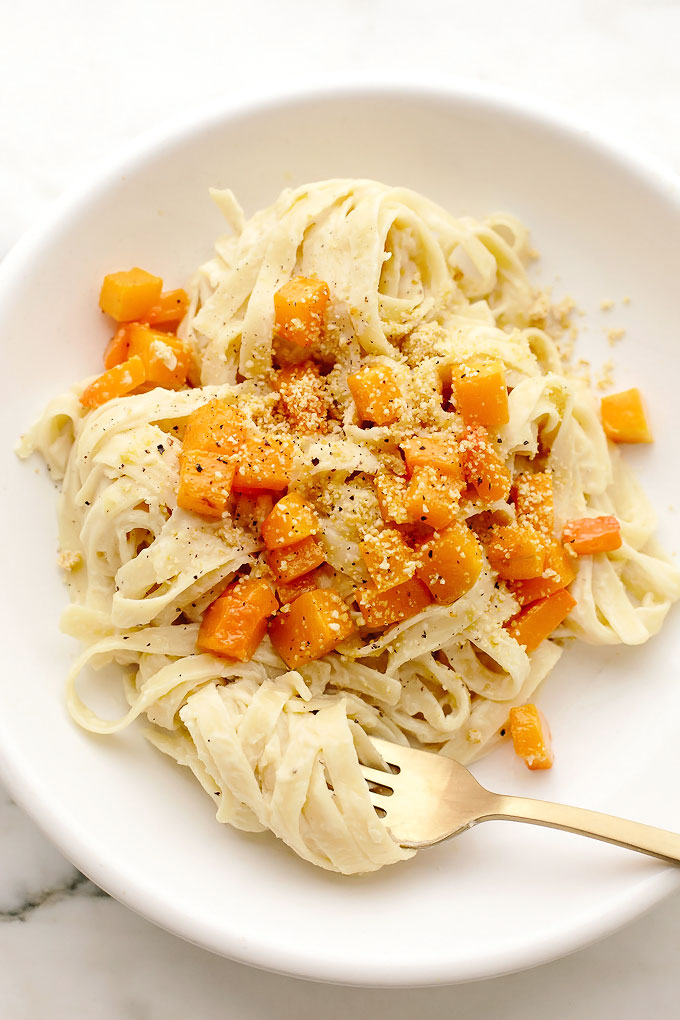
Divide the pasta amongst roomy bowls and top with the roasted butternut squash and a generous sprinkle of vegan parmesan.
Then, twirl, savor, and repeat.
This vegan fettuccine alfredo is rich, creamy, and satisfying yet nourishing at the same time. Thanks to the cauliflower and butternut squash, this decadent pasta packs a punch of vitamin c, vitamin k, vitamin a, folate, fiber, b6, and manganese.
Have your creamy Italian pasta and feel good, too!
📖 Recipe
Vegan Roasted Butternut Squash Fettuccine Alfredo
This vegan roasted butternut squash fettuccine alfredo is creamy, satisfying, and packed with feel-good ingredients. A simple, garlicky vegan cauliflower-cashew alfredo sauce is tossed with heaps of warm fettuccine. The pasta is then topped with roasted butternut squash and a sprinkle of vegan parmesan cheese.
1medium butternut squash, peeled, halved, seeded, and cut into small (½-inch) cubes
2tablespoonsextra-virgin olive oil, divided
Sea salt as needed
12ouncesfettuccine or linguine pasta
2cupssmall (1-inch) fresh cauliflower florets
1cupfiltered water
⅓cupraw cashews, soaked for at least two hours (unless using a high-speed blender)
3tablespoonsnutritional yeast flakes
1tablespoonapple cider vinegar
Freshly ground black pepper
6clovesgarlic, minced
1recipe Vegan Parmesan Cheese(optional but recommended)
Instructions
Preheat the oven to 400F. Line a large baking tray with parchment paper.
Spread the squash into an even layer in the lined pan, drizzle with 1 tablespoon of the olive oil, and toss to coat. Roast for 25 to 30 minutes, or until tender (but not mushy) and beginning to caramelize, tossing at the halfway point.
Bring a large pot of water to a boil and add 1 tablespoon sea salt. Add the pasta and cook according to package instructions (you want the pasta to have a nice al dente bite to it). Drain the pasta, reserving 1 cup of the cooking water, and set aside.
Meanwhile, bring a medium pot of water to a boil. Add the cauliflower florets and boil for 7 minutes, or until very fork-tender. Strain off the water.
Add the boiled cauliflower florets, filtered water, cashews, nutritional yeast, vinegar, 1 teaspoon sea salt, and black pepper to a blender (do not use a food processor). Blend on high for 2 minutes, or until completely smooth and creamy. Set within reach of the stove.
Heat the remaining 1 tablespoon olive oil and the garlic in a large sauté pan over low heat. Cook for 2 minutes, or until soft and fragrant.
Stir in the cauliflower sauce, and simmer for 1 minute, or until warmed through.
Turn off the heat, add the pasta to the pan, and toss to coat. If a slightly thinner sauce is desired, add a bit of the reserved cooking water, one small splash at a time, as needed to thin. (Note: If you add cooking water, you’ll need to increase the seasoning to accommodate.)
Taste and generously season with more sea salt and black pepper, if desired.
Divide the pasta between bowls and top with the roasted butternut squash and parmesan (if using). Serve immediately.
This Golden Milk Turmeric Latte sounds a bit out there. But trust me, this is an energizing drink that tastes great hot or cold. This recipe is Paleo compliant, dairy free, gluten free with vegan options and loads of health benefits!
This post contains affiliate links and was made in partnership with Rodelle.
How To Make A Golden Milk Turmeric Latte
It’s no secret that I am a bit of a closet hippie. I love trying alternative natural types of recipes. Golden Milk Turmeric Lattes are starting to become a bit mainstream now so I decided to share my recipe.
If you aren’t into unique drinks or haven’t jumped on the turmeric train yet, no worries. We will ease into this 😆 It is actually very tasty and comforting. The hot turmeric milk will warm you up on a cold winter night. And the iced version is perfect for summer.
I use all of my Rodelle Spices because the flavor is unbeatable, especially the Rodelle Turmeric.
What are the turmeric latte benefits?
Turmeric milk is not a new thing, in fact, it has been around for a long time. It is known as haldi doodh in Hindi. So this isn’t some new-wave woo-woo fad.
The curcumin in turmeric is said to have anti-inflammatory benefits. Of course, I’m no doctor or scientist. I drink it because I like it and any health benefits are just a bonus.
There are some side effects to too much turmeric that you should keep in mind. Nausea, dizziness and upset stomach can be an issue for anyone that is sensitive to turmeric. I know this is true because when I first began making golden lattes I had some nausea and dizziness.
If you are sensitive to turmeric or have never tried the turmeric lattes before, I recommend using half the amount of turmeric called for in this recipe until you find the amount that works for you.
Can you make turmeric milk in the microwave?
Yes. Just mix all the ingredients and microwave until hot (about 4 minutes for a full batch). Then the mixture can be stirred and served or blended to make it frothy.
Can you make a large batch of turmeric lattes and keep it refrigerated?
Yes. This is what I do. I make this recipe and get 2-3 turmeric lattes depending on the size of my mugs. Just refrigerate. Blend or shake before serving. And reheat in the microwave for a hot latte or pour over ice for a cold latte.
Is this golden milk recipe vegan?
It can easily be made vegan if you use coconut oil instead of ghee and maple syrup instead of honey.
What tools do you need for this recipe?
You will need a Small Pot, a Whisk and a great Blender. ← I use and own all of these products. If you don’t have a blender you could use a Frothing Wand . . . this is something I don’t currently own but is in my amazon cart 😆
Need More Healthy Beverage Recipe Ideas?
Almond Milk Breakfast Smoothies
Strawberry Lemonade Sun Tea
Naturally Infused Flavored Water
Grapefruit Kale Green Smoothie
Ginger Beet Juice
Lime and Mint Mojito Smoothies
Golden Milk Turmeric Latte
Yield: 3
Prep Time: 3 minutes
Cook Time: 10 minutes
Total Time: 13 minutes
This Golden Milk Turmeric Latte sounds a bit out there. But trust me, this is an energizing drink that tastes great hot or cold. This recipe is Paleo compliant, dairy free, gluten free with vegan options and loads of health benefits!
Ingredients
2 (13.5oz) Cans Organic Reduced Fat Coconut Milk
3 Tablespoons Honey or Maple Syrup for vegan
1 teaspoon Ground Turmeric
1/4 teaspoon Cinnamon
1/4 teaspoon Ginger
1/8 teaspoon Black Pepper
Pinch Sea Salt
1 Tablespoon Ghee or Coconut Oil for vegan
Instructions
Combine all ingredients in a small pot over medium heat.
Heat for 10-15 minutes while whisking occasionally. Do not bring mixture to a boil.
Serve with a sprinkle or cinnamon. Or, cool for 5 minutes then transfer to a blender and blend until frothy.
For iced lattes, refrigerate then pour over ice.
This post contains affiliate links. Basically, I get a little kick back for sending you over to purchase. . . at no extra cost to you. Thanks for your support!
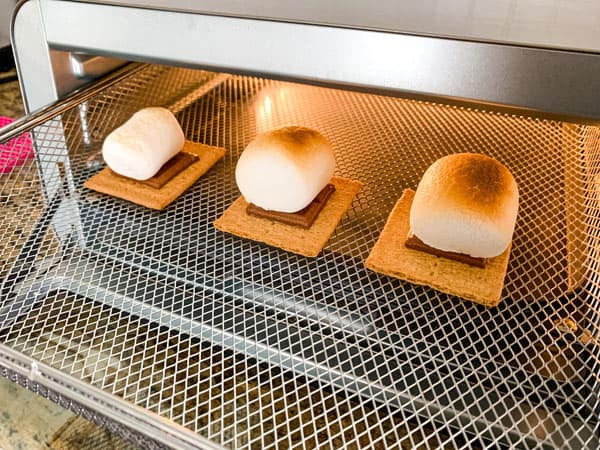
Toaster Oven S’mores are ooey-gooey summertime bliss that you can enjoy all year. There’s no campfire needed for this tasty treat. You can bake one, two, or a few in just 5 minutes with the help of your little oven (using the Broil, Bake, or Air Fry setting).
Move over small-batch cookies, cupcakes, and hand pies. This is the toaster oven dessert to end ALL toaster oven desserts!
These easy indoor smores have it all: rich melted chocolate, toasty marshmallows, and crumbly sweet graham crackers.
So what do you say, want to make some?
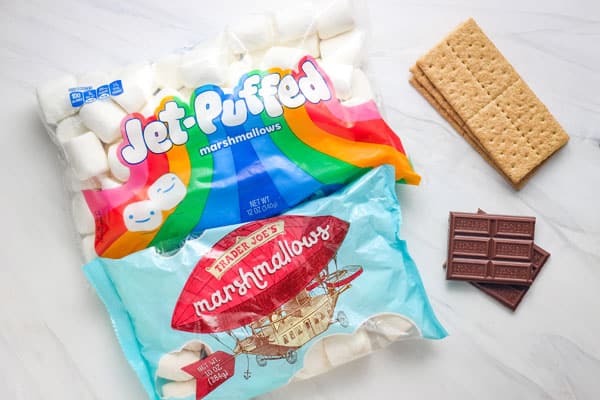
Ingredients
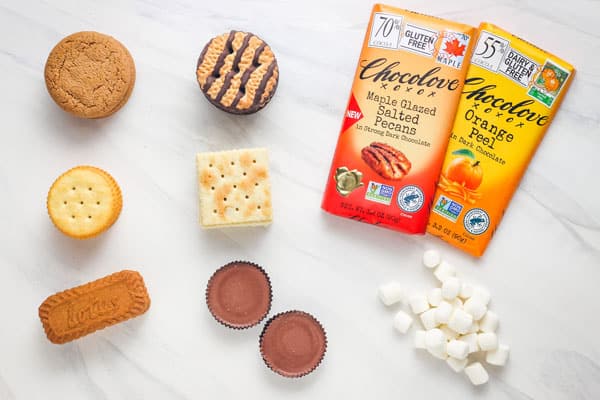
Marshmallows: Both traditional and vegan marshmallows will work. The vegan ones will be less puffy and a bit crispy on the outside.
Graham Crackers: Plain, honey, or flavored graham crackers all taste great, cinnamon’s my personal favorite.
Chocolate Bar: Classic milk chocolate is always a hit with kids but dark chocolate or a caramel-filled chocolate bar would also taste delicious.
How To Make S’mores In The Toaster Oven
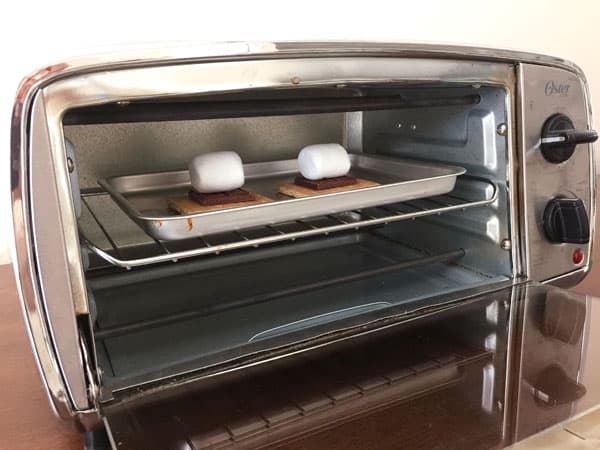
1. Break a graham cracker sheet into two squares and place them on your toaster oven baking pan.
2. Top each graham with a square of chocolate and a marshmallow.
3. Place the pan inside of your toaster oven. But before you turn it on, take a quick peek to make sure you’ve left plenty of space between the heating elements and the marshmallows.
The marshmallows puff up and if they’re too close to the elements they can catch on fire. Yep, that helpful nugget does come from personal experience 😉
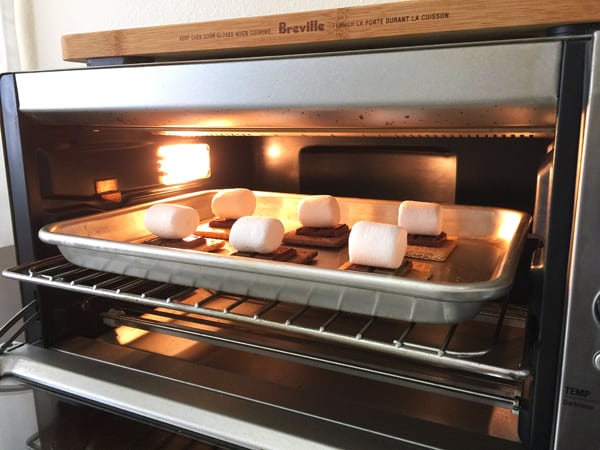
4. Set the toaster oven to Broil and cook until the marshmallows are puffed and golden on top, about 2 to 3 minutes (the time will vary depending on your toaster oven).
Similar to toasting coconut, not much happens at first but once the marshmallows start to brown they can become burnt quickly so don’t walk away.
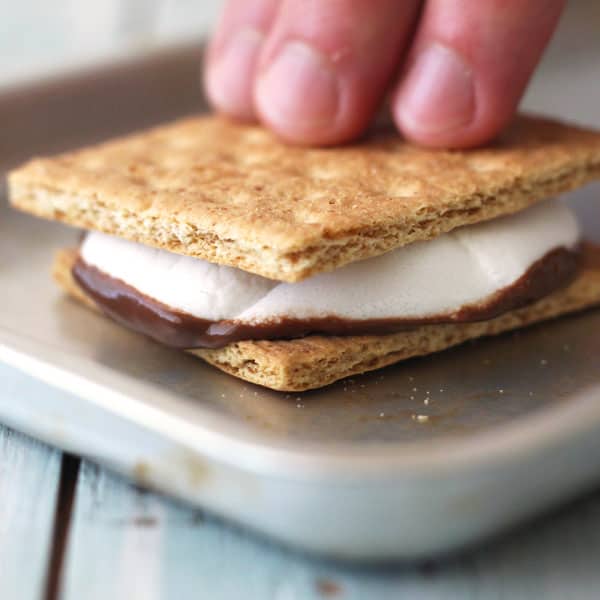
5. Remove the pan and top with the remaining graham crackers. I like to press the graham down lightly to really smoosh the marshmallow into the chocolate. Then…DIG IN!
Troubleshooting:My marshmallows keep burning, what can I do?
Some toaster ovens and countertop ovens have very intense broil settings. If your marshmallows are browning too fast there are two things you can try.
Move the rack to a lower level.
If your oven has an adjustable broiler, turn the temperature down.
On our large countertop oven, we like to turn the Broiler temperature down to 400°F (or medium option) and use the middle rack placement. The s’mores take about 3 minutes to brown.
If these options are not possible or they don’t work for you, try baking instead of broiling the smores.
Baked Smores
While you’re assembling the s’mores, preheat the oven to 400°F (or 375°F if you’re using a convection toaster oven) using the BAKE setting. Bake the smores until puffed and toasty, about 3 to 4 minutes.
If you’re feeling super impatient you can add the s’mores to the toaster oven while it preheats. Just remember to set a separate timer for 3 to 4 minutes so you don’t forget about them.
Air Fryer Toaster Oven Smores
If your toaster oven has an air fryer setting, you might want to give it a try. We’ve made a few batches in our Ninja Foodi air fryer oven and they’ve turned out pretty tasty.
We set the temperature at 325°F and after 90 seconds the marshmallows were puffed and golden (though the vegan one did brown a lot less), the chocolate was warm and melty, and the graham crackers were beginning to brown around the edges.
In this particular oven, the elements are much closer to the food so it tends to cook things faster. Your air fryer oven might take a little longer. But probably not a lot longer. So don’t walk away from it.
While the air fryer s’mores were yummy we thought they were missing that toasty campfire flavor that you get from using the broiler. Not bad, just different.
Tips and Variations
Try Crackers: If you haven’t had a s’more made with saltines (or soda crackers) you are missing out. The cracker’s salty flavor and flaky texture balance perfectly with the gooey marshmallow and sweet chocolate.
Mini Marshmallows: These little guys puff up and brown faster than the larger marshmallows. Also, they may move around a little if you’re using the Air Fryer function.
Use a Different Cookie: Ginger snaps or Biscoff cookies are fun for a spiced s’more with a crunchier texture. Fudge-striped cookies are messier but add lots of tasty chocolate flavor.
Chocolate Options: Flavored bars or leftover candy (like peanut butter cups, mini Twix bars, or an Almond Joy) are an easy way to take your s’mores up a notch.
BP + Fresh Fruit: Banana slices or fresh berries combined with a drizzle of crunchy peanut butter is an irresistible combo!
More Easy Toaster Oven Desserts
Toaster Oven Cinnamon Chips
Toaster Oven Chocolate Chip Cookies
Toaster Oven Cinnamon Toast
Ingredients
2 Graham Cracker Sheets, divided
2 Chocolate squares
2 Marshmallows, vegan or traditional
Instructions
Break a graham cracker sheet in half and place on your toaster oven baking pan.
Top each graham with a square of chocolate and then a marshmallow.
Set your toaster oven to Broil, insert pan and broil until the marshmallows are golden on top, about 2 to 3 minutes.
Carefully remove the pan, top with remaining graham crackers, and enjoy your toaster oven s’mores!
Notes
Broiler Tip: Make sure there are at least a few inches of space between the heating elements and the marshmallows before broiling.
Bake Option: Bake the assembled s’mores in a preheated 400°F toaster oven until the marshmallow is puffed and toasted, about 3 to 4 minutes. If using a convection toaster oven, reduce the temperature to 375°F.
Air Fryer Toaster Oven: Air Fry at 325°F for 1 to 2 minutes or longer if needed.
Keep an eye on things: All toaster ovens are different, watch the marshmallows closely for browning, and adjust the cooking time as needed.
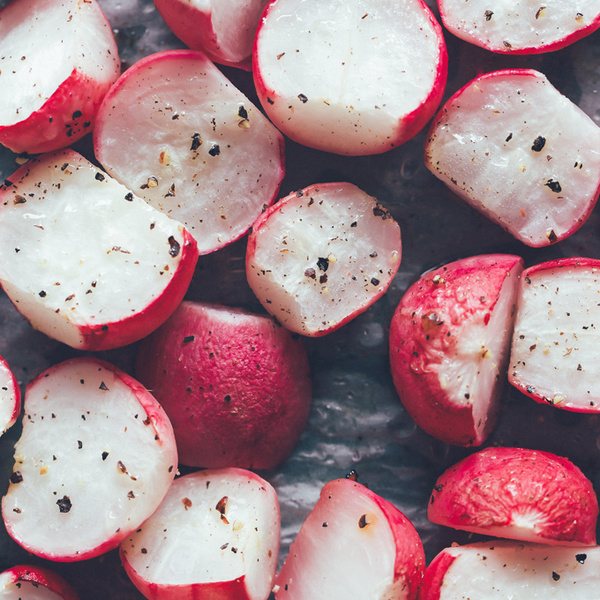
Roasted Radishes – The Potato Sub You’ve Been Looking For. If you’re looking for a root vegetable to munch on, minus the carbs, radishes are your new best friend.
Ingredients:
2 bunches of radishes, about 20
1 tbsp avocado oil or vegan butter (melted)
salt/pepper to taste
Instructions:
Preheat oven to 350F and line baking sheet with parchment paper.
Cut radishes in half and spread out on the baking dish.
Drizzle on the avocado oil or melted butter, coating the radishes evenly.
Sprinkle with salt and pepper, mix around then let it bake for 20-25 minutes or until fork tender.
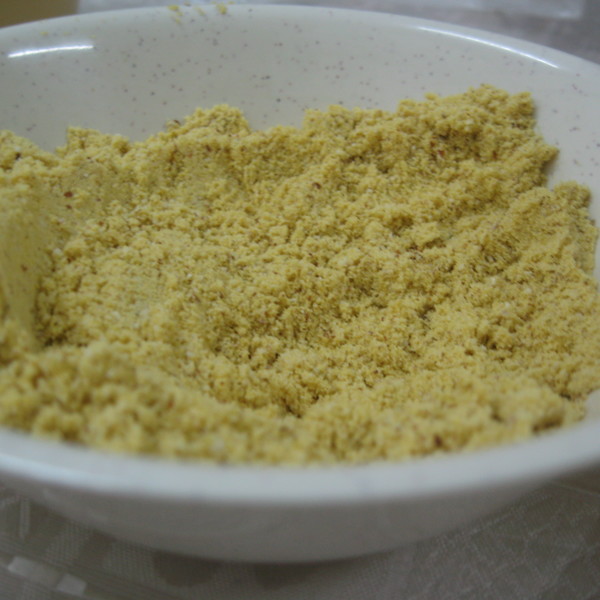
“After finding that nowhere in New Zealand has vegan parmesan in stock I decided to make my own and it tastes great! Just only use when serving or for ingredients. If it’s left on a moist dish as a garnish it tends to make the yeast soggy.”
1
cup nutritional yeast (available at natural food stores)
1⁄2
cup whole almond
1⁄2
teaspoon salt
directions
Grind the almonds into a fine powder using a coffee, nut, or spice grinder (a food processor works, but it takes longer. A hand blender does not work for grinding almonds.).
Questions & Replies
Got a question?
Share it with the community!
Want a Second Helping?
Sign up for our newsletter to get recipes, easy dinner ideas, tasty treats and more delivered straight to your inbox.
To withdraw your consent or to learn more about your rights, see the Privacy Policy.
RECIPE SUBMITTED BY
Hi there I’m a twenty year old Kiwi from Auckland New Zealand. My partner and i have recently become vegan for health reasons, my partners youngest is also allergic to eggs nuts and dairy so it nice we don’t have to cook separate meals (although we still get the “i don’t like this”).
Up until christmas this year i hadn’t had fruit for about 17 years so i’m enjoying trying new things slowly.
My partner and i will be married in October 08 (so excited)
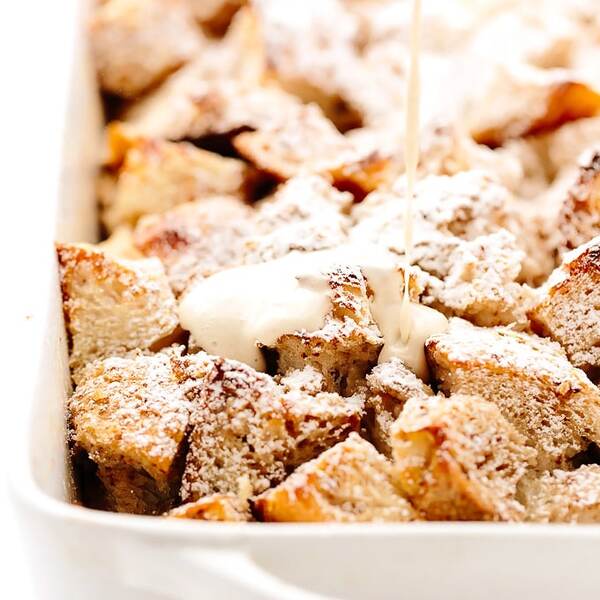
This vegan eggnog french toast casserole makes the perfect holiday brunch. It requires just 15 minutes of active kitchen time and can be prepared up to a full day in advance. Hearty cubes of french bread are soaked overnight in a rich mixture of coconut milk, applesauce, almond milk, maple syrup, vanilla, nutmeg, and cinnamon. In the morning, the dish gets popped in the oven to bake for 45 minutes and then topped with spoonfuls of vegan crème anglaise and drizzles of maple syrup.
My mom makes a mean french toast casserole. It’s light, fluffy, and almost soufflé like.
She’s been making it for special occasions for years and years, and it’s a family favorite. The only issue is that it’s not exactly vegan, so it’s been a while since I’ve enjoyed it myself.
But after making this sweet potato french toast casserole, I figured I’d try my hand at a more classic version with a spiced holiday twist.
A little nutmeg here, cinnamon there, and vegan crème anglaise to boot. After just two trials, this vegan eggnog french toast casserole came to be.
It’s glorious. And I certainly don’t toss the G word around carelessly when it comes to food. No, no. The G word is reserved for only the most special of dishes.
As luck would have it, today’s my mom’s birthday, so not only is this french toast casserole GLORIOUS, it’s also aptly timed.
So, how does one make this glorious eggnog french toast casserole? Let’s have a look…
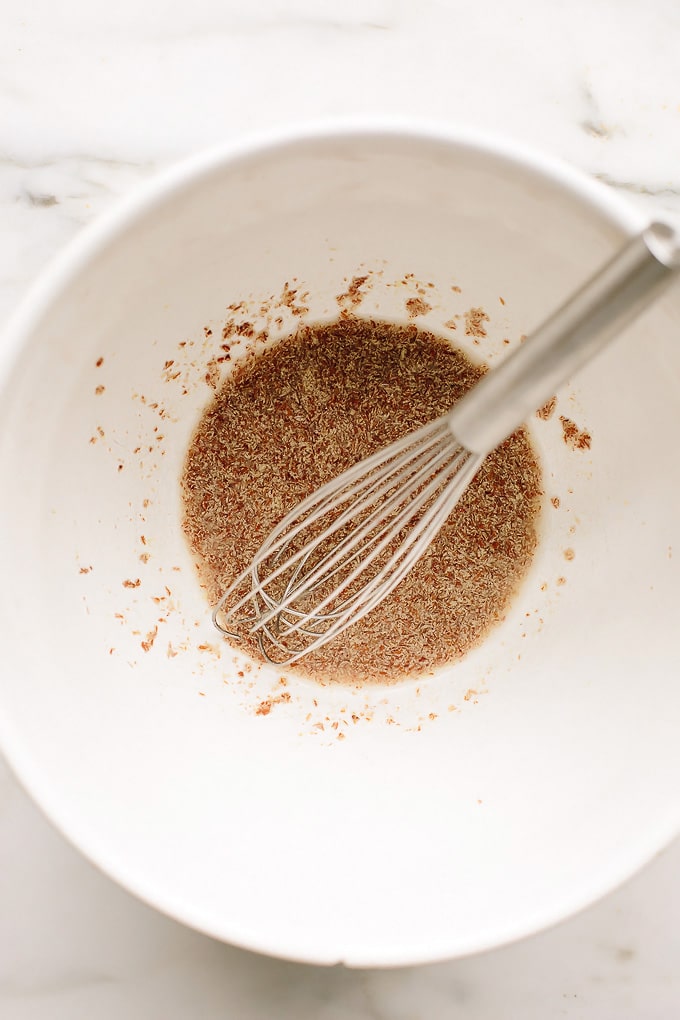
To start, you’ll whisk together ground flaxseed and filtered water.
Let the mixture rest for 5 to 10 minutes to thicken and create a flax “egg”. This acts as the binder in the casserole and takes the place of traditional eggs.
While the flax mixture thickens, slice a large French or sourdough boule (or loaf) into 1-inch cubes.
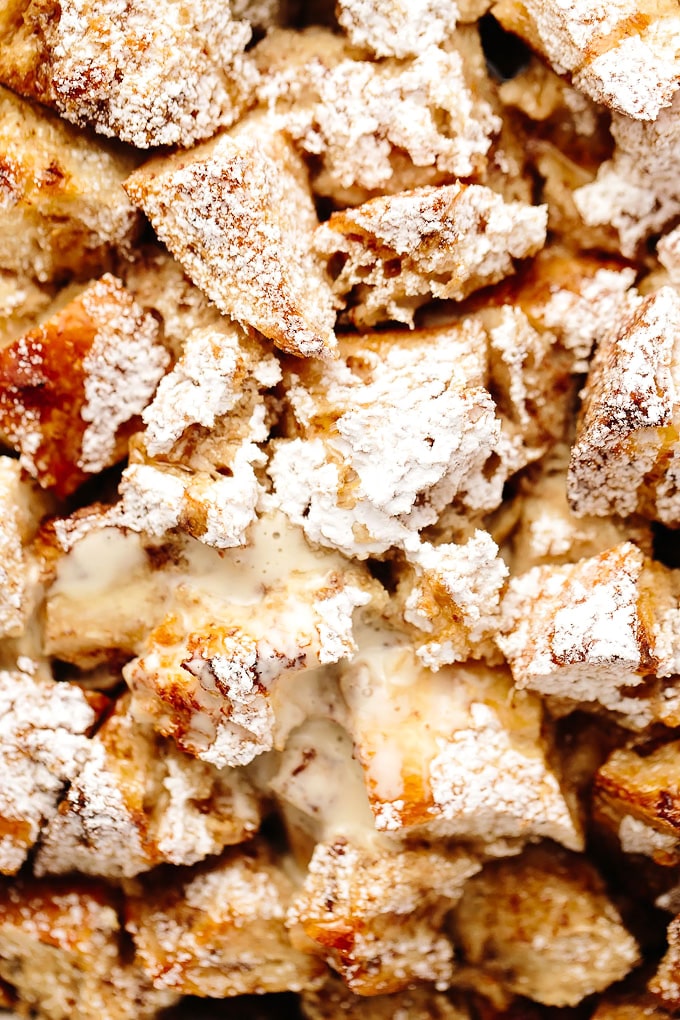
It’s important to use a sturdy, hearty loaf for this recipe in order to yield the optimal french toast texture—crispy on top with a soft, almost soufflé like interior. Soft loaf bread (or even multigrain bread) simply won’t cut it.
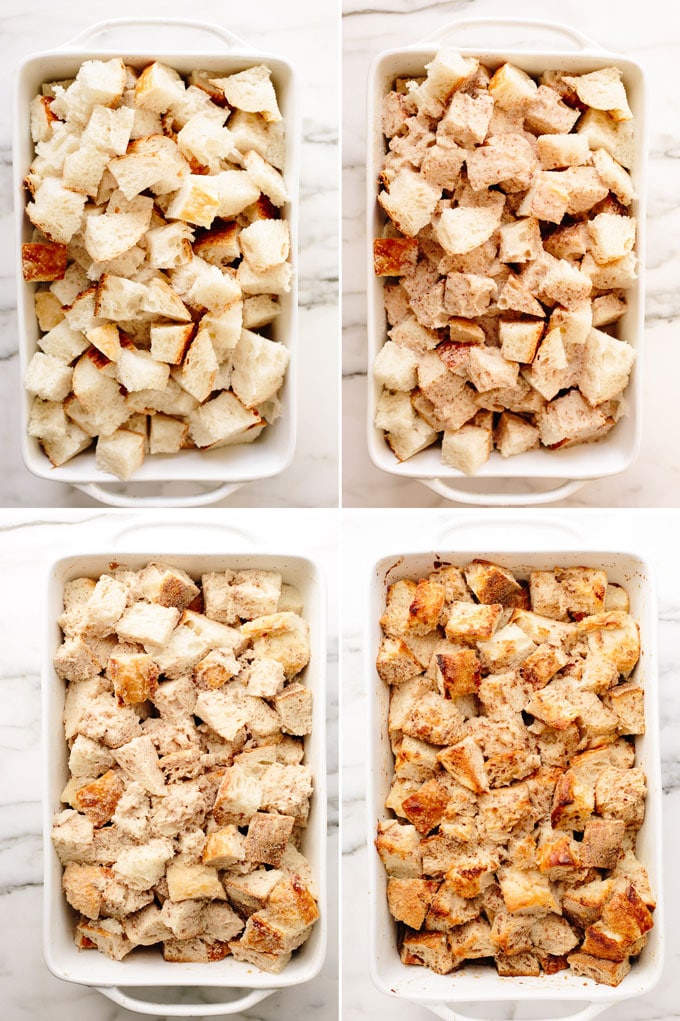
Once you’ve sliced your bread, add it to a lightly greased baking dish.
Then, to the flaxseed mixture, add unsweetened almond milk, unsweetened applesauce, canned coconut milk, maple syrup, vanilla, nutmeg, cinnamon, and sea salt, and whisk together until smooth.
For the most authentic french toast taste, use kala namak instead of sea salt—it adds the most wonderful eggy flavor.
Pour the wet mixture over the bread cubes and gently stir to ensure they’re evenly coated.
Then, wrap the baking dish and refrigerate for at least eight hours or overnight. If you’d like, you can prepare the casserole up to a full day in advance.
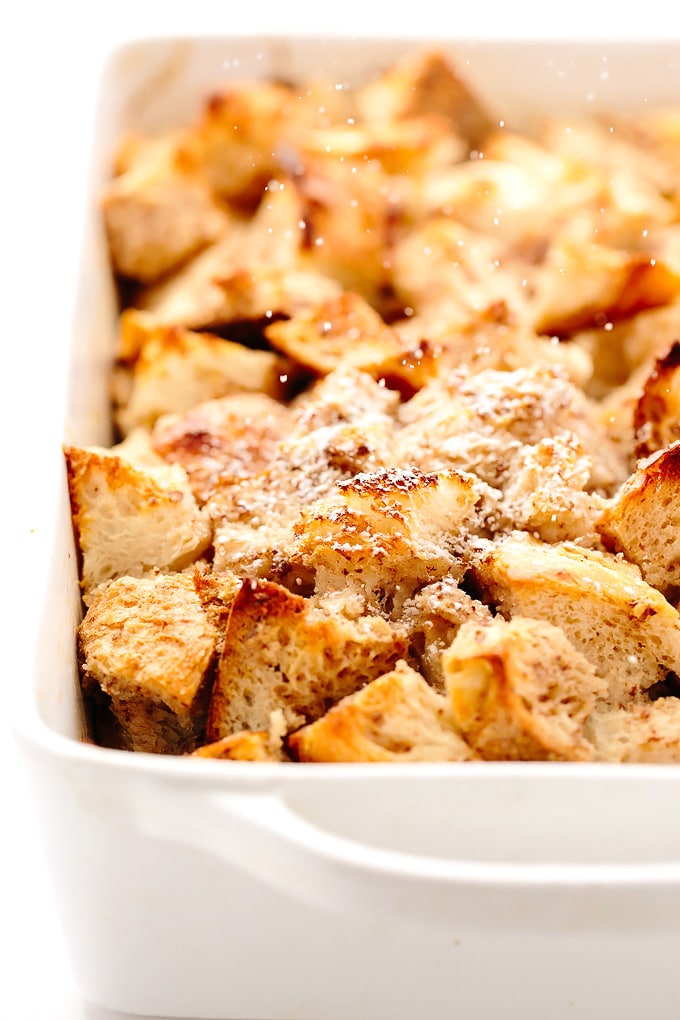
In the morning, bake the french toast casserole for 45 minutes, or until the top is slightly crisp and the bottom is well set yet soft, tender, and fluffy.
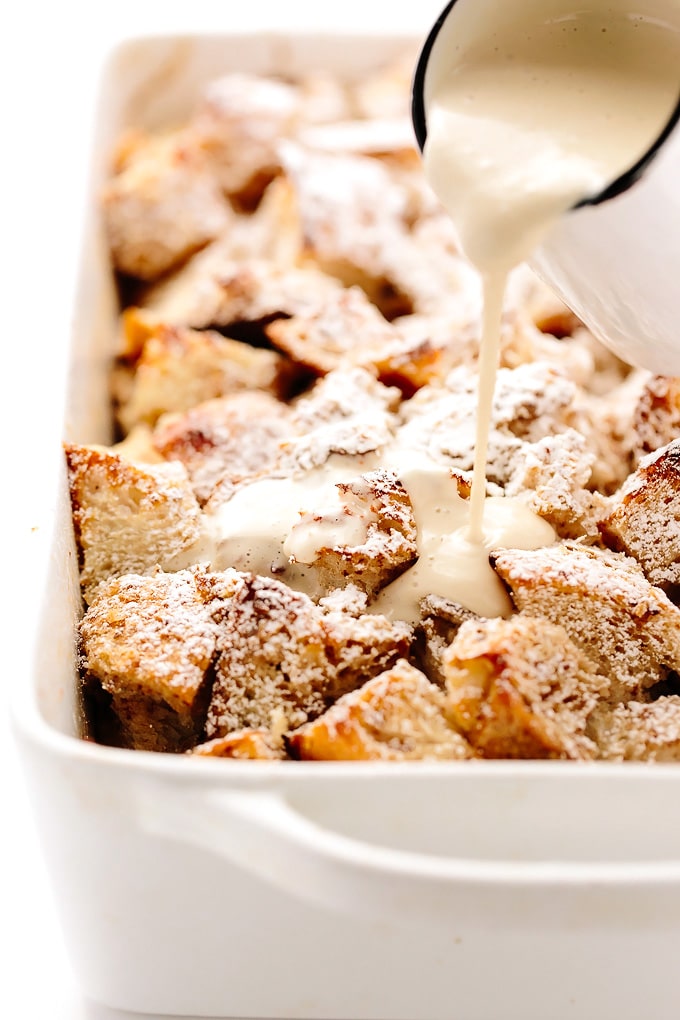
While the casserole bakes, prepare this vegan crème anglaise.
Once the casserole is ready—and if you’re feeling extra festive—sprinkle on some vegan powdered sugar (or a bit of arrowroot starch if you’re simply looking for that overall snow-dusted vibe).
Alternatively, keep things ultra simple and skip this step.
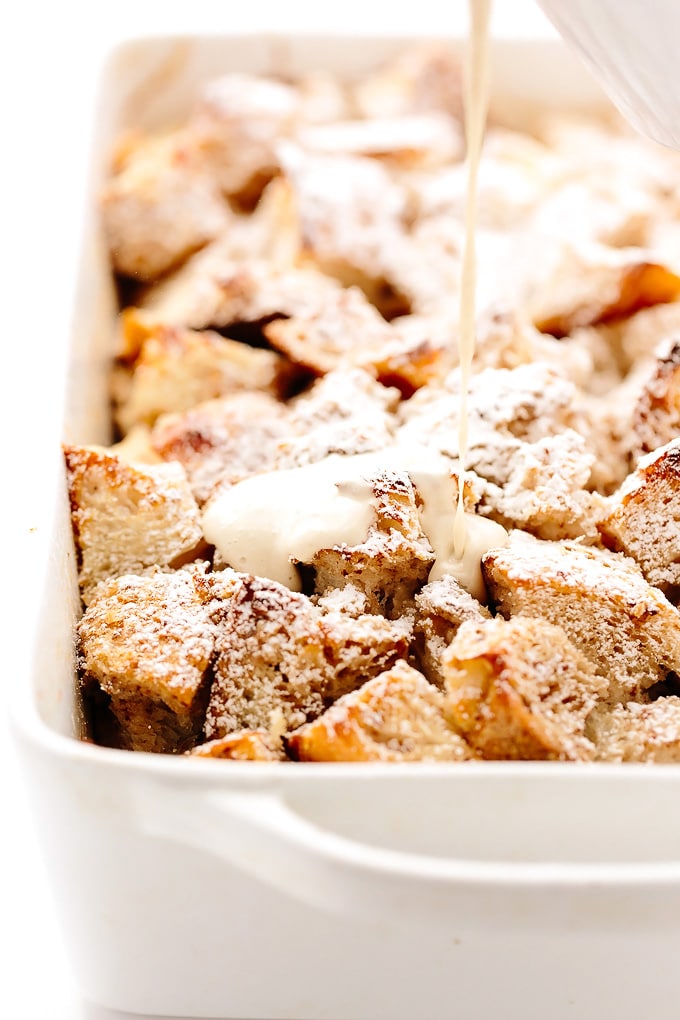
Next, pour on the crème anglaise and drizzle on the maple syrup (either over the casserole as a whole or over each spooned-out portion)…
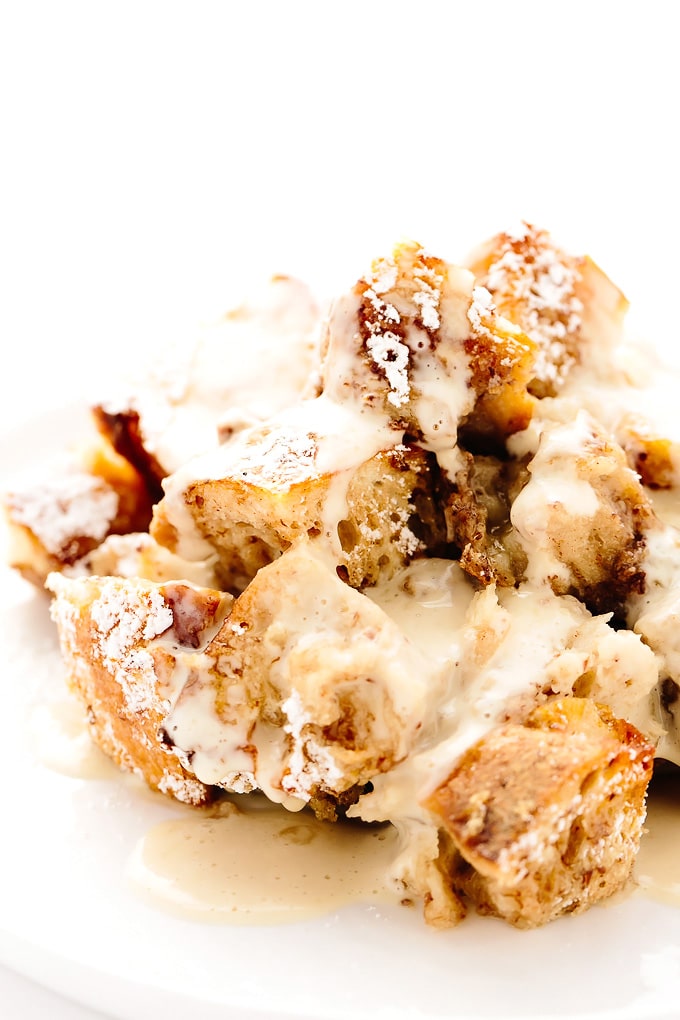
Then, there’s nothing left to do but serve, savor, and (maybe even) repeat.
This vegan eggnog french toast casserole is everything. It’s sweet, nutmeg-kissed, warm, cozy, comforting, and festive. Plus, it comes together with just 15 minutes of active kitchen preparation and is designed to please a crowd.
I hope this recipe offers a bit more warmth, comfort, and JOY to you this holiday season!
📖 Recipe
Vegan Eggnog French Toast Casserole
This vegan eggnog french toast casserole makes the perfect holiday brunch. It requires just 15 minutes of active kitchen time and can be prepared up to a full day in advance. Hearty cubes of french bread are soaked overnight in a rich mixture of coconut milk, applesauce, almond milk, maple syrup, vanilla, nutmeg, and cinnamon. In the morning, the dish gets popped in the oven to bake for 45 minutes and then topped with spoonfuls of vegan crème anglaise and drizzles of maple syrup.
Course Breakfast, Brunch
Cuisine plant-based, Vegan
Prep Time 15 minutesminutes
Cook Time 45 minutesminutes
Total Time 1 hourhour
Servings 8
Author Ashley
Ingredients
3tablespoonsground flaxseed
¼cupplus 2 tablespoons filtered water
20- to 24-ouncehearty french bread loaf/boule or sourdough loaf/boule, sliced into 1-inch cubes*
1 ¼cupunsweetened almond milk
1cupunsweetened plain apple sauce
1cupfull-fat canned coconut milk, can vigorously shaken before measuring
½cuppure maple syrup, plus more for serving
1tablespoonpure vanilla extract
2–3teaspoonsfreshly ground nutmeg, to taste
1teaspoonground cinnamon
½teaspoonfine sea salt or kala namak (highly recommend—adds an eggy flavor)
1 recipeVegan Cashew Crème Anglaise
Instructions
Lightly grease a large, oven-safe baking dish.
In a medium mixing bowl, whisk together the ground flaxseed and filtered water. Let stand for 5 to 10 minutes to thicken.
Meanwhile, add the bread cubes to a large mixing bowl.
To the flaxseed mixture, add the almond milk, apple sauce, coconut milk, maple syrup, vanilla, nutmeg, cinnamon, and sea salt. Vigorously whisk until smooth.
Pour the mixture over the bread cubes, and thoroughly toss to coat, ensuring they’re all evenly covered.
Spread the coated bread cubes evenly into the prepared baking dish. Cover and refrigerate for at least 8 hours or overnight (can be refrigerated for up to 24 hours before baking). Note: At this time, you’ll also want to soak the cashews for the crème anglaise—see recipe here.
In the morning (or just before baking), preheat the oven to 350F.
Uncover the dish and bake for 45 minutes to 1 hour, or until set and desired doneness is reached. (I prefer a slightly crisp top with a soft, slightly gooey bottom—almost like a bread pudding—so I bake mine for 45 minutes, but baking time will depend on taste preferences as well as the type of bread you use.)
Remove the casserole from the oven and cool for 10 minutes before serving.
Serve with generous spoonfuls of spiced cashew crème anglaise and drizzles of maple syrup.
Notes
*Be sure to use a hearty, crusty bakery loaf for this recipe (sliced loaf bread will not work—it’s far too soft), or you’ll need to significantly increase the baking time and potentially reduce the amount of liquid used as well.
**Prep time is active preparation and doesn’t include the 8+ hour refrigeration. Just FYI to keep this in mind when planning!