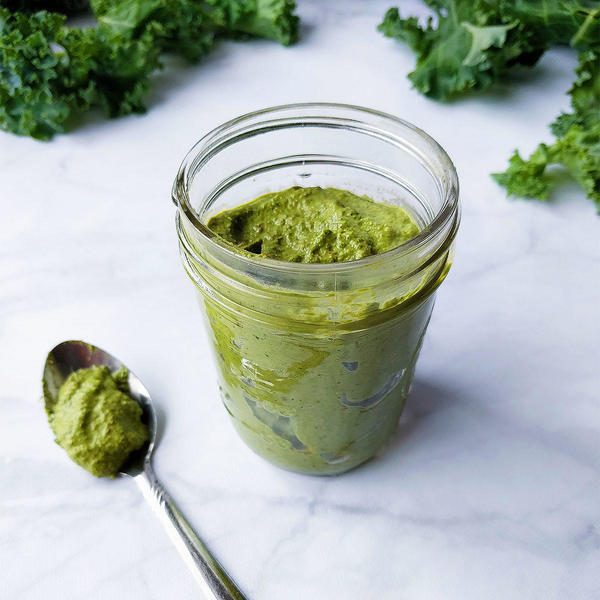
Pesto is one of those sauces I feel like I could put on anything! I love pesto pasta, pesto pizza, pesto on toast, pesto mixed with hummus, pesto tofu – you name it. Because it’s traditionally made with olive oil (a lot of olive oil) I used to only make pesto every once in awhile though. That is, until I invented a healthy version I call my “kale pesto” that I now make all the time!
Pesto Made Healthy
My version of pesto is oil free and dairy free, making it much healthier than regular pesto. Traditional pesto is made using:
Basil leaves
Olive oil
Parmesan cheese
Pine nuts
I swap out the dairy for vegan Parmesan cheese (made from cashews) and replace the olive oil with lemon juice instead. That’s not the only change I make though. I decided to get even more creative with the “healthy” theme of my pesto recipe and try to sneak some kale into the mixture as well. The result – I don’t even notice the kale is there, and it adds an even greater health boost to the final outcome!
Getting Creative With Ingredients
While experimenting in the kitchen, I also played around with different nut combinations. Though pine nuts are delicious, they can also be expensive. Walnuts happen to be my favorite nut, and they’re cheaper than pine nuts, so I almost always have a bag of them lying around. Luckily, using walnuts instead of pine nuts still gives this pesto that subtle nutty flavor and texture.
My final secret ingredient is… sun-dried tomatoes! This ingredient is totally optional, but I think it adds a really nice, unique flavor to the pesto. I very rarely shop at Whole Foods, but when I do I try to pick up a bag of sun-dried tomatoes. So far, it’s the only store I’ve been able to find sun-dried tomatoes in a bag (as opposed to in a jar with lots of oil). I really like sun-dried tomatoes as an ingredient in recipes, but try to avoid getting the kind that’s packed in oil! The ones at Whole Foods are dry in a bag, so I usually buy them there.
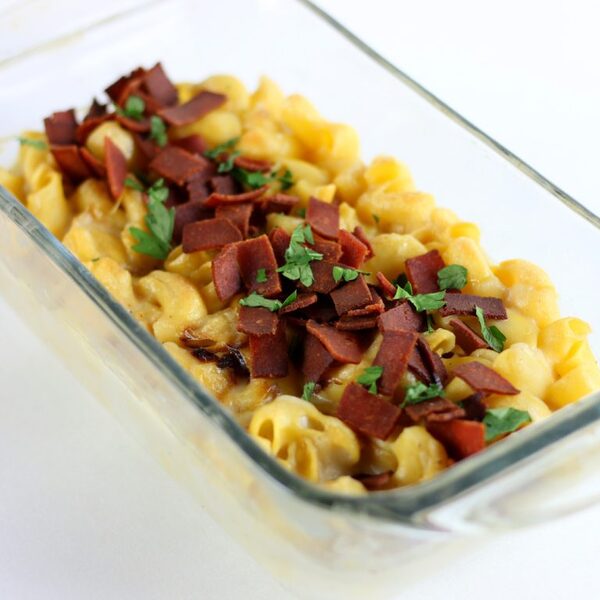
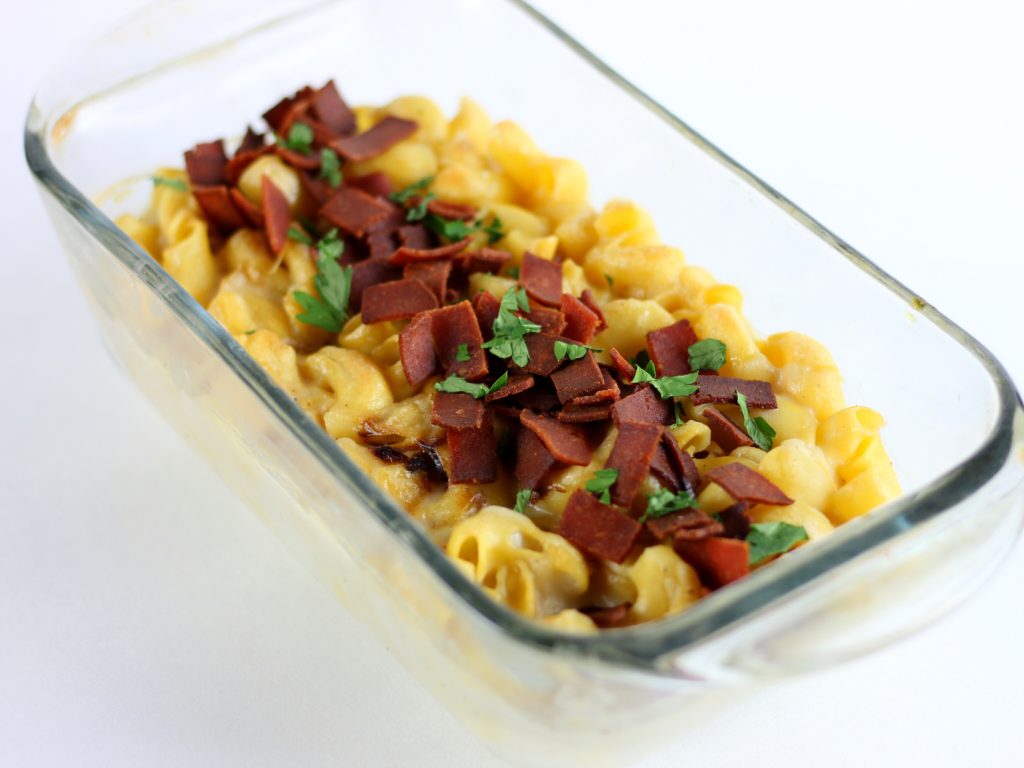
Kale Pesto With Sun-Dried Tomatoes
Making the pesto is super easy. Simply throw all the ingredients into a blender or food processor and blend until smooth. I hope you enjoy this healthy kale pesto recipe that is oil and dairy free!
Kale Pesto With Sun-Dried Tomatoes
Healthy vegan pesto that is oil and dairy free! It’s made with basil and kale to make it extra healthy, but still packed with tons of flavor! Perfect to be spread on anything.
I’ve recently had bit of a blip food wise. I’ve been blaming it on the recent house move (which was 3 months ago!) and leading an extremely busy life but have to face facts that I am a greedy so and so at times and fall into bad eating habits all too easily.
So, I’ve decided to go back to my mainly vegan, mostly sugar free life. I say ‘mainly’ and ‘mostly’ because it is possible that I will catch myself out by uploading a burger shot or similar to Instagram, so I’m not going to declare myself a food angel, just yet…
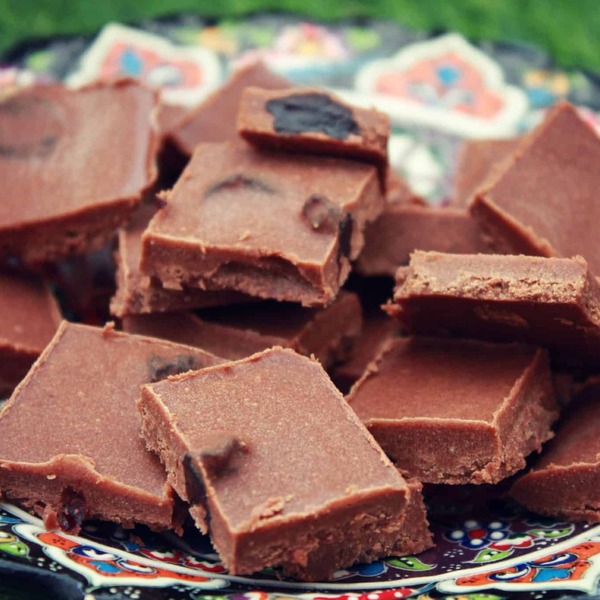
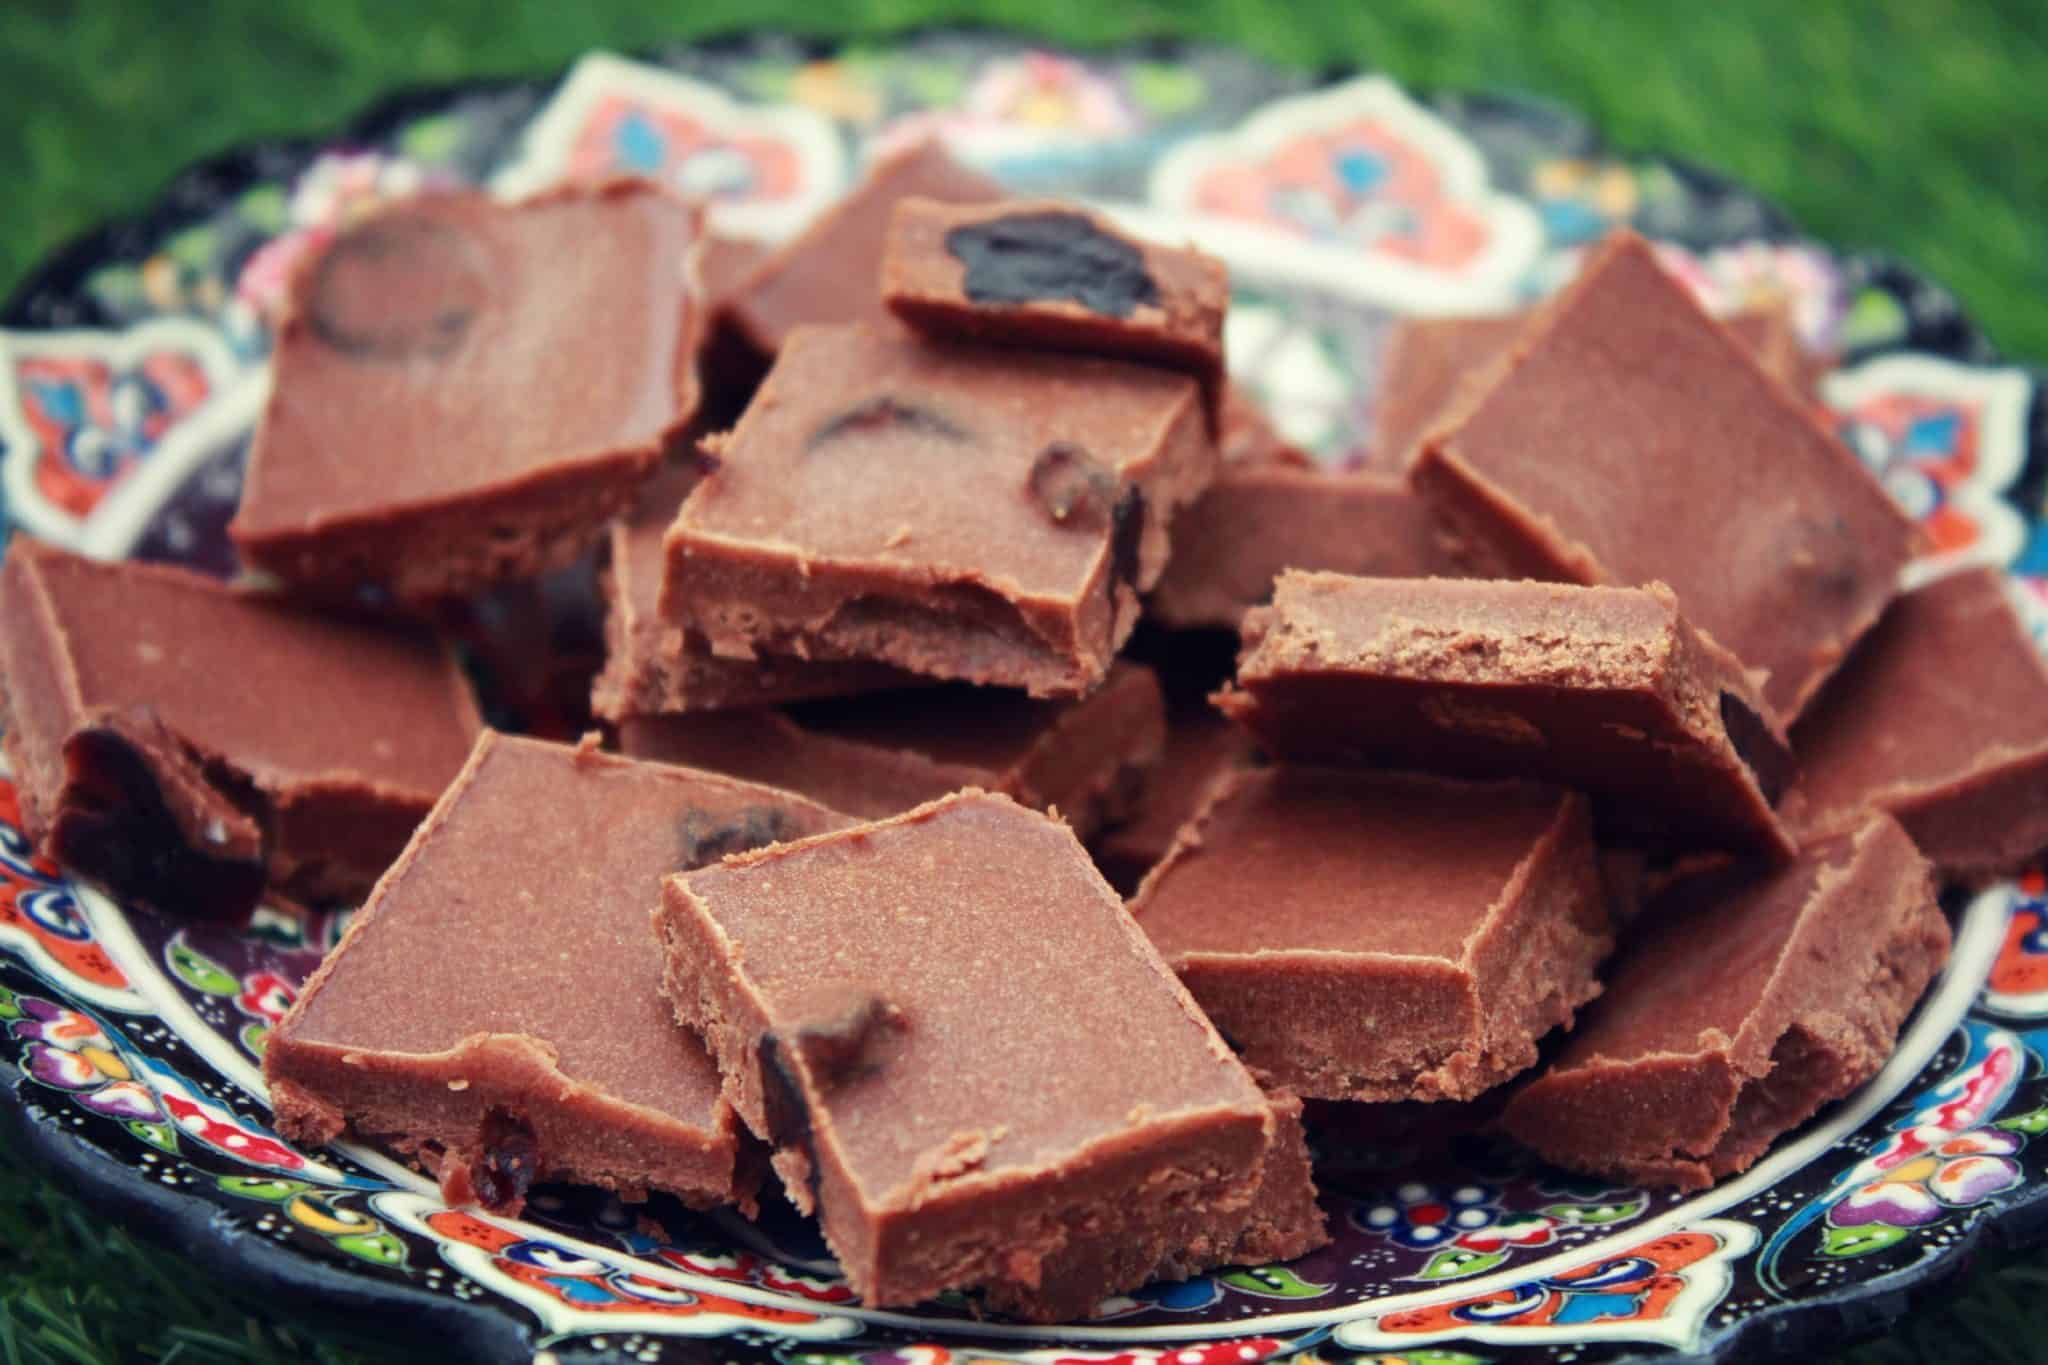
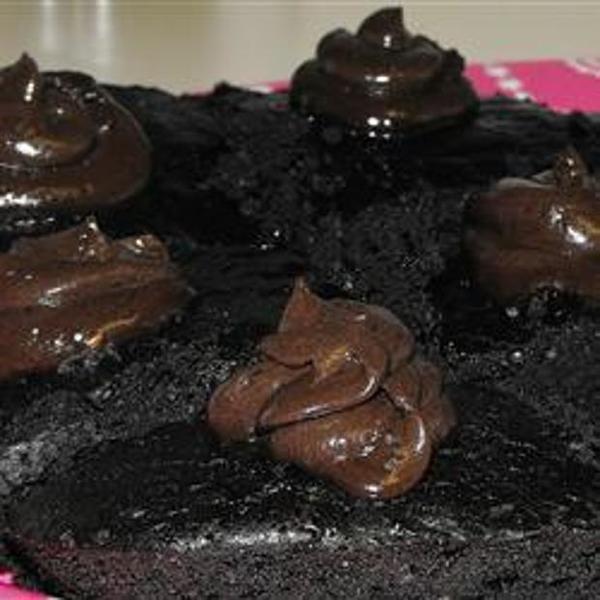
I eat vegan and sugar free for health reasons and because I feel so much better when I do. When I stick to it, and I’m exercising I feel as though I am on my A game! However, I have a sweet tooth and thought I’d give this raw chocolate fudge recipe a try to satiate my appetite.
Ridiculously simple to make, once they’re done just pop them in the fridge and dip in when you need a sweet-fix, the cherries go lovely and chewy and there is a gorgeous hint of chocolaty coconut.
Ingredients
100g almond butter (or any other nut butter)
100g coconut oil, plus extra for greasing
50g of dried cherries
50g of raw cacao powder
100g of honey (use 100g agave nectar to make them vegan)
1 teaspoon of vanilla extract
a pinch of sea salt
Method
Put nut butter and coconut oil in a food processor, whiz for a minute or so. Sieve in the raw cacao and add all other ingredients except for the cherries. Whiz until gooey. Add cherries and mix with a spoon. Using a spatula transfer to a coconut oil-greased and lined baking tray. Put in the freezer for 30 minutes. Cut into fudge sized chunks. They will keep for around two weeks in the fridge.
Enjoy!
Pin this image to your recipe board!
*See the original recipe at Deliciously Ella
Reader Interactions
Trackbacks
[…] Vegan. Refined sugar free. Chocolate and cherry. What’s not to like? Get the recipe. […]
[…] Vegan. Refined sugarine free. Chocolate and cherry. What’s not to like? Get a recipe. […]
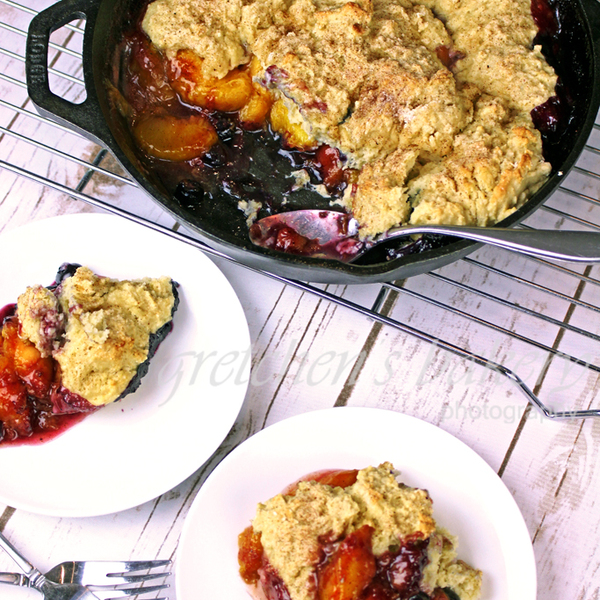
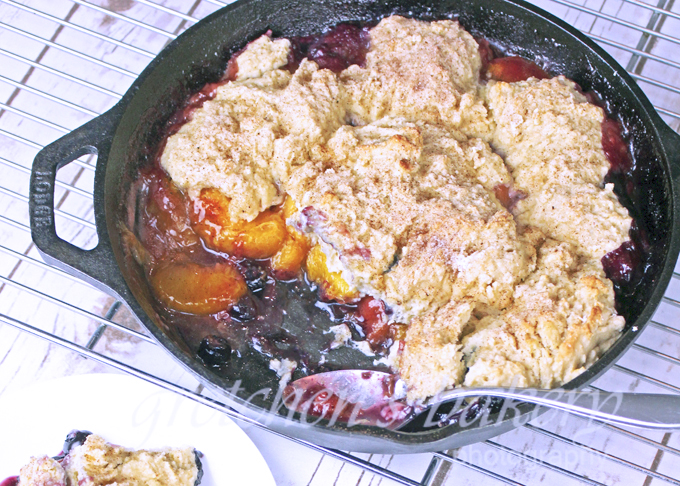
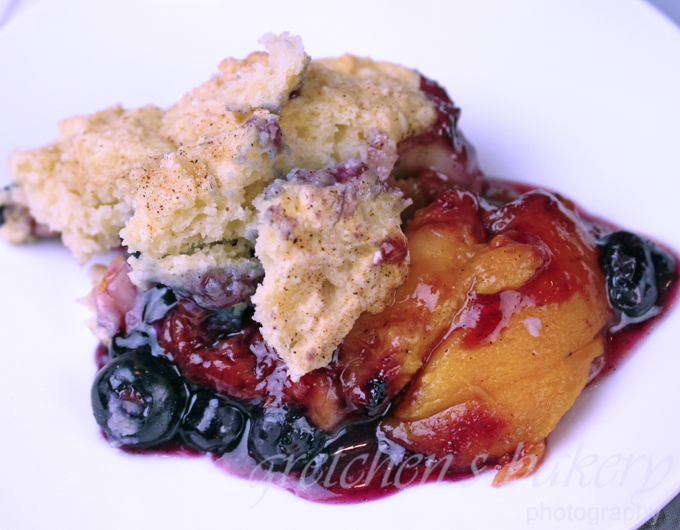
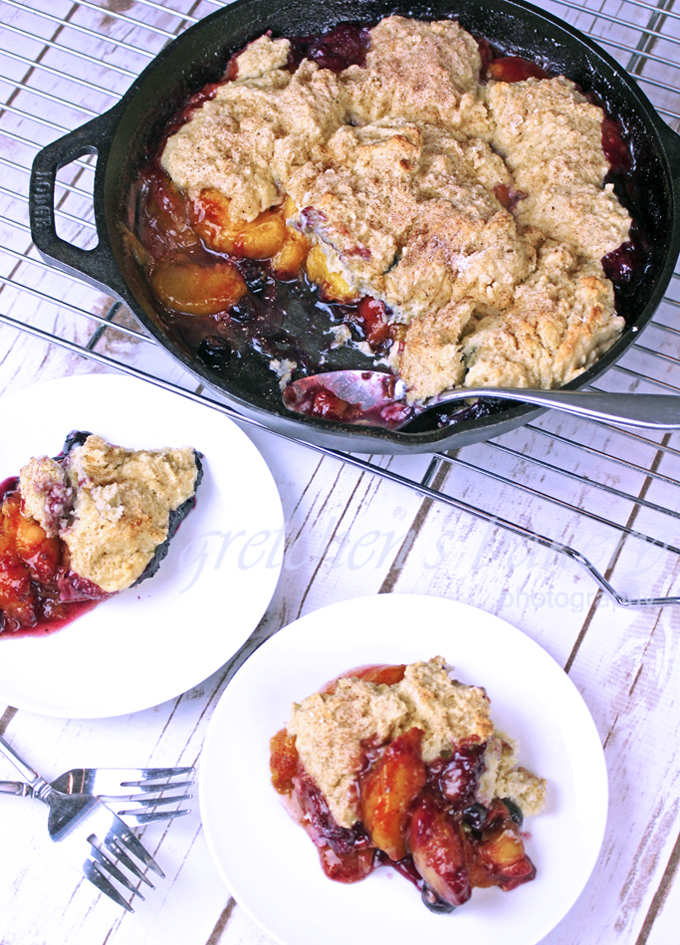
Today I have my favorite combination of all time ~ Blueberry Peach Cobbler
Cobbler recipes are the easiest way to celebrate all the fruits of summer!
The main difference in my peach blueberry cobbler recipe versus most of the recipes I have seen on the internet is in the way I make my cobbler topping.
Mine is more of a biscuit style, almost like a dumpling versus the poured cake batter style cobbler
Biscuit toppings are a better option to soak up all that juicy and delicious fruit filling without making it all soggy like a pancake or cake topping
In my opinion this technique brings more texture to each bite rather than that soft cake type batter
Biscuit making in general take a delicate hand in mixing or you lose that flaky, light crumb and end up with a more bread-like crumb that is dense and tough.
If you watch the YouTube video tutorial for how I make this recipe you will get a close up view of how to handle the making of the biscuit topping for the most flaky and light dough you have ever tried!
CLICK HERE FOR THE YOUTUBE VIDEO TUTORIAL FOR HOW TO MAKE THIS COBBLER
This website may contain links as part of the Amazon Affiliate program, which means when you click a link and make a purchase through my website I may earn a small commission at no additional cost to you
Notes for Success:
When making a biscuit or cobbler topping, the ingredients must be cold!
I usually put the vegan butter in the freezer while I gather all my other ingredients this way it is super cold when I grate it into the flour mixture
Using a box grater for the butter is a professional tip to getting the butter worked into the dough with as little hand pressure as possible
Other helpful items for the perfect cobbler!
CAST IRON PAN
9″ X 9″ CASSEROLE DISH
Yield: serves 10-12
Blueberry Peach Cobbler
Prep Time 1 hour
Cook Time 45 minutes
Total Time 1 hour45 minutes
Ingredients
For the Fruit Filling:
Fresh Peaches 5 or 6 large for about 3½ cups of peeled sliced peaches
Fresh or Frozen Blueberries 1 cup
Granulated or Light Brown Sugar 1 Tablespoon
Cornstarch 1 Tablespoon
Ground Cinnamon ¼ teaspoon
Ground Nutmeg ¼ teaspoon
Ground Ginger 1/8 teaspoon
Lemon zest from 1 small lemon approx 1 teaspoon
Juice from half an orange approx 2-3 Tablespoons
For the Cobbler Topping:
All Purpose Flour 1¾ cup (218g)
Granulated Sugar 2 Tablespoons (28g)
Salt ½ teaspoon
Baking Powder 2 teaspoons
Vegan Butter COLD 2 Tablespoons
Plant Milk COLD ¾ cup (177ml)
Instructions
Combine all the ingredients for the fruit filling together in a large mixing bowl, toss well to combine evenly
Pour into a lightly greased casserole dish (9″ x 9″) or a 1]10″ Cast iron Skillet
In another large bowl combine the flour, salt, baking powder and sugar together and make sure it is all blended well.
Add the cold grated or small diced butter to the flour mixture and cut in with a pastry cutter, fork or by using a box grater to incorporate as best as possible without melting the butter with the heat from your hands.
Once the flour mixture resembles course meal and the butter is distributed evenly pour in the cold soy milk and toss gently to absorb the flour.
You are not making bread so try not to knead or overwork the dough
Place Tablespoon sized pieces of the cobbler dough over the fruit filling in the dish and then sprinkle with optional cinnamon sugar
Bake in a preheated 375°F oven for approximately 45 minutes or until the fruit is bubbling and the cobbler toppings is not raw, pick up a small piece of the dough to make sure it is not raw & doughy
Serve hot with your favorite non dairy ice cream or whipped coconut cream
Notes
Leftover cobbler can be stored for up to 5 days in the refrigerator, covered and simply rewarmed before serving.
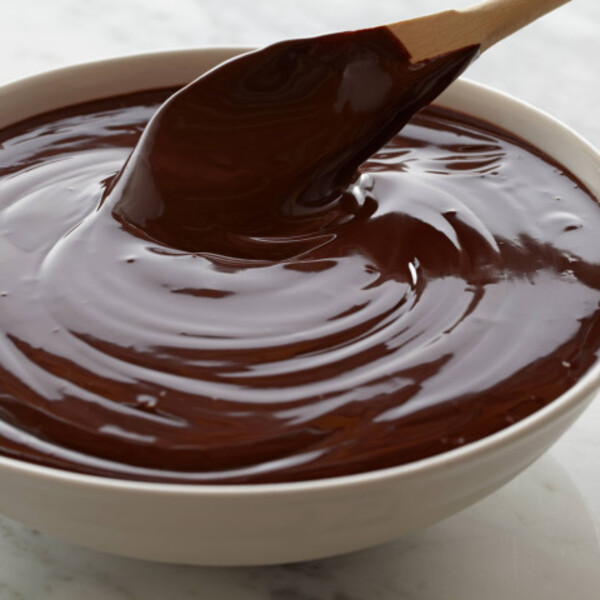
This vegan brownie recipe makes rich, chewy, chocolaty treats with a wonderfully crisp crust.
Vegan Brownie Ingredients
These are the ingredients you’ll need to make this homemade vegan brownie recipe:
Flour: This vegan brownie starts with all-purpose flour.
Sugar: Make sure the package is labeled “vegan,” as some store-bought white sugars aren’t strictly vegan.
Cocoa powder: You’ll need ¾ cups of good-quality unsweetened cocoa powder.
Baking powder: Baking powder acts as a leavener, which means it helps the vegan brownies rise.
Salt: Salt enhances the overall flavor of the brownies, but it won’t make them taste salty.
Water or coffee: Use a cup of hot water (or a cup of brewed coffee for more flavor).
Oil: Vegetable oil keeps these vegan brownies nice and moist.
Vanilla: Vanilla extract takes the flavor up a notch.
How to Make Vegan Brownies
You’ll find the full, step-by-step recipe below — but here’s a brief overview of what you can expect when you make vegan brownies:
Whisk the dry ingredients in a large bowl.
Add the wet ingredients and stir until the batter is blended.
Pour the batter into a prepared baking dish and spread evenly.
Bake in the preheated oven until the top is no longer shiny and the center feels just set.
Let the brownies cool before cutting them into squares.
Test Kitchen Tips
This top-rated user recipe was tested in our test kitchen. Here are some tips from recipe tester Tricia Manzanero Stuedeman.:
It is important to use high-quality unsweetened cocoa powder, as the flavor of your cocoa will be on full display. If you use cheap cocoa, your brownies will taste cheap. Ghirardelli, Vahlrona, and Guittard are great options.
“Keep in mind that warm brownies will be quite tender when cut,” says Tricia. “I found it easiest to use a sharp, straight-bladed knife and a smooth cutting motion rather than a sawing motion using a serrated knife. A small, thin spatula can be helpful to loosen the bottom of brownies and lift them out of the pan.”
Tricia tried the recipe with water and brewed coffee. She preferred the version with the coffee, as it masked the oil’s flavor.
How to Store Vegan Brownies
Store the vegan brownies in an airtight container at room temperature for up to three days.
Allrecipes Community Tips and Praise
“Amazing,” raves one Allrecipes community member. “This has become my go-to brownie recipe every time and it turns out amazing always. Definitely would recommend!”
“This was my first attempt at vegan brownies and my non-vegan family couldn’t tell the difference,” says Tessa L. “They’re delicious.”
“I wanted something sweet when I didn’t have eggs, butter, or milk. This recipe fits the bill!” according to Cook and a half. “My husband was a little hesitant because of the word vegan, but even he loved them. I will use this recipe every time I make brownies.”
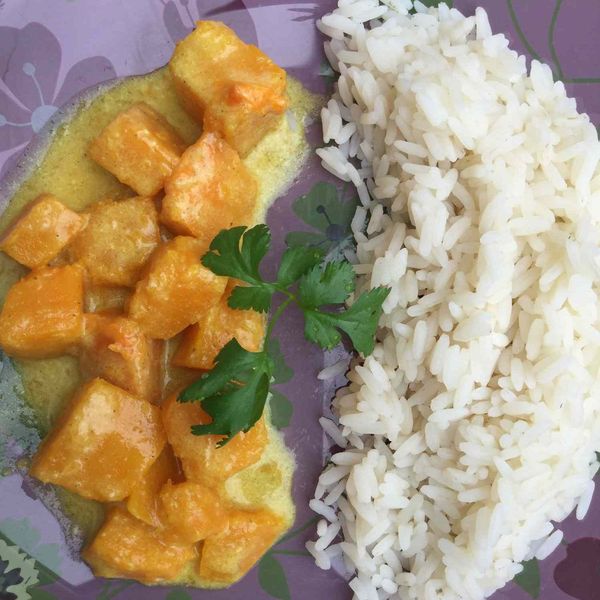
This is a very easy yet very delicious way to make a vegan butternut squash curry with few ingredients. I just serve it over rice, and you have a simple dinner for 2 on a weeknight. If you like your curry spicy, feel free to add cayenne pepper or chili powder.
Submitted by thetofuqueen
Updated on August 22, 2022
Cook Mode (Keep screen awake)
Ingredients
This recipe was developed at its original yield. Ingredient amounts are automatically adjusted, but cooking times and steps remain unchanged. Note that not all recipes scale perfectly.
Original recipe (1X) yields 2 servings
1mediumbutternut squash, peeled and cut into 1-inch cubes
1tablespoonvegetable oil
1teaspoonground cumin, or more to taste
1teaspoonground coriander, or more to taste
1pinchground turmeric
1(14 ounce) cancoconut milk
Directions
Heat oil in a large skillet over medium-low heat. Add butternut squash and cook gently until squash begins to soften, about 20 minutes. Drain off excess oil. Add cumin, coriander, and turmeric and stir to coat thoroughly. Pour in coconut milk and cook until butternut squash is completely soft, but still holding shape, about 10 minutes.
Nutrition Facts (per serving)
738
Calories
50g
Fat
80g
Carbs
11g
Protein
Nutrition Facts
Servings Per Recipe 2
Calories 738
% Daily Value *
Total Fat
50g
64%
Saturated Fat
38g
192%
Sodium
53mg
2%
Total Carbohydrate
80g
29%
Dietary Fiber
15g
55%
Total Sugars
14g
Protein
11g
21%
Vitamin C
133mg
148%
Calcium
353mg
27%
Iron
12mg
66%
Potassium
2663mg
57%
* Percent Daily Values are based on a 2,000 calorie diet. Your daily values may be higher or lower depending on your calorie needs.
** Nutrient information is not available for all ingredients. Amount is based on available nutrient data.
(-) Information is not currently available for this nutrient. If you are following a medically restrictive diet, please consult your doctor or registered dietitian before preparing this recipe for personal consumption.
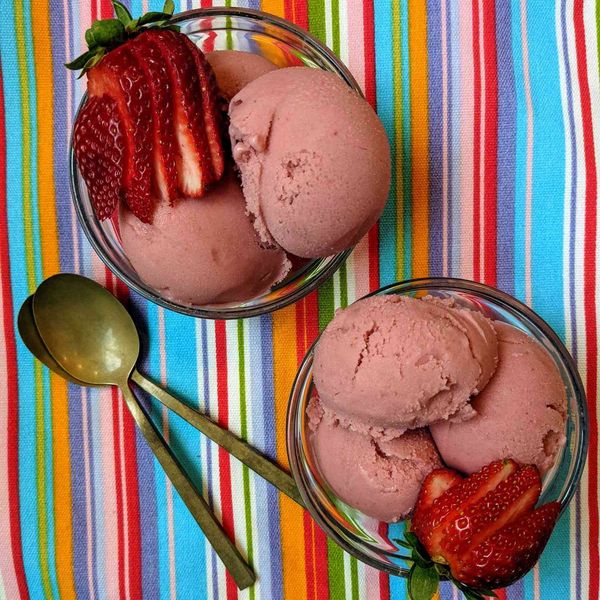
Mix lemon juice and cornstarch together in a small bowl and pour into a blender. Add strawberries, soy milk, sugar, sweetener, and salt; blend until smooth.
Pour mixture into a pot. Heat over medium heat, stirring frequently to keep from burning, until mixture comes to a boil and starts to thicken, 10 to 15 minutes. Cover and chill thoroughly, 8 hours to overnight.
Pour mixture into an ice cream maker and freeze according to manufacturer’s instructions, in 2 batches if necessary, about 20 minutes. Transfer to an airtight container and freeze until firm, about 4 hours.
Cook’s Notes:
Sour salt is available in some supermarkets. If you can’t get it, use more lemon juice, but remember that that adds more water that will become ice in the finished product.
Consistency will obviously be a little grainier than something that contains an appreciable amount of fat, but as a healthy alternative this is fantastic. The tangy strawberry packs a really flavorful punch.
I used liquid sucralose drops instead of granulated Splenda(R), to sweeten to taste. I also tweaked the tartness with citric acid crystals (sour salt). You want the mix to be a little too sweet at room temperature, because you’ll taste the sweetness less after freezing.
Mix will come out like soft-serve, and can then be either served, or decanted and frozen. To serve it from the freezer, you’ll need to let it stand at room temperature for a bit before it will scoop, but it will nicely.
We’re checking if you’re a real person and not an automated bad bot. Usually, the captcha below will complete itself. If it doesn’t, simply click the checkbox in the captcha to verify. Once verified, you’ll be taken to the page you wanted to visit.
Human verification is in progress ✨
If for some reason after verifying the captcha above, you are constantly being redirected to this exact same page to re-verify the captcha again, then please click on the button below to get in touch with the support team.
Contact Support
Please mention the “Ray ID: 956306992b7ea69c” and “Client IP: 35.239.153.170” to your ticket.