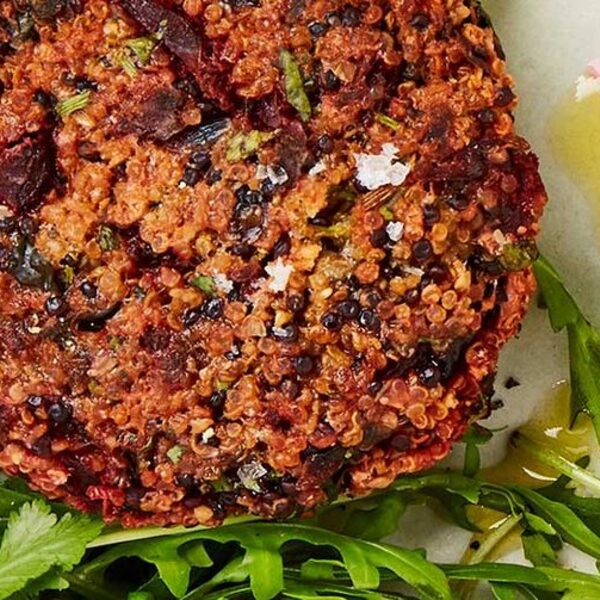
Heat the oven to 220C/200C fan/gas 7. Put 1 tbsp of the rapeseed oil in a small frying pan and tip in the onion, cumin and garlic, then fry over a medium heat for 8 mins until softened and golden. Tip into a bowl. Add the cooked quinoa, beetroot, flour, flaxseed and coriander, and mix until combined. Season lightly. Leave to sit for 5 mins to bind.
step 2
Divide the mixture into four – it will be quite loose – then, using wet hands, shape them into patties. Put the burgers on a lined baking tray and put in the oven for 15 mins. Turn them over and cook for another 10 mins.
step 3
Meanwhile, make the salad dressing. Whisk together the beetroot liquid, lemon juice, yogurt and oil, and season.
step 4
To serve, pile the rocket onto plates and place a burger on top. Drizzle over the dressing and scatter over the extra coriander.
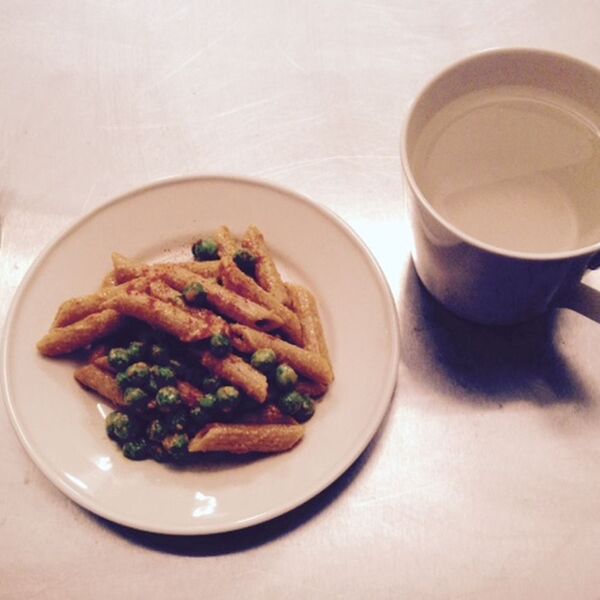
This is inspired by a simple, vegan version of mac and cheese that doesn’t involve processed cheese products. —Jessipes
What You’ll Need
Ingredients
1 cup
Whole Wheat Pasta
1 cup
Frozen Peas
2 tablespoons
EVOO
1/4 cup
Nutritional Yeast
.5 teaspoons
Garlic Powder
.25 teaspoons
Smoked Paprika
Directions
Prepare pasta and put back into the pot. Meanwhile place frozen peas in a bowl of hot water for 5 minutes and drain. Mix all of the ingredients to the pot and warm up.
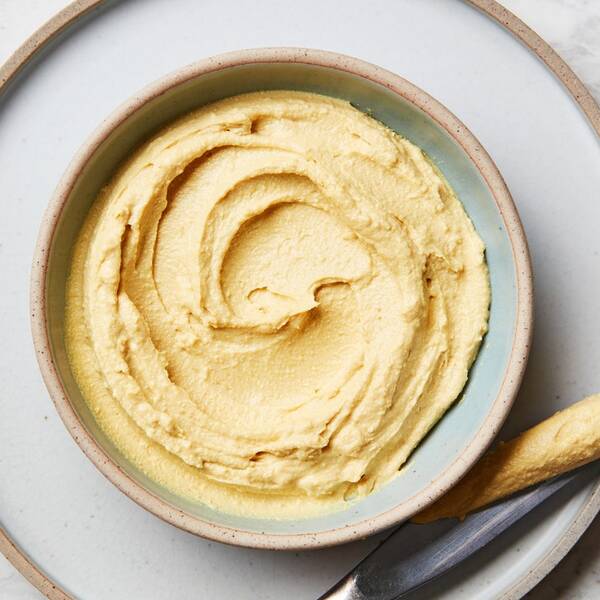
This dairy-free cheese sauce recipe yields more sauce than you need for two vegan cheesesteaks, but it keeps well in the refrigerator for five days if you want to make more sandwiches later in the week. It’s also a great topping for veggie burgers or dip for crispy potatoes.
Ingredients
4 oz. firm tofu (¼ of a 16-oz. block), cut into cubes
¼ cup neutral vegetable oil
¼ cup nutritional yeast
1 Tbsp. IPA-style beer
2 tsp. lemon juice
1 tsp. Diamond Crystal or ½ tsp. Morton kosher salt
Preparation
Purée 4 oz. firm tofu (¼ of a 16-oz. block), cut into cubes, ¼ cup neutral vegetable oil, ¼ cup nutritional yeast,1 Tbsp. IPA-style beer, 2 tsp. lemon juice, and 1 tsp. Diamond Crystal or ½ tsp. Morton kosher salt in a blender until smooth.
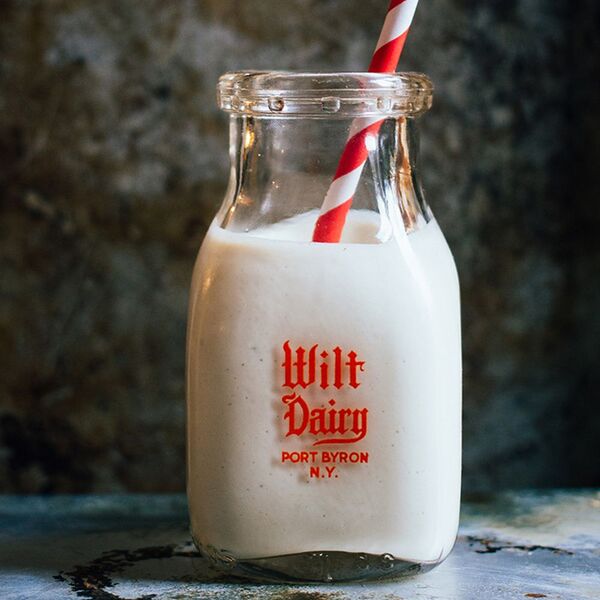
When travelling in America last summer I came across cashew milk, which I can’t find anywhere here in the UK, and it was the creamiest tasting plant based milk I have ever come across. Which got me thinking, I can just make this at home, cashews are easy to get, and nut milks are so easy to make. I’ve used cashews in dairy free cheesecake recipes before, and I’m a big fan of the cashew ice cream they sell in our local organic shop, and they certainly don’t lack in gorgeous creamy texture. Also the great thing about making milk with cashews, is that they are so soft after soaking, that they just melt into the water when blended, which saves you having to strain any pulp afterwards. Keeping all the nutty protein and fibre goodness all together in a great tasting drink. So naturally I thought, adding less water makes a delicious, dairy free and vegan cream. This is such a versatile little creation, and works amazingly in so many different recipes. I have been using it in equal parts to cream as a substitute in recipes without any trouble, and feel great knowing that I am adding a good dose of healthy fats and quality protein to recipes that were previously full of empty calories. —The All Natural Cure
Ingredients
100 grams
cashews
200 milliliters
water
2 teaspoons
vanilla
Directions
Soak the cashews overnight, or for at least 3 hours.
Drain the soaking water and put into a blender with the water and vanilla paste.
Blend on high for a minute or two, until completely smooth.
Store in an airtight jar in the fridge, this will keep for up to two weeks.
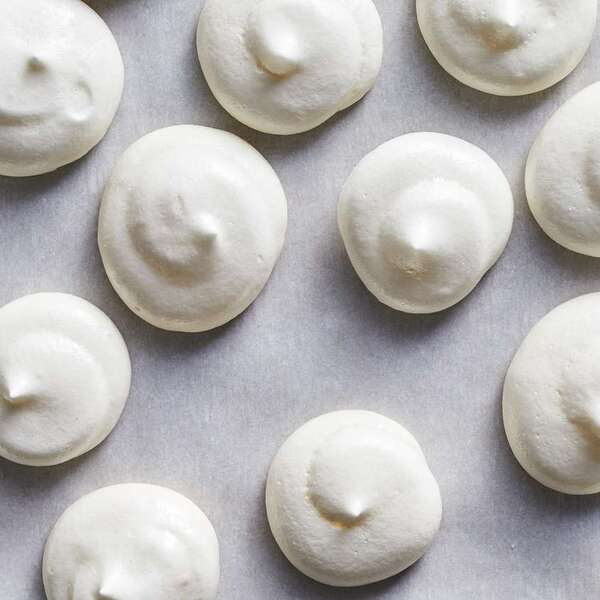
There are so many delicious and healthy recipes that start with a can of chickpeas, including hummus, stews, soups, grain bowls, wraps and snacks. But did you know that you can also use the liquid in the can? Chickpea liquid, aka aquafaba, is a wonderful stand-in for egg whites in all sorts of recipes. Aside from the chickpea liquid, these cookies contain only sugar and either vanilla or almond extract, so they’re not just vegan—they’re also gluten-free. They’re also quite low in calories-and delicious, of course!
Tips for Making Vegan Meringue Cookies
1. Whip the Meringue Mixture
The first step when making vegan meringue cookies is to drain the chickpeas and save the liquid. You can save the liquid for a few days in the fridge, but be sure to bring it to room temperature before using it. Then beat the chickpea liquid in a mixing bowl with an electric mixer on high speed (or in a stand mixer with a whisk attachment) until stiff peaks form, 5 to 10 minutes. When whipped, the aquafaba looks exactly like whipped egg whites. The next step is to add a stabilizer—you can use cream of tartar or sugar. Our recipe calls for sugar since we also want to sweeten the cookies. Once you have stiff peaks, add sugar, 1 tablespoon at a time, and continue beating until the mixture is very glossy, about 5 minutes. The final step is to add flavoring—vanilla extract or almond extract are both delicious—and then continue beating for another minute to incorporate the flavoring.
2. Pipe the Meringue Cookies
After you’ve whipped the meringue, it’s time to pipe the cookies onto a baking sheet lined with parchment paper (which keeps them from sticking). You can use a pastry bag fitted with a 1/2-inch plain tip, or fashion your own bag out of a 1-gallon sealable plastic bag. Fold the top of the bag around your hand and spoon in the meringue, using your hand as an edge against the spatula to get the mixture into the bag. Seal the bag almost completely, leaving a small space to squeeze out any remaining air. Snip the tip and start by piping a dot of the meringue under each corner of the parchment paper to make sure your parchment doesn’t fly away. Then squeeze the meringue into 1 1/2-inch cookies, about 1/2 inch apart.
3. Bake and Serve the Cookies
After you’ve piped the cookies, bake them at 200°F on the upper rack of your oven until they’re dry and crispy, 1 1/2 to 2 hours. Turn off the oven and leave the meringues in, with the door closed, for 1 hour more. Serve the cookies right away or save them for later—they’ll keep in an airtight container for two weeks (if you can resist eating them).
Check Your Wallet: Traditional Meringue Cookies vs. Vegan Meringue Cookies
For a look at the price difference between traditional and vegan meringue cookies, we turned to Dustin Harder, aka the Vegan Roadie (@theveganroadie). Both the vegan version and traditional version clocked in at just 4 cents per serving (a serving is two cookies), which is a sweet deal, Harder notes. But, he adds, if you’re buying premium eggs, which can cost $6 or $7 for a dozen, you would be spending more to make the traditional version.
Environmental Impact: Traditional Meringue Cookies vs. Vegan Meringue Cookies
In terms of the environmental impact, vegan meringue cookies are a great way to reduce food waste, since you’re using something you’d normally pour down your drain. If you’re opening a can to make the meringues, instead of throwing away the chickpeas (like you might with extra egg yolks), you can put them to use in salads, hummus or grain bowls. If you’re worried about BPA, a lining used in some cans and also found in plastics, select chickpeas that come in BPA-free cans.
Nutritional Comparison: Traditional Meringue Cookies vs. Vegan Meringue Cookies
As for nutritional differences, meringues, whether vegan or not, are already a lightened-up cookie. Both versions are low in calories, but our vegan meringue has just 5 calories per cookie! You’ll save 7 calories per 2-cookie serving compared to traditional meringues, and the vegan meringue cookies also have 2 grams less added sugar per serving.
Vegan meringue cookies are a wonderful light treat on their own and also nice served with fresh fruit. If you haven’t already used the chickpeas themselves to make something savory, why not use them to make another sweet treat, such as Cinnamon-Sugar Roasted Chickpeas or Dark Chocolate Hummus to serve alongside the meringues?
Cook Mode (Keep screen awake)
Ingredients
6tablespoonsliquid from one 15-ounce can no-salt-added chickpeas, at room temperature
¼cupsugar
½teaspoonpure vanilla or almond extract
Directions
Position a rack in upper third of oven; preheat to 200 degrees F. Line a large baking sheet with parchment paper.
Beat chickpea liquid in a mixing bowl with an electric mixer on high speed until stiff peaks form, 5 to 10 minutes. Add sugar, about 1 tablespoon at a time, and continue beating until very glossy, about 5 minutes. Add vanilla (or almond) extract and beat for 1 minute more.
Place a dot of the meringue under each corner of the parchment paper to secure it to the pan. Spoon the meringue into a 1-gallon sealable plastic bag (or pastry bag fitted with a 1/2-inch plain tip). Seal the bag almost completely, leaving a small opening for air to escape from the top as you squeeze. Snip off a bottom corner to make a 3/4-inch-wide opening. Fold the top of the bag over a few times, then gently push the meringue down to the snipped corner. Holding the bag perpendicular to the pan, pipe the meringue into 1 1/2-inch cookies, spacing them about 1/2 inch apart.
Bake the meringues on the upper rack until they are dry and crispy, 1 1/2 to 2 hours. Turn off the oven and leave the meringues in the oven, with the door closed, for 1 hour more.
To make ahead
Store in an airtight container for up to 2 weeks.
Equipment
Parchment paper
Originally appeared: EatingWell.com, March 2019
Nutrition Facts (per serving)
Nutrition Facts
Servings Per Recipe 25
Serving Size 2 cookies
Calories 9
% Daily Value *
Total Carbohydrate
2g
1%
Total Sugars
2g
Added Sugars
2g
4%
Potassium
0mg
0%
Nutrition information is calculated by a registered dietitian using an ingredient database but should be considered an estimate.
* Daily Values (DVs) are the recommended amounts of nutrients to consume each day. Percent Daily Value (%DV) found on nutrition labels tells you how much a serving of a particular food or recipe contributes to each of those total recommended amounts. Per the Food and Drug Administration (FDA), the daily value is based on a standard 2,000 calorie diet. Depending on your calorie needs or if you have a health condition, you may need more or less of particular nutrients. (For example, it’s recommended that people following a heart-healthy diet eat less sodium on a daily basis compared to those following a standard diet.)
(-) Information is not currently available for this nutrient. If you are following a special diet for medical reasons, be sure to consult with your primary care provider or a registered dietitian to better understand your personal nutrition needs.
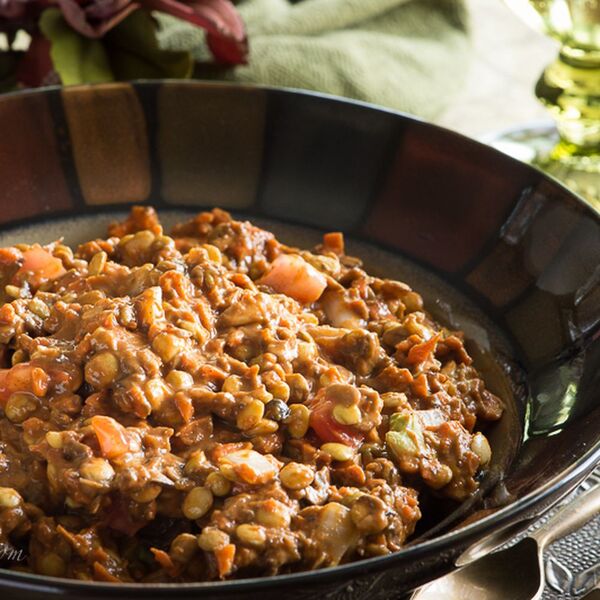
This is a delicious, healthy raw vegan chili that can be warmed gently on the stove top or in the dehydrator. A great hearty raw recipe for fall and winter. —Rawmazing
Ingredients
1 cup
lentils, soaked overnight and drained
1 cup
diced onion
4
carrots, diced
2 cups
mushrooms, chopped
1/4 cup
olive oil
2 tablespoons
Nama Shoyu or other soy sauce
2 tablespoons
raw agave nectar
1/4 cup
sun-dried tomatoes
2 tablespoons
olive oil
4
dates
4
medium ripe tomatoes
2 tablespoons
raw apple cider vinegar
1 tablespoon
raw agave nectar
2 tablespoons
chili powder
pinch
Himalayan salt
Directions
In a large bowl stir together: lentils, onions, carrots and mushrooms. Set aside
Make the marinade by whisking together 1/4 cup olive oil, nama shoyu and agave. Pour over veggie mixture and let sit for 1 hour.
Combine remaining ingredients in high-speed blender. Pour over marinated veggies and stir together
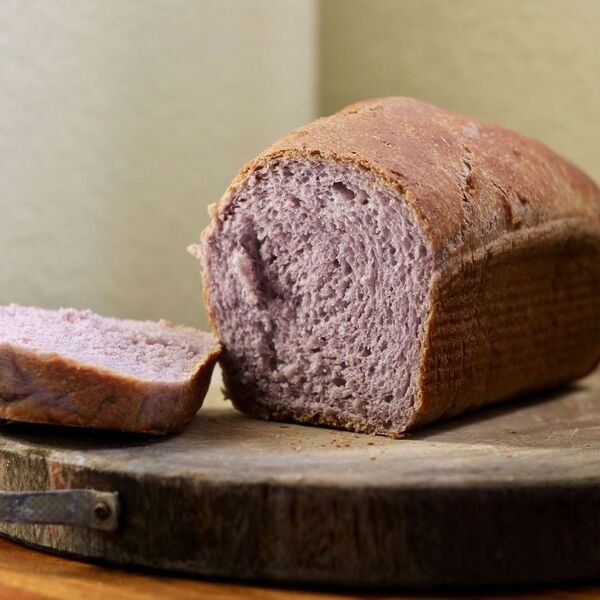
This loaf of bread has sticky rice flour making for an awesome chewy/fluffy texture that you cannot find any where else. Also, the ube powder adds an awesome color! —Melissa Huang
Ingredients
75 grams
glutinous rice flour
158 grams
water
250 grams
bread flour
50 grams
ube powder
2
large egg whites
40 grams
granulated sugar
4 grams
instant yeast
1/2 teaspoon
salt
1 teaspoon
vegan butter
Directions
In a small pot, whisk the glutinous rice flour and water over medium heat until it forms a sticky goo. This will take a couple minutes but make sure to keep whisking or else it will burn. Once it forms the blob, take it off the heat to cool.
In the bowl of stand mixer, combine the bread flour, ube powder, egg whites, sugar, yeast, salt, and the sticky blob of glutinous rice flour.
Mix on low first until everything is combined. It will look a little dry at first, but just keep mixing. Try to refrain from adding water because it will throw off the ratio of ingredients. You will have to scrape the bowl a couple times.
Once everything has come together, mix on medium/high for 5 minutes. Then add the butter and mix on high for another 15-20 minutes. The dough will look more like a paste and stick to the sides of the bowl. If you run your spatula around the sides and the dough sticks like crazy, you will need to add more bread flour. The dough should still sort of hold its shape, but it will look like a goo when kneading.
Make sure to knead for the entire 15-20 minutes. Then cover the bowl with a damp paper towel and let the dough rise in a warm place until doubled in size (about 2 hours).
On a floured surface, form the dough into a rectangle, about 1/2 inch thick, and one that when you roll up will fit in your loaf tin.
Line your loaf tin with parchment paper so that there are long portions of the paper hanging from two sides. Place your formed bread in and cover lightly with the hanging parchment paper and some plastic wrap.
Place in the fridge to proof for 12-18 hours. I do this overnight. The next day it should look slightly more poofy.
Take the bread out to room temperature while you preheat your oven to 330 degrees F.
Bake the bread cover with the parchment paper for 25 minutes then uncover and bake for another 20 minutes. The bread should sound hollow when you tap it and be golden brown.
Take the bread out of the loaf tin by lifting the parchment paper. Let cool on a wire rack.
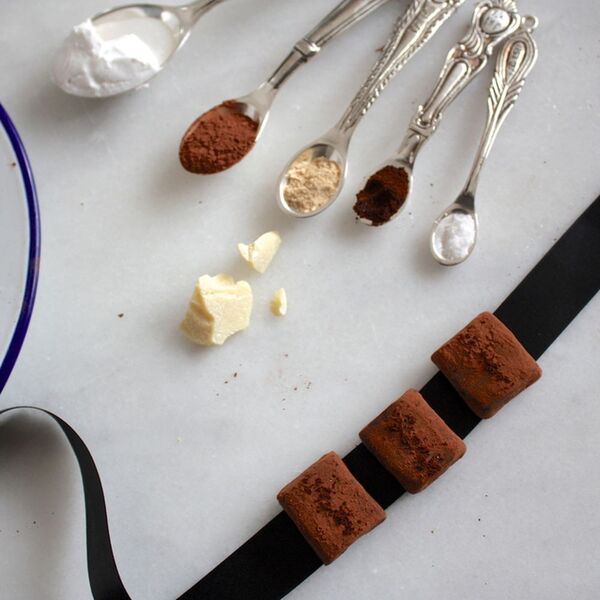
I love the flavor of tiramisu! But I also love dairy free desserts. A great way to combine the flavors of tiramisu with a dairy free dessert is to make vegan chocolate which is so versatile and can be infused with any flavor desired. In place of dairy cream I have replaced it with coconut cream and instead of refined cane sugar I have used Maple sugar. By using high quality ingredients you can create delicious chocolates that battle the greatest chocolate boutique. —sabrina
Ingredients
1.5 teaspoons
high quality ground decaf espresso [I used Illy]
3 tablespoons
cacao powder [I used green and black]
25 grams
cacao butter
1.5 tablespoons
coconut cream
1 tablespoon
coconut milk
1 pinch
sea salt
1.75 tablespoons
maple syrup sugar [sweeten to taste]
Directions
Place the cacao butter pieces in a microwave safe bowl and microwave the cacao butter for 1.5-2 minutes until the pieces melt [Check on them at the 1.25 mark and the 1.5 mark].
Once the cacao butter is out of the microwave add in the cacao powder, sugar, milk, cream, espresso and salt. If you desire more sweetness or a stronger espresso flavor add accordingly.
Refrigerate for 45 minutes.
Once cooled, remove from refrigerator, place 1 teaspoon of cacao powder on a plate and spread with your fingers.
Gather the chocolate in your hands and mold into a rectangular shape with about an inch of thickness.
Place on the plate, even out the depth and straighten the sides.
Cut rectangular blocks with a knife, shape accordingly, and then coat each piece with cacao powder and then top with some ground espresso. Enjoy!
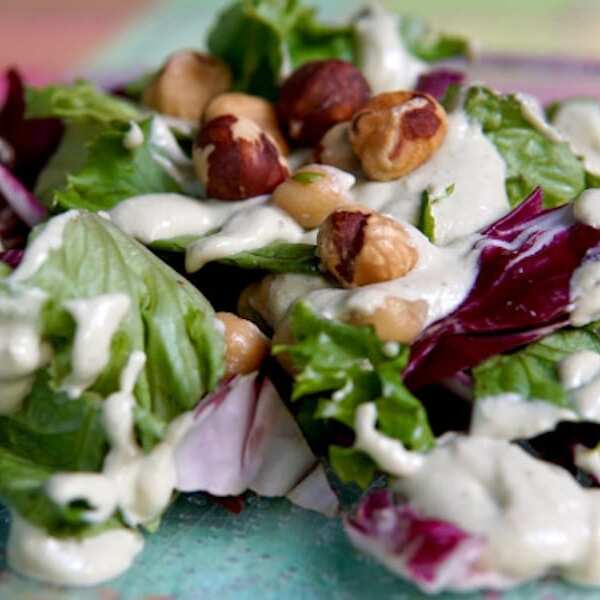
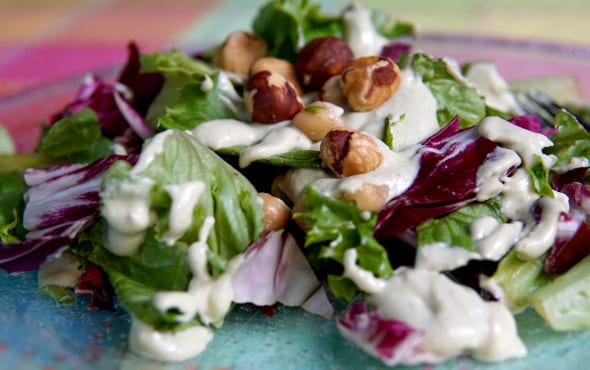
Need a delicious salad with a homemade, vegan dressing? Look no further! This Radicchio Salad with Vegan Ranch Dressing is fit for a weeknight or a dinner party side.
A vegan buttermilk ranch dressing – that’s whole-food, plant based – and delicious? Yes, yes, and yes. This creamy dressing might be the answer you’ve been looking for all this time. It’s become a favorite at our house.
This time of year, it’s a fantastic addition to a holiday dinner celebration.
Of course, you can use this recipe to dress any salad greens you like, and I can tell you from experience that heirloom tomatoes (in the summer) are an especially nice addition, but here’s just how very simply we made this salad work for us last night!
Print
5 Stars 4 Stars 3 Stars 2 Stars 1 Star
No reviews
Salad
1 head radicchio (chopped)
1 head romaine lettuce (or leaf lettuce, chopped)
Dressing
1 cup raw cashews
3/4 cup unsweetened soy milk
3 tablespoons lemon juice
2 teaspoons brown mustard
1 teaspoon apple cider vinegar
3/4 teaspoon Kosher salt
1/4 cup fresh parsley (chopped)
Garnish
Toasted hazelnuts
Instructions
Place salad greens in medium size bowl, and set aside.
To make Vegan Buttermilk Ranch Dressing, place cashews, soy milk, lemon juice, mustard, vinegar, and salt in a high powered blender, and process until smooth. Add the parsley and pulse a few times to combine.
Toss salad with desired amount of dressing, and refrigerate the remainder.
Top salad with toasted hazelnuts, and serve immediately.
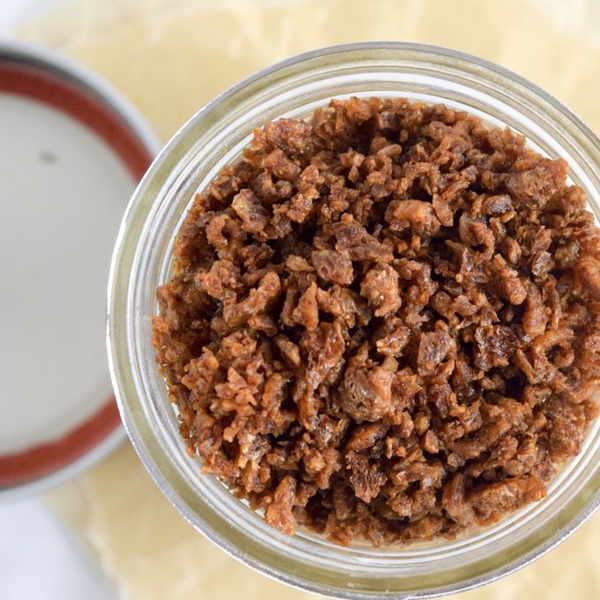
Savory, smoky, sweet, crunchy and delicious easy vegan bacon bits made from TVP (Textured Vegetable Protein). These things are excellent for sprinkling on top of salads, baked potatoes or simply eating by the handful. Which, I’m not ashamed to say, “I do!” —Shane Martin
Ingredients
1/2 cup
TVP Textured Vegetable Protein
2 tablespoons
low sodium tamari sauce, or soy sauce
1 tablespoon
water
1 tablespoon
maple syrup
2 teaspoons
liquid smoke
1/2 teaspoon
smoked paprika
1/2 teaspoon
garlic powder
1/4 teaspoon
black pepper
Directions
Place all ingredients, EXCEPT FOR TVP, in a small sauce pan and bring to a boil.
Once the mixture starts to boil, remove from heat and add TVP. Stir until all the liquid has been absorbed.
Pre-heat oven to 225 and line a baking sheet with parchment paper. Spread bacon bits out evenly on baking sheet and place in oven. Cook for just a couple minutes then shake so the bacon bits will cook evenly. Repeat until the bacon bits are crispy, but be careful not to burn.


/8ed00699-a811-46e9-a568-002b7a861595--veganmaccheese1.jpg)


/d214aebb-3acb-42b6-9db5-ec56e91dfc1f--cashew.jpg)


/c5c28f92-623e-459a-9c34-22f22d3f234f--untitled-370-Edit.jpg)

/deebf5b5-4cbe-433d-b927-6cf6d769f0b5--fullsizeoutput_455.jpeg)

/94cab310-b9e2-4533-895c-6d5b1d8fdbb0--static.squarespace-2.jpg)


/2705dcf7-cd69-467a-8bff-e355cba7923c--fullsizeoutput_164f.jpeg)
0 Reviews