

When I posted my recipe for Vegan Wonton Soup the other day, I quickly found out that many of you don’t have access to vegan wonton & dumpling wrappers in your regular grocery store. This is not ok!
As a result, I suddenly felt like an evil person for posting a recipe for vegan wonton soup that many of you were not able to make. What a tease! I had to solve the problem ASAP.
Tah dah! Problem solved.
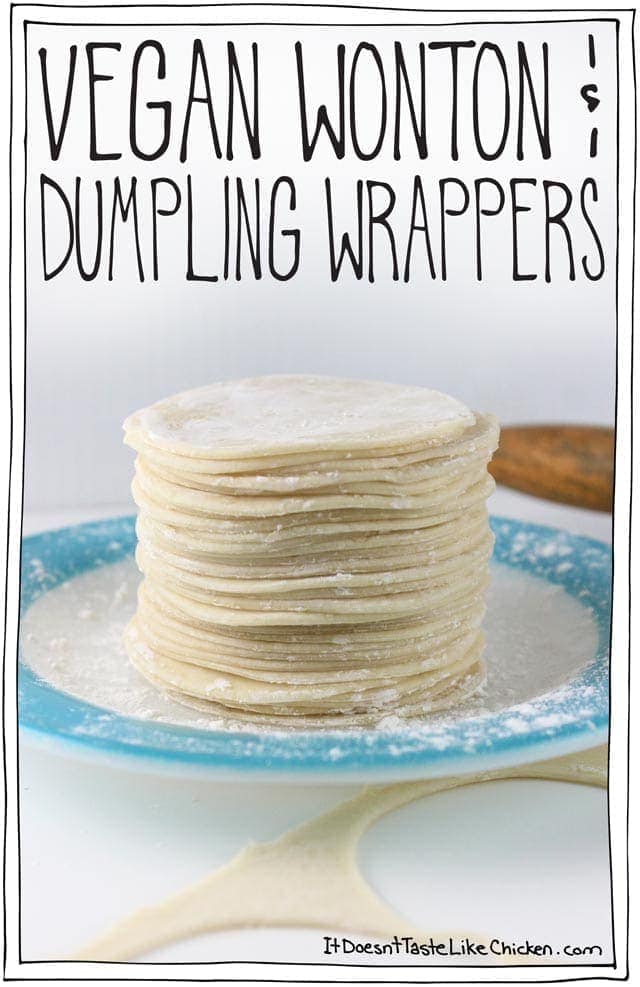
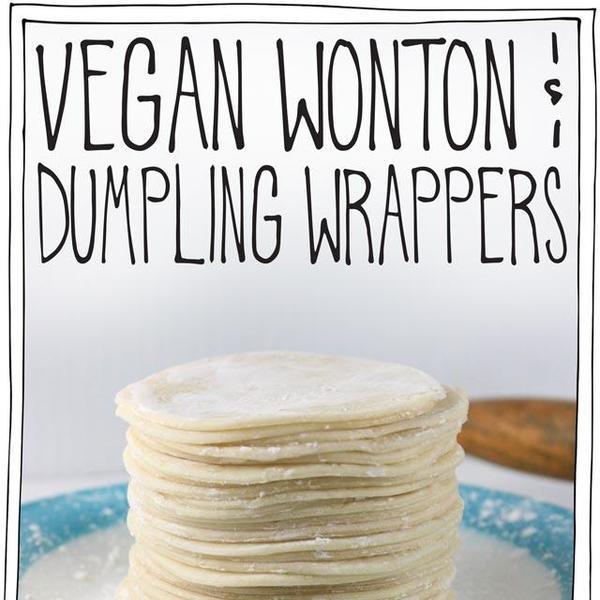
Vegan wonton & dumpling wrappers, hear me roar!
Only 4 ingredients make up these wrappers, and it’s all ingredients you most likely have on hand already. Woot! So last minute dumplings can be totally a thing.
I was actually surprised at how easy they were to make too.
All it takes is some elbow grease and a bit of patience when rolling them out, and they are quite easy. Just the way I like all my recipes!
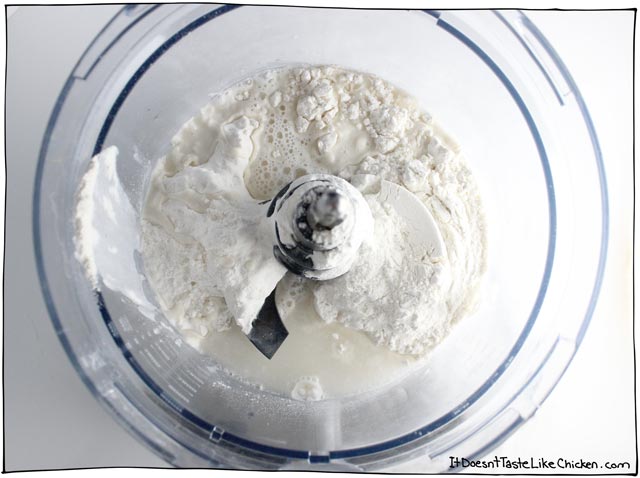
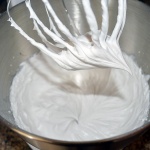
To make vegan wonton & dumpling wrappers: add the flour, water, and salt to a food processor with a dough attachment. Or add it to a mixer with a dough hook. Or add it to a large bowl with a spoon.
I used the food processor method, because -easy- but use whatever you have, they will all work just dandy.
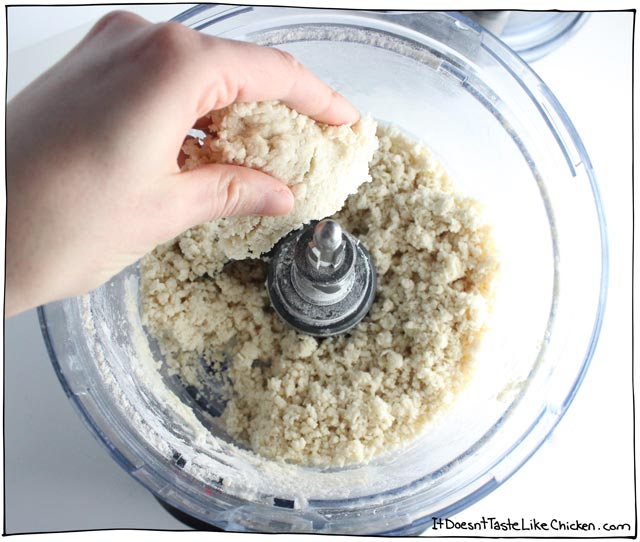
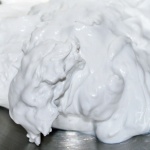
Mix well. The dough might look crumbly, depending on your mixing method, but it should hold together easily when pinched.
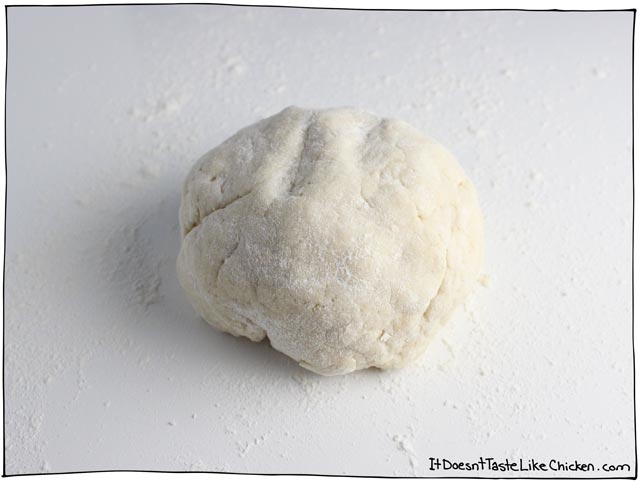
Turn the dough onto a clean work surface, and form into a ball. Cover with a clean, slightly damp tea towel (which will stop the dough from drying out), and let rest for 20 minutes.
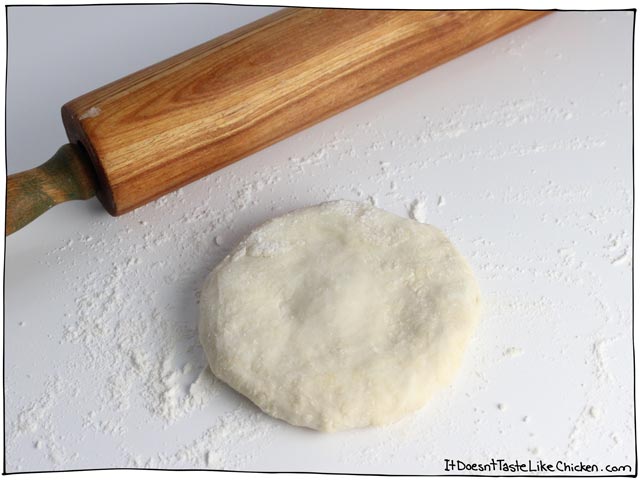
Once rested, break the dough in half, and start your engines! …Rolling pin engines…
Or if you have a pasta machine, you can totally take a short cut and use that to roll out your dough. Just dust the dough with a bit of cornstarch so that it doesn’t stick to the machine, and roll nice and thin.
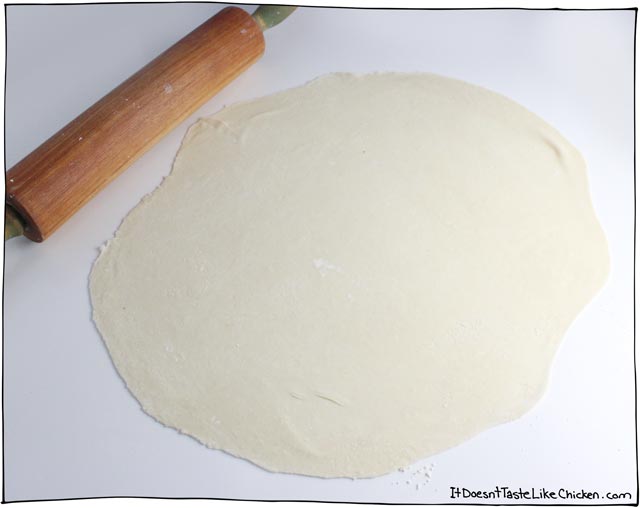
If you are using a rolling pin, like I did, you’re going to need to really get in there. The dough is not fragile like pizza dough, so you don’t have to worry too much about tearing it, you just need the patience and elbow grease to make it as thin as possible. The thinner the better. I found it easiest if I kept unsticking the dough from the counter, and flipping it over ever now and then while rolling.
When I used the wonton wrappers for dumplings later on for dinner, I ended up rolling out each circle a little more before using them to make them even thinner.
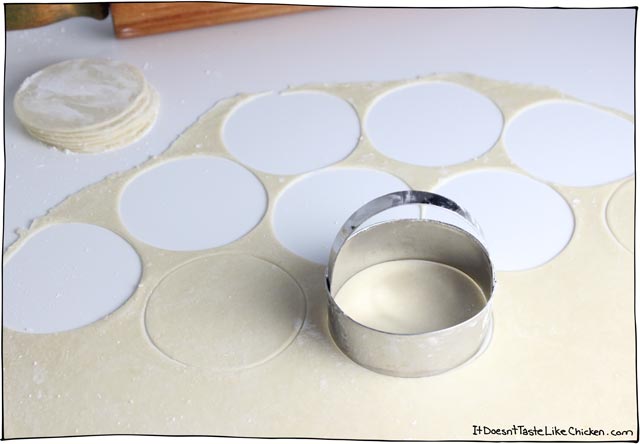
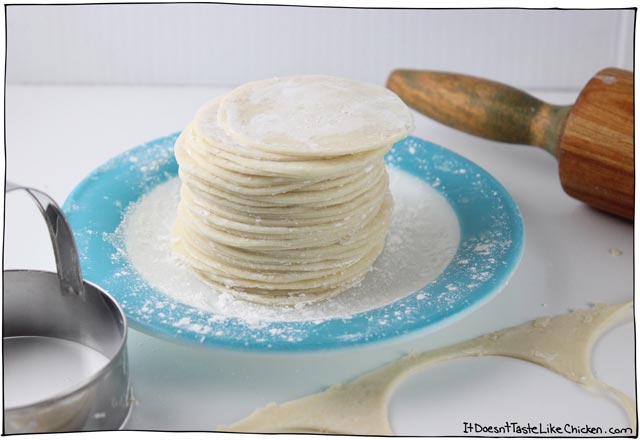
Use a large circle cookie cutter to make round wrappers, twisting the cookie cutter to cut all the way through. Or you can use a knife to cut square wrappers. Lightly dust and rub each wrapper with a bit of cornstarch so that they don’t stick together.
I tried to collect up the scrap dough and re-roll it, but I found this didn’t really work, so I decided to donate the scrap dough to the green bin gods. If you are worried about a little waste, then use the knife method to cut the wontons into squares for the least amount of scraps.
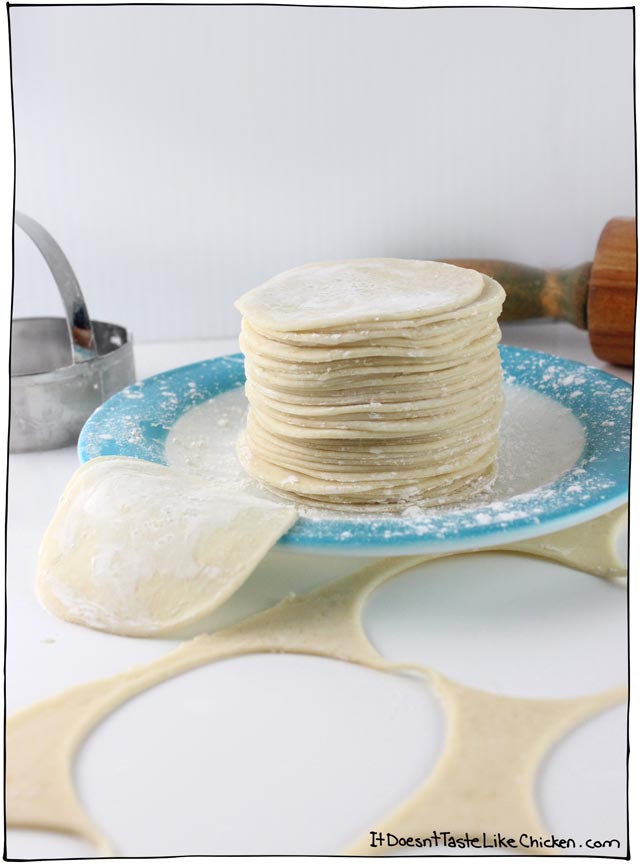
Repeat with the other half of the dough.
You can use your vegan wonton & dumpling wrappers right away, stack them and put them in an airtight container in the fridge for a couple of days, or put that airtight container in the freezer for later.
(click stars to vote)
Just 4 ingredients and easy to make. All it takes is a little patience and elbow grease.
Prep: 30 minutes
Total: 30 minutes
Prep: 30 minutes
Total: 30 minutes
Servings: 30 wrappers
PRINT
PIN
Save
COMMENT
Ingredients
- 2 cups all-purpose flour + more for rolling
- 9 tablespoons (½ cup + 1 tablespoon) warm water
- 1 pinch of salt
- cornstarch for dusting
Instructions
-
Add the flour, water, and salt to a food processor with a dough blade, OR a mixer with a dough hook, OR to a large bowl with a spoon. If using a food processor or mixer, mix very well for a couple of minutes. The dough might look crumbly but should easily hold together when pinched. If mixing by hand, mix until the dough comes together, then turn on a clean work surface and knead for a couple of minutes.
-
Turn the dough onto a clean work surface, and form into a ball. Cover with a clean, slightly damp tea towel (which will stop the dough from drying out), and let rest for 20 minutes.
-
Take about ½ of the dough and roll out as thinly as possible. Alternatively, if you have a pasta machine, dust a small piece of dough with cornstarch, and roll out thinly. Use a large circle cookie cutter to make round wrappers, twisting the cookie cutter to cut all the way through. Or you can use a knife to cut square wrappers. Lightly dust and rub each wrapper with a bit of cornstarch so that they don’t stick together. Repeat with the other half of the dough.
Notes
You can use your vegan wonton & dumpling wrappers right away, stack them and put them in an airtight container in the fridge for a couple of days, or put that airtight container in the freezer for later.
I tried to collect up the scrap dough and re-roll it, but I found this didn’t really work, so I decided to donate the scrap dough to the green bin gods. If you are worried about a little waste, then use the knife method to cut the wontons into squares for the least amount of scraps.
Nutrition
Calories: 22kcal
Did You Make This Recipe?Tag @itdoesnttastelikechicken on Insta and let the world see just how amazing plant-based creations can be!
Cuisine: Chinese, Japanese
Course: Side Dish
Cuisine: Chinese, Japanese
Course: Side Dish
Bon Appetegan!
Sam.
If you like this recipe you might also like: