Blog

  • Vegan Olive Oil Cake

    Vegan Olive Oil Cake

    recipe image

    Vegan Olive Oil Cake

    Photo by Alexandra Burghardt
    • Prep time
      20 minutes
    • Cook time
      1 hour
    • Makes
      9 inch cake
    Author Notes

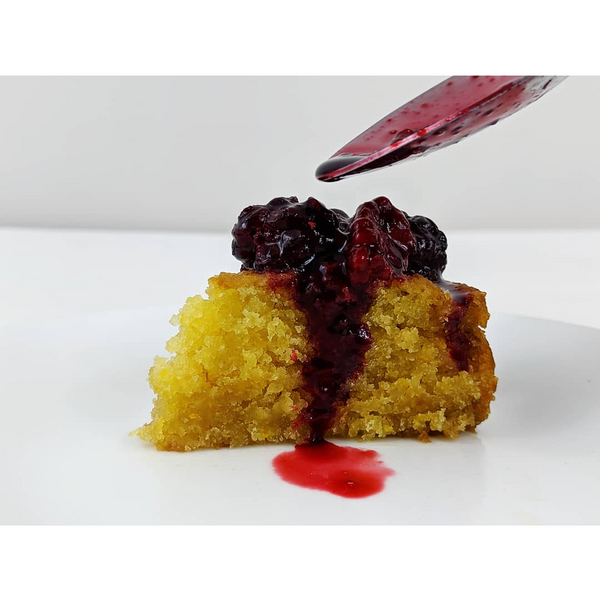
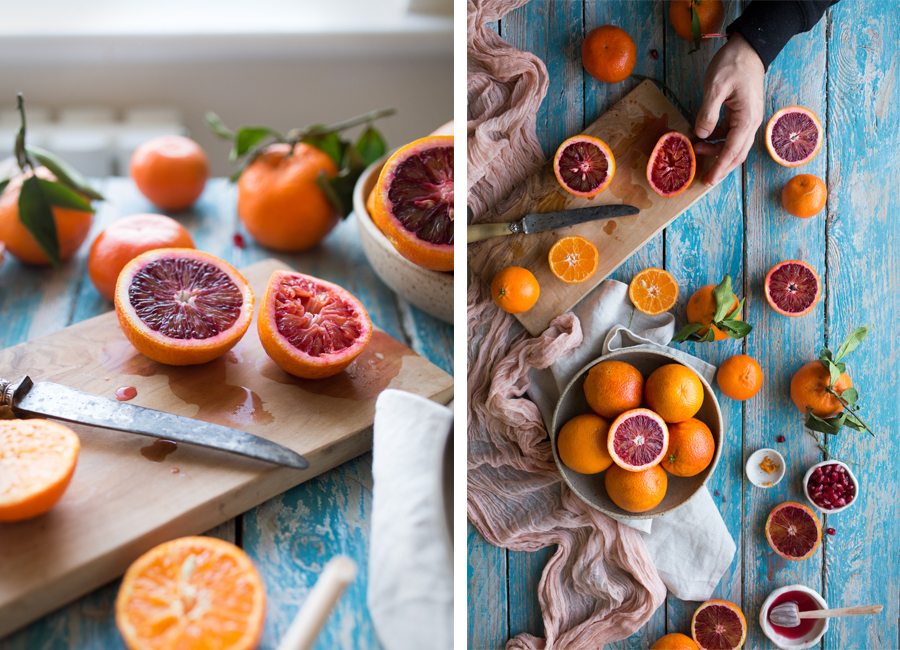
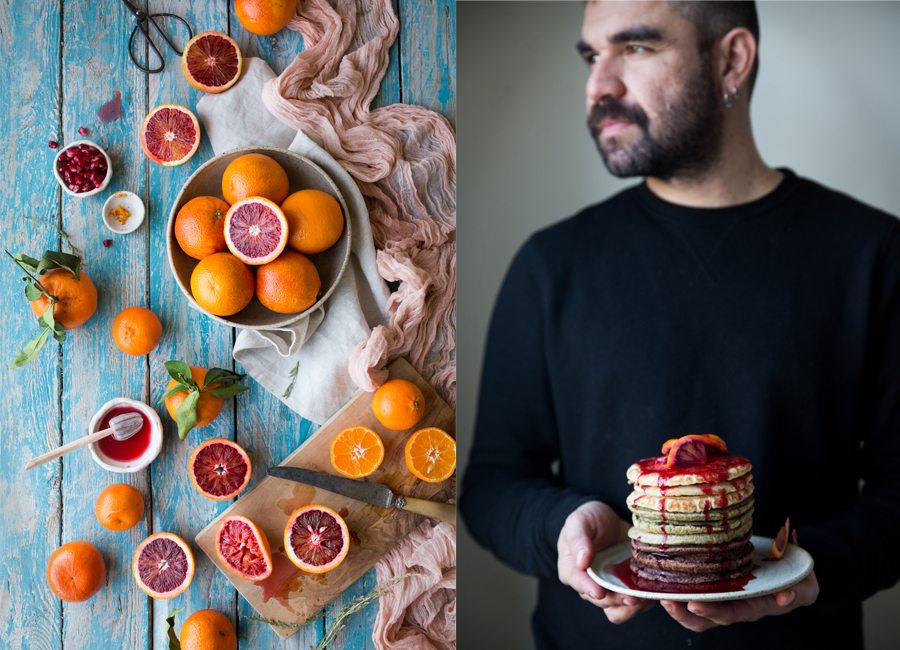
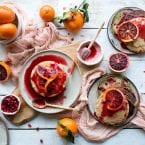
    I adapted Maialino’s Olive Oil Cake to be able to make it for my vegan mother – a perfect brunch dessert for Mother’s Day! My first go around, I tried subbing out the eggs for ground flax seed, and the milk for coconut milk, which ended up with a greasy dense strange tasting cake. Trying to find a better way to help give the cake some lift without eggs, I swapped the whole milk for vegan buttermilk, aquafaba for the eggs, and lowered the olive oil to one cup. Those did the trick and I ended up with a delicious, pudding-like cake, perfect for a summer dessert or brunch treat! —Alexandra Burghardt

    Ingredients

    • 1 cup

      almond milk (or other dairy free milk)


    • 1 tablespoon

      apple cider vinegar


    • 1 cup

      olive oil


    • 9 tablespoons

      aquafaba


    • .5 cups

      orange juice


    • 1

      zest of 1 orange


    • 1.25 cups

      sugar


    • 2 cups

      all purpose flour


    • .5 teaspoons

      baking soda


    • .5 teaspoons

      baking powder


    • 1.5 teaspoons

      salt


    • Fruit for topping

    Directions
    1. Add the apple cider vinegar to the almond milk and whisk to combine, set aside for 5 minutes to thicken.
    2. Preheat oven to 350 – grease and line a 9 inch cake pan with parchment paper.
    3. Whisk together all the wet ingredients very well – aquafaba, olive oil, orange juice, orange zest, and milk / cider mix. I whisked until foamy.
    4. Add the dry ingredients to the wet – sugar, flour, baking soda and powder, salt. My lazy method is to dump them all on top of the wet, whisk the dry stuff on top a bit to combine, before mixing it all in together.
    5. Pour mixture into prepared pan and bake 50-60min, until golden on top and springy to the touch. If it’s underbaked it will have a more oily texture so bake it a bit longer than you think.
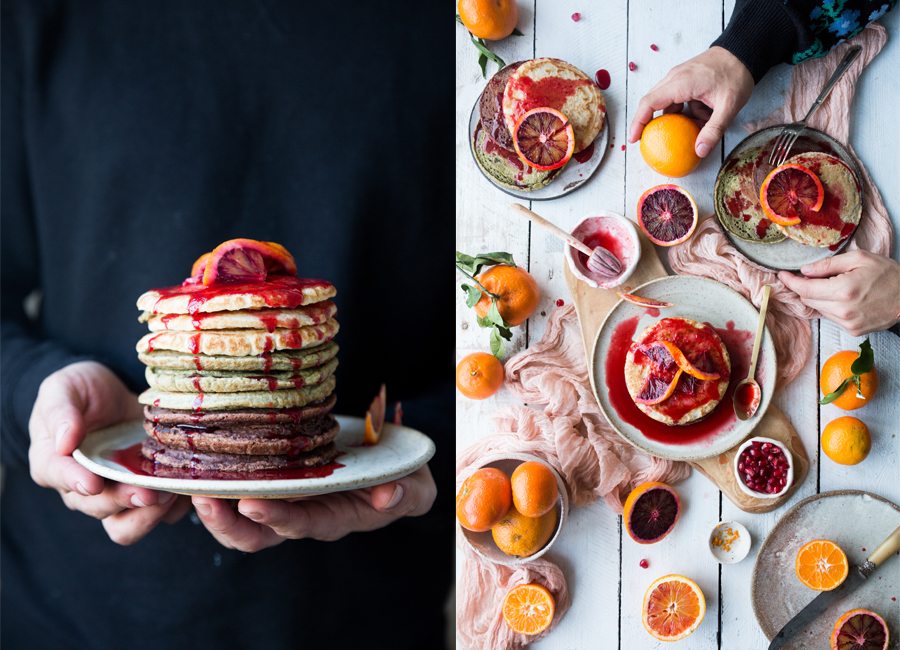
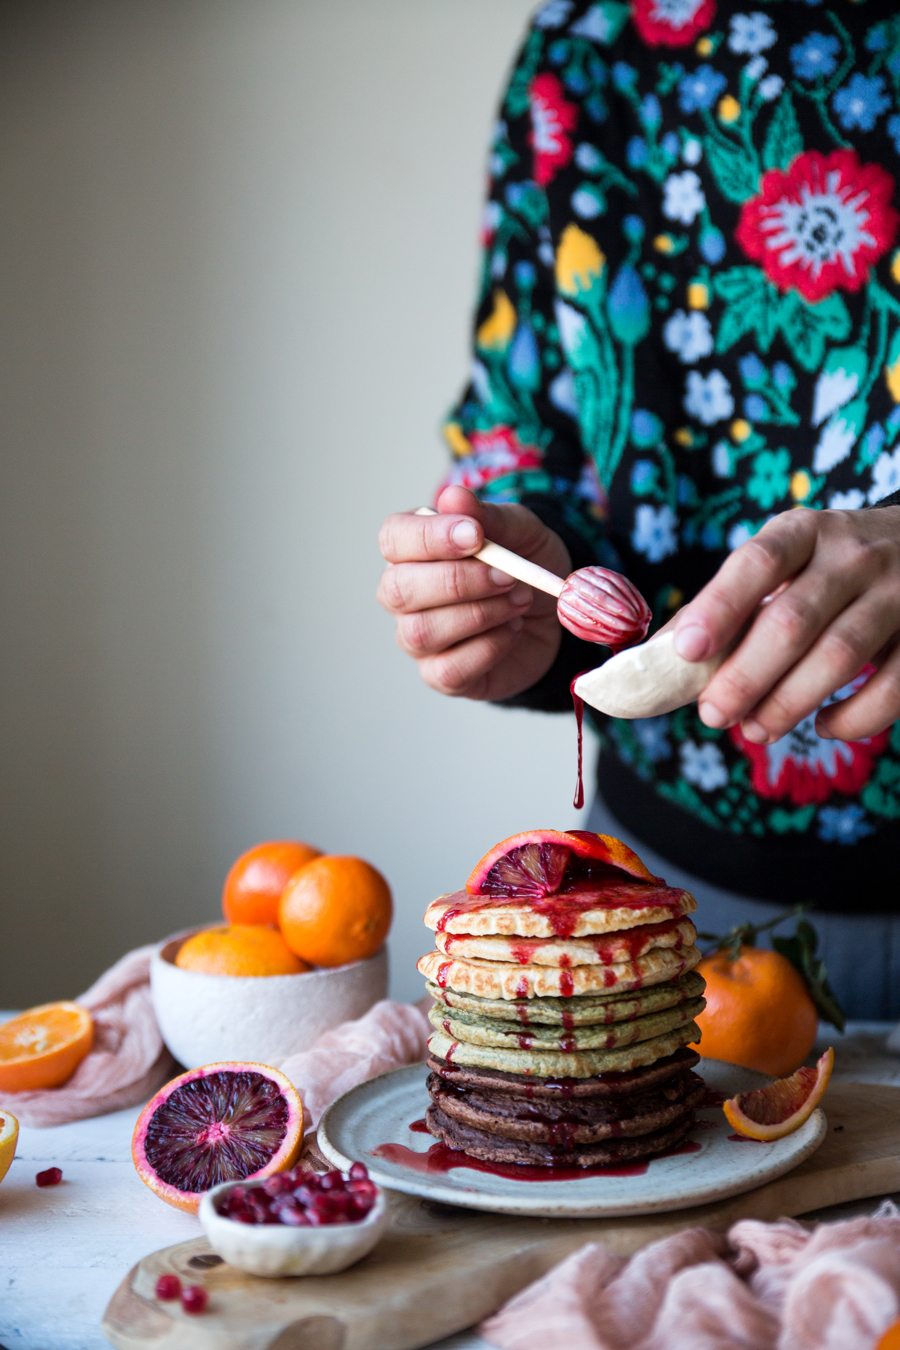
    6. Let cool in the pan 30 minutes, then turn out on to a wire rack to cool completely before cutting. Top with fruit if desired (always a must in my book!)

    Read More

  • Vegan Lasagna

    Vegan Lasagna

    recipe image

    It’s rare for a vegan recipe to taste as good as the original, but this vegan lasagna comes pretty close. It’s the perfect swap when you want a family style recipe for an Italian feast that abides by everyone’s diet restrictions. Maybe someone is dairy-free, another is vegetarian, or you’ve got a bunch of full vegans at your table. Regardless, everyone including the meat eaters will be happy with this meal. 

    This satisfying meat-free lasagna is made with blended cashews for richness and creaminess without any dairy. Mushrooms and spinach add extra heft and a healthy dose of veggies that even your kids will enjoy eating. If you don’t have a ton of experience making cheesy non-dairy alternatives, don’t be intimidated by the cashew cream component. All of you have to do is boil the cashews down until tender and then blend with water and nutritional yeast to get that thick and melty texture. Adding herbs and spices will get you all the flavor you need! 

    Lasagna also makes for an easy make-ahead meal since it freezes and reheats quite well. Whip up this vegan lasagna whenever you have the time during a busy week and pop it into the oven for a warm and hearty dinner that’ll be ready in no time.

    Advertisement – Continue Reading Below

    • 2 Tbsp.

      olive oil, divided

    • 2

      cloves garlic, pressed

    • 1 c.

      raw cashews

    • Kosher salt and pepper

    • 8 oz.

      small cremini mushrooms, cut into ¼ in pieces

    • 8 oz.

      shiitake mushrooms, cut into ¼ in pieces

    • 1 1/2 c.

      marinara sauce, divided

    • 1/4 c.

      nutritional yeast

    • 2 c.

      baby spinach, chopped

    • 1/2 c.

      flat leaf parsley, chopped plus more for serving

    • 1/2 c.

      fresh basil, plus more for serving

    • 8

      no-bake lasagna noodles

      1. Step 1Heat oven to 425°F. Heat 1 tablespoon oil and garlic in a small saucepan on medium until sizzling, about 1 minute. Remove from heat and stir in cashews, then ½ tsp each salt and pepper. Add 1½ cups water and bring the mixture to a boil. Reduce heat and simmer until cashews are tender, 10 to 12 minutes.
      2. Step 2Meanwhile, heat remaining Tbsp oil in a large skillet on medium-high. Add mushrooms, season with ¼ tsp each salt and pepper and cook, tossing occasionally, until golden brown and tender, 6 to 8 min. Remove from heat and stir in 1 cup marinara sauce.
      3. Step 3Transfer cashew mixture to a blender, add nutritional yeast and ¼ cup water and puree until smooth. Transfer to a bowl and fold in spinach, parsley and basil. Spread remaining ½ cup marinara on the bottom of an 8-inch square baking dish. Top with 2 noodles.
      4. Step 4Spread one-quarter (about ¼ cup) mushroom marinara on top, followed by one-quarter of the cashew mixture. Repeat twice. Place the remaining 2 noodles on top; spread with the remaining sauce and dollop with the remaining cashew mixture.
      5. Step 5Cover tightly with an oiled piece of foil (to prevent sticking) and bake for 25 minutes. Uncover and bake until the noodles are tender, 5 to 8 minutes more. Sprinkle with additional parsley and basil before serving. 

    NUTRITIONAL INFORMATION (per serving): About 482 cal, 22.5 g fat (3 g sat), 0 mg chol, 740 mg sodium, 56 g carb, 9 g fiber, 11.5 g sugar (0 g added sugar), 19 g pro

    Did you make this recipe? Comment below!

    Headshot of Kate Merker

    Kate Merker (she/her) is the Chief Food Director of the Hearst Lifestyle Group, overseeing the team that produces food content for several Hearst titles, including Good Housekeeping, Women’s Health, Prevention, Woman’s Day and Country Living. She has clocked nearly 20 years of experience in food media and before that, worked at some of New York City’s finest restaurants. 

    Headshot of Loren Cecil

    Loren Cecil joined the Good Housekeeping team as a freelance contributor in November 2021 after interning in the Test Kitchen while in graduate school. She has an undergraduate sociology degree from Tulane University and a Masters in Journalism from NYU. Her gourmet mom and four years in New Orleans fostered her passion for food and cooking, which she uses to craft mouthwatering write-ups for the Food Department.

    Read More

  • Spicy, Smoky Vegan “Chorizo” Dip

    Spicy, Smoky Vegan “Chorizo” Dip

    recipe image

    Spicy, Smoky Vegan

    Photo by Rocky Luten
    • Serves
      4 to 5
    Author Notes

    This smoky, meat-free puree is a wonderfully creamy dip that you can enjoy on its own or used to jazz up other recipes. It is vegetarian, vegan, and can be made gluten-free (just make sure your soy sauce or tamari are certified gluten-free). Ways to use: On toast, with an egg; with crunchy raw vegetables, crackers, or pita chips for dipping; in a sandwich or on a flatbread with leftover roasted veg; spoon into a frittata or onto pizza, or spread into tacos; in a savory galette.

    Featured in: A Party-Friendly, Smoky, Spicy Dip You’ll Want on Everything. —Izy Hossack

    • Test Kitchen-Approved
    Ingredients

    • 1 teaspoon

      fennel seeds


    • 2/3 cup

      /2 3/4 ounces / 75g sundried tomatoes in oil


    • 3 tablespoons

      sundried tomato oil from the jar


    • 1 1/3 cups

      / 8 1/2 ounces / 240g cooked red kidney beans, drained and rinsed


    • 2 teaspoons

      sweet smoked paprika


    • 1/4 to 1/2 teaspoons

      crushed red pepper, or 1/4 teaspoon cayenne pepper or grinding of black pepper


    • 2 tablespoons

      miso paste, soy sauce, or tamari


    • 2 teaspoons

      apple cider vinegar


    • 2

      garlic cloves, crushed


    • 1/2 teaspoon

      teaspoon granulated sugar or 1 dried date, pitted


    • 1/4 cup

      water

    Directions
    1. In a dry skillet, toast the fennel seeds over high heat, stirring frequently, until they begin to color and smell fragrant. Transfer them to a mortar and crush them with a pestle. Alternatively, pour them onto a cutting board and crush with the back of a spoon.
    2. Using a handheld blender, food processor, or countertop blender, blitz the fennel seeds with the remaining ingredients until smooth.
    3. Store in a lidded container in the refrigerator for up to 3 days or, using a tablespoon, scoop blobs of the dip onto a baking sheet lined with nonstick parchment paper and freeze. Keep the blobs in a labeled and dated sandwich bag for up to 2 months, thawing as needed.
    4. Ways to use: On toast, with an egg; with crunchy raw vegetables, crackers, or pita chips for dipping; in a sandwich or on a flatbread with leftover roasted veg; spoon into a frittata or onto pizza, or spread into tacos; in a savory galette.

    Passionate about cakes, roasted vegetables and anything involving Maldon salt or maple syrup. Izy is a student living in London, UK who spends her spare time blogging and rambling on topwithcinnamon.com

    Read More

  • Vegan Blood Orange Pancakes

    Vegan Blood Orange Pancakes

    recipe image

    A recent trip to South America enabled me to meet the only (!!!!) other Colombian food blogger I know – Julian from Historias del Ciervo. We’d been instagram friends for a few years during which I gleefully watched his following grow exponentially and rejoiced when he was nominated for the Saveur Blog Awards in 2016. He is – to date, as far as I’m aware – the only South American blogger EVER to be nominated by Saveur. Can you imagine how inspiring that is? HUGELY!

    It was lovely we had a chance to hang out during my travels and I was utterly grateful that Julian made time for me and my family, advising us on where in Medellin we should go during our short pit stop there. Needless to say we also spent lots of time geeking out about blogging and photography, which was totally awesome.

    I was delighted to be able to reciprocate the gesture and offer Julian advice on where to go and what to do when he came to London a few weeks ago. We also had enough time to hang out and create a recipe together and after some back and forth quickly decided on making these vegan pancakes with blood orange zest. SO GOOD! You can find his take on the day by clicking here. Do have a look because his photography skills are amazing!

    Back to pancakes… This is my go-to, work-every-single-time, just-use-basic-corner-shop-ingredients pancake recipe, which I adapted from a recipe I found in Gena Hamshaw’s book VEGAN. Making 1/3 of the batter green with matcha power and 1/3 of the batter brown with cacao powder is LOVELY, but totally optional, so no worries if you don’t have either to hand. So hope you enjoy these as much as Julian and I did…


    Click here for the blood orange syrup recipe.

    Print


    5 Stars 4 Stars 3 Stars 2 Stars 1 Star

    No reviews


    • Author:
      Kimberly Espinel


    • Total Time:
      1 hour 10 minutes


    • Yield:
      12 to 14 pancakes 1x

    INGREDIENTS FOR THE PANCAKES:

    • 2 1/4 cups/530 ml plant-based milk (we used almond milk)
    • 1 tsp apple cider vinegar
    • 3 tbs of melted coconut oil + more for frying
    • zest of 1 blood orange
    • 2 cups/250g plain white flour
    • 2 tbs golden caster sugar
    • 1 tbs baking powder
    • 1/2 tsp salt
    • 2 tbs cacao powder (optional)
    • 1 tbs matcha powder (optional)

    INGREDIENTS FOR THE BLOOD ORANGE SYRUP:

    • Click the link above for the recipe.


    Instructions

    1. Place the wet ingredients (milk, apple cider vinegar, zest and melted coconut oil) in a large bowl. Set aside.
    2. In another large bowl mix together the flour, sugar, baking powder and salt. Mix well.
    3. Next combine the wet ingredients with the flour mixture until just combined. Divide the batter into 3 batches (about 1 cup each), placing each in a large enough bowl. Keep one batter mixture as is, add 2 tablespoons of cacao powder to the second batch and mix until combined. Add 1 tablespoon of matcha powder to the last batter stir until combined.
    4. Heat a small pancake pan (12cm) over a medium heat, add some coconut oil to the pan when it’s hot. Then pour the plain pancake batter into the pan, using about 60ml of batter at a time. When bubbles form on top of the pancake and the bottom side looks golden brown, carefully flip the pancake over and brown the other side. Repeat until all the batter has been used. Then prepare the matcha batter in the same way and finally do the same with the chocolate batter.
    5. As the pancakes are cooking, place the blood orange juice together with the sugar in a small pan. Over a low to medium heat reduce the juice until it has the consistency of a syrup, stiring throughout – this took us about 10 minutes or so. Set aside.
    6. Once the pancakes are done, serve immediately and top with the blood orange syrup. DELICIOUS! Enjoy!

    Notes

    Tip 1: To speed up the pancake making process, consider getting a pan where you can fry multiple little pancakes at a time.

    Tip 2: To keep this nut free, please use soya milk or a seed milk instead of the almond milk.

    • Prep Time: 10 minutes
    • Cook Time: 1 hour
    • Category: Breakfast
    • Cuisine: Vegan

    Read More

  • Recipe: Vegan Chocolate-Date Smoothie

    Recipe: Vegan Chocolate-Date Smoothie

    recipe image

    Access to this page has been denied because we believe you are using automation tools to browse the website.

    This may happen as a result of the following:

    • Javascript is disabled or blocked by an extension (ad blockers for example)
    • Your browser does not support cookies

    Please make sure that Javascript and cookies are enabled on your browser and that you are not blocking them from loading.

    Reference ID: #4306c909-c3fb-11ef-8a3d-0a2ee25904af

    Read More

  • Vegan Stuffing

    Vegan Stuffing

    recipe image

    Listen, we all know that stuffing is the best part of a staple Thanksgiving menu. But, because of the butter, eggs and chicken broth that usually goes into classic stuffing, it’s a dish that vegans can’t always enjoy — until now! We created a stuffing that’s so delicious, you might even be convinced to make a few of your other holiday classics into vegan Thanksgiving versions. 

    This stuffing is every bit as flavorful as the classic stuffing you know and love. For the best results, use a quality, hearty loaf of bread and a nice olive oil. To get that classic stuffing texture, either slice your bread up to dry out the night before or toast it in an oven at 200° for about 20 minutes. The drier your bread is, the less mushy it will be after baking. Plus, you’ll get those extra-crunchy tops that are killer.

    Next we’re going to be using veggie stock to bind together the onions, celery and the dried out bread. If you really want to crank this stuffing up a notch (and we suggest you do), use homemade vegetable stock. It’s so easy (ready in around 30 minutes, less than 10 ingredients!) and packs a punch of fresh flavor. 

    The pièce de résistance of this stuffing is the herbs. We packed this stuffing full with thyme, sage and rosemary to give it that cold-weather, holiday cooking comfort. While we love the mouthwatering flavor of fresh herbs (and recommend them), if you don’t have any on hand, no worries! Dried herbs will work as well. 

    Looking for more vegan holiday inspo? Whip up our cauliflower stuffing for a low-carb option, or try out our vegetarian mushroom gravy or vegan mashed potatoes to truly complete your spread!

    Tried making this vegan take on the classic? Let us know how it went in the comments below!

    Editor’s Note: The introduction to this recipe was updated on August 26, 2022 to include more information.

    Advertisement – Continue Reading Below

    • 1

      loaf of crusty country bread

    • Cooking spray

    • 3 Tbsp.

      extra-virgin olive oil

    • 1

      large onion, diced

    • 4

      stalks celery, thinly sliced

    • 6

      cloves garlic, minced

    • 2 c.

      vegetable stock or water

    • Kosher salt

    • Freshly ground black pepper

    • 3

      sprigs thyme, stems removed

    • 2

      sprigs sage, finely chopped

    • 1

      sprig rosemary, finely chopped

      1. Step 1The day before: Slice bread into 1″ cubes and leave out overnight to dry out. (Alternately, place bread on baking sheets and bake at 200º for 20 minutes.)
      2. Step 2Preheat oven to 350° and grease a 3-quart baking dish with cooking spray. Heat oil in a large skillet over medium heat, add onion, and cook until lightly charred in some spots, about 5 minutes. Add celery and garlic and continue to cook, stirring occasionally, until celery starts looking translucent. Add vegetable stock to pan with veggies and scrape up any browned bits with a wooden spoon. Season with salt and pepper.
      3. Step 3Mix bread with vegetable mixture and chopped herbs until well combined and transfer to prepared pan. 
      4. Step 4Cover tightly with foil and bake for 40 minutes. Remove foil and continue to bake until stuffing is golden brown and crisp on top, about 35 minutes more.

    vegan stuffingpinterest

    Parker Feierbach

    Read More

  • Secretly Vegan Cinnamon Rolls

    Secretly Vegan Cinnamon Rolls

    recipe image

    Secretly Vegan Cinnamon Rolls

    Photo by Sabrina Sucato
    • Makes
      14-16 rolls
    Author Notes

    This recipe is a riff off my regular, dairy-friendly cinnamon roll recipe. I developed it after my newly vegan sister requested cinnamon rolls for her birthday. The process was much easier than I expected and not at all intimidating. If I hadn’t made them myself, I never would have known they were vegan. —Sabrina Sucato

    Ingredients

    • 1/4 cup

      warm water


    • 1 teaspoon

      granulated sugar


    • 1 packet

      active dry yeast


    • nonstick cooking spray


    • 1/2 cup

      granulated sugar


    • 3 1/2 cups

      flour


    • 1/2 teaspoon

      salt


    • 2

      whole egg replacements (I use Bob’s Red Mill)


    • 1 cup

      warm nondairy milk (I used almond)


    • 1 1/2 cups

      packed light brown sugar


    • 6 tablespoons

      vegetable oil


    • 1/2 cup

      light corn syrup


    • 2 teaspoons

      cinnamon

    Directions
    1. In a small bowl, mix warm water and one teaspoon of granulated sugar. Sprinkle in the yeast and let stand for two minutes. Swirl together and let stand until foamy, about five minutes.
    2. Use cooking spray to grease the inside of a large bowl. In another large bowl, combine flour, 1/2 cup granulated sugar, and salt. Make a well in the center and pour in yeast mixture, 2 egg replacements, and warm nondairy milk. Slowly mix until the dough comes together.
    3. Place dough on a heavily floured counter and knead until smooth, about 10 minutes. Place the dough into the pre-greased bowl and turn to coat on all sides. Cover the bowl with a towel and set in a warm, draft-free place to rise until doubled in size, about 1 1/2 hours. I recommend putting the dough inside the oven with the oven light on for this.
    4. In a small bowl, mix 3/4 cup brown sugar, 2 tablespoons oil, and corn syrup. Spread the mixture onto the bottom of a rectangular baking pan.
    5. In a small bowl, mix the remaining 3/4 cup brown sugar and cinnamon.
    6. Punch down the dough and roll into a large rectangle (about 10 x 18″). Brush lightly with oil and sprinkle on the cinnamon sugar mixture. On the longest edge, roll dough tightly into a cylinder.
    7. Cut the dough into 14-16 rounds, depending on how big you want the rolls to be. Place the rounds in the pan. They can touch, but should not be too squished together.
    8. Cover the rolls and let rise until doubled, about an hour.
    9. Preheat the oven to 350 Fahrenheit. Brush the rolls lightly with oil. Bake until golden brown, about 30 minutes. I always cook mine slightly under the recommended time so they don’t get too crispy.
    10. Remove pan from the oven and flip immediately into another pan. Let cool slightly and break apart to serve. Enjoy!

    Read More

  • Tartar Sauce

    Tartar Sauce

    recipe image

    Access to this page has been denied because we believe you are using automation tools to browse the website.

    This may happen as a result of the following:

    • Javascript is disabled or blocked by an extension (ad blockers for example)
    • Your browser does not support cookies

    Please make sure that Javascript and cookies are enabled on your browser and that you are not blocking them from loading.

    Reference ID: #4416e3f5-c3fb-11ef-9450-5a0c42877f15

    Read More

  • Vegan Chocolate Chip Cookies Recipe

    Vegan Chocolate Chip Cookies Recipe

    recipe image

    Excellent chocolate chip cookies that just happen to be vegan.

    Why It Works

    • The cocoa butter in chopped chocolate flavors and thickens this dough, which won’t behave the same with mass-produced morsels.
    • Refined coconut oil is odorless and flavorless, with a melting point and creaming properties similar to butter.
    • Nutmeg adds a sense of butteriness.
    • The toasty flavor of dry malt extract mimics the taste of brown butter.
    • An oat slurry provides water, protein, and emulsification, much like a whole egg, but with a subtle flavor that blends seamlessly with the dough.

    These cookies are crisp around the edges and chewy in the middle, with a brown butter-like aroma thanks to some culinary slight of hand—the subtle use of dry malt extract and nutmeg to create some of the toasty, nutty flavors that traditional butter cookies develop as they brown. The result is a cookie that needs no disclaimer—it’s not “good for a vegan recipe,” it’s just plain good.

    Vegan Chocolate Chip Cookies Recipe


    Cook Mode
    (Keep screen awake)

    For the Oat Slurry:

    • 1 1/2 ounces old-fashioned rolled oats, not quick-cooking or instant (about 1/2 cup minus 2 1/2 teaspoons; 42g)

    • 3 ounces water (about 1/3 cup plus 1 tablespoon; 85g)

    For the Dough:

    • 8 ounces refined coconut oil, solid but creamy, about 70°F/21°C (1 rounded cup; 225g)

    • 12 ounces light brown sugar, see note (about 1 1/2 cups, gently packed; 340g)

    • 3 1/2 ounces white sugar, see note (about 1/2 cup; 100g)

    • 1/2 ounce vanilla extract (1 tablespoon; 15g)

    • 2 1/4 teaspoons (9g) Diamond Crystal kosher salt, plus more for sprinkling; for table salt, use about half as much by volume or the same weight

    • 1 1/2 teaspoons baking soda

    • 1/2 teaspoon baking powder

    • 1/8 teaspoon grated nutmeg

    • 2 ounces prepared oat slurry (about 1/4 cup; 55g)

    • 12 1/2 ounces all-purpose flour (about 2 3/4 cups, spooned; 355g), such as Gold Medal

    • 1 1/4 ounces dry malt extract, such as Briess sparkling amber (about 1/4 cup; 35g)

    • 10 ounces dark chocolate, about 72% cocoa solids, see note (not commercial chips), roughly chopped (1 2/3 cups; 285g)

    1. For the Oat Slurry: In tall, narrow container just wide enough to accommodate the head of an immersion blender, combine rolled oats and water. Purée with an immersion blender until thick and smooth, then strain through a fine mesh strainer, pressing on the solids with a flexible spatula until they give up all their liquid. Discard the fibrous oat solids, and reserve 2 ounces of the thick and gooey purée to use as directed below. This should not be done in advance, as the oat slurry will continue to thicken and become unusable over time.

    2. For the Dough: Adjust oven rack to middle position and preheat to 350°F (180°C). Combine refined coconut oil, brown sugar, white sugar, vanilla, salt, baking soda, baking powder, and nutmeg in the bowl of a stand mixer fitted with a paddle attachment. Mix on low to moisten, then increase to medium and beat until light and fluffy, about 5 minutes, pausing to scrape the bowl and beater as needed along the way.

    3. With the mixer still running, dribble in the prepared oat slurry and continue beating until smooth. Shut off the mixer, and scrape the bowl and beater. Meanwhile, sift the flour into a medium bowl, then add the dry malt extract and whisk to combine, about 1 minute (if this mixture is not homogeneous, the cookies will have an irregular flavor and consistency, so take your time).

    4. Resume mixing the slurry on low speed, then add the malt-flour all at once, followed by the chopped chocolate. Continue mixing only until well combined. Because coconut oil is solid below 76°F, the dough will seem crumbly and dry; in a hot kitchen, the dough may seem wet or oily, instead.

    5. Portion the Dough: With a 2-tablespoon cookie scoop, divide the dough into about 32 pieces, firmly compressing each portion into the scoop with the palm of your hand or the edge of the bowl. Arrange on a parchment-lined aluminum baking sheet, leaving 2 inches between each. With the palm of your hand, gently press each portion to minimize its dome. This step is not meant to smash or flatten the cookie dough, but to create a slightly level surface. Sprinkle each with chopped chocolate and a pinch of salt.

    6. To Bake: Bake until the cookies are puffed and golden, but still quite steamy and soft in the middle, about 12 minutes. Due to the unique melting point of coconut oil, the cookies will seem doughy and raw in the middle, but they will become increasingly thick and firm as they cool. Cool directly on the baking sheet until the crumb is set, about 5 minutes. These cookies are best served fresh, or within 12 hours of baking, but leftovers can be kept in an airtight container at room temperature for up to 2 days.

    Special Equipment

    Immersion blender, non-reactive sieve, stand mixer, flexible spatula, 2-tablespoon cookie scoop (optional), half sheet pans

    Notes

    With kitchen temperatures above 74°F (23°C), start by refrigerating the mixing bowl and dry ingredients until cooled to 70°F (21°C). At elevated temperatures, these ingredients and equipment can act as a heat source, warming the dough and causing excessive spread in the oven.

    This Recipe Appears In

    • How to Perfect Vegan Chocolate Chip Cookies, One Ingredient at a Time
    Nutrition Facts (per serving)
    212 Calories
    10g Fat
    29g Carbs
    2g Protein

    ×

    Nutrition Facts
    Servings: 32
    Amount per serving
    Calories 212
    % Daily Value*
    10g 13%
    Saturated Fat 7g 37%
    1mg 0%
    181mg 8%
    29g 11%
    Dietary Fiber 1g 4%
    Total Sugars 18g
    2g
    Vitamin C 0mg 0%
    Calcium 21mg 2%
    Iron 1mg 8%
    Potassium 83mg 2%
    *The % Daily Value (DV) tells you how much a nutrient in a food serving contributes to a daily diet. 2,000 calories a day is used for general nutrition advice.

    (Nutrition information is calculated using an ingredient database and should be considered an estimate.)

    Read More

  • Vegan Salty Peanut Butter Ice Cream Recipe

    Vegan Salty Peanut Butter Ice Cream Recipe

    recipe image

    No-stir peanut butter adds incredible smoothness and body to this coconut-based ice cream. An extra dose of salt cuts through the sweetness and nutty duo of peanut and coconut. Peanut Butter and Company’s Smooth Operator is a delicious and 100% vegan no-stir peanut butter.

    Why this recipe works:

    • A mix of coconut milk and extra-rich coconut cream provide the smooth texture for a creamy vegan ice cream.
    • Corn syrup adds additional plush body to the base.
    • Simmering and puréeing the ice cream base emulsifies coconut fats that could otherwise separate and turn grainy while churning.

    Notes: You can find coconut cream in Chinese and Southeast Asian groceries or online. Don’t use cream of coconut or creamed coconut instead—they’re different products and can’t be substituted. If your diet permits white sugar refined with bone char, feel free to substitute an equal volume of it for the raw sugar in this recipe for a cleaner flavor.

    Read more on the technique behind vegan ice cream.

    Vegan Salty Peanut Butter Ice Cream Recipe


    Cook Mode
    (Keep screen awake)

    • One 13.5ounce can (about 1 3/4 cups) coconut milk

    • One 14-ounce can (about 1 3/4 cups) coconut cream (see note)

    • 1/4 cup “light” (clear)  corn syrup

    • 3/4 cup raw (turbinado) sugar (see note)

    • 1 cup no-stir peanut butter (see note)

    • 1 teaspoon vanilla extract

    • 1 1/4 to 1 1/2 teaspoons kosher salt, to taste

    1. In a medium saucepan combine coconut milk, coconut cream, corn syrup, and sugar and cook over medium heat, stirring frequently, until mixture comes to a simmer. Transfer mixture to blender, add peanut butter, cover very tightly, and blend for 30 seconds. (Alternately add peanut butter to pot and use immersion blender.) Pour into an airtight container, then add vanilla extract and salt to taste.

    2. Cover mixture and chill in refrigerator until it is very cold (at least 45°F, about 4 hours), then churn in ice cream maker according to manufacturer’s instructions. Transfer to an airtight container and chill in freezer until ice cream is firm enough to scoop, about 5 hours.

    Special Equipment

    Blender (upright or immersion), ice cream maker

    This Recipe Appears In

    • 3 (More) Great Vegan Ice Creams With 1 Easy Master Recipe
    Nutrition Facts (per serving)
    623 Calories
    37g Fat
    71g Carbs
    9g Protein

    ×

    Nutrition Facts
    Servings: 8
    Amount per serving
    Calories 623
    % Daily Value*
    37g 47%
    Saturated Fat 22g 111%
    0mg 0%
    387mg 17%
    71g 26%
    Dietary Fiber 2g 7%
    Total Sugars 63g
    9g
    Vitamin C 0mg 2%
    Calcium 32mg 2%
    Iron 2mg 13%
    Potassium 368mg 8%
    *The % Daily Value (DV) tells you how much a nutrient in a food serving contributes to a daily diet. 2,000 calories a day is used for general nutrition advice.

    (Nutrition information is calculated using an ingredient database and should be considered an estimate.)

    Read More