1/3 cup nutritional yeast or parmesan (such as vegan parma), optional
1 cup shredded mozzarella, such as daiya vegan
Instructions:
Instructions
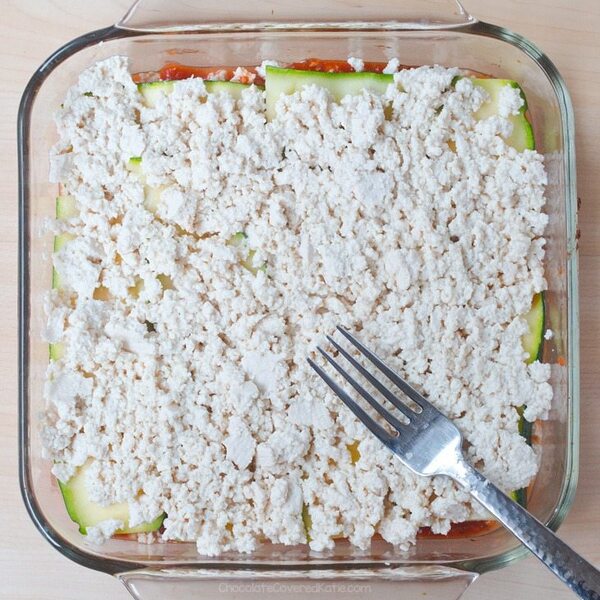
Slice the zucchini so that you get six slices from each. (See photo above.) Spread out on a large plate and sprinkle liberally with salt – don’t worry, most of this will be wiped off later. Let sit for an hour, and you will be amazed at how much moisture this helps bring out of the zucchini. Meanwhile, mash the tofu with the onion, garlic, and optional yeast, then set aside. Wipe all moisture off the zucchini, place on a baking tray, and place on the center oven rack. Now turn on the heat to 450 F and let zucchini cook 15 minutes. Take out zucchini, turn the oven to 375 F, and layer 1/2 cup tomato sauce into the bottom of an 8-inch square pan. Cover the sauce with a layer of zucchini, then spread 1 1/3 cup of the tofu mixture over the zucchini layer. Now add 1 cup sauce, then another zucchini layer, then 1 1/3 cup more tofu. Cover with the final cup sauce, another zucchini layer, and finally cover everything with your cheese. Bake on the center rack 40 minutes, then turn oven off—but don’t open the oven door—and let sit in the oven an additional 20 minutes.
It’s important to not skip either the salting (called “sweating”) or baking stages for the zucchini so your lasagna is not watery.
Green Goddess is a salad dressing usually made of mayonnaise, sour cream, chervil, chives, tarragon, anchovy, lemon juice, and pepper.
For this vegan Green Goddess Dip, I used vegan mayo, vegan sour cream, fresh parsley, tarragon, chives, basil, lemon juice, garlic, mustard, and salt and pepper.
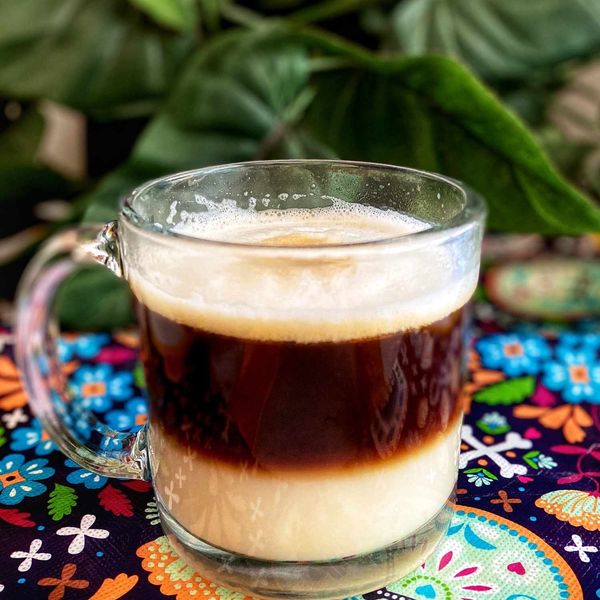
Making this layered drink is super easy in the Ninja Coffee Bar® or just heat and froth your milk of choice and pour over a strong cup of coffee. Aside from being delicious, it’s vegan and skinny!
Submitted by Yoly
Published on December 8, 2016
Cook Mode (Keep screen awake)
Ingredients
This recipe was developed at its original yield. Ingredient amounts are automatically adjusted, but cooking times and steps remain unchanged. Note that not all recipes scale perfectly.
Original recipe (1X) yields 1 servings
½cupalmond milk
2tablespoonssugar-free caramel flavoring syrup (such as Torani®)
2(1 gram) packetsstevia sugar substitute (such as Truvia®)
½cupstrong brewed coffee
Directions
Combine almond milk, caramel syrup, and sweetener in a small saucepan and heat until hot. Froth milk mixture and add to mug, holding back froth with the back of a spoon.
Pour coffee over milk mixture. Add froth
Cook’s Notes:
If using a Ninja Coffee Bar(R), select Cup size, Specialty brew.
You can also heat the milk and syrup in the microwave for 1 1/2 minutes or until milk is hot and bubbling.
Nutrition Facts (per serving)
115
Calories
1g
Fat
26g
Carbs
1g
Protein
Nutrition Facts
Servings Per Recipe 1
Calories 115
% Daily Value *
Total Fat
1g
2%
Sodium
82mg
4%
Total Carbohydrate
26g
10%
Dietary Fiber
1g
2%
Total Sugars
23g
Protein
1g
1%
Calcium
109mg
8%
Iron
0mg
1%
Potassium
154mg
3%
* Percent Daily Values are based on a 2,000 calorie diet. Your daily values may be higher or lower depending on your calorie needs.
** Nutrient information is not available for all ingredients. Amount is based on available nutrient data.
(-) Information is not currently available for this nutrient. If you are following a medically restrictive diet, please consult your doctor or registered dietitian before preparing this recipe for personal consumption.
This recipe was developed at its original yield. Ingredient amounts are automatically adjusted, but cooking times and steps remain unchanged. Note that not all recipes scale perfectly.
Original recipe (1X) yields 6 servings
2tablespoonsgrapeseed oil
1(14 ounce) packagetofu, cut into bite-sized cubes
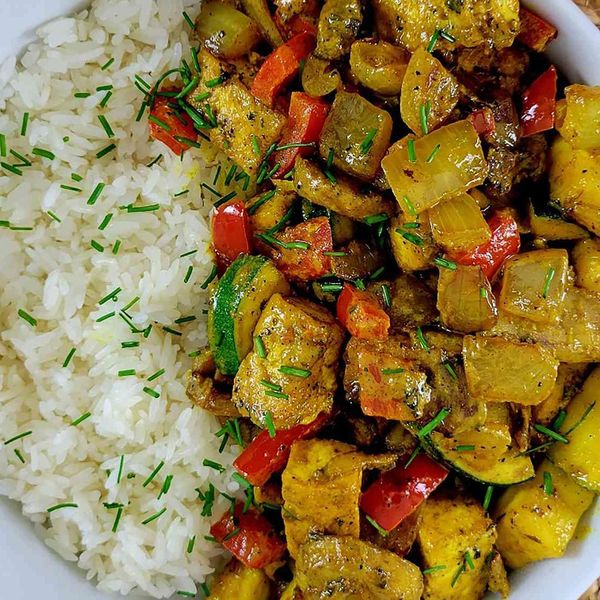
Heat grapeseed oil in a cast iron skillet over medium-high heat. Pat excess water from tofu with a paper towel, and fry tofu in the hot skillet until browned around the edges, about 4 minutes per side. Remove from skillet and set aside.
Add onions, bell peppers, and 1 tablespoon curry powder to the skillet and sauté for 2 minutes. Add zucchini and mushrooms to the skillet; sauté for 3 minutes.
Return tofu to the skillet, add 1 tablespoon curry powder, or more to taste, and mix well. Pour in coconut milk, stir well. Reduce heat to low, cover, and let simmer for 3 to 5 minutes. Season with salt and pepper.
Nutrition Facts (per serving)
138
Calories
10g
Fat
6g
Carbs
8g
Protein
Nutrition Facts
Servings Per Recipe 6
Calories 138
% Daily Value *
Total Fat
10g
13%
Saturated Fat
3g
14%
Cholesterol
0mg
0%
Sodium
7mg
0%
Total Carbohydrate
6g
2%
Dietary Fiber
3g
9%
Total Sugars
3g
Protein
8g
16%
Vitamin C
36mg
40%
Calcium
211mg
16%
Iron
2mg
13%
Potassium
280mg
6%
* Percent Daily Values are based on a 2,000 calorie diet. Your daily values may be higher or lower depending on your calorie needs.
** Nutrient information is not available for all ingredients. Amount is based on available nutrient data.
(-) Information is not currently available for this nutrient. If you are following a medically restrictive diet, please consult your doctor or registered dietitian before preparing this recipe for personal consumption.
I was so excited to get a review copy of Mastering the Art of Vegan Cooking. I love The Shannons blog and always enjoy their recipes.
They do interesting recipes and make the steps simple and easy to understand, so that all cooks can give them a try.
I love the way they dive into old ways that people cooked vegan, like depression cakes when home cooks had no dairy or eggs available to them to make cakes. There is also a price per serving on the recipes which is a great way to do menu planning on a budget.
The first thing I made was a tofu goldenrod. My mother made a non-vegan version with scrambled eggs and it’s served over toast then smothered in gravy. The Shannon’s version was perfect and we will be having it often as a last minute meal.
I’m sharing the blintz recipe with you today and they are rich and delicious. If you shy away from premade vegan cream cheese feel free to substitute a homemade cashew cream cheese or a plain version of my avocado cashew cream cheese.
I had my first blintz when I lived in New York and lived in kosher dairy restaurants. It was before I was vegan, but it was a vegetarian’s dream. I could order anything off them menu so I tried everything.
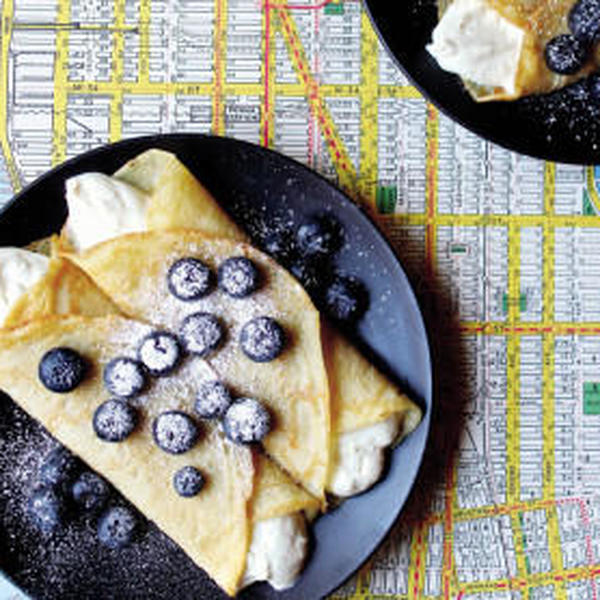
A blintz is basically a crepe with a creamy filling and usually topped with fruit. You couldn’t want anything more for a brunch and I suggest that you invite a few friends over to share these with. Add in some fresh squeezed orange juice and you have a restaurant quality meal on your deck.
Fresh Blueberry Blintzes from Mastering the Art of Vegan Cooking
Blintzes are a New York institution, like the Empire State Building and Yellow Cabs. A blintz is basically a crepe filled with slightly sweet and lemony ricotta filling (in our case, vegan cream cheese and tofu in place of ricotta) and often topped with a fruit compote. We decided to use fresh blueberries to make it a little healthier. ($1.54 PER SERVING)
Ingredients
Filling
1/2 8-ounce package vegan cream cheese
1/2 16-ounce package extra-firm tofu
1/4 cup powdered sugar
1 teaspoon vanilla extract
Zest of 1 lemon
Crêpes
1 1/2 cups white flour
1 tablespoon granulated sugar
1/2 teaspoon baking powder
1/2 teaspoon salt
2 cups soy milk
1/2 cup plus 2 tablespoons vegan margarine, plus more for cooking
1/2 teaspoon vanilla extract
2 tablespoons applesauce
To Assemble
Olive oil cooking spray
1/4 cup vegan margarine, melted
1 1/2 to 2 cups fresh blueberries
Powdered sugar, for dusting
Instructions
Make the filling:In a food processor, combine the vegan cream cheese, tofu, powdered sugar, vanilla, and lemon zest and blend until creamy.
Refrigerate until ready to use.
Make the crêpes:In a large bowl, combine the flour, granulated sugar, baking powder, salt, and soy milk and beat together with an electric handheld mixer. Once the batter is completely blended, add 2 tablespoons of the vegan margarine, the vanilla, and the applesauce.
Blend for 2 to 3 minutes with the bowl tilted so the batter gets light and creamy.
Heat your deepest cast-iron skillet over medium heat and lightly coat it with vegan margarine. (You’ll have to coat the skillet between each crêpe, so keep the margarine out.) Once the margarine begins to bubble, you’re ready to make crêpes.
Using a ladle, pour ⅓ cup of the crêpe batter into the skillet. Immediately rotate the skillet by rolling your wrist while holding the handle until a thin layer of batter covers the bottom. If your skillet is heavy, use a potholder to hold the other side of the skillet and use both hands to rotate the skillet.
Cook until the edges of the crêpe begin to turn light brown. Run a wide spatula along the edge to loosen the crêpe, then flip it and cook the other side until light brown. Transfer the crêpe to a plate, top with a piece of waxed paper, and cover with a clean kitchen towel. Repeat until you have used all the crêpe batter.
Assemble the blintzes: Preheat the oven to
400 ºF. Coat a baking dish with olive oil cooking spray.
Place one crêpe on a flat surface and spoon 3 tablespoons of the filling into the center in a straight line. Fold one edge of the crêpe over the filling and gently press it into the filling, then fold the other sides over and tuck them underneath. Place the blintz on a plate with the seam side up. Repeat until you have filled all the crêpes.
Brush the same skillet in which you cooked the crêpes with some of the melted vegan margarine and set it over medium heat. Once the skillet is hot, place the blintzes in the skillet, seam-side down, and brush with more melted margarine. You may need to work in batches.
Cook the blintzes for about 30 seconds to seal them. Using a spatula, gently roll the blintzes in the skillet and cook them evenly until they are a golden brown and have lightly crispy edges. Try not to brown the blintzes for more than 2 minutes.
Transfer the browned blintzes to the prepared baking dish. Bake the blintzes for 10 to 15 minutes. Remove from the oven and let cool in the dish for 5 minutes.
Serve warm, topped with some blueberries and a pinch or two of powdered sugar.
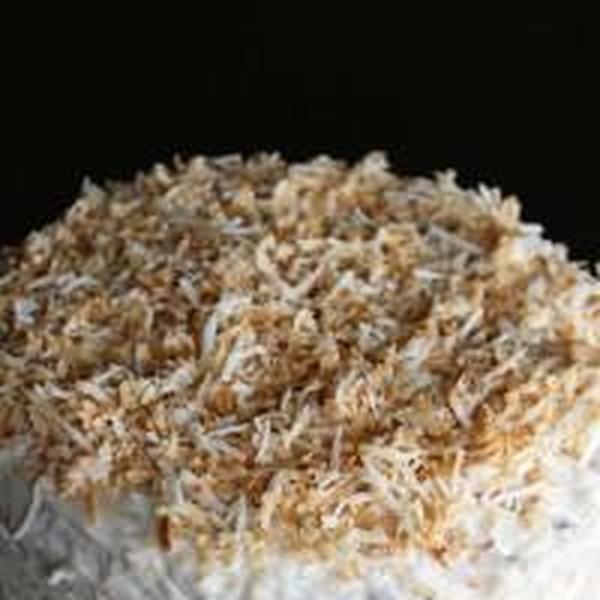
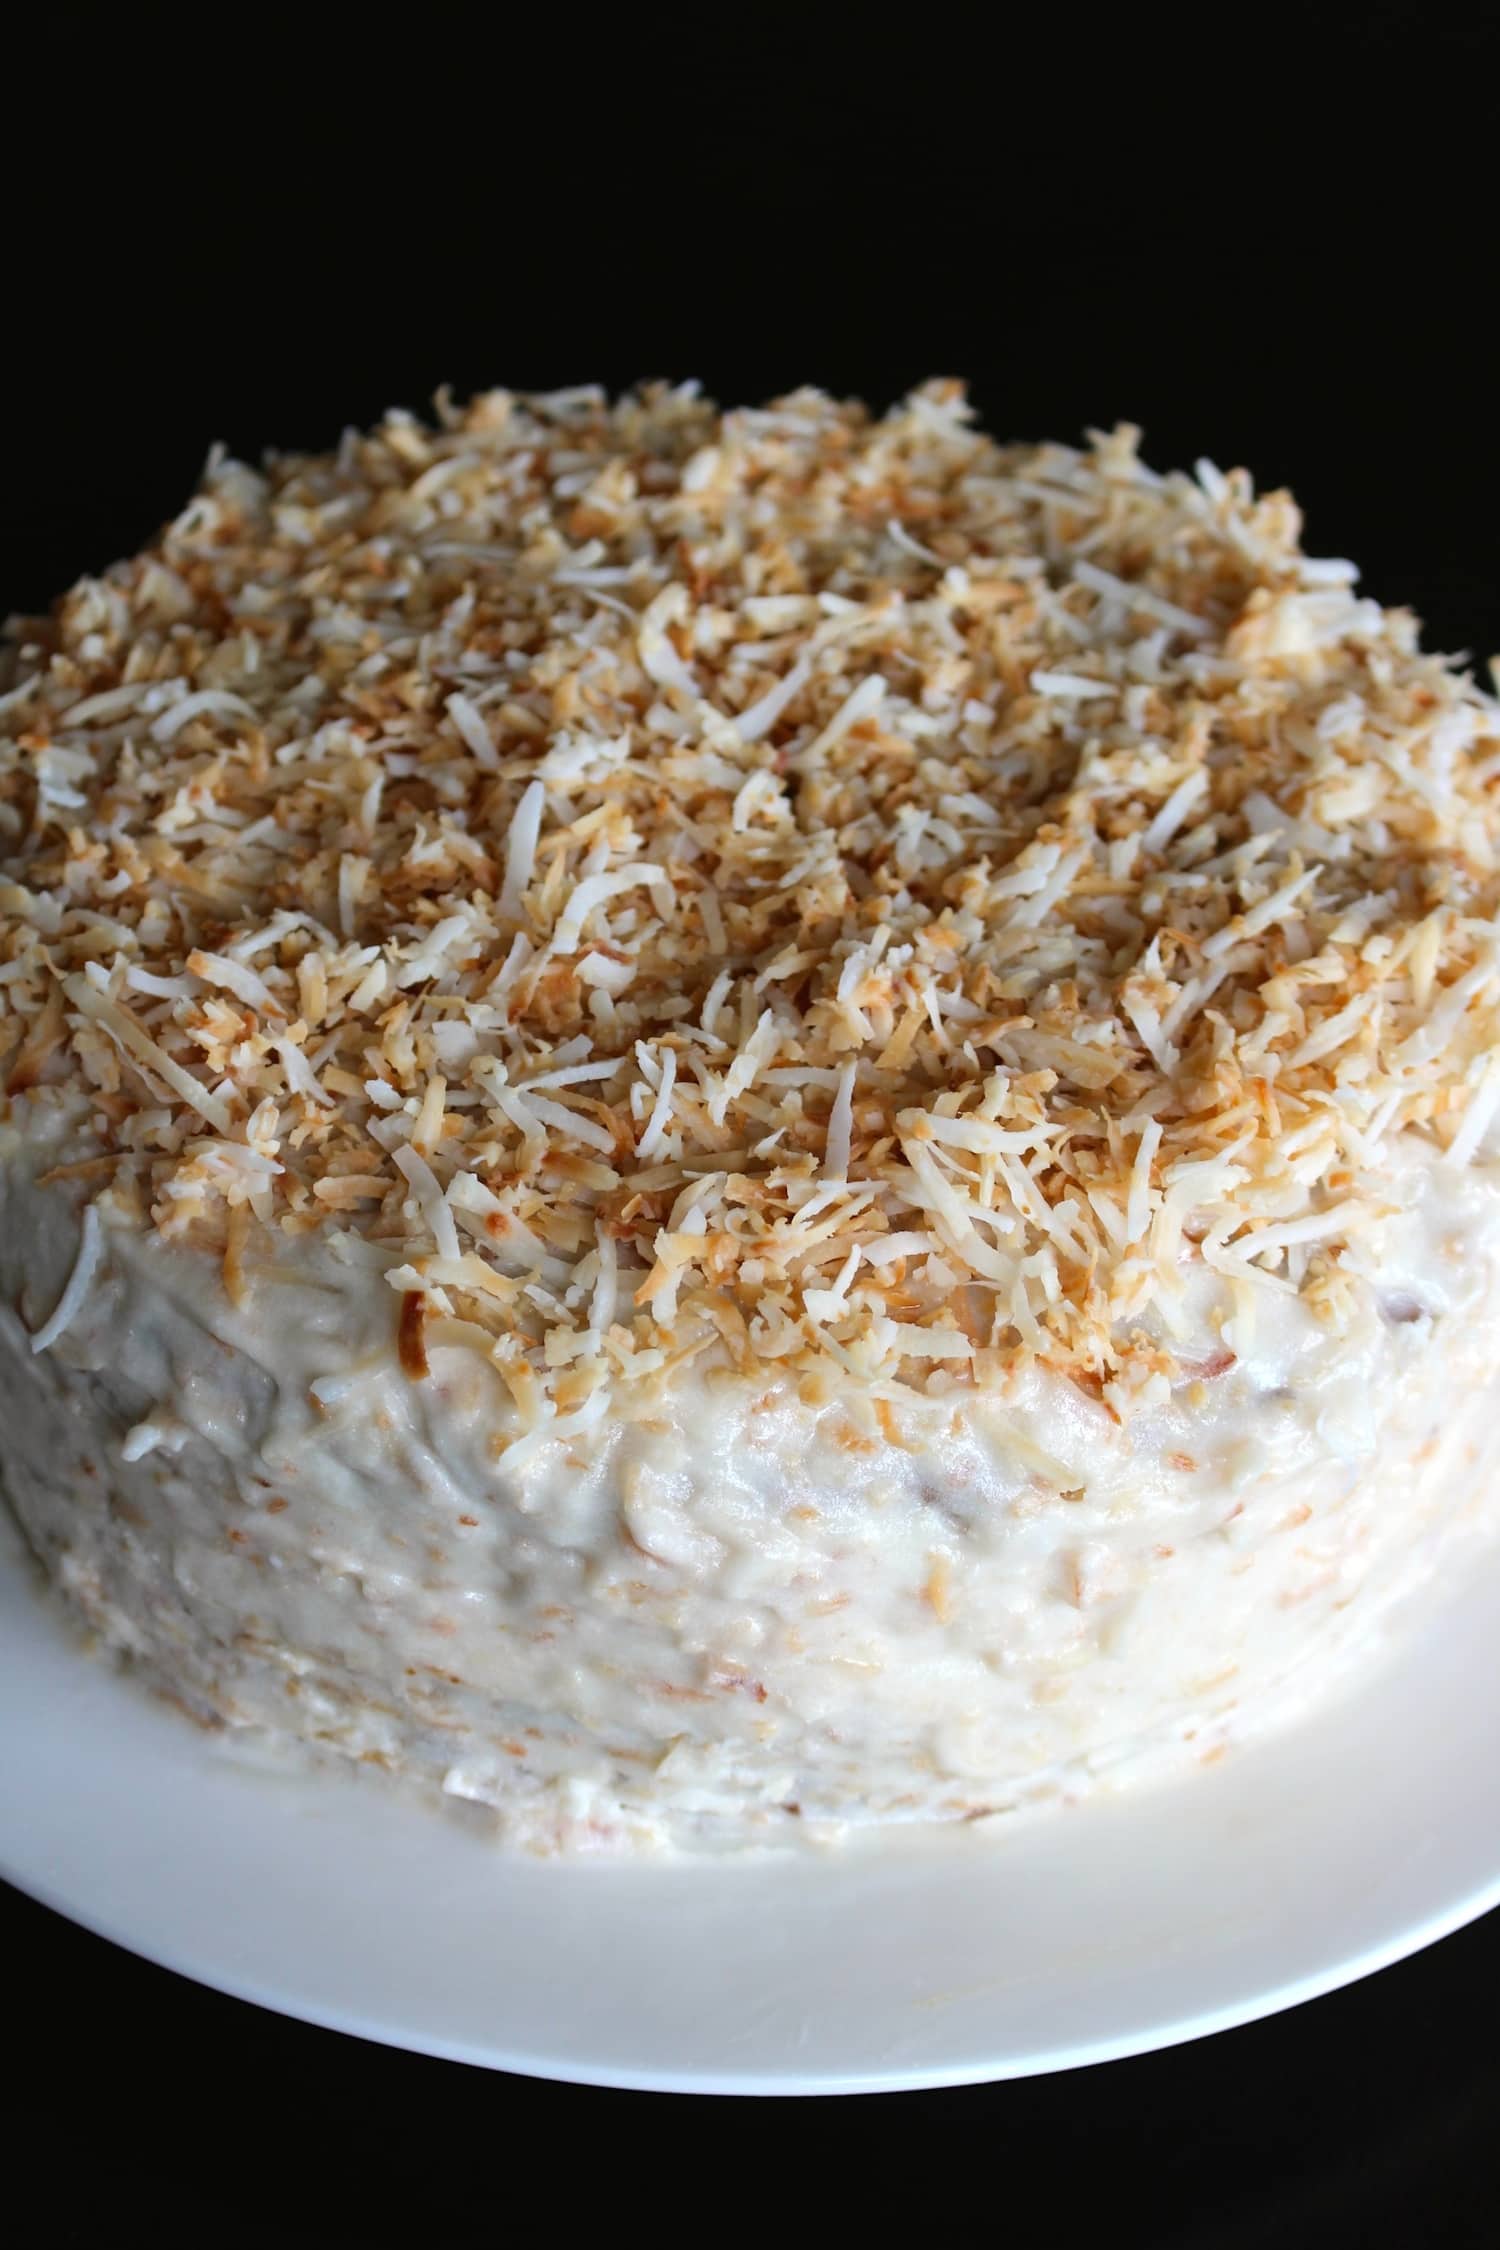
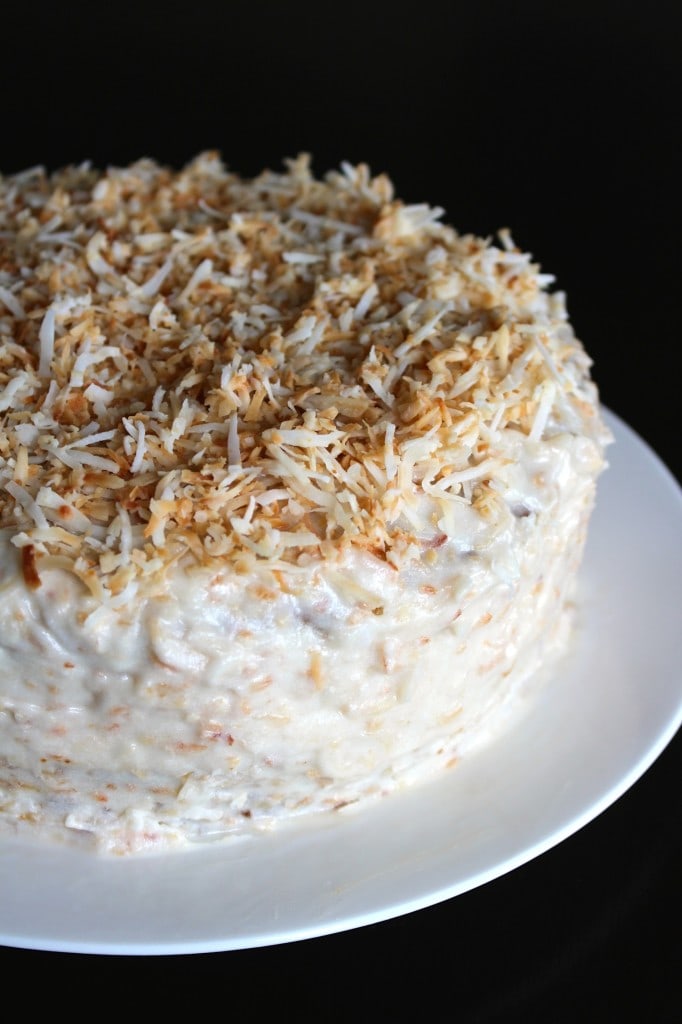
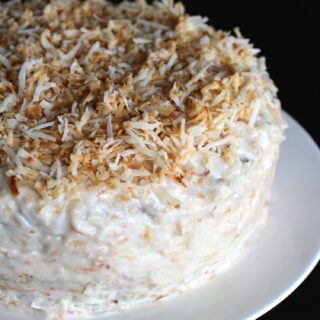
Free of eggs, dairy, and gluten, this rich, creamy and nutty Vegan and Gluten-Free Coconut Birthday Cake is the perfect dessert for any occasion!
I turned 26 on Wednesday.
Gulp.
I know, I know. Everyone hates when I say “I’m getting old!” But seriously, where is the time going?! I’m already past a quarter of a century and 30 is just around the corner. Although I can sometimes get wrapped up in my age, I gotta say, I’ve been able to do some amazing things in my lifetime. I also have so much to look forward to…
ahem…moving to China…
I really am so excited about this upcoming year. Brett and I are ready to dive into life in a new country, language learning, exploring, traveling, crowds and squatty potties. We’ve been living out of suitcases and traveling around Tennessee and Virginia for quite some time now, so we both are looking forward to unpacking and settling down in our new apartment (that we still have to find!). I still can’t believe we leave on Monday!!
But back to birthdays. My actual birthday on Wednesday was really chill. I was home alone at Brett’s parent’s house for most of the day and it was just what I needed. Brett has had a bunch of friends come into town at different times during the week and on Wednesday Brett, his friend Heath, and Brett’s Mom went Kayaking while I stayed back to rest and get some things done around the house. While they were gone I got to Skype with a good friend, organize some of our China things, get in a workout, and bake this amazing Vegan and Gluten Free Coconut Birthday Cake. It was so good for me to get in some down time amidst all our traveling/socializing and before more of Brett’s friends came in and the real partying started.
And can I just say that this cake is dangerous.
Growing up, my Mom would often make an amazingly rich coconut cake for special occasions. It was always one my favorite desserts and I loved that it was so sweet that it would make my tongue tingle. A few days before my birthday I was trying to think of a fun treat to make for my birthday. Since we probably won’t have an oven in China for a while, I knew I wanted to bake something. Randomly I remembered my Mom’s coconut cake. Why not “veganize” it?!
My Mom’s coconut cake recipe calls for boxed yellow cake, pudding mix, and lots of powdered sugar in the cream cheese frosting. I figured I could make a simple white vegan cake and then add in the shredded coconut and walnuts that my Mom’s recipe calls for. Then for the frosting I would use vegan cream cheese and cut back on some of the powdered sugar.
You guys, it was a success! Brett parents and all of Brett’s friends loved it and I couldn’t believe how much it brought me back to my childhood. The texture of the shredded coconut and the crunch of the walnuts take this cake to the next level. And nobody would ever guess that I cut the sugar in the frosting way down. It’s perfectly sweet and creamy.
I will say that this cake was a rare and special treat for me. As you can see from most of the other recipes I post, I’m not a big fan of processed foods like, white flour, vegan cream cheese, and powdered sugar. However I think recipes like this Vegan and Gluten-Free Coconut Birthday Cake are great for anyone who has allergies, is new to a plant based lifestyle, or who just wants to make a cake to prove to the skeptics out there just how delicious a vegan diet can be. Nobody would ever guess that this cake is egg, dairy, and gluten free!
I hope you have a special occasion coming up that you need a delicious cake for, because this Vegan and Gluten-Free Coconut Birthday Cake would be the perfect treat!
I know you don’t count calories, but your readers might like to know that by veganizing the coconut cake, there are 133 fewer calories in your version than the original. I look forward to trying this recipe
“Yo Mama” (a real commenter, see below!)
Thanks so much for posting this recipe! I made this cake for my boyfriends birthday a couple of days ago and it turned out really well. I’d never made anything with gluten free flour before so I was pretty nervous about how it would turn out. I used Bob’s red mill gluten free blend (and did not add xanthan gum-as suggested on the package) and when it first came out of the oven the cake had a strange kind of grainy taste to it. I was worried but decided to go ahead and frost it anyway. I stored it in the fridge over night and took it to my sweethearts house the next day (along with 2 vegan/gf cupcakes from the store just in case my cake was inedible lol) but it turned out great. I guess letting it set over night gave the flavors some time to come together and it totally lost that grainy taste to it.
The coconut, vanilla and walnuts came together really nicely and that frosting is DEVINE!!! Wish I could post a picture here ???? thanks again for the inspiration!
Keirsten
📖 Recipe
Vegan and Gluten-Free Coconut Birthday Cake
Faith VanderMolen
Being free of eggs, dairy, and gluten, this rich, creamy and nutty Vegan and Gluten-Free Coconut Birthday Cake is the perfect dessert for any occasion!
Prep Time 20 minutesmins
Cook Time 30 minutesmins
Total Time 50 minutesmins
Course Desserts
Cuisine American
Servings 12pieces
Calories 734kcal
Instructions
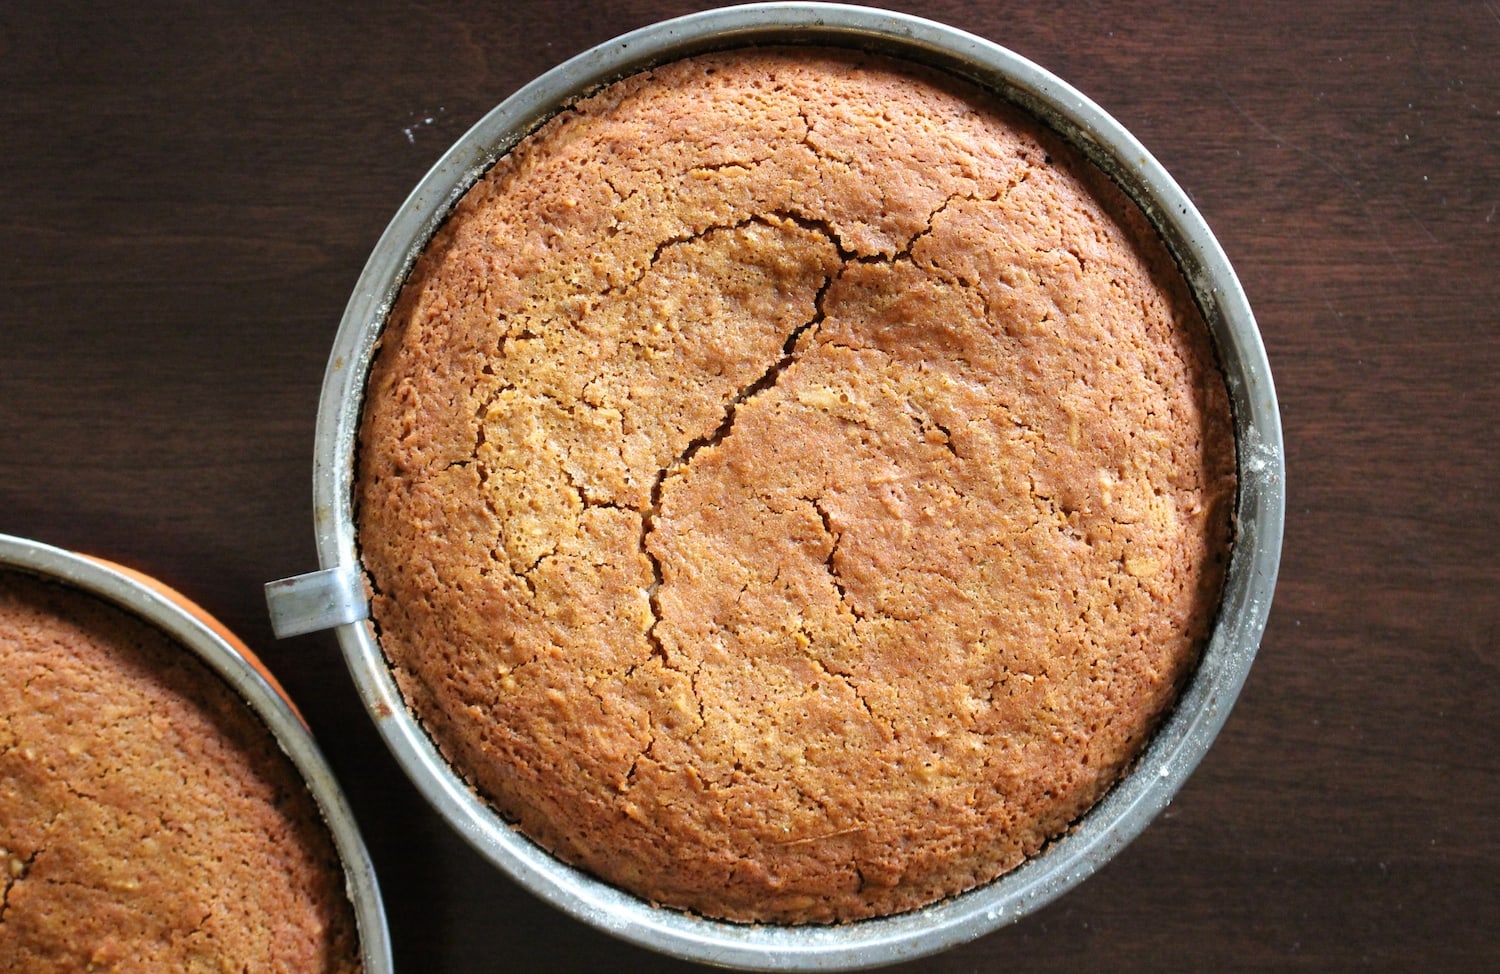
Start by heating your oven to 350°F.
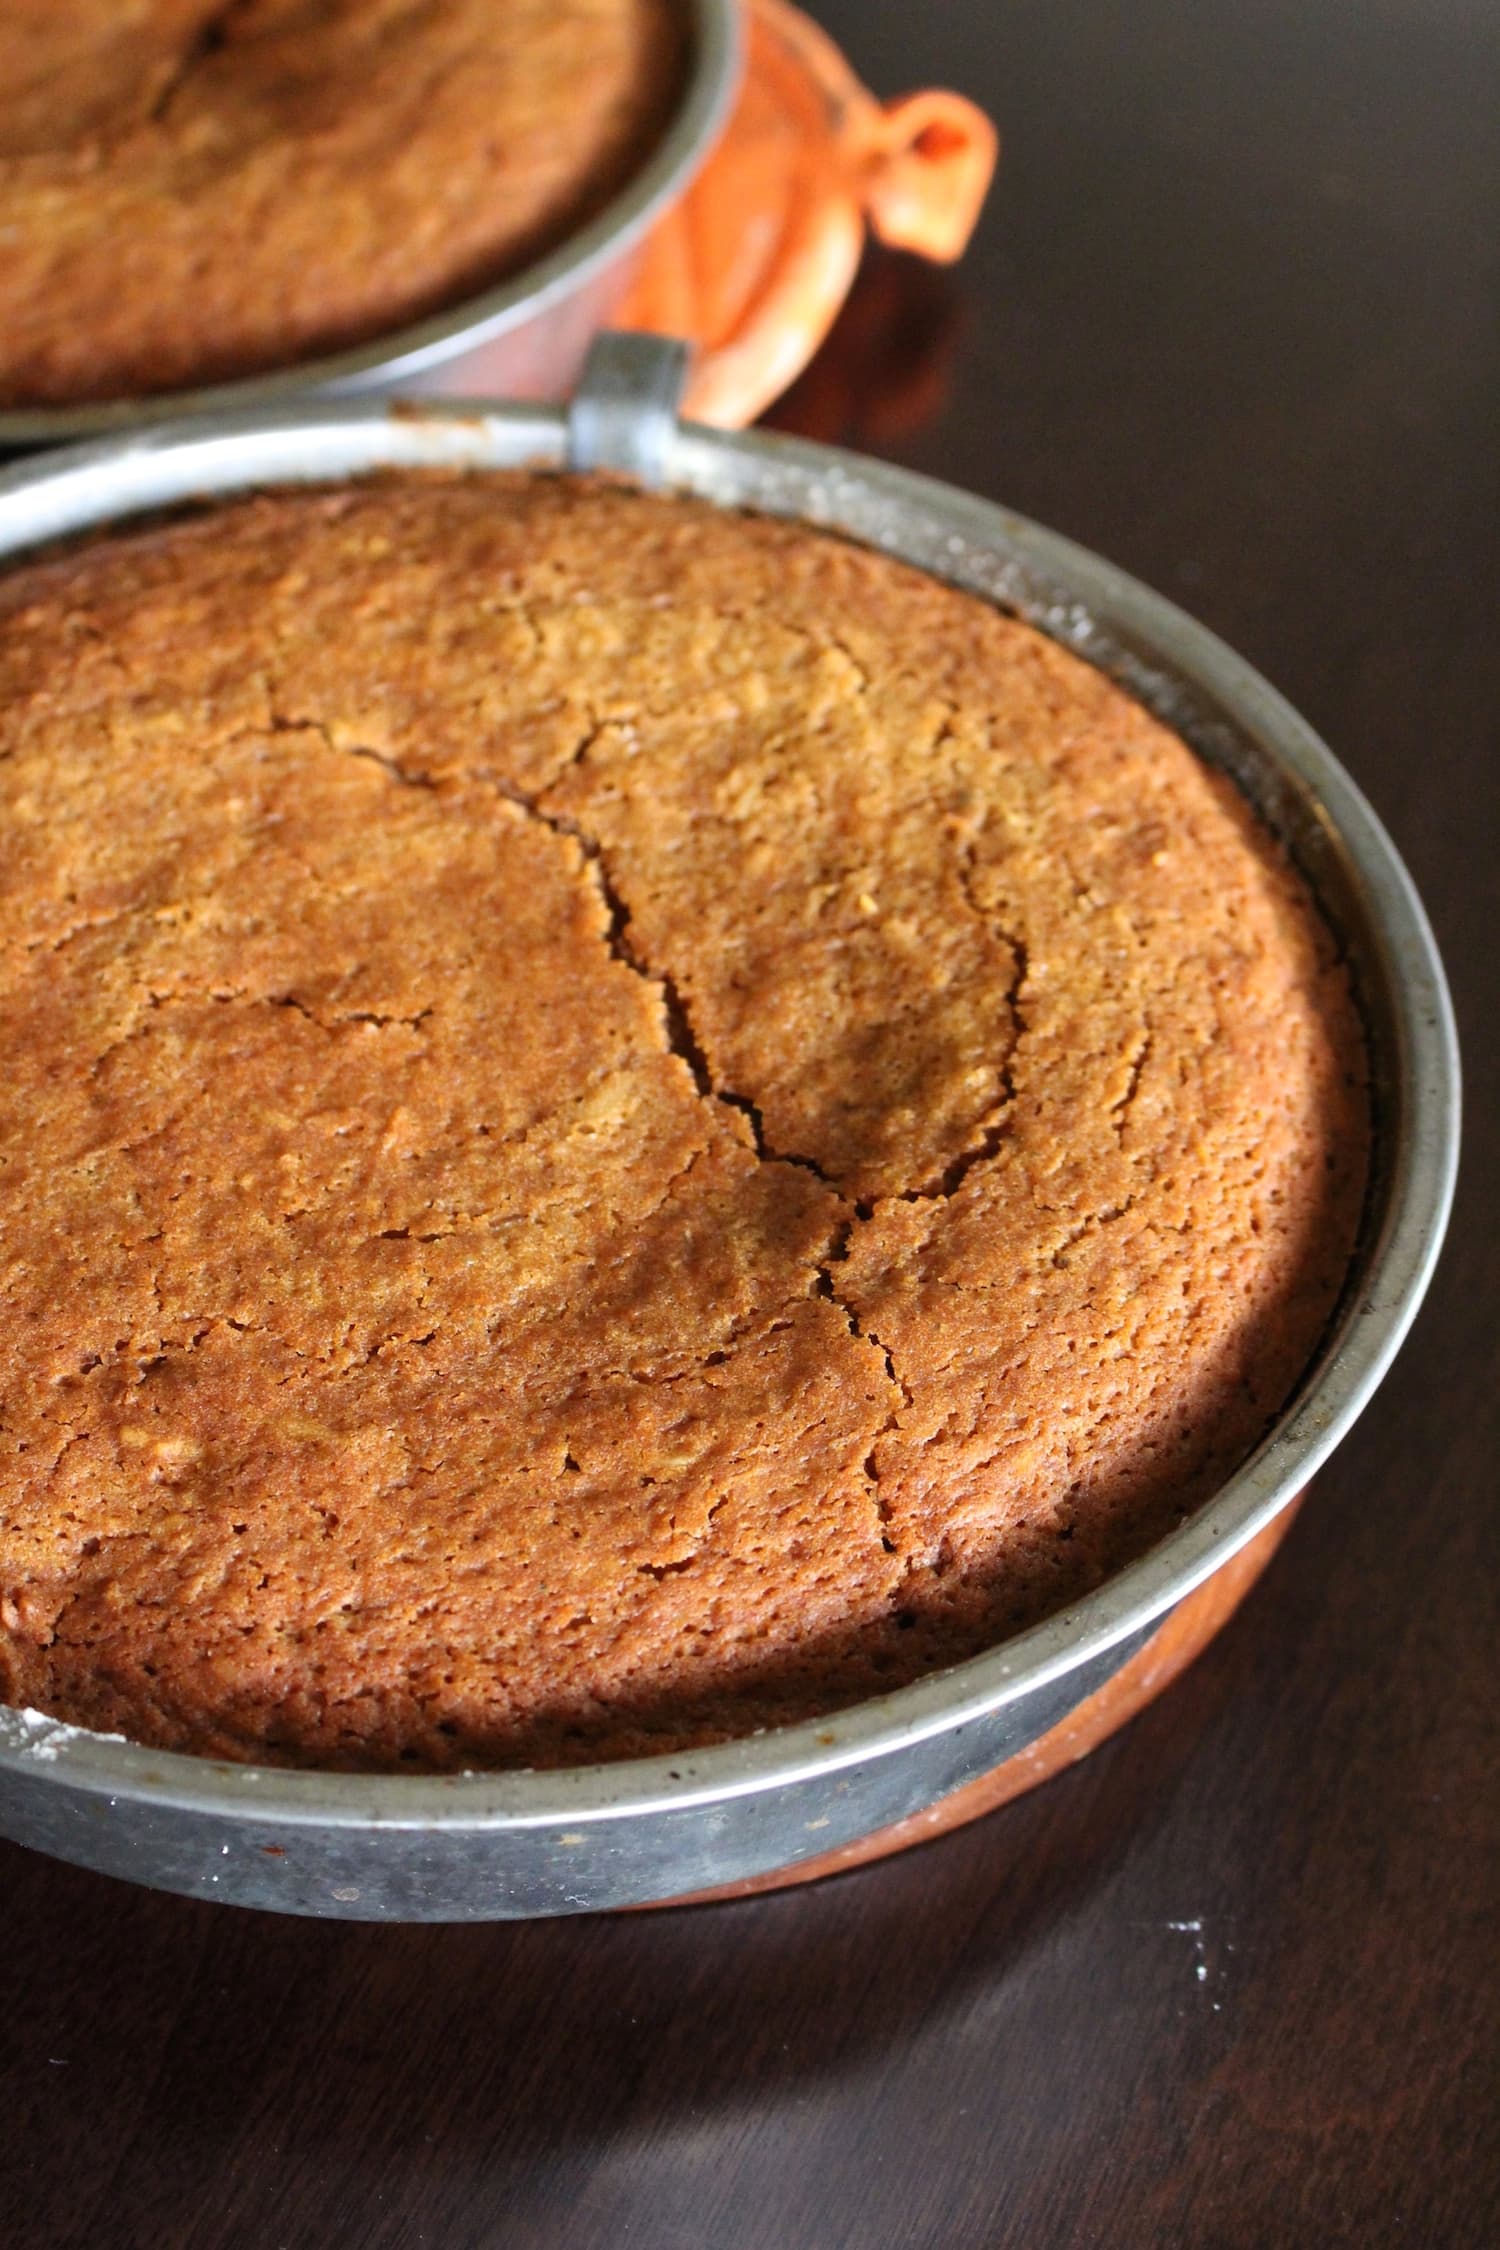
Grease two 8-inch round or square cake pans with non-stick cooking spray and dust with flour.
In a large bowl, whisk together the flour, sugar, baking soda, baking powder and salt.
Add liquid coconut oil*, non-dairy milk, and vanilla extract; whisk until no lumps appear and batter is smooth.
Stir in grated coconut and walnuts.
Lastly, add the vinegar, stir about seven times, and quickly pour into the prepared cake pans.
Bake around 30 minutes, until cake begins to pull away from sides and/or toothpick inserted in the center pulls out clean.
Let sit for ten to fifteen minutes before carefully removing the cakes from the pan and letting them cool.
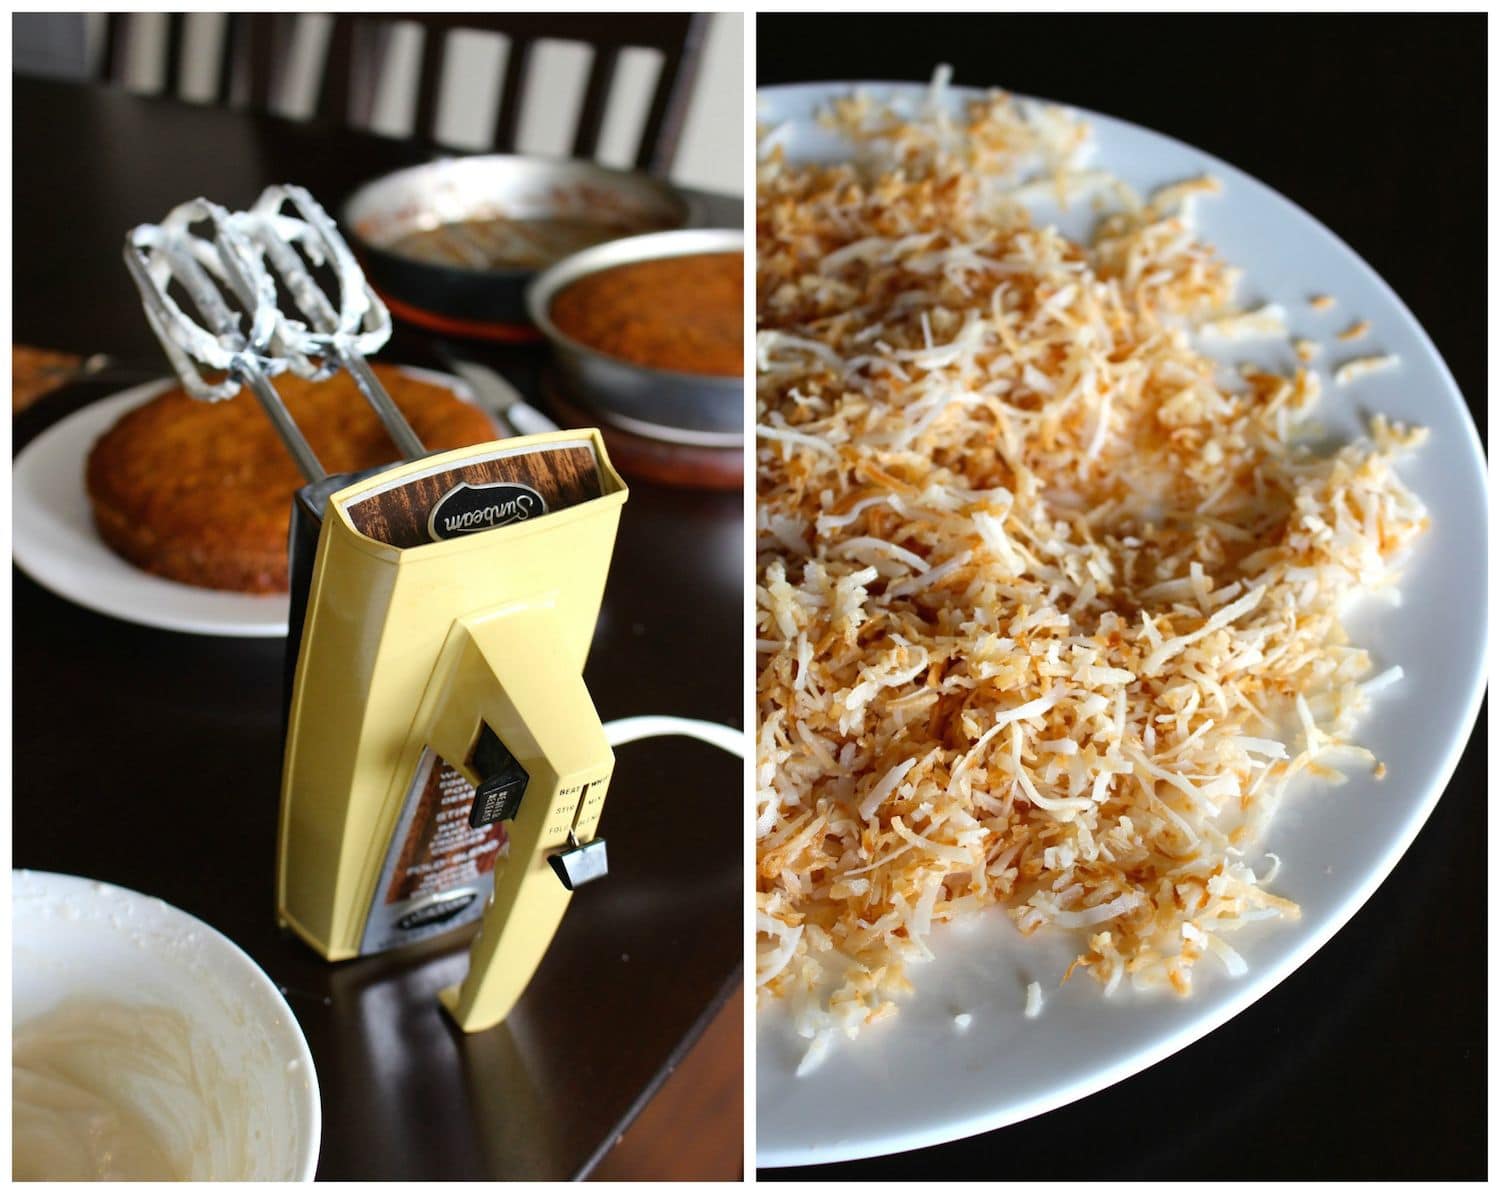
While the cakes is baking, prepare the frosting. In a skillet melt two tablespoons of coconut oil and add in the grated coconut. Stir continually over low heat until the coconut begins to toast and turn slightly brown. Remove the coconut from the pan and allow it to cool.
In a separate bowl cream together two tablespoons of coconut oil with the vegan cream cheese. Add in two teaspoons of non-dairy milk and then cream in the powdered sugar slowly, in small batches.
Stir in 1 ½ cups of the toasted coconut and leave the remaining ½ cup aside to add to the top of the cake at the end.
Place the frosting in the fridge for about 30 minutes to thicken up.
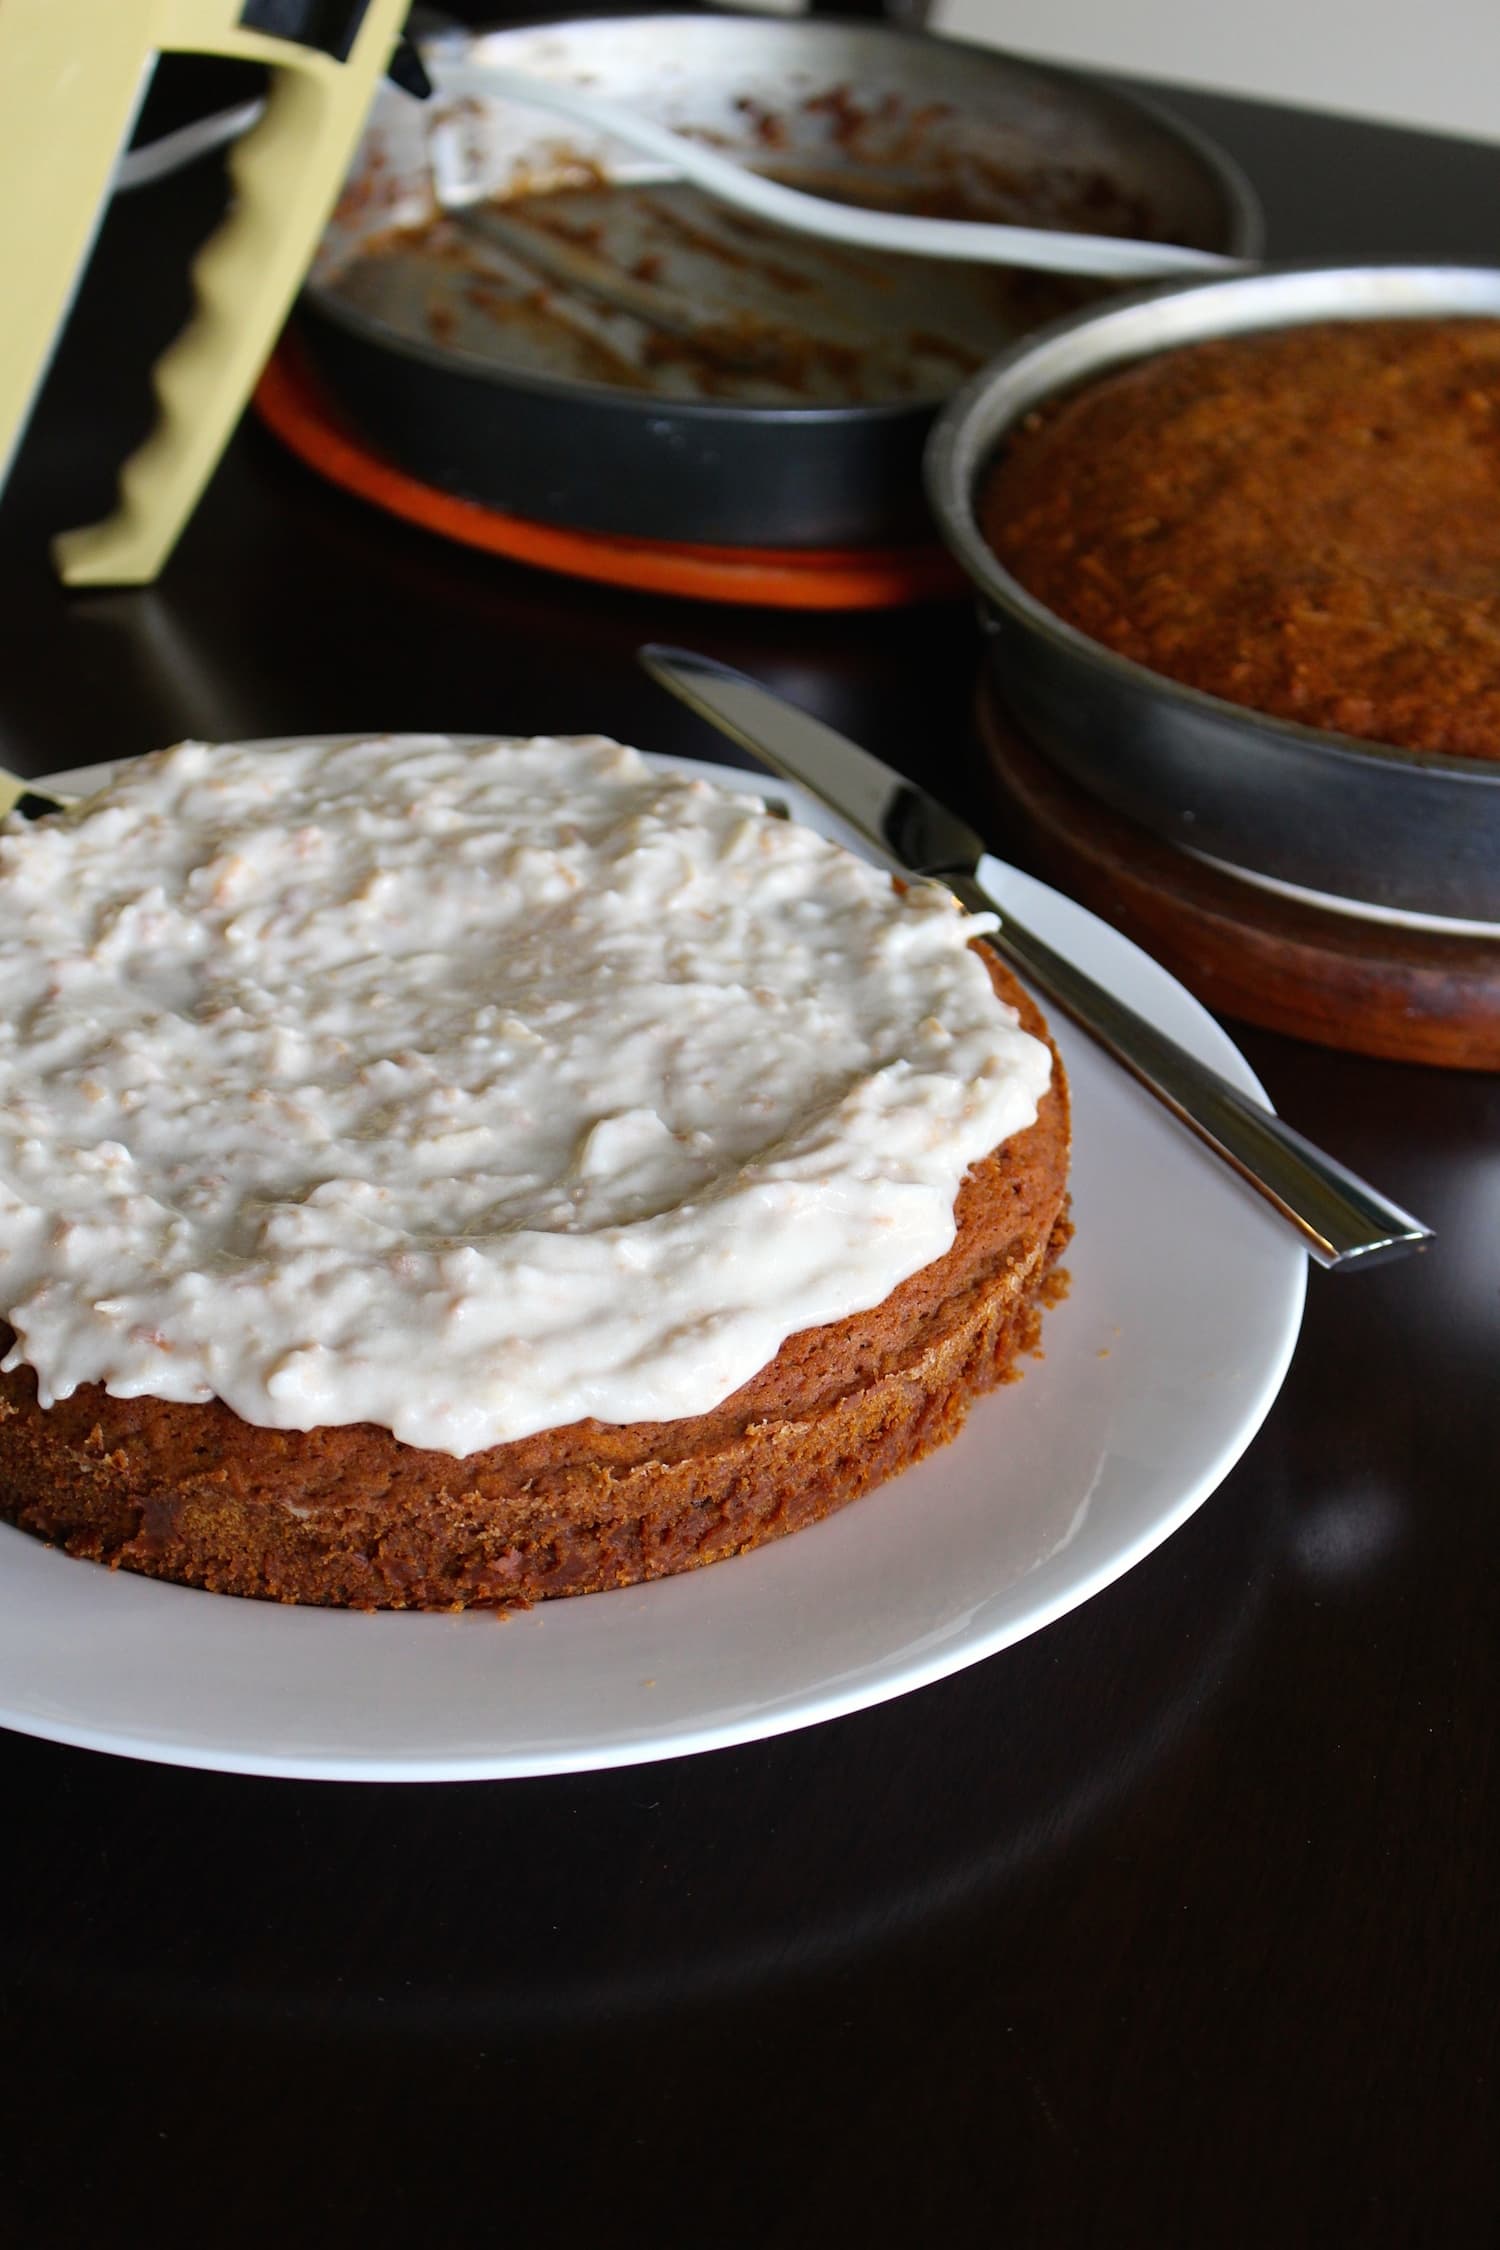
Assemble the cake:
Place one of the circle cakes onto a plate and spread ⅓ of the frosting on top of it. Then place the second cake on top of the frosting and press to secure the cakes together.
Spread the remaining frosting onto the top of the cake and spread it evenly across the entire top and sides of the cake.
Garnish the top of the cake with the remaining toasted coconut.
If possible, place the cake in the fridge for about 1 hour to allow the frosting the thicken.
Cut and serve!
Notes
Because I cut down the amount of powdered sugar in the frosting, it will seem a bit liquidy at first, but simply place it in the fridge for about ½ hour and it will begin to thicken up. It’s delicious!
*You can also use regular cane sugar.
Cover any leftover cake with plastic wrap and store it in the fridge for up to a few days.
Plant Biased is my new cookbook and beginner’s guide to eating a more plant based diet! I describe it as “the book I wish I had when I went vegan back in 2013.”
Plant Biased includes…
90+ beginner recipes! My top breakfast, main dish, dessert & snack recipes!
Why Plant Biased? Understand the “why” behind your choice to go plant-based!
Vegan Cooking Basics: What you need to know and what to avoid when cooking.
Grocery Shopping: How to confidently find healthy, unprocessed foods at the store.
Nutritional Guidelines: Make sure you meet all your nutritional needs!
Kitchen Essentials: Learn to create a place where you’ll LOVE to cook!
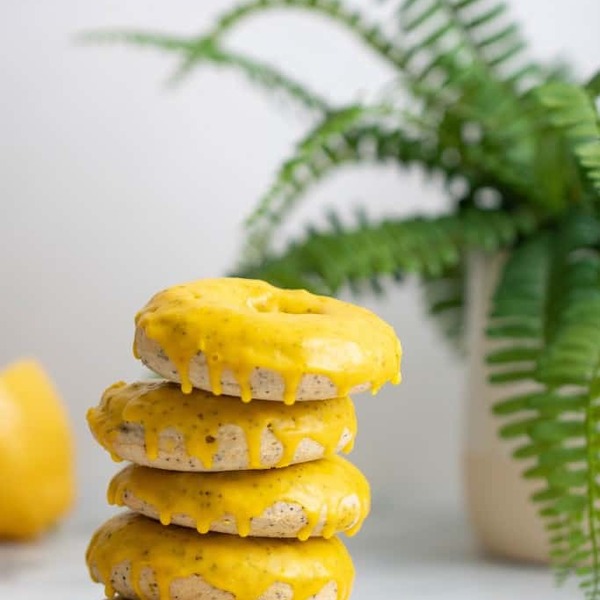
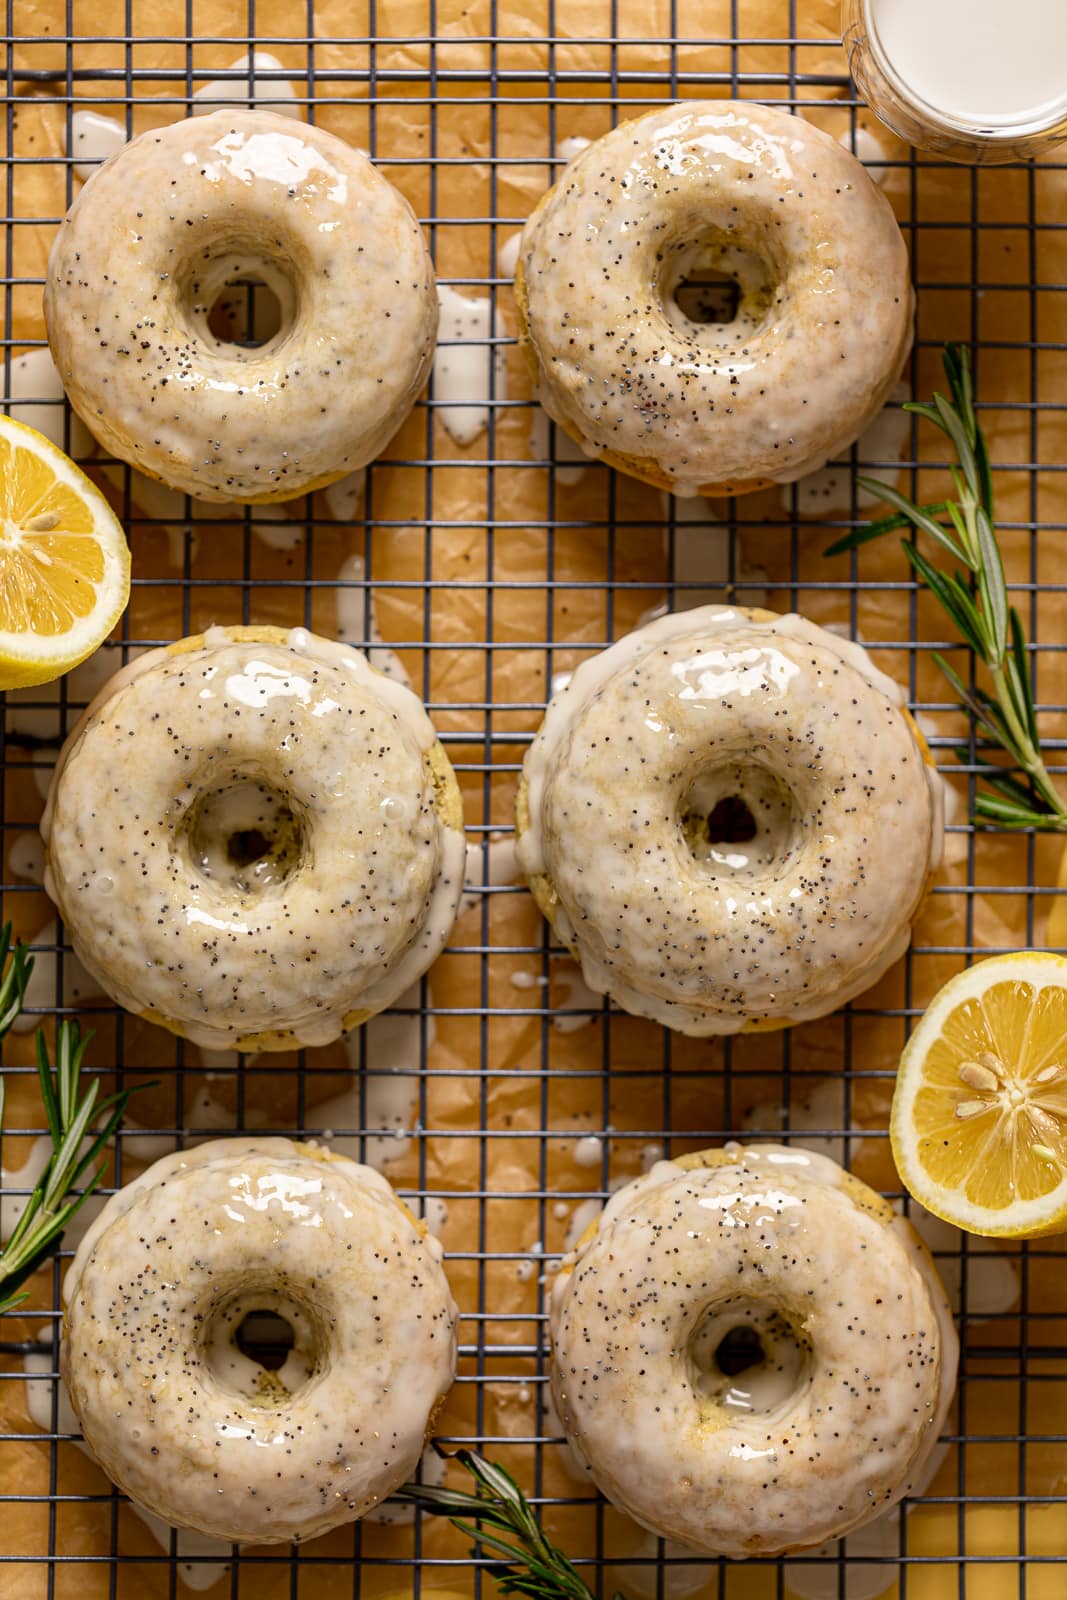
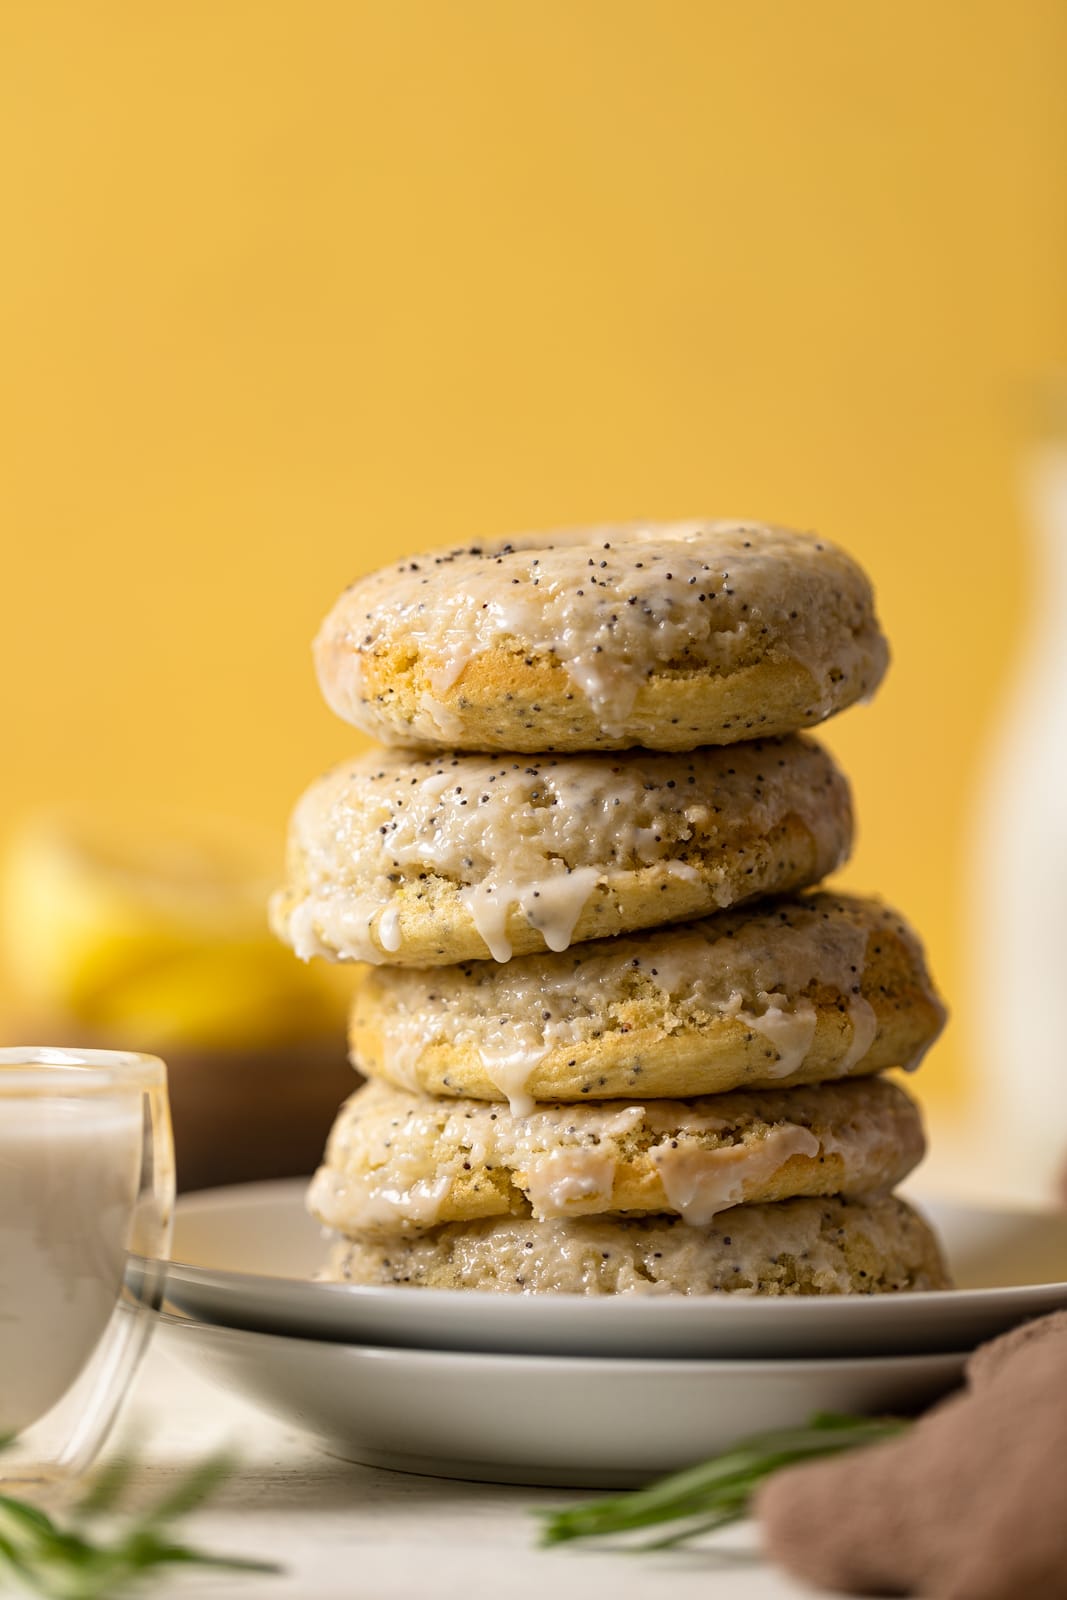
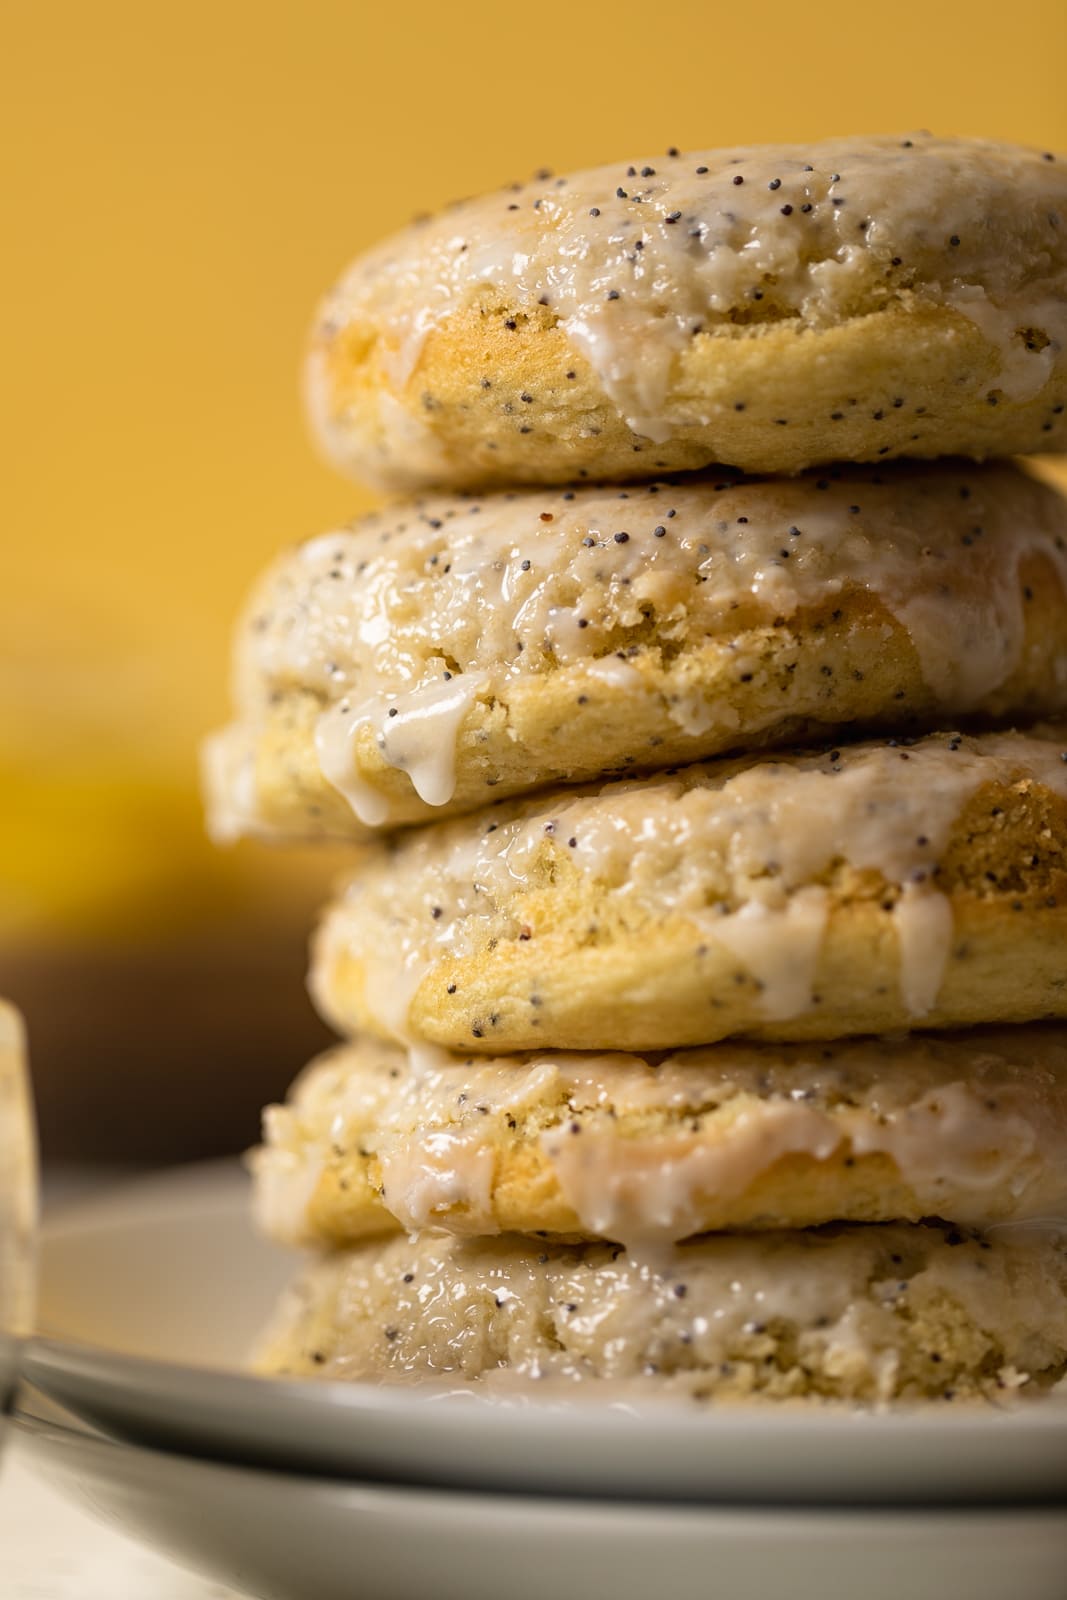
These Vegan Lemon Poppy Seed Donuts are anything but boring! They are super fluffy, soft, moist, and are a delicious sweet treat that comes loaded with lemony flavor married together with a slight nutty flavor from the poppy seeds and baked to perfection. Gluten-Free option.
Spring baking cannot exist with these Vegan Lemon Poppy Seed Donuts. This past week has been a SUPER busy one for me and although I’m tired, I know that the weekend means new things to do so there’s not much time for a full fledge day of rest! But a girl is surviving! Haha.
More importantly, I’m excited for new recipes in May and I must admit that upcoming recipes will be so amazing! I plan on testing out a lot of new flavors, textures, and styles, which of course can feel intimidating at first BUT exciting all at the same time.
If you’ve been an avid follower of Orchids + Sweet Tea, then you’ll know that these donuts aren’t my first attempt at making these little circle bites! These Vegan Vanilla Donuts with Sprinkles are actually one of my faves from last year—which I remade and revamped as well like these!
If you’re looking for another healthy version of doughnuts/donuts, then look no further—-these Healthy Blueberry Vegan Donuts with Blueberry Glaze are EVERYTHING! Easily whip them together in under 30 minutes!
Ingredients for Vegan Lemon Poppy Seed Donuts
here’s what you need to make these dairy-free donuts:
Flour. I use organic all-purpose from Bob’s Red Mill.
Baking powder. To help your pancakes become light and fluffy.
Lemon zest and juice for real lemon flavor.
Cane sugar. You can ensure that this is vegan-friendly by it being certified organic.
Vegan butter. You can also use coconut oil or vegetable oil if preferred.
Poppy seeds. These are usually sold in the spice or baking aisle of the grocery store.
Almond milk. Feel free to use a different plant-based milk if you like. I recommend making easy homemade almond milk (my recipe doesn’t require soaking!)
OK, back to poppy seeds! Did you know that poppy seeds are packed with benefits nutritionally? Yup.
WHY POPPY SEEDS?!
I’ve recently read that poppy seeds offer pretty impressive nutritional value and while they are super small seeds, they have super big benefits. Some include:
Aiding in the prevention of heart disorders. (Think—Omega-6 fatty acids which protect the heart!)
Supports Bone Health.
Prevents Constipation + other Digestive issues (Contains high amounts of Fiber!)
Enhances Brain Function.
Assists in Red Blood Cell production.
Helps with Insomnia. (Promotes relaxation and helps to deal with symptoms of sleeplessness!)
EQUIPMENT
The only unique piece of equipment you need to make homemade donuts is a donut pan. If you’re a donut fan, I highly recommend adding one to your kitchen toolbox. You’ll never have to go out for donuts again, and you can always customize the ingredients, flavors, and decorations of your breakfast pastries!
The easiest way to fill a donut pan without a major mess is to pipe the batter into the rings. You don’t need a special pastry bag, however. A simple gallon-sized Ziploc bg will do the trick. Simply fill the bag with your batter (work in batches to avoid over-filling the bag), then snip off one corner. Aim for a ¾-inch hole to pipe the batter cleanly into the donut rings in the pan.
The last piece of equipment you’ll need is a wire cooling rack. Ensure your donuts are fully cooled before glazing them. Waiting for these treats to cool is the hardest part of the whole recipe!
Can I Make Gluten-Free and Vegan Lemon Poppy Seed Donuts?
Absolutely! If you’d like to make this recipe gluten-free, simply swap the flour with your favorite gluten-free all-purpose flour blend. I like Bob’s Red Mill. If the batter is too runny, add more flour, ¼ cup at a time, until you have a thick and fluffy batter.
What Kind of Plant-Based Milk is Best?
You can use any vegan milk you like for these donuts! I recommend making your own because it’s cheaper and very easy. Here are some of the most popular recipes for dairy-free milk on my site:
Quinoa Milk
How to Make Potato Milk
Easy Homemade Creamy Cashew Milk
Ultra Creamy Homemade Oat Milk
Do Homemade Donuts Need to be Fried?
No! While many of the donuts you buy at places like Dunkin Donuts are deep-fried to get their golden crust and flaky layers, these vegan lemon poppy seed donuts are cooked fully in the oven.
This makes them a much lighter option with little oil. In fact, this entire recipe only has three tablespoons of vegan butter to ensure your donuts stay moist and tender. There are no grease stains left behind by these homemade treats!
Serving & Storing Suggestions
Who doesn’t like to start their day with a homemade donut? These are a perfect weekend breakfast treat, especially for special occasions like a birthday. Serve them with these easy Vegan Chai Tea Latte with Turmeric in the winter, or with refreshing Lemon Blackberry Mint Tea in warmer months.
These are also a great treat for Easter morning. The colorful light yellow and pops of black from the poppy seed always remind me of springtime.
The donuts are best enjoyed the day they’re made. If you have leftovers, however, you can store them in an airtight container at room temperature for up to four days.
For longer storage, freeze the donuts in an airtight container for up to three months. To serve, defrost the donuts on the counter for several hours. You can also freeze the baked, undecorated donuts and add the glaze just before serving.
Prep Time: 10 minutesmins
Cook Time: 15 minutesmins
Total Time: 25 minutesmins
Serves: 6servings
DONUTS:
1 ½cupsorganic all-purpose flour
½cuporganic cane sugar
2tspsbaking powder
1teaspoonlemon zest
¼teaspoonbaking soda
¼teaspoonsea salt
2Tbspspoppy seeds
1cupAlmond milk(You can use your fave plant-based milk)
1tablespoonfreshly-squeezed lemon juice
3Tbspsvegan butter, melted(See Notes!)
LEMON GLAZE:
2cupsorganic powdered sugar, sifted
1teaspoonfreshly-squeezed lemon juice
1-2TbspsAlmond milk(You can use your fave plant-based milk)
FOR THE DONUTS:
Preheat oven to 375 degrees Fahrenheit and spray your donut baking pans that has 6-wells.
In a bowl, add the milk + lemon juice, whisking together well and letting it sit aside for 5-6 minutes until “activated” and the milk thickens a bit. This creates the “buttermilk”.
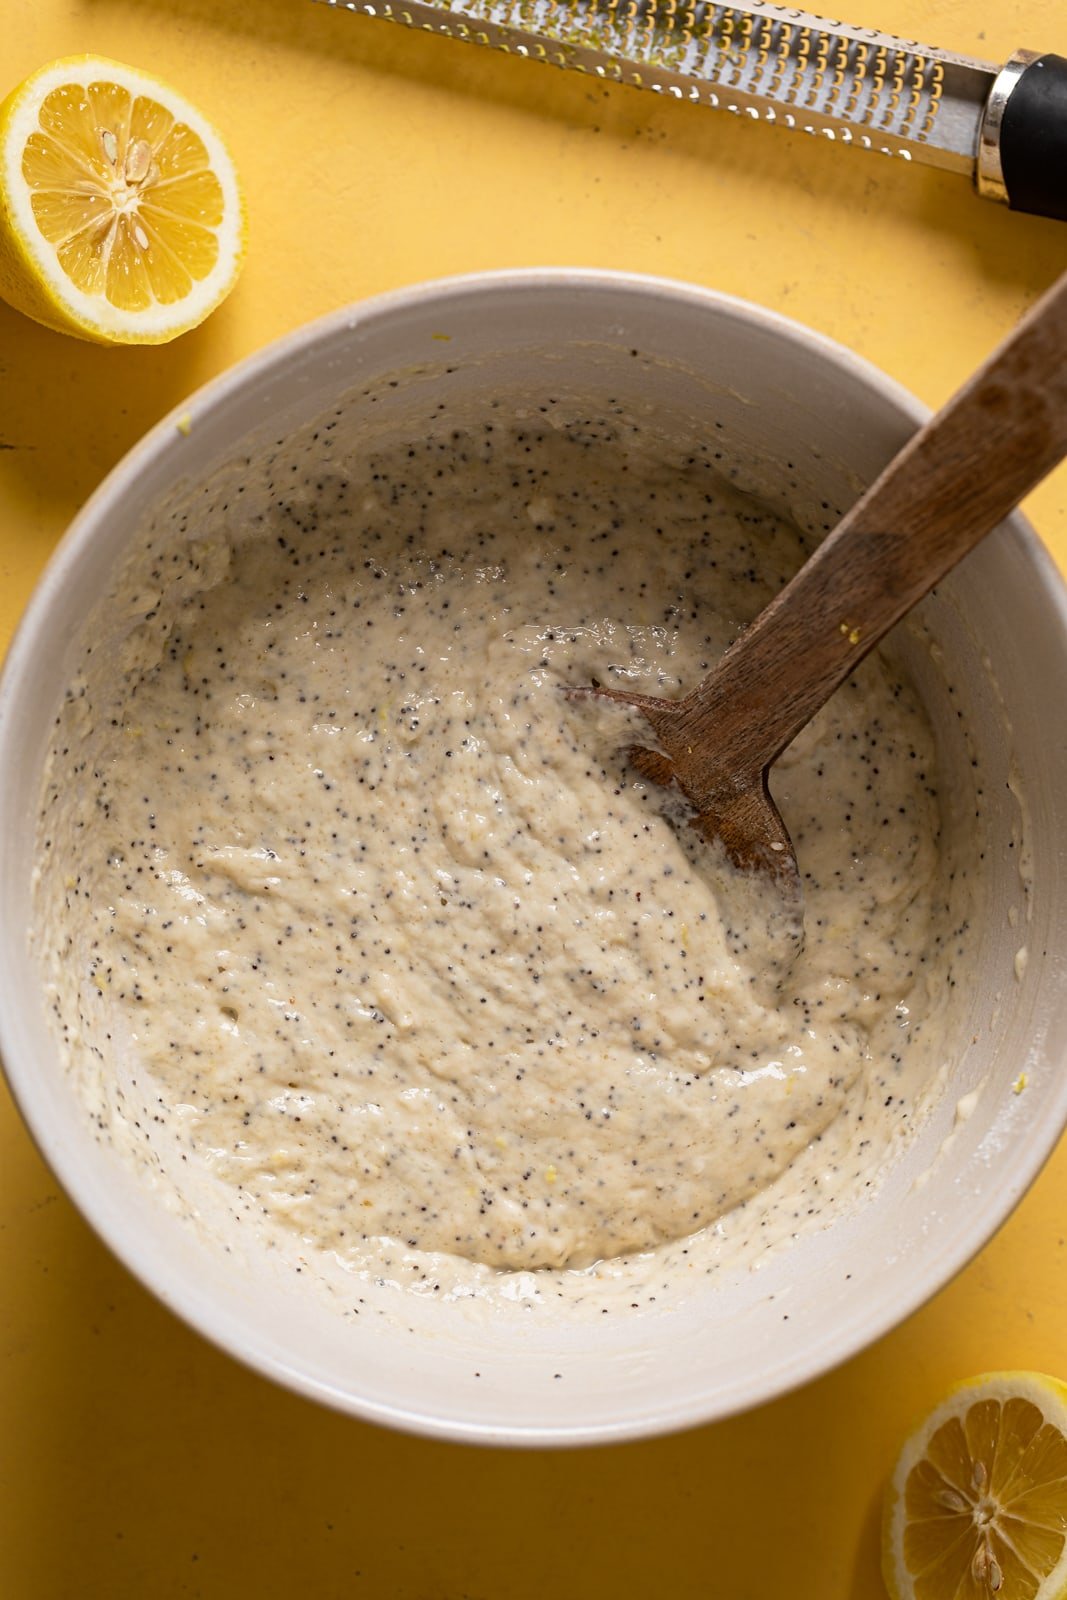
In a separate bowl, add the flour, baking powder, baking soda, sugar, lemon zest, and sea salt. Finally, stir in the buttermilk and melted butter, until combined and batter is thick and smooth, about 1-2 minutes. Fold in the poppy seeds.
Spoon the batter into a piping bag and pipe batter it into prepared donut pan wells, filling them about ¾ of the way.
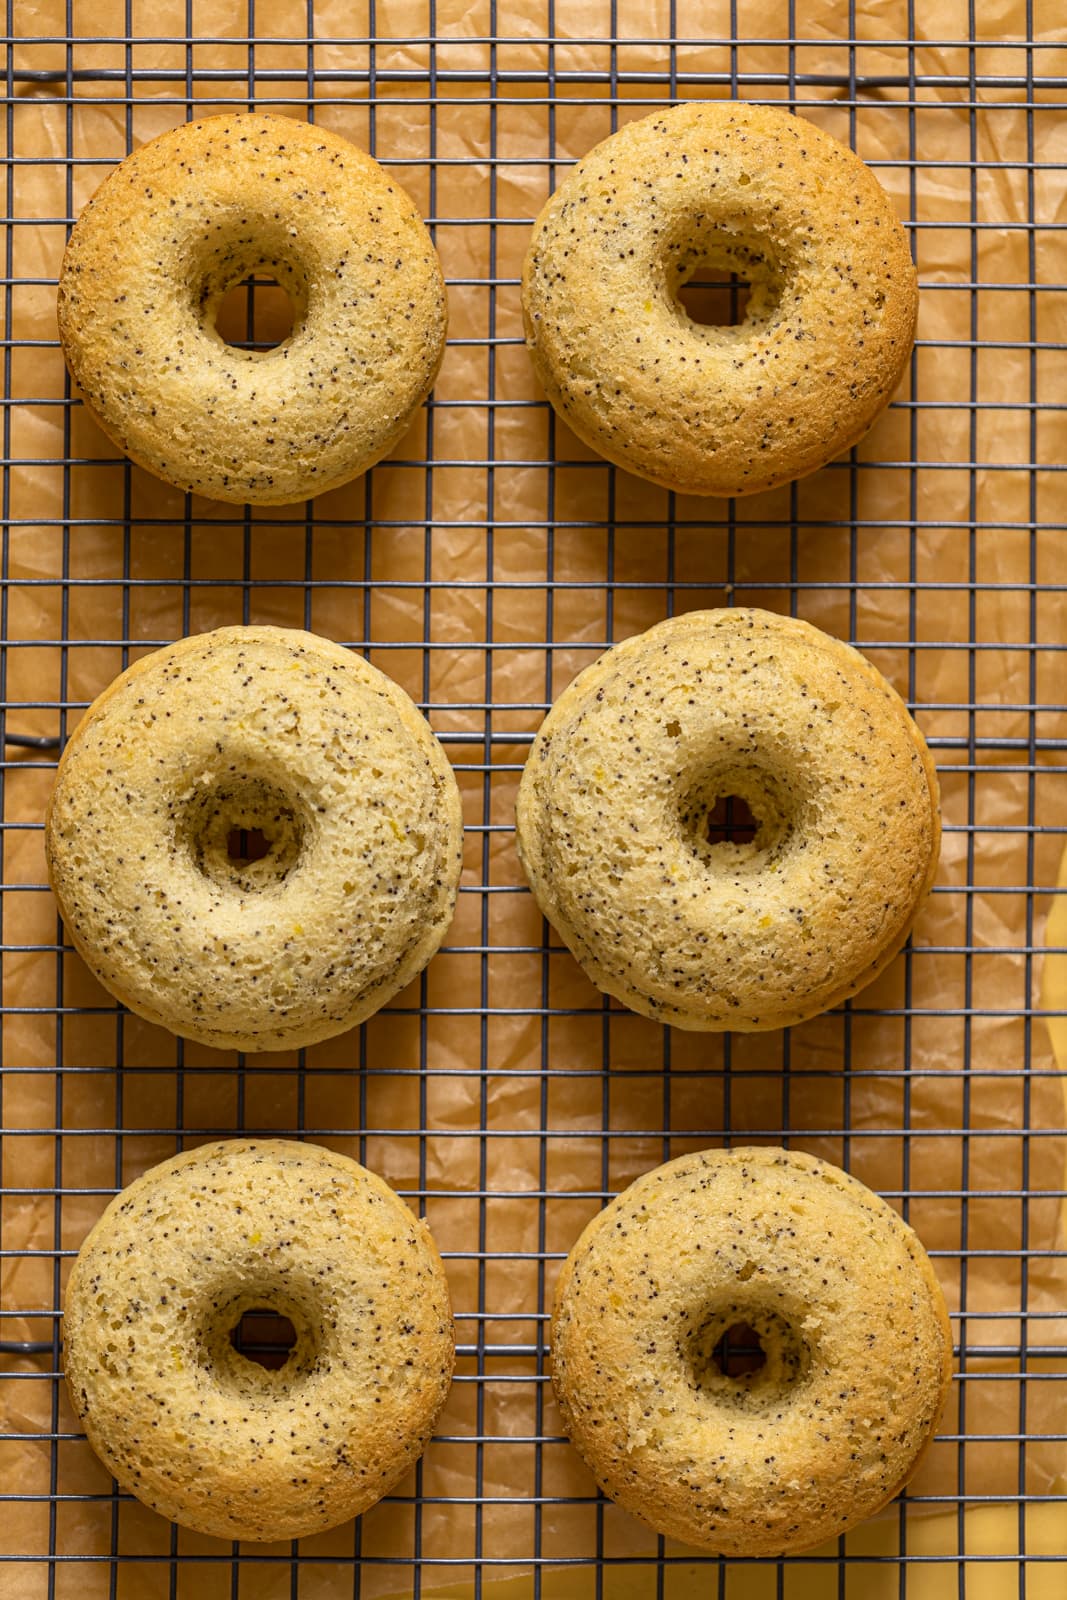
Bake for 10-13 minutes or until toothpick inserted into donuts comes out clean.
Remove from oven and allow to cool for 5 minutes before releasing the donuts from their pan and unto a cooling rack to cool completely.
TO MAKE THE LEMON GLAZE:
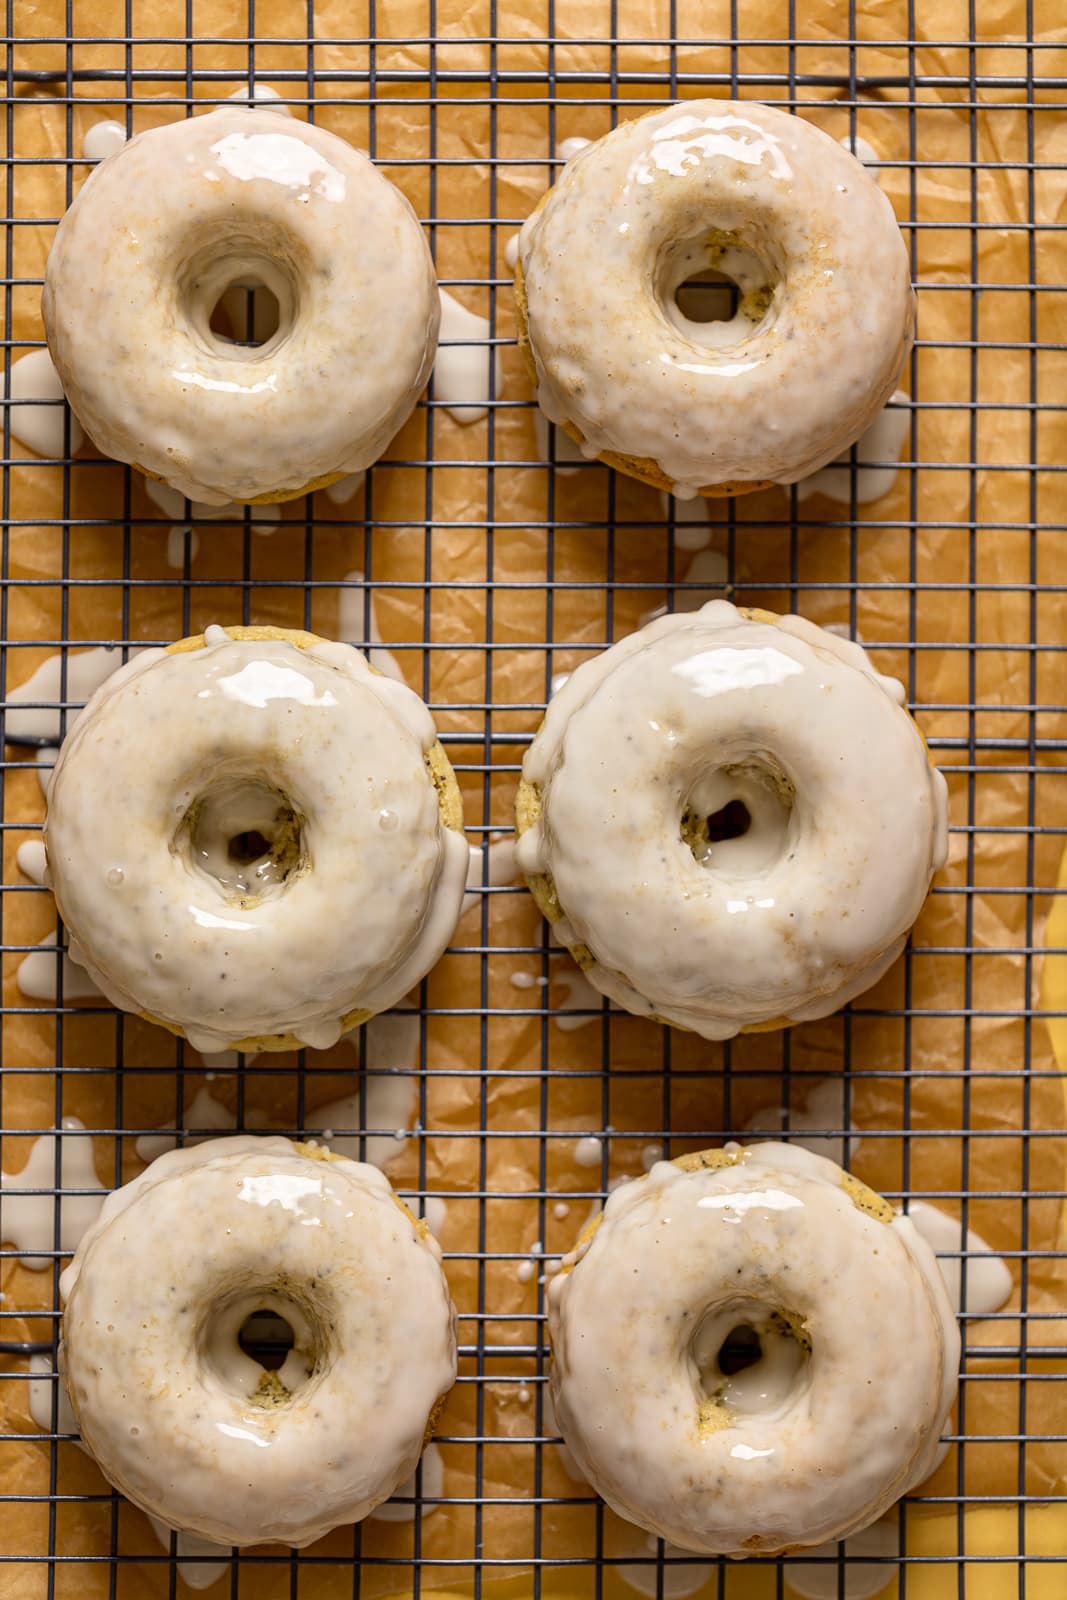
Whisk together the powdered sugar, Almond milk, and lemon juice until smooth and consistency is met. NOTE: For a thicker glaze, add additional powered sugar (1 tablespoon at a time) until consistency is met. For a desired thinner glaze, add additional milk (1 tablespoon at a time) until consistency is met.
Once fully cooled, dip each donut into the prepared Lemon Glaze and set them back onto cooling rack so that glaze hardens a bit. Top with a few sprinkles of poppy seeds for garnish, if desired. Repeat until all donuts are glazed and sprinkled.
Bon Appetit!
STORAGE: Can be stored in a tightly sealed container and best if placed in the refrigerator for up to 3 days for ultimate freshness.
FREEZE (LONGER STORAGE): For longer storage, freeze the donuts in an airtight container for up to three months. To serve, defrost the donuts on the counter for several hours. You can also freeze the baked, undecorated donuts and add the glaze just before serving.
GLUTEN-FREE VERSION: To make these donuts GF, I recommend using a GF Flour Blend (Bob’s Red Mills has a great version!). NOTE: If the batter is too ‘thin + runny’, simply add additional GF flour, ¼ cup at a time.
SWEETENER: If you choose to opt out of pure cane sugar, you can always substitute with coconut sugar, Agave, or pure maple syrup instead. For liquid sweeteners, just adjust the amount of milk used by reducing it by 2 Tbsps to start.
FLOUR: If you want your donuts to be more of a ‘cakey’ texture, substitute 1 cup of All-purpose flour with Super-Fine Cake Flour.
OIL: Instead of melted vegan butter, you can use melted coconut oil or vegetable oil, if preferred.
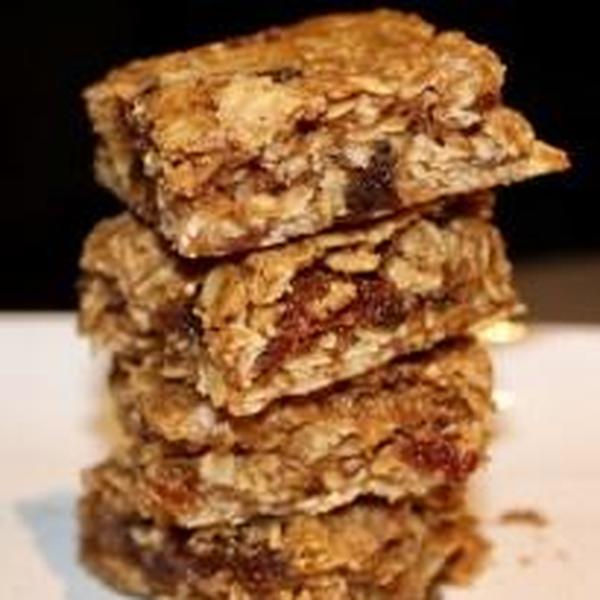
Another fall-inspired treat, which will satisfy any cravings you may have for Oatmeal Raisin Bars. I love a great cookie or bar and this particular version is not only vegan, but also whole-grain and includes a medley of autumn spices to keep it interesting. You probably have most of these ingredients in your kitchen right now.
First, combine the flaxseed and water in a small bowl and allow to thicken while you mix the other ingredients. Next, combine the dry ingredients in a bowl.
In a mixer or by hand, combine the coconut oil, vegan butter, brown sugar, and vanilla bean powder.
Pour the dry ingredients into the mixer and combine. Since it is still hot here on Maui, I usually put my cookie/bar dough in the fridge for 5-10 minutes to firm it up. After this, spread the dough in a parchment lined 8×8 pan.
Bake in 350 degree F oven for 25 minutes or until golden brown. Cool and cut into bars.
mins
Cook Time 25 minutesmins
Total Time 40 minutesmins
Ingredients
Flax egg:
1T.Flax seedground
3T.Water
Dry Ingredients:
3/4C.Whole Wheat Pastry Flour
1/2t.Baking soda
1/4t.Sea salt
1 3/4t.Pumpkin pie spiceI made my own from spices I had on hand
1/4t.Cardamom
1 1/2C.Rolled oats
1/2C.Raisins
Wet Ingredients:
1/4C.Unrefined coconut oilmelted
1/4C.Vegan butterI used Earth Balance
1/2C.Brown sugarpacked
1/2t.Vanilla powder or extract
Instructions
For the flax egg, mix the flaxseed and water in a small bowl. Set it aside while you combine your other ingredients.
Combine the dry ingredients, including the whole wheat pastry flour, baking soda, salt, pumpkin pie spice, and cardamom. Next, add the rolled oats and raisins.
In another bowl, mix the wet ingredients. These are the coconut oil, vegan butter, brown sugar, and vanilla powder.
Add the dry ingredients to the wet and mix until just combined.
Place in the fridge for a few minutes to firm up before spreading in a parchment lined 8×8′ baking dish.
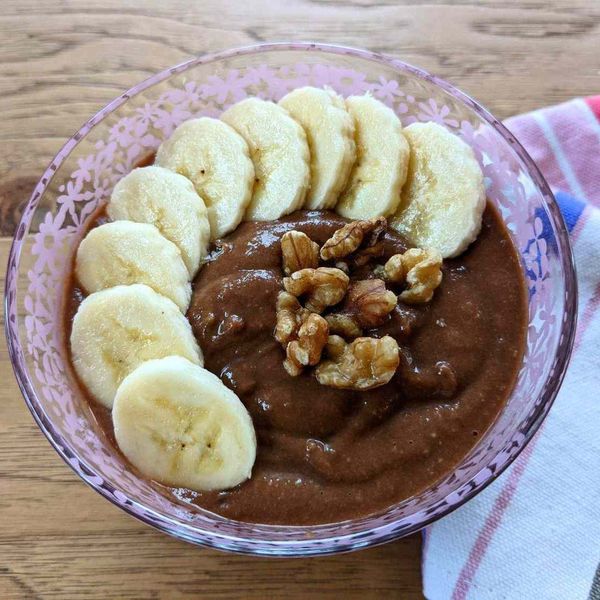
This is a minimalist recipe that relies on only natural banana sugars for sweetening and soybeans for creaminess. I invented it this morning for my family’s breakfast and it was well-liked, even though we are not vegans.
Submitted by Zazu
Published on April 13, 2011
Cook Mode (Keep screen awake)
Ingredients
This recipe was developed at its original yield. Ingredient amounts are automatically adjusted, but cooking times and steps remain unchanged. Note that not all recipes scale perfectly.
Original recipe (1X) yields 2 servings
1cupcooked soybeans
2mediumripe bananas, chopped
½cupwater, or as needed
1tablespoonunsweetened cocoa powder
2tablespoonschopped walnuts, or to taste
½mediumbanana, sliced
Directions
Place soybeans in a blender; add water, a little at a time, and blend to pudding consistency. Add chopped bananas and cocoa; blend until combined.
Transfer to a bowl. Garnish with walnuts in the center and banana slices around the edges.
Cook’s Note:
This recipe is super quick to whip up if you have precooked soybeans. The process of cooking dry soybeans takes time though.
Nutrition Facts (per serving)
313
Calories
11g
Fat
46g
Carbs
14g
Protein
Nutrition Facts
Servings Per Recipe 2
Calories 313
% Daily Value *
Total Fat
11g
15%
Saturated Fat
2g
8%
Sodium
229mg
10%
Total Carbohydrate
46g
17%
Dietary Fiber
9g
32%
Total Sugars
18g
Protein
14g
29%
Vitamin C
28mg
31%
Calcium
150mg
12%
Iron
3mg
18%
Potassium
1088mg
23%
* Percent Daily Values are based on a 2,000 calorie diet. Your daily values may be higher or lower depending on your calorie needs.
** Nutrient information is not available for all ingredients. Amount is based on available nutrient data.
(-) Information is not currently available for this nutrient. If you are following a medically restrictive diet, please consult your doctor or registered dietitian before preparing this recipe for personal consumption.


 mins
mins