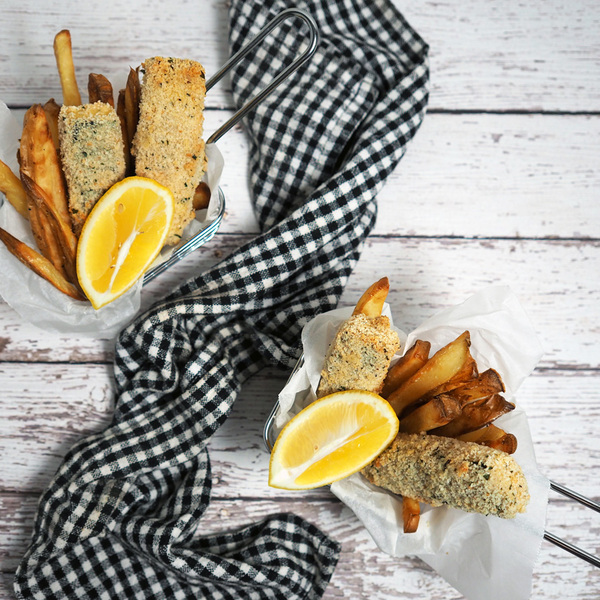
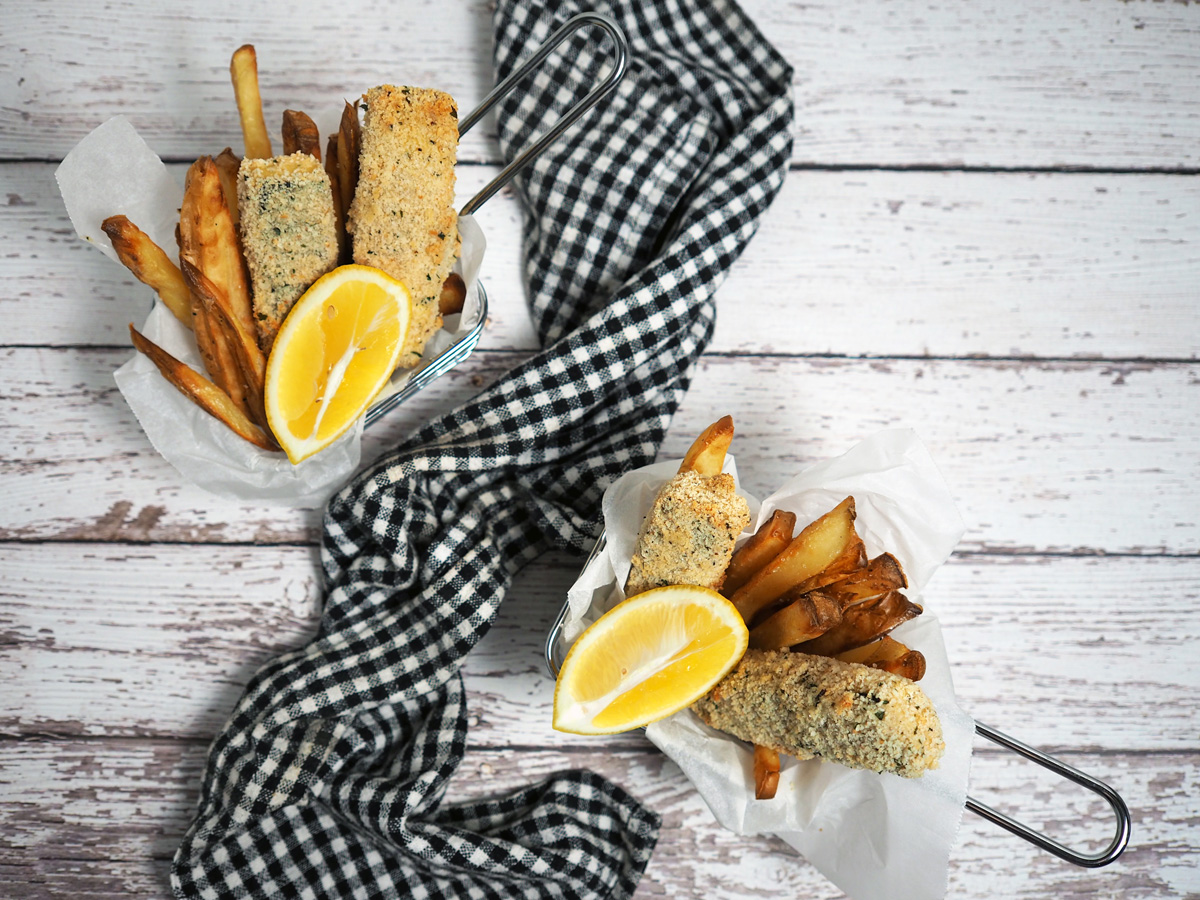
Fish fingers are really a part of growing up for most kids but when you realise fish are cute as hell, they’re very quickly taken off the menu! There are a few frozen fish finger substitutes out there and they’re all fantastic but I wanted to try things a little differently with my homemade version. Simply using tofu and seaweed as a base, these guys can be whipped up super quickly and easily made gluten free with GF breadcrumbs.
Ingredients
750g hi-protein firm tofu
4 sheets seaweed
1 1/4 cups non-dairy milk (I used soy)
2 teaspoons apple cider vinegar
2 cups dry breadcrumbs (make sure they’re vegan)
1 teaspoon salt
1 teaspoon mixed herbs
1/4 cup nutritional yeast
2 teaspoons garlic powder
Olive oil spray
Vegan tartare sauce and lemon to serve
Method
Preheat your oven to 200°C and line a baking sheet with baking paper.
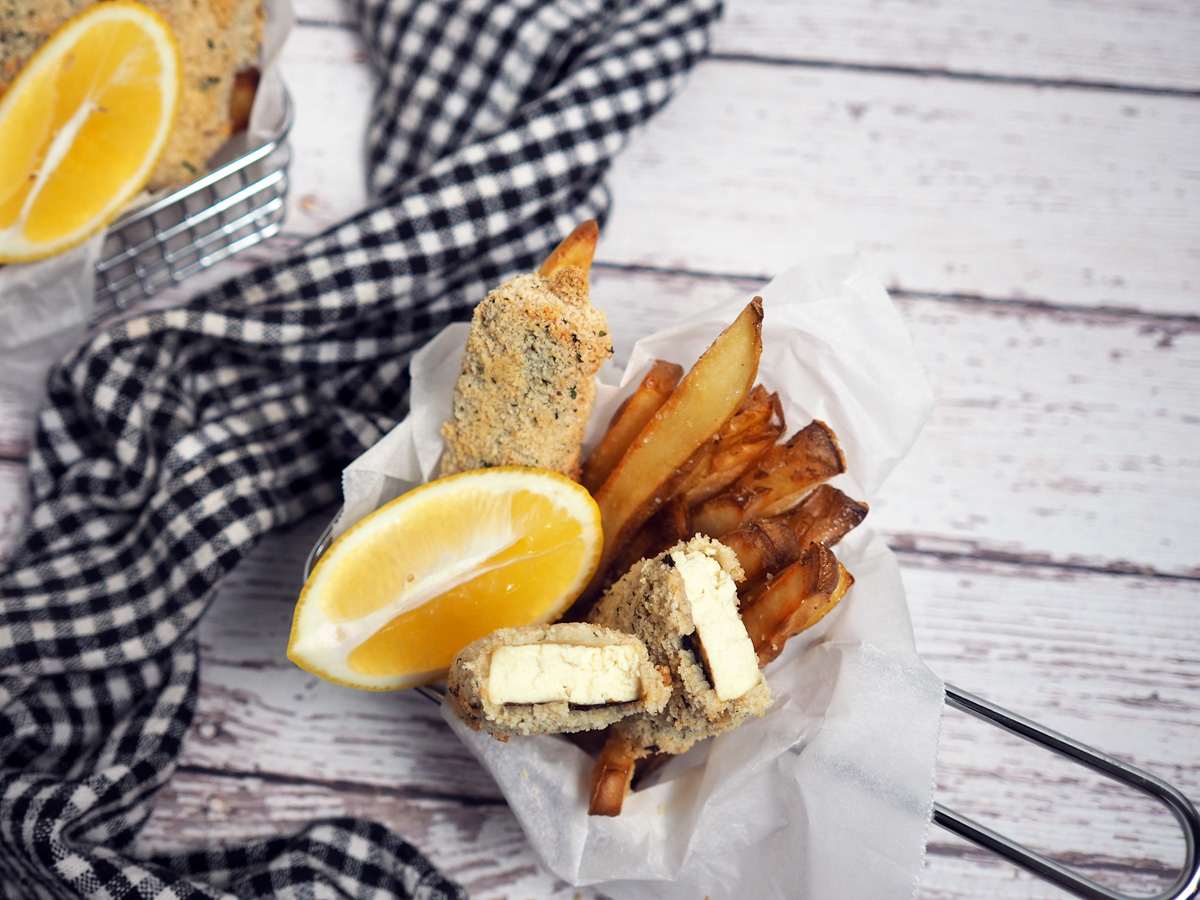
Cut the tofu into fingers (approx. 10cm x 3cm x 1.5cm) and cut the seaweed into 10cm x 3cm rectangles as well.
Use paper towel to cover the tofu and press down to remove any excess moisture.
The remaining moisture should allow for you to attach a piece of seaweed to each piece of tofu (double it up if you want it extra “fishy”).
In a shallow bowl, whisk together the non-dairy milk and apple cider vinegar. Set aside until it begins to curdle.
In another shallow bowl, combine the breadcrumbs, salt, mixed herbs and nutritional yeast.
Place each piece of seaweed tofu in the milk mixture before coating in breadcrumbs and doing this one more time so the tofu is nicely crumbed. Repeat this process with the remaining tofu, placing them about 3cm apart on the baking tray.
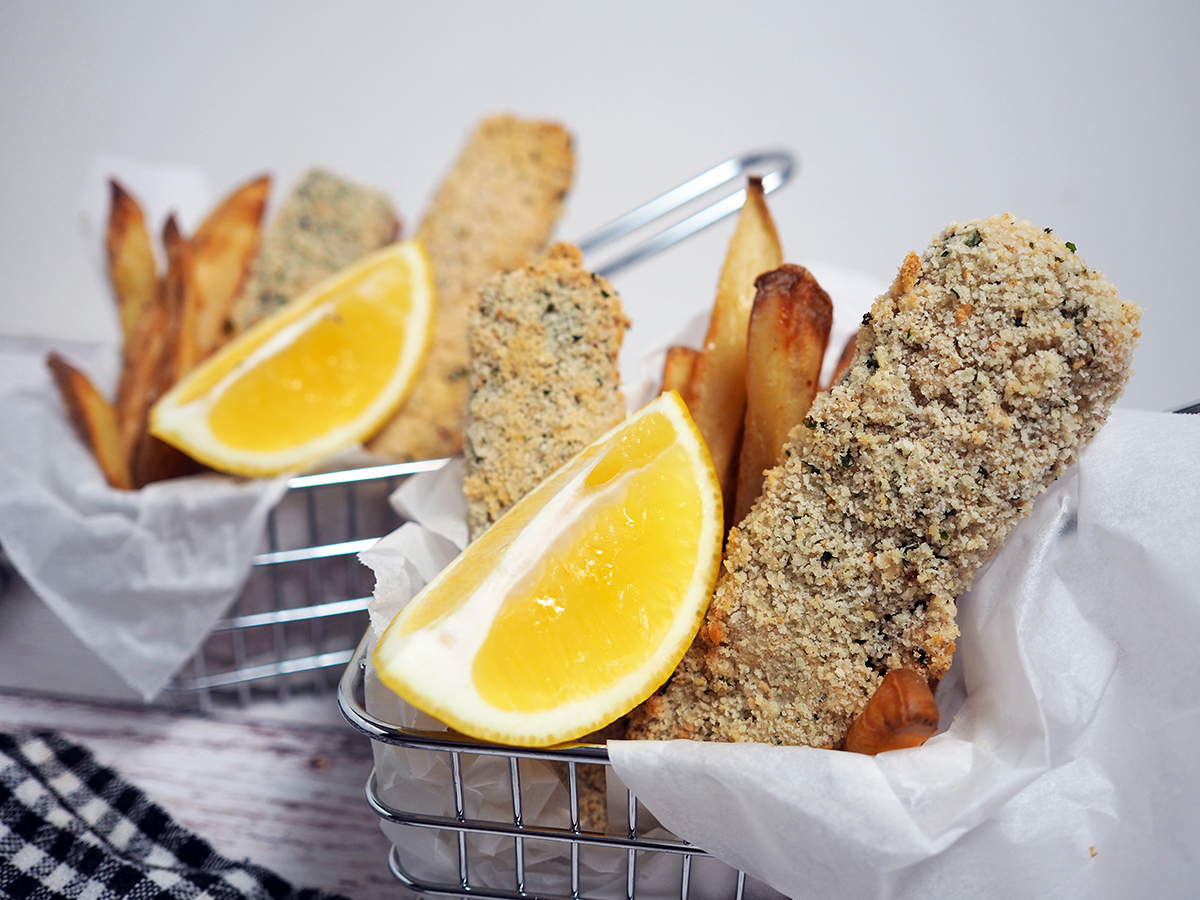
Spray with olive oil and bake the fingers for 15 minutes before turning and baking for a further 15 or until the crumbs are a golden brown.
Serve immediately with vegan tartare sauce, lemon wedges and homemade fries.
Inline Feedbacks
View all comments
Laurina Roo @sweetenedbyplants
9 years ago
Oh my gosh!!! *jaw drop! These are awesome! Especially being from Newcastle and living by the beach it’s great you’ve found a way to have your “tofish” finger – love the name by the way!
Author
Always gotta use a pun where you can 😉 I was never a real fan of seafood growing up except for when it was crumbed or fried to remove most of the fishiness (haha) so these have just the right amount of ocean taste to them. You can even increase it with more seaweed 😀
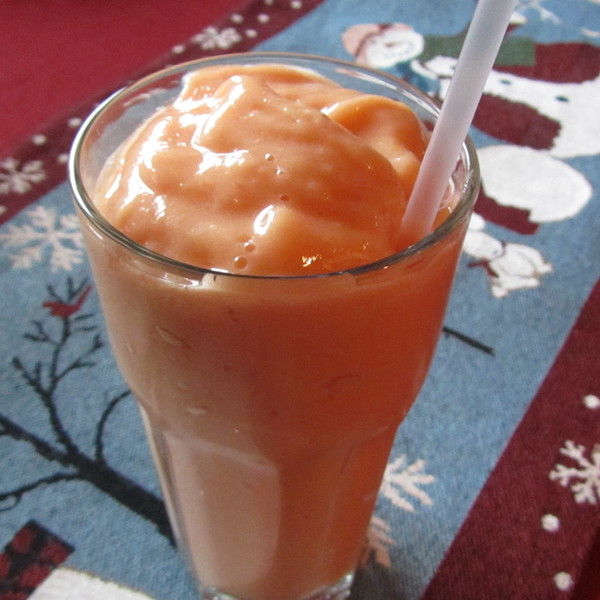
“(LFRV compliant!) This is a great anytime a day drink however this is perfect as a before dinner smoothie as it contains digestive enzymes. Bromelain, an enzyme in pineapple, breaks down cholesterol in the blood and reduces inflammation in the blood and tissues. Bromelain also eliminates muscle, joint, and headache pain and also helps break down fats. Papain, an enzyme in papaya, breaks down protein molecules in the blood, reducing inflammation that is linked to allergies or pain. Papain even attacks a protein on the coating of cancer cells which helps eliminate this threat.”
Ready In:
5mins
Ingredients:
3
1
cup chopped papaya (fresh & ripe)
1
cup chopped pineapple (fresh & ripe)
1
frozen banana
directions
Blend all ingredients and add as much water as needed to reach desired smoothie consistency. Drink up!
Questions & Replies
Got a question?
Share it with the community!
Want a Second Helping?
Sign up for our newsletter to get recipes, easy dinner ideas, tasty treats and more delivered straight to your inbox.
To withdraw your consent or to learn more about your rights, see the Privacy Policy.
Published: · Modified: by Audrey · This post may contain affiliate links · 39 Comments
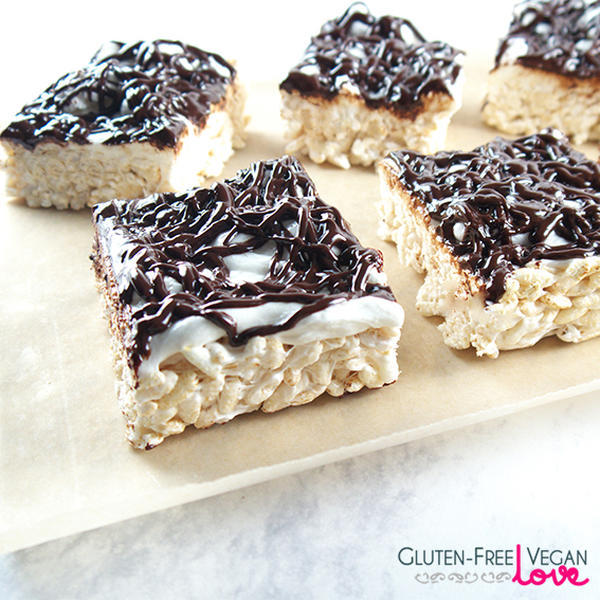
Ok, so the extra long post name was totally necessary here 🙂 because of my love for marshmallows. Rice krispie treats were a childhood favorite of mine — well, pretty much anything with marshmallows was a favorite, but I have extra fond memories of fresh warm rice krispie squares my friend’s mom used to make (and of which I devoured unseasonably large quantities every time I went over to his house…). Luckily, this treat is not something I had to give up as an adult. This is my take on rice krispie treats — ooey-gooey extra marshmallow-y gluten-free vegan rice krispie treats!
Note: I used Dandies for the vegan marshmallows in this recipe (you’ll need two 10 oz packs). If they’re not super fresh, they can be harder to melt, though it’s still doable — so try to look out for the fresher ones (or see these tips on melting Dandies). If you’re wondering how to make extra gooey rice krispie treats, you may want to use Ricemellow Creme marshmallow fluff as it is naturally even more gooey.
P.S. If the instructions below seem long, don’t worry about it. It’s really one of the easiest to make no-bake recipes out there. I just like to be thorough ;).
Note: this recipe is from before I went totally refined sugar-free.
]
Print
Ooey-Gooey Extra Marshmallowy Vegan Rice Krispie Treats
5 Stars 4 Stars 3 Stars 2 Stars 1 Star
5 from 4 reviews
Rice Krispie Base:
3–4 tablespoon coconut oil (or non-dairy butter)
22 vegan marshmallows (normal size – not the mini ones)
4 cups gluten-free Rice Krispies cereal (I used Nature’s Path)
Marshmallow Layer
2 tbsp coconut oil
20 vegan marshmallows (normal size – not the mini ones)
Chocolate Drizzle:
½ cup semi-sweet (or dark) vegan chocolate chips
1 tbsp coconut oil
1 tbsp maple syrup (optional, adds gloss)
3 tbsp non-dairy milk
Instructions
Line an 11×7” baking dish with parchment paper and set aside. Note: I used one that’s 11 x 7”, but pretty much any similar size will do — the larger the pan, the thinner the squares will be.
Melt coconut oil on medium-low heat. Add in marshmallows and allow them to melt into fluff by continuously stirring and breaking them up with a wooden spoon (it helps to get them to melt a bit faster). *If using Ricemellow marshmallow fluff, simply heat up the coconut oil, add fluff and mix thoroughly to combine.
Add rice krispies cereal and mix the entire mixture thoroughly.
Transfer mixture into a baking dish. This part will be a little messy and a little sticky, so use 2 spoons to help you along. Use a sheet of parchment paper to flatten and press the mixture, by laying on top and pressing in with your hands or with a flat object. Press the mixture down as much as you can and flatten the top so that the mixture is even.
Put the pan in the fridge to cool off while you prepare the rest of the ingredients.
Marshmallow Layer:
Follow step one from previous directions to warm up and melt down marshmallow fluff. *If using Ricemellow fluff, omit coconut oil and simply proceed to step 2.
Remove rice krispies from the fridge. Scoop out the melted marshmallow fluff and spread it out over the rice krispies mixture. Move quickly while mixture is warm, and don’t worry if it’s not perfect—just try to spread it out as evenly as possible.
Chocolate Drizzle:
Melt chocolate using a double boiler in the following way: Bring water in a small sauce pan to a boil. Place a glass heat-proof bowl on top (make sure it’s not touching the water). Place all drizzle ingredients except the milk in the bowl. Allow mixture to melt. Stir frequently.
Once chocolate is melted, add in the non-dairy milk, one tablespoon at a time. Mix thoroughly in between each addition to make sure it’s fully incorporated into the melted chocolate.
Quickly transfer chocolate mixture into a piping bag, and drizzle over the marshmallow later.
Set the rice krispies aside and allow to cool for another 5-10 minutes at room temperature. Note: you can cool them off faster in the fridge, but the chocolate drizzle will likely lose its shine.
Carefully lift out the rice krispie treats out of the tray (by lifting out parchment paper) and transfer onto a cutting board. Cut into squares and enjoy!
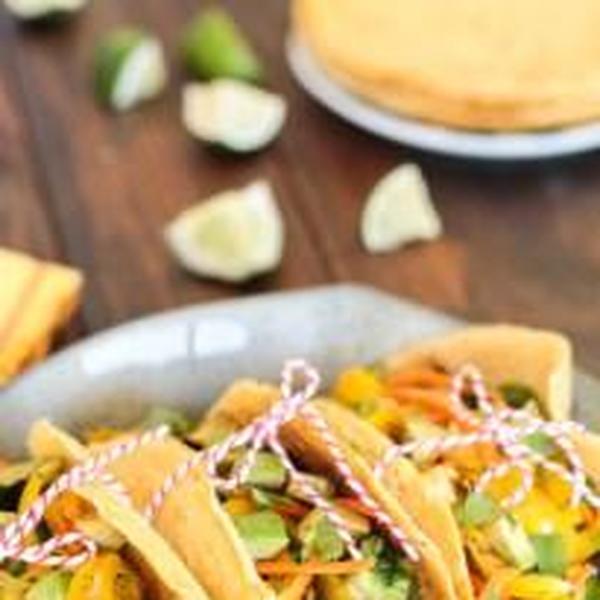
These vegan and grain free tacos are about the healthiest tacos you’ll ever have- they’re filled with black beans and vegetables, and the tortillas are made from chickpea flour.
If you’re anything like me, taco nights at home are a pretty hard thing to beat. I mean, who doesn’t love loading up a tortilla (or three or four) with allll the fixins?
But I’m sure I don’t have to tell you that all those toppings can really add up, calorically speaking. Meat, sour cream, cheese, guac…not to mention the essence of the taco itself- the tortilla. Is it flour? Is it fried? It all makes scarfing down more than a couple seem a little gluttonous.
Well, fret not, my friends, because these vegan, gluten free, grain free tacos are so packed with flavor and nutritious ingredients that you could easily inhale like six of them without feeling a sliver of guilt. Okay, maybe I’m exaggerating a little bit, but you get the idea. The backbone of this recipe comes from Goop. I followed their detox menu back in January, and their ah-mazing veggie taco recipe (which substitutes tortillas with wraps made from chickpea flour-genius!) was so insane it made me forget I was on any sort of diet. In fact, they’re still working their way into my dinner repertoire.
I tweaked the recipe here and there, keeping black beans and zucchini as the bulk of the filling but adding in a colorful, crunchy carrot and bell pepper slaw to top it off. Feel free to do the same or add whatever veggies your heart desires.
What you really want to focus on here are the chickpea flour tortillas. They’re made from a simple batter and then poured and into a skillet to cook- like crepes! Just swirl the batter around the pan in a thin layer, cook over medium heat for a minute or two until you see tiny bubbles start to appear, then flip and cook for another minute or so. The first one may come out a little wonky- also much like crepes- and that’s okay! If it comes out too thick, just thin out the batter. Too thin? Pour the batter a little thicker next time. You’ll get the hang of it.
The Goop recipe contains instructions for how to bake them into crunchy taco shells, but you can also leave them as is if you prefer these grain free tacos to be soft. Me, I’ve always been a soft taco kinda gal, and if I’m being totally honest, I’m usually too lazy (and hungry) to wait for that extra baking step. But for all you die-hard crunchy taco fans out there, I’ve included those instructions also. You’ll love these healthy grain free tacos either way, and if you’re anything like me, you’ll be making them ALL the time.
These vegan and grain free tacos are about the healthiest tacos you’ll ever have- they’re filled with black beans and vegetables, and the tortillas are made from chickpea flour.
Prep Time10minutes
Cook Time40minutes
Total Time50minutes
Servings4
Calories600kcal
AuthorDenisse
For the chickpea flour tortillas:
2cupschickpea flour
2cupswater
1teaspoonsalt
2tablespoonsolive oilplus more for sautéing
For the taco filling:
1can black beans
1clovegarlicsmashed
1/2jalapeñoseeded and finely diced
4sprigs cilantro
2zucchiniroughly chopped
1tablespoonolive oil
Salt and pepperto taste
1avocadodiced
For the carrot & bell pepper slaw:
1cupcarrotjulienned
1cupbell pepperjulienned
2tablespoonscilantrochopped
2tablespoonsscallionchopped
Zest and juice of 1 lime
Salt and pepperto taste
Whisk together the chickpea flour, water, olive oil and salt in a medium bowl. Let sit for about 15 minutes.
In a medium saucepan combine beans (with liquid), garlic, cilantro, jalapeño and a pinch of salt and simmer on low for about 20 minutes or until no liquid remains. Set aside.
Preheat oven to 375°. Toss zucchini with 1 tablespoon of olive oil and season with salt and pepper. Arrange on baking sheet in a single layer and roast for about 15-20 minutes, tossing once.
In a medium bowl combine carrot, bell pepper, cilantro, scallion, lime zest, lime juice and a pinch of salt and pepper. Set aside.
Heat a small nonstick sauté pan over medium high heat and add 1 teaspoon olive oil. When the pan is hot, add 1/4 cup of the chickpea flour batter. Lift and swirl the pan to spread the batter into a thin layer.
Cook for about 1-2 minutes or until tiny bubbles begin to appear, then flip and cook for another 1-2 minutes. Remove to a paper towel-lined plate. Continue with remaining batter, adjusting the heat and adding more oil to the pan as needed. You should have about 10-12 tortillas.
Optional: Enjoy as a soft taco or to make crunchy taco shells, arrange tortillas in the ridges of an inverted muffin tin. Bake for 15-20 minutes or until shells are crispy and slightly brown at the edges.
Assemble tacos by layering black beans, zucchini, avocado and slaw in a chickpea tortilla.
So, now the holidays are over and what to do with the leftover Christmas punch? Here is a SUPER easy recipe to enjoy those leftovers.
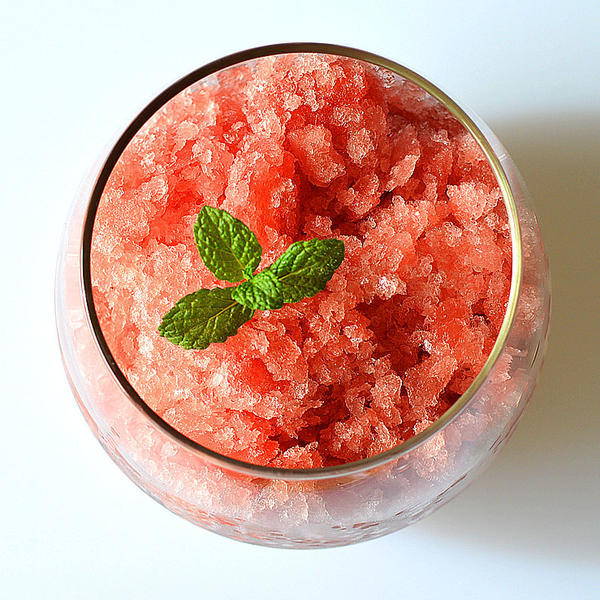
Wassail Granita
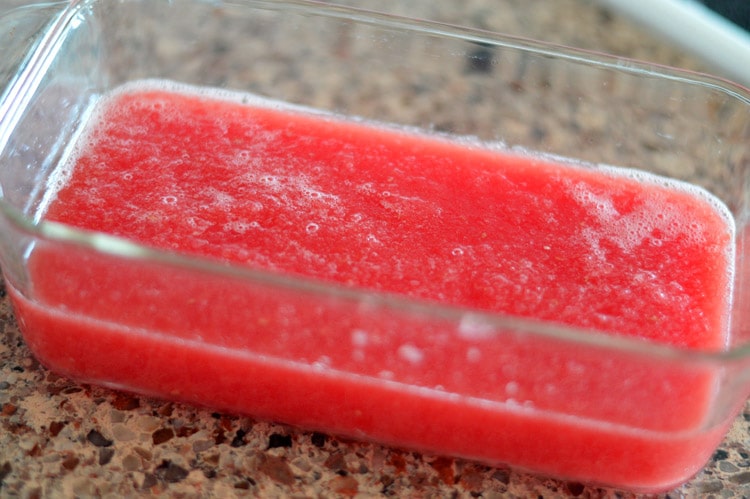
Wassail Granita is created by simply placing the punch into a flat freezer-safe dish or loaf pan, freezing in 45 minute intervals and scraping with a fork to create those crystals.
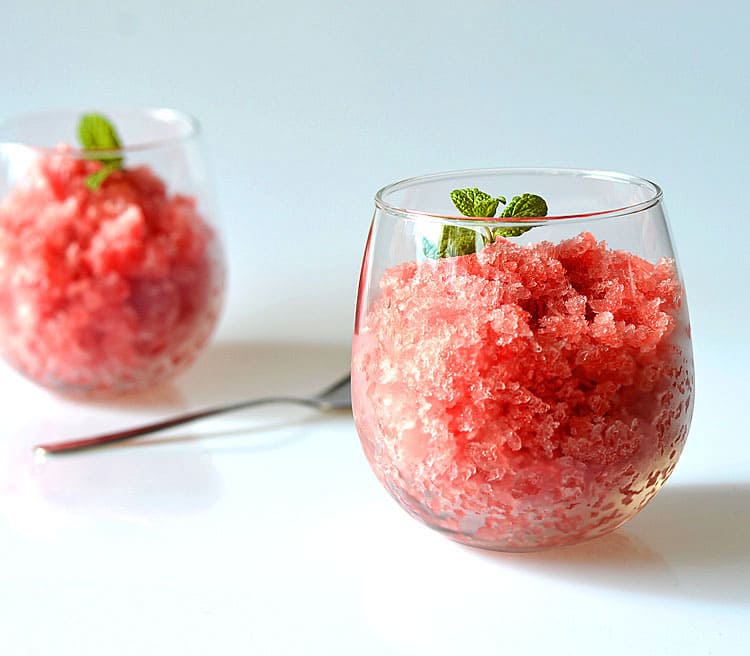
Continue this process until it is completely frozen and scraped into small crystals. Serve in a chilled decorative glass with a sprig of mint.
Below is our recipe for Cranberry Wassail. Enjoy! 🙂
Wassail Granita
Before you go, why not check out some of our recent videos and be sure to subscribe to the YouTube Channel! 🙂
Servings 4cups
Author Veg Life Staff
Ingredients
4CCranberry Juice
1-1/4CApple Cider
½CSugar
2whole Cinnamon Sticks
½tspof whole Allspice
¼tspGround Nutmeg
2Tbl fresh Orange Juice
Orange slicescinnamon sticks and/or whole cloves for garnish
Instructions
In a saucepan, add the cranberry juice and apple cider.
Add the sugar, cinnamon sticks, allspice and nutmeg.
Heat to boiling and then reduce heat, simmering for 10-15 minutes.
Strain to remove spices.
Place into a flat 8″ x 8″ glass baking dish, or loaf pan.
Freeze for 45 minutes.
Using a fork, lightly scrape to create the crystals.
Repeat this process until it’s completely frozen and scraped into loose crystals. It should appear much lighter in color once scraped.
Spoon into chilled decorative glasses with a sprig of mint.
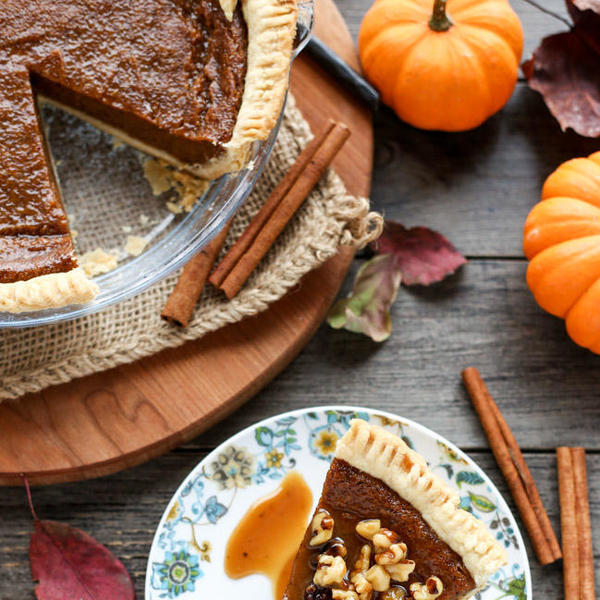
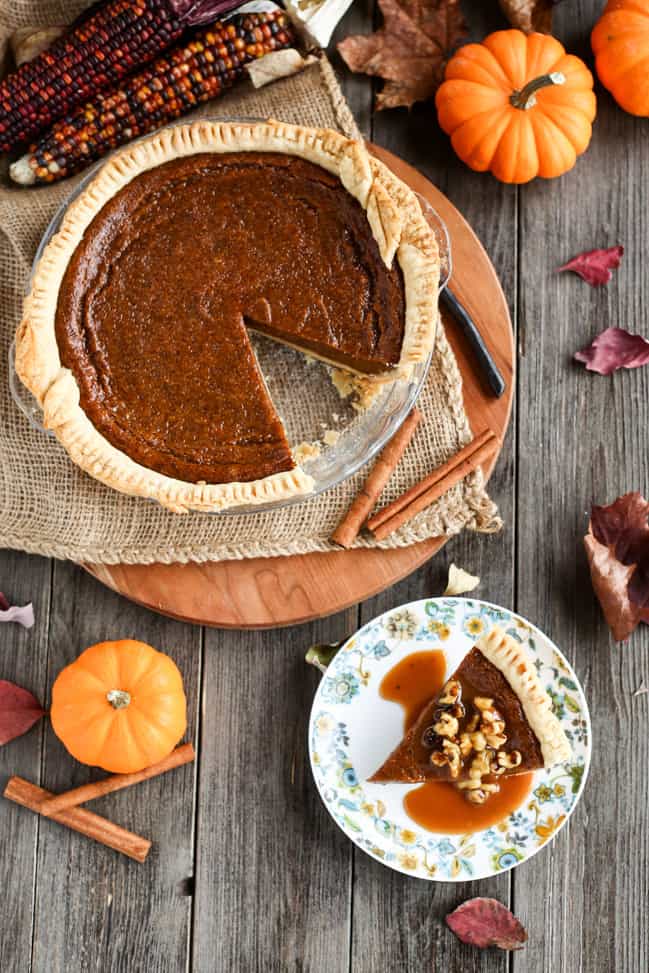
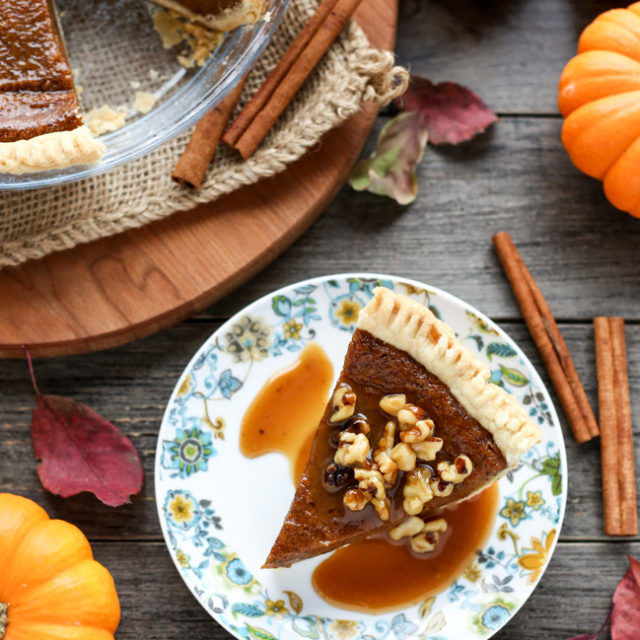
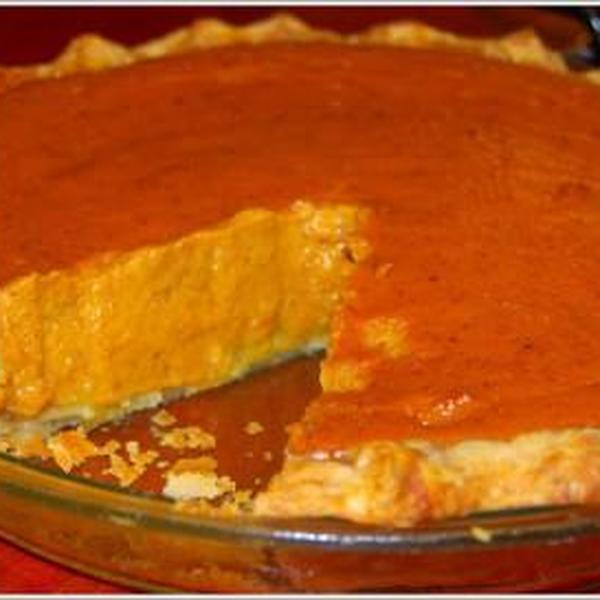
Classic veganized pumpkin pie. This is throwback to one of the first recipes I created for I Love Vegan, waaay back in 2012. You can peep the original on my tumblr. Look, it’s the same plate!
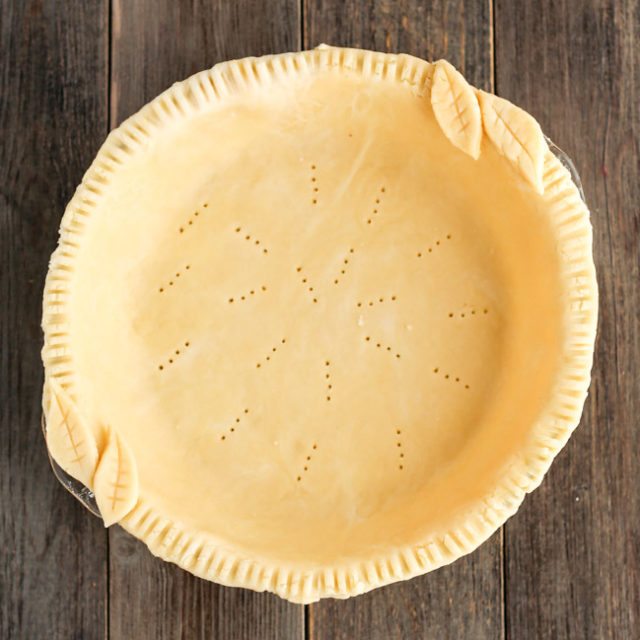
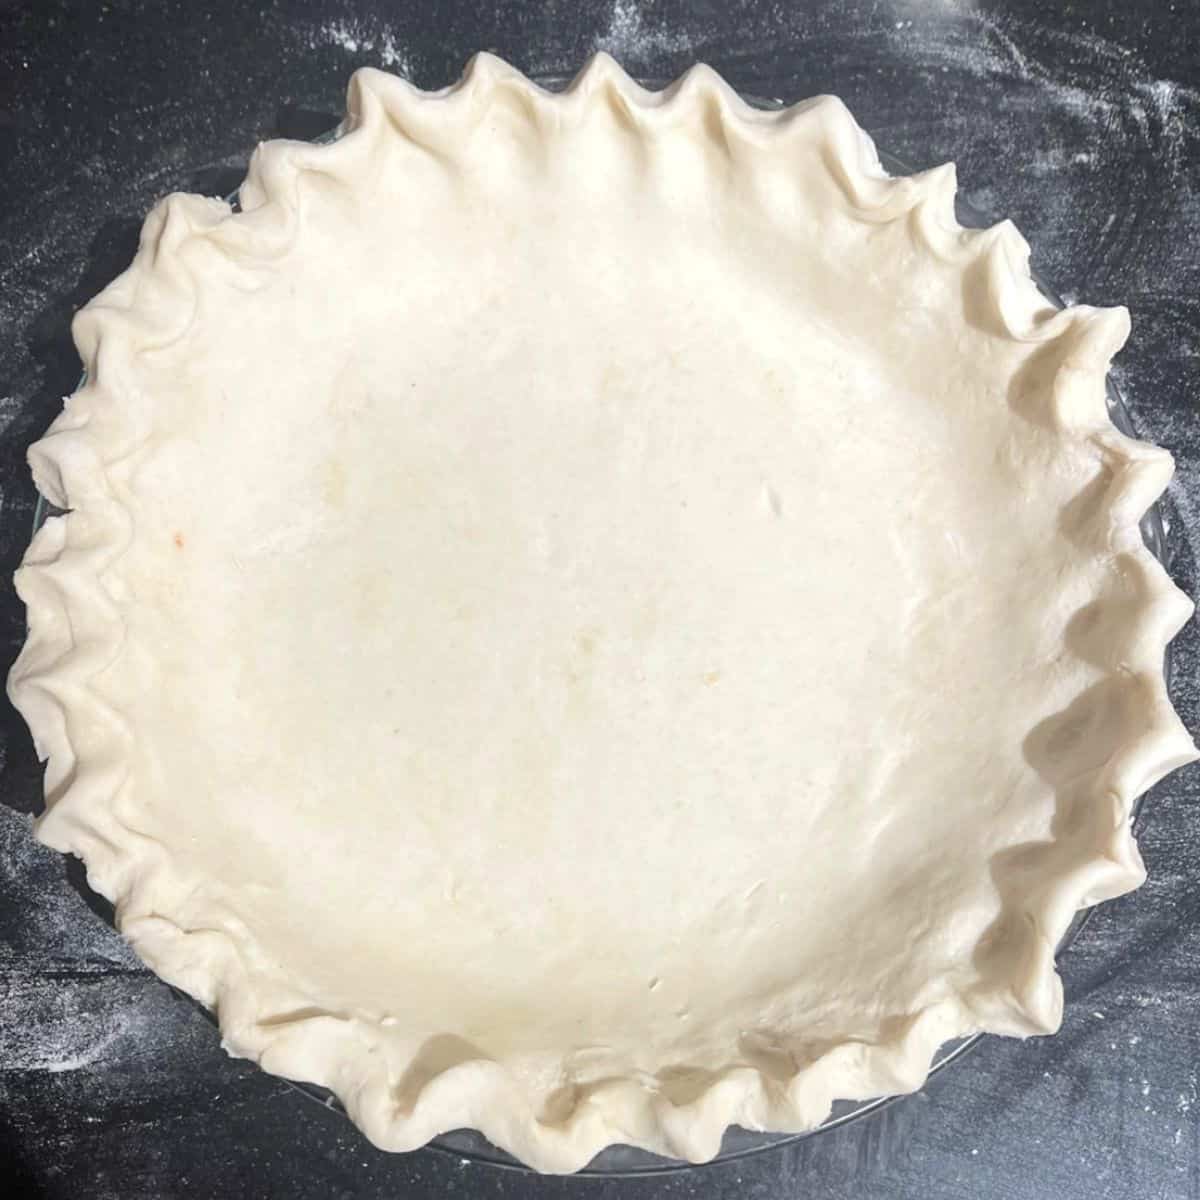
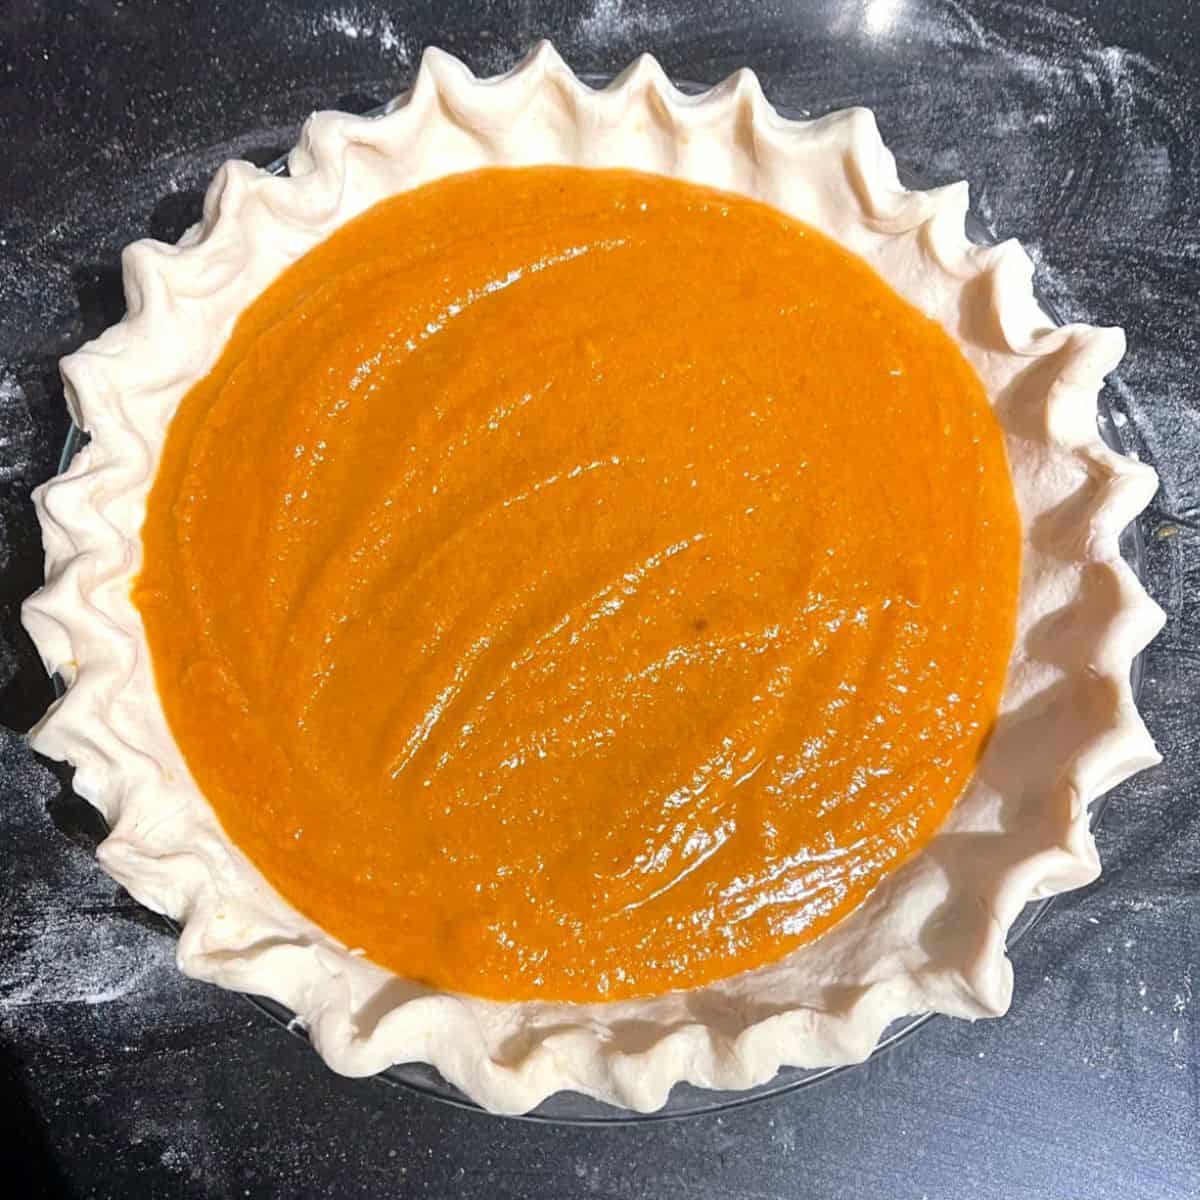
(Left) Uncooked pastry crust. (Right) Uncooked pastry crust with filling.
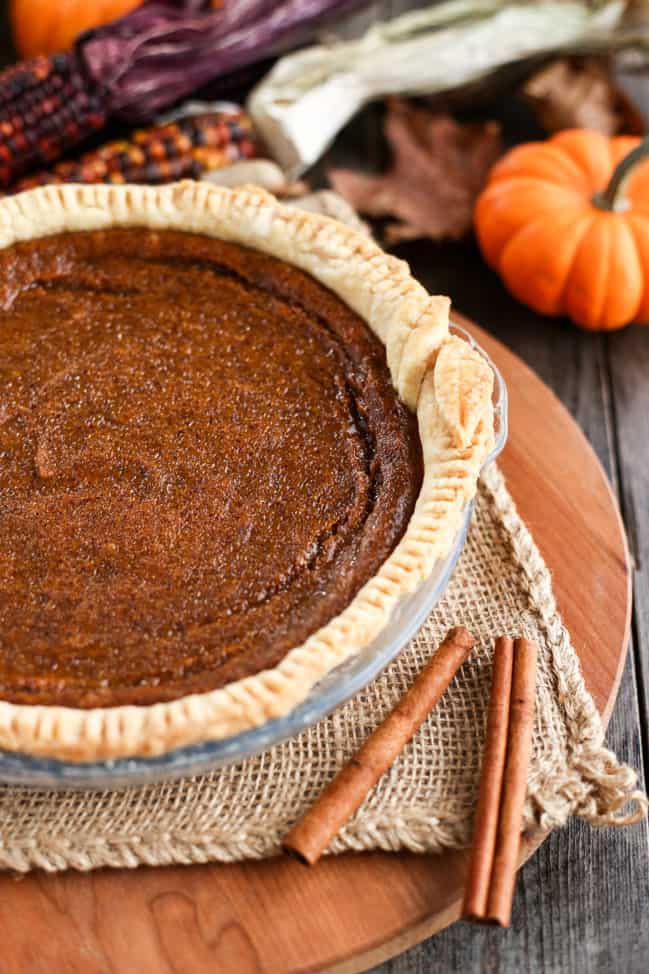
The original recipe’s crust was made with whole wheat flour and coconut oil. This one uses good ol’ all-purpose and vegan butter. Do yourself a favour and stick with the white flour/faux butter combo, it’s going to make your life much easier and your guests (or you know, just you) really happy. This crust is bang on, it’s flakey, it’s flavourful, and it’s pretty easy too!
Coconut oil certainly works for pie crust, but because it’s so sensitive to temperature, it’s difficult to work with. Chilled coconut oil is hard as rock (well nearly…) and warm coconut oil is straight liquid. Vegan butter on the other hand? Super easy to work with and so much more flavourful. Use our trusty ol’ pie crust tutorial for step-by-step pictures.
If you’d prefer a non-pastry crust, we’ve got a recipe for Rustic Oat Crisp Pumpkin Pie. That crust is totally foolproof! If you’re looking for a no-bake option, try our Pumpkin Pie Parfaits.
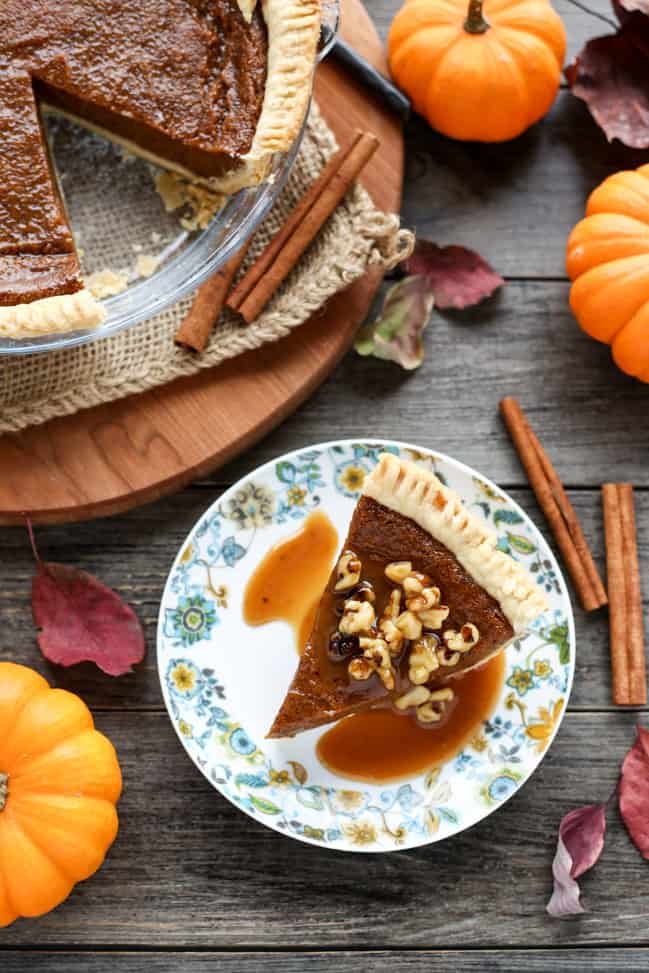
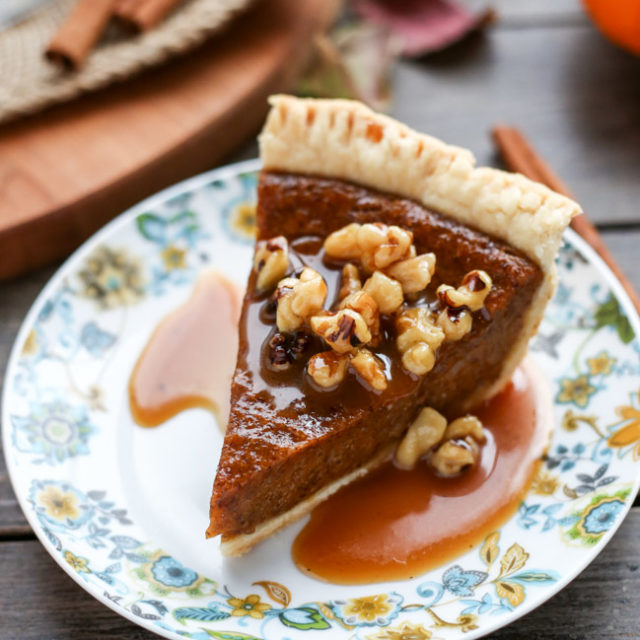
Coconut whip and I aren’t on speaking terms at the moment so we’re topping this classic pie with a simple caramel walnut sauce. Feel free to use coconut whip if you’d like!
Print
Vegan Pumpkin Pie
Author:Brittany at ilovevegan.com
Prep Time:40 minutes
Cook Time:1 hours
Total Time:1 hours 40 minutes
Yield:1 pie 1x
Category:Dessert, Baking
Cuisine:Vegan
Description
Classic pumpkin pie, veganized! Serve this vegan pumpkin pie with caramel walnut sauce (recipe below) or coconut whip.
1 ½ cups pure pumpkin purée
1 cup sugar
¼ tsp salt
1 tsp cinnamon
¾ tsp pumpkin pie spice
¾ cup vanilla soy milk
1 tbsp corn starch
4 ½ tbsp ground flaxseed
Instructions
Whisk together canned pumpkin, sugar, salt, cinnamon, and pumpkin pie spice.
Mix 2 tablespoon soy milk with corn starch. Combine soy milk + corn starch slurry with remaining soy milk, and ground flax seed. Let sit for 5 minutes or until thick.
Whisk the soy milk mixture into the pumpkin mixture and refrigerate for 20 minutes.
Baking
Preheat oven to 400F.
Fill pie crust with chilled filling. Bake for 15 minutes.
Turn heat down to 300F, and bake for 40-50 minutes or until center of pie is set. Refrigerate uncovered overnight.
Print
Vegan Pie Crust
Author:Brittany at ilovevegan.com
Prep Time:40 minutes
Total Time:40 minutes
Yield:1 pie crust 1x
Category:Baking
Cuisine:Vegan
Description
Delicious, flakey, flavourful vegan pie crust. For best results, use vegan butter instead of coconut oil or shortening.
2 cups all-purpose flour
¾ cup vegan butter, chilled (you can substitute vegetable shortening or coconut oil but the crust will be less flavourful – add ½ tsp salt)
¼ cup ice water
Instructions
In a bowl, combine flour and salt (if using coconut oil or vegetable shortening.)
Cut the chilled vegan butter into the flour using your hands or a pastry blender The fat should be cut into very small pieces, resembling coarse corn meal.
Slowly add ice water (just a little bit at a time, you may not need a full ¼ cup), stirring with a fork until the dough is crumbly and just holds together. The dough should not be sticky or wet.
Wrap dough tightly in plastic wrap to form a disk. Refrigerate for 30 minutes to allow to moisture to distribute evenly throughout the dough.
After chilling, unwrap dough and place onto a well floured work surface. Start rolling from the center of the dough to the outside. Roll in different directions to keep a circular shape.
After every few passes with the rolling pin, release the dough from your work surface using a long spatula to keep the dough from tearing.
Roll the dough until it is about an 1 or 2 inches larger than your pie plate. Gently pick up you dough and transfer into your pie plate. Cut off the excess and use a fork to decorate the lip of your dough. Using your fork, prick the bottom of your dough several times.
Notes
Substituting coconut oil for vegan butter will make this crust harder to work with.
Print
Vegan Caramel Walnut Sauce
Author:Brittany at ilovevegan.com
Prep Time:5 minutes
Cook Time:15 minutes
Total Time:20 minutes
Yield:3 /4 cup 1x
Category:Dessert, Dessert Sauces
Cuisine:Vegan
Description
This pourable vegan caramel sauce is great for pumpkin pie, hot drinks, and desserts all year round!
½ cup sugar
50 ml water
1 tsp lemon juice
1 tbsp margarine
¼ cup + 1 tbsp soy milk, divided
⅓ –½ cup chopped walnuts (or pecans)
large ice water bath (large enough to hold your saucepan)
Instructions
Gather all supplies and measure all ingredients before beginning. Keep everything within arm’s reach.
In a small saucepan over medium-high heat, bring sugar and water to a full boil. Prevent sugar granules from collecting on the sides. Avoid stirring.
Once the entire surface of the sugar is boiling, add the lemon juice. Do no stir.
Allow to boil for 3 minutes – until the sugar goes from clear to lightly golden (not brown!)
Leave the burner on, remove the sauce pan from the heat and whisk in 1 tablespoon of margarine.
Put back onto the heat, allow to boil and whisk constantly for 3 minutes.
Remove from heat and gradually whisk in ¼ cup of soy milk. Be careful! The sugar could splatter a little bit.
Put back on the heat, whisking constantly, and add an additional 1 tablespoon of soy milk.
Whisk for 1 minute and add chopped walnuts.
Transfer pot to an ice water bath. Whisk vigorously – you’re trying to incorporate a little bit of air while cooling down the caramel.
As the caramel cools it will thicken up, if it starts to get too thick add 1 tablespoon of soy milk and continue to whisk. Add more soy milk and whisk if needed.
Serve over pumpkin pie.
Reader Interactions
This site uses Akismet to reduce spam. Learn how your comment data is processed.
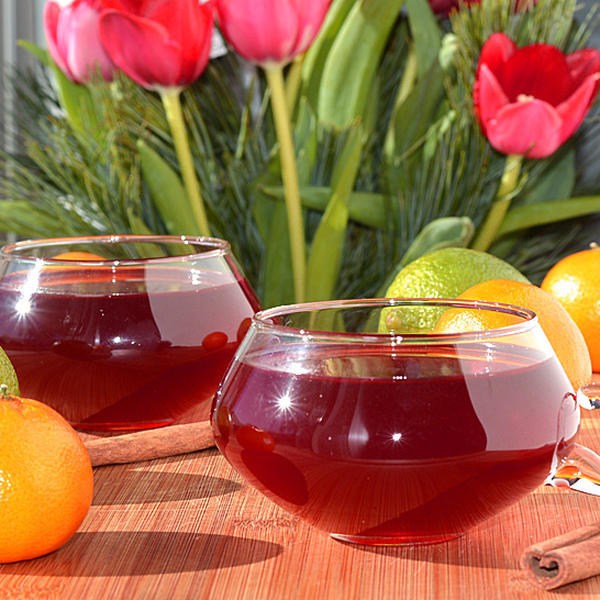
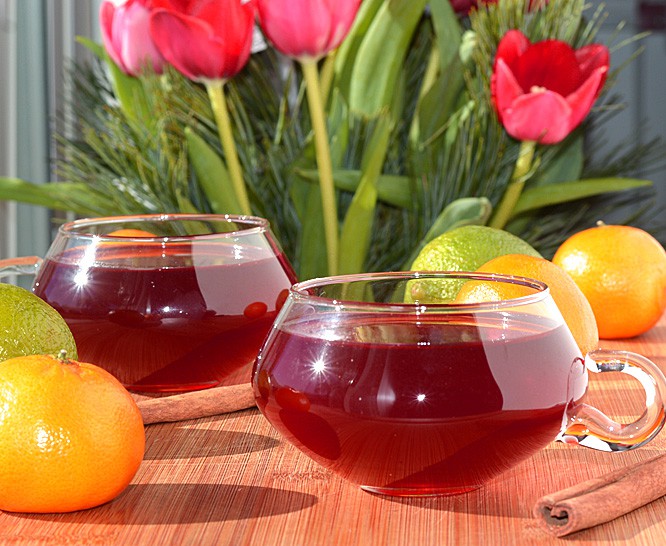
Cranberry Wassail… According to Wikipedia, wassail is defined as “a hot, mulled cider traditionally drunk as an integral part of wassailing, a medieval southern English drinking ritual intended to ensure a good cider apple harvest the following year.”
We offer a more modern, vegan and non-alcoholic version of Cranberry Wassail. This cranberry juice based cocktail is flavored with apple cider, sugar, whole cinnamon sticks, allspice and a bit of ground nutmeg. We gave ours a squeeze of fresh orange juice. Garnish with orange slices or whole cloves and serve warm.
Merry Christmas!
~Aimee
Cranberry Wassail
Before you go, why not check out some of our recent videos and be sure to subscribe to the YouTube Channel! 🙂
Servings 4one-cup servings
Author Veg Life Staff
Ingredients
4CCranberry Juice
1-1/4CApple Cider
1/2CSugar
2whole Cinnamon Sticks
1/2tspof whole Allspice
1/4tspGround Nutmeg
2Tbl fresh Orange Juice
Orange slicescinnamon sticks and/or whole cloves for garnish
Instructions
In a saucepan, add the cranberry juice and apple cider.
Add the sugar, cinnamon sticks, allspice and nutmeg.
Heat to boiling and then reduce heat, simmering for 10-15 minutes.
Strain to remove spices.
Divide between 4 heat-safe punch glasses and serve warm.
Garnish with orange slices, cinnamon sticks and/or whole cloves for garnish.
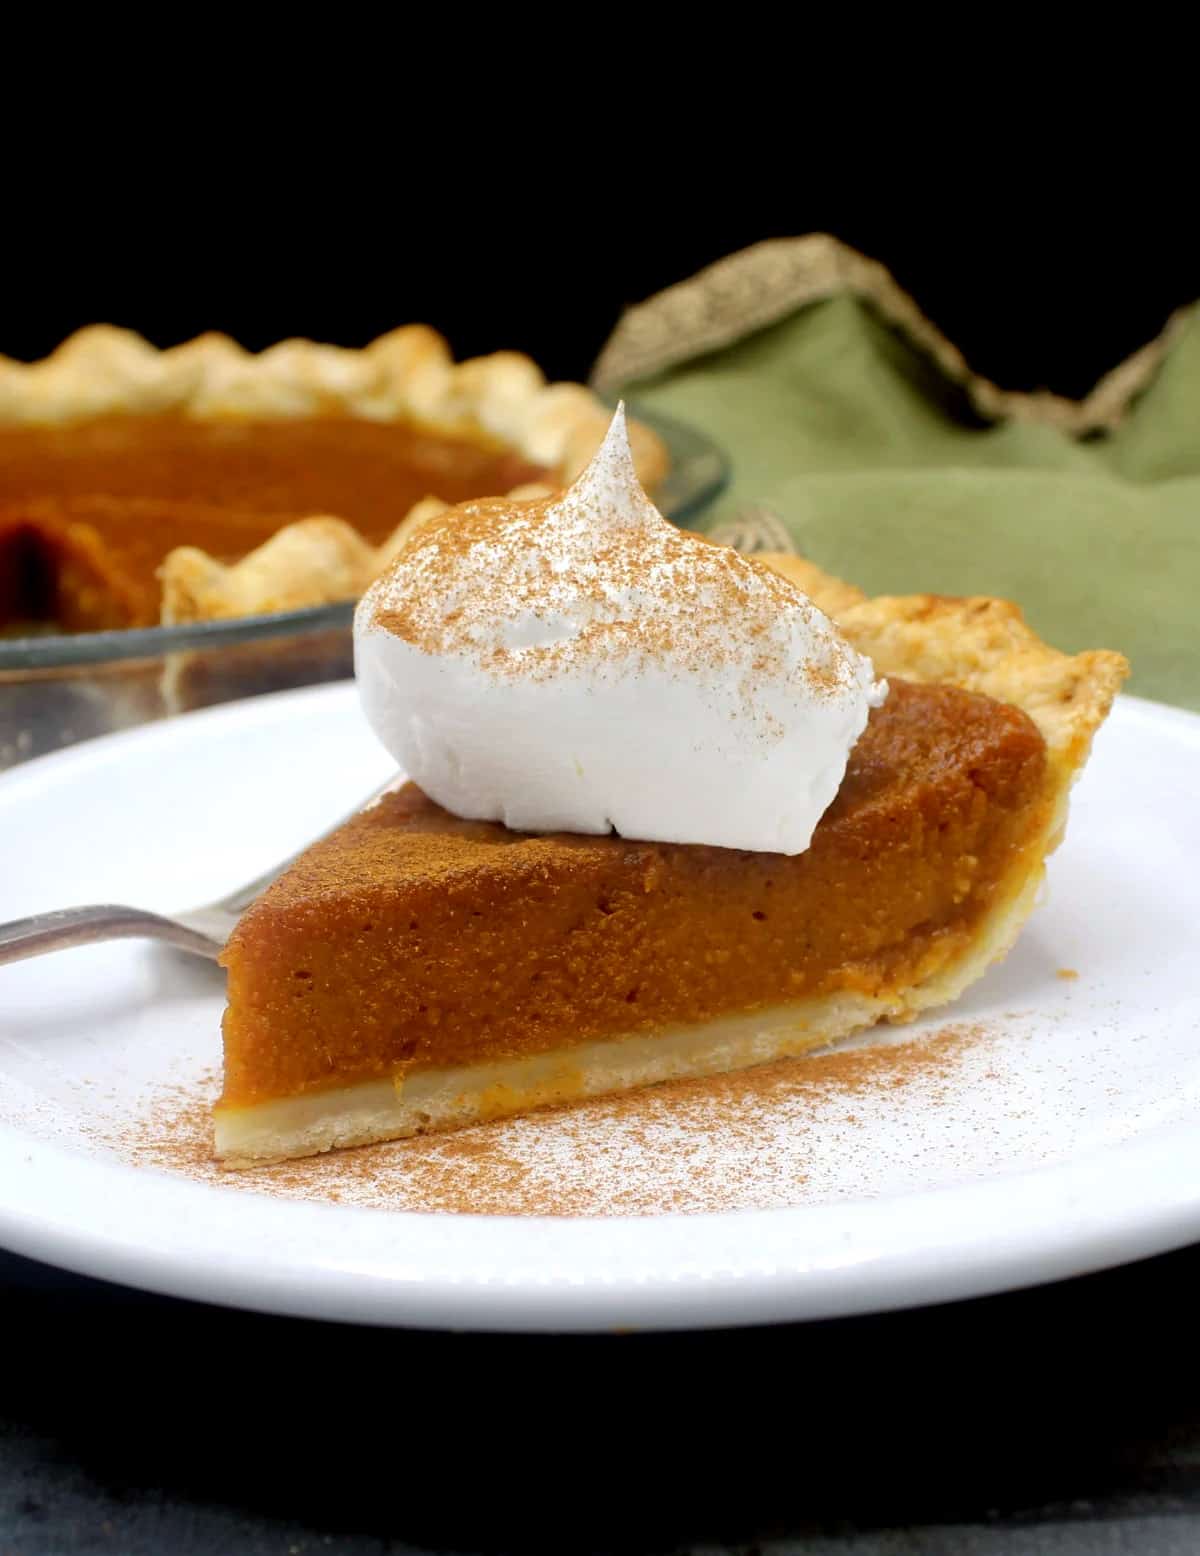
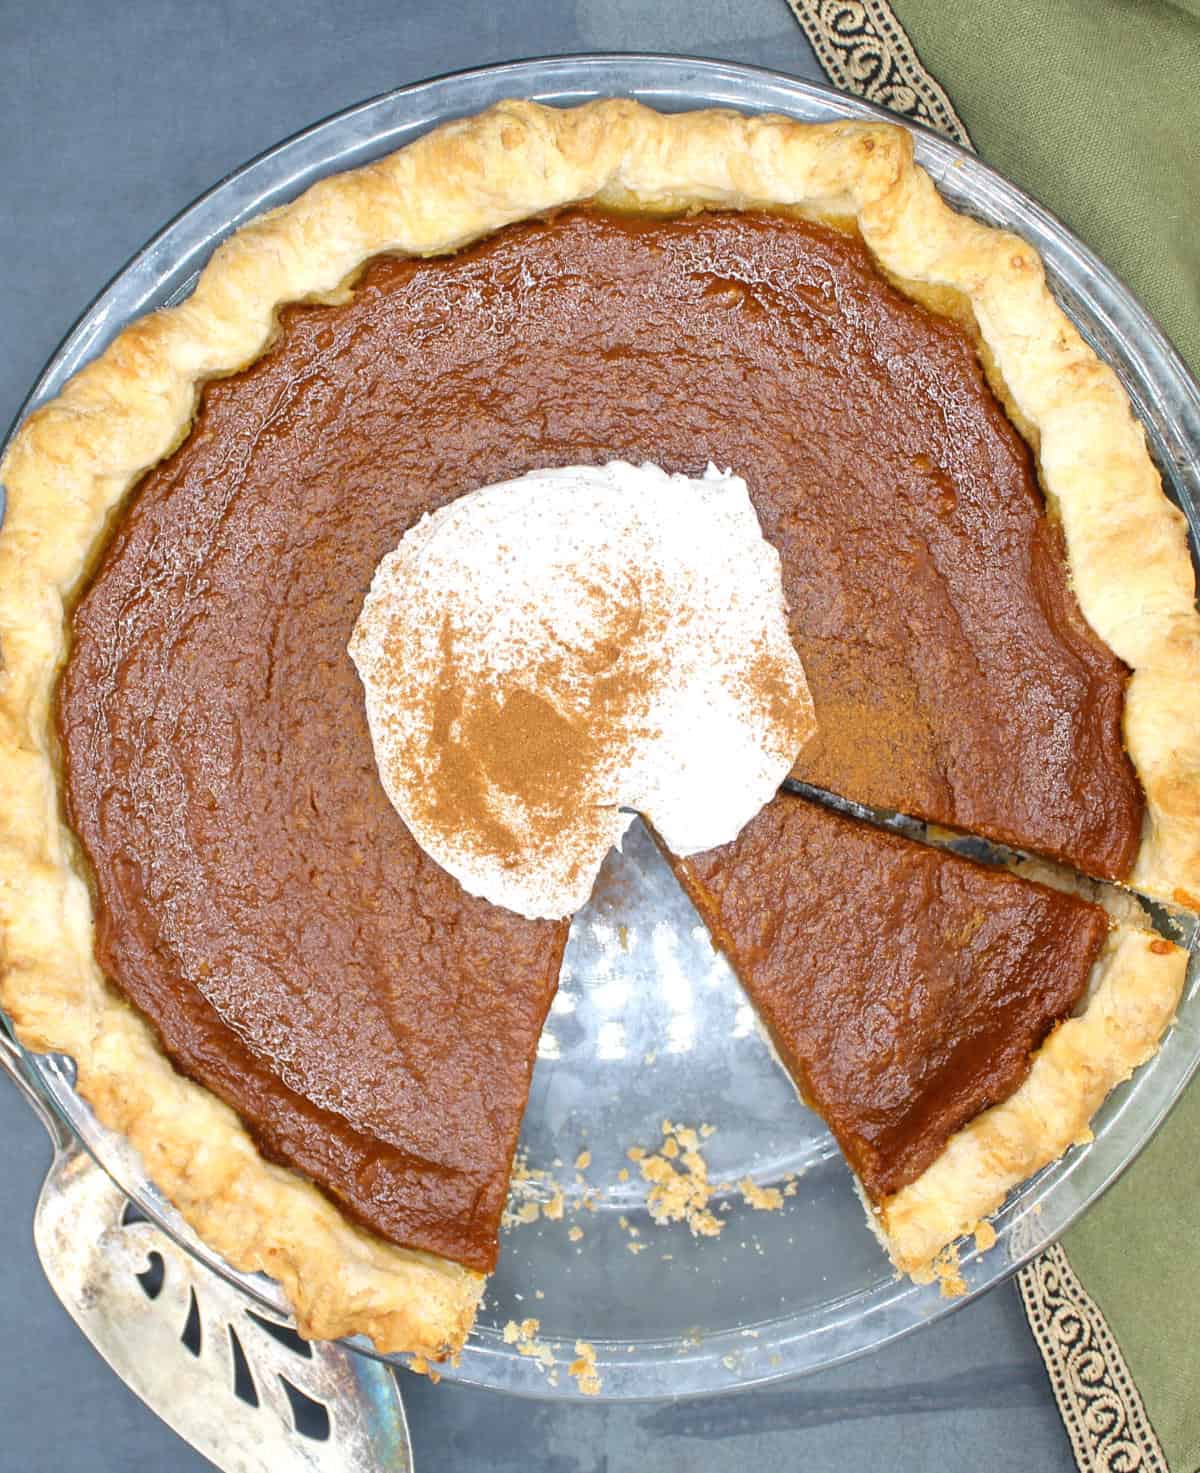
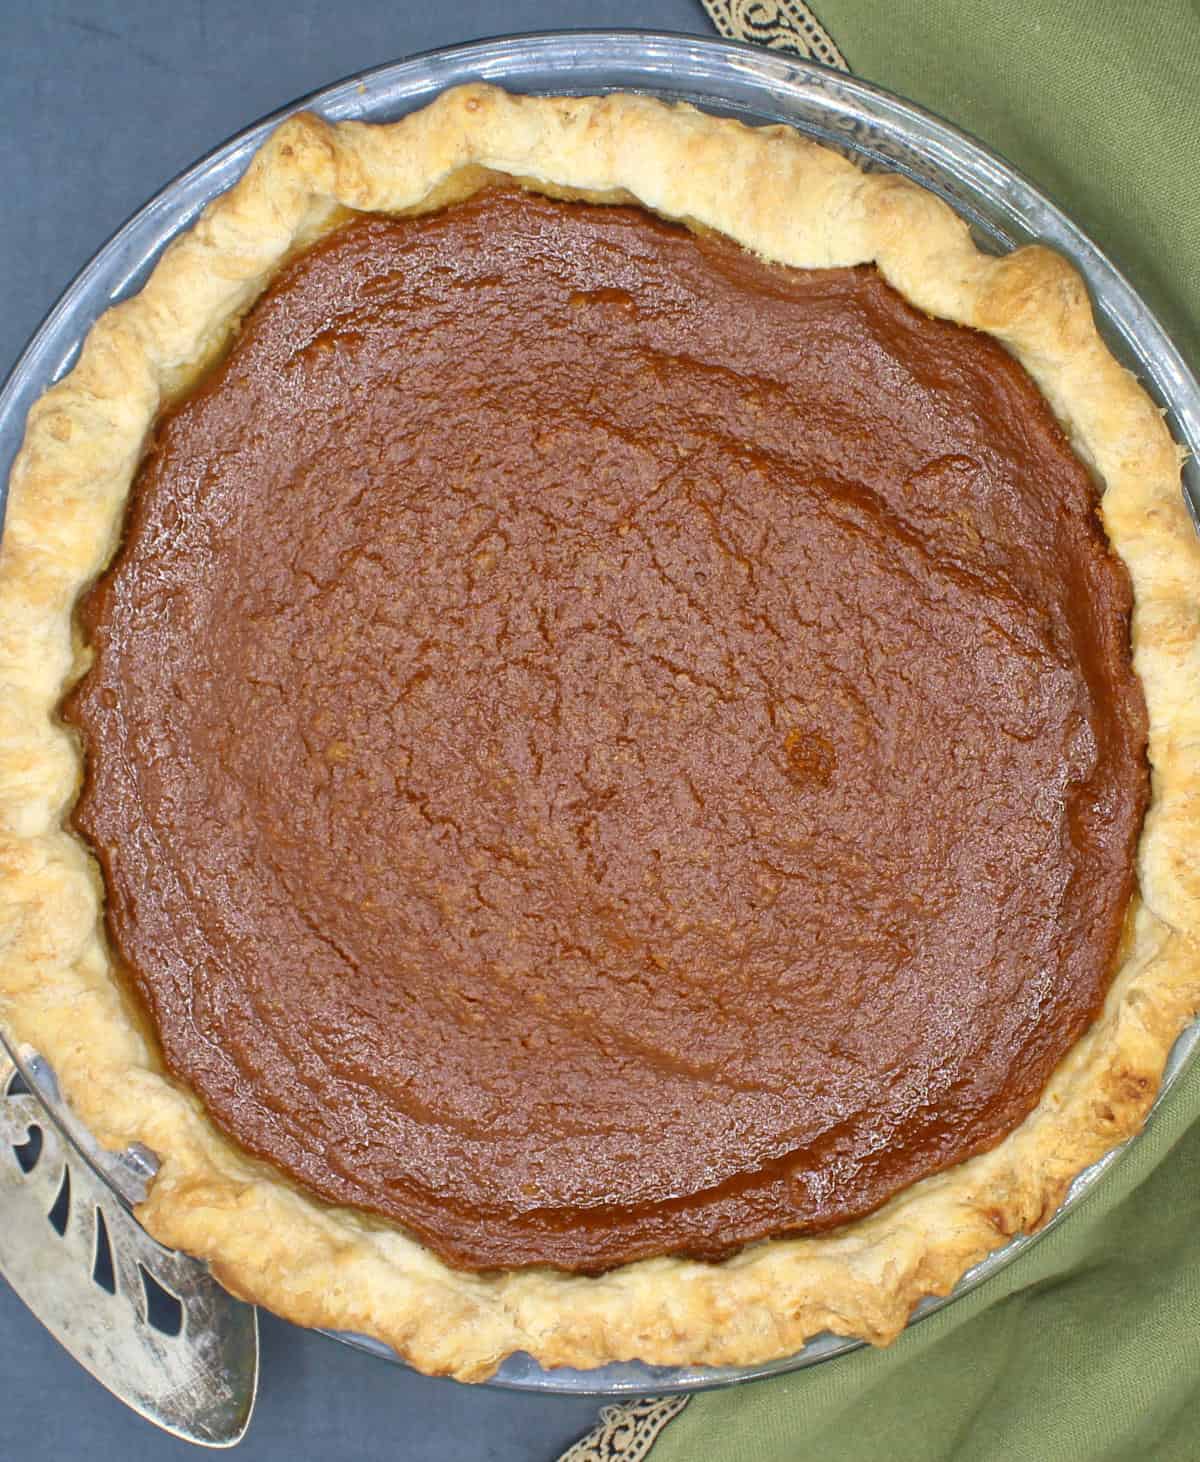
The best vegan Pumpkin Pie recipe, with smooth, rich pumpkin flavor and a crispy, flaky crust. It needs just nine ingredients and is so easy to make!
For more pumpkin treats, be sure to try vegan pumpkin cake with chai spices and this gluten-free vegan pumpkin praline tart.
Table of Contents
Why you will love this recipe
Ingredients
Variations
How to make vegan pumpkin pie
Vegan Pumpkin Pie FAQs
More yummy vegan pumpkin desserts
Recipe card
Reviews
Why you will love this recipe
Pumpkin pie is everyone’s favorite holiday dessert. And this vegan pie is so delicious, everyone will want more. The pumpkin pie filling is perfectly spiced with a smooth, creamy texture and the crust is crispy and flaky. The pie slices like a dream and it tastes amazing.
Easy to make. You can use a store bought crust (or make your own) and it takes just minutes to put the filling together. Then all you need to do is pour and bake for the perfect but foolproof vegan pumpkin pie. You can make your own pumpkin pie spice mix, and I’ll show you how, or you can use a store-bought pumpkin spice mix.
Make ahead: You can make this pumpkin pie up to three months ahead because it freezes really well. Wrap tightly in freezer-safe wrap and thaw before serving.
Soy-free, dairy-free and eggless. You can use canned coconut milk instead of cashews for the filling if you are nut-free, or use my gluten-free pie crust from this French onion tart recipe if you are gluten free. Any way, it will be the most delicious pumpkin pie you will ever eat.
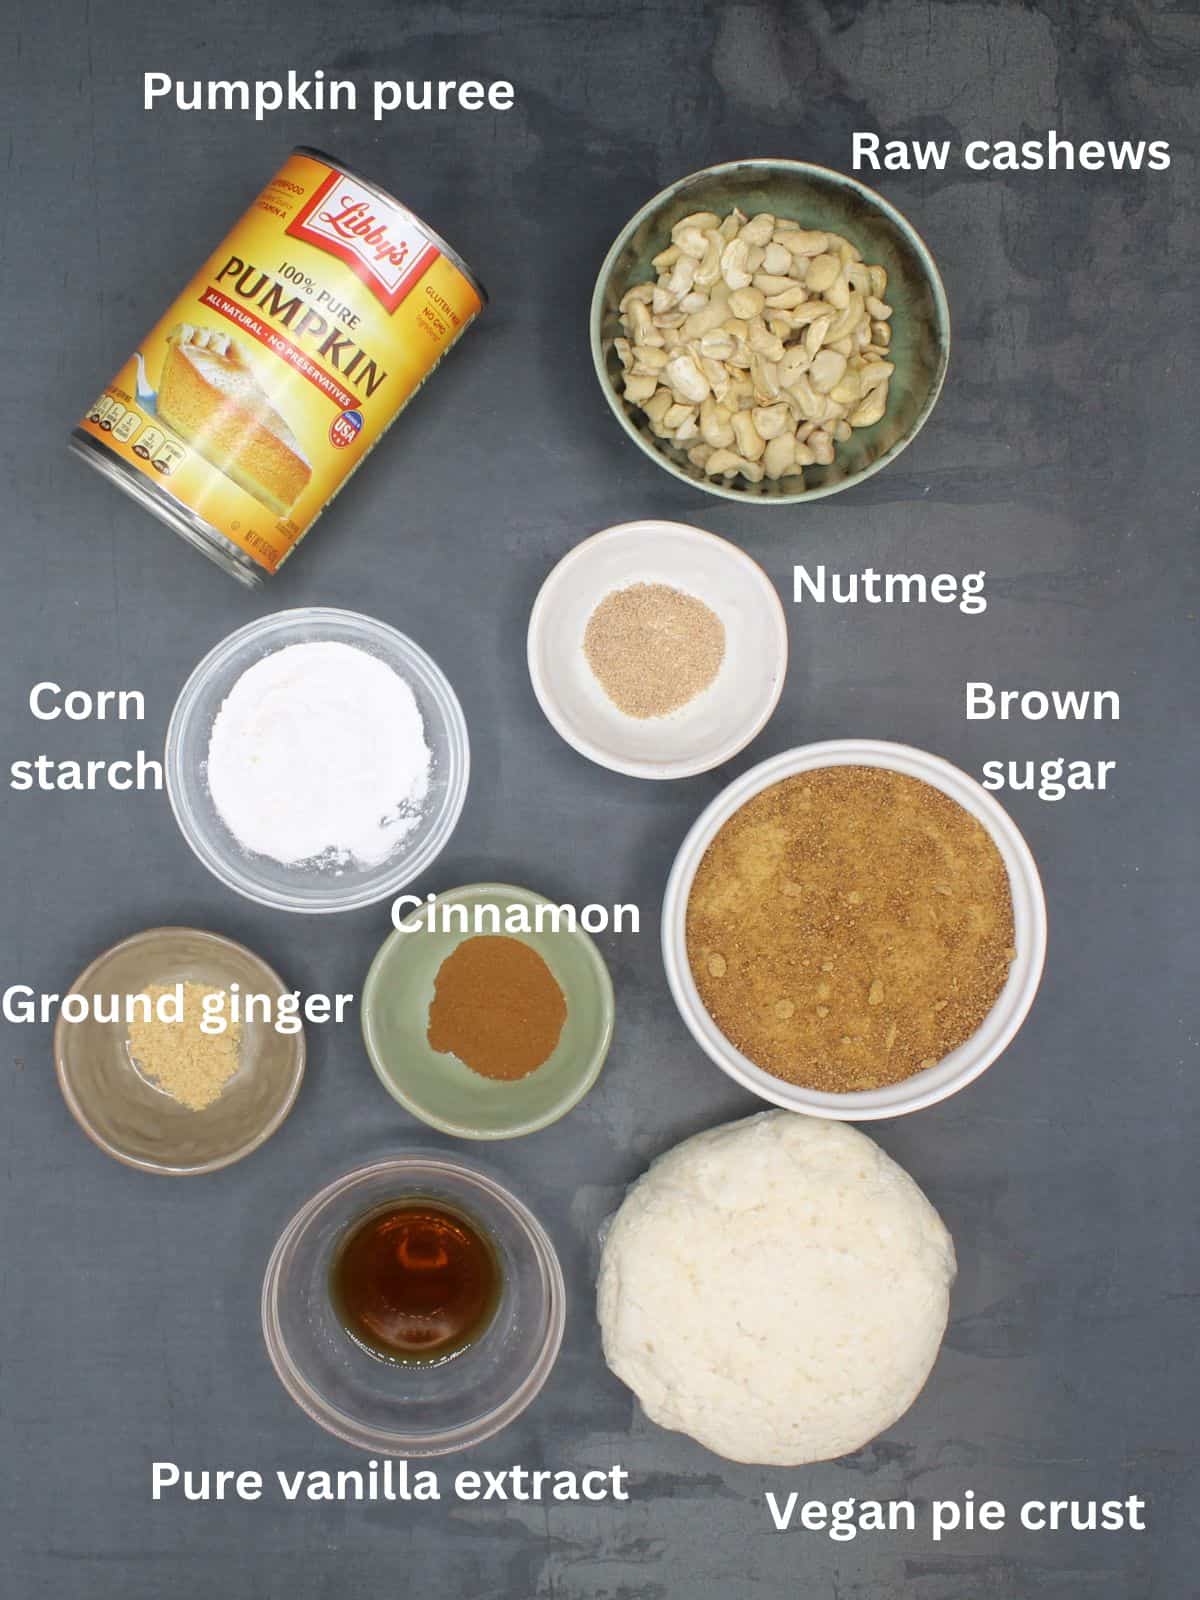
Ingredients
Check recipe box below for exact quantities of each ingredient.
One vegan pie crust. You can use my vegan pie crust recipe, which is both awesome and easy. Or use a store bought crust.
Raw cashews. Cashew cream is an awesome and close substitute for cream, which would be used in a traditional pumpkin pie recipe.
Pumpkin puree. Buy the puree and not the can labeled “pumpkin pie filling.”
1 cup light brown sugar or coconut sugar. You can use any sugar of your choice but brown sugar and coconut sugar add a delicious depth, so use one of those two if you can. You can also use 1 cup maple syrup although the filling will be slightly softer.
Corn starch. This helps thicken and set the filling. Tapioca starch or arrowroot starch are fine substitutes.
Pure vanilla extract. This nicely rounds out the flavor.
Variations
For a chai spice pumpkin pie, use chai masala spice mix instead of the pumpkin pie spices.
You can make this vegan pumpkin pie with butternut squash puree, which has a lovely, delicate flavor. To make the puree, roast 1-inch cubes of butternut squash tossed in oil for 40 minutes in a preheated 400 degree Fahrenheit oven, then give it a quick turn in the food processor to blend.
If you are gluten-free, use the vegan gluten-free almond shortbread crust I shared in this vegan white chocolate pie recipe. It is yummy with the pumpkin pie filling!
If you are nut-free, use a 14 oz can of full fat coconut milk instead of the cashew cream. Increase the amount of corn starch to 3 tablespoons instead of 2.
If you prefer to not use vegan butter, you can make the vegan pie crust with coconut oil. Refrigerate the coconut oil until it is quite hard, then cut into cubes and make the pie crust.
How to make vegan pumpkin pie
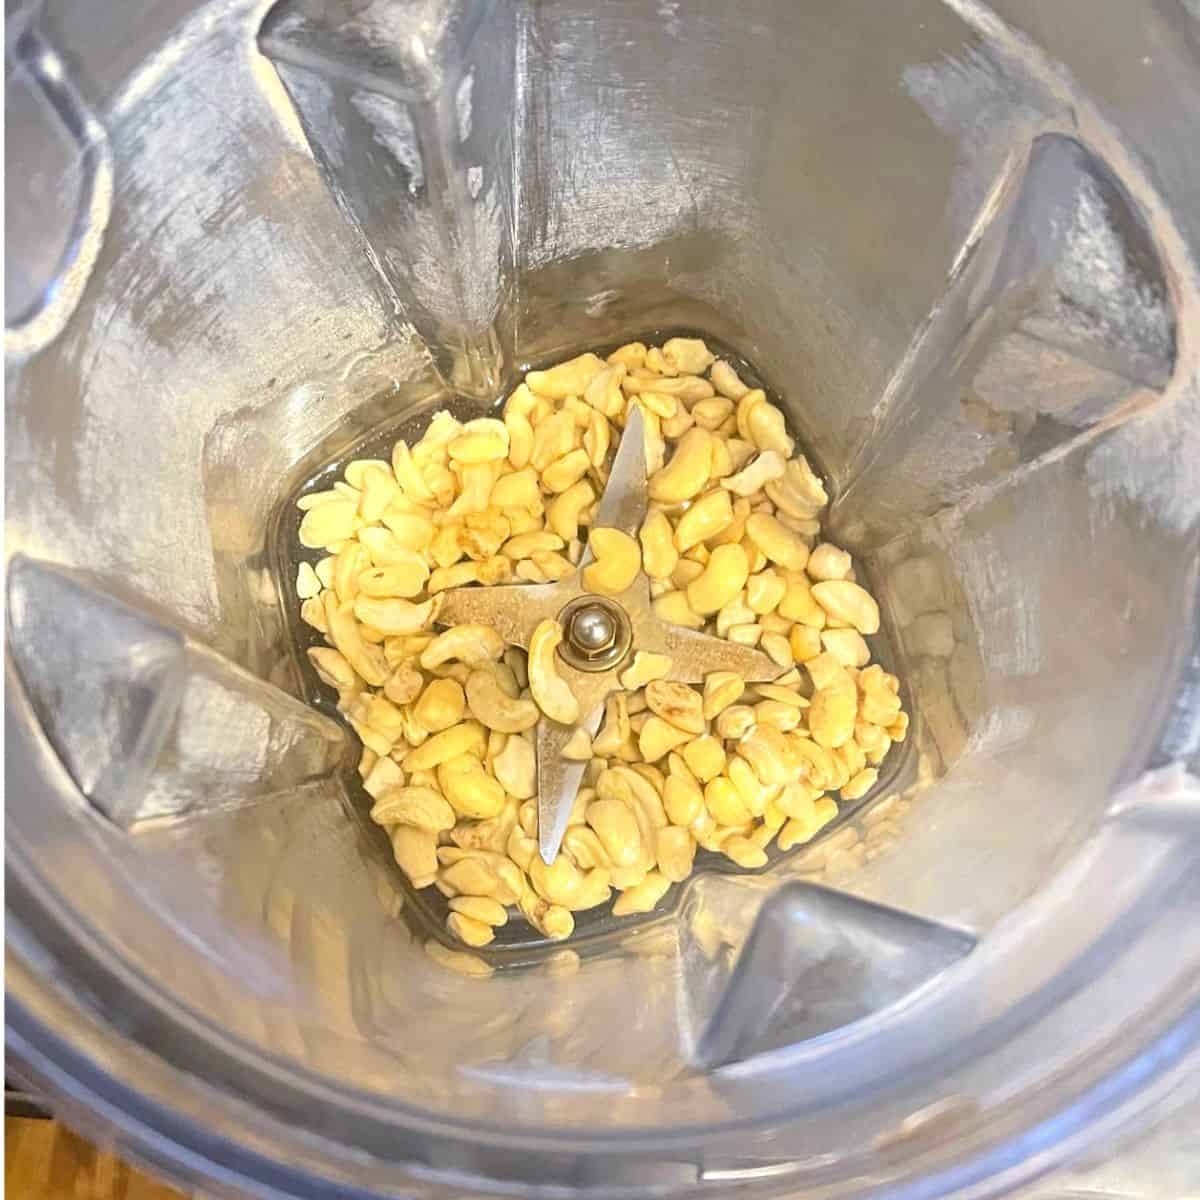
1. Preheat the oven to 425 degrees Fahrenheit/220 degrees Celsius. Place cashews in blender.
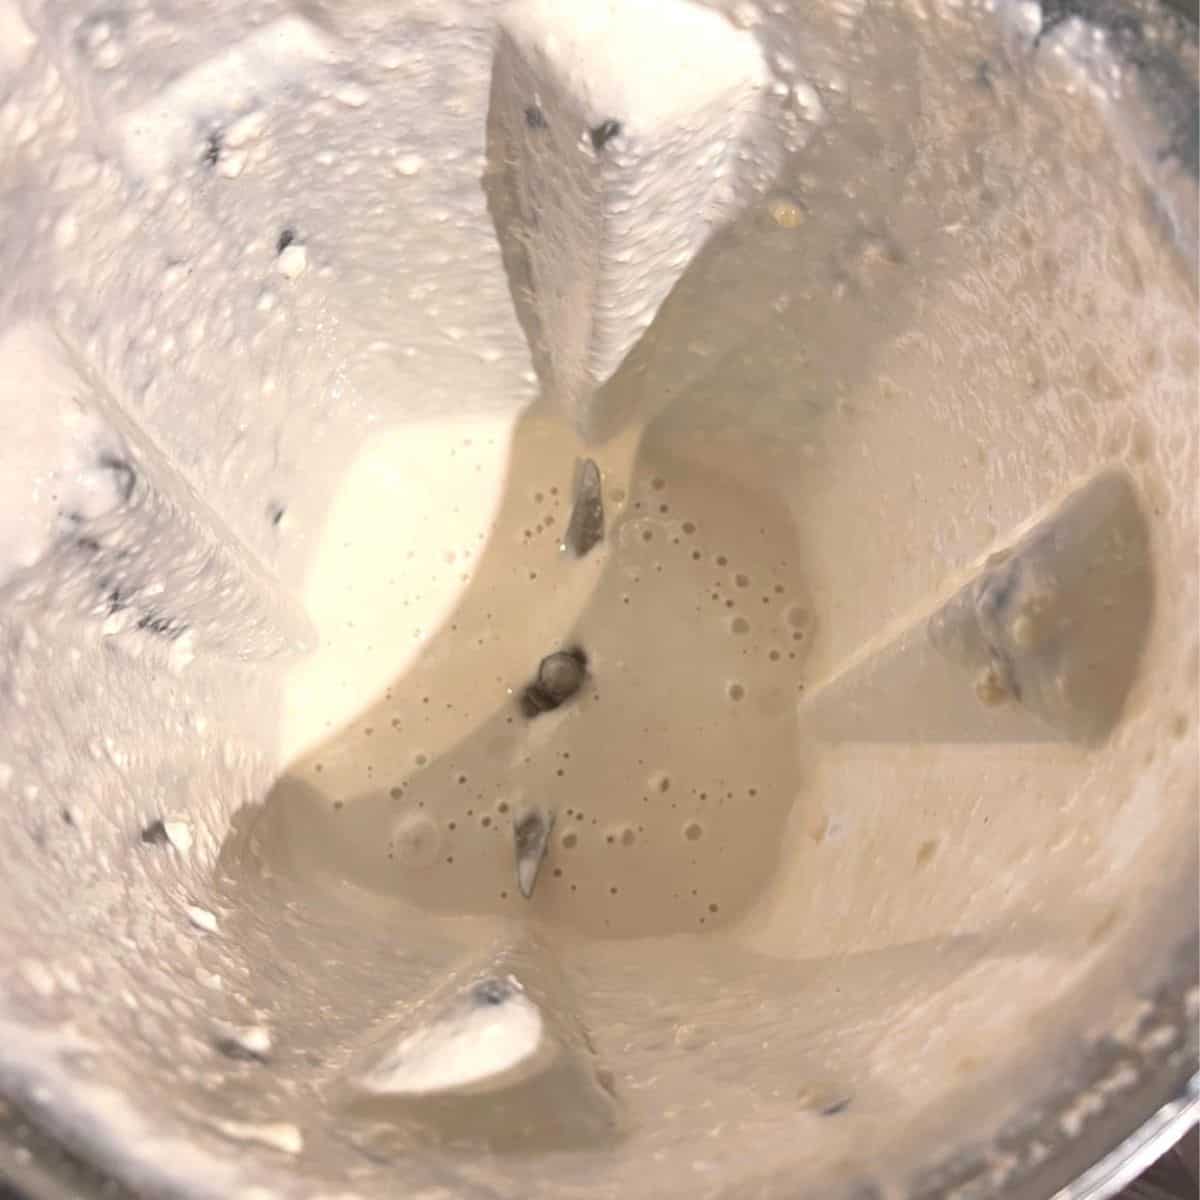
2. Blend the cashews with ¾ cup water until very smooth. You might need to soak the cashews first for 30 minutes if your blender isn’t very powerful.
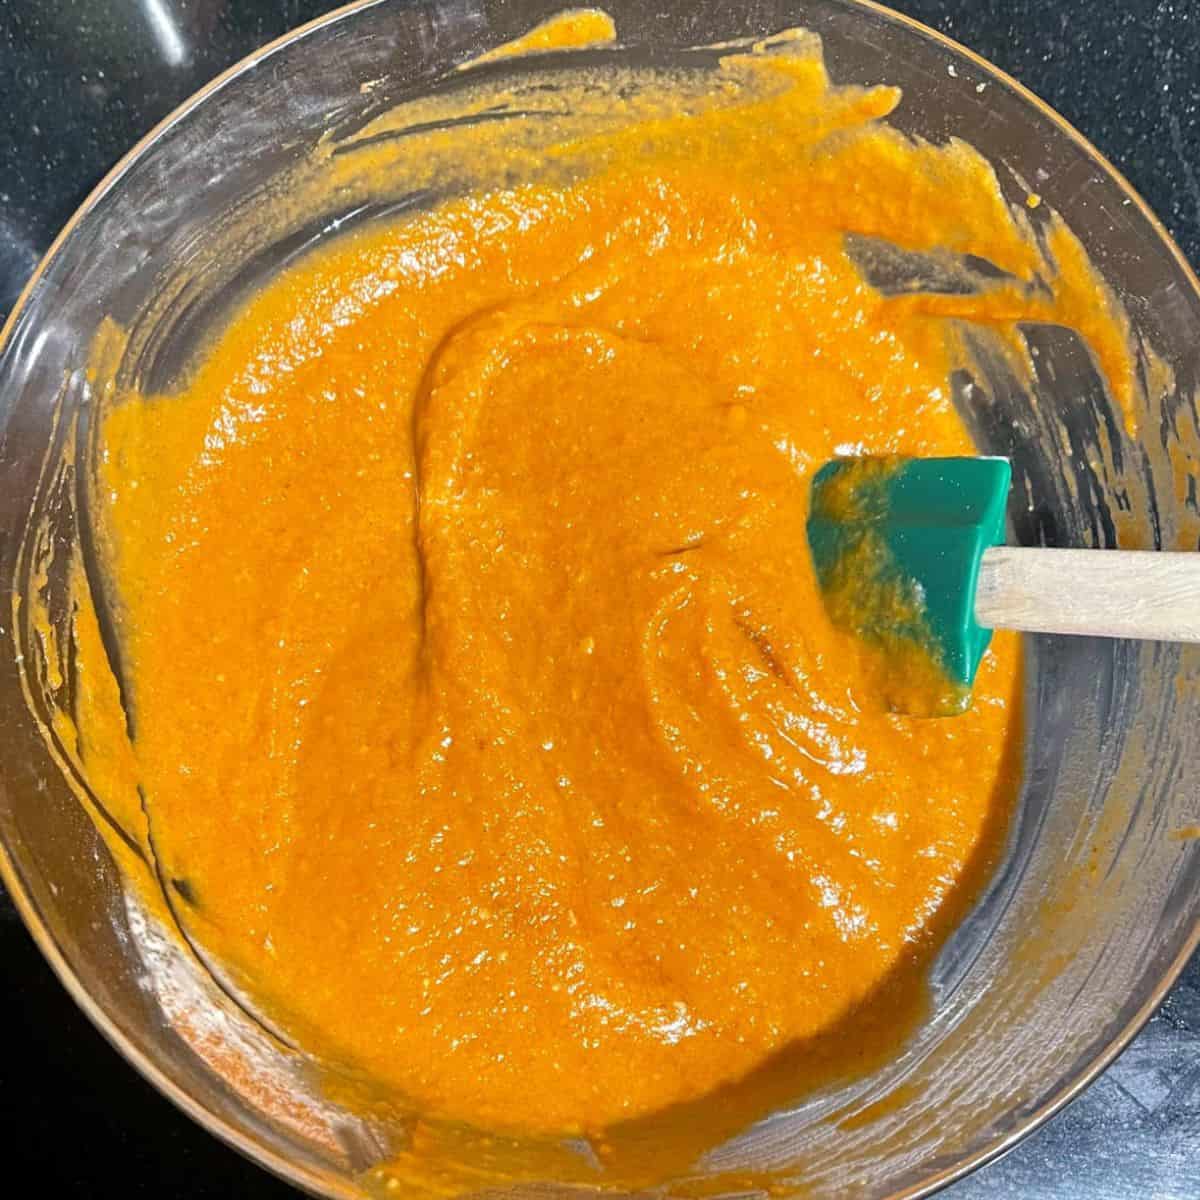
3. Place the blended cashew cream in a bowl with the sugar, pumpkin puree, ground cinnamon, ginger, nutmeg and cloves, if using, corn starch, salt and pure vanilla extract.
4. Stir until well-mixed.
5. Roll out the pie crust dough on a floured surface to a diameter slightly larger than a 9-inch pie plate or pie pan. Gently transfer the dough to the pie plate and fit it in. Crimp the edges. If using a store-bought pie crust you can skip this step.
6. Pour the prepared pumpkin pie filling mixture into the crust. Place the pie dish on a baking sheet and place on the center rack in the oven. Bake 10 minutes, then lower heat to 350 degrees Fahrenheit/175 degrees Celsius and bake another 50-60 minutes or until the pie has set.
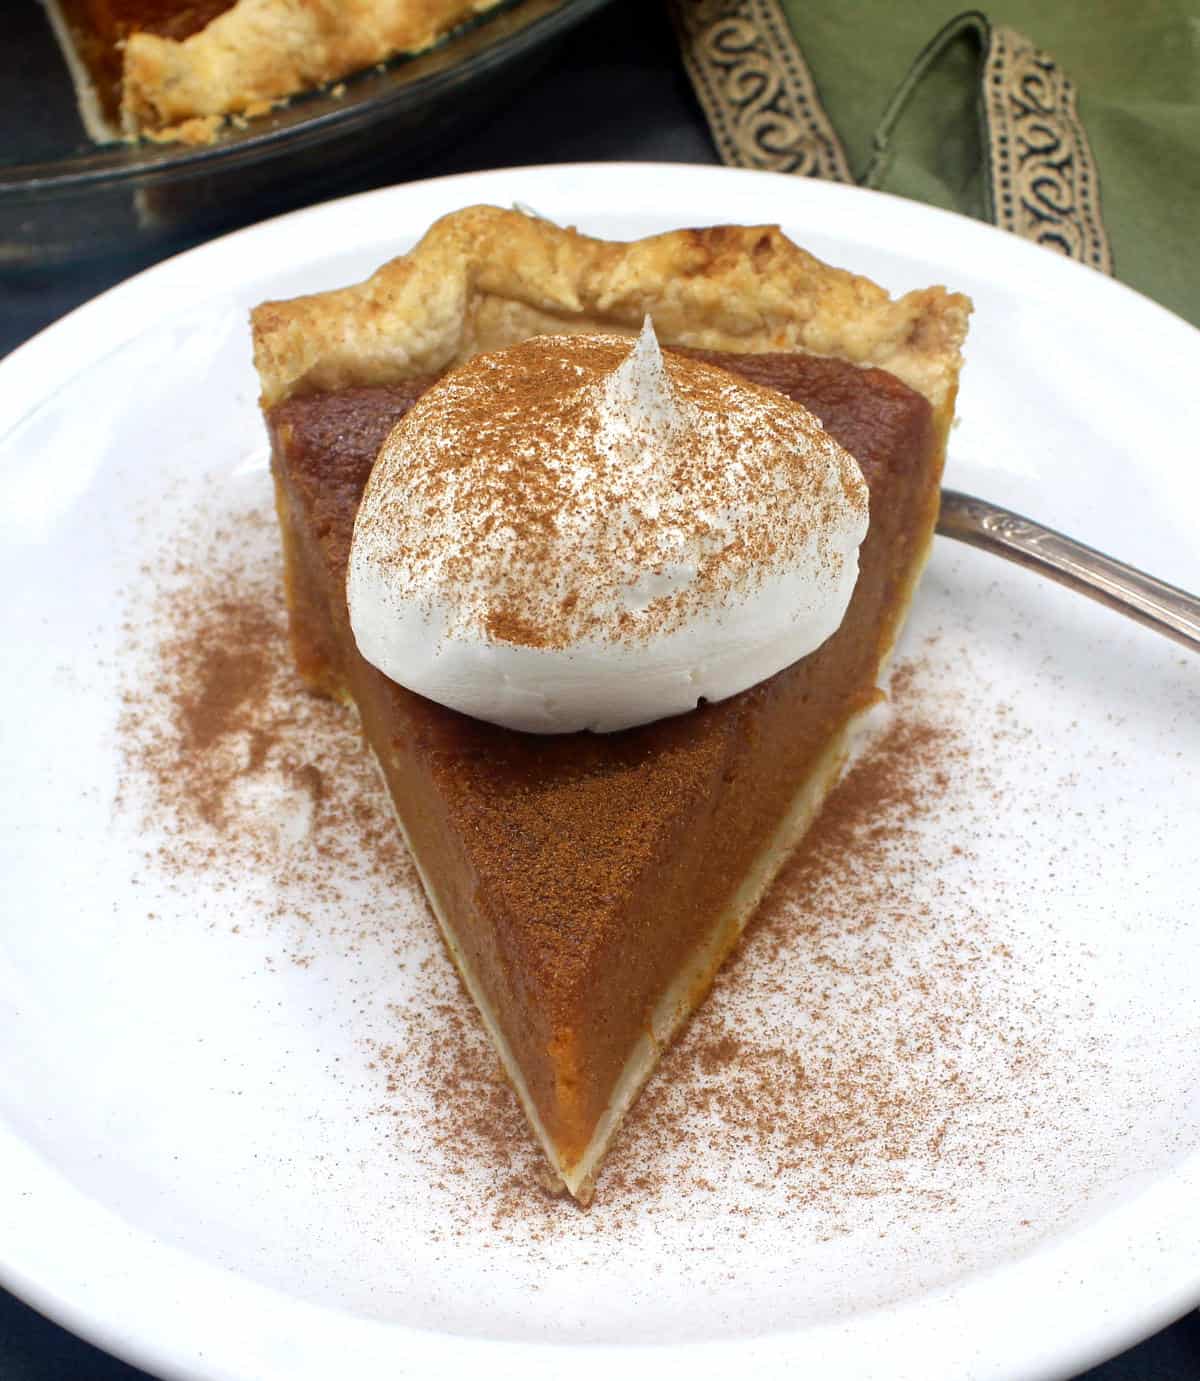
7. Cool the pie to room temperature on a wire rack. Place in the refrigerator and chill for another two hours before slicing. Serve with a dollop of vegan whipped cream or whipped coconut cream or on its own.
Vegan Pumpkin Pie FAQs
Can I make my own pumpkin puree to make this pie?
You absolutely can! Buying a canned puree just makes things easier but if you have the time making your own puree is even better because of the fresher taste. Don’t use the large, ornamental pumpkins used for jack o’ lanterns. Instead buy smaller pumpkins that are sold as “pie pumpkins” or use other winter squash, including butternut squash and acorn squash. Peel the squash, cut into 1-inch cubes, toss with oil, and roast in a 400 degree oven for 40 minutes or until very tender. Blend into a puree.
Is vegan pumpkin pie healthy?
The pumpkin, which is packed with Vitamin A and other nutrients, definitely raises the nutritional profile of this pie. We also use unrefined sugars in the filling. Overall the pumpkin pie is definitely healthier than one that is non-vegan because it doesn’t have the cholesterol of eggs and dairy cream. But it does have a good amount of fat and sugar so eat in moderation if you are watching your calories.
How to store vegan pumpkin pie?
The pie can be stored in the fridge for up to a week. You can also freeze the pie for up to three months. Be sure to wrap individual slices or the entire pie in freezer safe cling wrap and place in an airtight container. Thaw and reheat in a 350-degree oven.
More yummy vegan pumpkin desserts
Recipe card
Vegan Pumpkin Pie
Vaishali · Holy Cow Vegan
The best vegan Pumpkin Pie ever! It needs just nine ingredients and is so easy to make. It will become one of your favorite vegan pie recipes.
Prep Time 15 minutesmins
Cook Time 1 hourhr
Cooling time 4 hourshrs
Total Time 5 hourshrs15 minutesmins
Course Dessert
Cuisine American
Servings 8servings
Calories 350kcal
Equipment
9-inch pie plate
Ingredients
1vegan pie crust
½cupraw cashews
¾cupwater
15ozpumpkin puree(I used Libby’s, which is the most commonly available brand here in the U.S., but I am not brand loyal. Use any canned pumpkin puree of your choice).
2tablespoonscornstarch
1cup + 2 tablespoonsbrown sugar(coconut sugar is awesome too, but you can use any sugar of your choice)
1½teaspoonsground cinnamon
½teaspoonground nutmeg
½teaspoonground ginger
¼teaspoonground cloves(optional)
1teaspoonpure vanilla extract
Instructions
Preheat the oven to 425 degrees Fahrenheit/220 degrees Celsius. Place cashews in blender.
Blend the cashews with ¾ cup water until very smooth. You might need to soak the cashews first for 30 minutes if your blender isn’t very powerful.
Place the blended cashew cream in a bowl with the sugar, pumpkin puree, ground cinnamon, ginger, nutmeg and cloves, if using, corn starch, salt and pure vanilla extract.
Stir until well-mixed.
Roll out the pie crust dough on a floured surface to a diameter slightly larger than a 9-inch pie plate. Gently transfer the dough to the pie plate and fit it in. Crimp the edges. If using a premade crust you can skip this step.
Pour the prepared pumpkin pie filling into the crust. Place the pie plate on a baking sheet and place on the center rack in the oven. Bake 10 minutes, then lower heat to 350 degrees Fahrenheit/175 degrees Celsius and bake another 50-60 minutes or until the pie has set.
Cool the pie to room temperature on a wire rack. Place in the refrigerator and chill for another two hours or longer before slicing.
To print recipe card without images, uncheck “instruction images” after clicking the “print recipe” button.
Tried this recipe?Let us know in the comments below!
About Vaishali
Hi! I’m Vaishali, a journalist turned food blogger. At Holy Cow Vegan I share easy, tasty recipes made with clean, wholesome ingredients that the entire family can enjoy.
* 1/2 c grated parmesan cheese, or nutritional yeast for vegan version
* 1/4 tsp sea salt
Instructions:
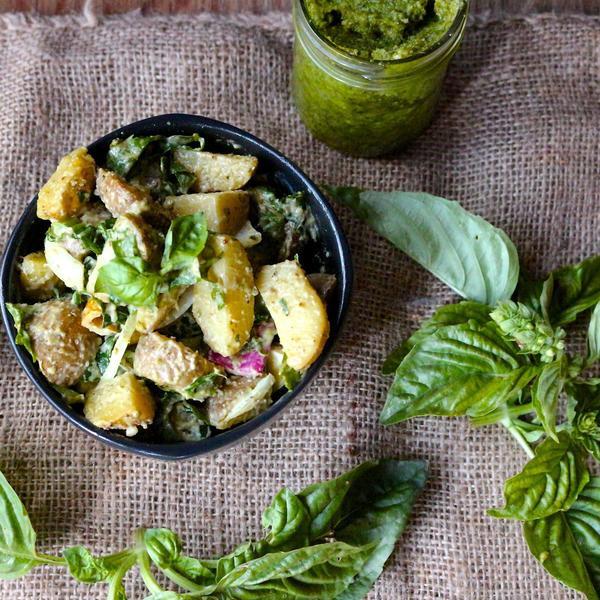
In a blender or food processor, start by adding the garlic, brazil nuts, basil and cheese, start blending and slowly add the olive oil until mixture starts to become smooth, add salt and pepper.
Boil water for the potatoes and cook until tender. Allow potatoes to cool before proceeding.
Mix the pesto and mayonnaise together, or leave the mayonnaise out for vegan
Add the cooled potatoes, kale, chard and onion to a large bowl and incorporate the pesto-mayonnaise until everything is well coated. I like to use my hand and mash the potatoes up a bit so that they absorb the most sauce.


 If you’re anything like me, taco nights at home are a pretty hard thing to beat. I mean, who doesn’t love loading up a tortilla (or three or four) with allll the fixins?
 Well, fret not, my friends, because these vegan, gluten free, grain free tacos are so packed with flavor and nutritious ingredients that you could easily inhale like six of them without feeling a sliver of guilt. Okay, maybe I’m exaggerating a little bit, but you get the idea. The backbone of this recipe comes from Goop. I followed their detox menu back in January, and their ah-mazing veggie taco recipe (which substitutes tortillas with wraps made from chickpea flour-genius!) was so insane it made me forget I was on any sort of diet. In fact, they’re still working their way into my dinner repertoire.
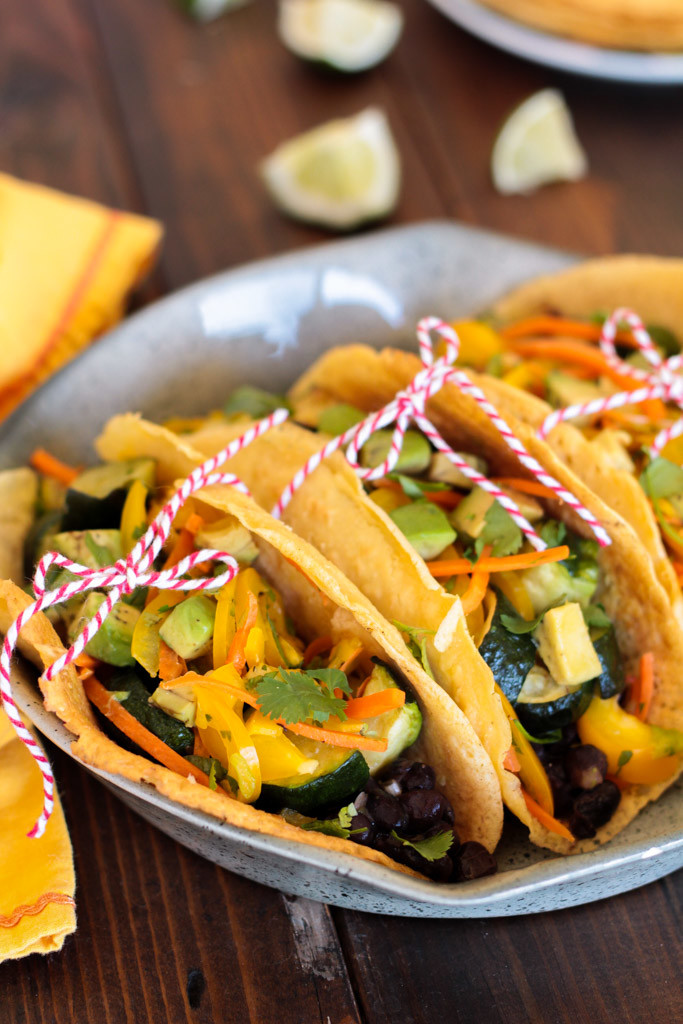 I tweaked the recipe here and there, keeping black beans and zucchini as the bulk of the filling but adding in a colorful, crunchy carrot and bell pepper slaw to top it off. Feel free to do the same or add whatever veggies your heart desires.
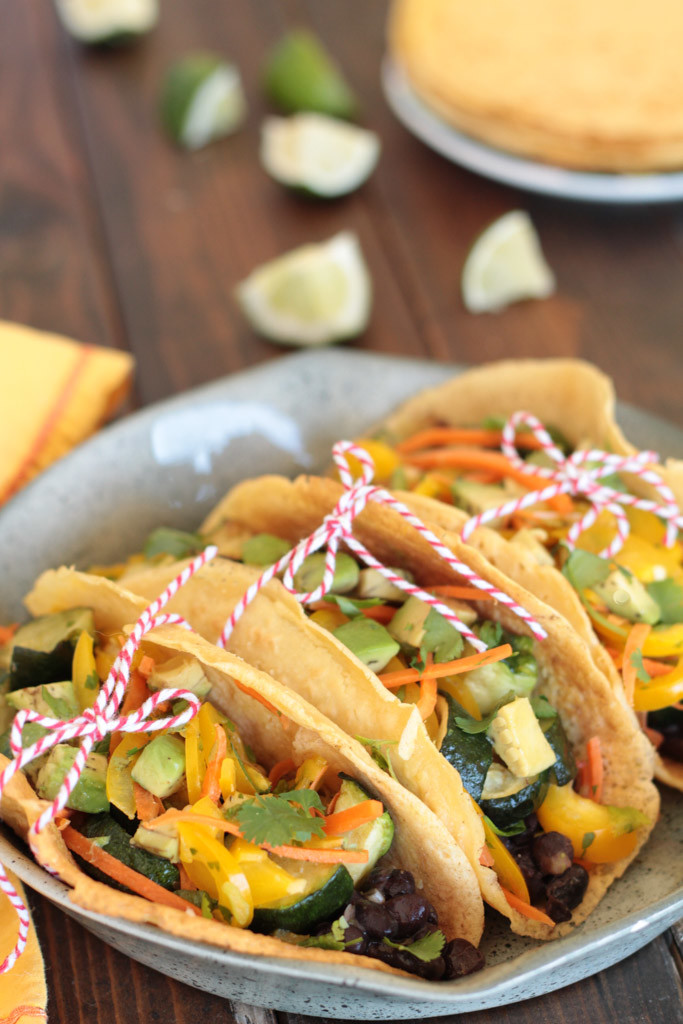


Inline Feedbacks
View all comments
Laurina Roo @sweetenedbyplants
9 years ago
Oh my gosh!!! *jaw drop! These are awesome! Especially being from Newcastle and living by the beach it’s great you’ve found a way to have your “tofish” finger – love the name by the way!
Author
Always gotta use a pun where you can 😉 I was never a real fan of seafood growing up except for when it was crumbed or fried to remove most of the fishiness (haha) so these have just the right amount of ocean taste to them. You can even increase it with more seaweed 😀