
Ingredients:
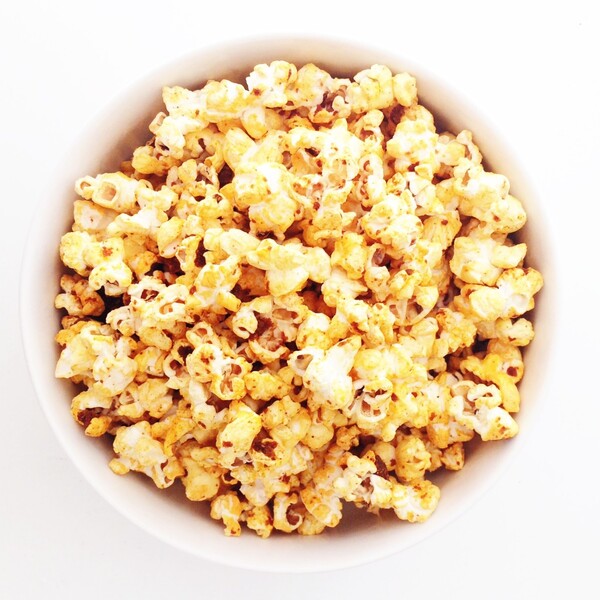
- 2 tablespoons olive oil
- ¼ cup nutritional yeast
- 1 tablespoon low-sodium tamari
- 2 teaspoons paprika
- ½ tsp garlic powder
- ¼ tsp turmeric
- ½ cup organic corn kernels
- Coconut oil
Ingredients:
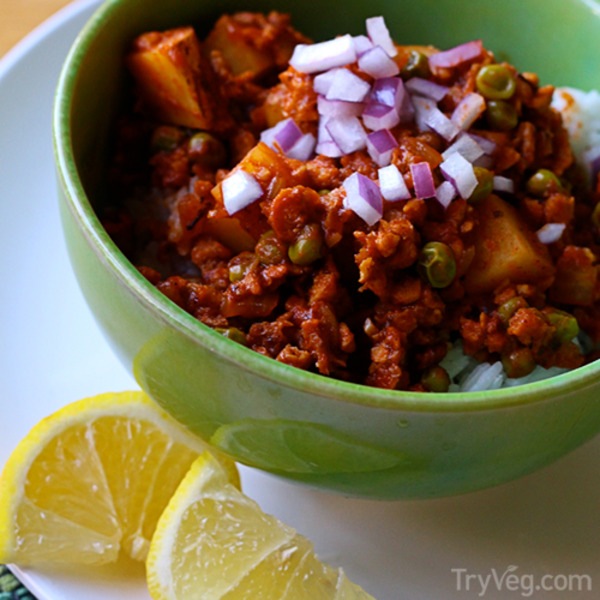

Cook onion in olive oil in large sauté pan over medium heat until translucent.
Add chorizo, tomato juice, potatoes, salt, and pepper.
Simmer over medium-low heat until potatoes are tender, adding a little water if the liquid evaporates too quickly.
Stir in the peas and heat through. Adjust seasoning and serve over steamed rice.
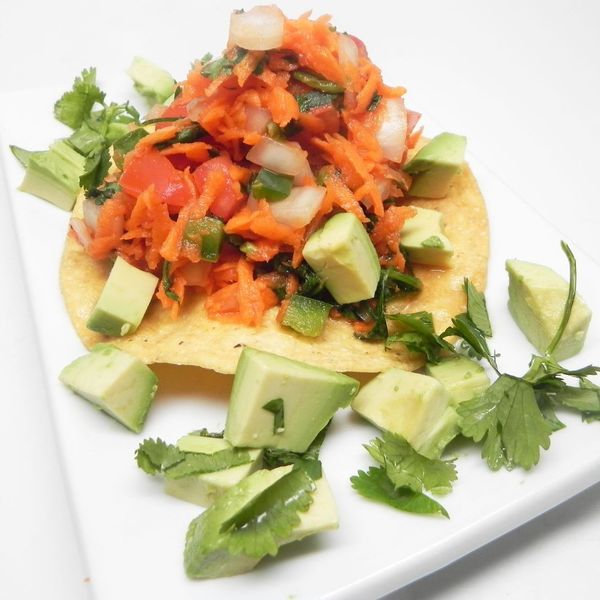

In Mexico, ceviche can also be made using only vegetables, in this case carrots, tomato, and onion that are marinated in a citrus sauce with ketchup and serrano peppers. Serve over tostadas, sprinkled with avocado. [Recipe originally submitted to Allrecipes.com.mx]
Submitted by
Maria Antonia Orozco
Updated on March 1, 2025
Cook Mode
(Keep screen awake)
Original recipe (1X) yields 8 servings
3 large carrots, peeled and grated
1 large tomato, chopped
½ small onion, chopped
1 serrano pepper, seeded and chopped
15 sprigs fresh cilantro, chopped
½ cup ketchup
2 small oranges, juiced
1 small lime, juiced
1 tablespoon Mexican-style hot sauce (such as Cholula®)
salt to taste
8 tostada shells
1 avocado – pitted, peeled, and cubed
Mix carrots, tomato, onion, serrano pepper, and cilantro together in a bowl.
Combine ketchup, orange juice, lime juice, and hot sauce in a separate bowl. Pour over vegetables and season with salt. Let stand for 1 hour until flavors are well combined. Drain.
Serve on tostadas and garnish with avocado.
| 150 | Calories |
| 7g | Fat |
| 22g | Carbs |
| 3g | Protein |
| Nutrition Facts | |
|---|---|
|
Servings Per Recipe 8 |
|
|
Calories 150 |
|
| % Daily Value * | |
|
Total Fat 7g |
9% |
|
Saturated Fat 1g |
5% |
|
Sodium 307mg |
13% |
|
Total Carbohydrate 22g |
8% |
|
Dietary Fiber 5g |
17% |
|
Total Sugars 8g |
|
|
Protein 3g |
5% |
|
Vitamin C 27mg |
30% |
|
Calcium 55mg |
4% |
|
Iron 1mg |
5% |
|
Potassium 428mg |
9% |
* Percent Daily Values are based on a 2,000 calorie diet. Your daily values may be higher or lower depending on your calorie needs.
** Nutrient information is not available for all ingredients. Amount is based on available nutrient data.
(-) Information is not currently available for this nutrient. If you are following a medically restrictive diet, please consult your doctor or registered dietitian before preparing this recipe for personal consumption.
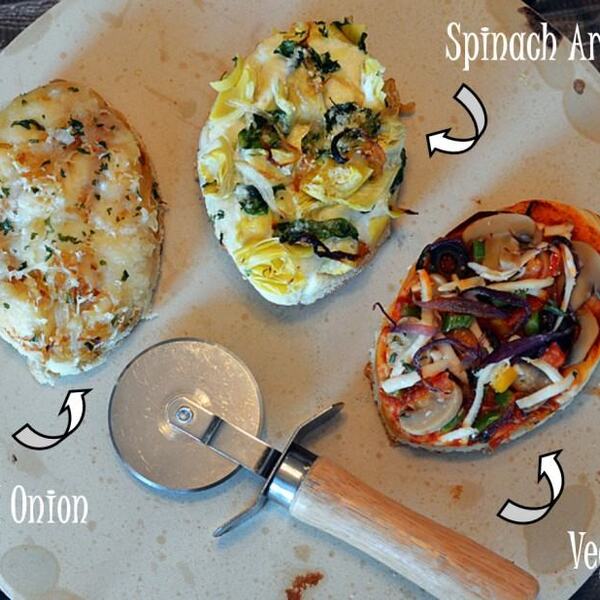

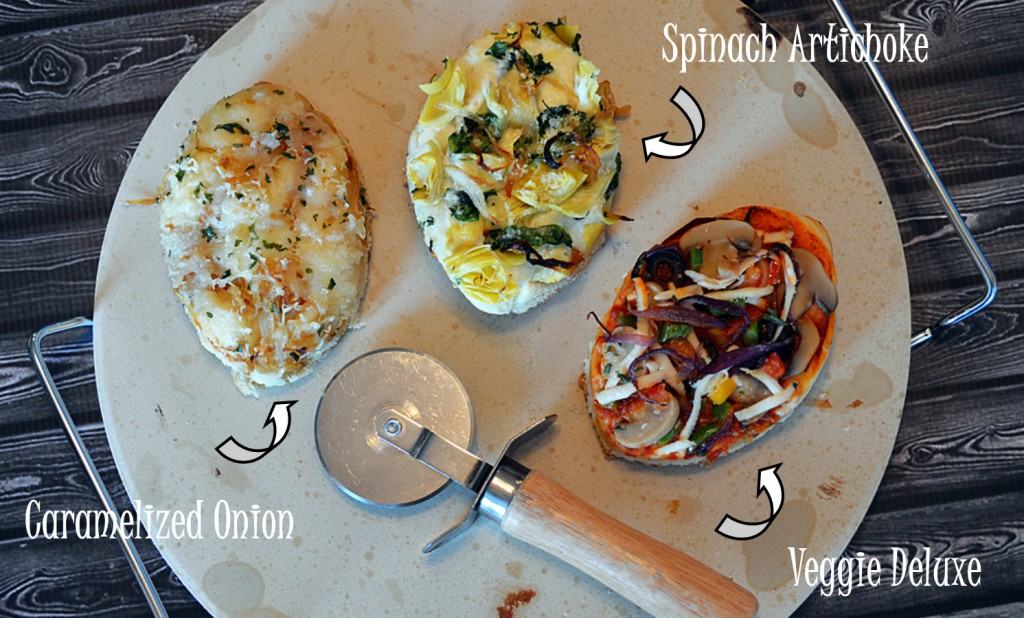
This dough was made using the dough cycle of a bread machine, but you could use the dough hook of an electric mixer to do the kneading. If you don’t want to make the dough, you could always buy it or, ask your favorite pizza place if you can buy the dough from them 🙂 We’ve done three toppings, but you can always improvise with the ingredients. Using a cookie cutter, we’ve cut them into football shapes for Game Day!
Author Veg Life Staff
Place the ingredients into a bread machine in the order listed and choose the DOUGH CYCLE. Again, if you don’t have a bread machine, you can use the dough hook and your electric mixer or….buy your favorite ready-made dough.
Once the dough cycle completes, let the dough rest for a few minutes and then pat the dough onto a cookie sheet. This takes some patience, but it will cooperate and fit the pan.
Cover the dough and let rise in a warm place. I usually turn the oven on for 5 minutes and then turn it off, letting the dough rise in the residual heat. You’ll get a really light dough this way. Also be sure you have fresh bread flour and yeast that is dated well. The dough will almost double.
In the meantime, prepare your toppings. We offer three options below, but you can improvise based on your favorite ingredients.
For the Caramelized Onion Pizza:

Saute an onion over medium heat in 2 Tbl of oil and slowly caramelize them. This takes about 20-30 minutes. You can always add a sprinkle of sugar which helps to expedite the process. Stir occasionally. You will use some of the onion for the Spinach/Artichoke Pizza as well. Layer onions onto your dough, top with mozzarella cheese (there are several vegan options available). Garnish with parsley, if desired.
For the Spinach/Artichoke Pizza:

Saute the spinach for just a minute or two until soft in a very small amount of oil. Drain and chop a can of artichokes. In the meantime, combine 2 Tbl of vegan Ricotta, 2 Tbl Almond Milk, 2 Tbl vegan Parmesan and 2 Tbl vegan Mozzarella. Spread the cheese mixture onto the dough and then add the artichokes and spinach. Top with additional parmesan, if desired.
For the Veggie Pizza:
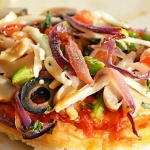
Saute a thinly sliced red onion in a small amount of oil to soften slightly. Place a layer of marinara sauce onto the dough. Add chopped green pepper, yellow peppers, tomato, mushrooms, black olives and the red onions. Top with mozzarella and parmesan.
Bake at 400 degrees for approximately 20 minutes (this will depend on the size you cut the pieces).
[bha size=’234×60′ variation=’05’ align=’aligncenter’]


Please enable cookies.
This website is using a security service to protect itself from online attacks. The action you just performed triggered the security solution. There are several actions that could trigger this block including submitting a certain word or phrase, a SQL command or malformed data.
You can email the site owner to let them know you were blocked. Please include what you were doing when this page came up and the Cloudflare Ray ID found at the bottom of this page.
Cloudflare Ray ID: 96e63f67480511a3
•
•
Performance & security by Cloudflare


Ingredients:
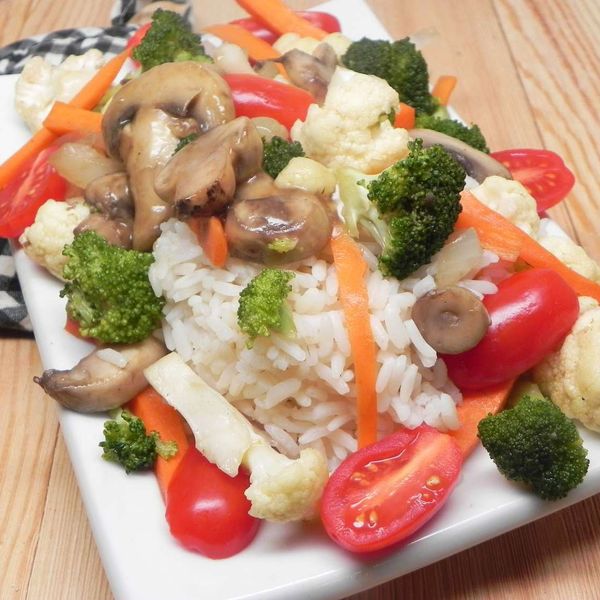

Delicious, fresh vegan stir-fry that is sure to please and is excellent as an addition to rice.
Submitted by
Anie
Updated on April 15, 2025
Cook Mode
(Keep screen awake)
Original recipe (1X) yields 4 servings
1 small onion, diced
2 tablespoons canola oil
1 clove garlic, diced
½ cup diced carrots
½ cup chopped cauliflower
½ cup chopped broccoli florets
½ cup sliced fresh mushrooms
¼ cup soy sauce
¾ cup water
1 tomato, diced
1 tablespoon chopped fresh basil, or to taste
salt and ground black pepper to taste
¼ cup unsalted sunflower seeds (Optional)
Combine onion, canola oil, and garlic in a large skillet. Cook over medium-high heat for 4 minutes. Add carrots, cauliflower, broccoli, and mushrooms one at a time with 2 minutes between each. Pour in soy sauce and stir to coat. Cook for 2 minutes more. Add water, tomato, basil, salt, and pepper. Bring to a boil; reduce heat and simmer until vegetables are fork-tender but not soft, about 5 minutes. Sprinkle with sunflower seeds.
| 149 | Calories |
| 12g | Fat |
| 9g | Carbs |
| 4g | Protein |
| Nutrition Facts | |
|---|---|
|
Servings Per Recipe 4 |
|
|
Calories 149 |
|
| % Daily Value * | |
|
Total Fat 12g |
15% |
|
Saturated Fat 1g |
5% |
|
Sodium 964mg |
42% |
|
Total Carbohydrate 9g |
3% |
|
Dietary Fiber 3g |
9% |
|
Total Sugars 3g |
|
|
Protein 4g |
9% |
|
Vitamin C 20mg |
22% |
|
Calcium 33mg |
3% |
|
Iron 1mg |
6% |
|
Potassium 301mg |
6% |
* Percent Daily Values are based on a 2,000 calorie diet. Your daily values may be higher or lower depending on your calorie needs.
** Nutrient information is not available for all ingredients. Amount is based on available nutrient data.
(-) Information is not currently available for this nutrient. If you are following a medically restrictive diet, please consult your doctor or registered dietitian before preparing this recipe for personal consumption.
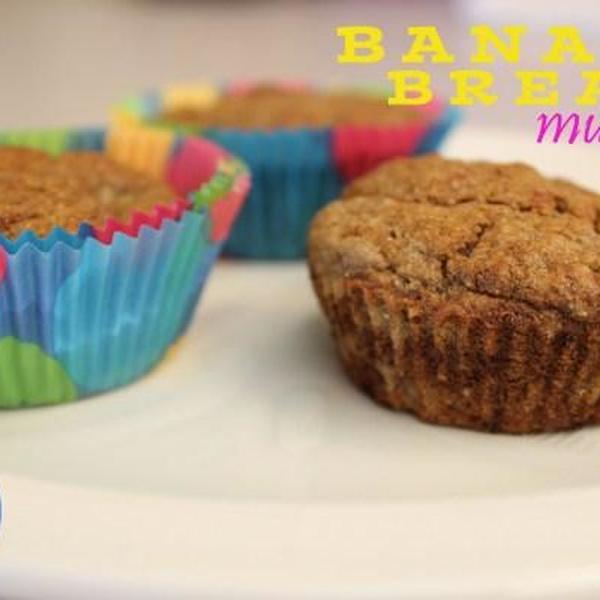

These vegan banana bread muffins are perfect if you are dairy free. I love cooking vegan banana bread because the ingredients are incredibly cheap and the prep is easy for a non-baker. Some vegan recipes are dry, but these vegan banana bread muffins are perfect because of the apple cider vinegar. We ate bacon this morning for breakfast, so we aren’t quite vegans, but we do love good dairy free recipes which is why I am constantly trying to figure out new vegan meals.

Baby Robert is going through a carb loading phase. He loves peanut butter sandwiches, waffles, and anything else involving bread. At one point I couldn’t get him to stop eating bananas and now I am having a hard time getting him to even look at them. Our aunt and uncle dropped off some bananas from their yard so we decided to make some banana bread with it. Remember my post on one banana, banana bread? This one is pretty similar, but has a much more banana-y taste since I used more.

Feel free to sub in milk, butter, and eggs if you don’t want a vegan recipe. I don’t think it would make much of a difference in taste since the flavor mostly comes from the bananas.

Vegan Banana Bread
Recipe Type: Dessert
Author: Hannah Rinaldi
Prep time:
Cook time:
Total time:
Serves: 12
Easy vegan banana bread.
Serving size: 1 slice or muffin Calories: 220 Fat: 9 grams Carbohydrates: 36 Sugar: 17 Protein: 3


As you can see, it was approved by Robert! These didn’t last too long and I ended up making a second batch later on in the week.


Published: · Modified: by Alissa Saenz · This post may contain affiliate links · 17 Comments
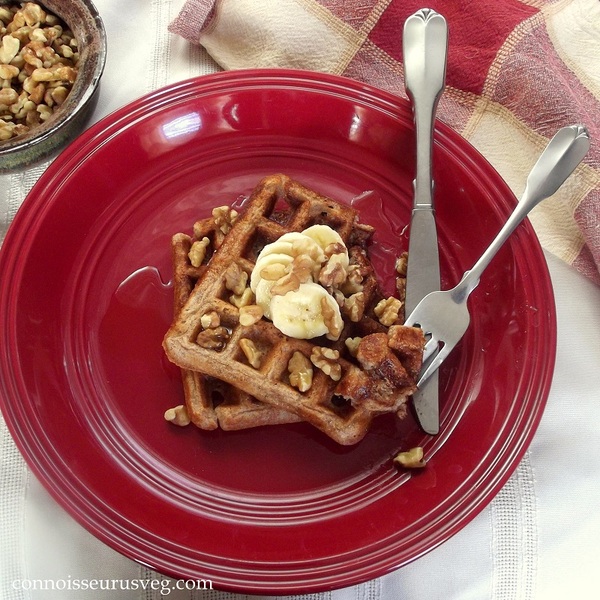
These vegan banana waffles are packed with sweet banana flavor and taste just like banana bread — but in waffle form! They’re super simple to make and perfect for everything from lazy weekend mornings to festive holiday brunches.

Overripe bananas are never a problem in my house. They make a great vegan egg substitute, so I can always incorporate them into a delicious recipe like vegan banana bread, vegan banana muffins, vegan banana cake, or vegan banana pancakes. In this vegan banana waffle recipe, my overripe bananas do double duty: adding natural sweetness and flavor while also replacing the eggs.
As a total non-morning person, I can confirm that these waffles are incredibly easy to whip up. I have zero patience for complicated projects early in the day. These take just nine ingredients and under thirty minutes to make — and they’re full of sweet, sweet banana goodness, which is exactly what I crave when I’m cranky in the morning.
I’ve even tested these babies on a few mornings when (kicking myself) I agreed to host brunch. They were totally no-fuss and always a hit! So whether you’re serving guests or just need a little motivation to crawl out of bed, this recipe has you covered.
Below you’ll find a list of ingredients in this recipe, with notes and substitutions. Scroll all the way to the bottom of the post to see the full recipe, including the amount of each ingredient.

Tip: Got some bananas that are just right for this recipe, but you’re not ready to make it? Freeze them! Just peel, then place them in a freezer bag and into the freezer. They’ll keep for a couple of months. Be sure to include any liquid that accumulates as they thaw — it adds flavor and moisture to the batter.”
The following is a detailed photo tutorial on how to make this dish. Scroll all the way down if you’d like to skip right to the recipe!
Step 1. Prepare. Start by oiling and preheating your waffle iron.

Step 2: Combine dry ingredients. Whisk the flour, cornstarch, baking powder, cinnamon, and salt together.

Step 3: Mash the bananas. Peel them, stick them in a bowl, then hit ’em with a fork or potato masher.

Step 4: Combine wet ingredients. Add the milk, oil, and vanilla to the banana. Stir everything up.

Step 5: Combine wet and dry ingredients. Add the flour mixture to the banana mixture, stirring in a bit at at time until all has been added and combined.

Step 6: Cook the waffles. Add the batter to the hot waffle iron in batches. Your waffle iron probably has a light that tells you when they’re done, but if not, just watch it — the amount of steam coming off of the iron will dramatically decrease when they’re done.
Step 7. Repeat. Keep cooking waffles until all of the batter has been used. Place them on a cooling rack as they come out of the iron — this will keep them from getting soggy!

Step 8: Serve. Your vegan banana waffles are ready to enjoy! Pile them on a plate and top them with vegan butter, banana slices, maple syrup, or any combination of the three!
How should I store leftovers of this recipe?
Store any leftover waffles in a sealed bag, stacking them and placing sheets of parchment paper in between. They’ll keep in the fridge for about three days, or in the freezer for about three months. To reheat, simply pop them in the toaster for a few minutes.
Can I make the batter ahead of time?
I don’t recommend it, since the baking powder will fizzle out over time. You can, however, mix the dry ingredients in advance and store them in a jar. Add the wet ingredients just before cooking the waffles.
Can I make this recipe gluten-free?
I haven’t tried making a gluten-free version, but if you’d like to give it a try, I’d recommend swapping out the wheat flour with an all-purpose gluten-free blend.
My waffles came out tough and dry. What gives?
Usually this means your bananas weren’t ripe enough. Just ripe or underripe bananas will have too little moisture and too much starch for this recipe. Make sure they have at least some brown spots.
Like this recipe? If so, please stop back and leave me a review and rating below if you try it! Also be sure to follow me on Facebook, Pinterest or Instagram, or subscribe to my newsletter for more recipes like this one!
These vegan banana waffles are packed with sweet banana flavor and taste just like banana bread — but in waffle form! They’re super simple to make and perfect for everything from lazy weekend mornings to festive holiday brunches.
Course Breakfast
Cuisine American
Prep Time 10 minutes
Cook Time 16 minutes
Total Time 26 minutes
Servings 8 waffles
Calories 98kcal
Author Alissa
Lightly oil your waffle iron, then turn it on to begin preheating.
Whisk the flour, cornstarch, baking powder, cinnamon, and salt together in a large mixing bowl.
Place the bananas into a separate large mixing bowl, then mash them up with a fork or potato masher.
Stir the milk, oil, and vanilla extract in with the bananas.
Begin adding the flour mixture to the banana mixture, mixing in about a third at a time and stirring just until the ingredients are fully combined.
Pour the batter into your waffle iron cavities. Refer to the waffle iron instructions for guidance on how much batter to use (Note 1). Cook the waffles until your waffle iron’s indicator light signals they’re done, or until steam has mostly stopped escaping.
Remove the waffles from the iron as they cook, placing them on a cooling rack as they come out. Continue cooking waffles in this manner, adding oil to the waffle iron if needed (Note 2).
Serve topped with vegan butter, maple syrup, and/or fresh banana slices.
Serving: 1waffle | Calories: 98kcal | Carbohydrates: 14g | Protein: 2g | Fat: 4g | Saturated Fat: 1g | Polyunsaturated Fat: 2g | Monounsaturated Fat: 1g | Trans Fat: 0.02g | Sodium: 220mg | Potassium: 19mg | Fiber: 1g | Sugar: 0.1g | Vitamin A: 1IU | Vitamin C: 0.01mg | Calcium: 101mg | Iron: 1mg

Hi, I’m Alissa! I’m a former attorney turned professional food blogger. I love creating vegan recipes with bold flavors! You can read more about me here.
I’d love to connect with you on Facebook, Instagram, or Pinterest.


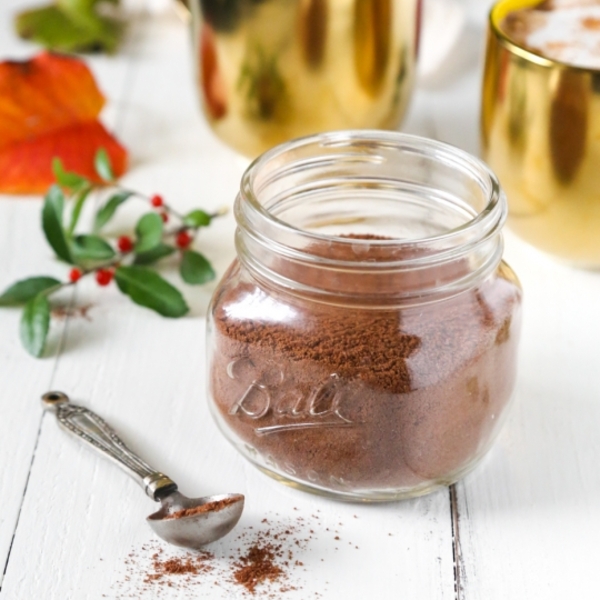
Chocoholics rejoice with this sweet and scrumptious vegan frosting chocolate recipe that will satisfy any chocolate craving without a drop of dairy.
The traditional chocolate frosting is made with sugar, fat (usually butter), and a little flavor but this vegan frosting version exchanges the butter for a dairy-free alternative like soy margarine.
The frosting is used to give a contrasting taste and texture to vegan cookies, dairy-free cakes, and dairy-free cupcakes. Of course, it’s also a beautiful decoration to make sweets look prettier.
This recipe can be doubled or tripled for parties and get-togethers when the time is of the essence.
“This was very easy to make. It came out delicious and was easy to spread. I beat it on low speed until the margarine was evenly incorporated, but the frosting had to have the almond milk to become a moist mixture. I recommend sifting the powdered sugar and cocoa powder after measuring.” —Diana Rattray
:max_bytes(150000):strip_icc()/vegan-chocolate-frosting-recipe-1001558-diana-rattray-20201-fa69085752dc4435805764f5062ef4ee.jpg)
Cook Mode
(Keep screen awake)
2 cups confectioners’ sugar (organic)
3/4 cup cocoa powder
2 ounces soy margarine (softened)
1/4 cup unsweetened almond milk (or unsweetened soy milk)
1/2 teaspoon vanilla
Gather the ingredients.
In a medium-large mixing bowl, sift the confectioners’ sugar and cocoa together, then add the softened margarine, almond milk, and vanilla and beat with an electric hand mixer, about 30 seconds to 1 minute.
Refrigerate and spread just before serving on fully-cooled cookies, cakes or cupcakes.
While Dutch process cocoa and natural cocoa don’t work the same in a baked recipe, they are both good options for frosting. Dutch-processed cocoa powder is mild. and darker in color. Natural cocoa (e.g., Hersheys) is lighter and more acidic.
| Nutrition Facts (per serving) | |
|---|---|
| 129 | Calories |
| 5g | Fat |
| 21g | Carbs |
| 1g | Protein |
×
| Nutrition Facts | |
|---|---|
| Servings: 8 to 12 |
|
| Amount per serving | |
| Calories | 129 |
| % Daily Value* | |
| 5g | 6% |
| Saturated Fat 1g | 4% |
| 0mg | 0% |
| 16mg | 1% |
| 21g | 8% |
| Dietary Fiber 1g | 4% |
| Total Sugars 18g | |
| 1g | |
| Vitamin C 0mg | 0% |
| Calcium 43mg | 3% |
| Iron 2mg | 11% |
| Potassium 16mg | 0% |
| *The % Daily Value (DV) tells you how much a nutrient in a food serving contributes to a daily diet. 2,000 calories a day is used for general nutrition advice. | |
(Nutrition information is calculated using an ingredient database and should be considered an estimate.)

