Author: PatagoniaLlami

  • Vegan Ferrero Rocher

    Vegan Ferrero Rocher

    recipe image

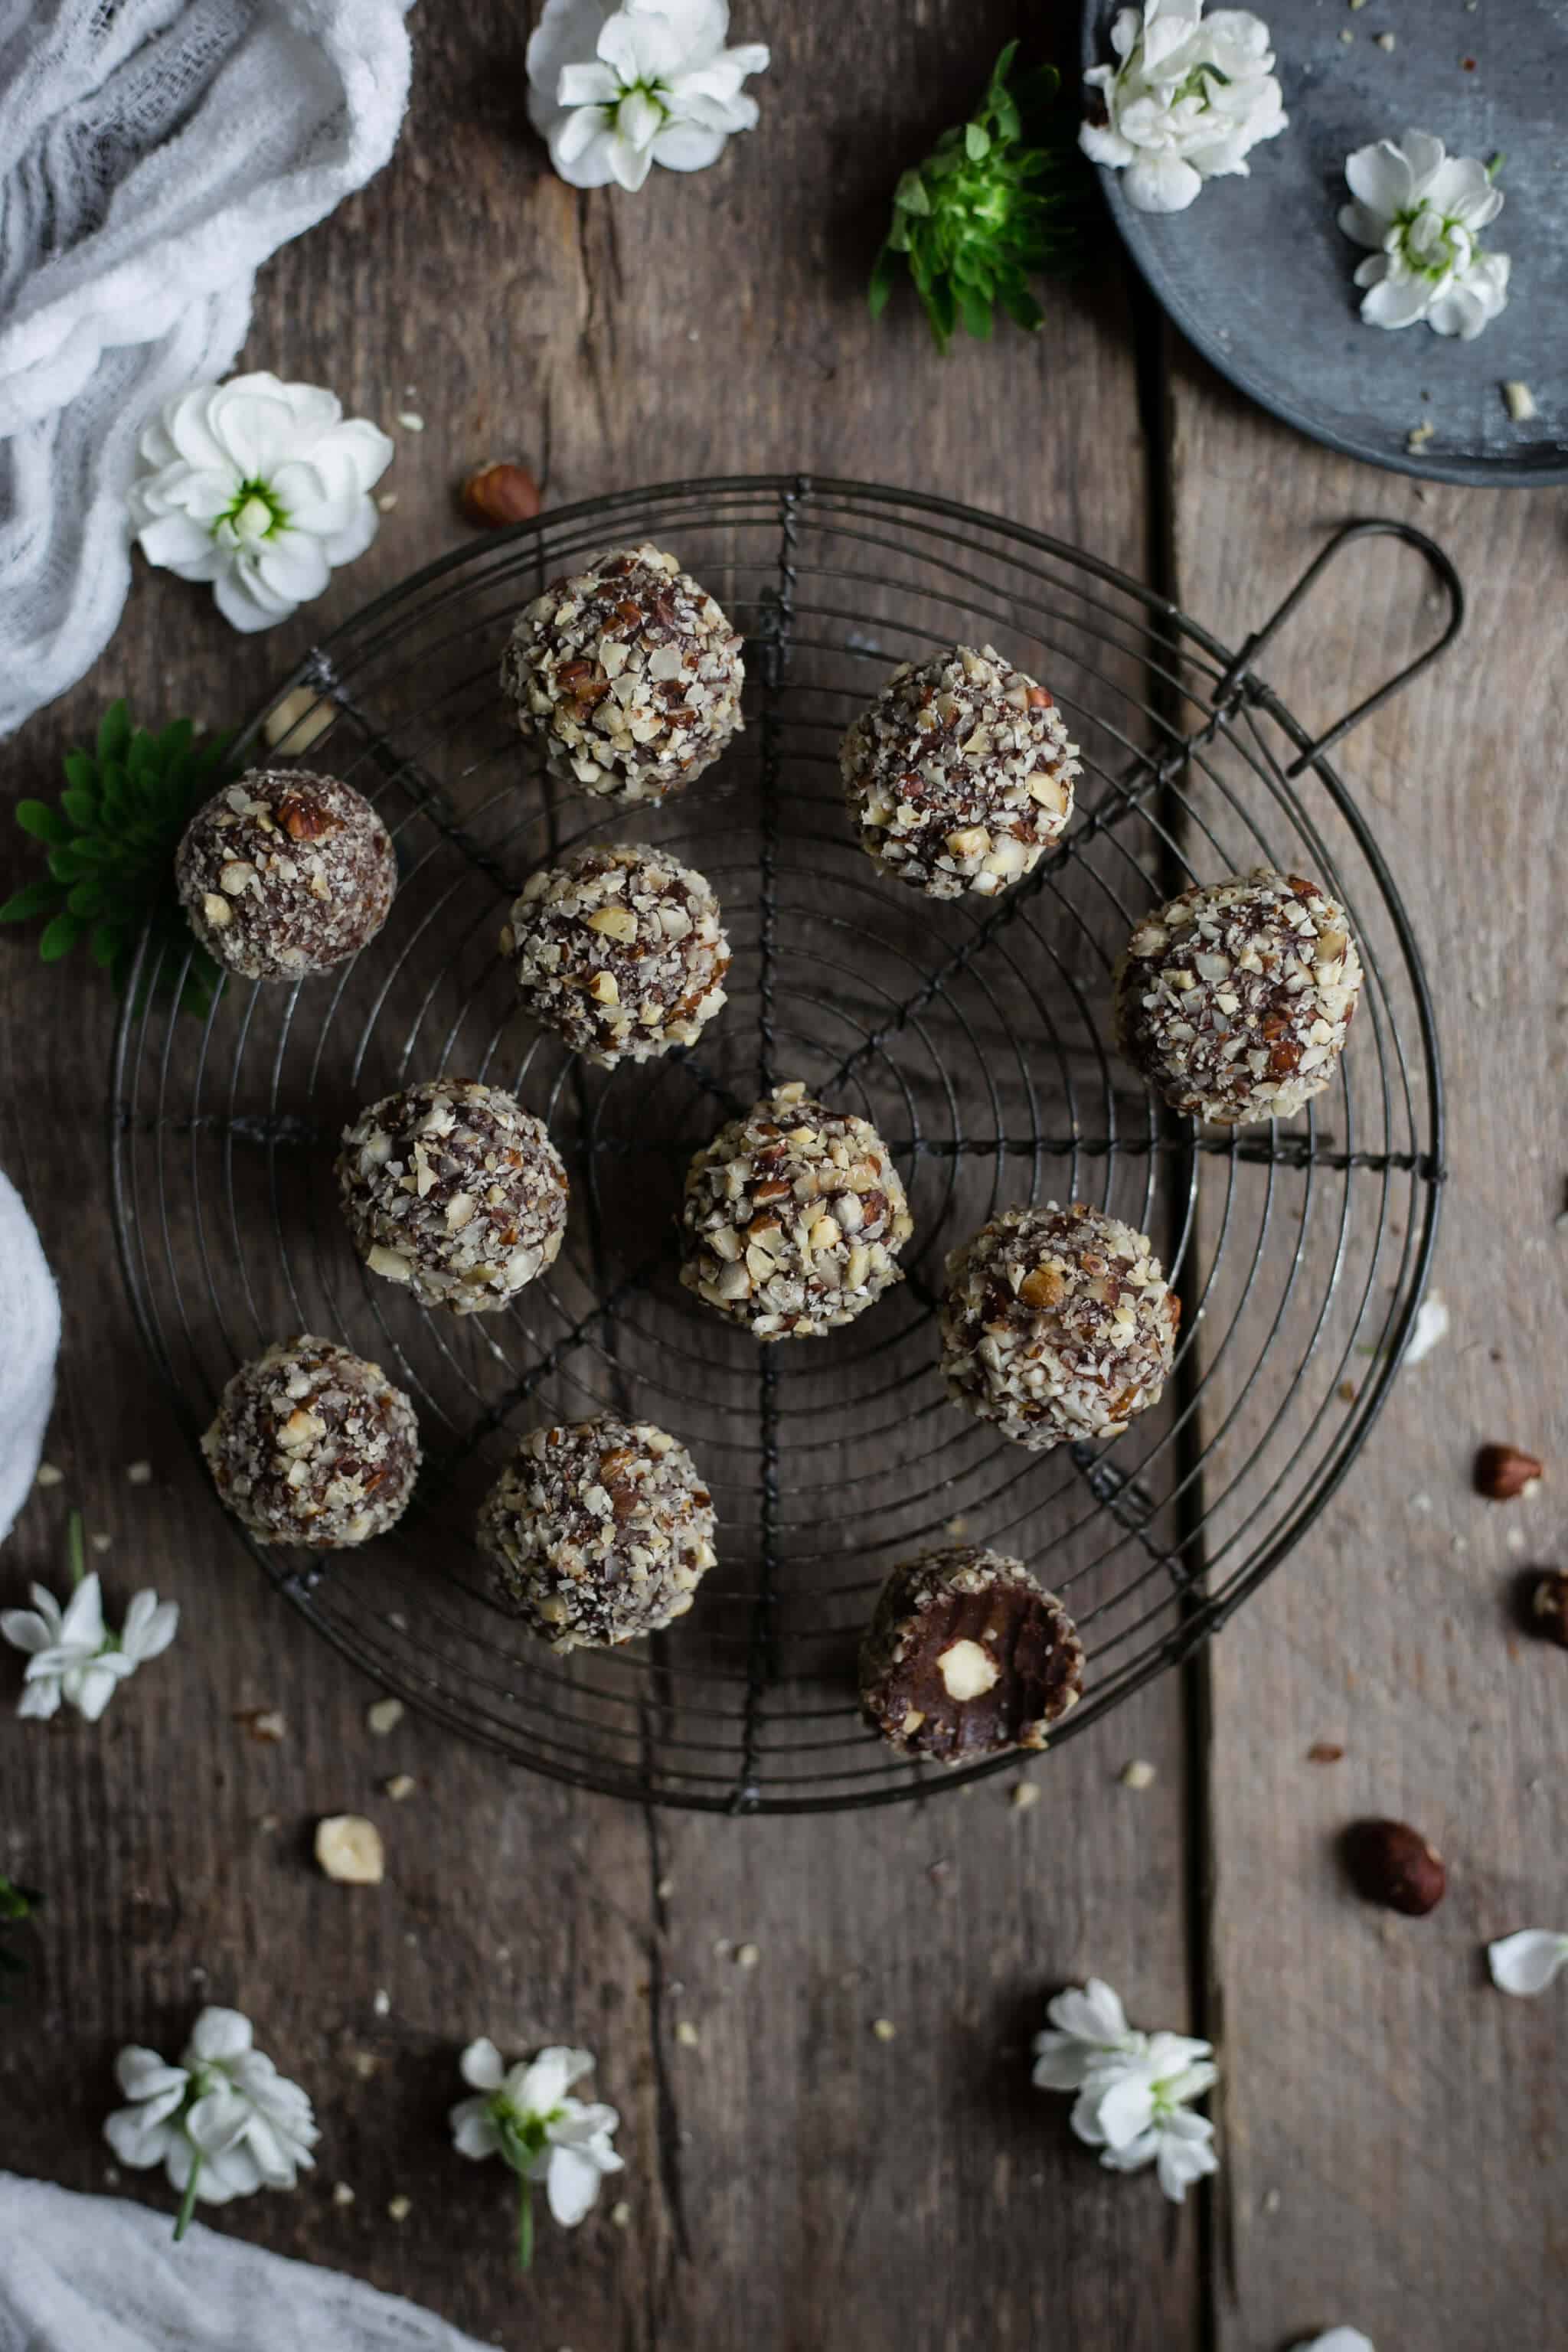
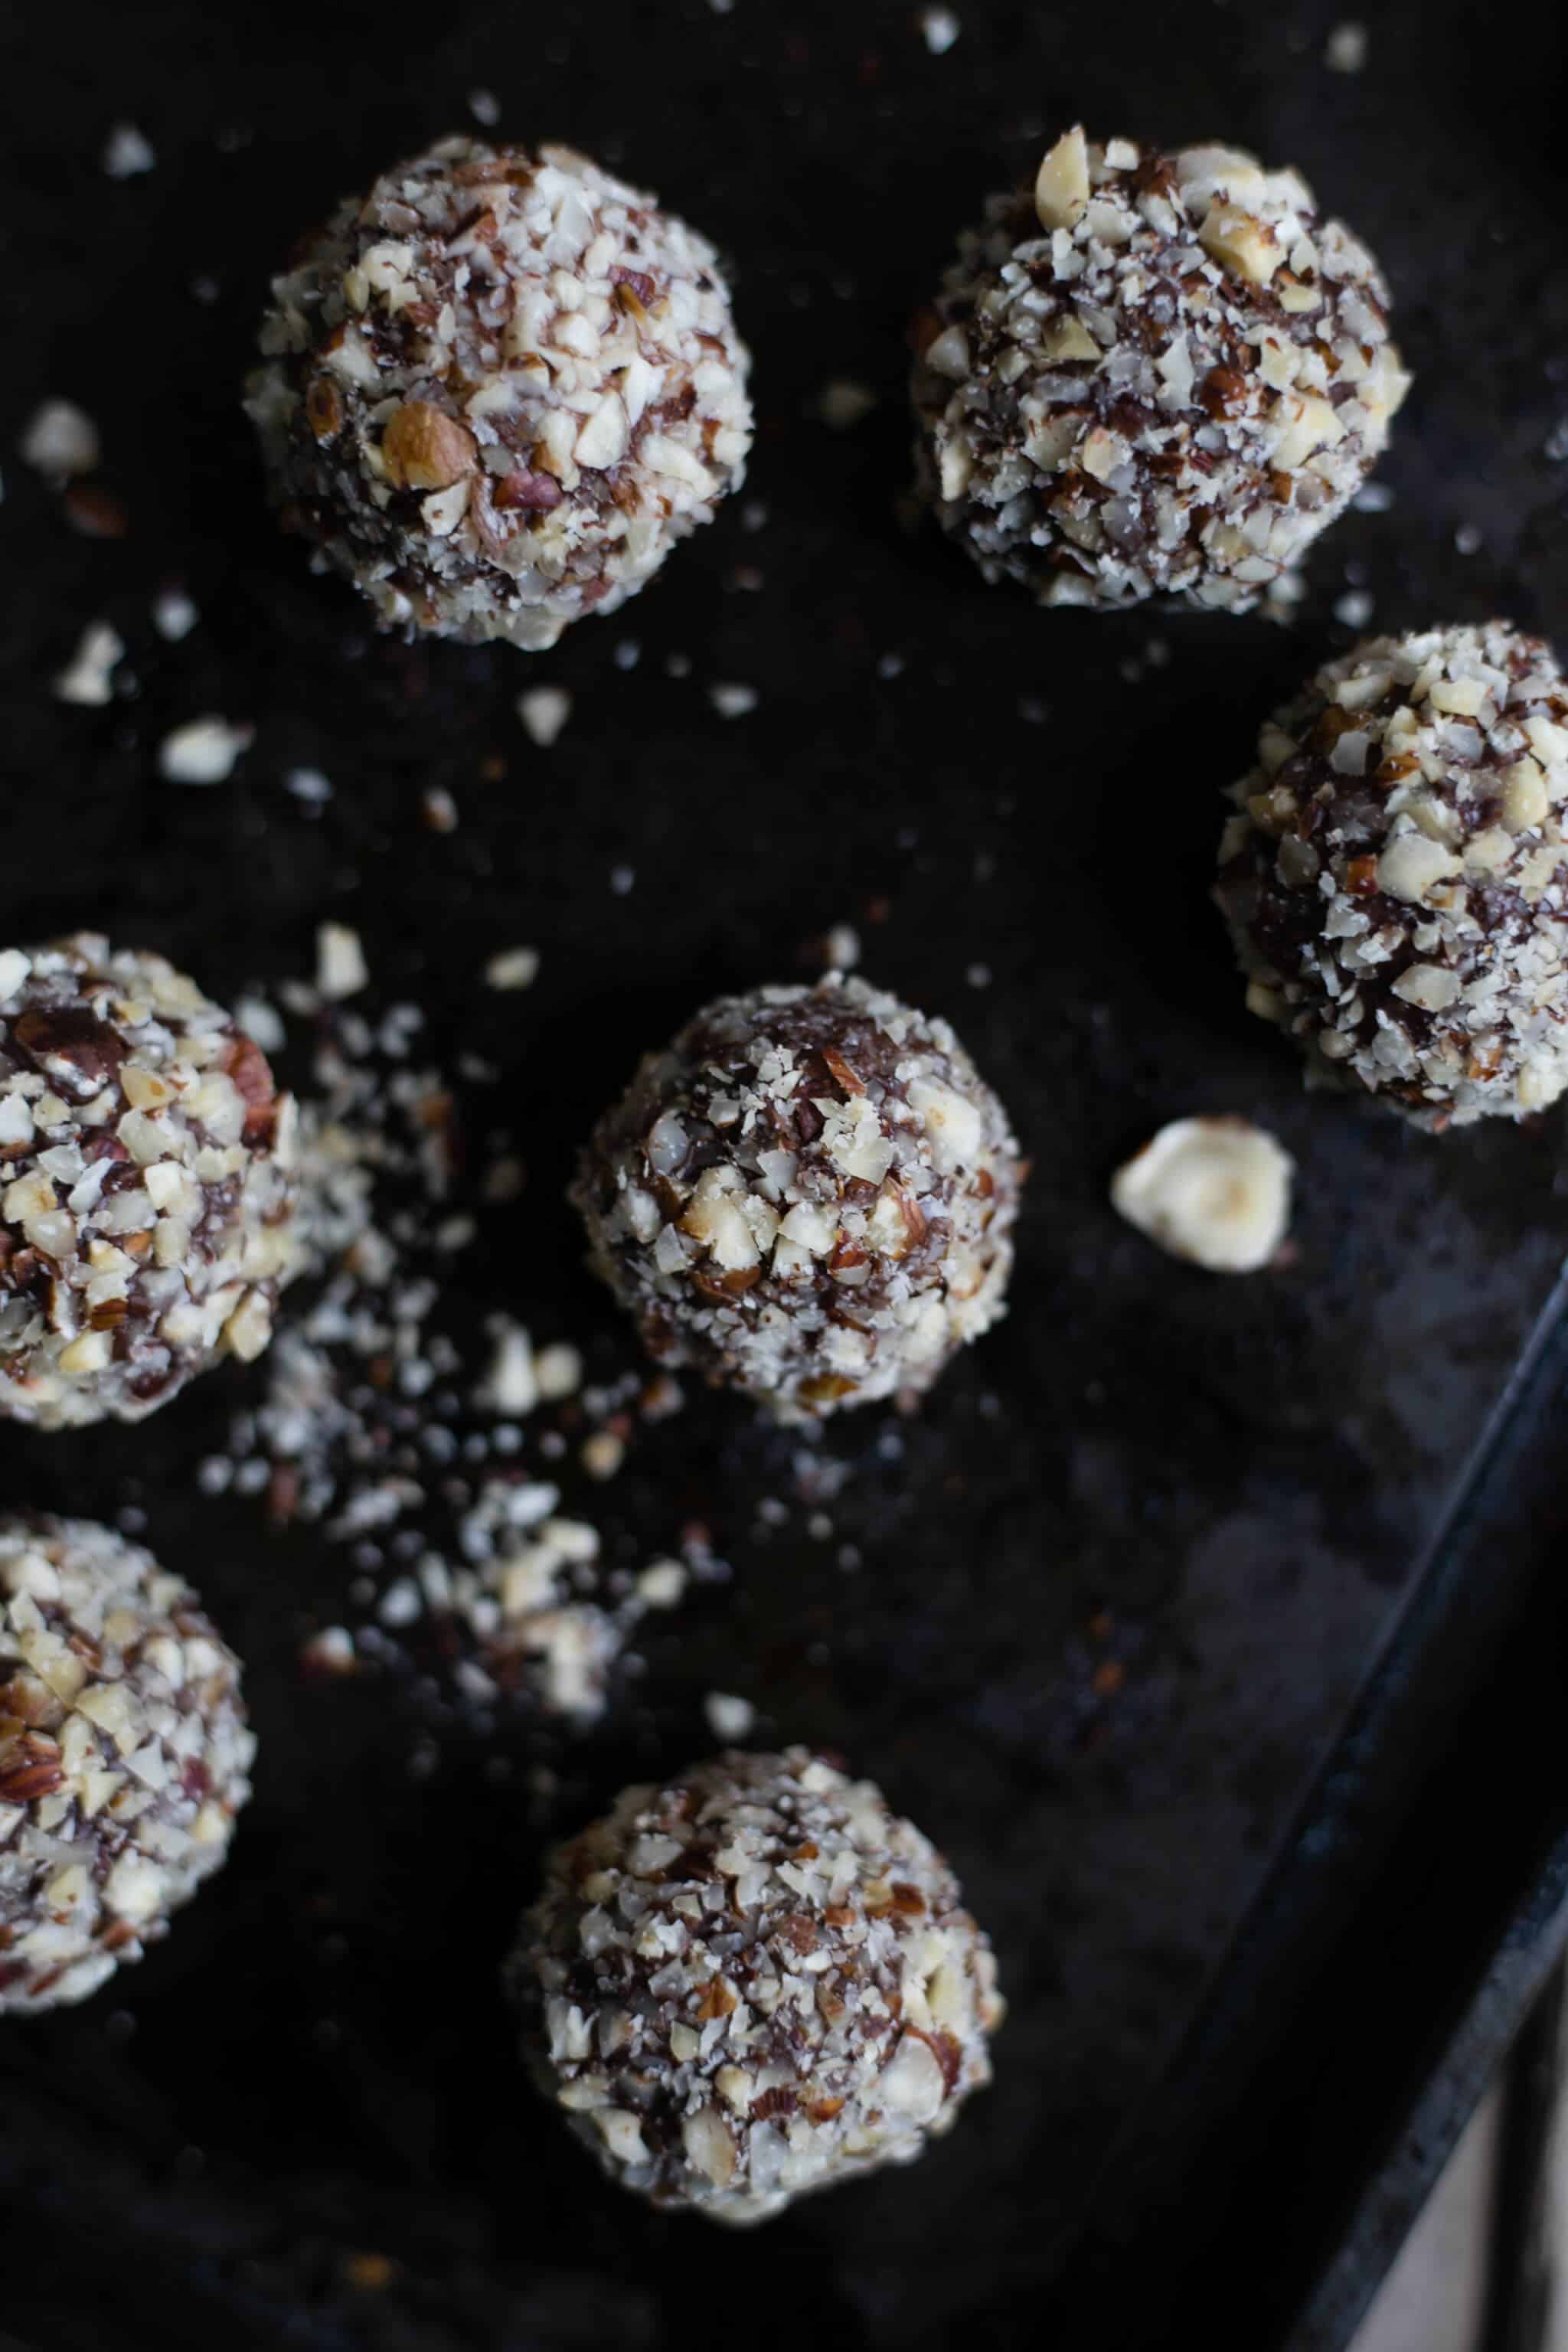
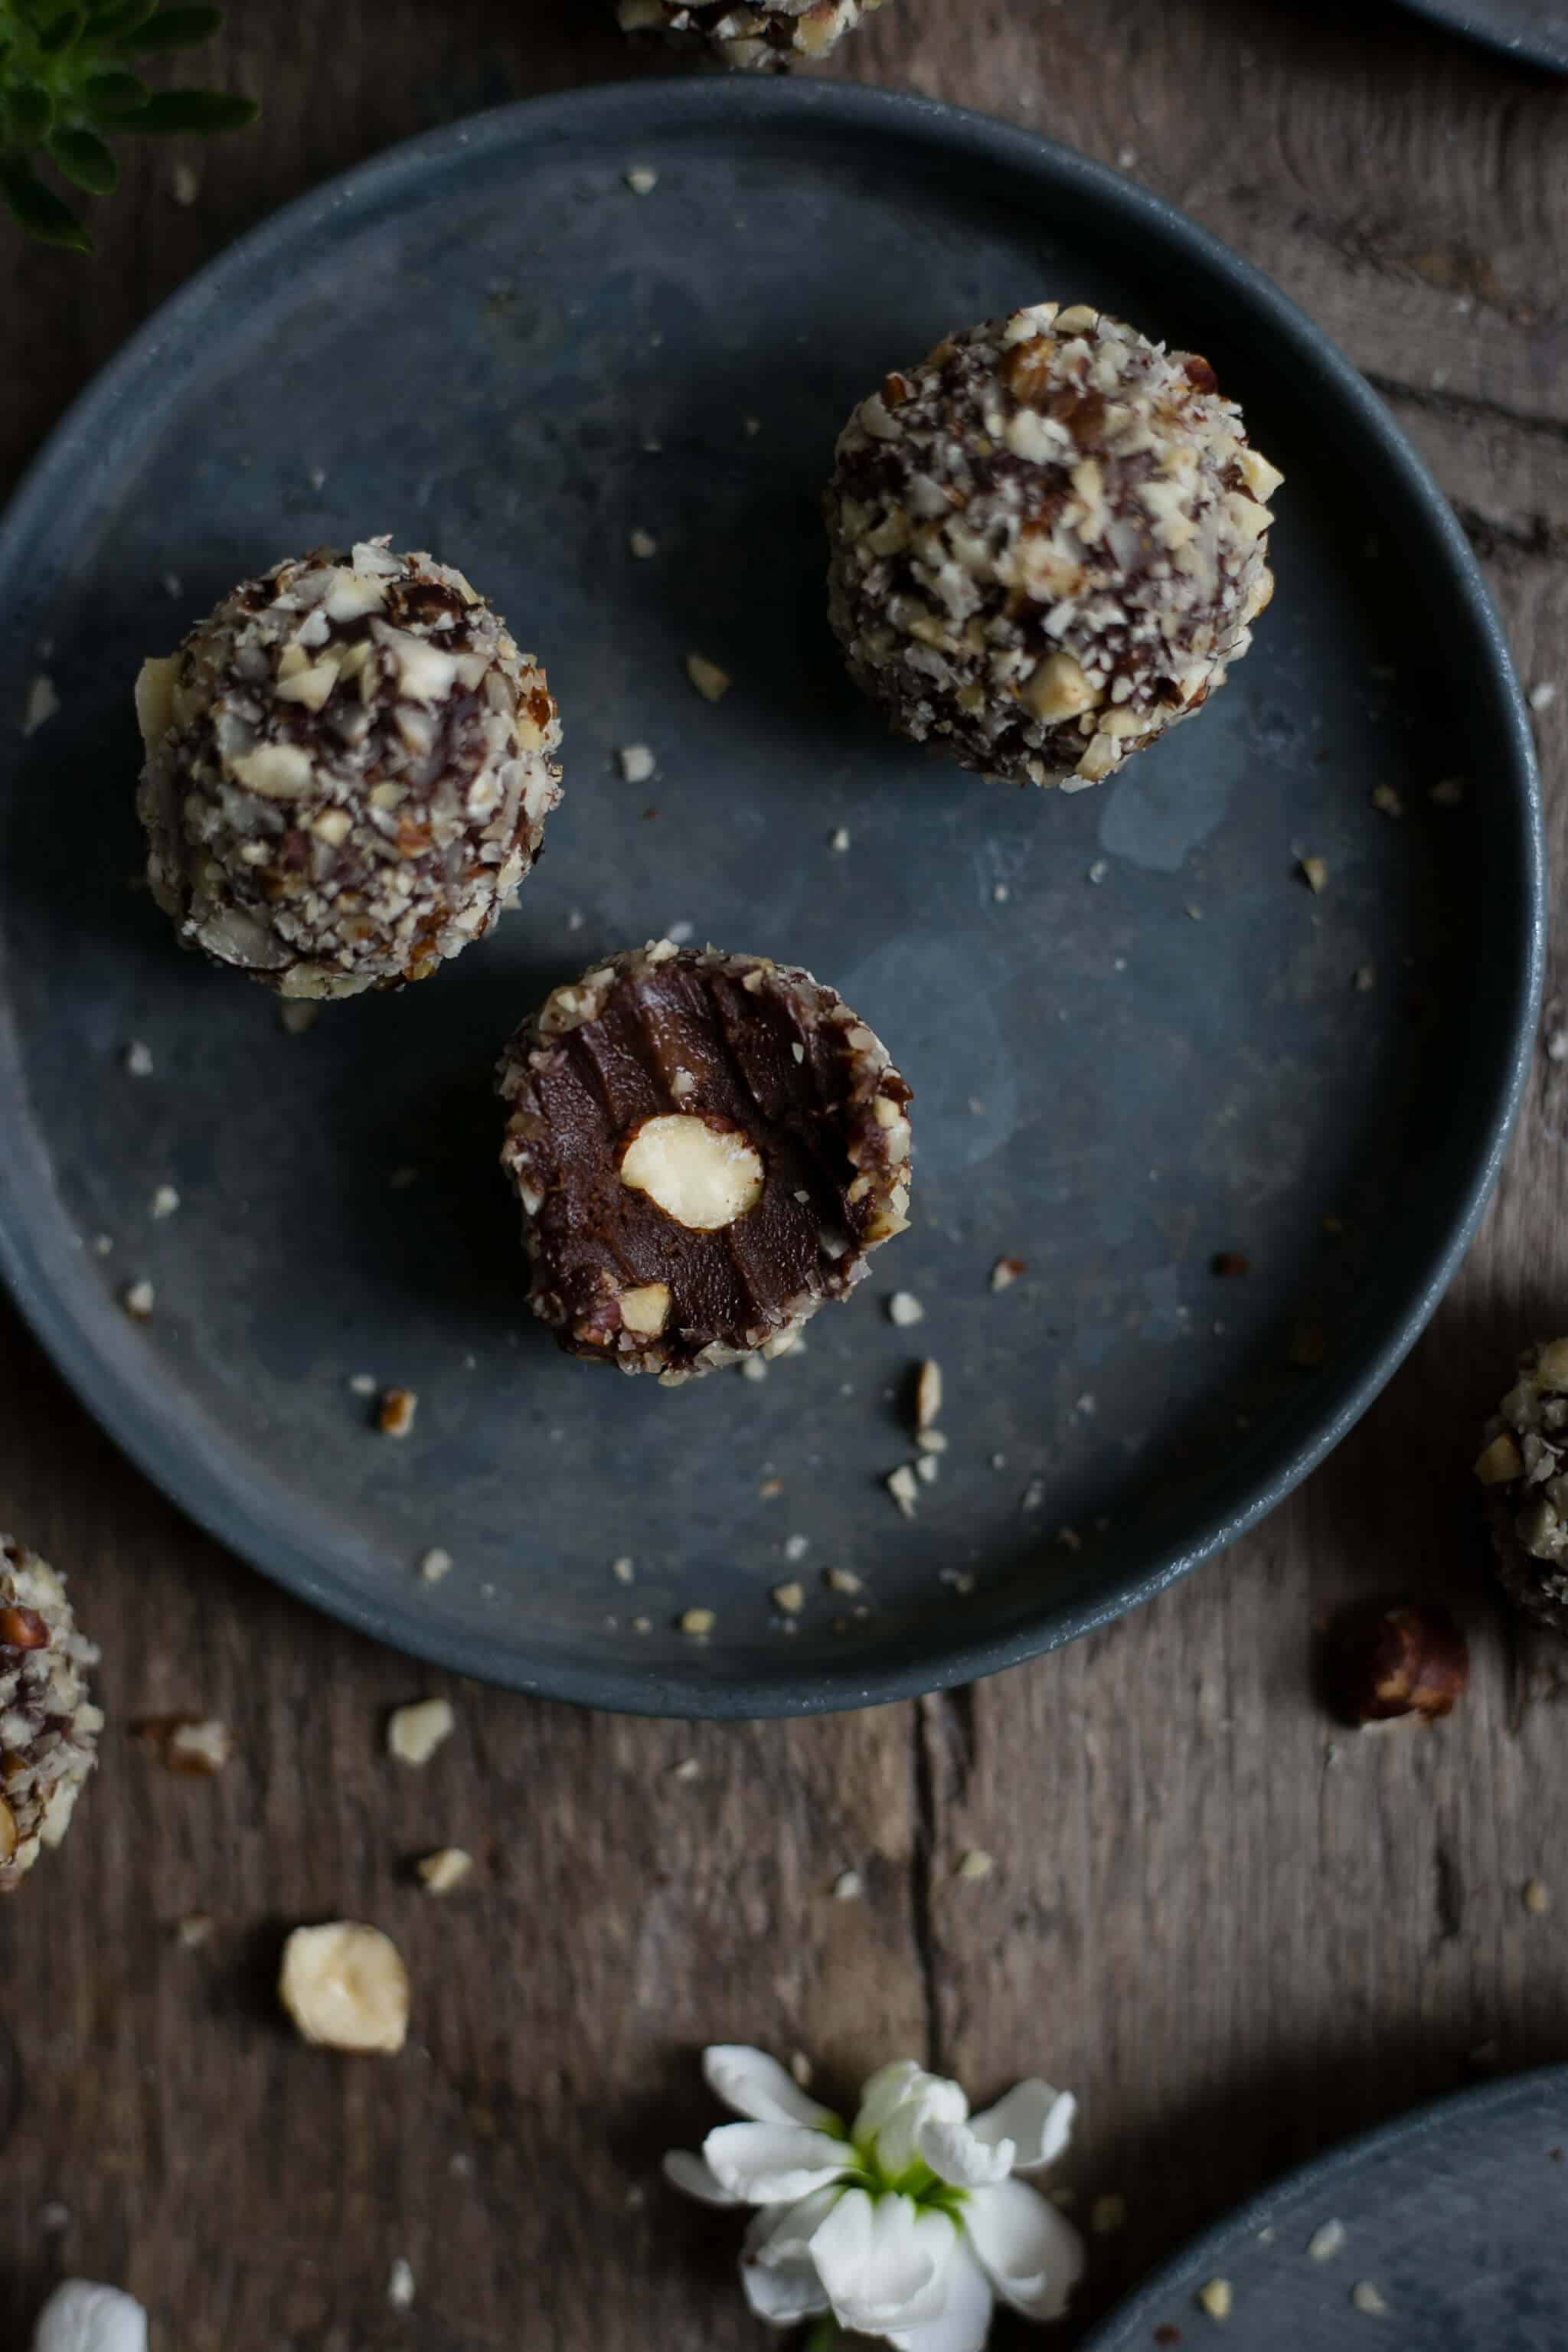
    Absolutely delicious, homemade, vegan Ferrero Rocher truffles with chocolate and hazelnuts. You will definitely need more than one!

    Ferrero Rocher chocolate truffles with roasted hazelnuts. 100% vegan! | via @annabanana.co

    Oh hey there! Remember me? I feel like it’s been years since I’ve posted a recipe (or anything, for that matter) over here! But as you may remember from my last post, we went on holiday, so I have a pretty good excuse… 

    Because it’s been so long (spiderwebs, tumbleweeds and dust everywhere!), I thought I will treat you to something special today. So… here I am, with these delicious, reach, and creamy truffles, which are also happen to be 100% plant based. If that’s not a special treat, then I don’t know what is!

    And just to be clear, I have called them Vegan Ferrero Rocher because they look and taste almost like a real deal! Because there is no thin wafer layer, I’ve used word ‘almost’ rather than ‘exactly’. Although, I’m aware that some of the most devoted fans of this famous chocolate and hazelnut treat, may not find it appropriate for me to use that term… As they say… you can’t please them all!

    Vegan ferrero rocher, delicious chocolate truffles with roasted hazelnuts | via @annabanana.co

    Chocolate and hazelnut Ferrero Rocher | via @annabanana.co

    I’ve made these vegan Ferrero Rocher’s just before we went on our holiday, and strangely enough, just as I was about to share a picture of them on my Instagram page , couple of other bloggers shared almost exact same picture of almost exact thing. Now, you may wonder, why the hell am I telling you this, right? Well, hear me out…

    When I started my journey with food photography and blogging, I would spend ages looking through a beautiful galleries and websites, searching for some recipes and inspiration. Quite often, I wouldn’t dare to make something, that other blogger/ fellow cook/ foodie made for their website, out of fear. Fear of being accused of copying someone, or even worse, stealing their ideas (which actually happened to me in the past, and it was an awful experience). Now, I’m obviously not going to advise you to go and just copy someone’s else work and content, because that is just eeeek and a BIG no-no.

    What I’m trying to say, is that it’s OK to be inspired by someone else. It’s OK to try to recreate someone else recipe, picture or idea. As long as you include and mention the relevant credits, as long as you admit that your work, or particular picture or idea has been born thank to ‘xyz’ , it’s OK to use it or even re-create it. It’s also absolutely possible, that two (or even more) people, had almost exactly same idea in the same time. It’s not unusual for me, to take picture of something, just to discover someone on Instagram has shared almost exact same idea, 10 seconds before I did.

    At the end of the day, we are all inspired by something or someone, when it comes to our work. Is it really possible to come up with the recipe, that has never, ever ever been created by someone before? Aren’t all the recipes/ ideas born as a result of something, that someone else did before us?

    I remember listening to this podcast ages ago, where the host was debating over copy rights for the recipes. The conclusion- there is no such thing. Reason being is that pretty much every recipe is based on some other recipe, and so on, and so on… He compared it to music composers. All of the great music composers based their music notes on someone’s else, who composed before them. Yes, you are creating your own thing, and you probably don’t know it yet, but you are doing it as a result of hearing it somewhere else before…

    Vegan Ferrero Rocher | via @annabanana.co

    And as mentioned above, as long as you give the relevant credits, where they are due, and as long as you don’t just blindly copy someone’s work word by word, and as long as you admit that you have been inspired by so and so, there is no shame in re-creating something, that has been done before. What’s even better, the person who inspired you, or who’s recipe you have re-created or based your recipe/ photo/ idea on, will more likely to feel super flattered and over the moon, when you mention that it’s them who you want to thank for it!

    As online creatives, we all have certain interests and hobbies and passions. And it goes without saying, that there is more than one person out there, who is interested in food photography, for example. As we have similar interests, we are more likely to be moving in the same circles, looking at similar photos, admiring work of the same creators, being inspired by the same person. As a result, we may create very similar work. And often, it’s even without knowing each other. Because it’s possible for two creatives, to have the same idea.

    So don’t get upset or stressed or angry, if you see that someone else posted almost an identical picture to yours. Instead, congratulate them! Tell them that you have also come up with the similar idea. Tell them that you like it, and that you like their take on it. Share your work with them, so they can see what you have come up with, and more likely, they will also congratulate you!

    There is a very thin line between stealing and copying ideas, to being inspired by someone. The difference is, to simply be honest and open about it, and tell the world who it is that sparkled that idea in you! I do feel like there is a bit of a stigma in the blogging (especially food blogging) world about it, and I hope that this post will encourage at least some of you, to just go and create whatever it is you fancy.

    The recipe for these vegan Ferrero Rocher’s is inspired by Rachel from Rawberry Fields, and her Raw Ferrero Rocher recipe, which you can view here. I like to add a bit of maca powder to mine, purely because I do love that earthy, buttery taste of maca, plus it tricks my mind into thinking, that these chocolate truffles are healthy (which, in a way, they are, comparing with the shop- bought version!).

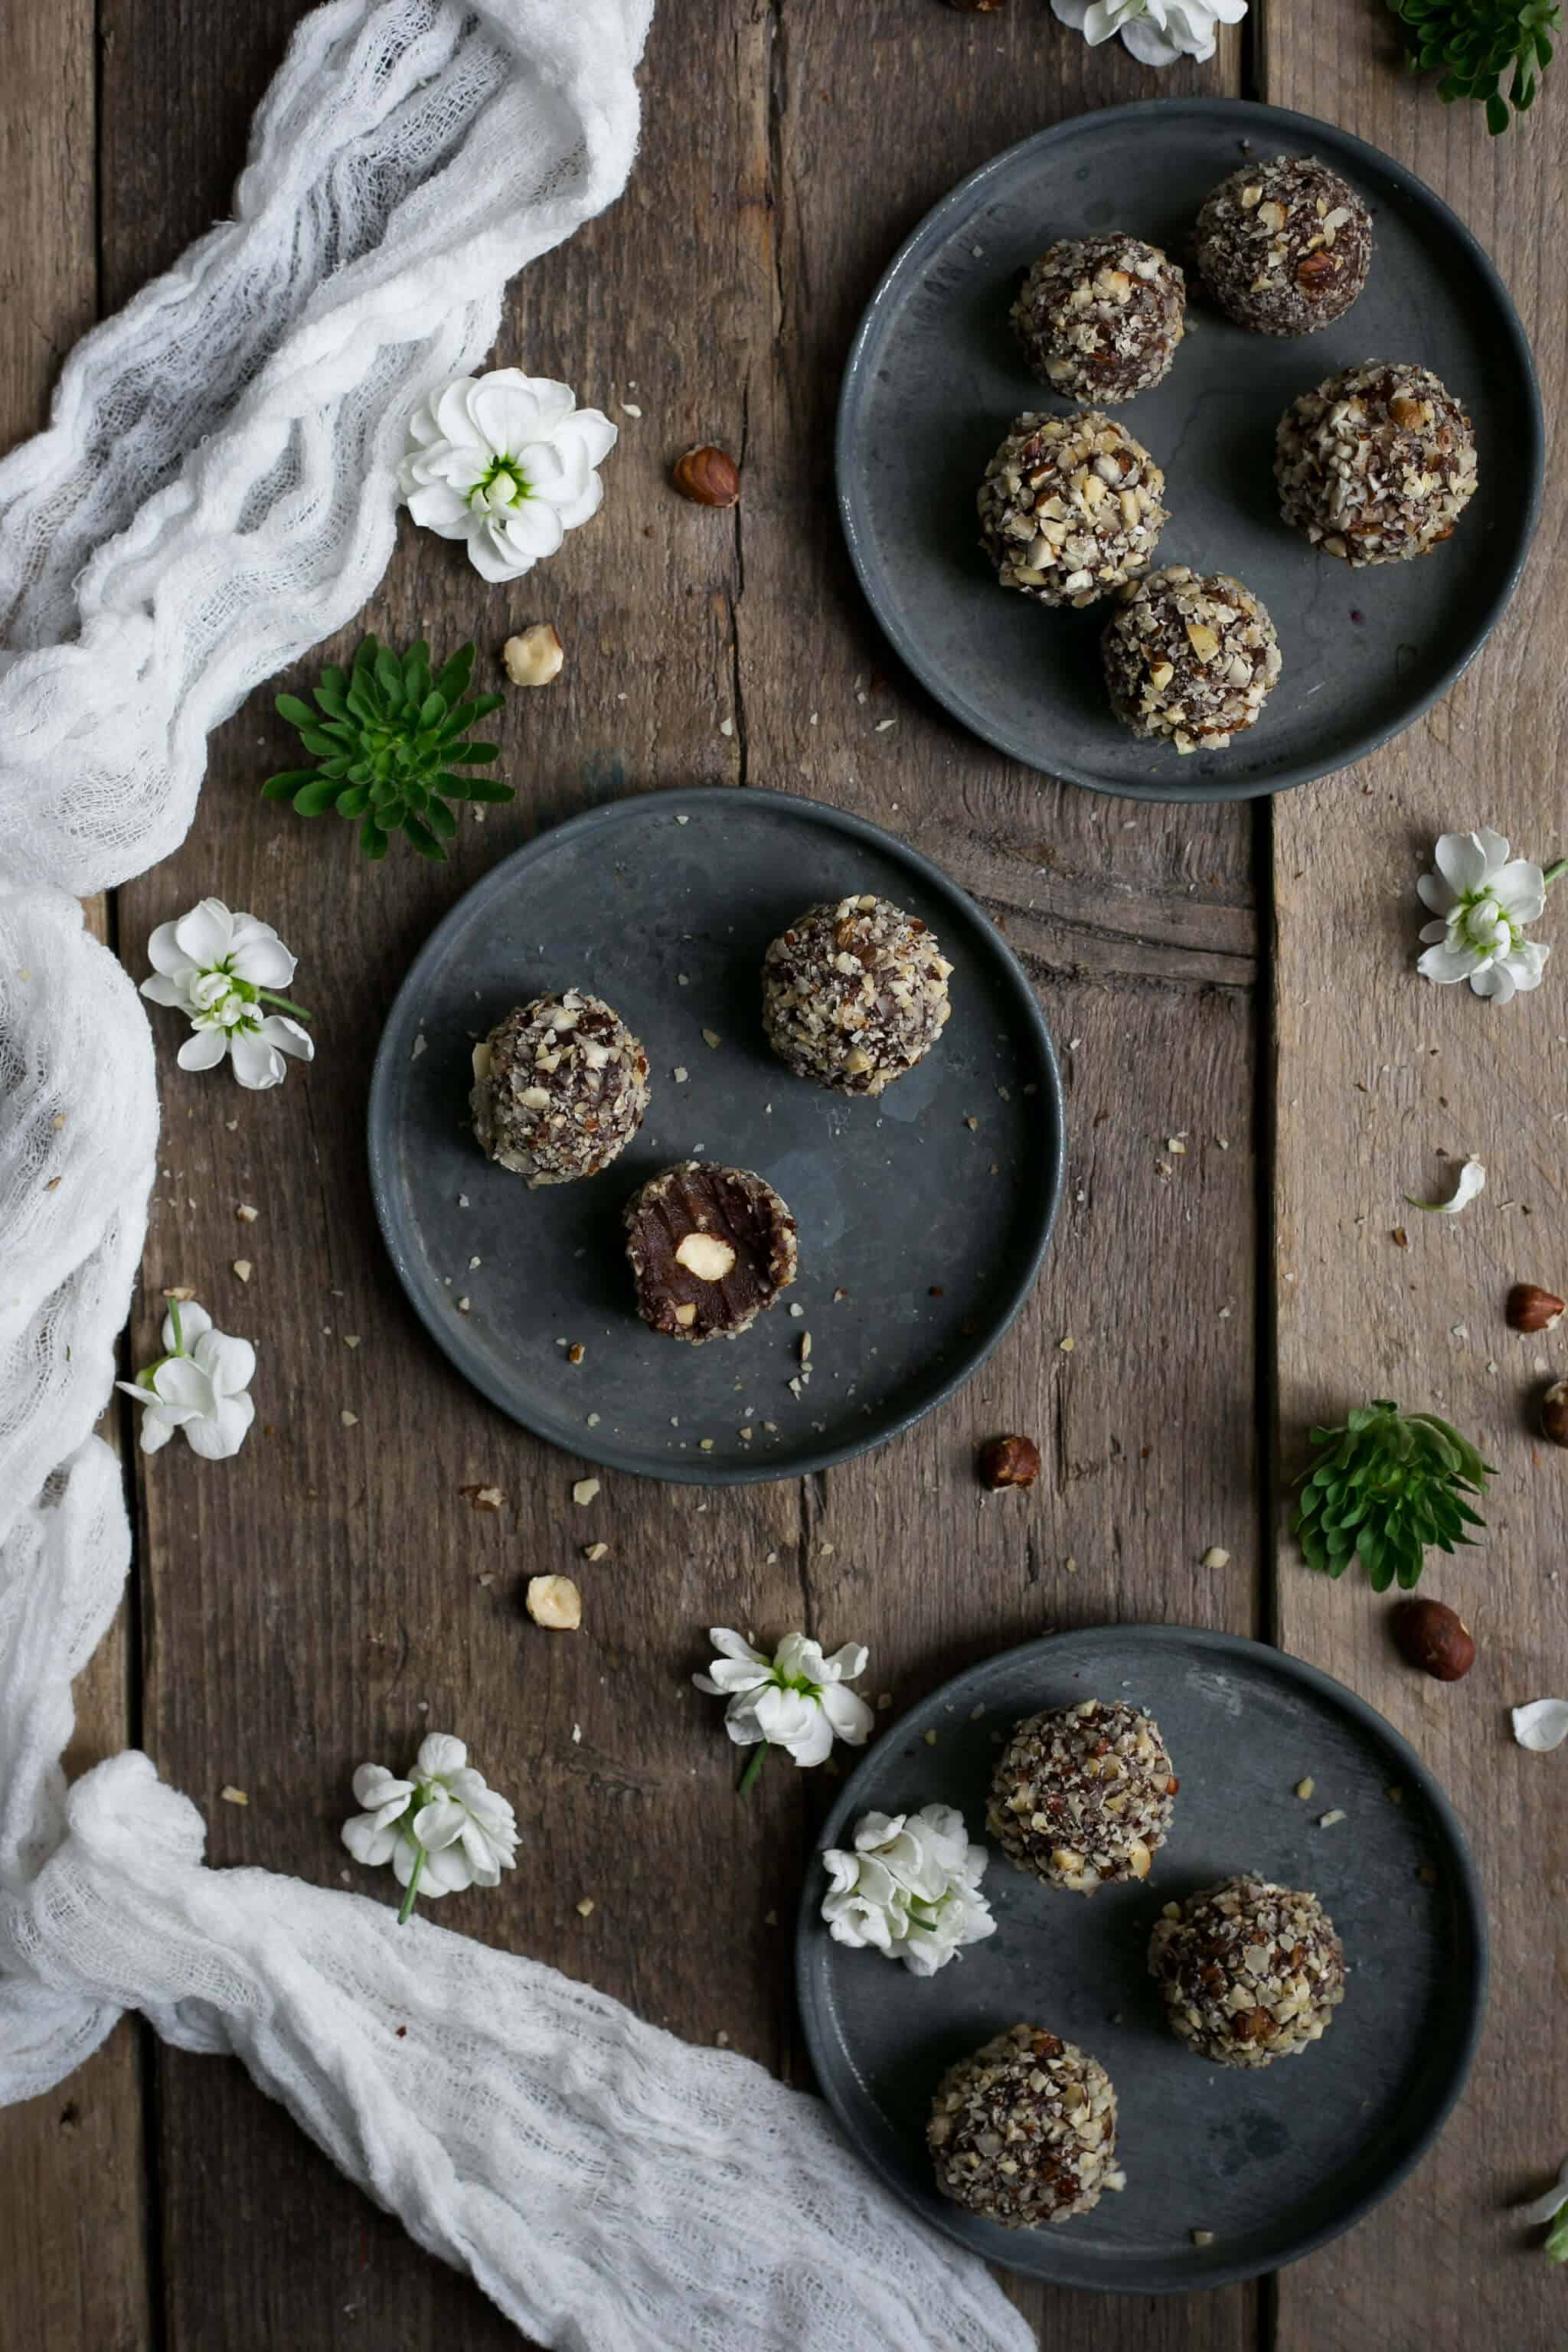
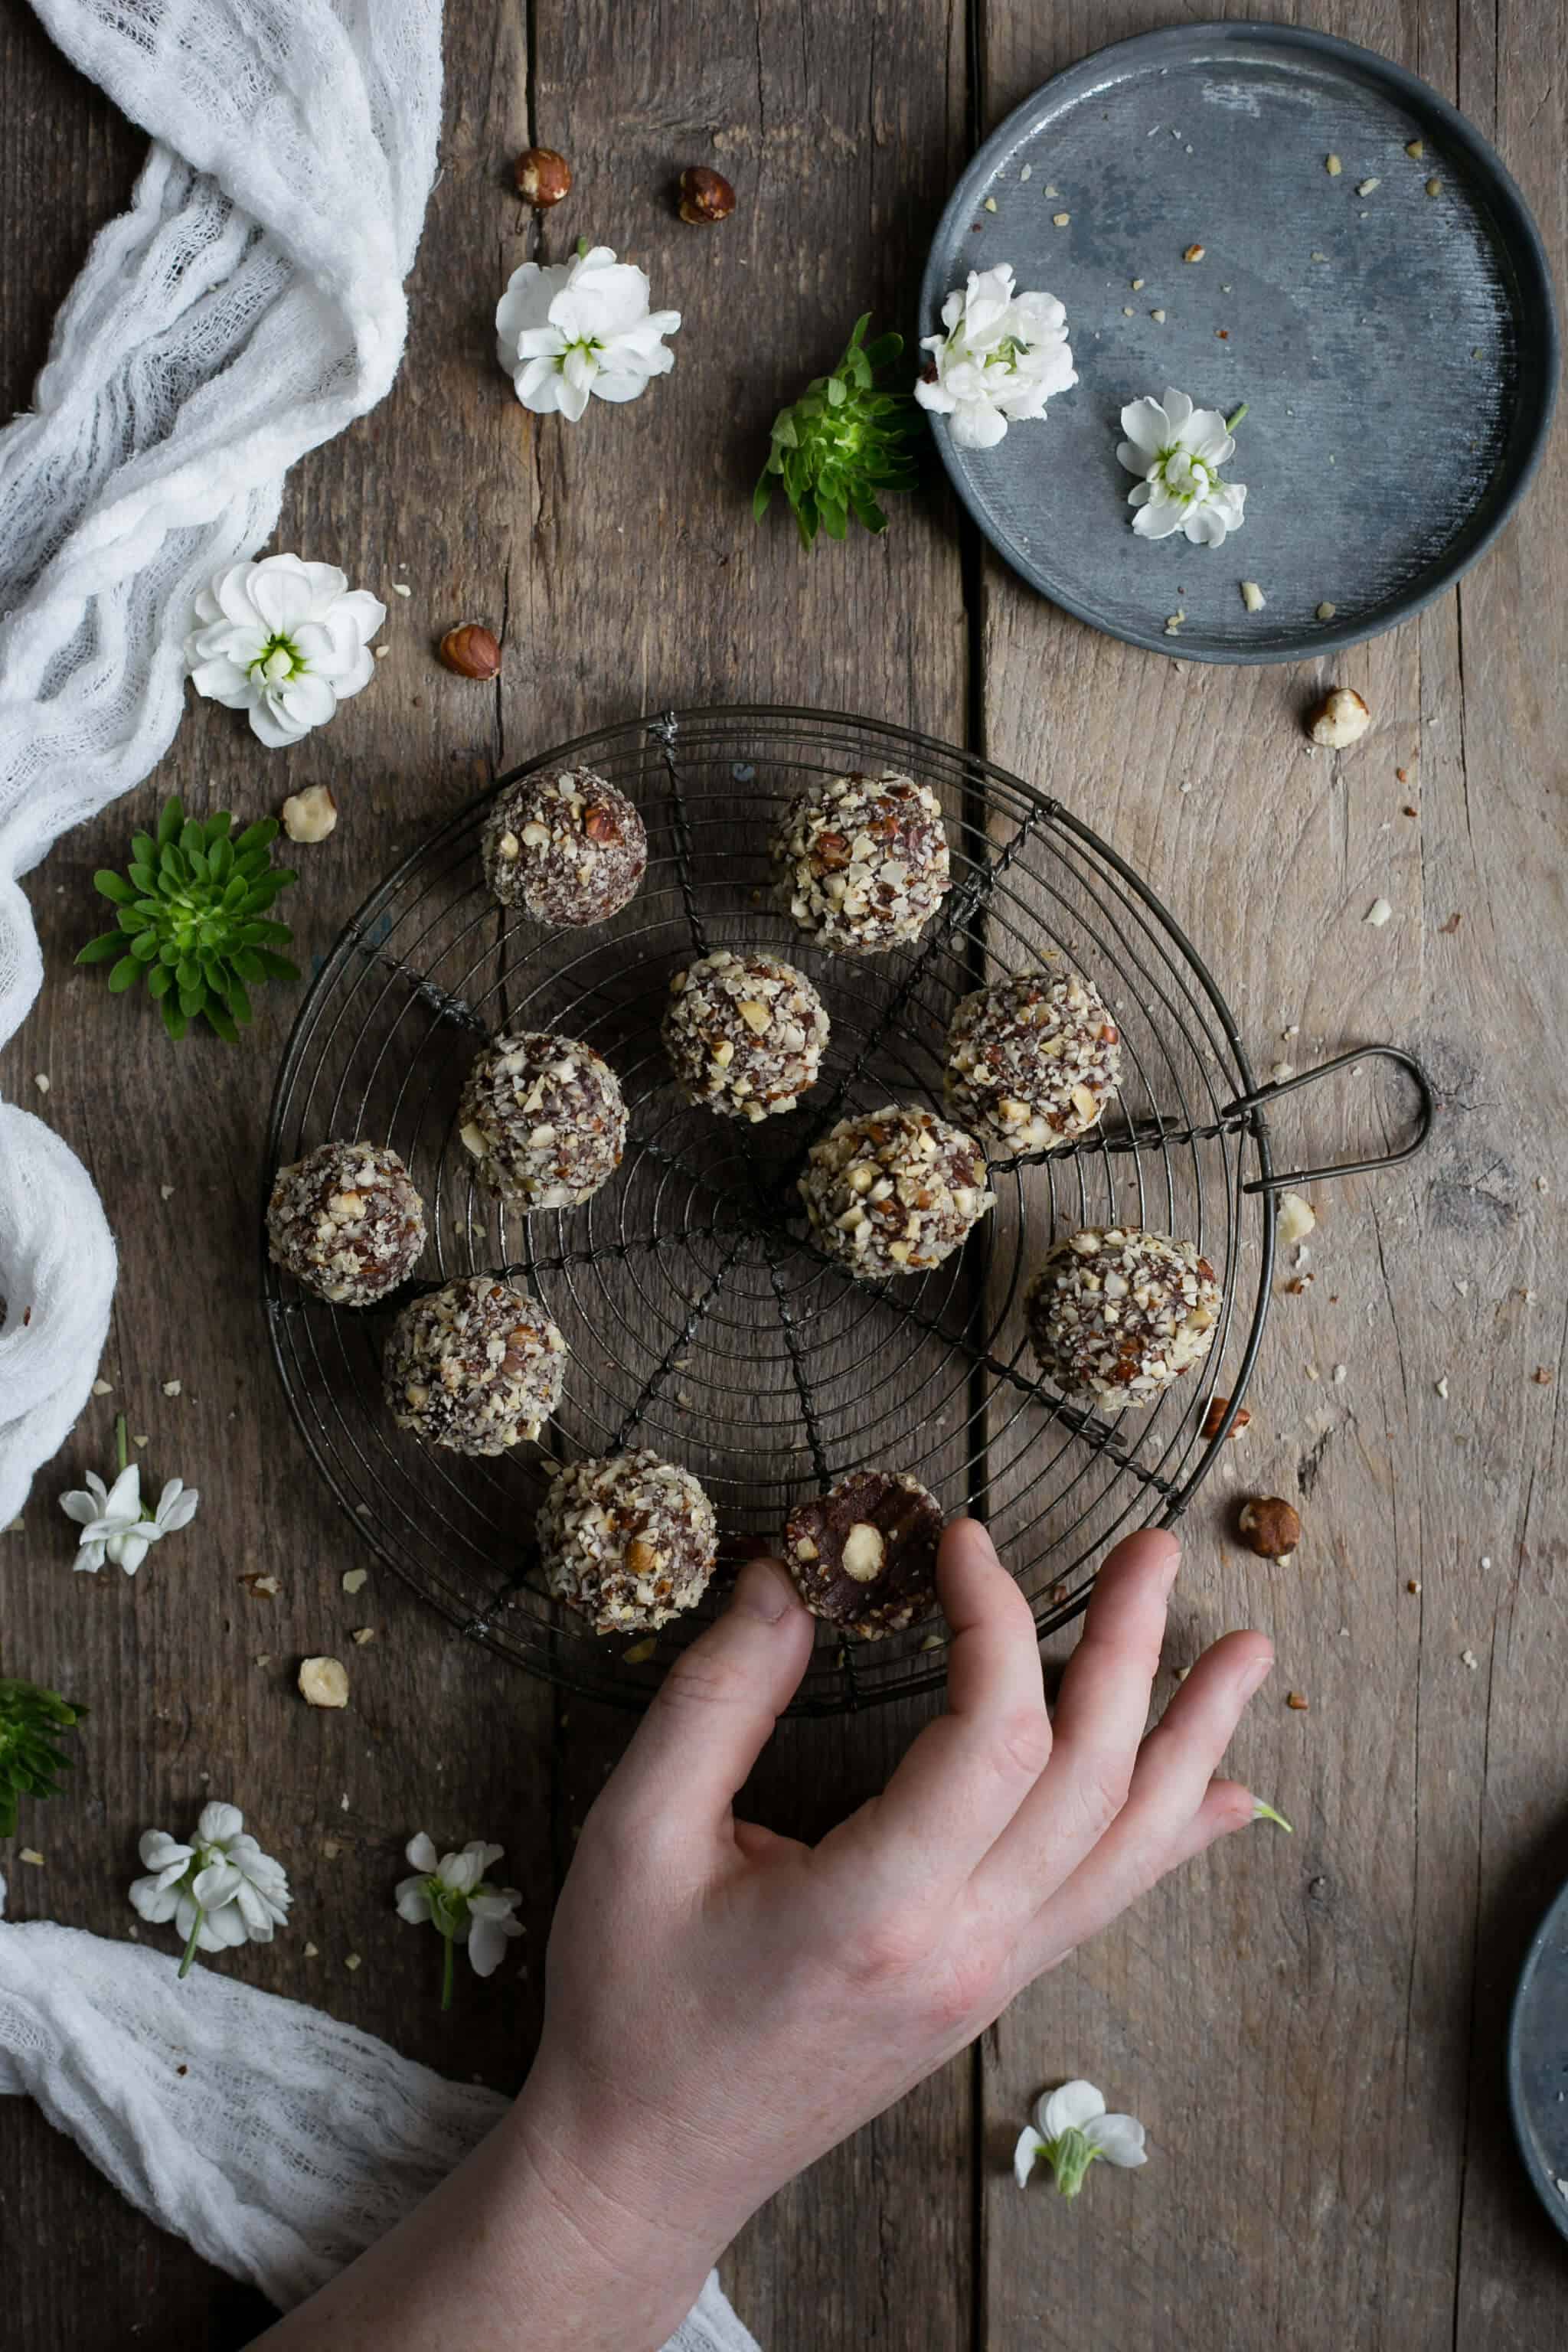
    Because the whole mixture of the ingredients tends to melt very quickly, I would highly recommend to work in small batches, and store the rest of it in the fridge, until you are done with the current batch. Once all of your vegan Ferrero Rochers are rolled and coated in roasted hazelnuts, put them in the airtight container, and place back in the fridge (if you can resist demolishing them all straight away!). After about 30 minutes, they will harden a bit more, and will be ready for you. If you do happen to have any left, they will keep well in your fridge for up to 7 days!

    Delicious vegan Ferrero Rocher truffles | via @annabanana.co

    Have you got any thoughts on today’s post? Do you think it’s OK to be inspired by someone else work and re-create it? I would love to know what you think and what experience you have on this subject. Let me know in the comments section below!

    Until next time!

    Anna.

    📖 Recipe

    Vegan Ferrero Rocher

    Delicious, creamy, chocolatey treat, with crunchy hazelnut coating.

    Prep Time55 minutes

    Cook Time10 minutes

    Total Time1 hour 5 minutes

    Course: Dessert

    Cuisine: Vegan

    Servings: 24 individual bites

    Calories: 199kcal

    Author: Anna

    Ingredients

    • ¾ cup coconut milk (full fat coconut milk from the can)
    • 170 g dark chocolate
    • ¾ cup nut butter (smooth)
    • ¼ cup maple syrup (can use honey if not vegan)
    • teaspoon sea salt
    • 1 cup roasted hazelnuts
    • 1 teaspoon maca powder (optional)
    • 1 teaspoon vanilla bean paste

    Instructions

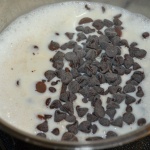
    • Chop the dark chocolate into rough pieces, and place in a glass bowl over the simmering water, allowing it to melt. Once chocolate has melted, remove from the heat, keeping it over warm water.

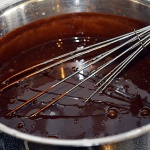
    • Pour the coconut milk into a small pan, add sea salt and maca powder (if using), and warm it up, but do not boil it. Take off the heat, and slowly pour it into melted chocolate, stirring constantly (don’t worry if it hardens or becomes grainy, just keep stirring until it all combines).

    • Add nut butter, vanilla bean paste and maple syrup, combine all together, and set aside, allowing the mixture to cool down to room temperature. Once it’s cooled down, place the mixture in the fridge overnight.

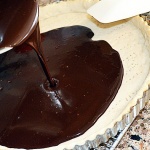
    • Reserve about 24 hazelnuts, and set them aside. Chop the rest of the hazelnuts into fine pieces, and spread them on your chopping board. Scoop the equal portions of the mixture into your hands, and flatten it a little with palm of your hands. Place the whole hazelnut in the middle, then roll the mixture over the nut, forming a small ball/ truffle. Cover in chopped hazelnuts, and place on a clean tray. You will need to work quickly, as the mixture may start melting (it’s good to divide your mixture in batches, and work with small amounts, keeping the rest in the fridge, until you need it). 

    • Transfer your Ferrero Rocher into a container and store in the fridge.

    Please note that all my recipes are developed and tested in metric grams. I recommend that you use digital scales for a more accurate results. I have provided a conversion to US customary in the recipe but please note that I haven’t tested using this method.

    Nutrition

    Calories: 199kcal

    Did you make this?Tell me how you like it? Leave a comment or take a picture and tag @anna_wierzbinska on Instagram. I love seeing your take on my recipes!

    Read More

  • Vegan Chocolate Cake with Avocado Frosting

    Vegan Chocolate Cake with Avocado Frosting

    recipe image
    This rich and fluffy chocolate cake is swirled with a ripple of chocolate fudge and slathered in a thin, yet decadent layer of avocado chocolate frosting. An optional strawberry heart on top.

    Ingredients:

    • 2 cups spelt flour, organic
    • 1/4 cup cocoa powder
    • 2 tsp baking powder
    • 1 tsp chia or flax seeds (ground or whole)
    • 1 cup raw cane sugar, organic
    • 1/2 cup vegan butter
    • 1/2 cup vegan chocolate chips
    • 1/2 cup HOT coffee, freshly brewed (or half espresso half water)
    • 1/2 tsp vanilla extract
    • 1 cup non-dairy milk
    • 1/4 cup vegan chocolate chips
    • 2 tsp vegan butter
    • 1 large avocado, ripe/pitted – flesh scooped
    • 1 1/2 Tbsp vegan chocolate chips, melted
    • 1 tsp vegan butter, melted
    • 1 tsp virgin coconut oil, melted
    • Strawberry Swirl: (optional)

    Instructions:

    1. Preheat oven to 350 degrees and grease a 9 or 10 inch round cake pan with a generous amount of coconut oil or vegan butter.
    2. Combine all dry ingredients in a large mixing bowl and set aside.
    3. Combine the ½ cup of vegan butter and ½ cup of vegan chocolate chips in a small bowl. Then pour in the HOT coffee. The coffee needs to be hot so that it melts the vegan butter and lightly melts the chips. Stir briskly for about 2-3 minutes, until a thick and melted mixture forms.
    4. Fold the melted chocolate mixture into the dry bowl and add the remaining wet ingredients as well. Stir well. If desired, beat with a hand mixer for 1 minute, but this is optional.
    5. Pour the batter into the cake pan and set aside while you melt the swirl chocolate mixture.
    6. For the swirl: heat the chips and vegan butter in a mug for 30 seconds and stir briskly until melted. Drizzle this in a swirl over top the cake batter. This swirl will add chocolatey richness and also help to weigh down the cake center so that it stays rich and dense rather than too fluffy on top. You can watch in the oven as the cake rises how the chocolate weighs it down slightly – in a good way.
    7. Add the cake to the 350 degree oven and bake for 25-30 minutes or until a toothpick test comes out clean. Pull cake from oven and set aside to cool for at least 20 minutes before attempting to remove from pan. When you remove the cake from the pan, transfer it to a cooling rack or to your serving plate. For faster cooling: place the cake in the freezer for 10-15 minutes.
    8. Frosting: Add the avocado flesh and melted oil, vegan butter and chocolate to a blender. Blend until smooth and fluffy, about 1 minute or so. A small or narrow-sized blender container works best.
    9. When cake is warm (mostly cooled) you can spread the frosting on top in a thin yet buttery-rich layer.
    10. Optional strawberry heart: blend the berries, sugar and oil until smooth and velvety, pour into a cup and place mixture in the freezer for at least ten minutes before swirling – this will thicken the mixture — then swirl a heart on top of the cake — add optional additional chocolate chips. Serve right away or store in the fridge until ready to serve. Cake stays delicious for up to 4-5 days when covered.

    Read More

  • Vegan Pecan Butter Tarts

    Vegan Pecan Butter Tarts

    recipe image

    by Lisa Le 17 Comments

    Vegan Pecan Butter Tarts

    Vegan Pecan Butter Tarts

    You heard me. Raisins don’t belong anywhere near a butter tart. Either give them to me plain, or give them to me loaded with pecans, but raisins are mushy, sad, hidden jerks that lurk at the bottom of your butter tart and hit you when you least expect it.

    But first, rewind.

    Have you ever heard of a butter tart? I’ve grown up with these, despite my Vietnamese up-bringing. I don’t really remember where I had them. They were around for potlucks, and sometimes at the grocery store bakeries in trays of six.  They’re basically tarts that are filled with almost a sticky, gooey caramel filling. Traditionally they have little hidden raisin gems at the bottom of the sticky filling, but I never liked those (clearly.)

    Vegan Pecan Butter Tarts


    Vegan Pecan Butter Tarts

    Raisins belong in trail mix. That’s it. They’re acceptable in oatmeal raisin cookies ONLY when I’m expecting them.

    chocolate chip cookies

    Image from: Second Floor

    If I’m expecting a chocolate chip oatmeal cookie, those raisins are nothing but LIES AND DISAPPOINTMENTS. If I wanted the empty, soul-less shells that are raisins, I would have just eaten a grape. Get out of my baked goods, raisins. Carrot cake, butter tarts, and cookies are better without you.

    Vegan Pecan Butter Tarts

    I like to load up my butter tarts with pecans. You can keep them whole, half the amount of pecans I put in, or be rad like me and keep it pecantastic. They are ridiculously addicting and perfect for holiday parties (I know I’m a few months too late, but hey, I don’t like following trends.)

    I used the remaining pie crust from my pecan pie recipe, but I’ve halved my pie crust recipe below so there’s less clicking involved for you. The filling isn’t as gooey and solid as my pecan pie, since these are typically a bit runnier. The added butter and increase of pecans make these slightly different but so delicious. Again, no tofu, no corn syrup. Mostly just sugar and pecans. More crust to filling ratio = happy Lisa. I mean, I love maple and sugar, but how can you resist perfectly flaky crust?


    Vegan Pecan Butter Tarts

    Vegan Pecan Butter Tarts

    Prep Time1 hour 10 minutes

    Cook Time35 minutes

    Total Time1 hour 45 minutes

    Servings: 16

    Author: Lisa Le

    Ingredients

    For the tart shells:

    • Half a stick 1/4 cup vegan buttery sticks cold and cut into cubes
    • Half a stick 1/4 cup vegan shortening), cold and cut into cubes
    • 1 1/2 cups all purpose flour + flour for rolling
    • 1/2 tsp salt
    • 1 tbsp white sugar
    • 5 tbsp 75 mL ice water

    Pecan Filling:

    • 1 tbsp flax meal
    • 3 tbsp warm water
    • 1/2 cup sugar
    • 1/4 cup maple syrup
    • 1/3 cup pecan pieces
    • 3 tbsp vegan butter
    • 1 tsp vanilla extract

    Instructions

    For the tart shells:

    • In a food processor (or if you don’t have one of those, a large mixing bowl and a pastry knife), blitz butter, shortening, sugar, flour, and salt until the butter and shortening is about pea sized. Pour in ice water and mix until just combined. Transfer to a clean countertop and shape into a disc. Wrap with plastic wrap and let chill in the fridge for at least an hour.

    • Once chilled, remove from fridge and roll out until Â1/4 inch thick, thinner if possible. Use a glass or cookie cutter to cut circles to fit into your cupcake pan. Use a fork to poke holes in the bottom to prevent air bubbles. Bake at 325ºF for about 10 minutes. The crust will shrink a little bit, depending on your pan, so give it about Â1/2 inch to shrink down to. Remove from oven and set aside.

    Pecan Filling:

    • In a small pot, combine white sugar, maple syrup, flax mixture, butter, and stir over medium low heat until sugar is dissolved (about 5 minutes). Turn off heat, stir in vanilla extract and pecan pieces, and spoon mixture into to the par-baked tart shells. Be careful to not overfill and give the mixture room to bubble up without overflowing.

    • Bake for about 20-25 minutes, until the edges of the tart shells are lightly golden. Remove from oven and let cool on wire rack. If any of the pecan sugar mixture leaked out, you might have to gently separate the tarts from the pan using a knife.


    Pecan Butter Tarts | The Viet Vegan | Sweet, crisp, buttery and totally dairy-free!

    About Lisa Le

    Lisa is the thirty-something, nerdy, procrastinating, feminist blogger and photographer behind The Viet Vegan. She loves spicy foods, noodles, and food in bowls.

    Reader Interactions

    This site uses Akismet to reduce spam. Learn how your comment data is processed.

    Read More

  • Spicy Vegan Chili

    Spicy Vegan Chili

    recipe image

    I made this spicy chili by tweaking a family recipe to make it vegan. Great on football Sunday! Cornbread is a great addition to this dish.

    Submitted by
    karkar

    Updated on September 13, 2022


    Cook Mode
    (Keep screen awake)

    Ingredients

    Original recipe (1X) yields 8 servings

    • 1 tablespoon canola oil

    • 1 large green bell pepper, diced

    • 1 large onion, diced

    • 2 jalapeno peppers, chopped (Optional)

    • ¼ cup chili powder

    • 2 cloves garlic, minced

    • 1 ½ teaspoons salt

    • ½ teaspoon ground cumin

    • 1 (28 ounce) can crushed tomatoes

    • 1 (15 ounce) can black beans

    • 1 ½ cups water, or as needed

    • 1 cup rinsed, uncooked white rice

    • 1 (15 ounce) can corn

    • ½ teaspoon ground black pepper

    • 1 (8 ounce) package shredded mozzarella-style vegan cheese (such as Daiya®)

    Directions

    1. Heat oil in a pot over medium-high heat. Sauté bell pepper, onion, and jalapeño peppers in hot oil until tender, about 3 minutes. Add chili powder, garlic, salt, and cumin. Cook, stirring occasionally, for about 10 minutes, making sure chili powder does not burn.

    2. Stir tomatoes, beans, water, and rice into the pot. Bring to a boil. Reduce heat to low, cover, and simmer until rice is fully cooked, about 20 minutes. Check after 10 to 15 minutes if extra water is needed; add 1/4 cup at a time.

    3. Stir corn and black pepper into chili and cook until heated through, about 5 minutes. Serve with vegan cheese.

    Tips

    You can use brown rice if you prefer.

    Do not halve the amount of beans, even if you halve the recipe. You may double if desired.

    Nutrition Facts (per serving)

    354 Calories
    11g Fat
    53g Carbs
    12g Protein
    Nutrition Facts
    Servings Per Recipe
    8
    Calories
    354
    % Daily Value *
    Total Fat
    11g
    14%
    Saturated Fat
    5g
    25%
    Sodium
    1405mg
    61%
    Total Carbohydrate
    53g
    19%
    Dietary Fiber
    9g
    32%
    Total Sugars
    3g
    Protein
    12g
    24%
    Vitamin C
    33mg
    37%
    Calcium
    84mg
    6%
    Iron
    5mg
    25%
    Potassium
    703mg
    15%

    * Percent Daily Values are based on a 2,000 calorie diet. Your daily values may be higher or lower depending on your calorie needs.

    ** Nutrient information is not available for all ingredients. Amount is based on available nutrient data.

    (-) Information is not currently available for this nutrient. If you are following a medically restrictive diet, please consult your doctor or registered dietitian before preparing this recipe for personal consumption.

    Read More

  • Toast With Refried Beans and Avocado (Vegan)

    Toast With Refried Beans and Avocado (Vegan)

    recipe image

    Ingredients:

    • * 2 slices sandwich bread (see note above)
    • 1 cup homemade or store-bought vegan refried beans
    • 1 avocado, thinly sliced
    • A few slivers white onion
    • Coarse sea salt such as Maldon or fleur de sel

    Instructions:

    1. Toast bread to desired level of doneness. 2. Top with refried beans and avocado (mash with a fork if desired). 3. Add slivered onions, sprinkle with salt, and serve.

    Read More

  • Vegan Shepherd’s Pie

    Vegan Shepherd’s Pie

    recipe image


    Cook Mode
    (Keep screen awake)

    Ingredients

    Original recipe (1X) yields 6 servings

    Mashed potato layer:

    • 5 russet potatoes, peeled and cut into 1-inch cubes

    • ½ cup vegan mayonnaise

    • ½ cup soy milk

    • ¼ cup olive oil

    • 3 tablespoons vegan cream cheese substitute (such as Tofutti)

    • 2 teaspoons salt

    Bottom layer:

    • 1 tablespoon vegetable oil

    • 1 large yellow onion, chopped

    • 2 carrots, chopped

    • 3 stalks celery, chopped

    • ½ cup frozen peas

    • 1 tomato, chopped

    • 1 teaspoon Italian seasoning

    • 1 clove garlic, minced, or more to taste

    • 1 pinch ground black pepper to taste

    • 1 (12 ounce) package plant-based ground beef substitute

    • ½ cup shredded Cheddar-style soy cheese

    Directions

    1. Gather all ingredients.

      Allrecipes / Christine Ma


    2. Place potatoes in a pot, cover with cold water, and bring to a boil over medium-high heat. Turn the heat to medium-low, and boil potatoes until tender, about 25 minutes; drain.

      Allrecipes / Christine Ma


    3. Stir vegan mayonnaise, soy milk, olive oil, vegan cream cheese, and salt into potatoes, and mash with a potato masher until smooth and fluffy. Set mashed potatoes aside.

      Allrecipes / Christine Ma


    4. Preheat the oven to 400 degrees F (200 degrees C), and spray a 2-quart baking dish with cooking spray.

      Allrecipes / Christine Ma


    5. Heat vegetable oil in a large skillet over medium heat. Add onion, carrots, celery, frozen peas, and tomato; cook and stir until softened, about 10 minutes. Stir in Italian seasoning, garlic, and pepper.

      Allrecipes / Christine Ma


    6. Reduce heat to medium-low and crumble plant-based ground beef into the skillet with vegetables. Cook and stir, breaking up the meat substitute, until the mixture is hot, about 5 minutes.

      Allrecipes / Christine Ma


    7. Spread vegetarian meat substitute mixture into the bottom of the baking dish.

      Allrecipes / Christine Ma


    8. Top with prepared mashed potatoes, smoothing them into an even layer. Sprinkle potatoes with shredded soy cheese.

      Allrecipes / Christine Ma


    9. Bake in the preheated oven until the cheese is melted and slightly browned and the casserole is hot, about 20 minutes.

      Allrecipes / Christine Ma


    10. Enjoy!

      Allrecipes / Christine Ma


    Nutrition Facts (per serving)

    552 Calories
    24g Fat
    65g Carbs
    20g Protein
    Nutrition Facts
    Servings Per Recipe
    6
    Calories
    552
    % Daily Value *
    Total Fat
    24g
    31%
    Saturated Fat
    4g
    18%
    Sodium
    1317mg
    57%
    Total Carbohydrate
    65g
    23%
    Dietary Fiber
    7g
    24%
    Total Sugars
    8g
    Protein
    20g
    40%
    Vitamin C
    25mg
    28%
    Calcium
    114mg
    9%
    Iron
    5mg
    27%
    Potassium
    1250mg
    27%

    * Percent Daily Values are based on a 2,000 calorie diet. Your daily values may be higher or lower depending on your calorie needs.

    ** Nutrient information is not available for all ingredients. Amount is based on available nutrient data.

    (-) Information is not currently available for this nutrient. If you are following a medically restrictive diet, please consult your doctor or registered dietitian before preparing this recipe for personal consumption.

    Read More

  • Vegan Potato and Cauliflower Salad

    Vegan Potato and Cauliflower Salad

    recipe image

    This vegan salad of potatoes and cauliflower is probably the best thing you’ve ever eaten. Even better, no one will be able to know it’s vegan.

    As the summer season approaches, my desire for salad increases. Specifically, potato salad. It’s such a nostalgic dish, and it goes with everything, so it’s perfect for a party outside. And I think the best potato salad is always the one you make yourself. Not only are vegan potato salads difficult to come by in the shop, but the ones that are accessible are subpar at best.

    But don’t panic; this delicious dairy-free potato salad is suitable for both vegans and non-vegans. So, I am making potato salad with cauliflower. However, I intended to create a meal that takes only 20 minutes to prepare. The ingredients and steps to make it are very simple, but the taste is amazing. It’s aromatic, refreshing, and just the proper amount of tangy. The creamy, fluffy potatoes bring earthiness and nostalgia to the dish.

    This dish is a delicious addition to any summertime meal; this dish is perfect for any outdoor gathering or barbecue. There are a few things to keep in mind to make the best potato cauliflower salad, but in the end, it’s an easy and delicious dish that everyone will enjoy.

    This quick and easy Vegan Potato and Cauliflower Salad is a healthy way to enjoy traditional potato salad with fewer carbs and more fiber. My son Daevyd kept asking for more.

    Making Vegan Potato and Cauliflower Salad is a great way to add nutrients to your meal plan. After all, cauliflower has plenty of health benefits.

    Other Salads To Prepare are 4 Bean Salad, Pipino Salad, and Yuca Salad(Cassava Salad).

    close up cauliflower potato salad in black bowl on grey background

    Why You Love This Vegan Potato And Cauliflower Salad?

    I hope you’ll adore this recipe for cauliflower potato salad! Because:

    • It’s quite creamy.
    • It’s quite simple and quick to prepare. Even faster than typical potato salad to prepare
    • Made with ingredients, you’ll find in your pantry
    • There are only 6 ingredients needed.
    • Always a favorite at potlucks, brunches, and holiday gatherings.
    • This dish is dairy-free, vegan, oil-free, gluten-free, and sugar-free.
    • This salad’s vibrant colors and flavors make it a delightful side dish to serve during the holiday season.
    • Okay, I’ll call it a salad, even if there is no lettuce, spinach, or kale. It’s like a hidden salad for people who dislike salads!
    • It’ll be a hit with your non-vegan friends. When we have a picnic with friends and family, they always ask for this meal, even though they’re not vegan. It’s simply amazing.
    • This recipe is perfect for cookouts, potlucks, or any large gatherings.
    • I like the fact that it is more nutritious than traditional potato salad. Keep reading to learn more!

    Health Benefits Of Potato And Cauliflower Salad

    Some Health Benefits Of Cauliflower

    Cauliflower is low in calories and contains vitamin C, K, and B6. Fiber, folate, potassium, manganese, magnesium, phosphorus, and pantothenic acid. A good source of antioxidants that protects the cells from free radical damage. Cauliflower may help with weight loss.

    • Cauliflower includes practically every mineral and vitamin your body needs. One of them is vitamin C, an anti-inflammatory that can help boost your immune system and lessen your risk of cancer and heart disease.
    • Cauliflower contains a lot of fiber, which helps to reduce inflammation and improve digestion.
    • Sulforaphane, glucosinolates, and isothiocyanates are antioxidants found in cauliflower that can help protect against cancer, heart disease, and diabetes.
    • Cauliflower is strong in choline, an essential ingredient that supports metabolism, brain growth, and nervous system function, and is insufficient in many people. It also keeps cholesterol from building up in the liver.
    • Cauliflower is high in allicin, a compound that may help prevent strokes and heart disease.

    The Great Aspects About Potatoes

    In terms of health benefits, potatoes are really underrated. You can obtain the following health benefits by eating these delectable carbs.

    • Because they include iron, phosphorus, calcium, magnesium, and zinc, they are beneficial to bone health.
    • Vitamin C, potassium, and vitamin B6 are all found in the potato, and the lack of cholesterol makes it a good choice for those concerned about heart health.
    • Potatoes are high in potassium, which can help keep blood pressure in check. Potatoes also include calcium and magnesium, which have been shown to lower blood pressure naturally.
    • Potatoes are high in folate, which helps to reduce your cancer risk.
    • Potatoes are high in fiber, which aids digestion. Fiber aids weight loss by keeping our stomachs full for extended periods of time.

    Recipe’s Required Ingredients

    This vegan potato and cauliflower salad are quite simple and easy to prepare. You’ll need the following listed ingredients, which are probably already found in your pantry:

    • Potato: Yukon gold potatoes are my favorite, but you can use Russet or whatever you have on hand.
    • Cauliflower: I added cauliflower to this traditional and classic potato salad recipe to increase the nutritional benefits. The outcome was creamy and tasty.
    • Sea Salt: To add a savory flavor, season with salt. Black pepper can be used for added flavor.
    • Red Onion: It’s made with red onions. If you don’t have red onions on hand, white onions, yellow onions, sweet onions, or shallots can be substituted.
    • Stalks of celery: Celery has a salty, slightly tart flavor and a crisp texture. This salad is made interesting by the crunch of celery.
    • Vegan Mayo: You can use your favorite store-bought vegan mayonnaise; my favorite is Just Mayo; if you are looking for a recipe made from scratch, you can try my recipe, or a combination of both is very tasty.
    • Paprika, and parsley leaves, for garnish

    cauliflower potato salad ingredients with red onion and mayo

    How To Make Vegan Potato And Cauliflower Salad?

    To make Vegan Potato and Cauliflower Salad, I placed the potatoes in a saucepan with water and salt on medium-high heat and brought them to a boil. Boiled the potatoes for about 10 minutes until tender.

    Halfway I added cauliflower florets to the boiling potato and cooked until tender. Then remove it from heat and drain with a colander.

    Next, I transferred potato and cauliflower to a large mixing bowl. Cooled it completely.

    Then I added onion and celery. After that, gentle fold in mayo and season with salt to taste. Finally, I covered it and refrigerated it for a couple of hours. When serving, I sprinkle paprika and parsley.

    Recipe Notes

    • You can steam or bake the cauliflower instead of boiling it if you don’t want to boil it. Keep an eye on it to make sure it doesn’t get too soft.
    • This salad also works with raw cauliflower.
    • After assembling the salad, refrigerate it for 30 minutes to allow the flavors to meld.
    • If you find the vegan mayonnaise to be too heavy, feel free to substitute a portion of it with vegan plain yogurt.
    • You can put whatever you want on this salad. You can maintain the low carb and keto ingredients or add any additions you want.
    • Because cauliflower rice is too small for this dish, it will not work.
    • Cut the cauliflower into uniform florets to ensure uniform cooking.
    • Make sure to use high-quality vegan mayonnaise made with healthy oils like coconut or avocado.
    • Adjust the salt and pepper as needed.
    • I intentionally left the skin on the potatoes, reducing the preparation time and also for their nutritional benefits.

    Make It Your Own Salad

    There are a lot of easy ways to make this cauliflower and potato salad your own and use up whatever you have on hand.

    • Toss in some crunch. Pistachios or cashews, roasted and shelled, would be a fantastic addition to this salad.
    • Increase your protein intake. Add a cup of cooked quinoa or a can of chickpeas to make this salad vegan. If you’re not vegan or vegetarian, feel free to add some cooked, diced chicken breast to the mixture before serving.
    • Increase the spiciness. If you want the dressing to have a bit more kick, add 1/4 teaspoon cayenne pepper.
    • Mix the vegetables together. You may also try roasting some carrots and marinating some kale in your dressing for an extra dose of greens.

    For More Cauliflower Recipes, Try These:

    • Cauliflower Hashbrowns
    • Barbecue Cauliflower Wings
    • Jamaican Jerk Cauliflower
    • Cauliflower Casserole
    • Roasted Cauliflower In Spicy Marinara Sauce
    • Cauliflower Rice Curry
    • Quick and Easy Roasted Cauliflower
    • Cauliflower Nuggets
    • Cauliflower Fried Rice

    Is It Better To Serve It Hot Or Cold?

    Whatever suits you best! Potato and Cauliflower salad is best served cold to keep the other vegetables crisp and fresh. To serve it warm, start by preparing the dressing and veggies, then combine everything with the steamed cauliflower.

    How Long Does It Last?

    The leftovers will keep in the fridge for up to 4 days. Simply keep the salad in a big covered container until ready to eat, then serve cold or warm. I believe that the flavor improves the longer it rests! … But not for too long.

    Can You Make It Ahead Of Time?

    Yes! This is an excellent recipe for meal prep because it can be made and stored in the refrigerator for up to four days before use. You may create the dressing/mayo up to a week ahead of time and store it in an airtight jar until ready to use.

    Is It Freezer-Friendly?

    No, potato and cauliflower salad does not freeze well.

    Can You Make This Cauliflower Potato Salad With Frozen Cauliflower?

    Yes! Allow the frozen cauliflower to thaw in the refrigerator before steaming; steam it for 4-5 minutes, or until slightly softened but not mushy. It should still be firm. The rest of the recipe can be followed exactly as is.

    What Kinds Of Potatoes Can I Eat On Keto?

    Choose cauliflower, rutabaga, or turnips for a healthy diet instead of white potatoes because they have fewer carbs. Sweet potatoes are a healthy carb option, but they’re still too high in carbs for keto. The options suggested above will not cause blood sugar spikes and can be utilized in a variety of keto recipes.

    Thanks for reading this blog post on Vegan Potato and Cauliflower Salad. I hope it has inspired you to try out a new dish. If you have any questions or suggestions, feel free to leave a comment below. And if you tried this recipe or any other from my website, please let me know how it turned out in the comments below! Thanks for visiting my Recipes, and I hope to see you again soon.

    cauliflower potato salad overlay in black bowl on grey background

    If you enjoyed this post about Vegan Potato and Cauliflower Salad and would love to see more, join me on Youtube, InstagramFacebook & Twitter!

    Get discounted copies of my cookbook here.

    Fortunately, because of the Ads on our website, readers and subscribers of Healthier Steps are sponsoring many underprivileged families.

    Want to Save This Recipe?

    Enter your email & I’ll send it to your inbox. Plus, get great new recipes from me every week!

    By submitting this form, you consent to receive emails from Healthier Steps.

    vegan cauliflower potato salad on black plate on grey background

    • 2 pounds potato (6 medium), cut into bite-sized chunks
    • 1/2 cauliflower chopped into bite-sized florets
    • 1 teaspoon sea salt
    • 1/4 cup red onion finely chopped
    • 2 stalks celery chopped
    • 1/4 cup vegan mayo
    • paprika and parsley leaves, for garnish
    • Place potato in a saucepan with water and salt on medium-high heat and bring to a boil.

    • Reduce to simmer for 10 minutes or until tender.

    • Halfway add cauliflower florets to boiling potato and cook until tender. Should take 5 minutes.

    • Remove from heat and drain with a colander.

    • Transfer potato and cauliflower to a large mixing bowl. Allow to cool.

    • Add onion and celery.

    • Gentle fold in mayo and season with salt to taste.

    • Cover and refrigerate for a couple of hours.

    • Sprinkle with paprika and parsley before serving.

    Calories: 115kcal | Carbohydrates: 18g | Protein: 2g | Fat: 4g | Saturated Fat: 0.5g | Polyunsaturated Fat: 0.1g | Monounsaturated Fat: 0.01g | Sodium: 279mg | Potassium: 476mg | Fiber: 3g | Sugar: 1g | Vitamin A: 5IU | Vitamin C: 32mg | Calcium: 19mg | Iron: 1mg

    Michelle Blackwood, RN

    Hi, I’m Michelle, I’m the voice, content creator and photographer behind Healthier Steps. I share vegan and gluten-free recipes because of past health issues. My goal is to help you make healthier choices and show you how healthy eating is easy and delicious.

    Read More

  • Vegan Banana-Chocolate Chip Cookies

    Vegan Banana-Chocolate Chip Cookies

    recipe image

    These cookies were made at a coffee shop in the town where my wife went to college. Luckily we knew someone who worked there and we ended up bringing home the recipe!

    Submitted by
    Jeff Talbot

    Updated on February 11, 2022


    Cook Mode
    (Keep screen awake)

    Ingredients

    Original recipe (1X) yields 48 servings

    • 6 cups all-purpose flour

    • 2 teaspoons baking soda

    • 2 teaspoons salt

    • 15 ounces vegan margarine (such as Earth Balance®)

    • 2 cups white sugar

    • 2 cups brown sugar

    • 2 medium ripe bananas, mashed

    • 3 teaspoons vanilla extract

    • 3 cups semisweet chocolate chips

    Directions

    1. Preheat the oven to 350 degrees F (175 degrees C).

    2. Mix flour, baking soda, and salt together in a bowl.

    3. Beat vegan margarine, white sugar, and brown sugar together in a separate bowl. Mix in mashed bananas and vanilla. Add flour mixture and chocolate chips slowly while mixing together.

    4. Drop spoonfuls of dough 2 inches apart onto ungreased cookie sheets.

    5. Bake in the preheated oven until golden, about 20 minutes.

    Nutrition Facts (per serving)

    231 Calories
    10g Fat
    34g Carbs
    2g Protein
    Nutrition Facts
    Servings Per Recipe
    48
    Calories
    231
    % Daily Value *
    Total Fat
    10g
    13%
    Saturated Fat
    4g
    19%
    Sodium
    222mg
    10%
    Total Carbohydrate
    34g
    12%
    Dietary Fiber
    1g
    4%
    Total Sugars
    21g
    Protein
    2g
    4%
    Vitamin C
    0mg
    0%
    Calcium
    11mg
    1%
    Iron
    1mg
    6%
    Potassium
    81mg
    2%

    * Percent Daily Values are based on a 2,000 calorie diet. Your daily values may be higher or lower depending on your calorie needs.

    ** Nutrient information is not available for all ingredients. Amount is based on available nutrient data.

    (-) Information is not currently available for this nutrient. If you are following a medically restrictive diet, please consult your doctor or registered dietitian before preparing this recipe for personal consumption.

    Read More

  • Grain Free and Vegan Pie Crust

    Grain Free and Vegan Pie Crust

    recipe image

    This easy, 5-ingredient (plus water) pie crust is the perfect base for all of your sweet or savory pies and quiches! Plus, it’s gluten free, grain-free, and vegan.

    Grain Free and Vegan Pie Crust

    Yield:
    1 crust (8 servings)

    This easy, 5-ingredient (plus water) pie crust is the perfect base for all of your sweet or savory pies and quiches! Plus, it’s gluten free, grain-free, and vegan.

    Ingredients

    • 2 cups blanched almond flour
    • 1/2 cup cassava flour
    • 1 Tablespoon tapioca flour
    • 1/4 teaspoon fine sea salt
    • 5 Tablespoons palm shortening
    • 5-6 Tablespoons ice cold water (or more, depending on consistency)

    Instructions

    1. Preheat the oven to 350F. Lightly grease a 9″ pie plate.
    2. In the bowl of a food processor, pulse the almond flour, cassava flour, tapioca flour, and sea salt a few times to mix and break up all of the clumps.
    3. Add the shortening and pulse until it is well incorporated into the dough. It’s fine if small clumps remain; they should be no later than a pea.
    4. With the processor running, add the water, one tablespoon at a time, until the dough comes together in a ball.
    5. Turn off the machine and feel the dough. It should be tacky, even sticky, but not wet. Let sit for 2 minutes before proceeding (this allows the flours to absorb the water).
    6. Turn the dough out on to a piece of wax or parchment paper, gather into a ball and press into a thick disc. Cover with another piece of wax or parchment paper and roll into a flat disc about 10″-11″ in diameter. Loosen the parchment from both sides of the dough and then carefully slide the dough into a lightly greased 9″ pie or tart pan. It is very delicate! If it breaks, just press it back together with your fingertips.
    7. Use tin foil or a crust shield to lightly cover the edges of the crust.
    8. Bake for 10 minutes. Remove from oven and cool slightly before filling and finishing the baking process. (Note: If the recipe does not call for pre-baking the pie shell, skip this step)
    Nutrition Information:

    Yield: 8

    Serving Size: 1


    Amount Per Serving:

    Calories: 269Total Fat: 23gSaturated Fat: 7gTrans Fat: 0gUnsaturated Fat: 15gCholesterol: 0mgSodium: 70mgCarbohydrates: 14gFiber: 4gSugar: 2gProtein: 6g

    Did you make this recipe?

    Please leave me a comment and rating, or tag me on Instagram using @nora_acleanbake or #acleanbake!

    Read More

  • Chocolate Ganache Tart {Vegan}

    Chocolate Ganache Tart {Vegan}

    recipe image

    Chocolate Ganache Tart

    Just in time for Valentine’s Day, this decadent chocolate ganache tart with coconut whipped cream will not disappoint! Rich, creamy and oh-so-chocolately good 🙂

    Servings 12

    Author Veg Life Staff

    Ingredients

    • For the Tart Dough:
    • 1/3 C Powdered Sugar
    • 7 Tbl vegan butter such as Earth Balance
    • 1-1/2 C All-Purpose Flour
    • ¼ C Silken Tofu
    • 1 Tbl Soy Creamer
    • Pinch of Salt
    • *****
    • For the Chocolate Ganache:
    • 1-3/4 C Soy Creamer
    • 1-1/4 C Semi-Sweet Chocolate Chips
    • 1 Tbl Sugar
    • Pinch of Salt

    Instructions

    • For the Tart Dough:

    • In the bowl of an electric mixer fitted with the paddle attachment, combine the sugar, salt and butter and blend until smooth. Add the tofu and blend until smooth. Add the flour and mix until you get a crumbly consistency. Add the cream and mix until the dough comes together. Remove the dough from the mixer and wrap the dough in plastic wrap.

    • Chill for 30 minutes. The dough will become easier to work with. If chilled longer than 30 minutes, let sit at room temperature to soften slightly before rolling.

    • Preheat the oven to 425 degrees.

    • On a floured surface, roll the dough into an 11” circle. Fit the dough into a 9” tart pan with a removable bottom.

    • Press the dough firmly into the bottom and sides. Trim any excess with a sharp knife. Using a fork, prick the dough all over.

    • Using parchment filled with pie weights, dried beans or just foil fitted snugly into the crust will prevent the dough from puffing up to much during baking and will help keep its shape.

    • Bake for about 8 minutes and remove the foil or filled parchment. Continue baking for another 6-8 minutes or until the dough is evenly dry and lightly browned. Cool completely.

    • For the Ganache Filling:

    • To make the chocolate ganache, put the cream in a medium saucepan. Bring just to a boil over moderate heat. Add the chocolate, sugar and salt to the cream and place over low heat.

    • Stir gently and almost constantly until the chocolate has melted and the mixture is smooth. This will only take a few minutes, and take care not to let the chocolate get to hot; it should only feel warm to your finger. Set aside, off heat, for 10 minutes, stirring once or twice.

    • Pour the chocolate mixture into the cooled tart shell.

    • Refrigerate the tart for at least an hour, but better if overnight, until set. The filling will still be soft, not firm.

    • Serve with a dollup of our coconut whipped cream!!

    Read More