Sweet sweet pineapple 😍 You’ve had it straight from the can, on top of your pizza and now in our delicious refined sugar-free chocolate bar!
You’ll love the tropical-infused flavour, ice-cold and perfect for summer! Give this Vegan Frozen Pineapple Bars a go and let us know what you think in the comments below!
You can find more sugar-free recipes like this one and more over on our Youtube at Healthy Treat. Liked this recipe? SAVE it to your collection
Prep: 25 minutes
Freeze: 2 hours
1 cup cashews
60g sugar-free vegan cookies
¾ cup fresh pineapple, diced
2 tbs Natvia
200g sugar-free milk or dark chocolate
Soak the cashews for 15 minutes in hot water. Drain and rinse.
Combine the biscuits in a food processor and pulse until they resemble coarse breadcrumbs. Add the pineapple, cashews and Natvia and pulse until combined and smooth. Press into a greased and lined 20cm loaf tin and freeze for 2 hours.
Slice into bars and coat in melted chocolate. Keep in the freezer.
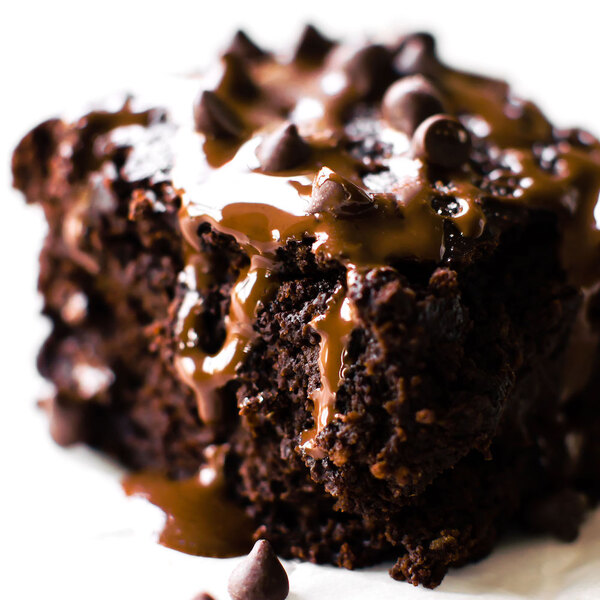
Ultra rich Easy Vegan Fudge Brownies chock full of chocolate, made in one bowl, and healthier than most with applesauce, oat flour, and no added sugar!
ORIGINALLY PUBLISHED NOVEMBER 9, 2017
PHOTOS + RECIPE UPDATED AUGUST 12, 2022
I’ve eaten a lot of brownies in my life. Almost all of them are a fond fudgy memory, but there is something that every single one of my favorite brownies over the years have in common. And that something is chocolate. I don’t just mean chocolate flavor, all brownies have that. I mean real deal chocolate. Chips or chunks or melted and mixed in chocolate. Double, triple, (quadruple? can that exist pls) chocolate.
Cocoa powder is okay, but I want something that melts. Something extra gooey amidst all the chocolate and chewy. Because if you finish a brownie with clean fingers then you’re doing it wrong.
So if you too hold your brownies to an exceptionally high messy-fingers standard, then this is the brownie for you. And if you don’t, then I think you are selling your brownie-loving self short. And if you eat brownies with a fork…who are you even? Not that I’m judging.
Whichever kind of human you may be, let’s get you a plate and a piece and talk about why these are soon to be your favorite chocolate indulgence.
Before brownie making, there are a few things you need to know:
This is not a dessert/breakfast brownie. This is a dessert/dessert brownie. If healthy is what you are here for, allow me to redirect you -> HERE
There is a not insignificant amount of melted chocolate involved in this recipe. You’ll thank me later.
No added sweetener is necessary in this recipe, the applesauce + semi-sweet chocolate has it covered.
They’re good. Like really really good. Like good bordering on crazygood.
And yes, drizzling with melted chocolate does officially tip them into crazygood territory. Btw adding a little coconut oil to your melting chips -> perfect drizzle consistency.
As I may have mentioned a time or too, these brownies are quite rich and fudgy. If you want them more on the cakey side of fudgy, add the one half teaspoon of baking soda. If you want them more on the super duper extra side of fudgy then omit the baking soda. Personally I prefer them with the baking soda – a hint of fluffy amidst the fudge.
This recipe is made with oat flour – store-bought or blitzed in the blender, and certified gluten-free if necessary. I tested them with almond flour too, but it was a no go. Too gooey and fall apart-y. Apologies to my grain-free friends, but I’ll work on a paleo version soon.
Oh, and if the words too chocolatey are something you’ve said before, then you could replace the cacao/cocoa powder with more flour to tone it down a smidge. Or there is always the glass-of-milk-to-go-with option. But since you are here reading a fudge brownie recipe I’m guessing you’re cool with decadent and currently thinking: Bring. It. On.
Happy brownie baking and blissfully devouring to you!
Print
Easy Vegan Fudge Brownies
Author:Natalie
Prep Time:10 minutes
Cook Time:30 minutes
Total Time:40 minutes
Yield:8 servings 1x
Category:dessert
Method:baking
Cuisine:american
Description
Ultra rich Easy Vegan Fudge Brownies chock full of chocolate, made in one bowl, and healthier than most with applesauce, oat flour, and no added sugar!
8oz dairy-free semi-sweet chocolate chips
3/4 cup (180g) unsweetened applesauce
1 tsp vanilla extract
1 flax egg (1 tbsp flax meal + 3 tbsp water)
1/2 cup (50g) cocoa powder
1/2 cup (60g) oat flour
1/2 tsp baking soda
1/2 tsp salt
Frosting: THIS chocolate cashew cream frosting (pictured) or THIS 2 ingredient dairy-free ganache
Instructions
Preheat the oven to 350F. Line a baking dish (mine was 9″x6″) with parchment paper and/or grease the sides.
Prepare flax egg and set aside to gel.
Melt the chocolate chips in a mixing bowl, stir until smooth.
Add applesauce (room temperature), flax egg, and vanilla. Whisk to combine.
Add the oat flour, cocoa powder, baking soda, and salt. Whisk/stir to combine.
Pour into prepared dish, smoothing the top.
Bake for 30-35 minutes at 350°F, the center should not feel squishy when they are done.
Cool in the pan for 15 minutes before transferring to a cooling rack.
Either enjoy warm, or cool and top with one of the frostings listed above. Enjoy!
Notes
For the old version: omit the flax egg, increase applesauce to 1 cup, decrease cocoa powder to 1/4 cup
Posts may include affiliate links. We receive a small compensation for your purchase at no additional cost to you. For more information, visit our Affiliate Disclosure.
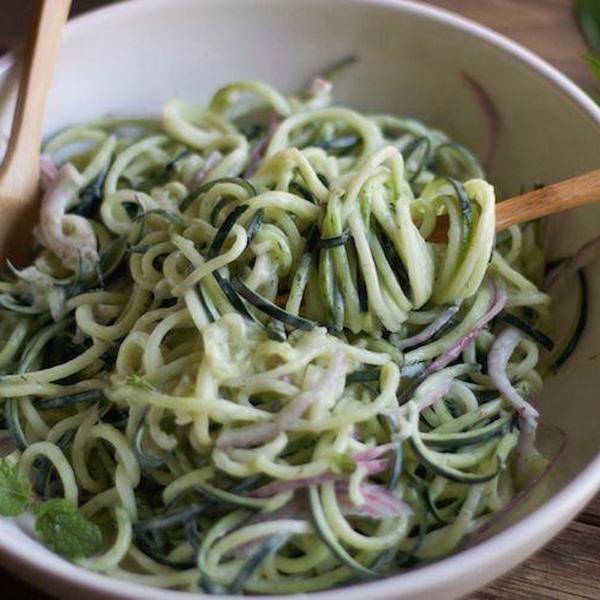
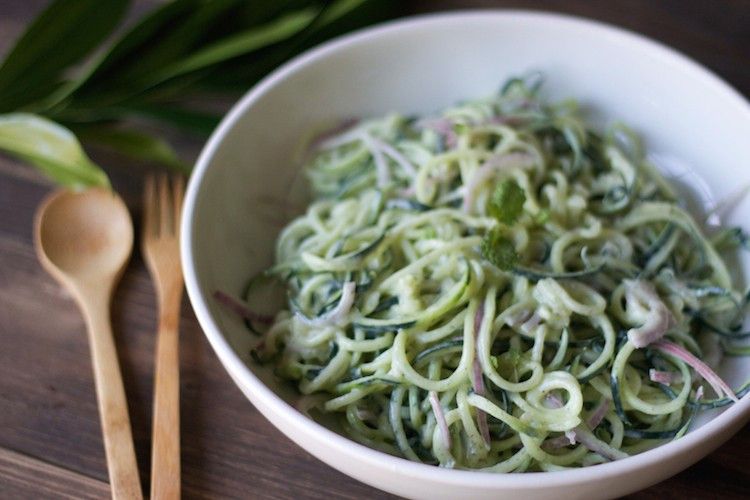
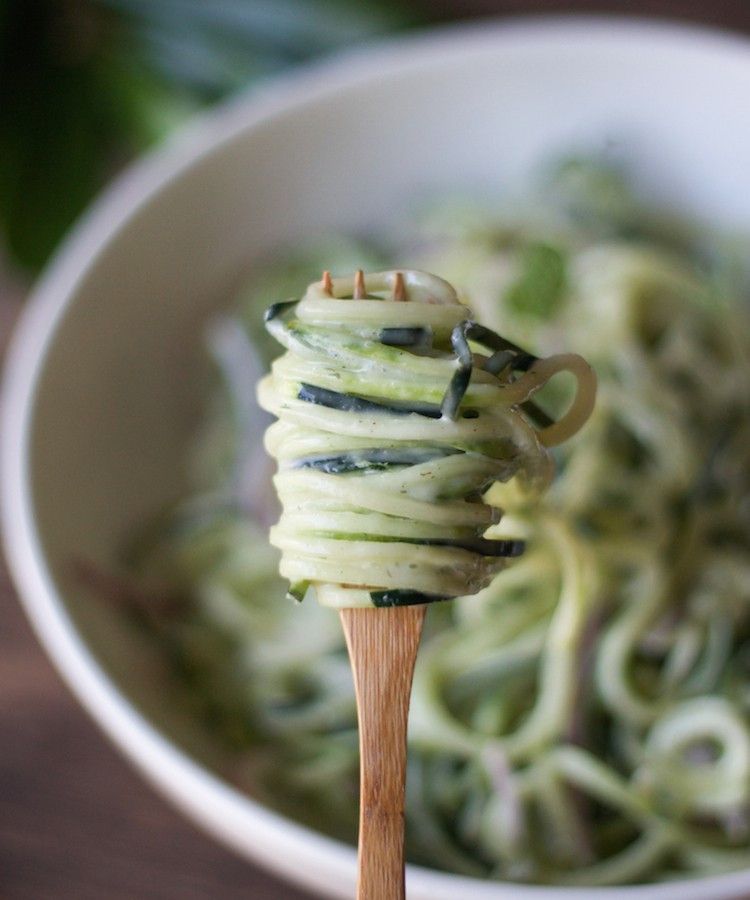
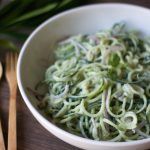
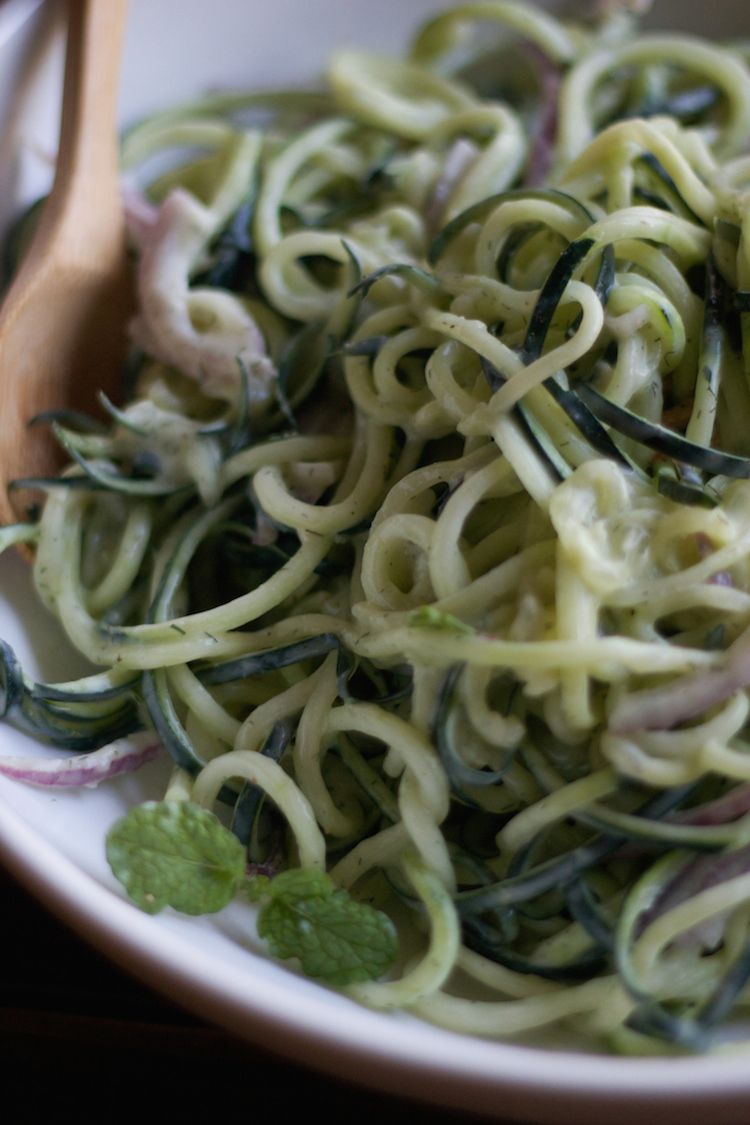
I’ve said it before that I love Mediterranean food. Tzatziki’s if you don’t know is a Greek yogurt sauce that is light, fresh, and creamy. This is a fully plant-based version of the traditional tzatziki recipe but with my own creative spin of course. This vegan yogurt dill dressing with cucumber noodles is made with cucumbers, garlic, olive oil, salt, lemon juice, dill, and of course vegan yogurt.
It’s very easy to make at home and totally worth it. I used my own Homemade Vegan Coconut Yogurt with this recipe but you can also use other vegan yogurts like soy. Just make sure you get plain yogurt, I made the mistake of buying vanilla and it didn’t turn out the same 🙂
This vegan yogurt dill dressing with cucumber noodles has a very similar flavor to the traditional tzatziki recipe, although the texture is not the same, since Greek yogurt is thicker and we are using cucumber noodles instead of chopping them and mixing them into the dressing. If you want a thicker texture, you can use a denser yogurt (if you buy it) or make your own homemade yogurt thicker.
If you don’t have vegan yogurt at home, you can substitute it with hemp seeds. It tastes just as great but with added protein power.
Print
Vegan Yogurt Dill Dressing With Cucumber Noodles
5 Stars 4 Stars 3 Stars 2 Stars 1 Star
No reviews
Author:Vanessa Cassani
Prep Time:10 mins
Total Time:10 mins
Yield:21x
Category:Entree
Cuisine:Raw Vegan, Gluten-Free
2 cucumbers
1 cup vegan yogurt
2 garlic cloves
1/2 lemon (juice)
2 tablespoons extra virgin olive oil
1 teaspoon dill
1 teaspoon salt
Instructions
Place the vegan yogurt in a bowl, add the garlic cloves (finely chopped), lemon juice, oil and dill.
Stir and let stand for 2-3 hours in the fridge. This allows all the flavors to combine and the sauce the thicken.
Spiralize your cucumber and mix in sauce. Serve cold.
Notes
Add different topping to this dish like cherry tomatoes, sliced onion, or fresh mint.
Nutrition
Serving Size:2
Calories:251
Sugar:11g
Sodium:1244mg
Fat:18g
Saturated Fat:5g
Unsaturated Fat:13g
Carbohydrates:20g
Fiber:2g
Protein:7g
Cholesterol:16mg
I hope you give this recipe a try and if you do, take a picture and tag me on Instagram @LiveSimplyNatural or @LSNatural on Twitter or, pin it for later on Pinterest. I love seeing what you guys are cooking up in the kitchen. Stay tuned for more simple vegan recipes!
You know those great girlfriends you have that you may not catch up with all the time (where does the time go, where?) but when you do it’s like no time passed at all?
I rounded up two of mine on Sunday. After a crazy fun catch up, we treated ourselves to Gold Class cinema tickets and settled in to watch ‘Mental’ – a crazy Australian movie that is essentially about loving and believing in yourself, even if you don’t fit in. Or even if your friends think you’re weird for bringing fluffy socks to wear in the cinema (my feet get cold!).
Fun, zany, and totally kooky, this flick really is mental.
http://youtu.be/VnQPnXbj-RY
Amidst our popcorn, bubbles and giggles, we got to reminiscing about the magical night when one of their hubbies cooked us all an amazing Thai feast. I still think about my favourite dish from that night – Pumpkin Red Curry. It was superb and incredible and I’m sure he spent hours selecting the right ingredients and making everything from scratch.
Naturally after we talked about it I wanted it BIG TIME but I was in the mood for a much faster version…
Lighter than a traditional Thai curry & rice but with just as much pizzaz, I give you: Thai Pumpkin & Chickpea Wraps!
Fast, fresh, tasty and ohso easy to make.
Go Mental.
Rebecca Weller – Vegan Sparkles
Prep Time 10 minutesmins
Cook Time 15 minutesmins
Total Time 25 minutesmins
4tbspThai red curry pastecheck ingredients to ensure it’s vegan
400gpumpkinchopped into 2cm pieces
1tin chickpeasdrained
1cupcoconut milk
6large green leavessilverbeet/collard/spinach, etc, washed
1handful fresh coriander leaveschopped
1limejuiced
In a large pot or pan over medium heat, stir pumpkin and curry paste for a couple of minutes until aromatic.
Add coconut milk and simmer for ten minutes or until pumpkin is soft.
Add chickpeas and lime juice and simmer for two more minutes.
Remove from heat and allow to cool.
Line lettuce leaves with pumpkin mixture. Top with coriander and roll into wraps.
Whether your ice them, sprinkle them, or eat them plain these vegan sugar cookies are perfect for anyone minding their diet. They’re also gluten free, perfect for kids and adults with sensitivities!
Every holiday, I crave the same things. Cranberry dressing (homemade, NOT from a can), the skinniest slice of pumpkin pie (because, that leaves more room for whipped cream), and the butteriest, sugar cookie I can find. The first two are easy to make vegan, but the cookies are more of a challenge. I spent the months leading up to the holidays working on recipes, tinkering with proportions and taste testing to give you my ultimately vegan sugar cookies recipe.
Ingredients
1/2 cup Earth Balance Buttery Stick (or a vegan shortening)
1/2 cup date sugar
1/4 cup packed brown sugar
1/4 cup of soy or nut milk
1.5 cups gluten free flour blend (I used Pamela’s Artisan Blend)
1tsp baking powder
1/4 tsp salt
1 tsp ground cinnamon
Instructions
Pre-heat oven to 350 degrees
Cream “butter” and sugar, then whip in milk.
Mix in the dry ingredients. If the consistency is too thick, you can add a little more milk. You need to be able to scoop it up and form it into golf ball size balls.
Set the balls about 2 inches apart on a parchment-lined baking sheet, and press each one down with the bottom of a glass, which you’ve dipped in sugar.
Bake for 14-18 minutes or until crunchy and brown. Allow them to cook completely.
Enjoy your vegan sugar cookies!
For more Gorgeously Green recipes delivered to your inbox, subscribe to my weekly newsletter!
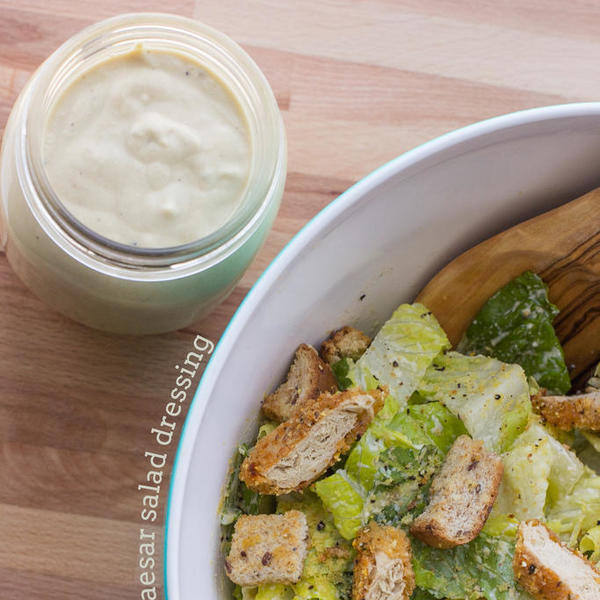
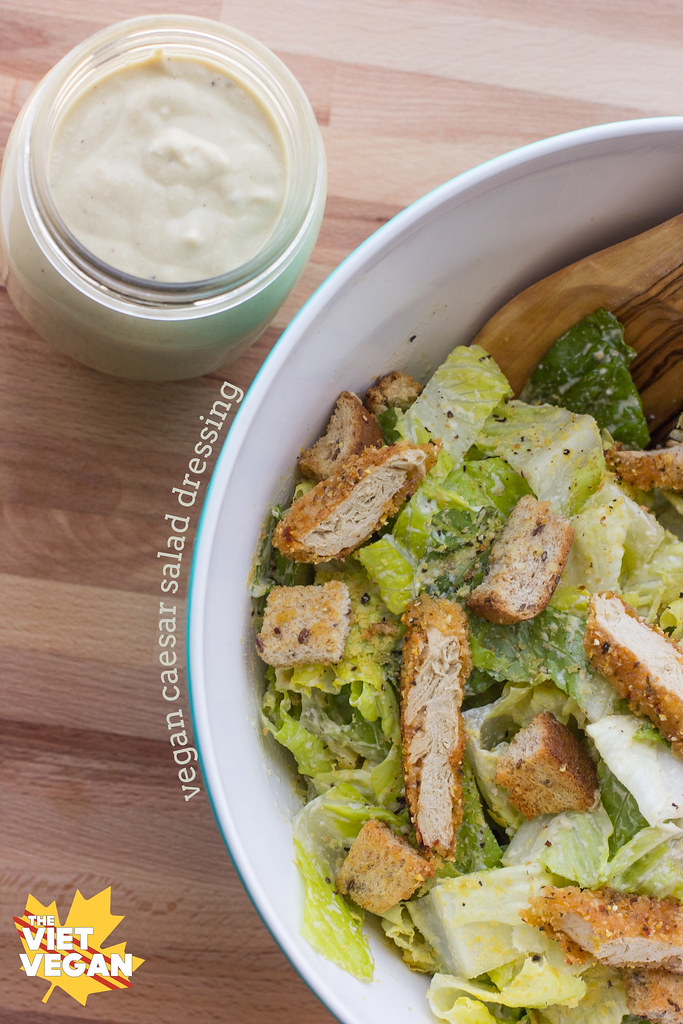
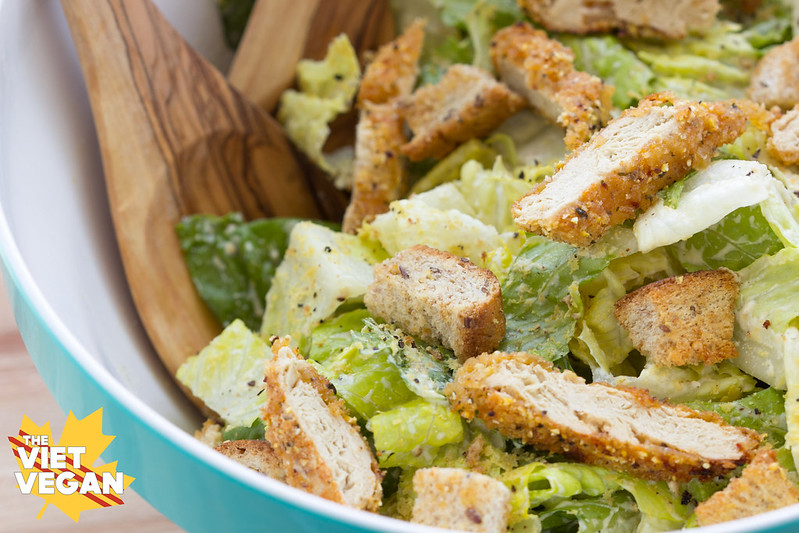
but caesar salad gets its trademark flavour from anchovies.
This healthier vegan caesar salad dressing boasts that deep slightly briny flavour
salty and cheesy, creamy with some tang.
I feel like I’m back on my two feet again. Starting to pick up the things I’ve been putting on the back burner for ages. For a while now, this place shifted from being a potential source of income to being my diary. I have found more purpose in it as a place for me to express myself than a place for me to make a living, but it’s lead me to a job I love. It’s helped me realize who I am and what I love to do, and that’s all I can ask for.
I couldn’t have gotten to this point without the help of the blogging community. I’ve grown this little corner of the internet with the help of some amazing people. They’re not always easy to find, but you’d be surprised by how the blogging community can be an endless wealth of people who are happy to support each other. I’ve come across plenty of blogging “Mean Girls”. You know who they are: they’re the cliquey, “cool” kids with massive audiences and will snarl and tear others down as soon as you turn your back.
The blogging world is surprising very high school. There are so many different niches, different circles of people within the same niche, but somehow I found a community of people that have been so open to sharing knowledge and happy to life each other up in whatever ways they can.
I’m sure you’ve heard of them before on my blog or someplace else in the blogosphere: Online Blog Con is an online conference that offers something different from any other blog conference I’ve gone to. I went to Blissdom Canada and BlogHer Food and I had both very positive and very negative experiences with them. But physical blog conferences are all about networking and schmoozing, and I really didn’t connect with the blogging community until I joined OBC in 2012.
Back then I was a teeny blog on blogspot with maybe 100 people a day visiting my blog. My photos were abysmal, my writing terrible, and I had no idea what I wanted to do with my blog. But OBC taught me the nitty gritty details of blogging, keeping me in the loop of all the constant changes happening in the blogosphere. The waxing and waning of social media platforms like Twitter, Pinterest, Instagram, even StumbleUpon would never have been on my radar if it weren’t for OBC. I wouldn’t have known anything about SEO, how to fix your site if you break it by messing with the code, which hosting companies are good, which brands are good to work with…and don’t even get me started with advertising networks.
Let’s just say, this little corner of the internet would be a spec of dust it weren’t for OBC. I hope you join us for the upcoming conference in the fall. It’s a wonderful place full of friendly people who are encouraged to learn, network, and grow with each other. This year I can’t really afford to go to any big conferences that require a lot of travel like BlogHer Food, but OBC is such a small price to pay for all its ever done for me. This is my second year helping organizing it and I’m so excited to give back to the blogging community what it’s given me. We’re giving away a free ticket this week, so enter, share OBC with your friends, and I hope to see you join the OBC community!
a Rafflecopter giveaway
Terms and Conditions:
Giveaway ends July 12th at 11:59 PM EST. Open internationally. Prize is worth $52. Winner will be selected randomly through Rafflecopter and be notified by email. Winner have 48 hours to respond before a new winner is selected. Please note that The Viet Vegan is not responsible for sponsors that do not fulfill their prizes. Once notified of the winner, Online Blog Con will fulfill their prize and in a timely manner. I will contact the sponsor regarding your prize. Online Blog Con will contact the winner with the free ticket details. If there is an issue with a sponsor, please notify the blog you won a prize from within 30 days for assistance, after that we may be unable to assist you. The product offered for the giveaway is free of charge, no purchase necessary. I, Lisa Le, am one of the organizing members of Online Blog Con, and this giveaway represents both my genuine values as a blogger as well as an organizing committee member. Facebook, Twitter, Instagram, and Pinterest are in no way associated with this giveaway. By providing your information in this form, you are providing your information to me and me alone. I do not share or sell information and will use any information only for the purpose of contacting the winner.
In other news, if you’ve been following along with me via Snapchat (add me @thevietvegan!), you’ll know that I’m in Pennsylvania. It’s a trip we make every year to drive my cousin back home after she’s stayed with me for a few weeks. It’s been interesting watching her grow up over the years. She loves caesar salad, and I promised her we’d veganize caesar salad for her to eat while she was here. After two batches of caesar salad dressing experiments and probably about a week straight of caesar salad, we perfected the recipe together.
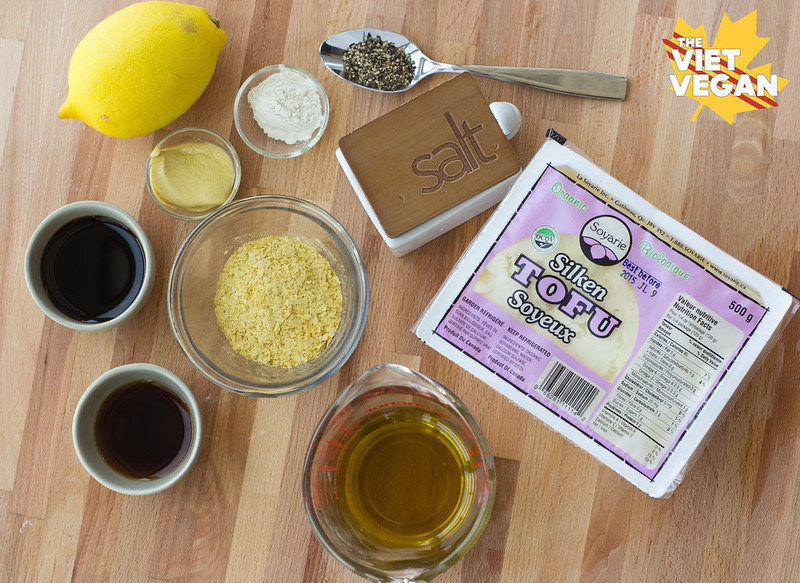
It’s surprisingly simple, the dressing. A lot of the ingredients I already had in my pantry, and the silken tofu lends its creamy texture without being heavy with fats like a nut-based dressing would be. It’s light and flavourful and I don’t even think twice about loading up my salad with a huge dollop of dressing. Sprinkle some extra nooch on top to get that parmesany flavour, toss with some baked Gardein crispy strips and homemade vegan croutons because I doubt I could find any vegan ones out there. The only thing that would make this better is some coconut bacon strips.
Enjoy!
Vegan Caesar Salad Dressing
Servings: 1
Author: Lisa Le
Ingredients
1blocksilken tofu (500 g, I used Soyarie brand)
1/4cupolive oil
2tbsptamari
1lemonjuiced
3tbspnutritional yeast
2pinchessaltabout 1/2 tsp
1tspdijon mustard
1tspgarlic powder
1tbspvegan Worcestershire sauce
1tspblack pepper
To make the salad:
1romaine heart
1tspnutritional yeast
1/2tspfreshly grated black pepper
2handfuls of homemadevegan croutons
2Gardein Turk’y Cutletsbaked (without gravy), and sliced
Instructions
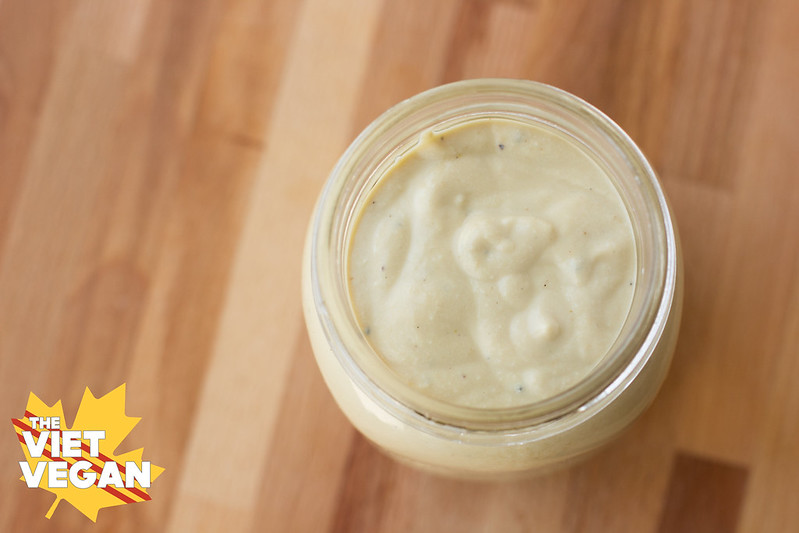
To make the dressing, combine silken tofu, olive oil, tamari, lemon juice, nutritional yeast, salt, dijon mustard, garlic powder, Worcestershire sauce and black pepper in a food processor. Blitz until smooth and creamy. Scrape down the sides and puree until uniform. Transfer to a clean jar.
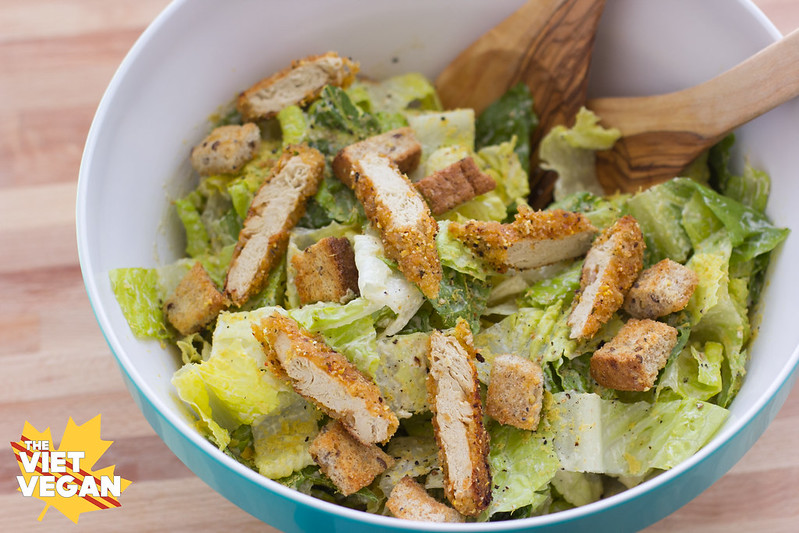
To make the salad, toss chopped romaine hearts with desired amount of dressing. Serve with a sprinkling of nutritional yeast, a crack of black pepper, croutons, and some baked turk’y cutlets.
Enjoy!
About Lisa Le
Lisa is the thirty-something, nerdy, procrastinating, feminist blogger and photographer behind The Viet Vegan. She loves spicy foods, noodles, and food in bowls.
Reader Interactions
This site uses Akismet to reduce spam. Learn how your comment data is processed.
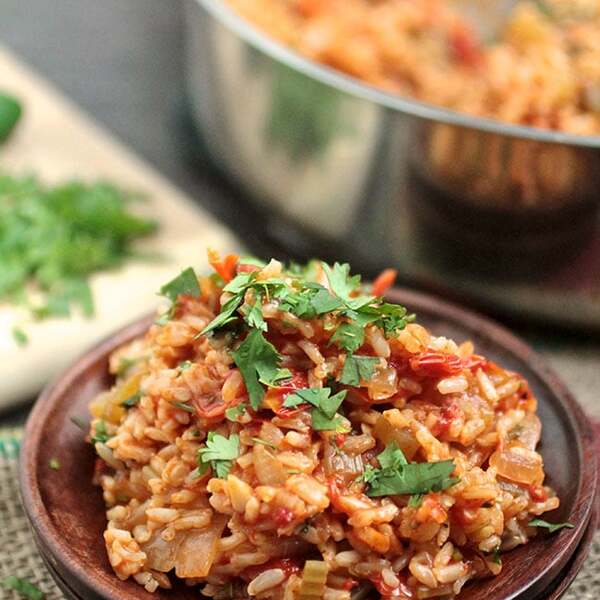
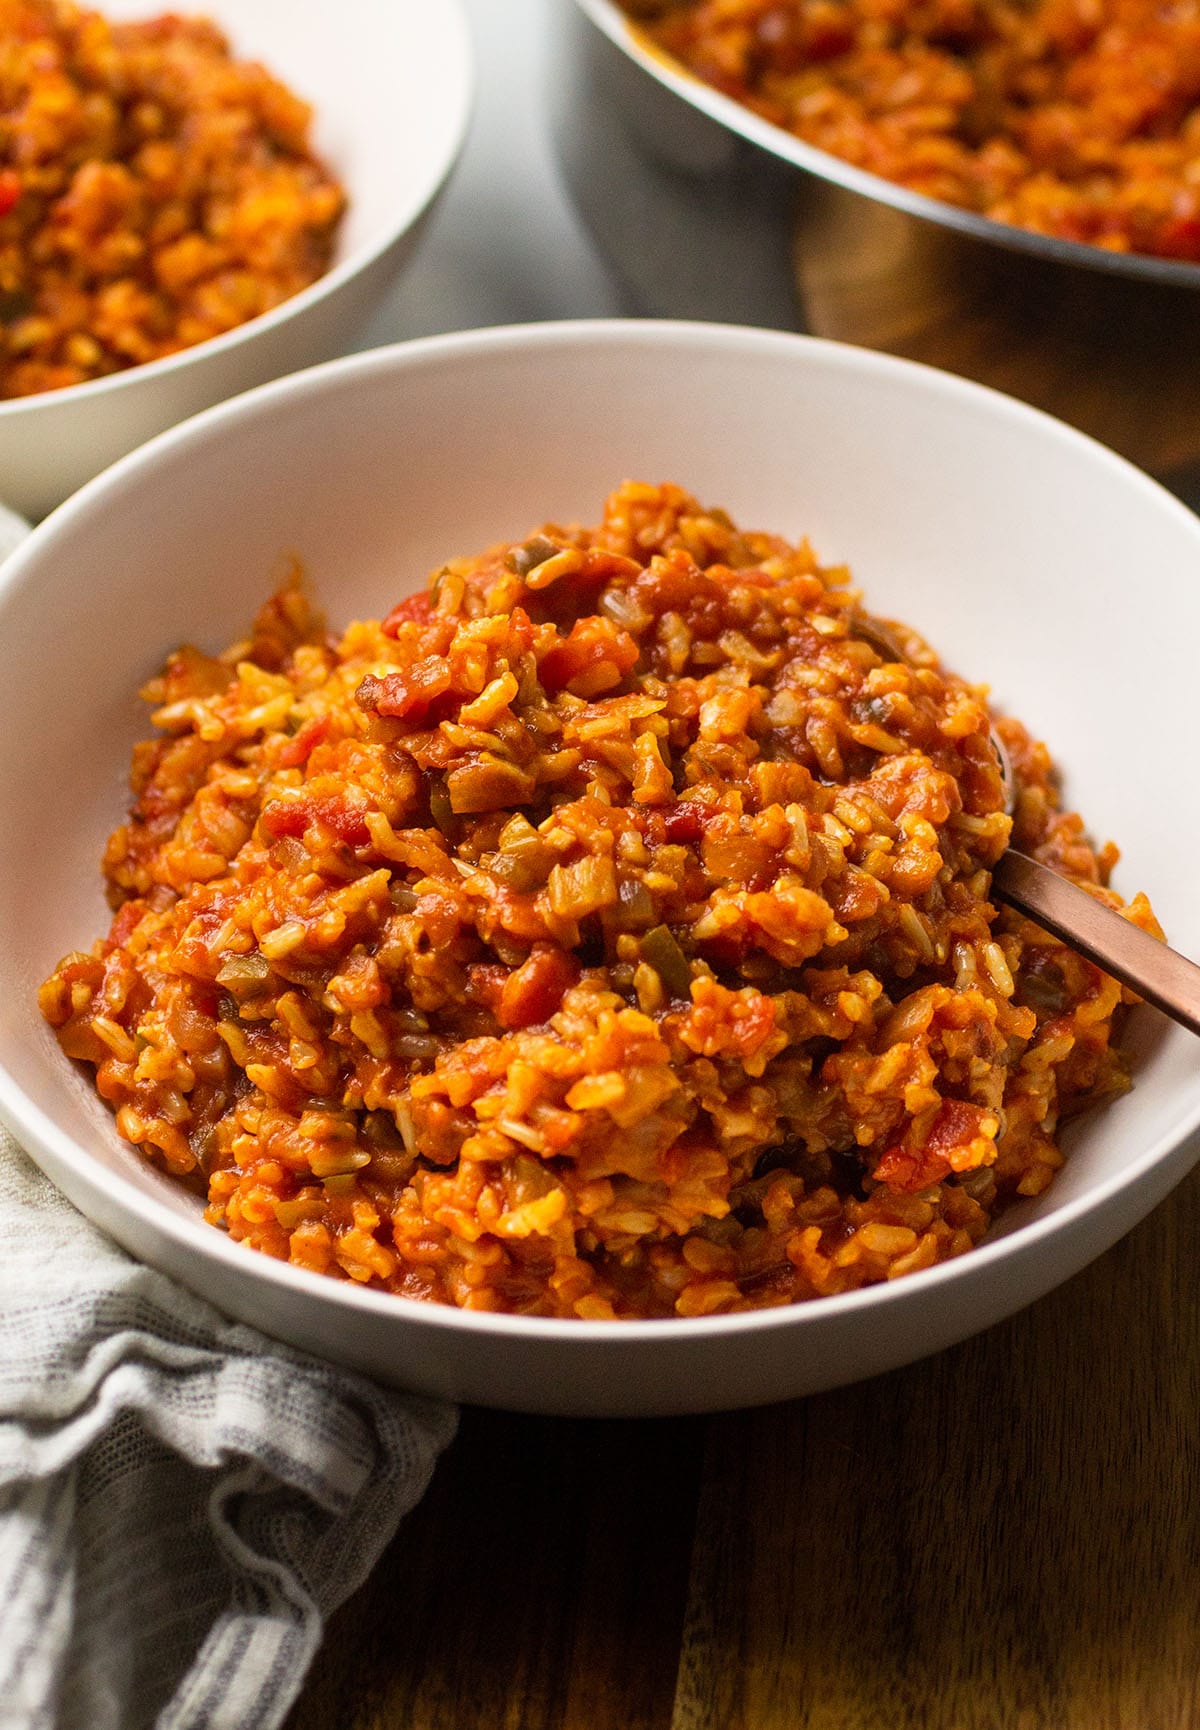
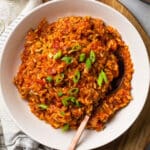
This easy vegan jambalaya recipe is cozy, spicy, and full of flavor! Brown rice and plenty of veggies help this one-pot meal feel hearty and filling. Vegan, Gluten-Free.
This recipe was originally published in 2014. It was updated in 2024 to include new photos, notes, and a few tweaks to make the recipe easier and more streamlined.
Jambalaya is the ultimate one-pot wonder! This Louisiana comfort food staple has a hearty, stick-to-your-bones texture and plenty of spice. A foundational dish in Creole and Cajun cooking, jambalaya uses Louisiana’s holy trinity – onion, celery, and bell pepper – as its building blocks.
While traditional jambalaya features both meat and seafood – like andouille sausage, shrimp, or chicken – we love making this flavorful rice on its own for an easy vegan spin (although you can certainly add some meat, meat substitutes, or beans if you like!)
Meet our Guest Expert!
We consulted with food writer (and New Orleans Native!) Lauren LeBlanc to help us pay proper tribute to Jambalaya’s deep roots. Lauren is the founder of Lauren From Scratch, where she shares her culinary expertise with Southern Louisiana, New Orleans, and Cajun recipes. Find her tips throughout this post!
Cajun vs. Creole Jambalaya
While there are countless approaches to homemade jambalaya, it has evolved into two primary categories: Cajun jambalaya (sometimes called “brown jambalaya”) starts with browned sausage but uses no tomatoes, which results in a deeper brown color. Creole jambalaya typically includes crushed tomatoes, which gives it a brighter red color, and often includes shrimp instead of (or in addition to) pork sausage.
This recipe leans towards the Creole jambalaya tradition, and includes a can of diced tomatoes for color and flavor. To learn more about traditional jambalaya, check out this creole chicken and sausage jambalaya from Jessica at Swanky Recipes (A NOLA local!)
Lauren’s Tip
Jambalaya originated in Louisiana with Spanish, French, and African roots dating back to the 1700s. Its predecessor was most likely Spanish paella – a rice-based dish that can include seafood, chicken, or sausage. Early jambalaya recipes would have been made with local ingredients, like ham, shrimp, sausage, and long grain rice grown in the Mississippi River delta. Jambon is the French word for ham; yaya is a West African word for rice. Jambon à la yaya, or “ham with rice”, eventually turned into jambalaya.
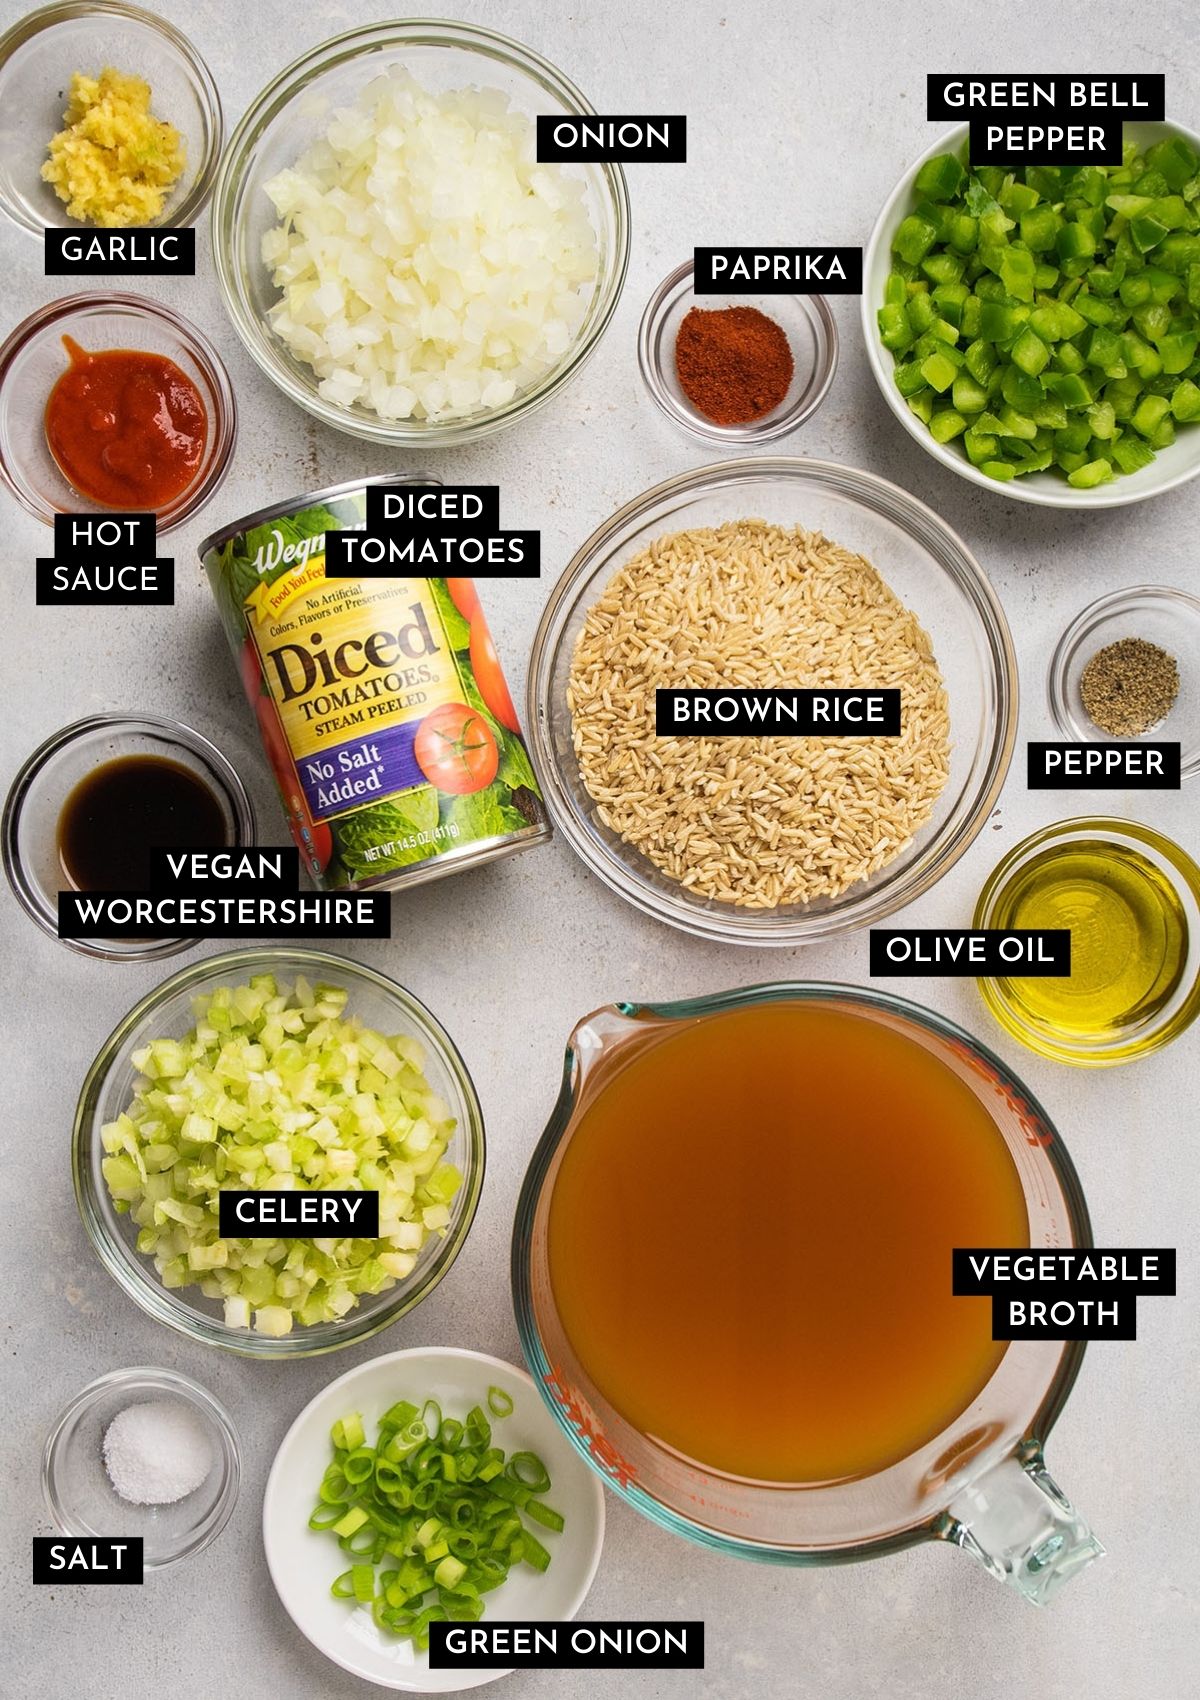
Ingredients
For a full ingredients list and exact quantities, scroll to the recipe card below.
Before you jump into cooking, we want to highlight a few things:
Diced tomatoes give this jambalaya its bright red color. Look for a small can – about 15 ounces – and opt for a “no salt added” variety if possible (this gives you full control of the seasoning!)
Vegan Worcestershire Sauce lends important balance and umami here. We’ve tested and liked Annie’s Vegan Worcestershire; you can also try a homemade vegan Worcestershire sauce recipe. If you don’t have this specialty ingredient on hand, use soy sauce instead (don’t just skip it!)
Hot Sauce adds depth and complexity to help mimic the rich flavor you get in a meat-forward jambalaya.
Celery, Onion, and Green Bell Pepper – AKA the holy trinity of Cajun cooking – form the vegetable base of this dish.
Brown rice adds extra flavor and texture to this recipe, which helps it feel hearty. We recommend using a long grain brown rice here.
Substitutions and Variations
Add protein. Add your favorite plant-based meat substitute (like vegan sausage), diced tofu, or drained and rinsed beans (we like chickpeas, red kidney beans, or black beans here). Stir extra protein right into the jambalaya, or add it as a topping to the finished dish.
Dial up the spice by stirring extra hot sauce or paprika into the jambalaya once the rice is cooked. While it’s not traditional, you can also add a spoonful of diced jalapeño or poblano pepper and sauté it along with the holy trinity vegetables.
Swap some or all of the smoked paprika for cayenne pepper or your favorite Cajun or Creole spice blend.
Lauren’s Tip
If you want more “meatiness” in this vegan jambalaya, add chopped mushrooms. Some older Cajun jambalaya recipes called for a can of sliced mushrooms, but it would also be a great addition to this vegan Creole version. Roughly chop 8 ounces of mushrooms and add them in with the diced tomatoes.
Step by Step Instructions
Heat a large, deep saucepan over medium-high heat. (We’re using a deep stainless steel skillet in these photos; you can also make this recipe in a Dutch oven. Make sure your pot has a lid – you’ll need it to cover the rice as it cooks!)
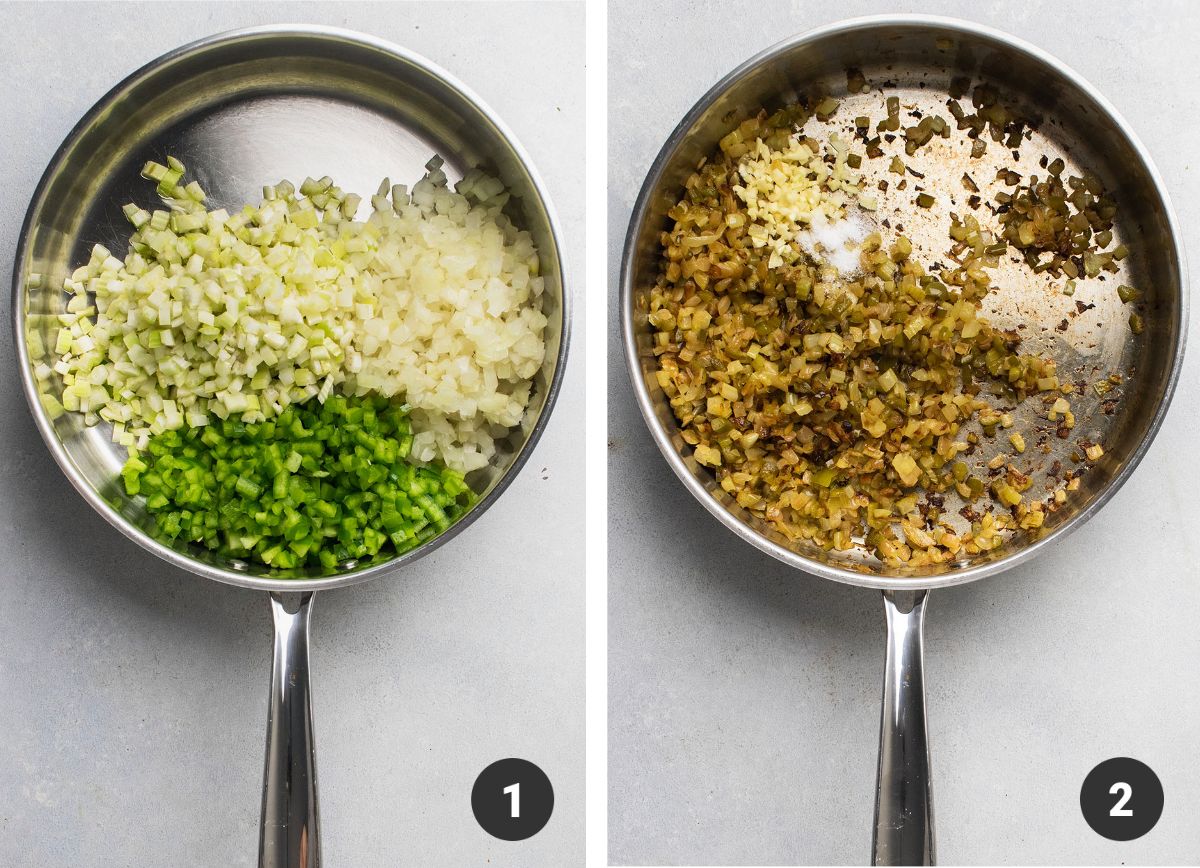
Add a splash of olive oil to the hot pan, then add the onion, celery, and green bell pepper(Image 1, above). Sauté, stirring only occasionally, until the vegetables have softened and developed a deep brown color.
Be patient here: Giving the veggies plenty of time to brown and caramelize will build much more flavor into your jambalaya! In our testing, the veggies took anywhere from 10-30 minutes to properly brown, depending on the pan and the intensity of the burner.
When the veggies are browned, stir in minced garlic and a pinch of kosher salt(Image 2, above). Let that cook another minute, until the garlic is fragrant.
Lauren’s Tip
In Cajun jambalaya (brown jambalaya), much of the flavor comes from browning the meat first. In Creole jambalaya (red jambalaya), the holy trinity is usually sautéed first and the meat is added later. For this vegan version, caramelizing the vegetables adds more flavor depth in place of browning meat, so take your time with this step!
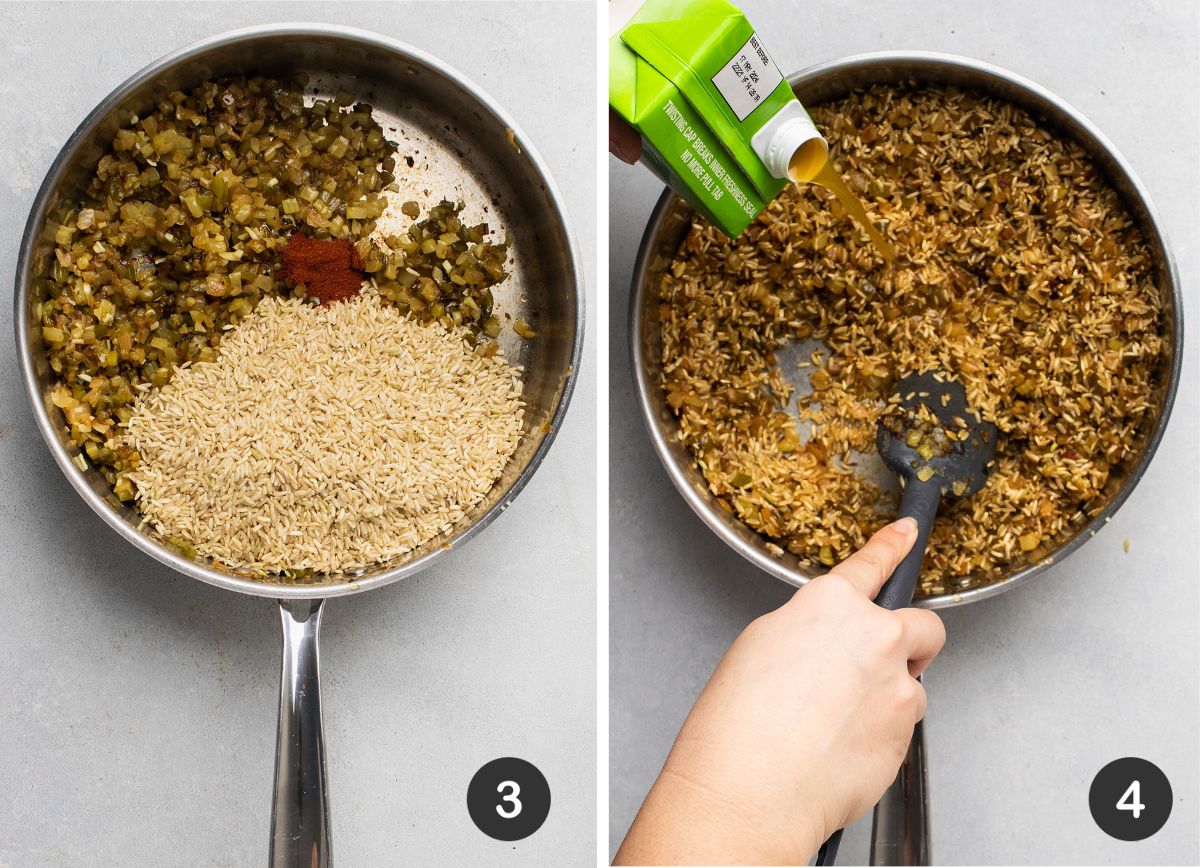
Add brown rice to the skillet, along with smoked paprika(Image 3, above). Stir everything together and let it cook 30 seconds or so, until the paprika is fragrant. The rice will start to look glossy as it absorbs some of the moisture in the pan.
Deglaze the pan with a bit of vegetable broth(Image 4), stirring constantly to release any browned bits from the bottom of the pan (that’s where a ton of flavor is!) Continue adding broth a bit at a time, stirring constantly, until all the broth has been added.
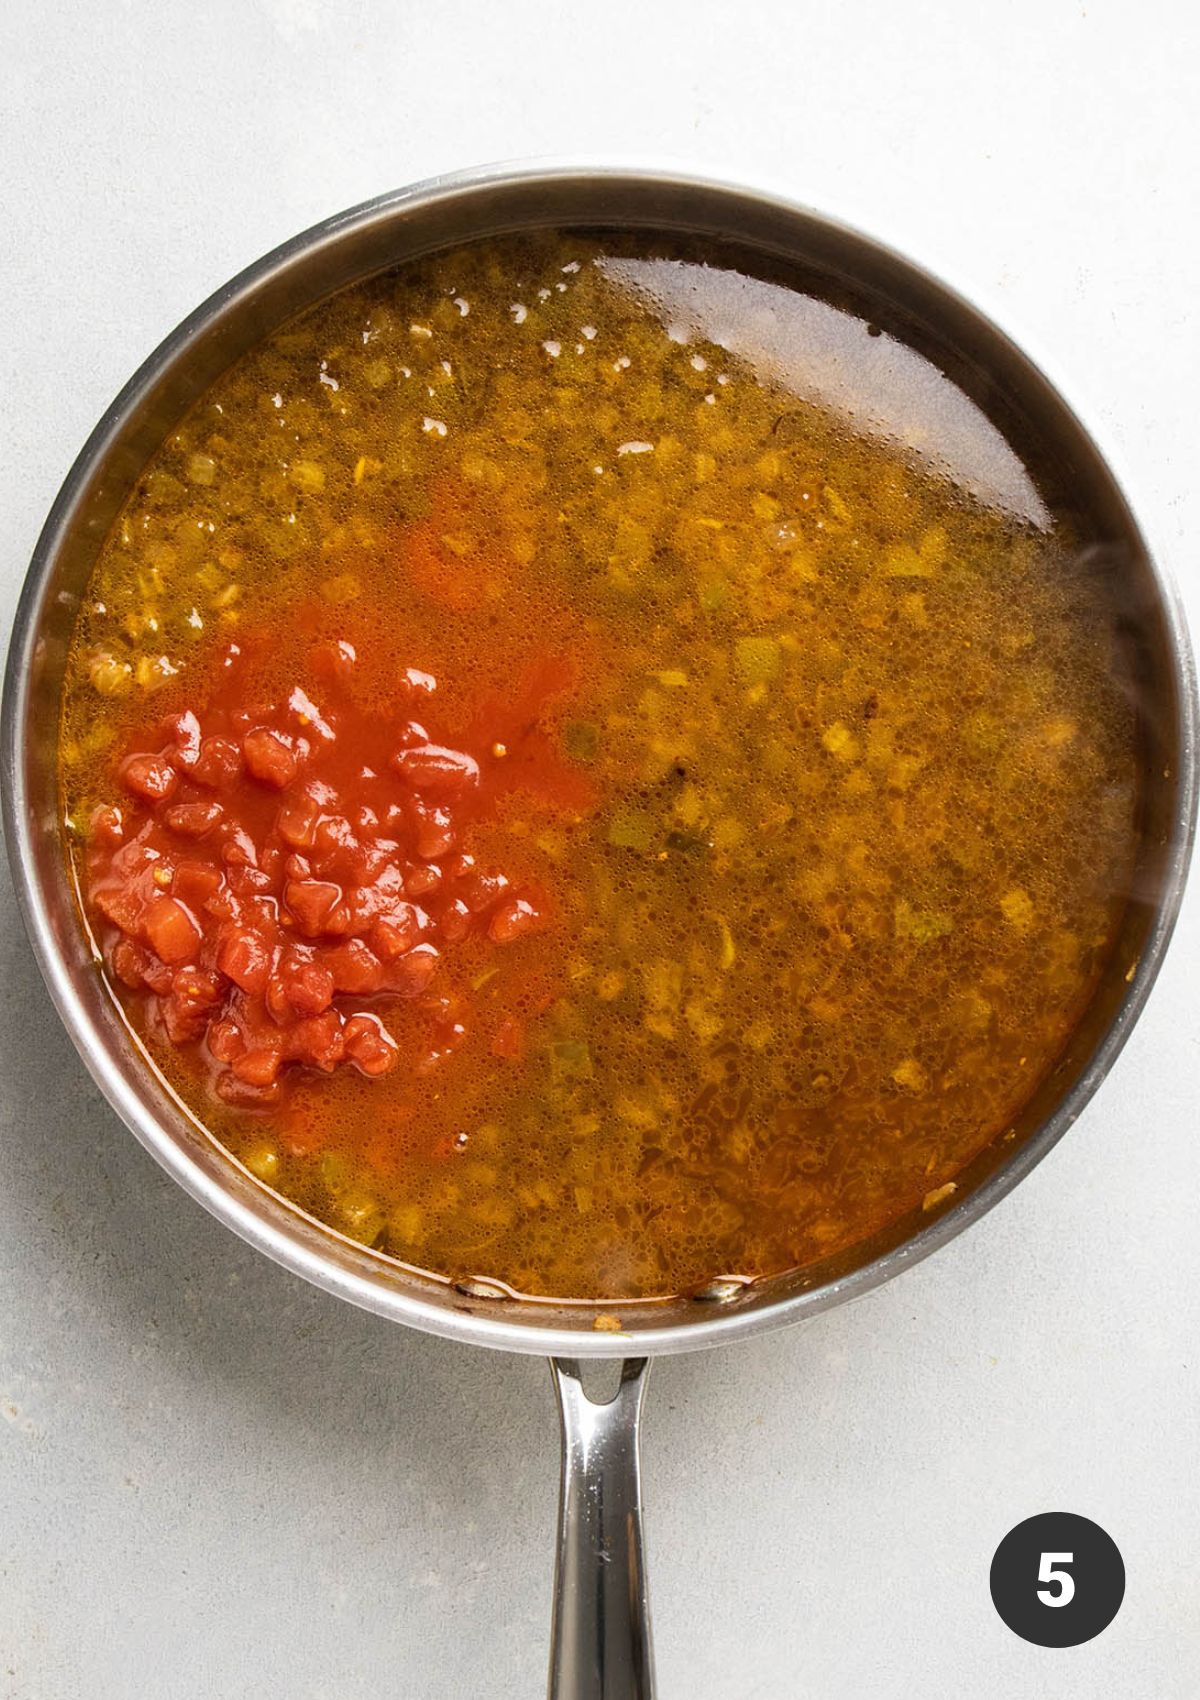
Stir diced tomatoes, Worcestershire sauce, and hot sauce into the rice (Image 5, above), then add another generous pinch of kosher salt.
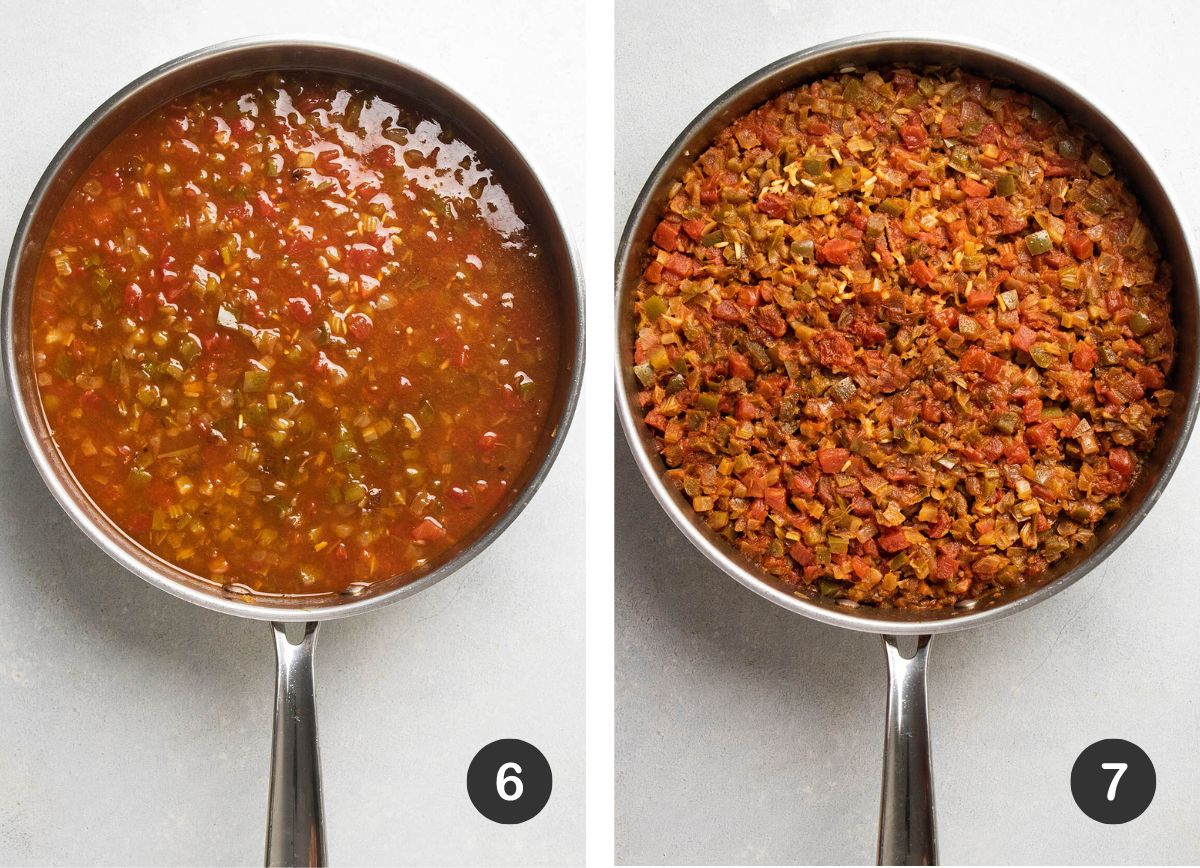
At this point, the liquid should cover the rice in the pot (Image 6, above) and resemble a chunky, brothy stew.
Bring the mixture to a low simmer, then cover the pot with a tight-fitting lid. Reduce the heat to low, and let it cook for about an hour, until the rice has absorbed all the liquid (Image 7). The exact cook time will vary depending on the size of your pan and the strength of your stovetop burner.
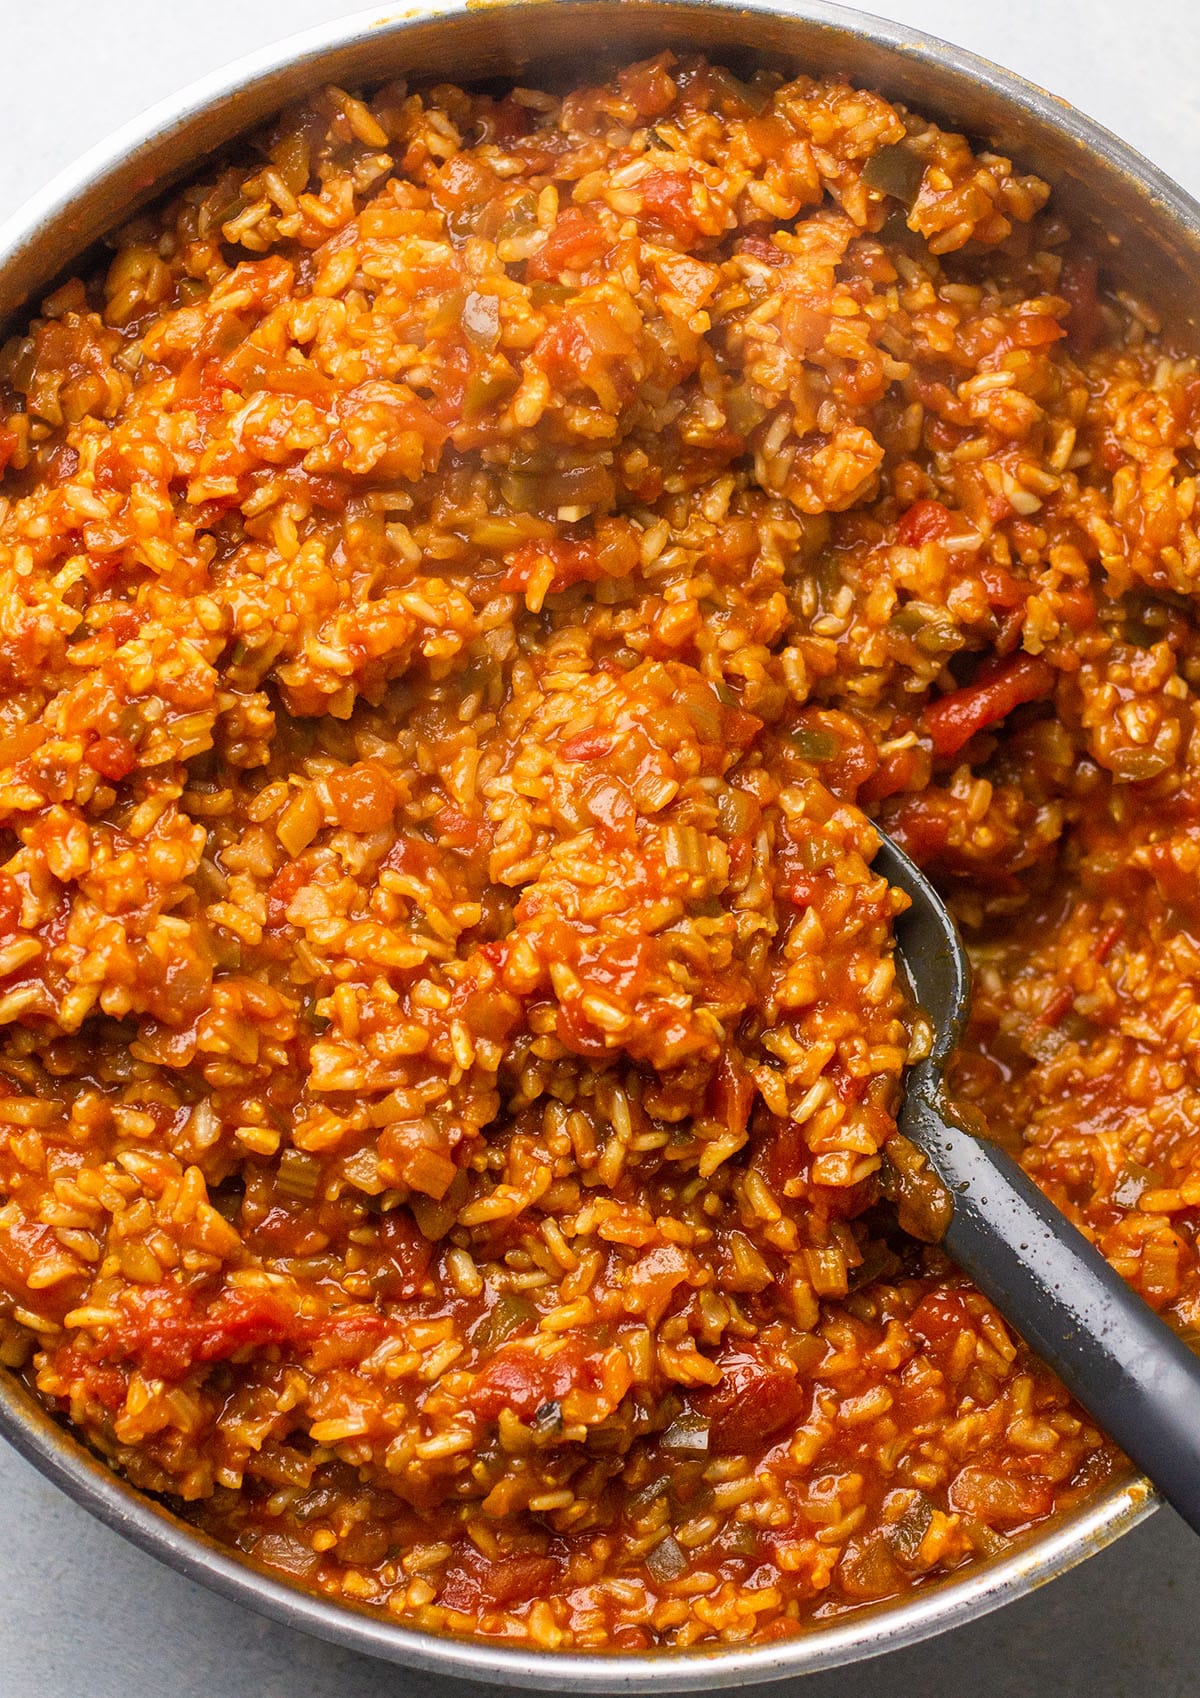
When all the liquid has been absorbed, stir the jambalaya and give it a taste. Add more salt as needed. Don’t worry if the top of the jambalaya looks less-than-impressive when you initially remove the lid: It will come to life as you stir it all together!
Don’t open that lid!
While the rice is cooking, it’s important to keep the lid closed to contain all the steam and moisture. This ensures the rice comes out perfectly cooked. In Louisiana, every Cajun kid is taught not to peek in the pot while the rice is cooking.
How to Store Leftovers
Let leftover jambalaya cool completely, then store in an airtight container in the fridge for up to 5 days. Reheat in the microwave or in a skillet on the stovetop over medium heat. If the jambalaya looks dry, add a splash of water or veggie stock as you reheat it.
This jambalaya also keeps well in the freezer! Freeze in an airtight container, then defrost overnight in the fridge and reheat in the microwave or on the stovetop.
FAQs
Can I substitute white rice or other grains for the brown rice?
Because brown rice has a longer cook time – and absorbs more water – than other rice and grain varieties, we recommend sticking with the brown rice in this recipe as written unless you’re comfortable making rice cooking adjustments on the fly. If you prefer to use white rice, farro, or quinoa in place of brown rice, you will likely need to reduce the amount of vegetable broth in this recipe and/or shorten the cooking time.
Note: Traditionally, jambalaya is made with long-grain white rice. We chose to develop this recipe specifically with brown rice because it is a bit heartier and has more depth of flavor, which helps us build a more complex jambalaya with flavor that’s closer to traditional non-vegan versions.
What kind of pot or pan should I use?
We’re using a deep stainless steel skillet in these photos; you can also make this recipe in a Dutch oven. Make sure whatever pan you use has a tight-fitting lid. Choose a pot that’s wide and fairly deep so that the rice has plenty of room to expand as it cooks!
Should I rinse my rice for jambalaya?
In general, no – you don’t need to rinse the brown rice when you’re making the jambalaya (although you certainly can rinse your rice if you prefer!) We tested it both ways and didn’t notice a real difference, so do what feels best to you!
Is Jambalaya the same as Gumbo?
No. While these dishes share some similarities (including a Louisiana origin), they are different. Gumbo, for example, is a brothy dish (kind of like soup or stew) that includes a flour-and-butter (or flour-and-oil) roux, which is cooked until it is very dark and then used as the base of the soup. Authentic Cajun Gumbo is often served with a scoop of rice on the side, while in jambalaya recipes, rice is the star ingredient.
Why did you update and change this recipe?
The short answer: We updated it to make it even better!
This recipe was originally published in 2014. It was updated in 2024 with new photos, additional notes, and streamlined instructions. With the help of Lauren LeBlanc, an expert on Cajun and Louisiana cuisine, we also made some small adjustments to keep this recipe more in line with a traditional, authentic jambalaya!
The old version of this meatless jambalaya included jalapeño; today, we use green bell pepper instead, which makes this recipe heartier (and aligns it more closely with a traditional jambalaya!) To account for the extra bulk a green pepper added to this recipe, we also reduced the rice and liquid from the original version so the final amount of jambalaya is the same.
The previous version of this one pot jambalaya also called for fresh diced tomatoes: We’ve replaced those with a can of crushed tomatoes to make prep easier and faster. Other than that, you’ll notice we’ve kept things pretty much the same! The biggest change we made was adding a TON of step-by-step photos to help you along as you cook.
If you loved the original recipe we shared, we promise this one is even better! If you’re attached to the original version, though, no worries: feel free to contact us and we’ll send you a copy.
Can I make this recipe in a slow cooker or Instant Pot?
We recommend making this recipe on the stovetop as instructed: Getting a good sear on the vegetables is so, SO important to develop the flavor of this vegetarian jambalaya, and you don’t get that same flavor development if you just throw everything in the slow cooker. We have not tested this recipe in a crockpot or an Instant Pot, so can’t speak to exact timing or adjustments if you’d like to use that equipment.
More Hearty, Vegan Comfort Food
Did you make this recipe? Leave a comment and star rating below to let us know how it turned out!
Print
📖 Recipe
Spicy Vegan Jambalaya
5 Stars 4 Stars 3 Stars 2 Stars 1 Star 4.8 from 34 reviews
Author: Jessie
Prep Time:30 minutes
Cook Time:1 hour
Total Time:1 hour 30 minutes
Yield:Serves 4-6 1x
Category:Main Dish
Cuisine:Cajun and Creole Inspired
Diet:Vegan
Description
This easy, vegan jambalaya recipe is perfect for cozy weekends or Meatless Mondays!
3 Tablespoonsolive oil
1 large yellow onion, diced (about 1 ½ cups)
4 large stalks celery, diced (about 1 heaping cup)
1 large green bell pepper, seeded and diced (about 1 heaping cup)
Equipment Note: Use a large, wide saucepan or pot with a tight-fitting lid. We used an older version of this deep, 5.5 quart sauté pan in these photos; this recipe also works well in a Dutch oven.
Instructions
Brown the Veggies (10-30 minutes)
Heat your saucepan or Dutch oven over medium-high heat. Add olive oil; heat until it shimmers.
Add diced onion, celery, and bell pepper to pan and stir to combine. Sauté, stirring only occasionally, for at least 10 minutes, until veggies have softened and developed a deep brown color. Tip: Depending on your pot and the strength of your burner, it can take anywhere from 10-30 minutes for your veggies to develop a deep brown color. Be patient here: Letting the veggies brown properly is the key to developing incredible flavor in this dish!
When veggies are browned, stir in garlic and a pinch of kosher salt. Let cook another minute or so, until garlic is fragrant.
Add brown rice and smoked paprika to pot; stir to combine. Cook 30-60 seconds, just until the paprika is fragrant and the rice has begun to soak up the liquid in the pan (the rice should look a little glossy and translucent around the edges).
Add the Liquids (5 minutes)
Add vegetable broth to pot a little at a time, stirring well between each addition to scrape any browned bits off the bottom of the pan (these browned bits – called fond – are where a ton of flavor lives!) Continue until all vegetable broth has been added.
Add diced tomatoes, Worcestershire sauce, and hot sauce to pot along with another generous pinch of salt; stir to combine.
Cover and Cook (1 hour)
Bring mixture to a simmer, then cover with the lid and reduce heat to low. Cook for 45-60 minutes, until the rice has absorbed all the liquid in the pot. Tip: The exact cooking time will vary based on the size of your pan and the strength of your burner.
Stir jambalaya, taste, and add salt as needed. Garnish with sliced green onions (optional) and serve immediately.
Notes
Vegan Worcestershire Sauce. Regular Worcestershire sauce isn’t typically vegan: Strict vegans should be sure to opt for a vegan variety (if you’re not vegan, regular Worcestershire works just fine here!) We’ve tested and liked Annie’s Vegan Worcestershire; The Wizard’s Vegan Worcestershire sauce is also well-reviewed (although we haven’t tested it ourselves). Worcestershire lends important balance, flavor, and umami to this recipe – don’t just skip it! If you don’t have vegan Worcestershire, use soy sauce instead (it’s the best substitute we tested!)
Additions and Substitutions. Add your favorite vegan protein (like plant-based sausage, soy curls, or tofu), diced mushrooms, or beans (chickpeas, butter beans, kidney beans) to this jambalaya to make it heartier. If you’d like more spice, add extra smoked paprika or hot sauce, or sauté some chopped jalapeño along with the veggies. Use red or yellow bell pepper instead of green bell pepper.
Look for brown rice with a long grain, and avoid any pre-cooked or microwaveable rice products as the cook time and absorption can vary widely. We did test this recipe with short grain brown rice: It tastes great but often needed an extra few minutes to cook.
Can I use a different kind of rice? We do not recommend using white rice or other grains in place of the brown rice unless you are comfortable making on-the-fly substitutions, as different rice varieties vary widely in cook time and liquid absorption. Swapping white rice for the brown rice in this recipe with no other adjustments will affect the texture and taste of the final dish. White rice or other grains will likely require less liquid and a shorter cook time than this recipe as written.
What if my rice isn’t fully cooked? If your rice is still crunchy towards the end of the cooking window, it just needs a bit more time to cook! If the jambalaya has no liquid left, add an extra splash of veggie stock or a bit of water, then re-cover with the lid and continue to cook on low heat for another 10-20 minutes. If there is still liquid in the pot, simply re-cover with the lid and cook a few minutes more.
What hot sauce should I use? We’ve tested this recipe with almost a dozen different hot sauces (including Sriracha, Cholula, Tabasco, Frank’s, and a variety of local/specialty hot sauces). and they’ve all been great! Use whatever you have on hand.
Like all good things, jambalaya takes practice. Use this recipe as a jumping-off point, take a few notes after your first try, and keep at it! Remember that everyone’s kitchen and equipment is different: It may take a few tries to dial this recipe in for your specific environment.
This recipe was originally published in 2014. It was updated in 2024 with new photos, additional notes, and a few adjustments to make the recipe even easier and more straightforward.
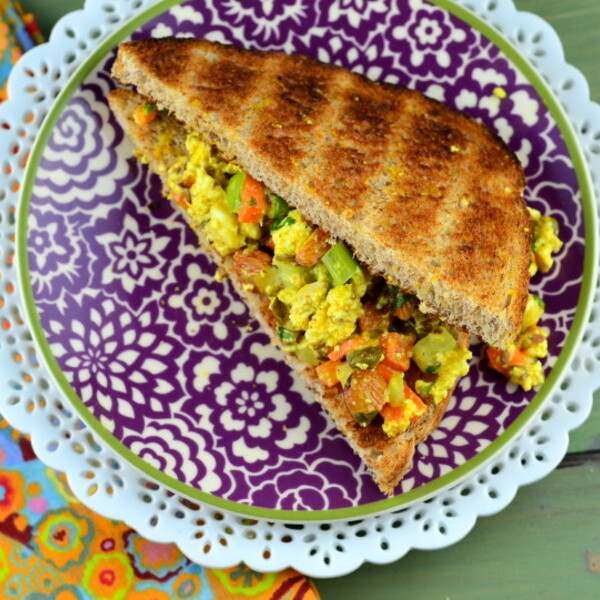
“This is an adopted recipe I’ve not yet had the chance to try. Here’s what the OP had to say about it: “I’ve also heard this referred to as “Vegan Tuna Salad.” I absolutely love this salad! I’m not a vegetarian, let alone vegan, but this is fabulous. I’ve been buying it from Whole Foods Market in their Deli section (expensive little 8 ounce containers) so I came up with this by reading the ingredients listed on the container! I love it with tortilla chips…””
Ready In:
45mins
Ingredients:
15
16
ounces soy tempeh
1⁄4
cup sweet pickle relish (I use Cascadian Farms organic sweet relish)
1⁄4
cup finely chopped celery
1⁄4
cup finely chopped red onion
1⁄4
cup finely diced red bell pepper
1⁄4
cup raw sunflower seeds
1⁄4
cup finely diced green pepper
1⁄4
cup scallion, sliced into little rings, only the white and very light parts
2
tablespoons tamari
2
tablespoons finely chopped flat-leaf Italian parsley
2
tablespoons lemon juice
1⁄2
teaspoon finely minced fresh garlic
1
teaspoon ground cumin
1
teaspoon dry dill weed
1
cup vegan mayonnaise (I recommend Vegenaise non-dairy vegan mayonnaise)
directions
Prepare the tempeh first breaking it into chunks and steaming it over boiling water for about 15 minutes.
Set aside and allow to cool.
Assemble the rest of the ingredients in a large bowl adjusting the amounts according to your preference.
Finely crumble the cooled tempeh into the bowl and combine with the chopped vegetables.
Add the mayonnaise last.
Chill before serving.
Serve as a sandwich spread – hearty wheat bread is nice, or serve as a dip with organic stone ground tortilla chips.
Serving size is relative — .
Questions & Replies
Got a question?
Share it with the community!
Want a Second Helping?
Sign up for our newsletter to get recipes, easy dinner ideas, tasty treats and more delivered straight to your inbox.
To withdraw your consent or to learn more about your rights, see the Privacy Policy.
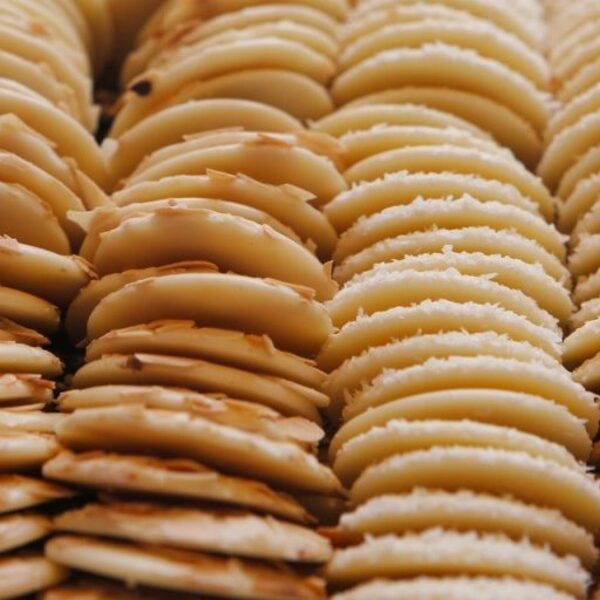
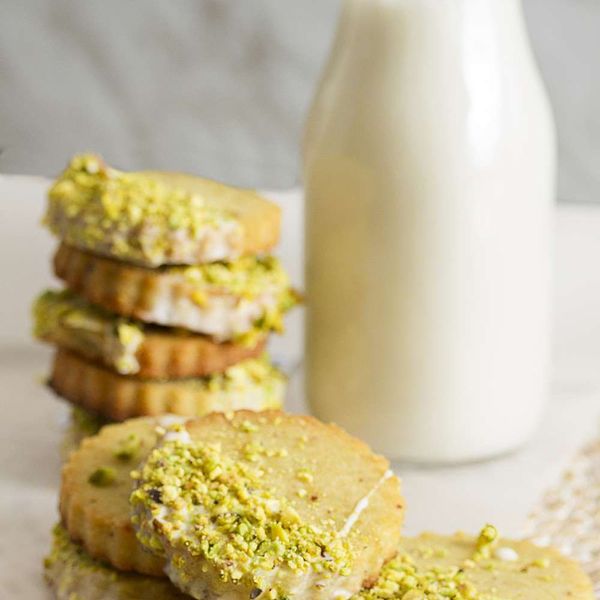
Pistachios are by far my favorite nut. They’ve got that aromatic aftertaste that keeps you coming back for more. You pair that with rose water, and the taste is reminiscent of baklavas. Most gluten-free and vegan shortbread recipes, I have found to be complete fails. This one is surprisingly just like the original version.
Submitted by Happy as a Yam
Updated on November 23, 2021
Additional Time:
8 hrs 30 mins
Total Time:
9 hrs 15 mins
Jump to Nutrition Facts
Cook Mode (Keep screen awake)
Ingredients
Original recipe (1X) yields 30 servings
Cookies:
¼cupwater
½teaspoonagar-agar powder
½cupvegan butter, at room temperature
½cupsolid coconut oil
¾cuppowdered sugar
1 ½cupsbrown rice flour
½cupfinely ground pistachios
1 ½teaspoonsvanilla extract
¼teaspoonsalt
Icing:
3tablespoonsaquafaba (chickpea water)
1 ½cupspowdered sugar
1tablespoonrose water
1cupfinely chopped pistachios
Directions
Bring water and agar-agar powder to a boil over medium heat. Reduce heat and simmer until thickened, about 5 minutes. Remove from the heat and refrigerate until set, 20 to 30 minutes.
Cream vegan butter and coconut oil with an electric mixer on medium speed for about 2 minutes. Sift in powdered sugar, 1 tablespoon at a time, mixing after each addition to combine. Sift in flour and ground pistachios; stir to combine. Stir in vanilla and salt until incorporated, scraping the bowl as necessary. Stir in the prepared agar-agar; your dough will become wet but don’t worry, it will harden in the refrigerator. Cover the bowl with plastic wrap and refrigerate, 8 hours to overnight.
Preheat the oven to 350 degrees F (175 degrees C). Line a work surface with parchment paper. Line a baking sheet with parchment paper.
Remove dough from the refrigerator and divide in half. Cover one half with plastic wrap and return to the refrigerator. Cover the remaining half with plastic wrap and roll on the prepared surface until it’s 1/4-inch thick, working it into your hands to warm it up if it’s too thick.
Cut out cookies with cookie cutter shape of choice. Rinsing off the cookie cutters with hot water between cuts will help remove any stuck-on cookie dough. Place cookies on the prepared baking sheet.
Bake in the preheated oven until the edges turn golden brown, 10 to 20 minutes, depending on the size. Cool on the baking sheet briefly before removing to a wire rack to cool, about 10 minutes.
Whisk aquafaba with an electric mixer until foamy. Whisk in powdered sugar, 1 tablespoon at a time, until fully incorporated and thick. Stir in rose water.
Dip cooled cookies into the icing and place back on the baking sheet. Sprinkle with chopped pistachios.
Nutrition Facts (per serving)
157
Calories
10g
Fat
16g
Carbs
2g
Protein
Nutrition Facts
Servings Per Recipe 30
Calories 157
% Daily Value *
Total Fat
10g
12%
Saturated Fat
4g
22%
Sodium
68mg
3%
Total Carbohydrate
16g
6%
Dietary Fiber
1g
4%
Total Sugars
10g
Protein
2g
4%
Vitamin C
0mg
0%
Calcium
8mg
1%
Iron
0mg
2%
Potassium
86mg
2%
* Percent Daily Values are based on a 2,000 calorie diet. Your daily values may be higher or lower depending on your calorie needs.
** Nutrient information is not available for all ingredients. Amount is based on available nutrient data.
(-) Information is not currently available for this nutrient. If you are following a medically restrictive diet, please consult your doctor or registered dietitian before preparing this recipe for personal consumption.
Lately, I’ve been having the strongest craving for spicy food. I have no idea why. I’ve never been particularly fond of it, but over the past couple of weeks, I’ve found myself sprinkling cayenne pepper on absolutely everything. From yogurt, to salads, to fruit… you name it. A few days ago I ate an entire bowl of cut up strawberries loaded with cayenne and black pepper, lemon juice and balsamic vinegar. All that after eating roasted chipotle salsa with a spoon, right out of the jar. Sounds insane, I know.
Obviously, my body is craving something. What, I’m not sure. But I better figure it out soon, because my stomach is not very happy with me at the moment.
I was on this spicy food kick when I made the Israeli Carrot Soup for the first time. And that “pinch of cayenne” the recipe calls for, was more like a handful!
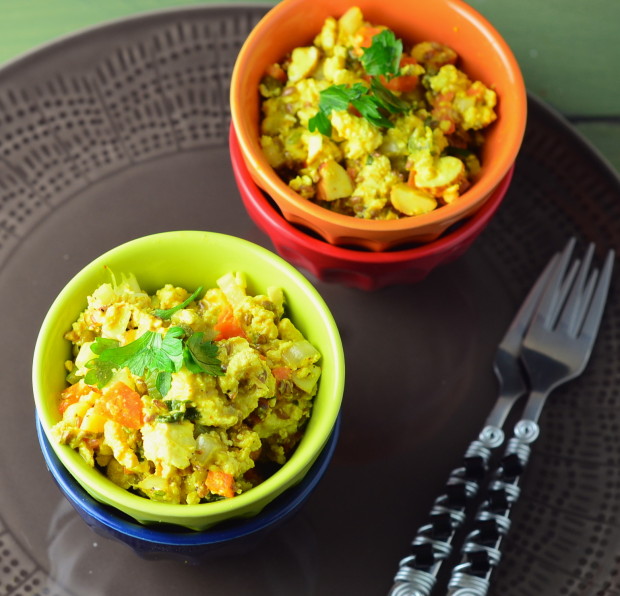
Same goes for this Vegan Chicken Salad. When I first tested the recipe on my own, I believe I added not only cayenne, but also sriracha and pickled jalapeno peppers. Super hot. Good thing Vicky was with me to cool it down a bit when we re-tested it for the blog!
So here’s the “milder” version for you. And if you feel like kicking up the heat a notch, you know what to do 😉
Enjoy!
Print
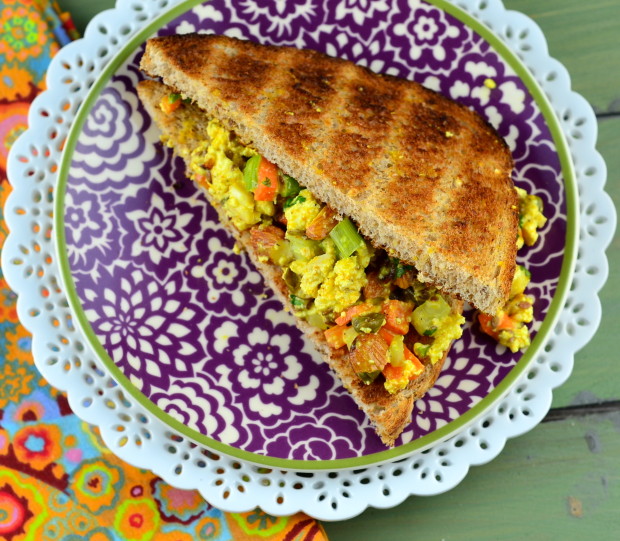
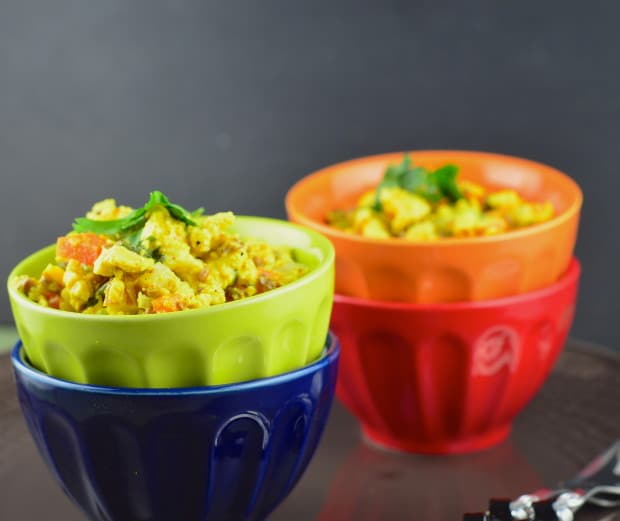
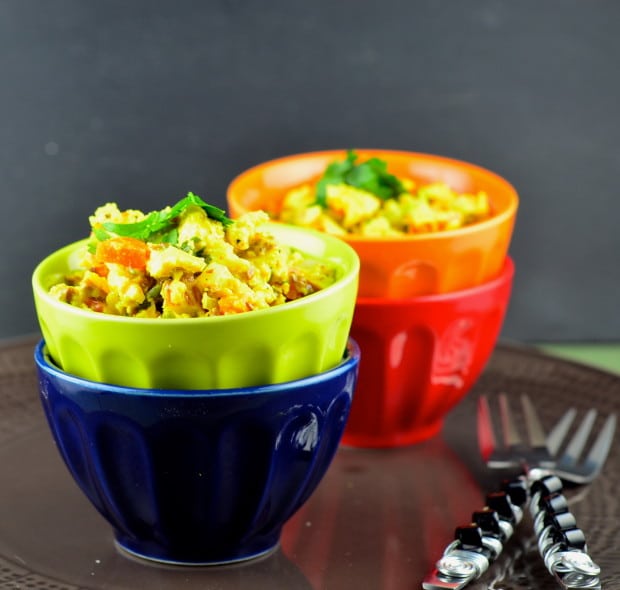
Vegan Chicken Salad
5 Stars 4 Stars 3 Stars 2 Stars 1 Star
5 from 2 reviews
Instructions
In a large bowl, crumble the tofu with your hands. Add chopped celery, carrots, cilantro, flax seeds, scallions, almonds, capers, turmeric and black pepper. Set aside
To prepare the dressing, whisk together vegan cream cheese and sandwich spread. Add mustard, rice vinegar, lemon juice, maple syrup, salt and cayenne (if using), whisking until all the ingredients are well incorporated
Pour dressing over tofu mixture, mix well and refrigerate until ready to use
Prep Time:15 mins
Category:Salad
Cuisine:Kosher / Vegan
Reader Interactions
This site uses Akismet to reduce spam. Learn how your comment data is processed.