
Sorry, we need to spruce things up.
We’re sorry that things have gotten a bit messy, but the page you are looking for is unavailable. You might find what you’re looking for by browsing our menu or using our site search.
Sorry, we need to spruce things up.
We’re sorry that things have gotten a bit messy, but the page you are looking for is unavailable. You might find what you’re looking for by browsing our menu or using our site search.
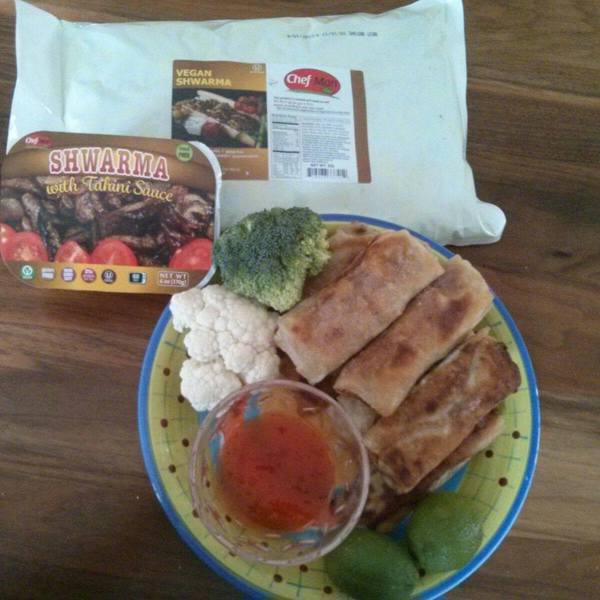


“Quick and Easy Vegan Eggrolls”

Got a question?
Share it with the community!
Have any thoughts about this recipe?
Share it with the community!

by Lauren Hartmann 4 Comments
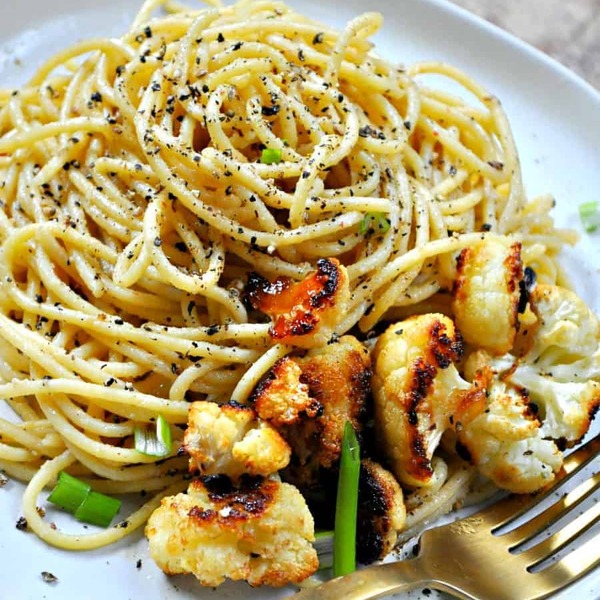
Cheesy peppery perfection!

This may sound different than anything you have ever tried, but trust me. This vegan caramelized cauliflower cacio e pepe will be one of the greatest things you have ever eaten. Cacio e pepe is a traditional Italian dish that literally means cheese and pepper. This quick and easy pasta is vegan and yet still perfectly cheesy by using vegan butter, pasta water and nutritional yeast. Then a crap ton of fresh cracked pepper. It is so F’in good. Seriously just the vegan cacio e pepe alone is perfection.

However, I recommend taking it up a notch with pouring caramelized cauliflower on top. Cauliflower florets tossed in olive oil and agave. Roasted at a super high temperature. Caramelized cauliflower is one of my new favorite things, and is goes so perfectly with this vegan cacio e pepe, you will wonder how this dish is not on every menu!

The sweetness of the cauliflower paired with the creaminess and spiciness of the pasta, you will wish you had it all to yourself! This is a super easy recipe that takes only 30-45 minutes. Perfect for a weeknight, and since it uses very few ingredients, you could probably be chowing down on this amazing pasta dish like immediately.

I promise this vegan version of a classic, is totally better than the original. Super cheesy, like you will never know it is vegan. Then nice and spicy from the awesome cracked black pepper. However, I have to say, you shouldn’t skip the caramelized cauliflower. It is the bomb. Do people say “it’s the bomb”? Whatever, it is.

Print Recipe
A vegan take on the Italian classic cacio e pepe. Super cheesy, a little spicy. Paired with caramelized cauliflower. It is so amazing!
Prep Time 15 minutes
Cook Time 30 minutes
Total Time 45 minutes
Servings 2
Author Lauren Hartmann
Get the water for the pasta on the stove to start boiling.
Now preheat the oven to 425 degrees.
Cut the cauliflower into florets. Then put the cauliflower on a sheet pan. Pour the olive oil and agave on top. Then sprinkle with the 1/2 tsp. salt and 1/4 tsp. pepper. Toss to coat the cauliflower in everything evenly.
Now roast the cauliflower at 425 degrees for 25-30 minutes. Flipping the cauliflower about half way through. Roasting until the cauliflower is brown and caramelized.
Once the water is boiling for the pasta, cook according to package directions.
When the pasta is done, drain but reserve about 1/4 cup of the pasta water first.
Now add the pasta back to the pot, leaving the heat off, but using the residual heat, add the vegan butter, stir to coat and melt the vegan butter, then add in the nutritional yeast and reserved pasta water. Toss to coat. Then add the fresh cracked pepper. Stir. Taste and adjust seasoning, adding salt and more nutritional yeast if needed.
Once the cauliflower is done, add the pasta to a bowl and top with cauliflower and then a bit more pepper if desired. Serve immediately.

[…] big, dare I say huge fan of cheesy pastas. Any vegan macaroni and cheese, alfredo sauced pasta, cacio e pepe, and the list goes on and on. Welp, this vegan Greek macaroni and cheese is freaking killer! It has […]


Disclosure: You may see links to ingredients or cooking items in the ingredient, instructions, or equipment sections of this post. I’m a participant in the Amazon Services LLC Associates Program, an affiliate advertising program. I will receive a small percentage of sales generated by these links. However, this in no way increases the price of the items.
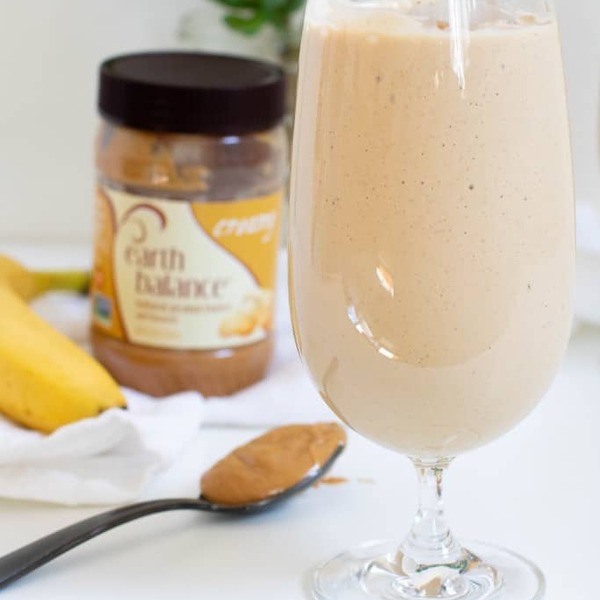

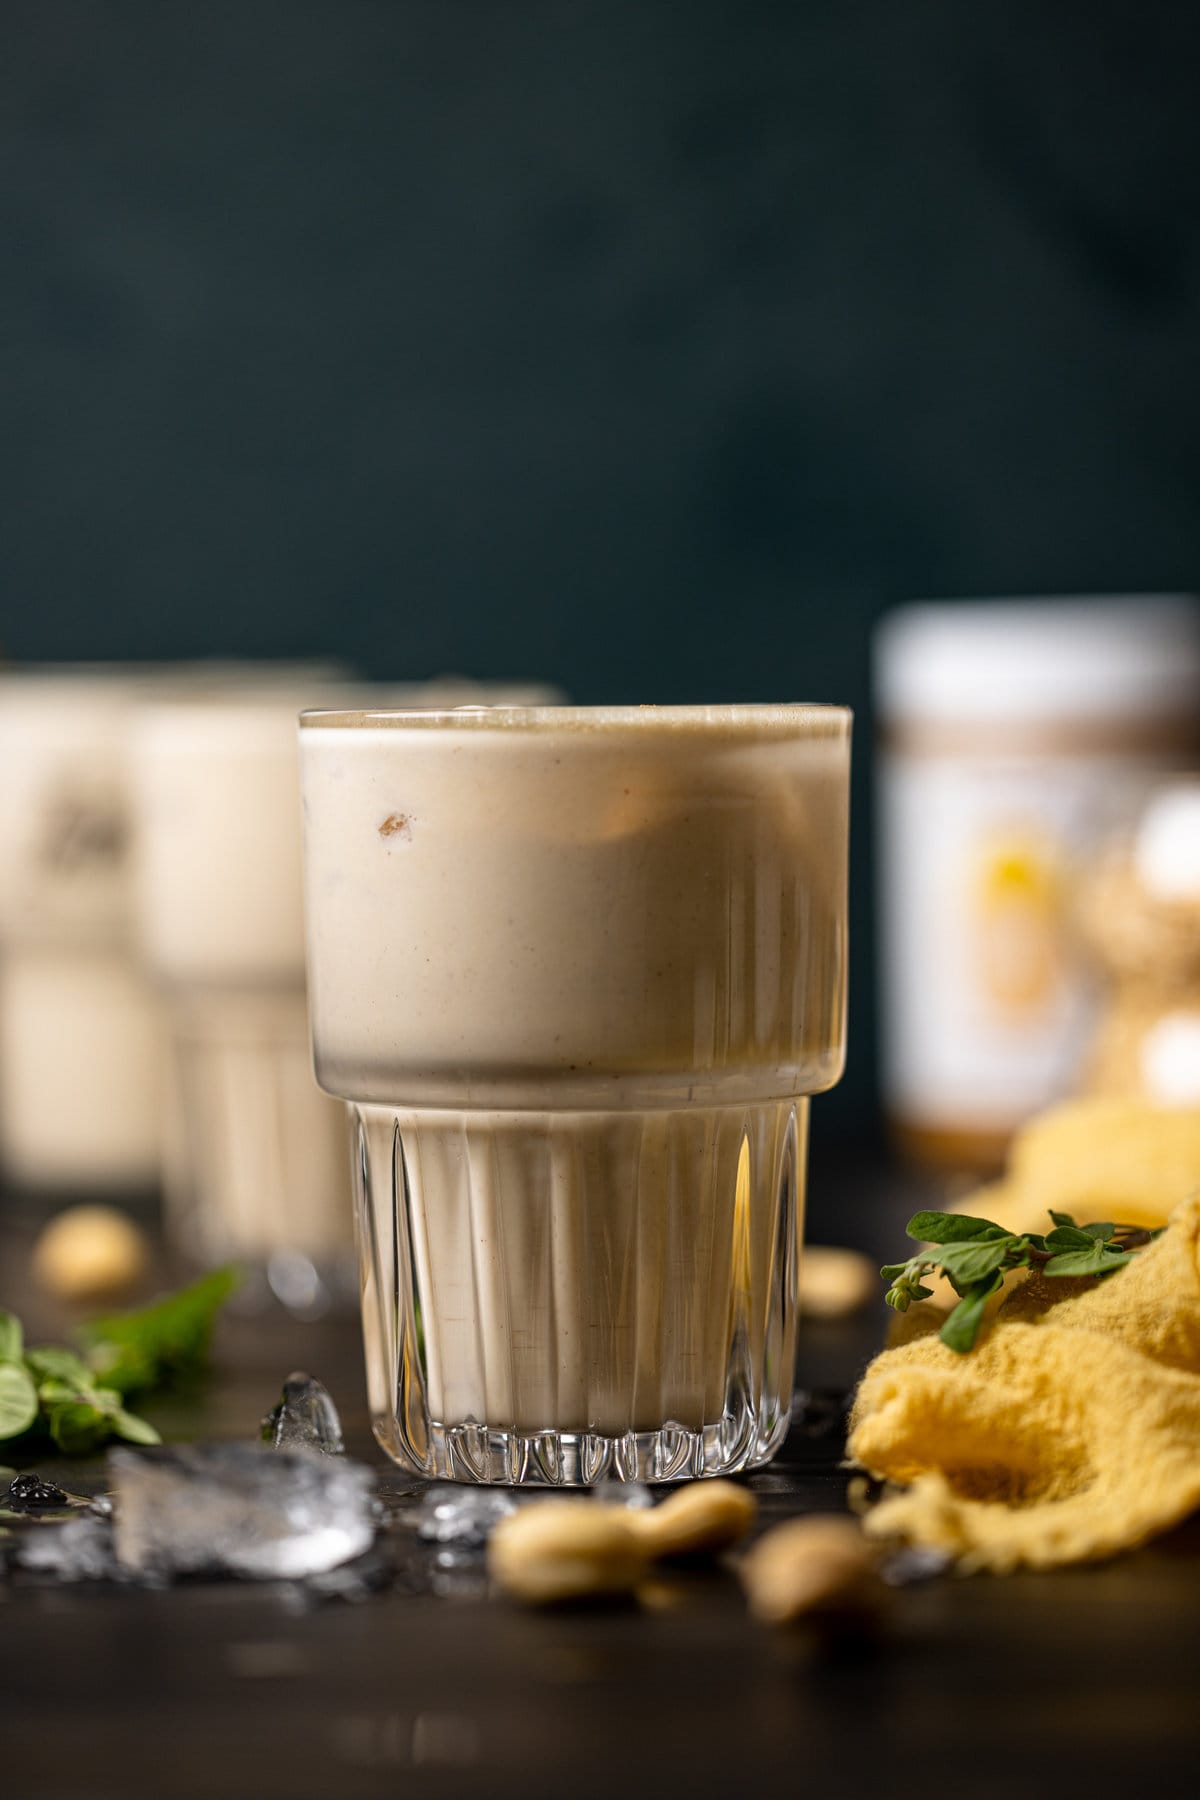
This delicious Jamaican Vegan Peanut Punch is a healthier twist on the traditional drink, featuring bold peanut flavors + optional rum. This vegan version boasts its creaminess, velvetiness, nuttiness, and generous play on warming spices and a hint of oats. Perfect for family meals or a great way to kick-start your morning! Completely Vegan, Dairy-free + Blender-free option!
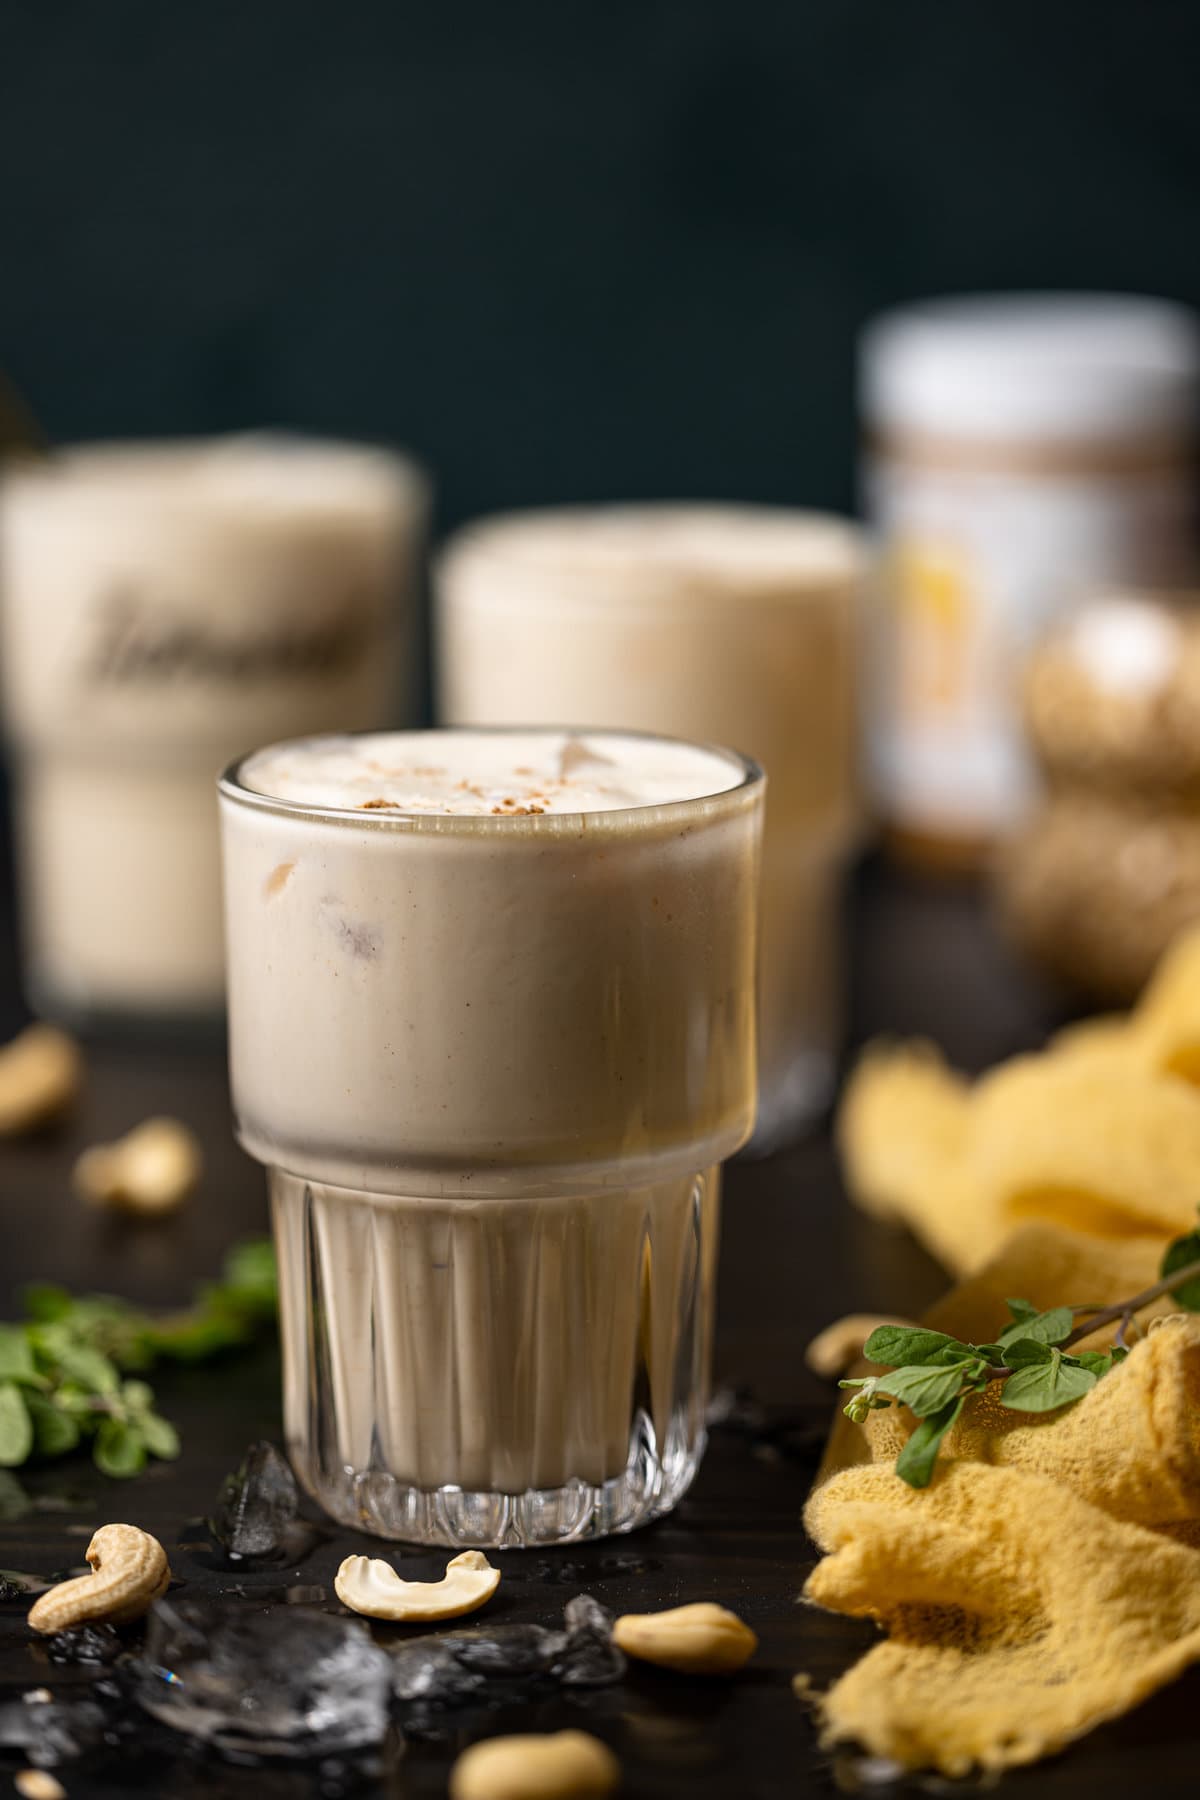
Drinks have a special spot in my heart, especially when they let me channel my Jamaican roots into delicious recipes. This Jamaican Vegan Peanut Punch is a household favorite—it’s creamy, rich, and oh-so-velvety. Plus, it’s vegan + gluten-free, making it a hit with everyone, from the little ones to the grown-ups.
I always stash away leftovers of this in the fridge—it’s just as tasty when you go back for seconds! And if you’re curious about Jamaican eats, I’ve got you covered with 22 must-try jamaican dishes and a handy list of 10 go-to ingredients for whipping up Jamaican goodness in your kitchen.
Seriously, once you whip up a batch of this goodness, you’ll want to make it a weekly ritual. And if you’re up for more Jamaican-inspired drinks, my Vegan Jamaican Irish Moss Drink, Traditional Vegan Jamaican Carrot Juice and Jamaican Rum Cream are must-tries!
In Jamaica, the traditional peanut punch is known as the “adult drink” (aka Jamaican Strong Back) because it usually contains Guinness (and alcoholic beer) which gives the punch it’s “burnt-like” flavor. In addition, peanut punch usually contains Supligen (a liquid energy + meal supplement), raw peanuts, oats, nutmeg, cinnamon, nutmeg, vanilla, and condensed milk. However, this recipe doesn’t contain any alcohol which makes it perfect for the entire family!
When it comes to vegan punches (or drinks), using cashews as the creaminess factor is the secret sauce to it all. Yes, that’s right—-cashews. If I’m honest, I use cashews A LOT in my recipes, especially in my vegan recipes. When soaked and blended, it adds a nice creamy texture to anything.
Here’s what you need to make this Jamaican Vegan Peanut Punch:
Here, I’ve curated a list of drinkware and mocktail essentials that I use to achieve my favorite drinking experiences, especially with this Jamaican Vegan Peanut Punch. Everything from my fave glassware, cocktail shakers, ice cube trays, and more. SEE THEM HERE!
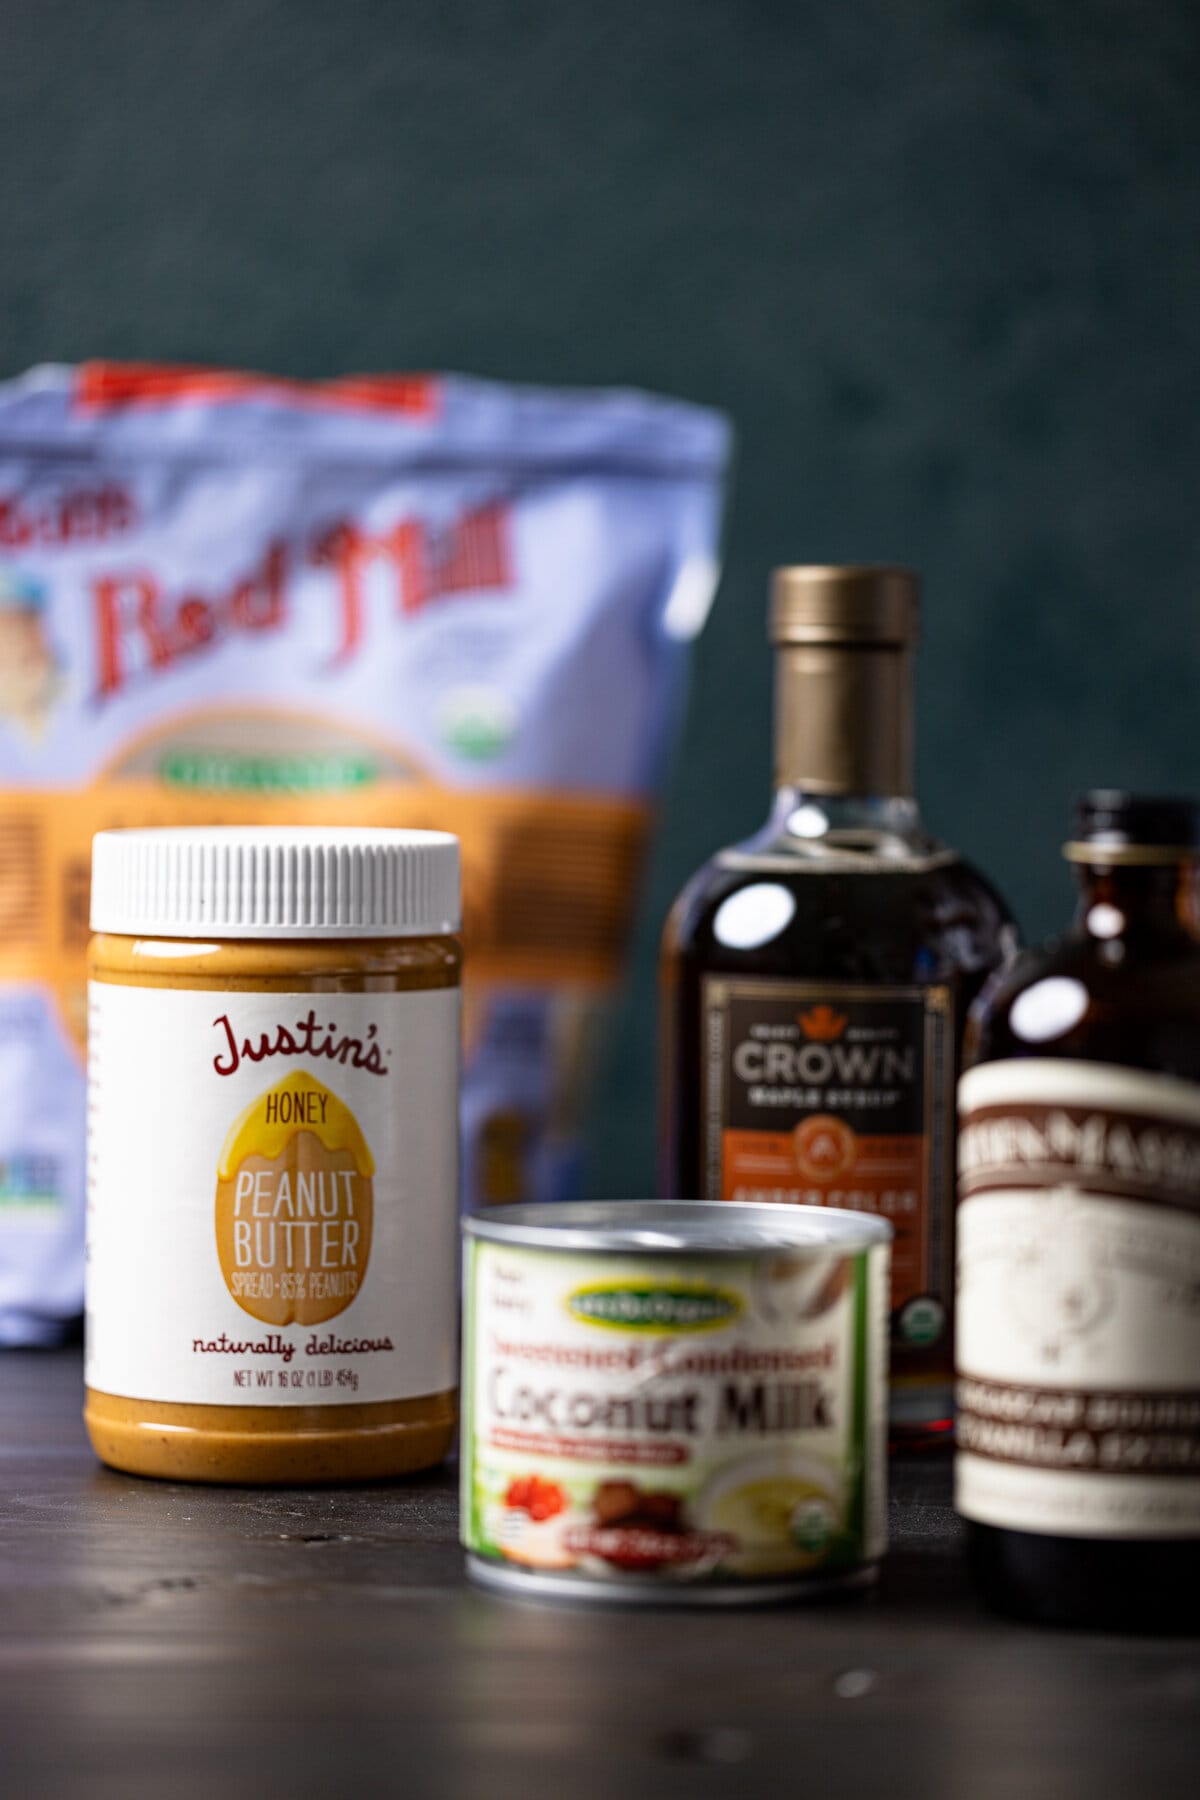
First, I must let you know that Sweetened Condensed Milk is a canned milk that has 60 percent of it’s water content removed, making it thicker in consistency.
Also, it has 40-45% sugar, making it a great sugar substitute in recipes that use sugar. More importantly, condensed milk creates a caramelized flavor along with it’s sweetness, which give the dishes that require it, a beautiful kick of flavor.
That being said—I generally love using the original Sweetened Condensed Milk like the Eagle Brand’s version, however, in this peanut punch recipe, I love using Edward’s & Son’s Let’s Do Organic’s dairy-free coconut version to make it vegan-friendly.
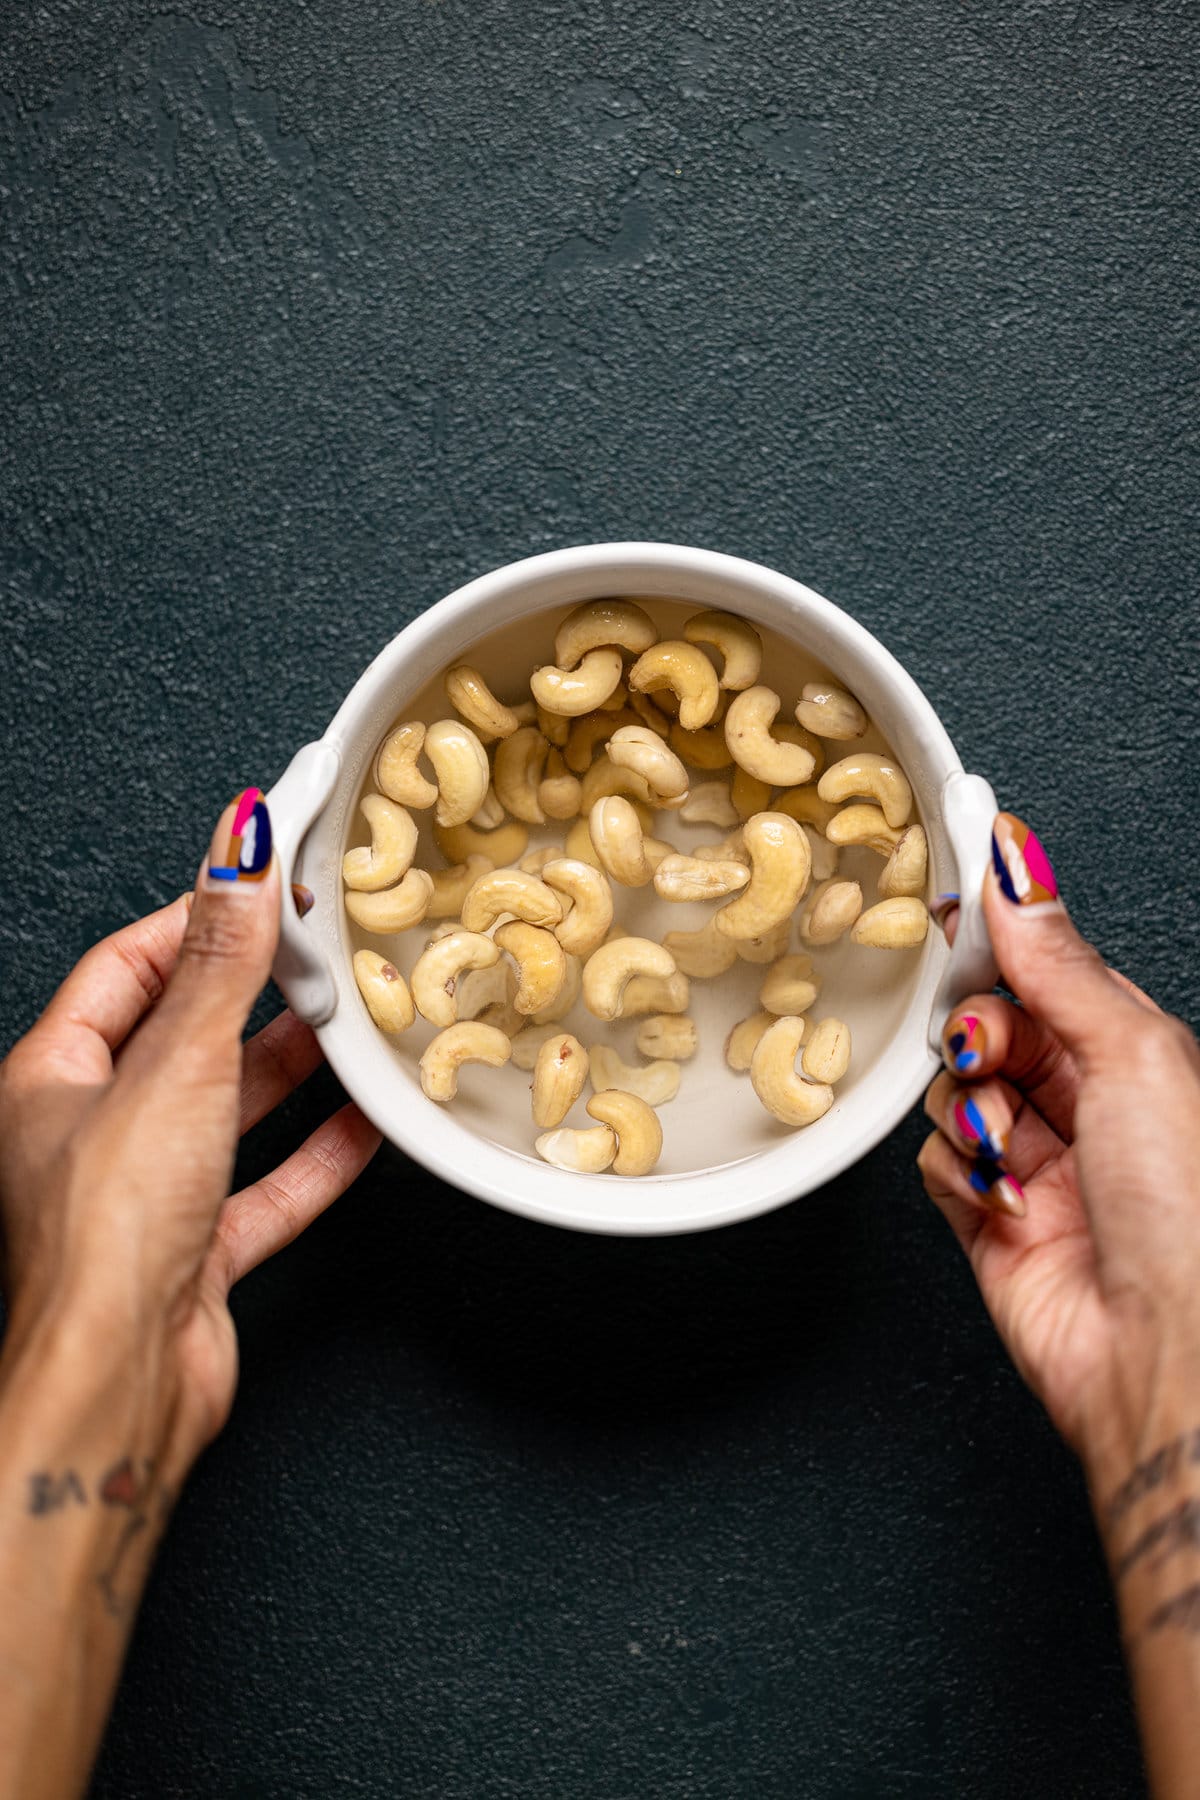
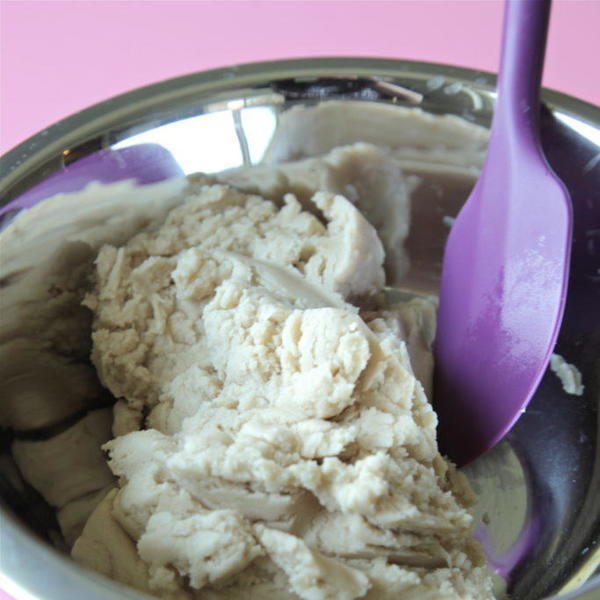
It is required that you soak your cashews for quite some time before blending. By soaking the cashews, you are softening them to prepare the nuts for blending. Without soaking your nuts, the nut milk would contain grit and a less pleasant texture. Soaking the nuts also creates a creamy texture that does not require straining the solids.
My preferred method of soaking my cashews is overnight at room temperature. I also cover the soaking container with plastic wrap so that everything stays really fresh.
If you do not have all night or many hours to soak your cashews, you can instead use boiling water. By using boiling water instead of room temperature, the nuts will soak much faster due to the presence of heat. Soak the nuts in the hot water for only 30 minutes before blending. While this is a great way of quickly soaking cashews, the overnight method produces the optimal texture + creaminess, in my opinion.
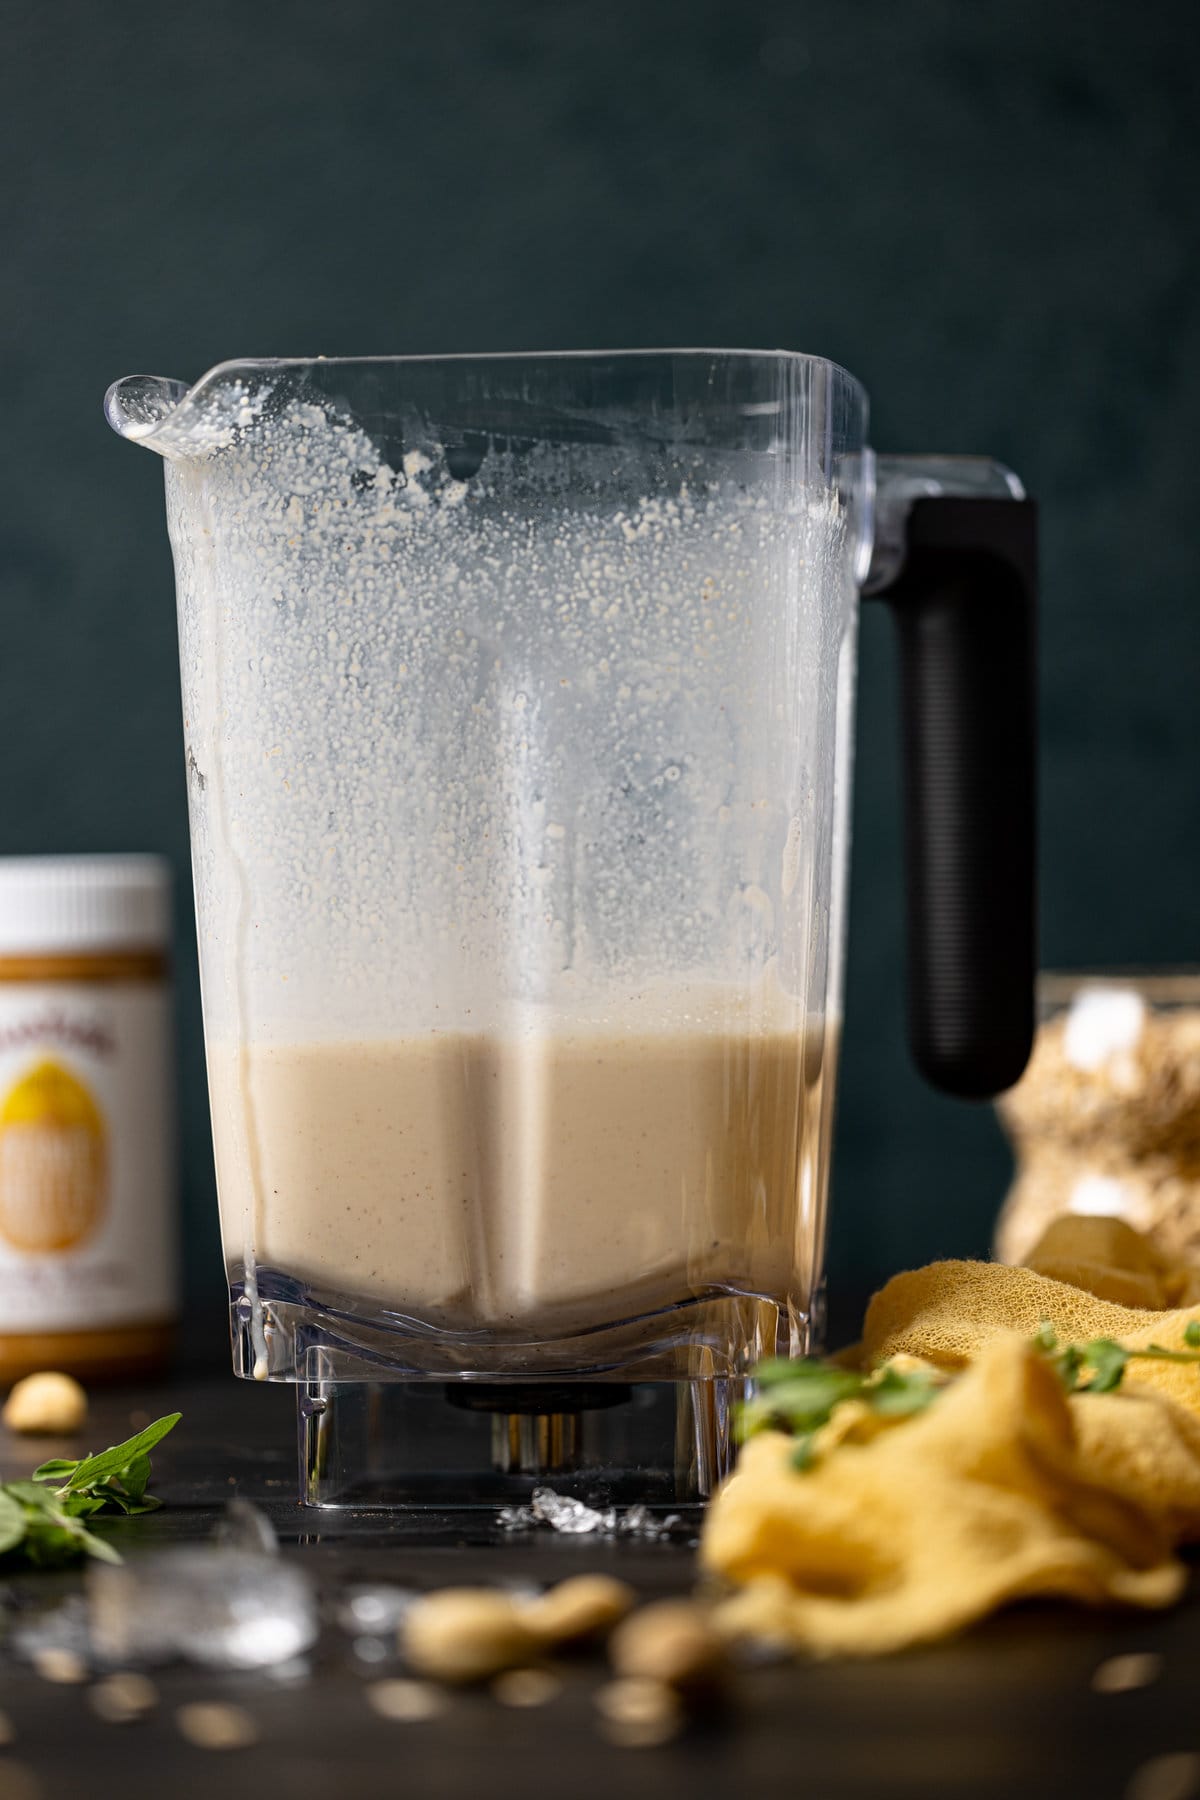
If for any reason you aren’t able to use a blender, you can still enjoy this delicious Jamaican Vegan Peanut Punch. Instead, you can use a hand-mixer and have a perfectly whipped peanut punch drink on hand.
To start add your peanut butter or crush the raw peanuts (if using) or cashews a bit and add them in a deep bowl with the milk. Let them sit for 2-3 minutes so that they soften a bit more. Next, using an electric hand-mixer, whip on low-speed until nuts are blended in. Then add softened peanut butter (if using), vanilla, cinnamon, nutmeg, oats, maple syrup, and dairy-free condensed milk and whip again until smooth and combined.
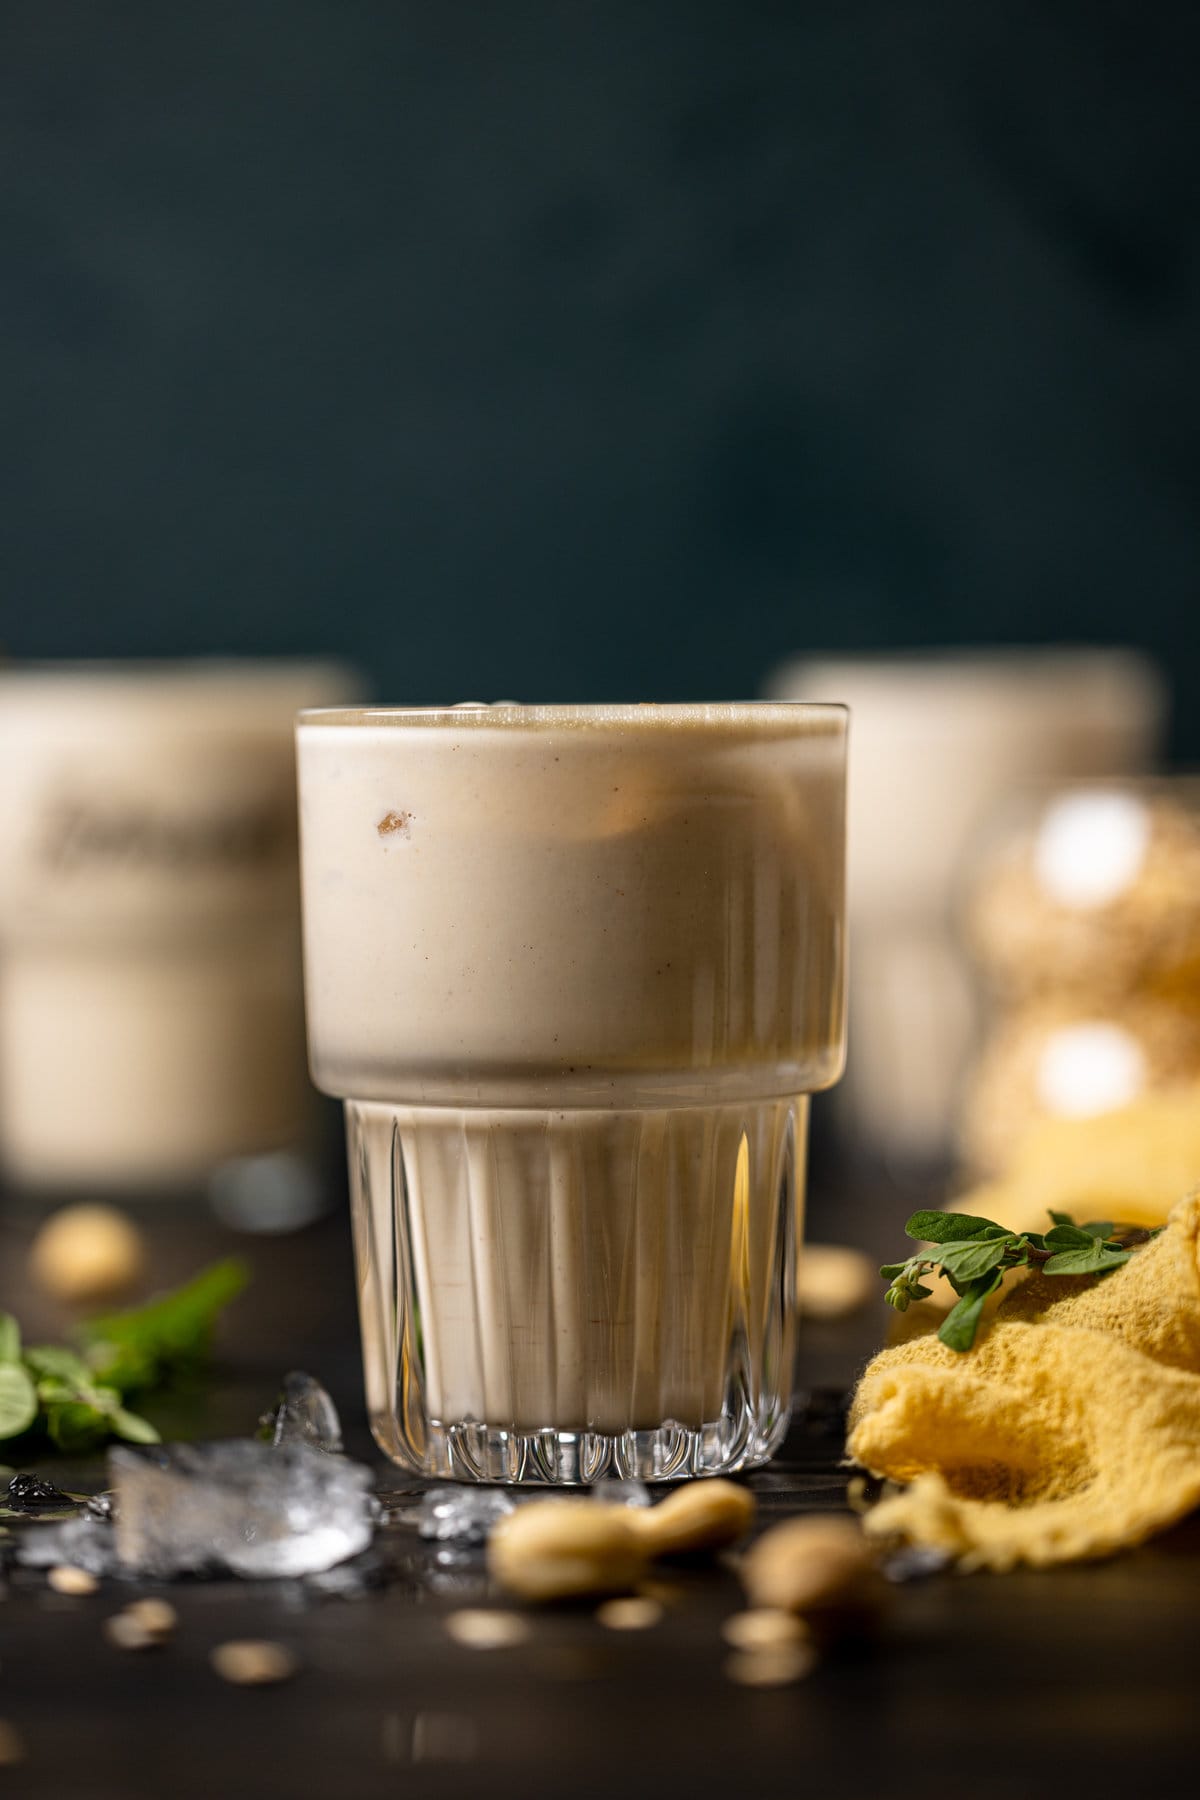
Add your peanut punch to your fave glass(es), top with a dollop of coconut whipped cream (optional), a few pinches of cinnamon or nutmeg and wallah!
I love using Peanut Butter and have always been a HUGE fan since I was a kid growing up. Honestly, I can only eat chocolate (and truly enjoy it) when there’s peanut butter involved. Anyone else can relate?
While traditional peanut punch contains raw peanuts, if for any reason you don’t have any on hand and still want to enjoy this drink, substituting them with organic peanut butter works and gives you some of the health benefits as raw nuts would.
So, of course, having this drink mostly made of peanut butter was a WIN, WIN for me! Haha. Usually, I enjoy using Justin’s Peanut Butter, but on my recent trip to the Organic Market, I came across Earth Balance’s Peanut Butter with Flaxseed and I had to give it a try! Thank goodness I did! It’s so tasty! Plus, it comes loaded with Omega-3, Sweetened with Agave, 0 grams of trans fat, and a host of other things that makes it a great Vegan option!
OK, so in case you aren’t too familiar with this drink, let’s talk about it. As I mentioned previously, traditional peanut punch is considered “Jamaican Strong Back” for this main reason: it has it’s advantages for men. There is a notion that this drink (when made traditionally) helps to enhance sexual performance, perhaps because it’s said to increase testosterone levels. How? Mainly because of the health benefits of peanuts themselves, which include:
Vitamins + Minerals — i.e. Vitamin E which has antioxidant, Magnesium which is important for muscle function + energy production, and a host of other things.
Niacin — An excellent source of this important B Vitamin that helps to convert food into energy, aides in digestion, the nervous system, and helps with the skin.
Biotin — Contains an excellent source of biotin, which enormously helps with physiological well-being.
Protein — Protein is essential for building and repairing body cells.
Absolutely! If you’d like to switch things up with the type of plant-based milk that you use—–that’s totally fine! The world of plant-based milk is constantly expanding. From the classics like coconut milk, cashew milk, soy milk and almond milk, we now have delicious options like oat milk, and even potato and quinoa milk.
How To Store Leftover Jamaican Vegan Peanut Punch
When properly stored in the refrigerator in a tightly sealed jar, leftovers lasts for 3-4 days. NOTE: Ensure that you do not store leftover peanut punch with any ice as this will “water down” the drink greatly. Always only add ice when serving.
Can i use another type of sweetneer?
Yes! Instead of maple syrup, you can use substitute sweeteners like honey or Meedjol dates, if preferred.
Can I make vegan peanut punch ahead of time?
Yes, you can prepare vegan peanut punch ahead of time and store it in the refrigerator until you’re ready to serve. Just be sure to give it a good stir before serving, as some separation may occur due to the natural ingredients.
If you’re loving this Jamaican Vegan Peanut Punch, then you’re sure to enjoy these other options as well:
If you tried this Jamaican Vegan Peanut Punch recipe or any other recipe on my website, please please leave a 🌟 star rating and let me know how you go in the 📝 comments below. And don’t forget to tag @orchidsnsweettea_ on Instagram and hashtag it #orchidsandsweettea! I love hearing from you!
Prep Time: 5 minutes
Total Time: 5 minutes
Serves: 4 servings
Add the soaked + drained cashews, rolled oats, peanut butter, milk, vanilla, cinnamon, nutmeg, condensed milk, and maple syrup to a high-powered blender and blend on medium-high speed, until smooth, about 1-2 minutes. NOTE: Mixture should be mostly thin with a bit of creaminess. If needed, you can strain your drink (with a mesh strainer or cheesecloth) to avoid any “grainy” bits.
To serve, pour the peanut punch into prepared glass(es) over crushed ice. For extra deliciousness, feel free to top with a dollop of coconut whipped cream and a few sprinkles of cinnamon or nutmeg.
Sip and enjoy!
Calories: 528kcal | Carbohydrates: 30g | Protein: 18g | Fat: 40g | Saturated Fat: 8g | Polyunsaturated Fat: 9g | Monounsaturated Fat: 20g | Cholesterol: 0.1mg | Sodium: 280mg | Potassium: 516mg | Fiber: 4g | Sugar: 14g | Vitamin A: 2IU | Vitamin C: 0.1mg | Calcium: 55mg | Iron: 2mg
Jamaican Vegan Peanut Punch.


Ingredients:
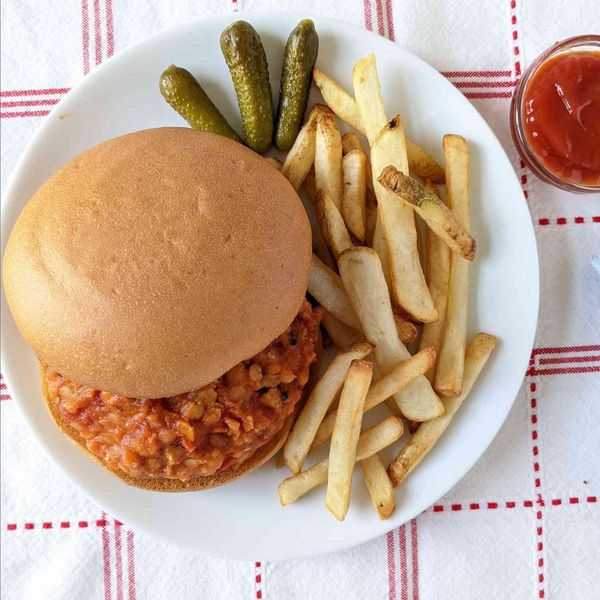

Vegetarian-friendly recipe for lentil Sloppy Joes, great for piling on buns.
Submitted by
Laura Shansey
Updated on February 26, 2025
Cook Mode
(Keep screen awake)
Original recipe (1X) yields 6 servings
1 large sweet onion, roughly chopped
1 medium green bell pepper, roughly chopped
1 medium red bell pepper, roughly chopped
1 tablespoon olive oil
1 medium carrot, shredded
1 small zucchini, shredded
2 cups reduced-sodium vegetable broth
1 cup dry red lentils, rinsed and drained
2 (14.5 ounce) cans diced tomatoes
1 tablespoon chili powder
1 tablespoon prepared yellow mustard
1 tablespoon cider vinegar
1 tablespoon maple syrup
1 tablespoon tomato paste
2 teaspoons vegan Worcestershire sauce
salt and ground black pepper to taste
6 large hamburger buns, split
Combine onion and both bell peppers in the bowl of a food processor; pulse until blended into a uniform size but not liquid.
Heat olive oil in a large pot over medium-high heat. Add onion-bell pepper mixture, carrot, and zucchini. Cook and stir until soft and heated through, 6 to 8 minutes.
Add broth and lentils; bring to a boil. Reduce heat and simmer, uncovered and stirring occasionally, until lentils are tender, about 15 minutes.
Stir in tomatoes, chili powder, mustard, vinegar, maple syrup, tomato paste, Worcestershire sauce, salt, and pepper; bring to a boil. Reduce heat and simmer until thickened, about 10 minutes. Serve on buns.
You can use tomato sauce instead of diced tomatoes.
| 449 | Calories |
| 8g | Fat |
| 76g | Carbs |
| 18g | Protein |
| Nutrition Facts | |
|---|---|
|
Servings Per Recipe 6 |
|
|
Calories 449 |
|
| % Daily Value * | |
|
Total Fat 8g |
10% |
|
Saturated Fat 1g |
7% |
|
Sodium 847mg |
37% |
|
Total Carbohydrate 76g |
28% |
|
Dietary Fiber 10g |
36% |
|
Total Sugars 10g |
|
|
Protein 18g |
36% |
|
Vitamin C 59mg |
65% |
|
Calcium 200mg |
15% |
|
Iron 8mg |
46% |
|
Potassium 838mg |
18% |
* Percent Daily Values are based on a 2,000 calorie diet. Your daily values may be higher or lower depending on your calorie needs.
** Nutrient information is not available for all ingredients. Amount is based on available nutrient data.
(-) Information is not currently available for this nutrient. If you are following a medically restrictive diet, please consult your doctor or registered dietitian before preparing this recipe for personal consumption.

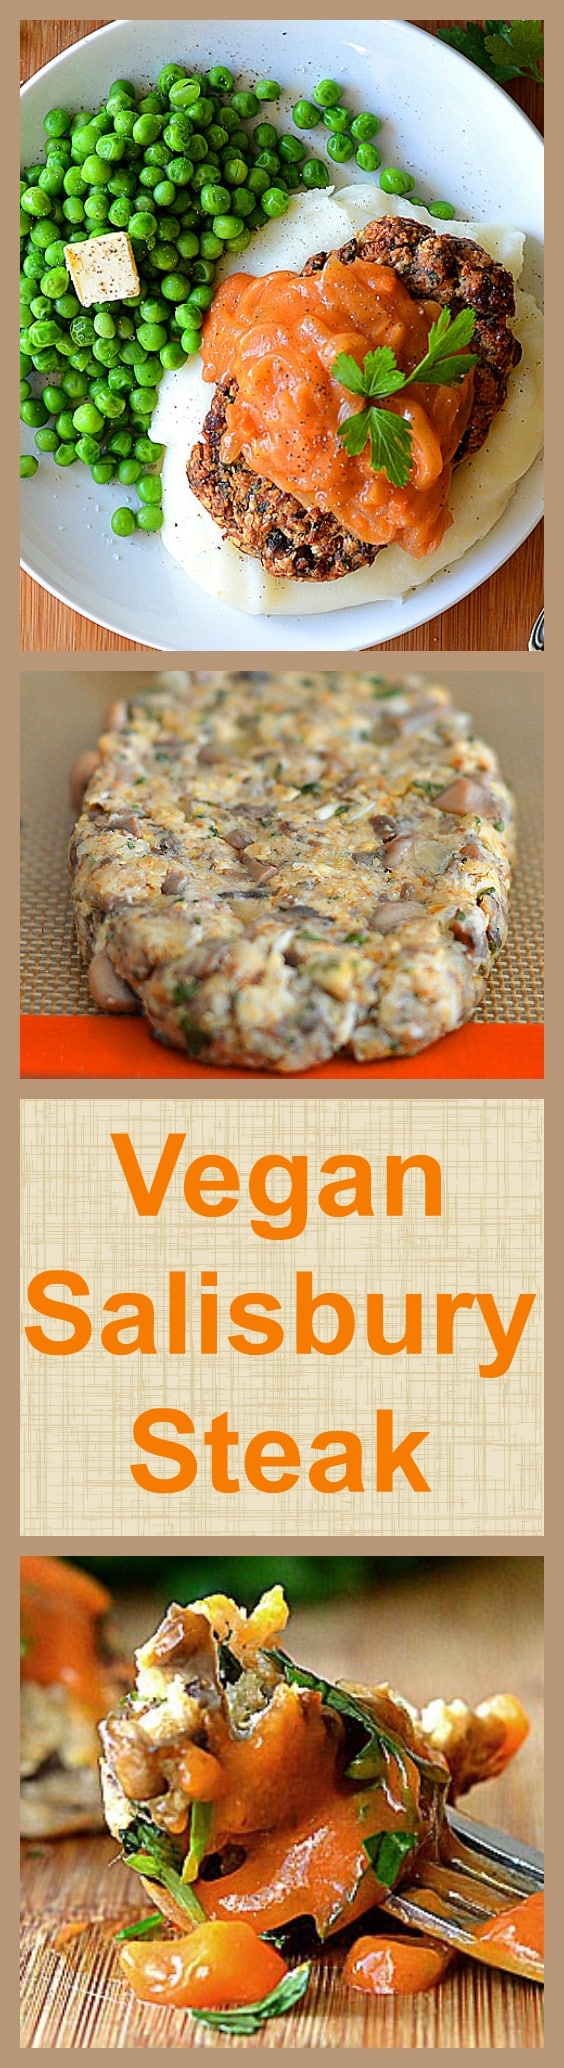
When I think of classic dishes growing up, Salisbury Steak was always among them. I did a little bit of research into the history of the recipe finding that the term “salisbury steak” has been used in the U.S. since about 1897. Created by Dr. J.H. Salisbury who was an early proponent of the low-carb diet for weight loss.
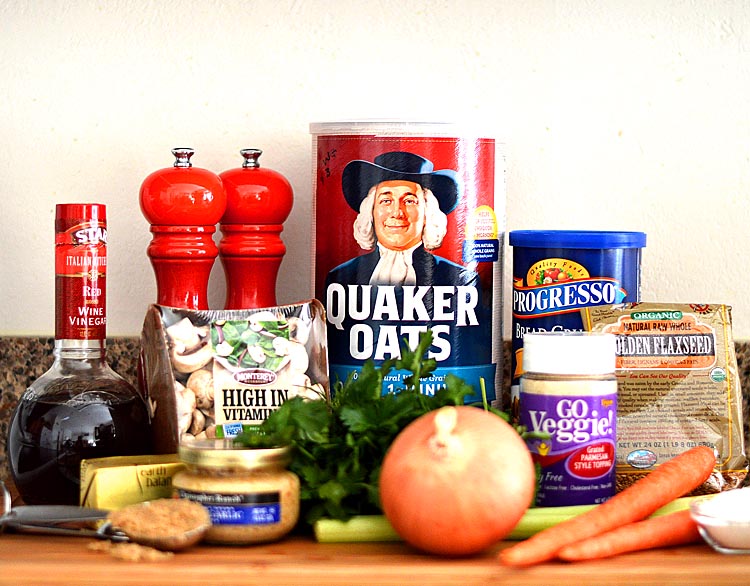
Ours is an even healthier version that would make Dr. Salisbury proud. Instead of ground beef, we used coarsely chopped mushrooms, quick-cooking oats and breadcrumbs as the main ingredients. Traditionally, Salisbury Steak is topped with either sauce or gravy, I opted for a compromise – tomato onion gravy.
Vegan Salisbury Steak with Tomato Gravy
There are just a handful of ingredients that make up this flavorful version. The process itself is really not much different than making a meatloaf except that we shape the patty into that classic Salisbury Steak form.
Vegan Salisbury Steak with Tomato Gravy
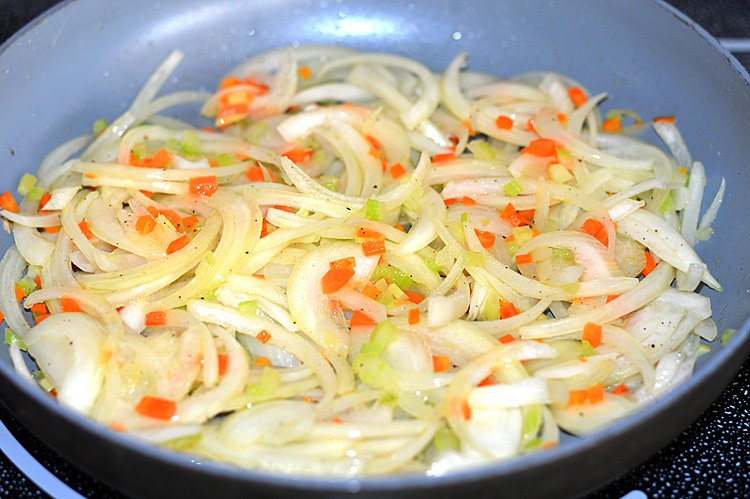
To begin, we saute onions, celery and carrots in a small amount of oil until they are tender and golden. This will become the base for our tomato gravy, so we want them to caramelize which adds even more flavor.
Vegan Salisbury Steak with Tomato Gravy
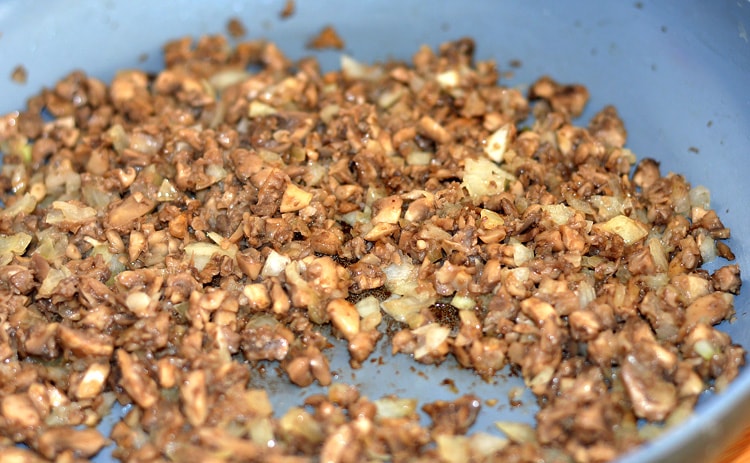
While the vegetables are sauteeing, chop the mushrooms (with a sharp knife, not a food processor). We want there to be texture, but no large pieces. In a separate saute pan, add a small amount of oil and 1 small finely diced onion. Cook for a few minutes and then add the mushrooms. Immediately season with salt, as it will draw out the moisture. Continue to cook until the onions soften and all of the moisture evaporates. Remove from the heat and add the garlic.
While the mushroom mixture cools slightly, create a mixture of 2 Tbl Ground Flax + 7 Tbl of water and allow to sit in the refrigerator for 20 minutes.
Vegan Salisbury Steak with Tomato Gravy
Combine the mushroom mixture with the flax mixture and add the remaining ingredients. Season with salt and pepper. Cover and refrigerate for several hours or even better, overnight. It should look something like this…

Vegan Salisbury Steak with Tomato Gravy
Using damp hands, firmly compact and form into that signature Salisbury Steak patty shape. Bake at 425 degrees for 15-20 minutes taking care not to let the bottom get overly brown. Once they start to firm up, you can carefully flip halfway through the cooking process.

Vegan Salisbury Steak with Tomato Gravy
While the patties are baking, let’s finish the tomato onion gravy. To the now sauteed vegetables, add 1 Tbl of flour and cook for 1 minute. Add the broth, red wine vinegar, tomato paste, brown sugar and season with salt and pepper. Finish with fresh parsley.

Vegan Salisbury Steak with Tomato Gravy
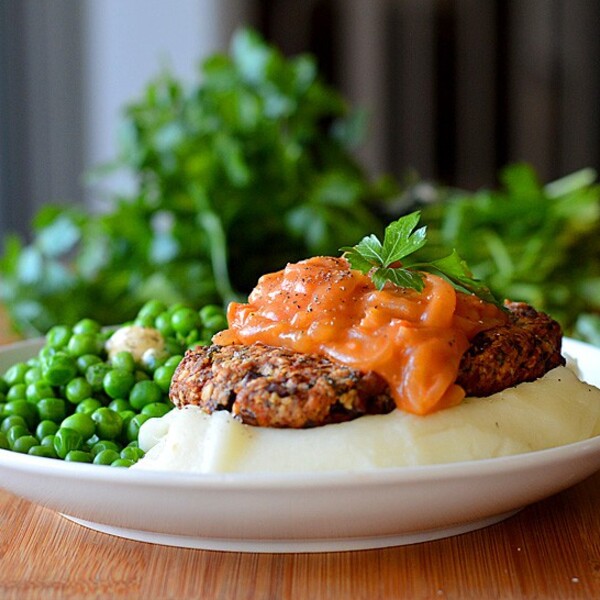
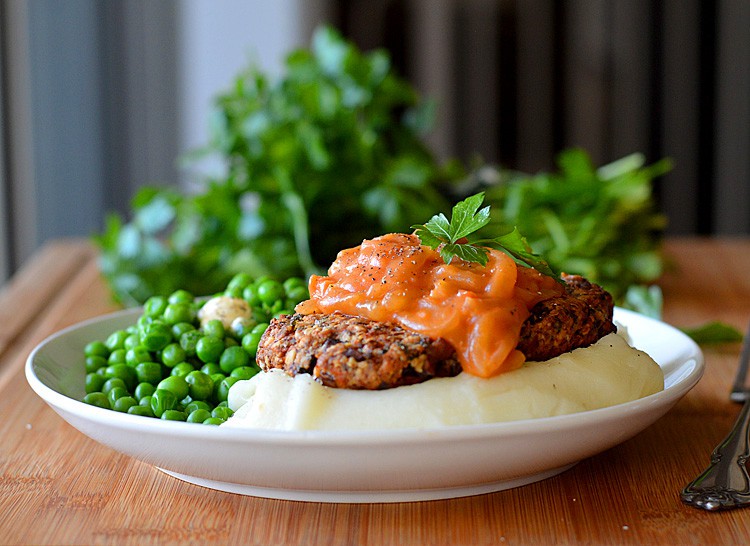
Serve atop garlic mashed potatoes with your favorite green vegetable.
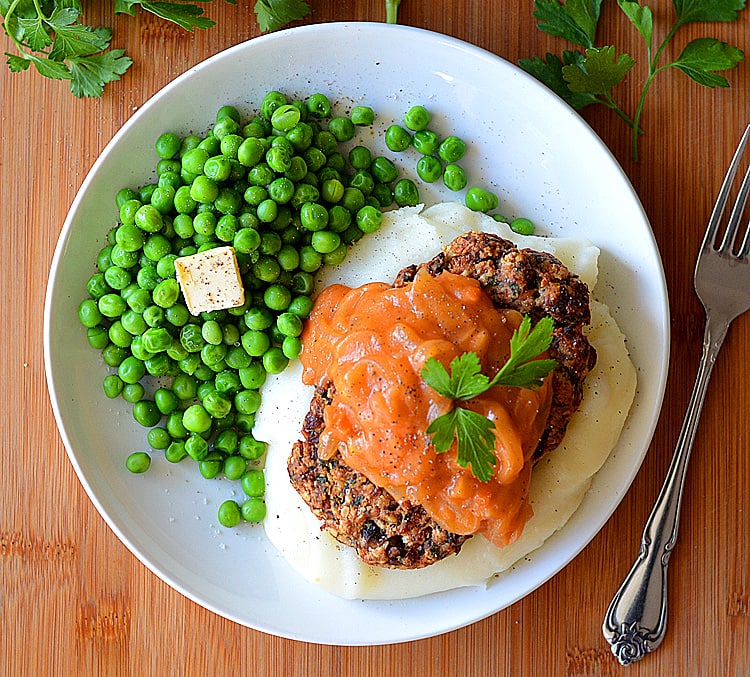
Vegan Salisbury Steak with Tomato Gravy
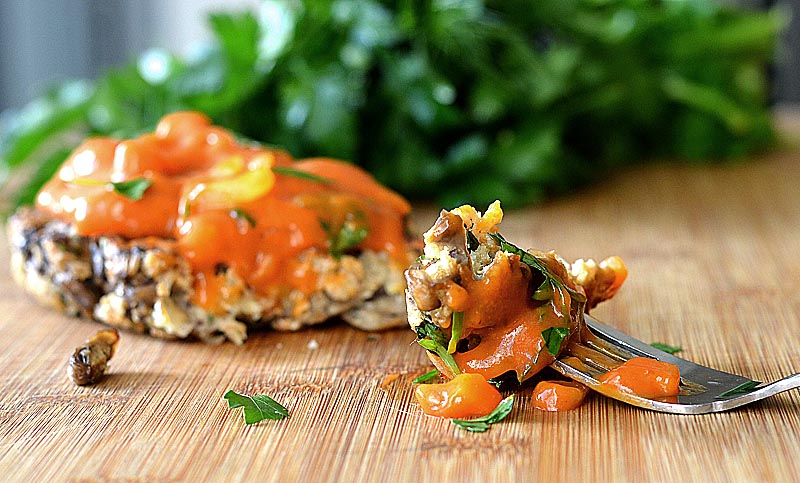
Just look at that texture! The sauce is sweet, tangy and full of flavor.
Vegan Salisbury Steak with Tomato Gravy
If you liked this recipe, PIN it for later! 🙂
Before you go, why not check out some of our recent videos and be sure to subscribe to the YouTube Channel! 🙂
Serves: about 4 “steaks”
Begin by sauteeing onions, carrots and celery in 1-1/2 tsp each margarine and oil.
Prepare mushrooms by removing stems, wiping clean.
Using a knife, not a food processor, chop mushrooms into a fine dice. No large pieces.
In a skillet on medium-high heat, add the oil, onions and chopped mushrooms.
Season immediately with salt and pepper. The salt will draw out the moisture in the mushrooms. Continue to cook until all moisture has evaporated.
Remove from the heat and stir in the minced garlic. It will cook a little from the residual heat of the pan.
Prepare the flax “eggs” by combining the ground flax with water and allowing to rest in the refrigerator. It will become gelatinous and be our binder.
Add the flax mixture along with the remaining mushroom steak ingredients. Combine with a fork until coarse and crumbly.
Season with salt and pepper.
At this point the mixture should hold together. If it seems a bit dry, add a Tablespoon of water (or you could add a splash of almond or coconut milk).
Cover with plastic wrap and refrigerate for several hours. Preferably overnight. This will allow the moisture to permeate the dry ingredients and the flavors to meld.
Preheat oven to 425 degrees.
Form the mushroom mixture into patties. Bake for approximately 15-20 minutes, flipping halfway through. They should be firm, but tender and lightly golden on each side.
To complete the tomato onion gravy, add the remaining ingredients , stirring to combine until hot and bubbly.
Serve atop garlic mashed potatoes with your favorite green vegetable for a side.
Serves: about 4 “steaks”

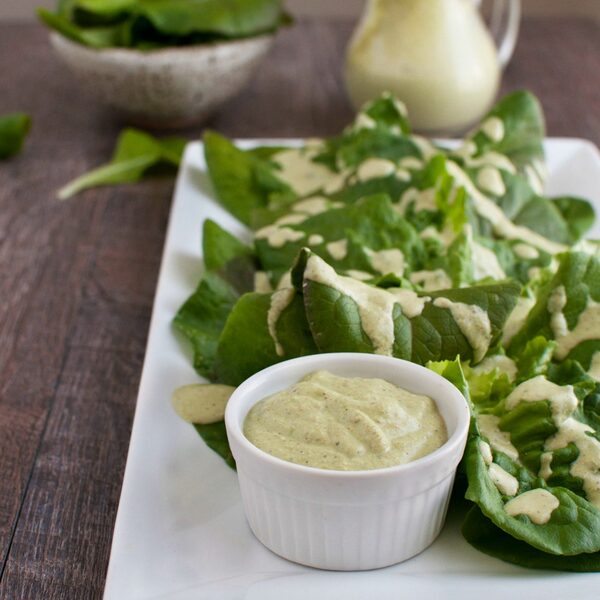


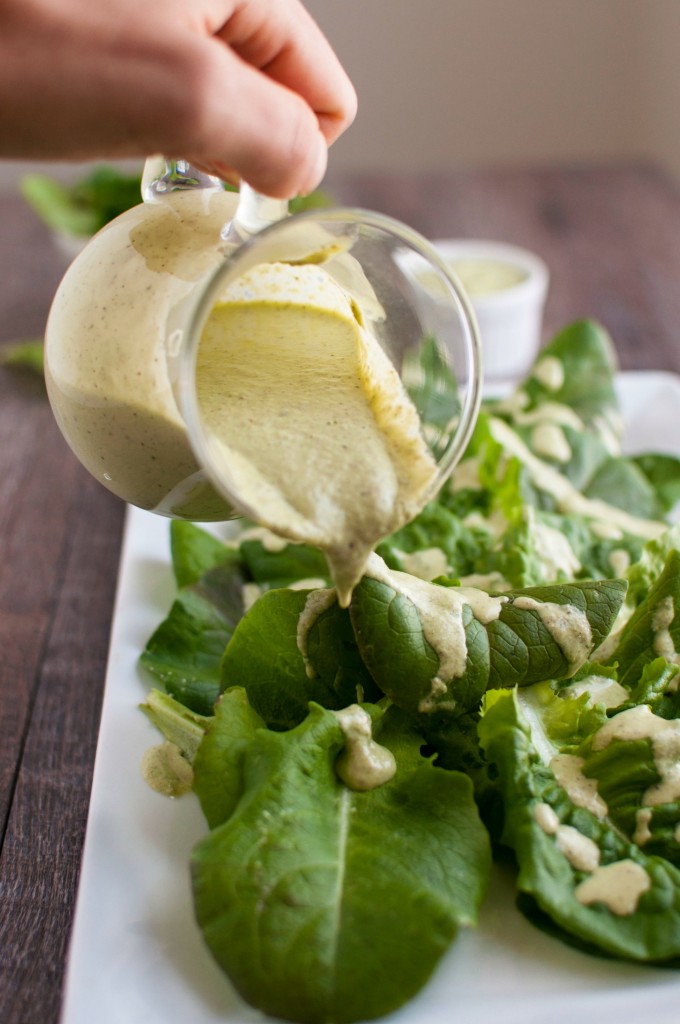
A good salad dressing is like the icing on top of a cake…it completes it and makes it even more delicious. This Vegan Caesar Pesto Dressing may be just what you’re missing in your salad.
After two months of testing (and eating) holiday recipes I think I am over it. As much as I love creating wholesome versions of classic holiday treats, it still involves me eating more sweets then I usually do. Sugar is sugar, after all. So today I have salad on the brain. Salad dressing that is. I have said it before and I will say it again, salads do not have to be boring! Add an unprocessed, delicious salad dressing and I find I’m much more excited about eating salad.
Salads are a great way to help anyone reach the recommended daily intake of vegetables (which can be upwards of 10 servings per day). Include a healthy-sized salad for just one meal a day and you can easily meet half your veggie needs. “Eat the rainbow” by adding a lot of color to your salads. You’ll benefit from the wide variety of nutrients. Unfortunately a healthy salad can be jeopardized by a low-quality dressing full of sugar and refined oils. Nothing can ruin a beautiful plate full of vegetables more.
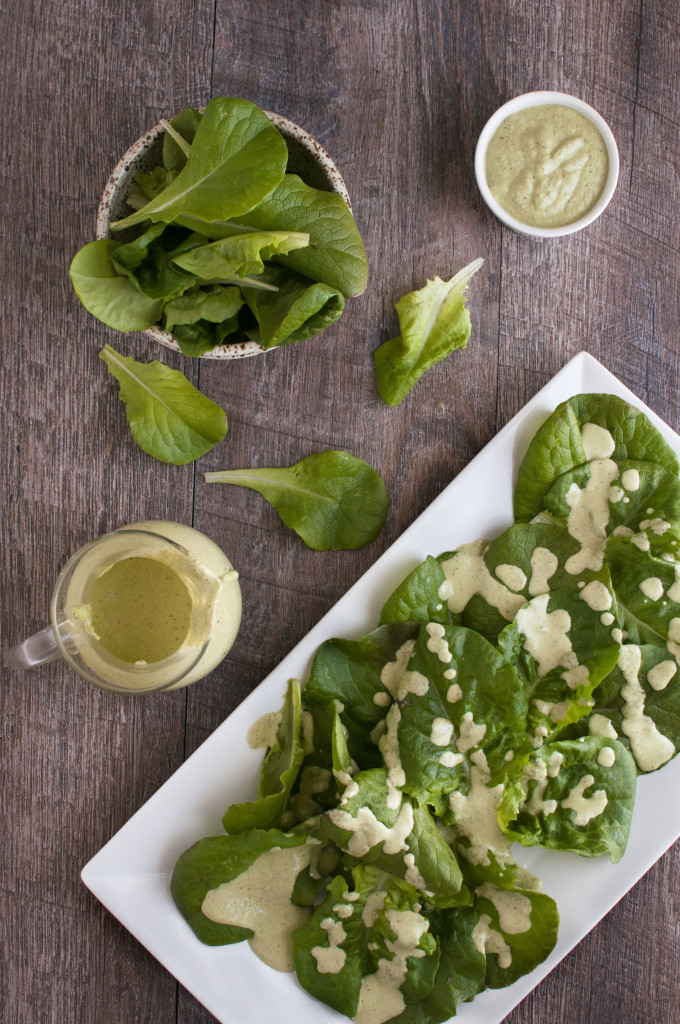
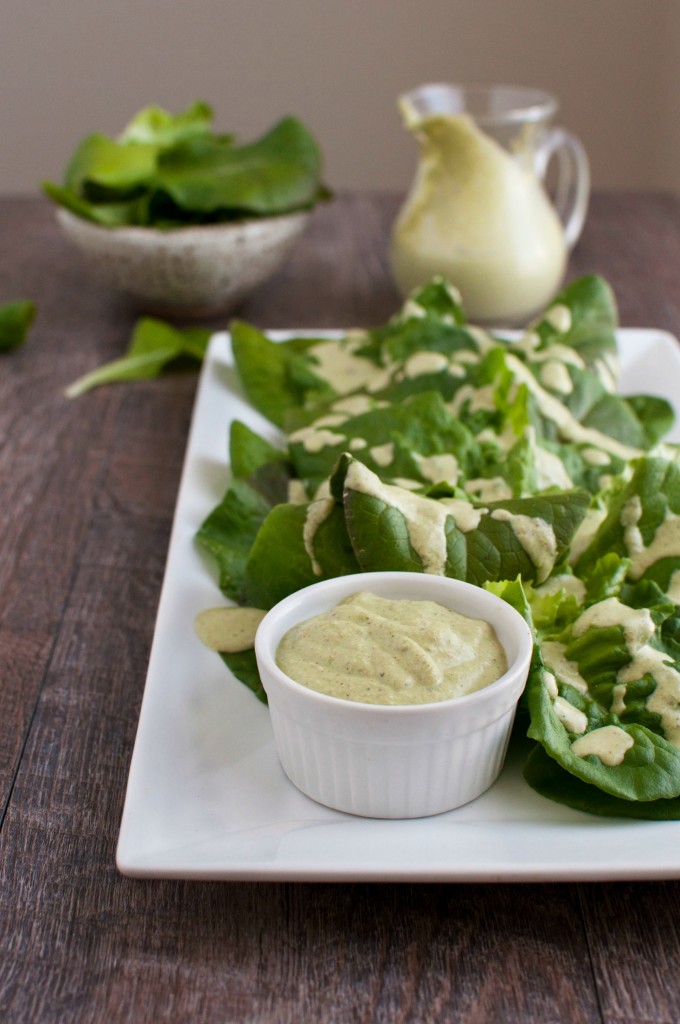
Sometimes the hardest part of creating a healthy salad is finding a good dressing. I decided to combine two of my favorite sauces into one flavorful, nutrient-packed dressing. Pesto meets Caesar for my Vegan Caesar Pesto Dressing that is seriously to die for! It may just have you craving salad. Use this sauce with other meals, not just as a dressing. Use it as an aioli for dipping sweet potato fries, part of a crudités platter at a party, a sandwich spread, or as a flavorful sauce for grass fed steak or pasture chicken.
Enjoy this dressing! Let me know what you decide to try it on – salad, sandwich, or something else!
Healthy vegan caesar pesto dressing with so many delicious uses and made with 100% real ingredients.
Prep Time 8 hours
Total Time 8 hours
Cover the pine nuts in filtered water and soak overnight to soften.
Drain and rinse the pine nuts.
Add the nuts and the rest of the ingredients in a blender and blend until smooth and creamy.
Store in an airtight container for up to 5 days.
Choose organic ingredients when possible.

Have you ever tried a castor oil pack? I asked this question a few months ago on my Instagram page and got a lot of questions. Most people had never heard of castor oil packs and expressed interest in learning more about…
Are you dealing with copper toxicity? You may very well be and have no idea! Now copper is an essential nutrient so in general copper isn’t bad. However if we aren’t able to utilize it like we should or properly…
You would not believe some of the things that are used in our food. If you are looking for a great reason to stop eating processed foods then this may be it. 1. Castoreum: Also known as beaver anal gland…


Published: · Modified: by Rebecca Pytell · This post may contain affiliate links.
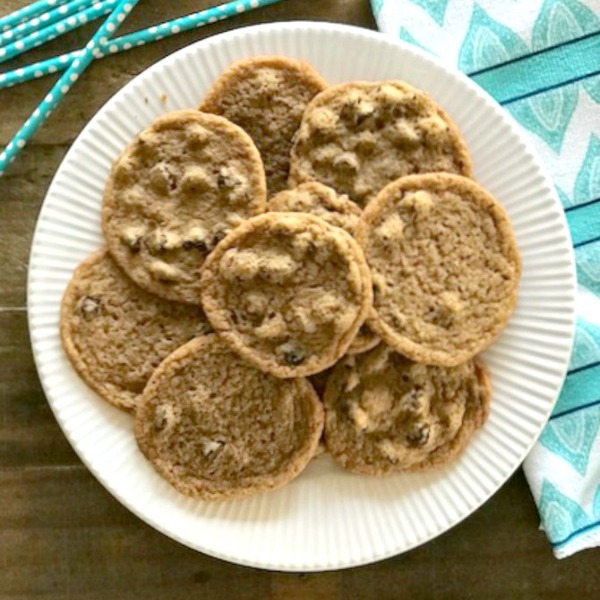
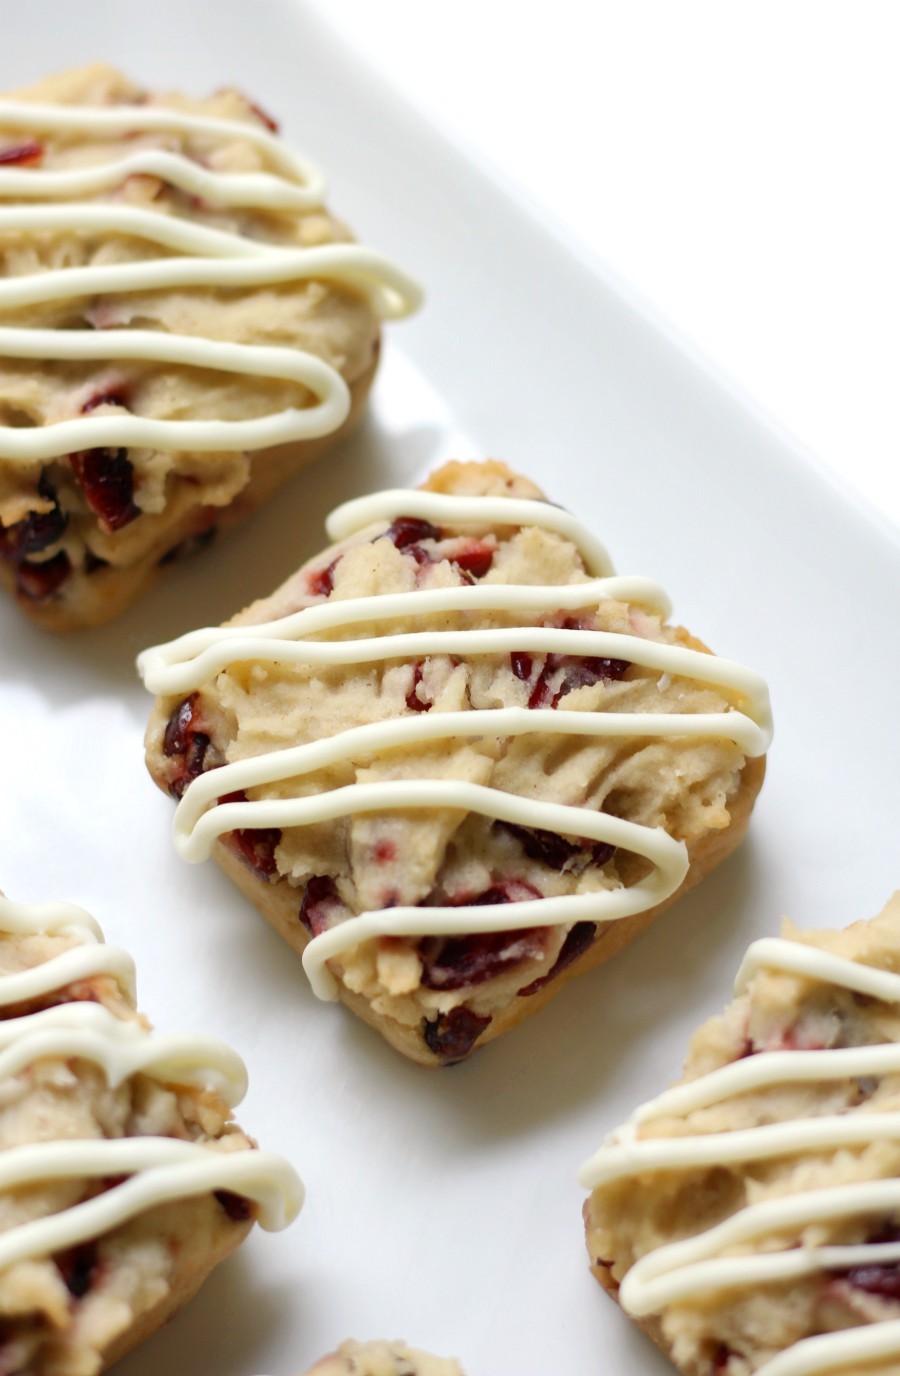
An easy homemade copycat recipe for the classic seasonal Starbucks treat! Gluten-Free Vegan Cranberry Bliss Bars that are allergy-free, perfectly baked blondie cake squares, loaded with dried cranberries, vanilla, citrus, and dairy-free white chocolate drizzle!

Caveat, no, I’ve never had a Starbucks Cranberry Bliss Bar and initially, I had zero intention of these cranberry bliss “squares” to even be a Starbucks copycat recipe. Alas, when all was said and done, that’s what came out of the Strength and Sunshine oven. Cranberry and white chocolate is such an iconic holiday combo; the perfect tart and sweet balance and just begging to be included on the holiday dessert table in some form or another!

A delicious sweet and tart combination of dried cranberries (craisins), vanilla, a touch of orange citrus, a buttery “blondie” cake, and white chocolate drizzle. The Starbucks version is descried as, “a blondie cake base topped with sweet cream cheese icing, tart dried cranberries and white orange drizzle“. My gluten-free, vegan, allergy-free bars nix the cream cheese icing and just use melted dairy-free/soy-free white chocolate as icing instead. Otherwise, the flavors are the same and the ingredients are just much more…friendly and free-from!
As I said, I had no intention (initially) of making a copycat recipe. So instead of having this recipe require you to bake a whole pan of blondies and then cut them into intricate triangle-shaped bars like the Starbucks version, I actually have a much easier, simpler, no fuss, no-cut method! I actually used (for the first time) this square, “brownie bar” pan that I snagged at a garage sale a few months ago for $2! It was brand new, pristine, and just begging for me to take home! You know how much I love collecting ALL the kitchen appliances and gadgets; so when I find a pan that would normally be $$$ but was only $2, well, can you blame me?

I assume Starbucks wants you to think they’re a nice sweet snack to have with your sugar-laden coffee dessert in a cup. Really, you’d just be consuming 2 desserts in one fell swoop. In one cranberry bliss bar at Starbucks you get a whopping 26g of sugar, 37g of carbs, 15g Fat (9g saturated), for a total of 300 calories. With my perfectly portioned, no-so-sinful cranberry bliss bars, you really can have them as a snack with your afternoon coffee or tea OR as a nice sweet dessert at the end of a holiday gathering. You know that we’re using Swerve as our sweetener so that slashes the sugar and carb count drastically!

Ah, the elusive SOY-FREE vegan white chocolate that is so hard to find. Or shall I say, “was”, hard to find! I used my favorite “Milkless Polar Dream White Chocolate Bars” from No Whey! Foods, but you can also use Pascha’s white chocolate baking chips or their white chocolate bar. Whichever you can easily get your hands on! I prefer the taste of the Polar Dream bars, but the Pascha baking chips are easier to “measure out”. However, can you really have too much drizzle?

5 Stars 4 Stars 3 Stars 2 Stars 1 Star
No reviews
An easy homemade copycat recipe for the classic seasonal Starbucks treat! Gluten-Free Vegan Cranberry Bliss Bars that are allergy-free, perfectly baked blondie cake squares, loaded with dried cranberries, vanilla, citrus, and dairy-free white chocolate drizzle!
*If you don’t have a brownie square baking pan, you can use a 9×9 square baking pan instead. You will have to cute 9 squares yourself, as you would with baking typical brownies or blondies.

I wouldn’t call these healthy, but I would call the “healthier” than your favorite seasonal Starbucks treat! Gluten-Free Vegan Cranberry Bliss Bars (or squares) for everyone! Top allergy-free and with a much, much shorter ingredient list! Plus they’re a fun dessert to bake up during the holidays when you need a change from all the CHOCOLATE baking that typically occurs…right? Because we all know that white chocolate isn’t really chocolate, eh?
So tell me:
+ What’s (or was) your favorite seasonal Starbucks treat? Not seasonal, but their banana chocolate chip bread was my mom’s and I’s favorite indulgence!
———————————————-
Stay connected:
Facebook: Strength and Sunshine
Twitter: @RebeccaGF666
Instagram: rebeccagf666
Pinterest: RebeccaGF666
Bloglovin’: Strength and Sunshine

