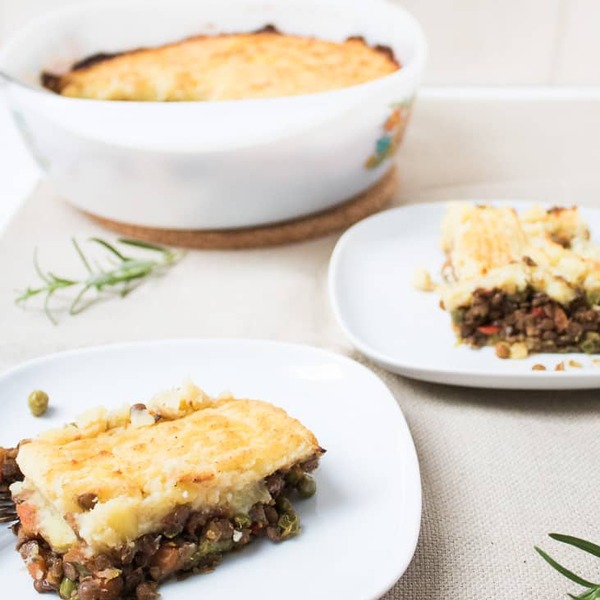
Shepherd’s pie is a popular traditional dish in England and Scotland. It’s mostly prepared with mashed potatoes, leftovers of roasted beef, veal or lamb meat and vegetables but often is cooked also with minced meat.
The variations regarding vegetables are different and depend on the housewife’s taste. I decided to make an absolutely vegan variation of this well known English meal… it’s done easily, takes about an hour but it’s very delicious…
I think that this recipe with lentils is very suitable for more special occasions, if we want to surprise our guests with vegan meal or to cook something a bit different for a vegan Christmas Eve
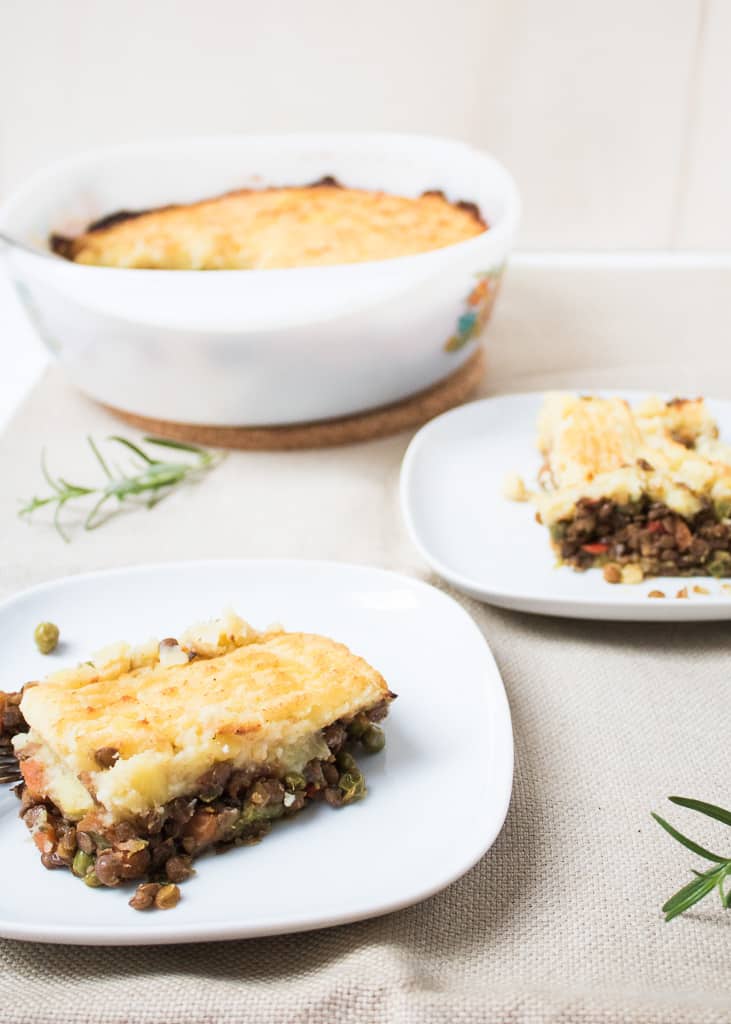
Vegan Shepherds Pie – Step by Step
VEGAN SHEPHERD’S PIE
Vegan Shepherd’s pie with lentils, peas and potatoes – one incredible and unknown dish. Lots of taste and aroma – try this interesting recipe and you’ll like it!
Prep Time 5 minutesminutes
Cook Time 1 hourhour
Total Time 1 hourhour5 minutesminutes
Servings 4people
Ingredients
1cuplentils
1cupgreen peasfrozen or canned
1onion
2clovesgarlic
1carrot
1red pepper
2cupbio vegetable stock
500-600gpotatoes
1table spooncoconut oil
1/2cupalmond milk or other vegan milk – oat, soy, etc.
1tea spoonoreganoor thyme
1table spoonfresh rosemary optional
3table spoonolive oil
salt
black pepper
1pinchnutmegoptional
Instructions
Peel the potatoes and boil them until they soften.
Peel and cut the onion and the garlic, cut the carrot and the pepper.
In a deep saucepan warm up some olive oil. Steam the vegetables until they soften. Add the lentils and pour the vegetable stock. Add marjoram or thyme and a little rosemary. Let the lentils boil until soft, it usually takes 25-30 minutes.
5-10 minutes before the lentils are completely boiled add the frozen peas and let it cook until the lentil is fully boiled. If needed, add more water.
In the mean time pour out the water from the boiled potatoes, add the coconut butter and the nut (oat) milk and mash the potatoes. You can use potato press but a fork can be used as well. Add some salt and a pinch of nutmeg.
Put the boiled lentils in a fireproof cookware and flatten it well, on the top put the mashed potatoes and flatten this layer as well. You can create an interesting effect on top of the mashed potatoes by drawing wavy lines with the fork.
Put it in the oven from 20-25 minutes at 200 degrees until the meal obtains a nice golden color.
These cute little vegan corn dog bites are a fun appetizer, snack, or lunch for vegan kids and anyone who is a kid at heart! Baked in mini muffin tins, you get all the flavor of corn dogs without the mess and since they are baked not fried, they’re a healthier alternative too!
Want to save this recipe?
Enter your email below and get it sent straight to your inbox. Plus, get more amazing vegan recipes that will satisfy your cravings!
My kids have always been intrigued by corndogs, but they could never have one because even the vegetarian varieties at the store were not vegan or gluten-free. I attempted to make them a few times, but it was always a lot of work and messy without great results. So I decided that it would be easier to bake them in muffin tins, and they were a hit!
You’ll love this recipe because it’s
fun to make and fun to eat!
gluten-free, dairy-free, and egg-free, so nearly everyone can enjoy them.
perfect for appetizers, picnics, or kids’ lunches.
delicious dipped in a variety of vegan sauces.
the perfect bite-sized snack!
Ingredients and substitutions
Cornmeal – any cornmeal will work. I usually use basic yellow cornmeal. Make sure to buy gluten-free if needed.
Flour – you can use all-purpose white flour, whole wheat, or a general gluten-free flour mix. I usually use my own all-purpose gluten-free flour recipe or a store-bought gluten-free mix.
Baking Powder – to make them rise a little.
Sea Salt – for flavor. You can also add a dash of garlic powder or onion powder to the batter for a little more flavor.
Sugar – for flavor. You can use any sweetener you wish like coconut sugar, agave, or maple syrup, or leave it out completely if you wish.
Oil – to make them moist. Use canola oil or light olive oil for a neutral flavor.
Vegan Hot Dogs – Tofu Pups, Smart Dogs, Tofurkey Hot Dog, or any type of veggie dog works well. The types that come in packs of 5 instead of 8 are slightly larger and work a little better. You will need about 3 of these large hot dogs.
Spray Oil – to grease the muffin tins so you can get them out easily.
Helpful tools
Mini Muffin Tins – for baking the corn dog muffins in.
Mixing Bowl – for mixing the cornbread batter.
Whisk – for stirring the batter
Fancy Toothpicks – for using them as handles to pick up the bites (optional). You can also cut lollipop sticks in half.
How to make vegan corndog bites
Step 1 – Preheat the oven to 400° F.
Step 2 – Spray the mini muffin tins with spray oil and set aside.
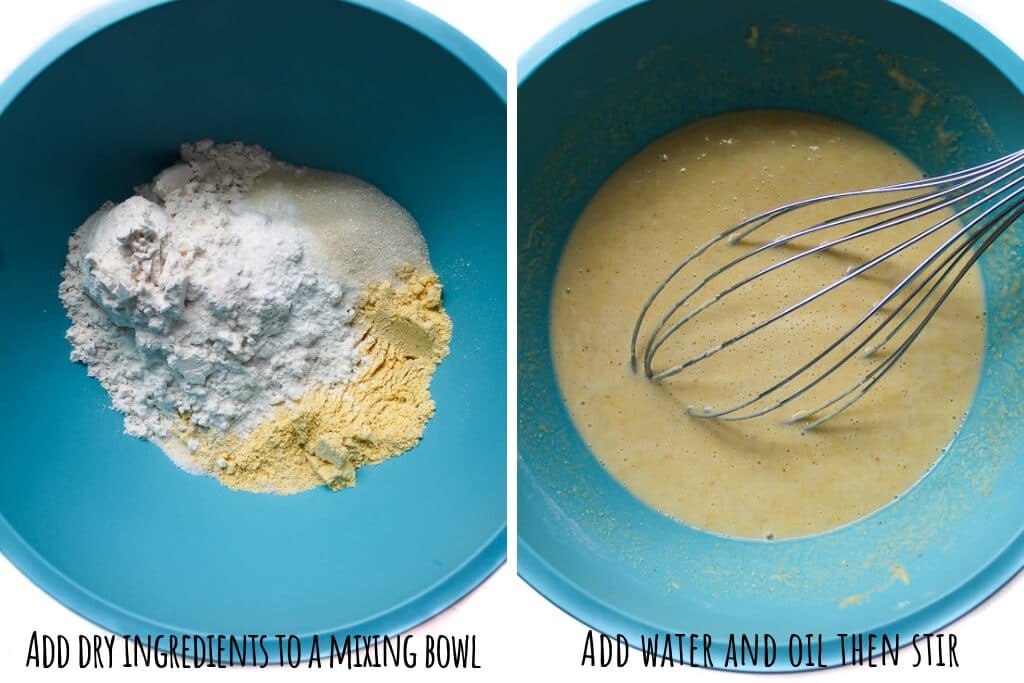
Step 3 – Measure out the dry ingredients for the cornbread batter in a mixing bowl.
Step 4 – Add the wet ingredients and stir well.
Step 5 – Pour the batter into the muffin tins filling them about 3/4 of the way full.
Step 6 – Cut up the vegan hot dogs into about 1/2-inch-sized pieces. (The same length as your tin is deep).
Step 7 – Press the hotdogs into the center of each muffin and stick a toothpick in it.
Step 8 – Bake at 400° F for 18-20 minutes until golden brown.
Step 9 – Serve with a dipping sauce of your choice.
Pro Tips
Make sure to oil the muffin tins so they come out easier.
If you are using a gluten-free flour mix that does not contain xanthan gum, add a teaspoon of xanthan gum along with the flour. (This will keep the corn dog from being too crumbly).
Dipping sauces
You can dip them in the standard ketchup or mustard or if you want to get a little fancier, you can use some of our favorite homemade vegan sauces.
These are our favorite sauces to dip the corndog bits into.
Vegan Barbecue Sauce
Vegan Honey Mustard
The Best Vegan Buffalo Sauce
Vegan Nacho Cheese Sauce
Plant-Based Chick-fil-A Sauce
Vegan Ranch Dressing
Vegan Honey
*The corn muffin recipe was adapted from my no-fail vegan cornbread recipe! If you love cornbread you have to give it a try! For a spicer cornbread, try my vegan jalapeno cornbread.
More vegan hot appetizers
Vegan Stuffed Mushrooms
Vegan Sausage Rolls
Polenta Pizza Bites
Vegan Spinach Balls
Fried Oyster Mushrooms
Tofu Fries
Zucchini Fries
Deep Fried Cauliflower
Vegan corndog bite recipe
Vegan Corn Dog Bites
Yield: 24bites
Prep: 10 minutesmins
Cook: 20 minutesmins
Total: 30 minutesmins
A vegan hot dog baked inside a mini corn muffin to make a bite-sized appetizer or kid-friendly snack.
3/4cupcornmeal, (use gluten-free if needed).
3/4cupflour, (use an all-purpose gluten-free flour mix if needed).
1 1/2tablespoonssugar
2teaspoonsbaking powder
1/2teaspoonsalt
1cupwater
1/4cupoil, canola oil or light olive oil works best.
3largevegan hot dogs
1spray oil
Heat the oven to 400°F (200°C).
Spray the mini muffin tins with spray oil and set aside.
Measure out the dry ingredients for the cornbread batter in a mixing bowl.
Add the wet ingredients and stir well.
Pour the batter into the muffin tins filling them about 3/4 of the way full.
Cut up 3 large vegan hot dogs in about 1/2 inch pieces. (The same length as the tin is deep).
Press the hotdogs into the center of each muffin and stick a toothpick in it.
Bake at 400°F (200°C) for 18-20 minutes.
Serve with a dipping sauce of choice.
Make sure to oil the muffin tins so they come out easier.
If you are using a gluten-free flour mix that does not contain xanthan gum, add a teaspoon of xanthan gum along with the flour. (This will keep the corn dog from being too crumbly).
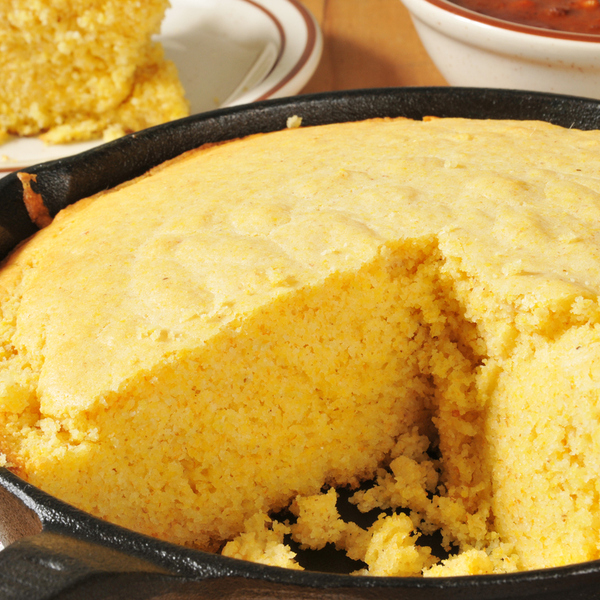
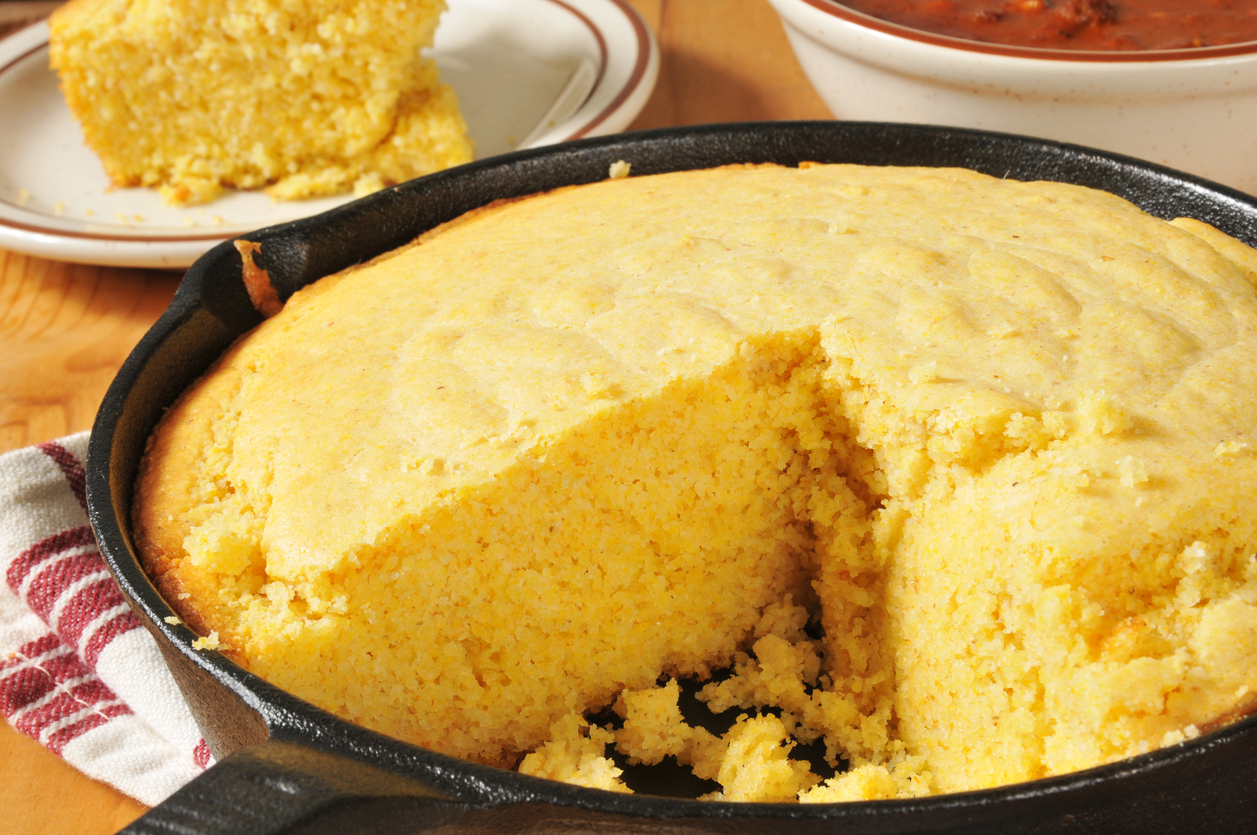
Corn casserole is a dish that is as easy to put together as a boxed cake mix is to transform into a cake – it’s a one-bowl sensation that takes minutes to prepare! Even so, the ingredients list is not exactly the most redeeming and could use a makeover. Traditionally, cornbread mix is folded into butter, sugar, eggs, sour cream, milk, and cream-style corn, and the result isn’t something that is doing your body any favors.
In this fluffy vegan cornbread casserole recipe, we not only nix the animal products but also embrace healthier versions of the refined sugar and flour. Cornmeal and spelt flour are supported by the sweetness of applesauce and the creaminess of vegan butter and nut milk. Baked to a warm, fluffy finish, the casserole tastes nothing like compromise and everything like the real deal.
What You’ll Need
The ingredients are pretty straightforward and not hard to find. When it comes to the almond milk, I strongly suggest making your own to avoid the sneaky sugar, stabilizer, and preservative add-ins.
Meanwhile, it’s important to note how you can turn this recipe gluten-free. Corn is naturally gluten-free, but the spelt flour and baking powder are not. To go gluten-free with this recipe, replace the spelt flour with oat flour or with a store-bought gluten-free flour mix. For the baking powder, all you have to do is replace the three teaspoons called for in the recipe with two teaspoons of cream of tartar and one teaspoon of baking soda.
Vegan Corn Casserole Recipe
Serves 8
Ingredients
1 1/2 cups cornmeal
1 cup spelt flour
3 teaspoons baking powder
1 teaspoon salt
1 1/2 cups almond milk
1/3 cup unsweetened applesauce
1/3 cup vegan butter, melted
2 tablespoons maple syrup
1 1/2 cups frozen corn kernels
4 scallions, finely chopped
Directions
Preheat the oven to 350 degrees Fahrenheit.
In a bowl, mix together the cornmeal, spelt flour, baking soda, and salt. Fold in the nut milk, applesauce, melted vegan butter, and maple syrup. Once well combined, stir in the frozen corn kernels and scallion. Stir until just combined and then transfer the mixture to a lightly greased casserole dish.
Pop the casserole dish into the oven and bake for about 45 to 55 minutes, or until the cornbread casserole is tender throughout and has a golden brown glow.
Serve while it is still warm to enjoy the casserole at its fluffiest. Once it cools, it will have a bread-like consistency.
Related on EcoSalon Southwestern Corn Pudding Recipe Crustless Corn and Zucchini Quiche Recipe A Vintage Revamp of Del Monte’s Creamed Corn
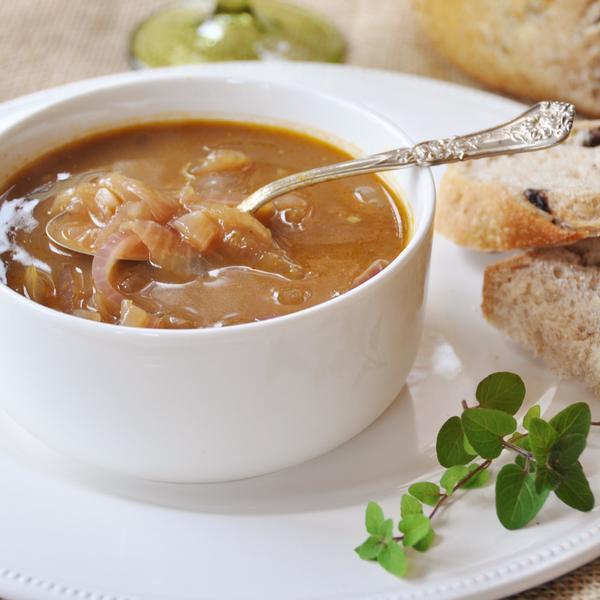
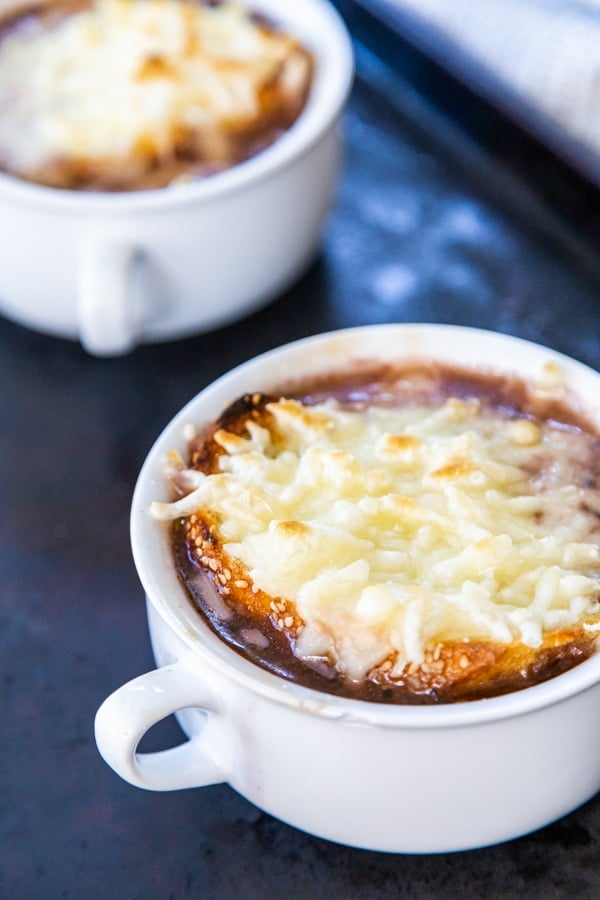
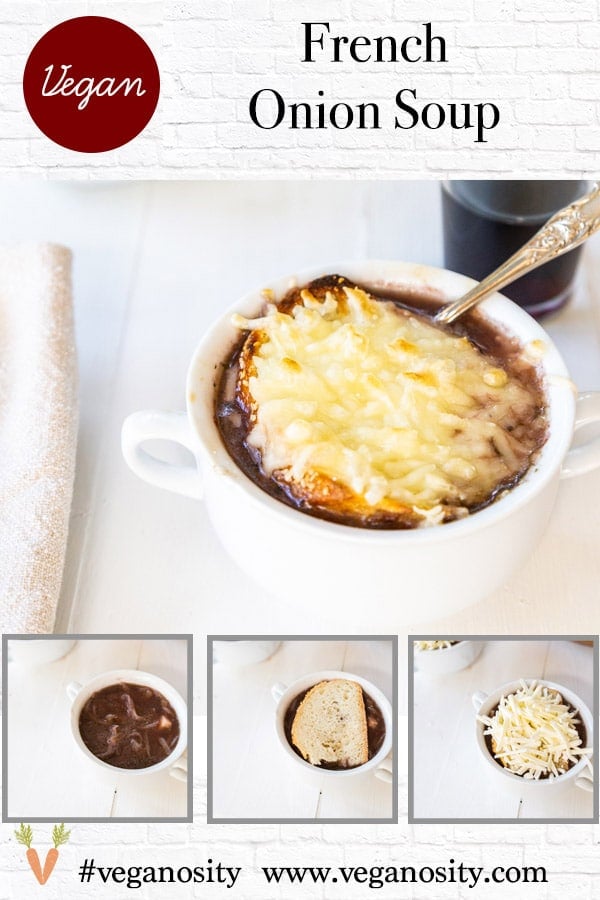
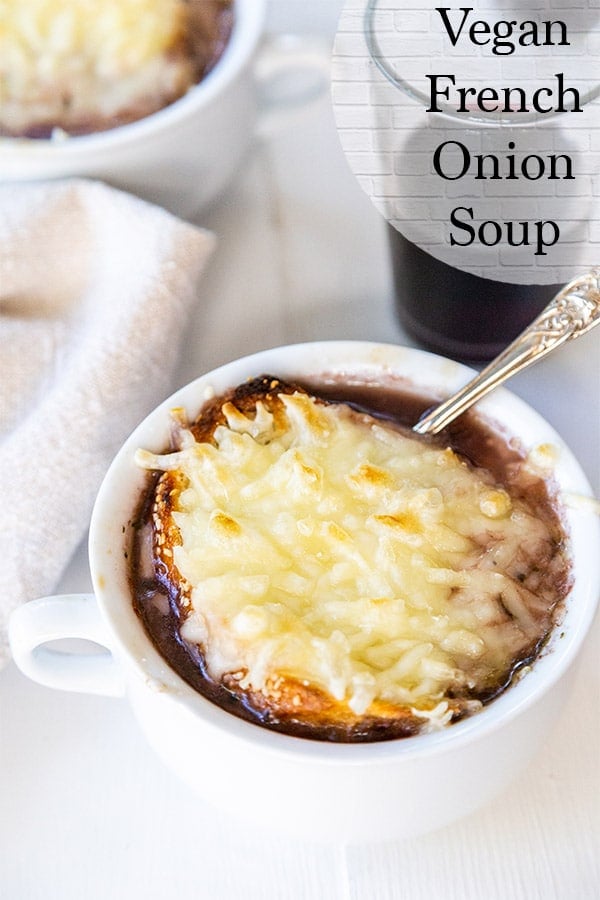
Easy Homemade Vegan French Onion Soup that tastes like traditional French onion soup, only this is made with vegetable stock and vegan mozzarella cheese. It has a rich and flavorful broth and gooey melted vegan mozzarella on top. SO GOOD! If you love caramelized onions as much as we do, this soup is going to rock your vegan life. So will our Onion Confit Tartlets and our Baked Onions with Fennel Breadcrumbs recipe.
This recipe was originally published on October 15, 2014 and updated on August 25, 2019.
This post may contain affiliate links which won’t change your price but will share some commission.
Hi there! We’re Linda and Alex, the mother daughter duo and creators of Veganosity. Thanks for visiting us, we’re so happy you’re here. If you’re looking for Southern inspired vegan comfort food recipes, you’ve come to the right place.
We love vegan comfort food and we’re really good at making it. Take a tour through our site and you’ll find all of the recipes that scream, stretchy pants required!
The good news, they’re all plant-based recipes, so you don’t need to feel guilty eating them. Now sit back, relax, and eat happy. 🙂
Also, in case you didn’t know, we’re published cookbook authors. We’ve written two vegan cookbooks that will help you make amazing vegan BBQ (you don’t even need a grill) and everyday meals, from breakfast to dessert.
Click on the titles to check them out. GREAT VEGAN BBQ WITHOUT A GRILLand THE ULTIMATE VEGAN COOKBOOK.
DAIRY-FREE FRENCH ONION SOUP
We’re not going to lie, when we went vegan (almost 6 years ago), we thought the days of making French onion soup were over.
Although we had used vegetable stock to make ours, because we didn’t eat beef or pork, we never thought that we could find a vegan mozzarella to layer over the soup and toasted bread.
Then we discovered that we could make our own plant-based mozzarella cheese and our lives were changed.
We’re so excited to share this easy French onion soup recipe with you, and can’t wait to hear what you think about it.
QUICK FRENCH ONION SOUP RECIPE
Add the word, French, to a recipe and people shy away. The French are known for creating complex and fancy foods that most home cooks are afraid to make.
Here’s the thing, this onion soup is SO easy to make!
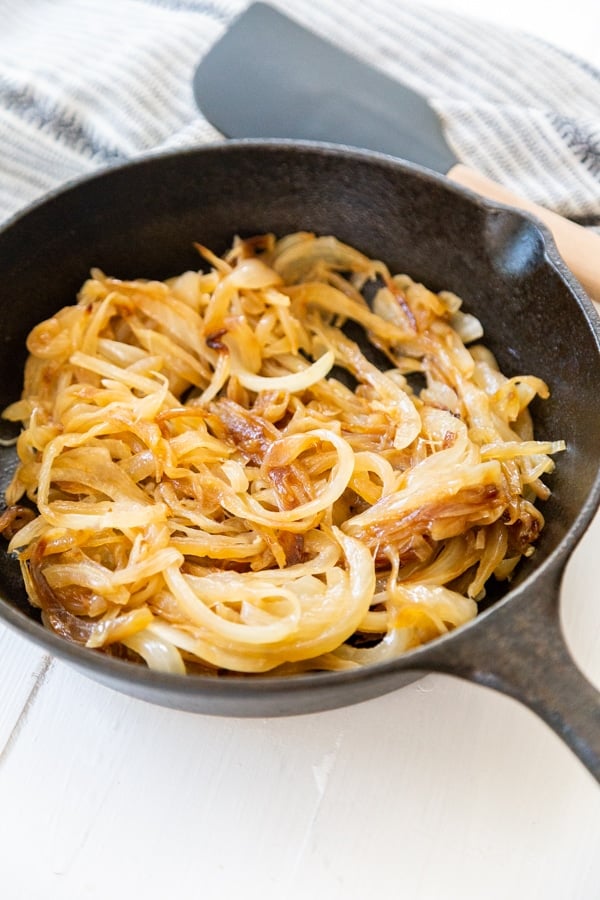
The most time-consuming part is caramelizing the onions, but that only takes about 15 minutes, and the way they’ll make your kitchen smell is totally worth it.
Once the onions are ready, it’s all about adding ingredients and stirring. EASY!
WHAT INGREDIENTS DO I NEED TO MAKE FRENCH ONION SOUP?
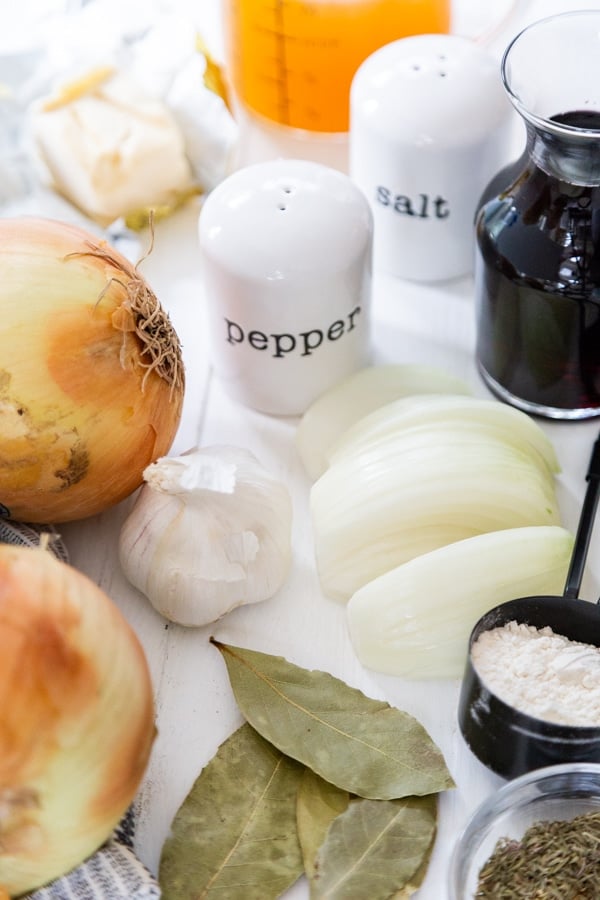
The ingredients in this homemade French onion soup recipe are super basic.
You’ll need:
White onions – they need to be thinly sliced. Make sure you slice them evenly so they cook evenly.
Vegan butter – we use Miyoko’s or Earth Balance
Extra-virgin olive oil – use the best quality oil you can find because flavor matters.
Garlic
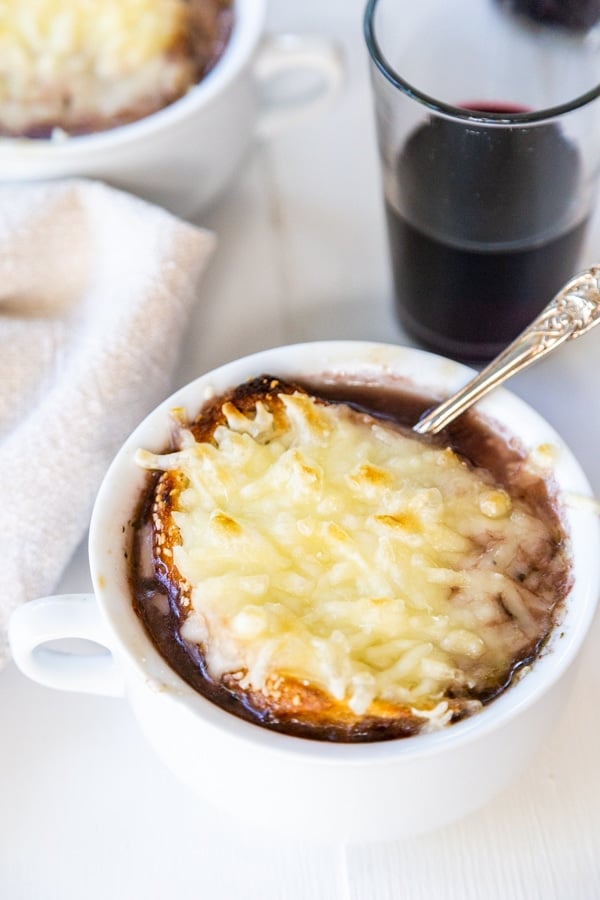
Red wine or balsamic vinegar if you don’t cook with wine.
Flour – this will give the soup body.
Vegetable stock or no beef broth
Bay leaves
Thyme
Sea salt and black pepper to taste
TOPPINGS
Sliced and toasted French bread
Vegan mozzarella cheese – there are several brands we like. Violife shredded or Miyoko’s Mozz are our favorites.
Toppings are optional. Feel free to eat the soup without if you want.
HOW DO YOU MAKE VEGAN FRENCH ONION SOUP?
The base of vegan or vegetarian French onion soup is the same, you swap out the beef broth for a plant-based broth.
To make it more flavorful we buy vegetable stock. Stock is richer than broth and works best for this soup.
You can also buy a no-beef bouillon if you like. Just follow the instructions to make 64 ounces of broth.
STEP ONE
Caramelize the onions in the butter and olive oil.
This will take approximately 15 minutes and you’ll need to stir the onions often to prevent them from burning.
STEP TWO
Add the wine or vinegar and stir. Cook until it reduces to a thick gravy like consistency.
STEP THREE
Sprinkle the flour over the onions and stir to coat.
The flour adds body to the soup.
STEP FOUR
Add the garlic and cook for 1 minute, then add the stock/broth, thyme, and salt and pepper and bring it to a boil.
Reduce the heat and simmer for 15 minutes.
STEP FIVE
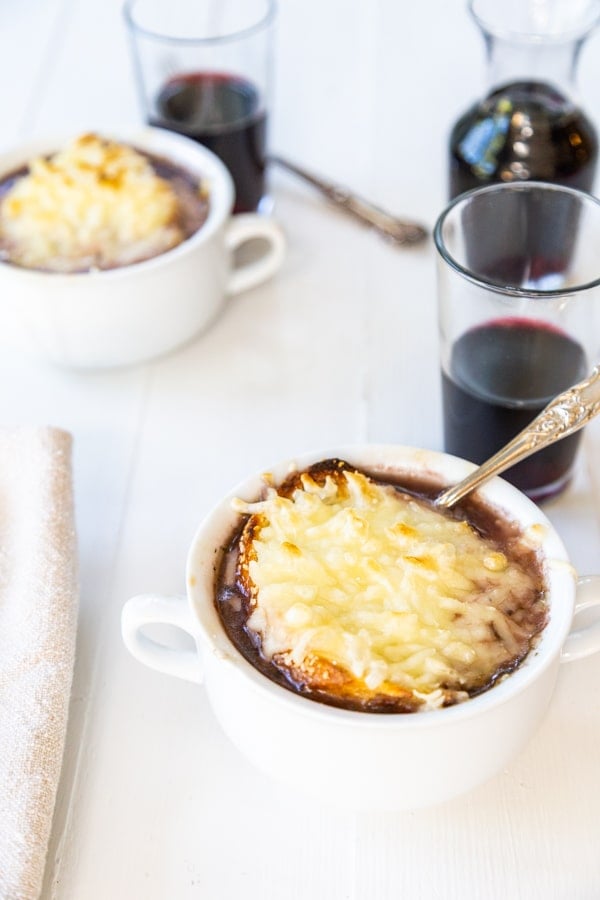
Fill the bowls with the soup and put a piece of toasted bread on top and then cover with shredded vegan mozzarella cheese.
Put the bowls under the broiler and let the cheese melt and bubble.
Make sure to watch the soup carefully when broiling so it doesn’t burn.
HOW TO MAKE QUICK CARAMELIZED ONIONS
There isn’t a way to hurry up caramelized onions. They need time.
If you turn the heat up, you’ll burn them. It’s just reality, my friend.
Having said that, it only takes 15 minutes to caramelize onions for French onion soup because you want them to be lightly caramelized.
If you’re caramelizing onions until they’re completely caramelized and a deep golden brown, you’ll need to set aside approximately 20 minutes.
STEP ONE
Heat the vegan butter and olive oil over medium heat until the butter is just beginning to bubble.
Add the thinly sliced onions and stir to coat in the butter and oil.
NOTE: Make sure you slice the onions evenly so they cook evenly.
STEP TWO
Cook the onions on medium heat until they soften then reduce the heat to medium-low and cook for approximately 15 to 20 minutes, depending on how brown you want them to be.
Stir often.
CAN YOU MAKE FRENCH ONION SOUP WITHOUT WINE?
Yes, you absolutely can.
If you don’t cook with alcohol, you can substitute a good balsamic vinegar for this recipe.
The wine adds a lovely flavor and acid to the soup, and although the flavor of balsamic isn’t quite like wine, it gets the job done.
You can also caramelize onions with balsamic vinegar whenever a recipe calls for wine.
ARE ONIONS HEALTHY?
Yes! Here are some of the nutrients they provide:
Vitamin C
Fiber
Calcium
Iron
Protein
They’re also low in sodium and are fat free. To read more about this amazing plant food, click HERE.
MORE VEGAN SOUP RECIPES YOU’LL LIKE
ITALIAN LEMON ROSEMARY BARLEY SOUP
SPICY GREEN CAULIFLOWER AND BRUSSELS SPROUTS SOUP
CREAMY ROASTED CARROT, GARLIC, AND ROSEMARY SOUP
VEGAN MINESTRONE SOUP WITH ARUGULA
VEGETARIAN TORTILLA SOUP
Make our homemade easy vegan French onion soup and let us know what you think. We love to hear from you! And, don’t forget to take a picture of your gorgeous creation and tag us @veganosity on Instagram.
Let’s connect on Instagram andTwitter. You’ll get a peek into our everyday lives in our stories and see what we’re sharing in our feed.
And, don’t forget to SUBSCRIBE to the blog so you never miss a recipe. Scroll below the recipe or in our side bar to become a Veganosity subscriber.
PIN ME
EASY HOMEMADE VEGAN FRENCH ONION SOUP
A French onion soup recipe that’s made with a vegetable stock and vegan butter and mozzarella cheese. It has all of the flavor and none of the cholesterol that you’d find in a traditional onion soup recipe.
Print
Pin
Rate
Course: Entree, Main Course, Soup
Cuisine: French, Vegan
Prep Time: 15 minutesminutes
Cook Time: 40 minutesminutes
Total Time: 55 minutesminutes
Servings: 8servings
Calories: 166kcal
Ingredients
4tablespoonvegan butterwe use Miyoko’s or Earth Balance
2tablespoonextra-virgin olive oil
6cupswhite onionthinly sliced
3garlic clovesminced
1cupred wine(or 1 tbs red wine vinegar if you don’t drink wine)
2tablespoonflour
64ouncevegetable stock
2bay leaves
2teaspoondried ground thyme
sea salt and black pepper to taste
TOPPINGS
Sliced and toasted French bread
Vegan mozzarella cheesesee note
Instructions
Heat the 4 tablespoon butter and 2 tablespoon olive oil in a stock pot over medium-high heat.
When the butter is melted and beginning to bubble, add the onions and stir to coat in the butter and oil.
Stir the onions often, and once they soften (approximately 5 minutes), reduce the temperature to medium-low heat and continue to stir until they lightly caramelize, approximately 10 to 15 minutes. They should be a light golden color.
Add the 1 cup of wine or 1 tablespoon of balsamic vinegar to the onions and stir to coat. Cook for approximately 5 minutes, or until the liquid is reduced.
Add the 2 tablespoon flour and stir to coat the onions. Cook for one minute.
Add the garlic and cook for one more minute.
Pour in the 64 oz of vegetable broth, 2 teaspoon dried thyme, 2 bay leaves, and salt and pepper to taste. Bring to a boil and then reduce the heat to a simmer for 15 minutes.
Fill 6 to 8 bowls with the soup and then place one slice of toasted bread on top of the soup and sprinkle a liberal amount of the vegan mozzarella on top of the bread and broil until the cheese is melted and browned on the edges. Keep your eyes on it the ENTIRE time it’s under the broiler so it doesn’t burn.
Notes
NUTRITION DISCLAIMER
We use Violife shredded vegan mozzarella or we shred Miyoko’s vegan mozz. You can also make your own. Click HERE for the recipe.
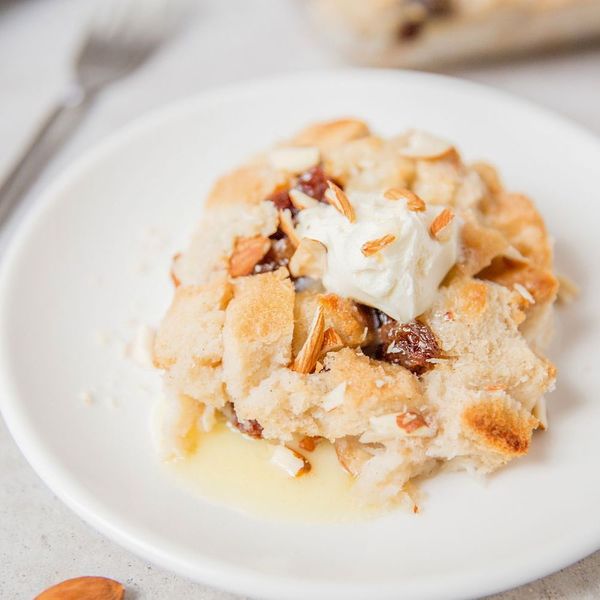
Bread pudding is a homey, comfort food dessert. if you have bread that is going stale, bread pudding is a great way to use it; it’s an old-fashioned dessert borne of kitchen efficiency, with the idea of nothing go to waste.
Typical bread pudding includes eggs, cream, or milk, but you don’t need any of these for a vegan bread pudding version. If your diet doesn’t include dairy, you probably have all or many of the ingredients already. It includes cinnamon and raisins, which are common additions to classic bread pudding recipes. This eggless bread pudding recipe is also low in fat, without any margarine, oil, or egg replacer.
Feel free to dress it up and top the bread pudding with a dollop of vegan tofu whipped cream, fruit compote, or fresh berries. A vegan rum sauce is a tempting option that makes a nice brunch dish to serve the family, especially during the holiday season.
Feel free to alter the recipe the next time you make it, adding in nondairy chocolate chips, toasted and chopped nuts (walnuts or pecans are good), or citrus zest. Sprinkle some confectioners’ sugar on top before serving. Bread pudding is endlessly adaptable.
Reprinted with permission from The Compassionate Cook Cookbook.
The Spruce / Ahlam Raffii
Cook Mode (Keep screen awake)
4 cups day-old, egg-free bread, cut into 1-inch cubes
3cupssoy milk
3/4cupgranulated sugar
1tablespoonvanilla extract
1tablespoonground cinnamon
1cupraisins
1/2cupchopped almonds
Vegan whipped cream, fruit compote, or sliced fresh berries, for garnish
Gather the ingredients.
The Spruce / Ahlam Raffii
Preheat oven to 350 F. Place bread in a 9-inch square baking pan.
The Spruce / Ahlam Raffii
In a large bowl, combine soy milk, sugar, vanilla extract, ground cinnamon, raisins, and chopped almonds. Stir well.
The Spruce / Ahlam Raffii
Pour mixed ingredients over bread. Stir to mix.
The Spruce / Ahlam Raffii
Bake for 30 minutes.
The Spruce / Ahlam Raffii
Serve warm or cool with vegan whipped cream, fruit compote, or sliced fresh berries. Enjoy.
The Spruce / Ahlam Raffii
Tips
This bread pudding may be made the night before, but not much longer than that because it gets soggy if it sits too long before baking. Cover and refrigerate it until you’re ready to bake it as directed.
If you don’t have soy milk, other plant-based nondairy milks will work, too, such as almond or oat.
How to Store and Freeze Vegan Bread Pudding
You can keep bread pudding in the refrigerator, covered, for up to 5 days. Reheat bread pudding in the oven at 350 for about 15 minutes until it’s warm.
Bread pudding freezes well. If it’s wrapped well, it can keep in the freezer for 3 to 4 months. Reheat it right in the oven (375 F) for 20 to 30 minutes until it’s warmed all the way through again.
Nutrition Facts (per serving)
368
Calories
9g
Fat
66g
Carbs
9g
Protein
×
Nutrition Facts
Servings: 6
Amount per serving
Calories
368
% Daily Value*
9g
11%
Saturated Fat 1g
6%
0mg
0%
244mg
11%
66g
24%
Dietary Fiber 4g
14%
Total Sugars 46g
9g
Vitamin C 1mg
3%
Calcium 241mg
19%
Iron 2mg
14%
Potassium 457mg
10%
*The % Daily Value (DV) tells you how much a nutrient in a food serving contributes to a daily diet. 2,000 calories a day is used for general nutrition advice.
(Nutrition information is calculated using an ingredient database and should be considered an estimate.)
Rate This Recipe
I don’t like this at all. It’s not the worst. Sure, this will do. I’m a fan—would recommend. Amazing! I love it! Thanks for your rating!
Happy day after Christmas! I hope you’re feeling rejuvenated after family time, good food and a big dose of the holiday spirit.
I spent the day making cinnamon rolls and catching up over mimosas, which was needed after a crazy past few weeks gearing up for our healthyglow.co launch. (Ladies, If you haven’t signed up to receive emails, DO IT!)
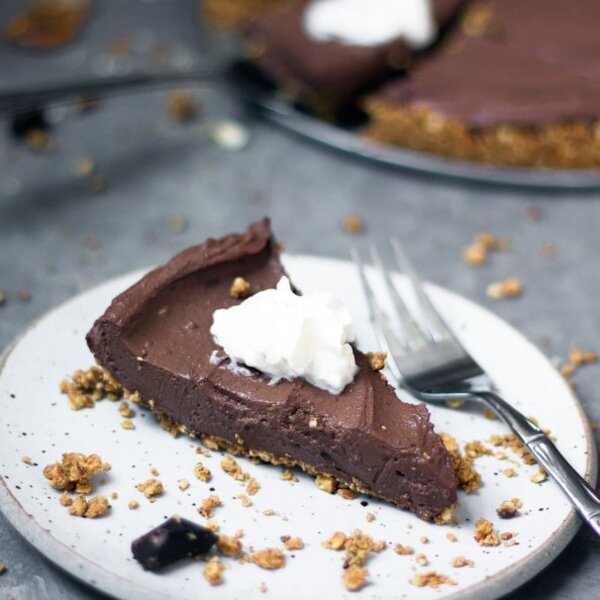
” title=”Creamy vegan chocolate tofu cheesecake with a sweet and salty peanut butter pretzel crust. Absolutely to die for & almost no bake!” width=”1067″>
Before we all decide to forgo sweets for the New Year, I wanted to share an exciting new partnership with you all. That’s right, in 2017 AK is going to be making a few delicious recipes with Nasoya tofu! Nasoya makes everything from silken and firm tofu to wonton wraps and tofu pasta.
If you haven’t had tofu before, why not try it out? There are several ways to introduce it into your diet and start making a few unique recipes. From vegan tofu cheesecakes to tofu stir-fry, I’m going to be cooking up tofu goodness in 2017.
” title=”Creamy vegan chocolate tofu cheesecake with a sweet and salty peanut butter pretzel crust. Absolutely to die for & almost no bake!” width=”1067″>
I wanted to end the year on a sweet note with this gorgeous chocolate vegan tofu cheesecake. Yep, you read that right, a delicious cheesecake made with protein-packed organic tofu, dark chocolate, vanilla and a splash of coffee.
All you have to do is blend the ingredients together to make the pie. EASY!
” title=”Creamy vegan chocolate tofu cheesecake with a sweet and salty peanut butter pretzel crust. Absolutely to die for & almost no bake!” width=”1067″>
I have to admit that the flavor of this cheesecake was a little bit surprising. I thought I’d be disappointed, but my Mom has been making a recipe similar to this for years, and she encouraged me to try it out. Can I just say WOW?! Mom knows best.
The flavor is a cross between rich chocolate pudding and chocolate mousse. So if you’re a chocolate lover like me, you need to get on this recipe STAT.
” title=”Creamy vegan chocolate tofu cheesecake with a sweet and salty peanut butter pretzel crust. Absolutely to die for & almost no bake!” width=”1067″>
I hope you’ll give this tofu cheesecake a try. It’s perfect for vegans or those who are avoiding dairy, or for experimenters who are looking for lighter dessert.
Optional: 1-2 tablespoons pure maple syrup, to enhance sweetness, if desired
Instructions
Preheat oven to 350 degrees.
In the bowl of a food processor, add in pretzels and pulse until they are finely ground and resemble a crumbly flour, about 1 minute.
Next add in creamy peanut butter, melted coconut oil and coconut palm syrup. Pulse again for 30 seconds until well combined.
Dump into a 9-inch spring foam pan and use your hands to spread crust evenly towards the sides, pressing firmly as you go.
Once your crust is ready, bake for 10 minutes. Allow crust to cool while you make the filling.
First melt the chocolate in a small saucepan over low heat, stirring frequently until smooth and completely melted. Set aside.
Make the filling by adding silken tofu, melted chocolate, vanilla and coffee to a clean bowl of a food processor or high powered blender. Blend until creamy and smooth. Taste and add maple syrup if necessary to enhance the sweetness.
Pour over crust, spread evenly towards the sides and smooth the top. Cover and refrigerate for 1-2 hours, or overnight. Cut into 12 slices. Enjoy with fresh berries and coconut whipped cream!
This post is in partnership with Nasoya. Thanks for supporting AK and the brands that help make this site possible!
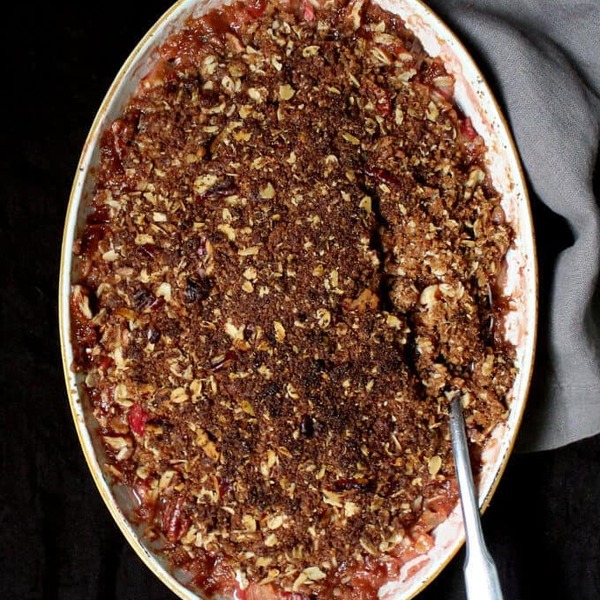
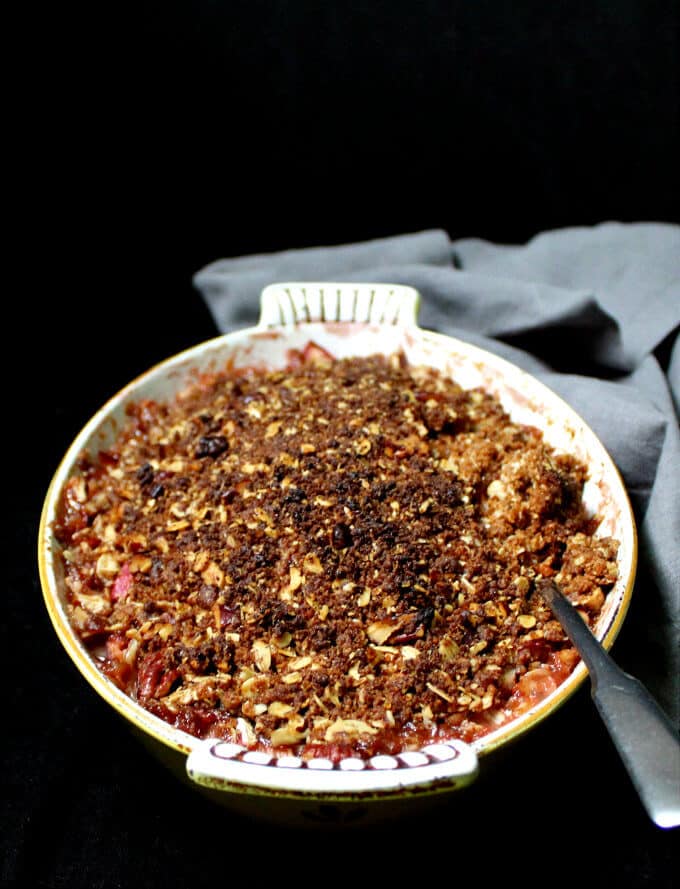
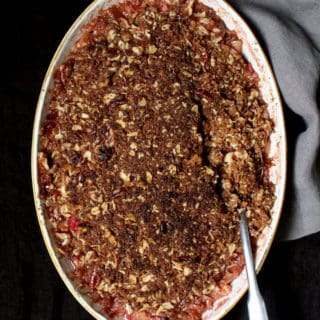
A vegan rhubarb crisp that is easy as pie to make. A gooey, jelly-like, tart rhubarb filling is topped with a golden, delicious, oat and nut crisp. Can be a gluten-free recipe. Perfect for breakfast or dessert.
I woke up yesterday, excited to bake up this sumptuous dish for my family: a gorgeous, tart-sweet Vegan Rhubarb Crisp that tastes good enough for dessert but makes a perfect breakfast.
I love rhubarb and I can’t get enough of it in the few weeks of spring that it’s available. It makes great recipes, sweet and savory, and it’s rather perfect in a rhubarb cake, a rhubarb pie, a rhubarb galette, or even a sweet rhubarb bread.
When I have too much of it on hand, lucky me, I turn it into a rhubarb jam.
I’d been longing to make a rhubarb crisp for a while, and I came across a Mark Bittman recipe that seemed really straightforward and yet sounded utterly delicious. It needed just a little veganizing, and I also used natural sweeteners like maple syrup and coconut sugar instead of white and brown sugar, making the crisp healthier and more breakfast-worthy.
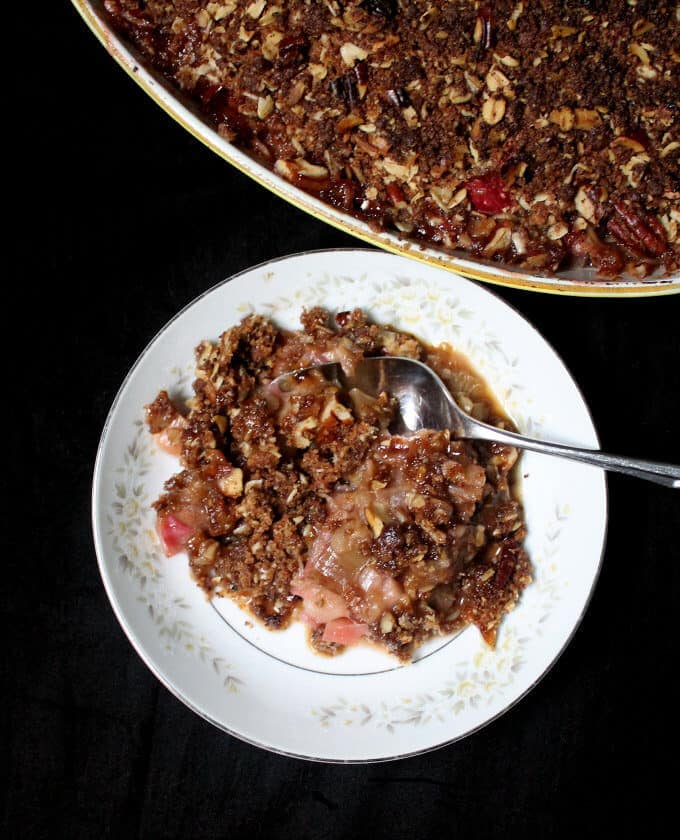
In the end, it was truly the perfect breakfast, and it was kid friendly as well, because Jay guzzled it down. If you have a mind to, serve it with a dollop of whipped cream, although the crisp itself is sweet enough and a great foil to the tart rhubarb.
Ingredients you will need for the perfect Vegan Rhubarb Crisp:
Rhubarb, of course. If the stalks are thick or tough, you might need to peel them, the way you would peel celery. Younger stalks don’t need any peeling. The color of rhubarb tends to vary, with some stalks being a dark pink and others almost green. The more colorful stalks make your dish prettier, but don’t really affect the flavor, so don’t worry if you can’t find beautifully colored rhubarb.
Lemon zest and juice. The essential oils in the zest add a welcome je ne sais quoi dimension to the recipe.
Maple syrup. I love the rich sweetness of maple combined with the tart flavor of rhubarb. There’s just a small quantity of maple syrup, so it doesn’t really take away the tartness. What it does, though, is that it takes away the edge off the tartness.
Coconut sugar: I use coconut sugar often in place of brown sugar. It has a rich, deep flavor and it’s said to be healthier than refined sugars because it has a lower glycemic index and is more slowly absorbed by the body, making it more diabetic-friendly than regular sugar. Important to remember, of course, that it is still a sugar and therefore should be eaten in moderation.
Vegan butter. I usually use oil in baking cakes but for pies and crisps I do prefer butter for the flavor. In this crisp, the butter is an important ingredient and not one I’d leave out.
Unbleached all purpose flour. You can totally make this entire dish gluten-free by using gluten-free all-purpose flour. Or make it even more healthy-ish by using whole wheat flour. Keep in mind that whole wheat won’t crisp as much.
Cinnamon adds a tremendous hint of flavor without overwhelming in this crisp. Use nutmeg for a great variation, or even a dash of ginger. I love the rhubarb-ginger combination.
Rolled oats. These go into the crisp. If you are doing this gluten-free, make sure you use gluten-free oats.
Pecans. These really take the crisp into sublime territory, adding richness, nuttiness and even more healthiness into the mix. Sub with walnuts for equally good results.
How to ensure you get a perfect Vegan Rhubarb Crisp:
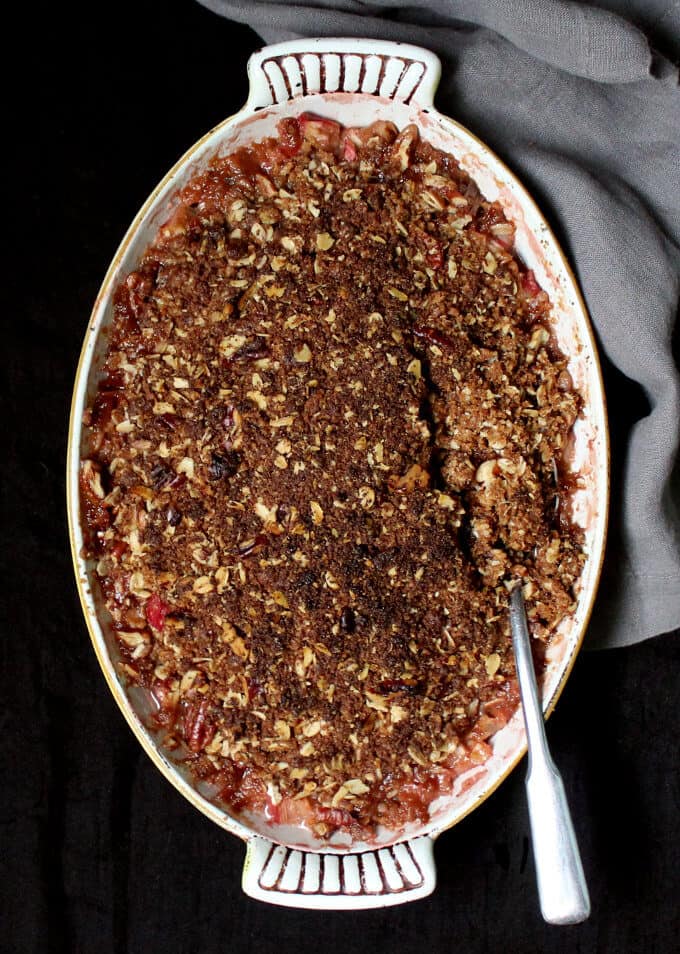
Use the right kind of baking dish. Cast iron is terrific. I have an enameled cast iron casserole I used, but an 8 or 10 inch cast-iron skillet would work too. If you have neither, use a regular gratin or baking dish.
Make sure to peel your rhubarb if it is tough, even if it means losing the pretty pink outer layer. It won’t affect the taste to lose the color. Cut your rhubarb into even pieces. I like a smallish cut, about ½ inch.
Cut the butter into smallish pieces, and make sure it is evenly dispersed through the crisp topping. If you work with a food processor, it will do the trick for you.
Make sure you add the nuts to the food processor at the end, and once you do, don’t overprocess. You want the nuts to be in small pieces, not in a powder, so you can feel them crunch between your teeth when you eat the crisp.
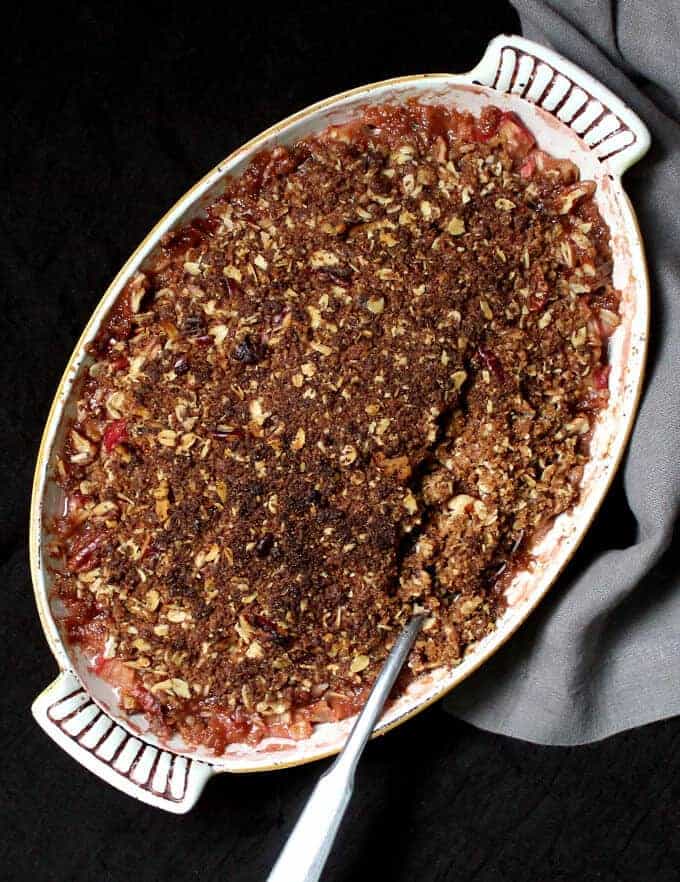
Make sure you let the crisp stand for at least 15 minutes after you take it out of the oven to let the juices thicken, otherwise it will seem a little watery.
I will leave you now with the recipe. If you can still find rhubarb in your market, I hope you will try it. Otherwise file it away for next spring, when it stages a return. I don’t let spring ever pass me by without cooking with this delicious ingredient at least once, and neither should you.
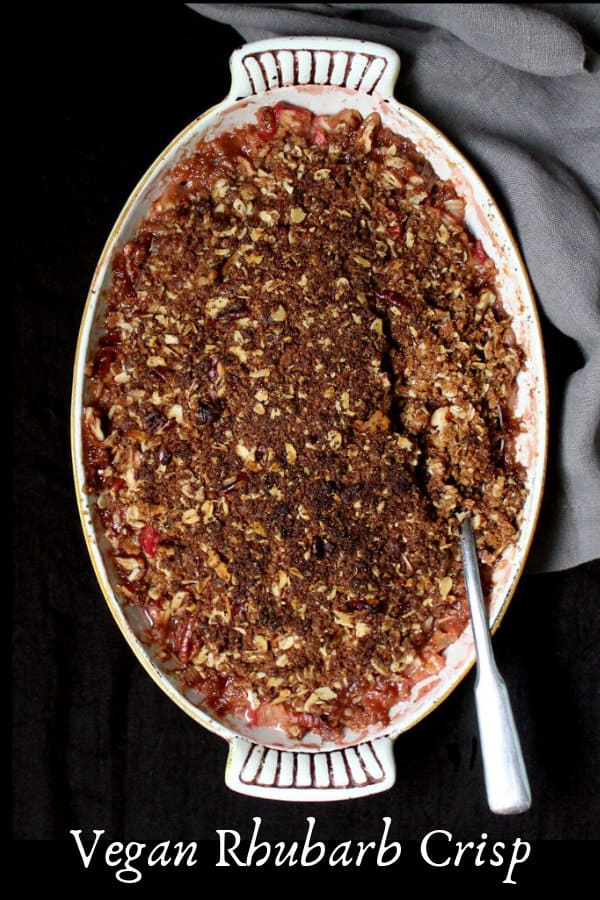
Vegan Rhubarb Crisp
Vaishali · Holy Cow Vegan
This vegan rhubarb crisp is not just delicious and decadent, it is also healthy and can double up both as breakfast or dessert. A gooey, jelly-like, tart rhubarb filling is topped with a golden, delicious, oat and nut crisp. You can also make this recipe gluten-free.
Prep Time 15 minutesmins
Cook Time 50 minutesmins
Total Time 1 hourhr5 minutesmins
Course Breakfast/Dessert
Cuisine American, Can be Gluten-Free, Soy-free, Vegan
Servings 8servings
Calories 239kcal
Equipment
Food processor, baking dish or a cast iron skillet, bowl for mixing
Ingredients
5stalksrhubarb(about 5 – 6 cups, cut in ½-inch pieces)
1lemon(juice and zest)
¼cupmaple syrup
6tablespoonvegan butter(cold, cut into ½-inch cubes)
½cupunbleached all purpose flour(use gluten-free all-purpose flour for a gf version)
¾cupcoconut sugar(turbinado sugar is a fine substitute. Or use brown sugar)
½teaspooncinnamon(try nutmeg or ginger for a slight variation)
½cuprolled oats
½cuppecans
Instructions
Preheat the oven to 375 degrees.
Toss the rhubarb with the lemon zest and juice and the maple syrup. Lightly grease the baking dish or cast iron skillet and place the rhubarb in it in an even layer.
Make the crisp by adding all ingredients to the food processor except the pecans. Pulse a few times until the mixture becomes grainy and the butter is evenly dispersed.
Add the pecans to the food processor and pulse 2-3 times more until the pecans are chopped up into smallish pieces but not powdery.
Scatter the topping over the rhubarb in an even layer.
Place the baking dish in the oven (I always place a baking sheet under the dish when I bake pies or crisps in case some of the juices bubble over). Bake 50 minutes until the top is golden-brown and the rhubarb is bubbling from the sides.
Remove to a rack and let stand 15 minutes before serving.
Tried this recipe?Let us know in the comments below!
About Vaishali
Hi! I’m Vaishali, a journalist turned food blogger. At Holy Cow Vegan I share easy, tasty recipes made with clean, wholesome ingredients that the entire family can enjoy.
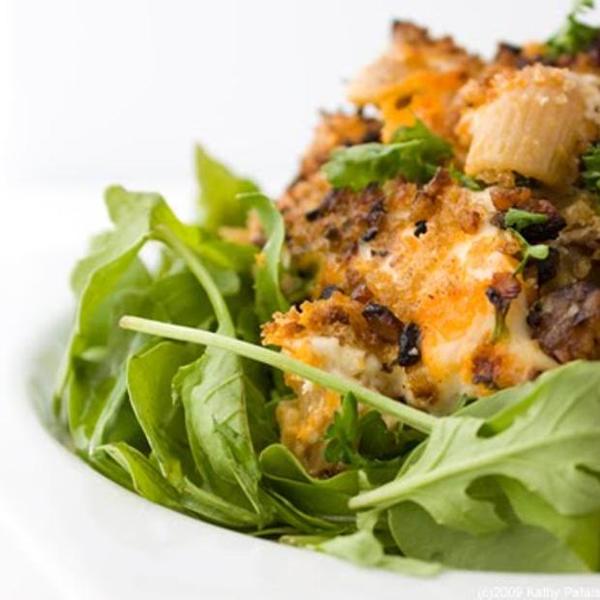
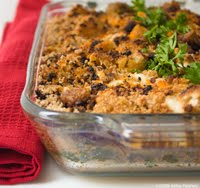
Vegan Mac-n-Cheese. Everyone should have their own recipe to pull out when they crave it. But I must warn you, my vegan Mac-n-Cheese recipe is not like most. It breaks a few vegan-mac-n-“cheese” rules. There’s no nutritional yeast, I don’t make a roux and I add a lot of ingredients that aren’t typically associated with Mac-n-Cheese. Like lots of greens. And mushrooms. And orange juice. And plenty of Butternut Squash. It’s anything but typical, but who can argue with yumminess. Pasta, sans Tomatoes. Sometimes I crave pasta, but I’m not in the mood for tomatoes, aioli is too simple and I’m all out of fresh basil for pesto sauce. This ‘cheesy’ butternut squash-infused sauce is perfect. Customize it to your Mac-n-Cheesiest dreams. You can have more cheese, less bread crumbs, more spiciness, less mushrooms. Make my Mac-n-Cheese, you own. Here is my recipe and a few rules I break…
The typical “Vegan Mac-n-Cheese” Rules I break:
Rule # 1: Nutritional Yeast. So many vegan Mac-n-Cheese recipes use Nutritional Yeast as the ‘cheese’. I certainly love that idea, but it’s not my style. I prefer to get my flavor and orange color from butternut squash and vegan cheddar cheese. That’s just how I like it.
Rule #2: Make a Roux. Roux’s are generally used as sauce thickeners. If you are using nutritional yeast, a roux is a good idea. But like I said, my butternut squash ingredient adds all the ‘cheese-esque’ thickness I could ever want. So I skip the ‘roux’ step.
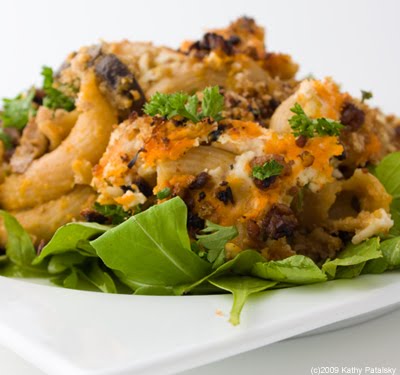
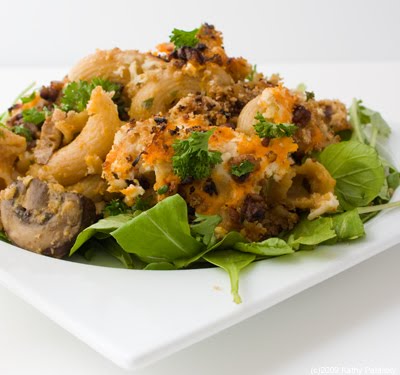
Rule #3: Greens? What Greens? Usually Mac-n-Cheese is served in heaping spoonfuls in a big bowl or mini-skillet. It’s the main attraction. But I just can’t get through a pasta meal without a lot of greens, so I basically grab a big handful of arugula and spinach and lay it on my serving plate. The small scoop of mac-n-cheese goes on top. Easy. The greens act as the main part of my bites, the mac-n-cheese is more a flavor enhancer to my delicious greens, rather than the main attraction. Yes it turns the beautiful neat pasta into kinda a bit pasta salad mess…but its a delicious mess.
Rule #4: White macaroni is traditional. No thanks on the ‘white pasta’ tradition. I much prefer whole wheat, spelt or quinoa pasta any day of the week. Healthier and heartier.
Rule #5: What mushrooms? I love adding a few sauteed mushrooms to my mac-n-cheese. If adds flavor and healthy mushroom goodness.
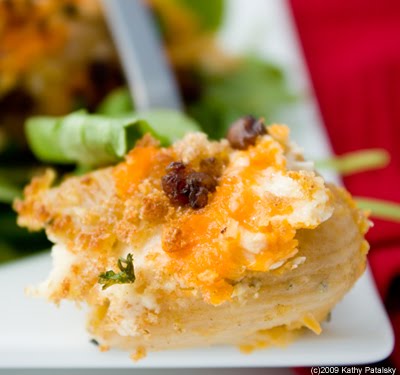
Cooking by Some Rules: *Yes on the bubbly brown cheesy top. Must have that. *Yes on a few bread crumbs on top for texture, but I use whole wheat panko crumbs. *Yes on the vegan cheese! Some vegan mac-n-cheese doesn’t even use ‘cheese’ but I do. I love the Follow Your Heart brand best. If I could find some retail store Daiya cheese, I’d use that to. *Yes on some ‘bacon’ bits. I use just a few tempeh bacon ‘mini-cubes’ on top and they are tasty!
Vegan Mac ‘n Cheese (that breaks all the rules)
Pasta: 16 ounces whole wheat pasta *Shell shaped variety, I used Chiocciole ¾ cup of Kathy’s Perfect Butternut Squash Dip 1 tablespoon olive oil 2 tablespoon cup vegan cheddar cheese, grated 3 tablespoon soy creamer or soy milk 3 tablespoon orange juice 2 tablespoon apple cider vinegar ⅓ cup chopped parsley
Mushroom Saute: 2 cups forest mushroom blend 1 teaspoon olive oil 2 tablespoon orange juice ½ teaspoon liquid smoke 1 teaspoon vegan buttery spread dash of salt/pepper
Tempeh ‘fake-bacon’ bits: 1 cup roughly chopped tempeh 2 teaspoon maple syrup 1 teaspoon olive oil 1 teaspoon minced garlic pinch of salt ½ teaspoon liquid smoke
Topping: ¼ cup whole wheat bread panko crumbs ¼ cup Monterey Jack Vegan Cheese, grated 2 tablespoon Cheddar Cheese, grated ½ cup tempeh bacon bits (see above ingredients)
Directions:
1. Make my Butternut Squash Dip Recipe. Set aside.
2. Cook the pasta. Drain. Transfer to a large mixing bowl.
3. Toss the hot pasta with olive oil. Then add in the cheese and toss again.
4. Fold the soy creamer, orange juice and parsley into the butternut squash dip. This will thin it out a lot. Perfect for your ‘cheesy’ sauce.
5. Fold in the thinned out butternut squash dip. Try not to break the pasta. The pasta should be well coated in an orange colored ‘thick glaze’. Cover bowl, set aside.
6. Saute the mushrooms in the butter/orange/oil/liquid smoke mixture. They are done when all the liquid has absorbed and the ends are beginning to crisp up a bit. Make sure your mushrooms are well cooked and not mushy.
7. Fold your mushrooms into your pasta. Cover and set aside.
8. Saute the tempeh bacon bits until crisp and cooked through. Set aside in pan.
9. Transfer pasta into casserole dish. Sprinkle a nice border of bread crumbs around the edges of the dish.
10. Top pasta and breadcrumbs with cheese. Evenly distribute the cheddar and jack cheeses on the top of the pasta. Add a few more dashes of bread crumbs over top. I like to drizzle 1-2 tablespoons of orange juice and EVOO on top for extra moisture – this is optional though.
11. Cover dish with foil. Bake at 350 degrees for 15 minutes. This will marinate all the flavors in the pasta. Uncover dish and broil on high for 2-4 minutes. Watch those breadcrumbs! They burn easily. Hopefully you will get some nice brown bubble cheese without over-burning any crumbs. A few browned/slightly burnt edges is OK, and in fact it’s encouraged!
12. Plating. I like to lighten this dish up by serving it on a bed or greens. I like spicy arugula. Garnish with some bright green parsley and red pepper flakes for a touch of spiciness.
NOTES: * You can certainly customize this mac-n-cheese recipe to suit your tastes: * Too Dry? I like my Mac-n-Cheese a tad on the dry side. But you can add more liquid ingredients if you want a creamier pasta. *More Greens? I love more greens. I will actually make a big chopped green salad filled with veggies and then add a scoop of this pasta over top. It turns into one big green pasta salad and it’s a great way to get a big bowl of salad and some mac-n-cheese all in one meal. * More Cheese? You can also add more cheese if you’d like. I like a light amount in the pasta and then a nice thin coating o top. * Lighter Option? Less oil, cream and buttery spread and add more butternut squash dip. You can even add in some extra butternut squash dip for a heartier pasta with less fat. * More Protein? You can also add in some big chunks of tempeh cubes for more protein. * Citrus Twist-add more OJ and even some diced orange slices for a citrus-cheesy twist on this recipe. * Spicier? Add some cayenne and red pepper flakes for more heat.
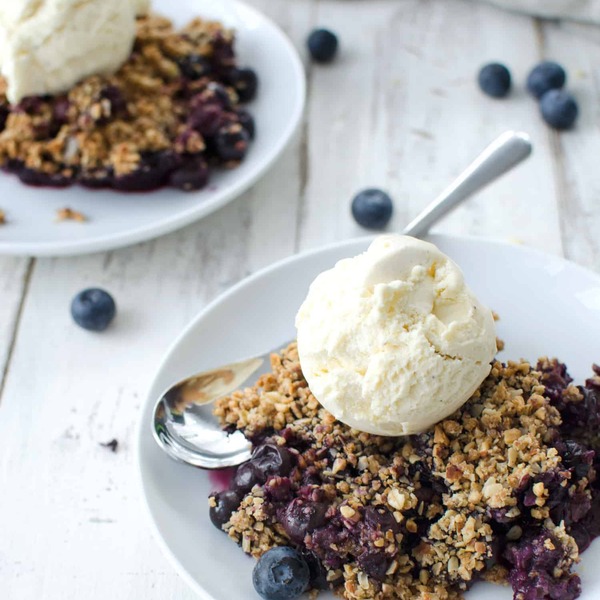
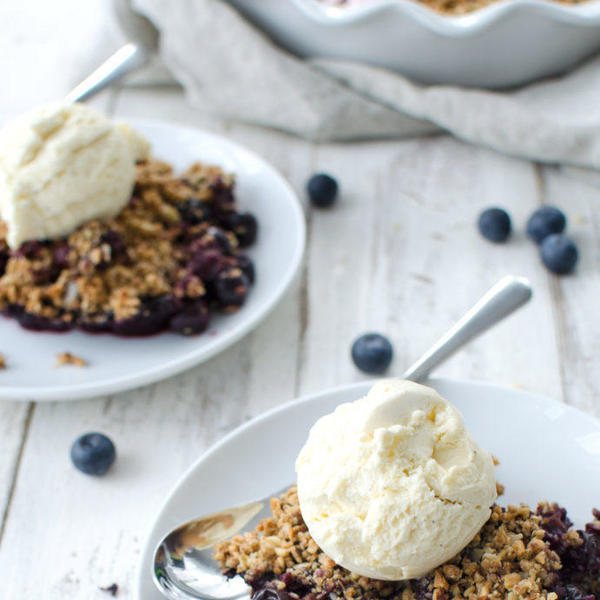
Vegan Blueberry Almond Crisp! Oat and Almond Blueberry crisp, perfect for summer! Easily gluten-free.
I clearly have a thing with fresh fruit and oats.
Evidenced by my blueberry muesli (❤︎) that I shared earlier this week and now this, fresh blueberries covered in a nut and oat crust, bubbling with the bright taste of summer.
This crisp follows my usual rules of fruit-based desserts: let the fruit shine, use as much whole-grains as possible and not too much sugar. There’s a time an a place for that (hello, brownies), but I wanted a dessert that you could also enjoy for breakfast, sans ice cream of course.
But for dessert? You should totally add ice cream.
Ironically, I am having quite the love affair with blueberries these days. Ironic in the sense that I am usually a one-woman berry (my beloved strawberry), but have been playing the field this summer with other fruits. Raspberries in my gazpacho, blueberries for breakfast, raspberries again in limeades and blueberries once more in this sweet & savory salad (and mojitos! and popsicles!)
And now, this dessert. When you get tired of eating berries straight from the counter- I’ve got you covered.
This crisp is embarrassingly easy, which is why I tend to favor it over more complicated options like pie. For my friends who don’t know this difference between boil and simmer, this dessert is for you. Pour the blueberries into a dish, pulse the rest of the ingredients in a food processor then add to the berries. Bake until bubbly.
I often push the limits of my crisp as I want the berries almost gooey and the topping really crisp, but up to you how long you want to bake this off. Super crusty oats + liquid berries + cold ice cream might be one of my favorite summer combinations.
It’s also perfectly blue (and ice cream is white), so I’m imagining this could double as dessert for the 4th of July. Add in a few strawberries or raspberries for garnish and you’ve got yourself quite the festive dessert.
What are your plans for the weekend? We leave this afternoon for the OBX and I cannot freaking wait. While I have a soft spot for all beaches around the world, there is nothing like the Outer Banks to me. I grew up going there as a child, lived there for a few summers in between college, and it’s where BL and I said “I do”. We’ve rented a tiny airBnB near the shore and I’m daydreaming of pounding through my summer book to-do list and lots of afternoon naps.
Of course, the weather looks like rain for 95% of our time there, so that may turn into lots of indoor reading. Either way, I’m at the beach. Life is good.
More Summer Dessert Recipes
Lemon Blueberry Muffins
Orange Blueberry Breakfast Bread
No Bake Chocolate Peanut Butter Pie
Roasted Blueberry, Coconut and Lime Popsicles
If you try this recipe, let me know! Leave a comment, rate it, and tag your Instagram photos with #delishknowledge . I absolutely love seeing your creations. Happy cooking!
Save
Vegan Blueberry Almond Crisp
Vegan Blueberry Almond Crisp! Oat and Almond Blueberry crisp, perfect for summer! Easily gluten-free.
Servings: 8servings
Prep Time: 15 minutesminutes
Cook Time: 20 minutesminutes
Total Time: 35 minutesminutes
2 1/2cupsfresh blueberries
1/3cuprolled oats
1/2cupalmonds
1/4cupflour of choice, regular, whole-wheat or gluten-free
1/4cuppacked brown sugar
1/2teaspooncinnamon
1/4teaspoonground nutmeg
1/8teaspoonsea salt
3tablespoonsvegan butter, I love Earth Balance brand
1tablespooncold water
ice cream, for serving
Preheat the oven to 350 degrees F.
Lightly spray with non-stick cooking spray or grease with more non-dairy butter a baking pan (I used a pie pan, but any 9″ baking dish will work)
In the bowl of a food processor, pulse the oats, almonds, flour, brown sugar, cinnamon, nutmeg and sea salt until just combined.
Add the butter and pulse again. Add the water and pulse again, the mixture should by crumbly when finished.
Add the blueberries to the baking pan and cover with crumble.
Bake for 20-25 minutes or until golden brown and berries are bubbly. Remove from oven and let cool for at least 10 minutes. Serve with ice cream or yogurt.
Vegan Blueberry Almond Crisp! Oat and Almond Blueberry crisp, perfect for summer! Easily gluten-free.
I clearly have a thing with fresh fruit and oats.
Evidenced by my blueberry muesli (❤︎) that I shared earlier this week and now this, fresh blueberries covered in a nut and oat crust, bubbling with the bright taste of summer.
This crisp follows my usual rules of fruit-based desserts: let the fruit shine, use as much whole-grains as possible and not too much sugar. There’s a time an a place for that (hello, brownies), but I wanted a dessert that you could also enjoy for breakfast, sans ice cream of course.
But for dessert? You should totally add ice cream.
Ironically, I am having quite the love affair with blueberries these days. Ironic in the sense that I am usually a one-woman berry (my beloved strawberry), but have been playing the field this summer with other fruits. Raspberries in my gazpacho, blueberries for breakfast, raspberries again in limeades and blueberries once more in this sweet & savory salad (and mojitos! and popsicles!)
And now, this dessert. When you get tired of eating berries straight from the counter- I’ve got you covered.
This crisp is embarrassingly easy, which is why I tend to favor it over more complicated options like pie. For my friends who don’t know this difference between boil and simmer, this dessert is for you. Pour the blueberries into a dish, pulse the rest of the ingredients in a food processor then add to the berries. Bake until bubbly.
I often push the limits of my crisp as I want the berries almost gooey and the topping really crisp, but up to you how long you want to bake this off. Super crusty oats + liquid berries + cold ice cream might be one of my favorite summer combinations.
It’s also perfectly blue (and ice cream is white), so I’m imagining this could double as dessert for the 4th of July. Add in a few strawberries or raspberries for garnish and you’ve got yourself quite the festive dessert.
What are your plans for the weekend? We leave this afternoon for the OBX and I cannot freaking wait. While I have a soft spot for all beaches around the world, there is nothing like the Outer Banks to me. I grew up going there as a child, lived there for a few summers in between college, and it’s where BL and I said “I do”. We’ve rented a tiny airBnB near the shore and I’m daydreaming of pounding through my summer book to-do list and lots of afternoon naps.
Of course, the weather looks like rain for 95% of our time there, so that may turn into lots of indoor reading. Either way, I’m at the beach. Life is good.
More Summer Dessert Recipes
Lemon Blueberry Muffins
Orange Blueberry Breakfast Bread
No Bake Chocolate Peanut Butter Pie
Roasted Blueberry, Coconut and Lime Popsicles
If you try this recipe, let me know! Leave a comment, rate it, and tag your Instagram photos with #delishknowledge . I absolutely love seeing your creations. Happy cooking!
Save
Vegan Blueberry Almond Crisp
Vegan Blueberry Almond Crisp! Oat and Almond Blueberry crisp, perfect for summer! Easily gluten-free.
Servings: 8servings
Prep Time: 15 minutesminutes
Cook Time: 20 minutesminutes
Total Time: 35 minutesminutes
2 1/2cupsfresh blueberries
1/3cuprolled oats
1/2cupalmonds
1/4cupflour of choice, regular, whole-wheat or gluten-free
1/4cuppacked brown sugar
1/2teaspooncinnamon
1/4teaspoonground nutmeg
1/8teaspoonsea salt
3tablespoonsvegan butter, I love Earth Balance brand
1tablespooncold water
ice cream, for serving
Preheat the oven to 350 degrees F.
Lightly spray with non-stick cooking spray or grease with more non-dairy butter a baking pan (I used a pie pan, but any 9″ baking dish will work)
In the bowl of a food processor, pulse the oats, almonds, flour, brown sugar, cinnamon, nutmeg and sea salt until just combined.
Add the butter and pulse again. Add the water and pulse again, the mixture should by crumbly when finished.
Add the blueberries to the baking pan and cover with crumble.
Bake for 20-25 minutes or until golden brown and berries are bubbly. Remove from oven and let cool for at least 10 minutes. Serve with ice cream or yogurt.


 ” title=”Creamy vegan chocolate tofu cheesecake with a sweet and salty peanut butter pretzel crust. Absolutely to die for & almost no bake!” width=”1067″>
 ” title=”Creamy vegan chocolate tofu cheesecake with a sweet and salty peanut butter pretzel crust. Absolutely to die for & almost no bake!” width=”1067″>
 ” title=”Creamy vegan chocolate tofu cheesecake with a sweet and salty peanut butter pretzel crust. Absolutely to die for & almost no bake!” width=”1067″>
 ” title=”Creamy vegan chocolate tofu cheesecake with a sweet and salty peanut butter pretzel crust. Absolutely to die for & almost no bake!” width=”1067″>
 ” width=”274″>
  ” width=”170″>