Author: PatagoniaLlami

  • EASY 30 MIN KIMCHI AND VEGAN FISH SAUCE

    EASY 30 MIN KIMCHI AND VEGAN FISH SAUCE

    recipe image

    If you thought making a batch of kimchi at home was hard and time-consuming, think again! With my 30-minute recipe (and the additional fermenting time of course!) for making authentic kimchi that tastes just like the real thing AND is also vegan, you will be making a fresh batch of homemade kimchi every week!

    Easy 30 Minute Kimchi And Vegan Fish Sauce - Cook Republic

    Why I wanted to create a vegan version of my homemade kimchi!

    It is true. I have had a slow-burning, escalating obsession with kimchi for a while. Like baking bread, once you start making your own kimchi there is no turning back. I first shared a step-by-step Vegan Kimchi recipe with heaps of process and stage shots two years ago. I give away a lot of kimchi jars every year to friends and a couple of them are allergic to seafood which was why I devised a vegan recipe that called on the umami flavour of mushroom and seaweed.

    That and the fact that I like to open the fridge door, get my kimchi jar out, unscrew the lid and eat straight off the jar with my nimble fingers at least once a day (Hey! Probiotics are good for you!) and too much fish sauce was hampering this ritual. I wanted something softer, a bit more rounded but equally pungent and spicy.

    Easy 30 Minute Kimchi And Vegan Fish Sauce - Cook Republic
    Easy 30 Minute Kimchi And Vegan Fish Sauce - Cook Republic

    Re-inventing traditional homemade kimchi with a vegan version that has a secret ingredient!

    After happily eating that kimchi for a couple of years, a chance lunch date at a Korean restaurant revealed a much superior kimchi to me. This one had a slight sweetness to it, had a deeper texture and a more viscose quality to it and packed a punch.

    So began a relentless quest to create jar after jar of kimchi, scouring websites and blogs, trying to absorb everything there was to the art of fermentation. Much like the mad bread-baking spree of 2013. But then after a few weeks of experimentation, I hit the jackpot. I used rice flour to create a viscose base for the cabbage and a brand spanking new vegan fish sauce recipe that was made with pineapple juice. This kimchi batch was vibrant, red, spicy, thick and hit the spot without overpowering me with that fish smell. And it went pretty quick. So I made another and am sharing it today so you can make your first batch too!

    Easy 30 Minute Kimchi And Vegan Fish Sauce - Cook Republic
    Easy 30 Minute Kimchi And Vegan Fish Sauce - Cook Republic

    Helpful tips for making the best jar of homemade vegan Kimchi.

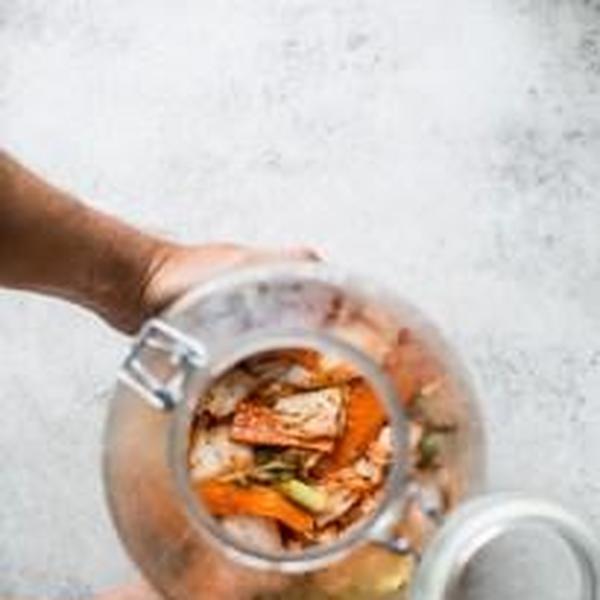
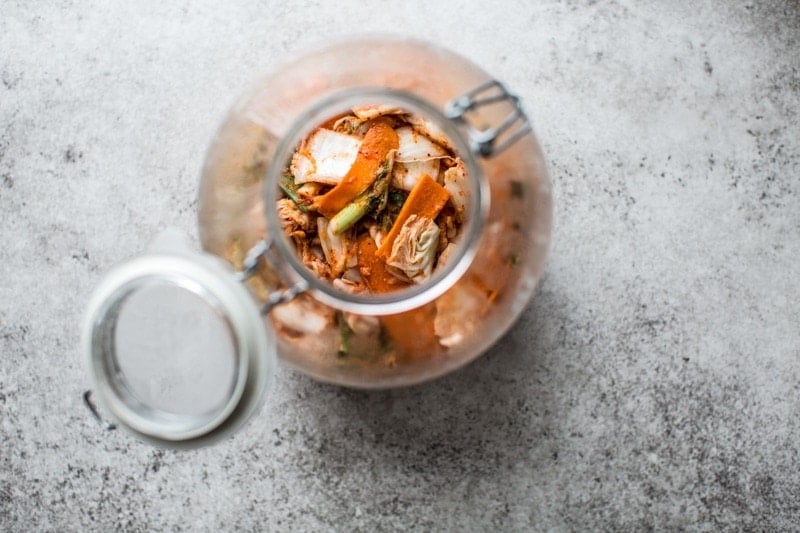
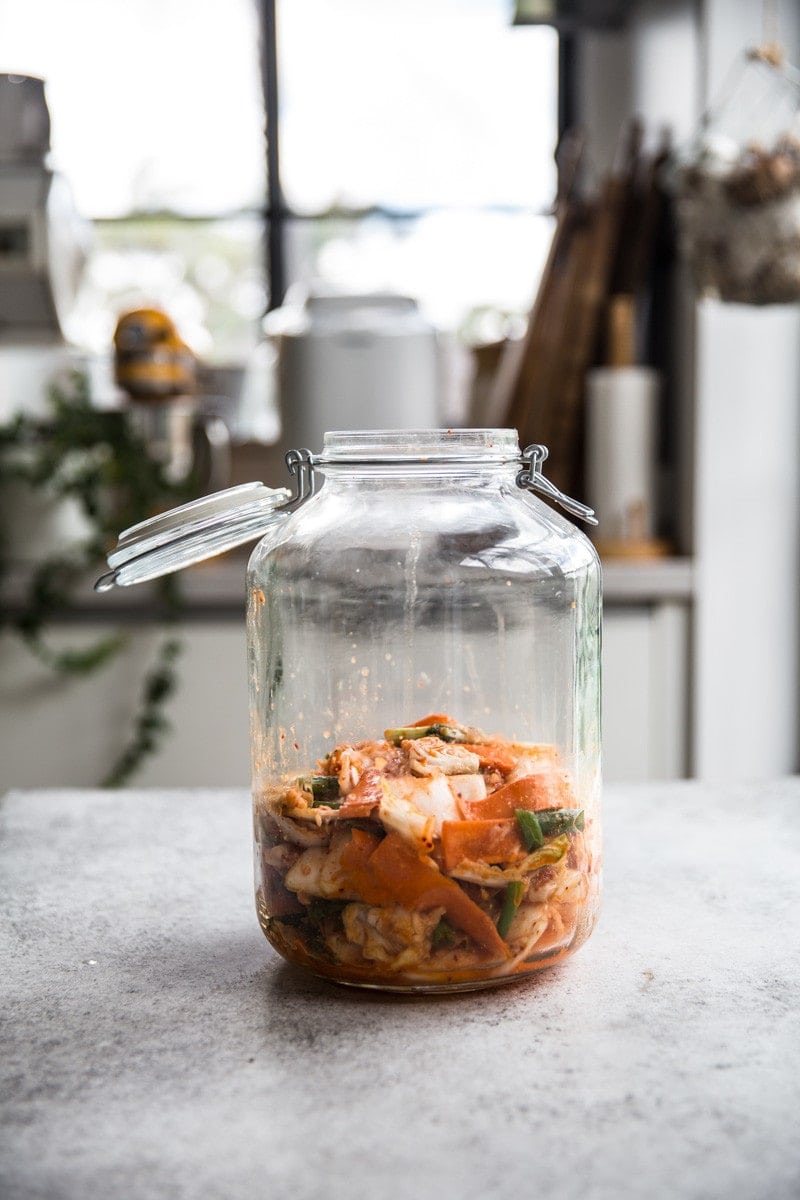
    Once you mix your kimchi, make sure you pack it in a large airtight jar with plenty of room for the gases to form. I use an Italian Fido jar with a tight rubber seal. Leave it in a warm spot in your kitchen out of direct sunlight and within the first few hours, you will see the foggy breath of the wonderful fermented gases form in the empty space above the kimchi.

    It is a magical process called lacto-fermentation that is a by-product of the clever pairing of cabbage and radish with salt and sugar. As you know everything has good and bad bacteria. The salt brining is to kill off the bad bacteria. Meanwhile, the good bacteria pair up with the sugar to create lactic acid which preserves the vegetable and gives it that amazing tangy taste. The probiotics are created as a result of this wonderful process.

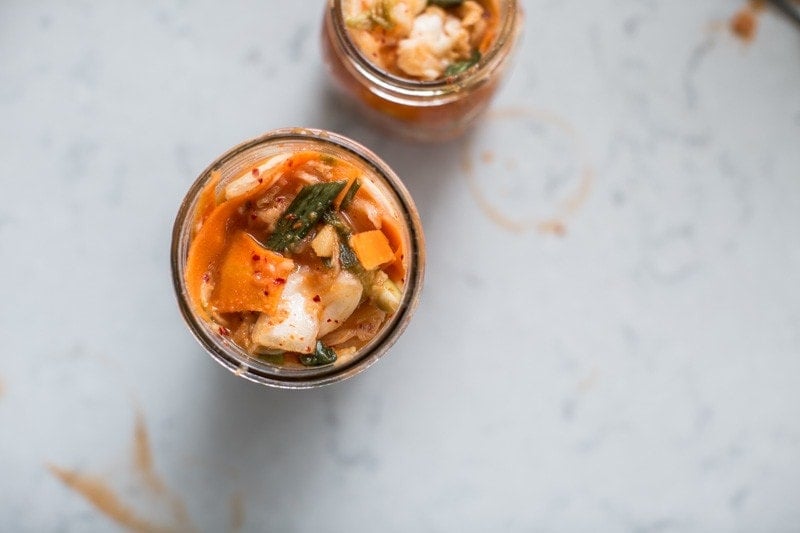
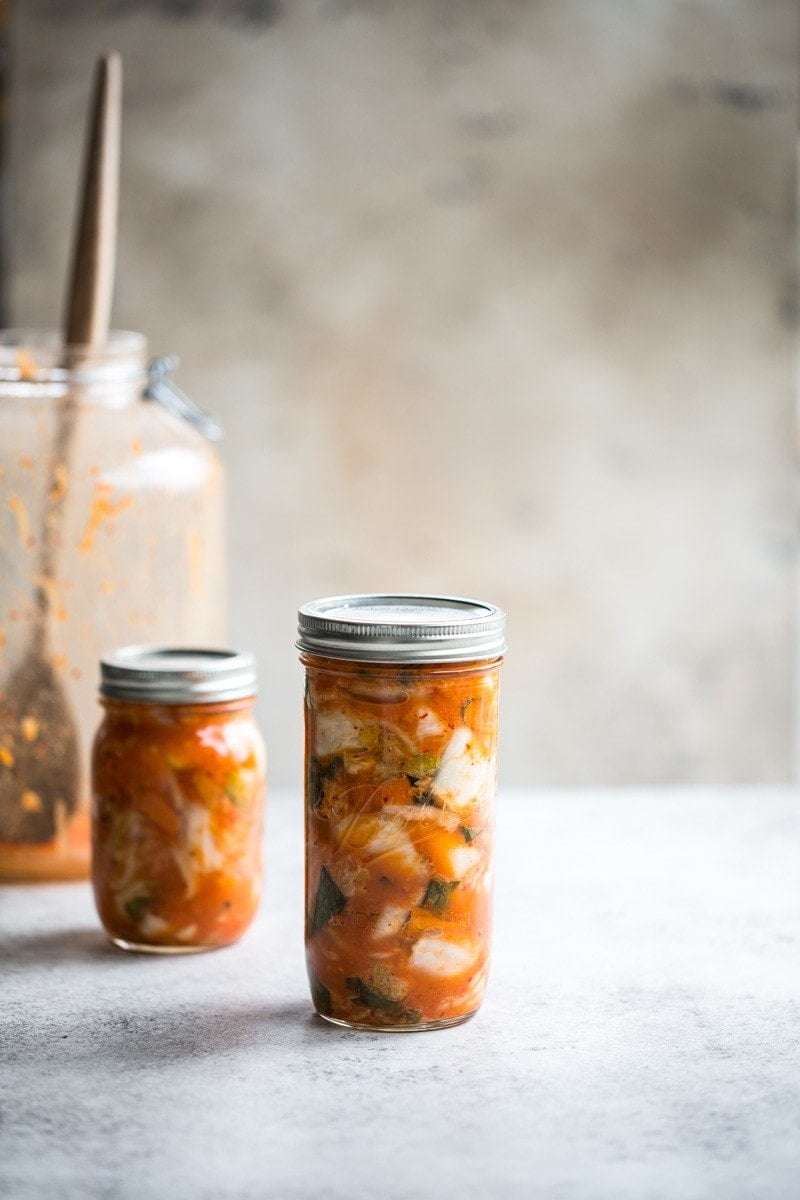
    Scientific lectures aside, this kimchi only needs to ferment for a day, another day if you want it to take your head off. After the fermentation, comes the bottling. You need smaller tight-lidded glass jars. Like 750ml or 1 litre mason ball jar. And the most important thing to remember is to pack your kimchi in real tight. Like, squish it down with your fingers (or spoon) making sure all the gorgeous liquid sits on top and there is barely a centimetre of space between the top and the lid. And then refrigerate. This is to prevent it from fermenting further. Lack of space and cold temperature will stop the fermenting process and more gases from forming. So there!

    Easy 30 Minute Kimchi And Vegan Fish Sauce - Cook Republic

    Vegan fish sauce made with pineapple juice!

    Before I wax lyrical some more about why this kimchi is amazing (30 minutes, that’s why!) let’s talk about this vegan fish sauce made with pineapple juice. Even more amazing! Imagine all those Thai dishes you couldn’t eat because of a seafood allergy or couldn’t make for a friend who broke into hives the minute you said “crustacea!” .. that is a thing of the past because this sauce has no fish but tastes like fish sauce and takes 2 minutes. What!!! …..

    I now have the freedom to create Thai recipes for seafood-intolerant friends with ease without losing any of that glorious salty, sweet and sour fish sauce flavour. This one will change your life. I love splashing this through my pad thai and pineapple fried rice. Yum!

    Easy 30 Minute Kimchi And Vegan Fish Sauce - Cook Republic
    Easy 30 Minute Kimchi And Vegan Fish Sauce - Cook Republic
    Easy 30 Minute Kimchi And Vegan Fish Sauce - Cook Republic
    Easy 30 Minute Kimchi And Vegan Fish Sauce - Cook Republic

    A kimchi makes a great weekend kitchen project. If you make yours this weekend (because it only takes 30 minutes!), I’d love to hear all about it in the comments below and if you love it, please do rate the recipe so it can encourage others to try their hand at making it too. Share your kimchi experiments with me on Instagram using #cookrepublic. I think I have been prepping and writing this post for over 10 hours now and seriously deserve a glass of wine. Plus its Friday! So I bid adieu. Happy weekend folks. xx

    Recipe

    Hungry For More Recipes? Subscribe to my newsletter. Check out Facebook, Instagram and Pinterest to see everything I share! And if you love cooking and new cookbooks, join my free Cooking Club on Facebook!

    Easy 30 Minute Kimchi And Vegan Fish Sauce - Cook Republic

    for the cabbage

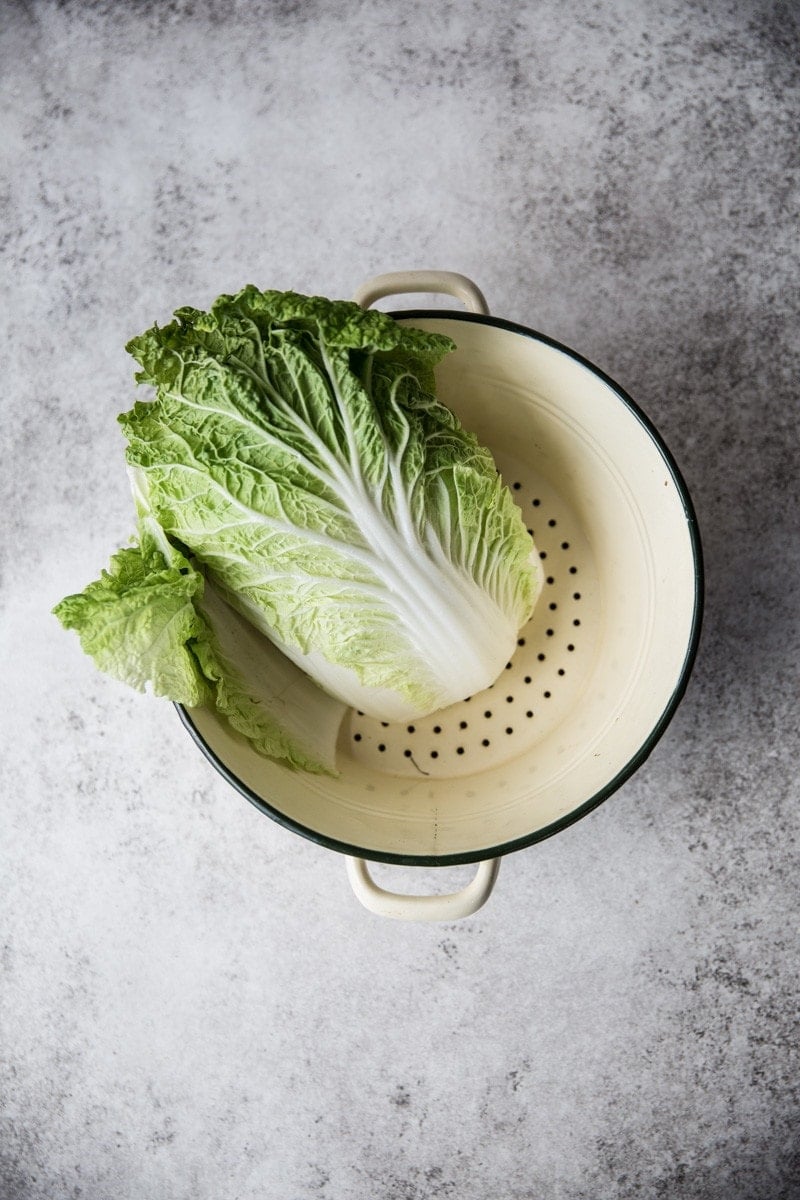
    • 1 kg wombok, Napa cabbage
    • 1 litre water
    • 1/2 cup salt

    for the kimchi sauce

    • 2 tablespoons rice flour
    • 2 tablespoons golden caster sugar or coconut sugar
    • 1/4 cup water
    • 4 garlic cloves
    • 2 tablespoons vegan fish sauce, see below
    • 2 tablespoons Korean red pepper flakes, gochugaru
    • 1 eschalot, peeled
    • 3 cm piece ginger

    additional veggies

    • 2 spring onions, green and whites sliced
    • 1 small carrot, 100g, shaved into ribbons
    • 1/2 cup 100g daikon radish, grated
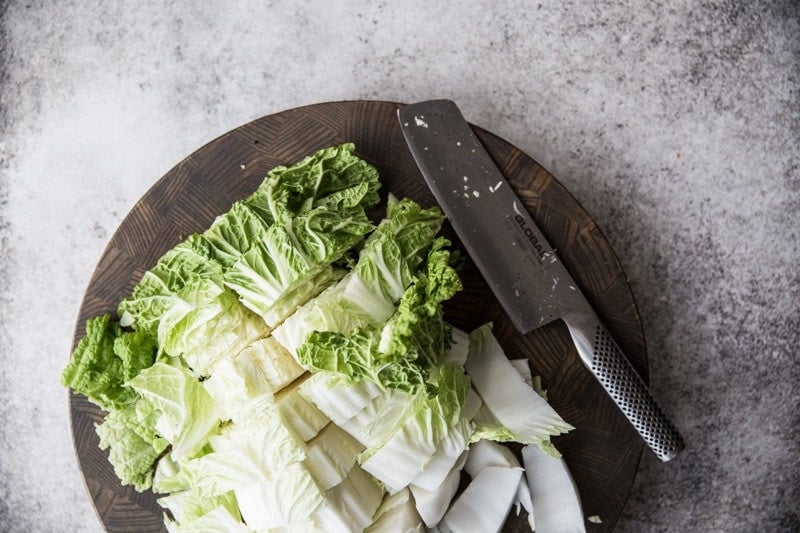
    • Wash, drain, trim and quarter a whole wombok. Cut each quarter into 3 cm slices.

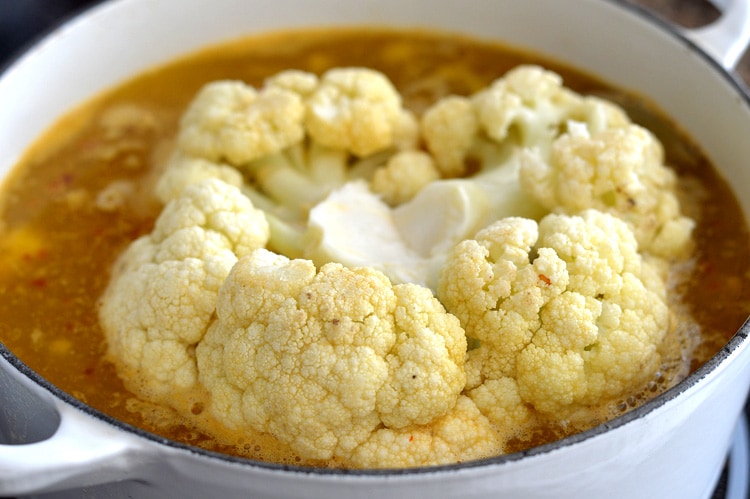
    • Bring water and salt to a boil in a saucepan. Place cabbage in a large, wide and deep bowl (I use an enamel basin). Cover with salted boiling water for 20 minutes.

    • Drain water. Rinse. Drain. Return cabbage back to the bowl.

    • While the cabbage is soaking, place rice flour, sugar and water in a small saucepan. Heat on medium-low, whisking until smooth and thickened. Remove from heat and cool slightly.

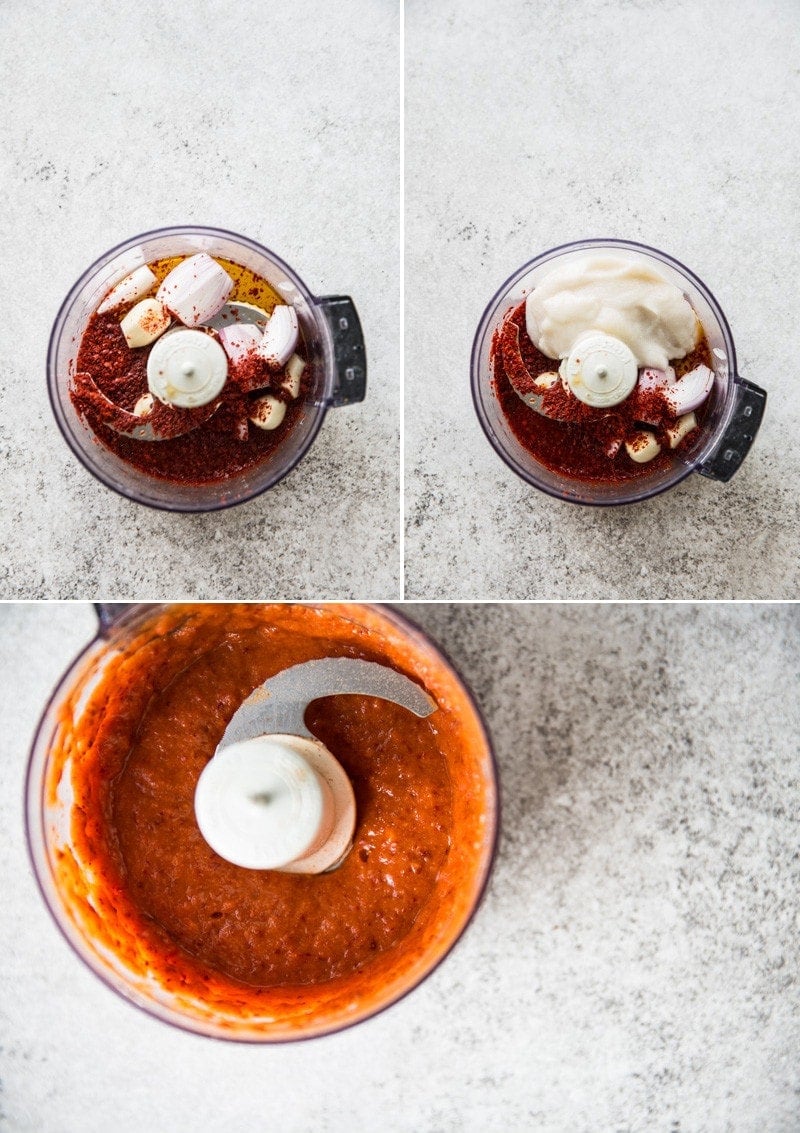
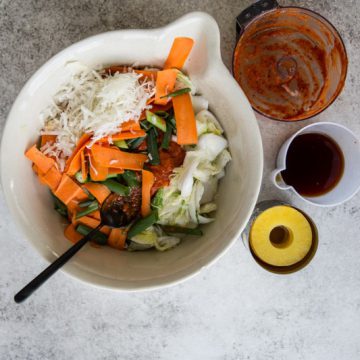
    • Place the rice paste along with garlic cloves, vegan fish sauce, Korean pepper flakes, eschalot and ginger in the bowl of a small food processor. Process to a fine sauce.

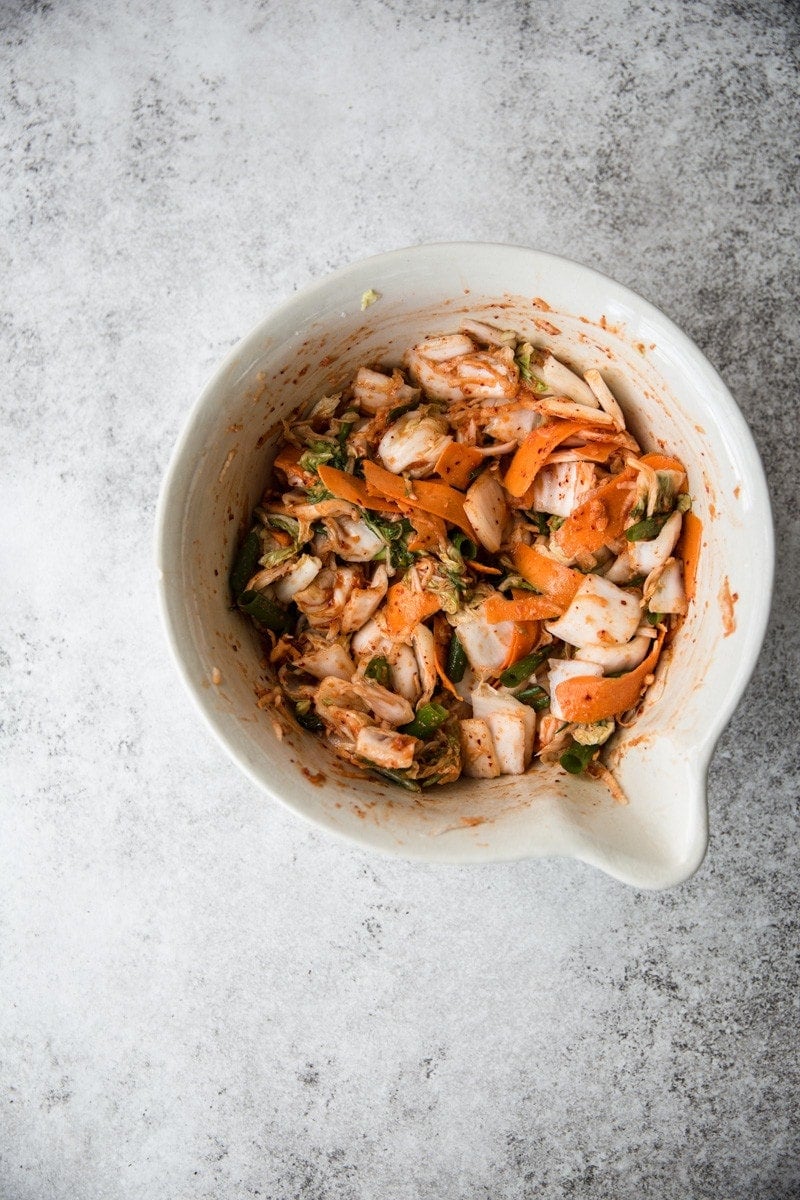
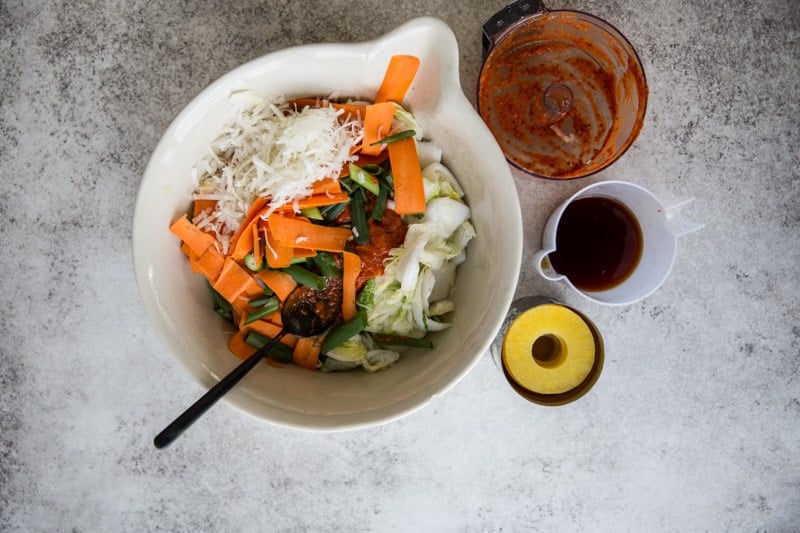
    • Add kimchi sauce to the cabbage along with the spring onions, carrot and radish. Massage the cabbage and sauce together, mixing everything well.

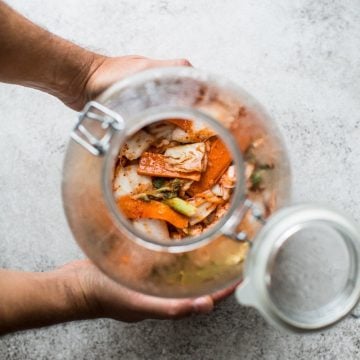
    • Scoop kimchi in a large 4 litre glass jar with a tight rubber seal. Allow to ferment in a warm spot in your kitchen out of direct sunlight for at least an hour before consuming. I leave it overnight or 24 hours for it to reach the right pungency.

    • When ready, bottle your kimchi in smaller 750ml or 1 litre glass jars with tight seals and refrigerate for up to a month.

    I’d love to hear how you went! Tag me on Instagram @cookrepublic

    Recipe

    Hungry For More Recipes? Subscribe to my newsletter. Check out Facebook, Instagram and Pinterest to see everything I share! And if you love cooking and new cookbooks, join my free Cooking Club on Facebook!

    Easy 30 Minute Kimchi And Vegan Fish Sauce - Cook Republic

    • 1/4 cup warm water
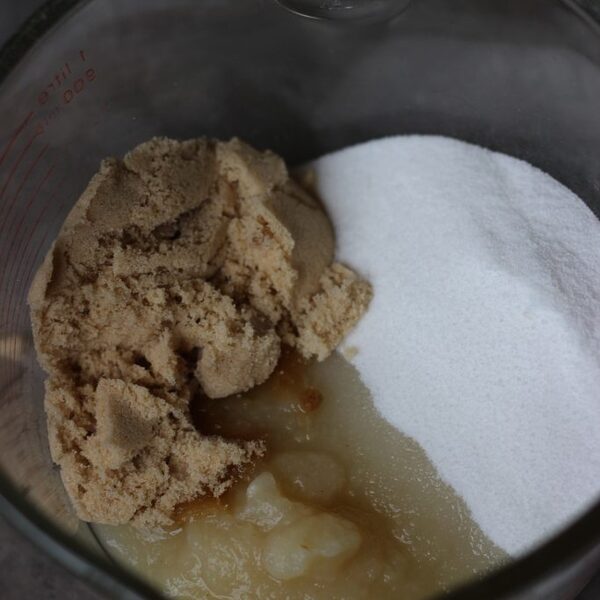
    • 1/4 cup pineapple juice, canned pineapple
    • 2 1/2 tablespoons coconut sugar
    • 2 tablespoons light soy sauce
    • 1/2 teaspoon sea salt flakes
    • Place all ingredients in a glass or non-reactive plastic jug and mix well.

    • Store in the fridge for up to a week.

    I’d love to hear how you went! Tag me on Instagram @cookrepublic

    Read More

  • French Apple and Almond Cake (vegan)

    French Apple and Almond Cake (vegan)

    recipe image

    by Anja Leave a Comment

    Preberi v slovenščini.

    We’ve been living in Luxembourg for a year now and I still haven’t made any french recipes, like I wanted to when we first learned about moving so close to France. The thing is, we don’t eat put as much as we did it Dubai, so the local cuisine isn’t influencing our cooking that much. We are still loving the middle eastern dishes though and we miss the spices and richness of flavours. As we recently got some hints we won’t be staying here much longer, we decided to make the best of the time we have here. So we dived into the culture, food and nature, to explore the country even more.

    This is how this cake was born. Luxembourg is known for the apples grown here, so naturally this is the fruit we eat most at home during winter. And when you visit the local pâtisserie, you can find an apple cake in different forms. So I set on a mission to find a locally inspired recipe, but easy to make, since lately all my kitchen experiments are often interrupted by David. I found this lovely recipe for a French Apple Cake, that I veganized and it turned out to be a hit. It’s a bit more on a sweet side, but you can easily lower the amount of sugar and it shouldn’t affect the cake. And even though I am not a fan of very sweet desserts, I loved it in this cake. The apples bring the sourness to balance out the sugar and almonds on top give it that extra crunch. So, there is some rum involved in the baking, I personally loved the rich aroma, but when baking for kids, you might want to avoid it. David did eat it with us, and there was no side affects, so I believe the alcohol has  evaporated while baking.

    I hope you enjoy baking this cake as much as we do! And most importantly, that you enjoy eating it with your coffee or tea. I would love to see how you make it, so tag @dearkitchen in your social media post, for me to see it!


    Print Recipe


    French Apple and Almond Cake (vegan)

    A French classic tea time cake made with apples and almonds, and a rich rum aroma.


    Instructions

    1. Preheat the oven to 190°C and grease and line a 23 cm cake pan.

    2. Make flax eggs by mixing the flax meal and water in a small dish. Set aside.

    3. Using a mixer, mix the margarine and sugar together until fluffy, approx. 3 minutes. Add the flax eggs and mix. Now add the vanilla and rum.

    4. Sift the flour, baking powder and salt into the wet ingredients and mix with a spoon.

    5. Peel the apples and remove the core. Cut into small cubes and mix into the batter. Transfer the batter into cake pan. Sprinkle with sliced almonds.

    6. Bake for 40 – 45 minutes or until golden brown on top. Use a tooth pick or knife to check if the middle is baked.
      Leave to cool and enjoy with tea or coffee.

    Read More

  • Vegan Paella

    Vegan Paella

    recipe image

    A fresh, flavorful Spanish vegan paella packed with leeks, onions, bell peppers, mushrooms and tomatoes. Tofu stands in for the seafood. It’s a vibrant pop of nutrition and flavor, all in one dish. And it’s one pot!

    Vegan paella in white plate.

    I have a thing for Paella, and can you blame me? There’s something so, grrr, red blooded about Spanish food. And when it’s a Vegan Paella, a one-pot package deal with so many goodies tucked in, one just can’t help but fall in love.

    This veg paella is definitely a dish to get all hot and bothered about. It’s delicious and there is so much goodness here from the rice and the lima beans and the red peppers and the tofu that your tastebuds will want to wear high heels and do the flamenco.

    Paella is a popular dish around my home because Desi will eat rice in just about any form. And when the house smells as great as it does when I’m making this, he is definitely interested. Better still, this is not just a perfect dinner but is perfect to brown-bag to work the next day.

    I used some beans in my Vegan Paella which are traditional, especially in Valencia, the Spanish city where Paella originated, and other traditionally used ingredients, like onions and red peppers and sausage (vegan, of course).

    But my recipe is also very simple and comes together rather quickly, because hey, I get it: we are not living in the 18th century where sultry senoritas could languidly saute and simmer and then serve it all up without a hair out of place.

    I’m off to serve mine, and I can’t believe I waited this long before wiping it off the face of the earth. And oh, if you’re a parent, Jay loved this despite the mushrooms, so I’d put it in the kid-friendly box.

    Tips and tricks

    • For an authentic tasting paella without the non-vegan ingredients like mussels and clams and chicken and sausage, you will need ingredients that will pack in flavor and umami. In this paella that umami comes from mushrooms, tomato paste, smoked paprika and, to some extent, the wine, which is optional but really nice here.
    • I also like adding some “seafood tofu” to my paella for the protein and flavor. That’s just tofu tossed with a few spices like paprika, garlic powder, salt and black pepper and some Old Bay seasoning, if you have it (it’s usually used to season seafood but is perfectly vegan and adds a nice, oceany flavor). I then pan-fry or air-fry the tofu (I much prefer air-frying tofu as it’s more hands-off and gives a great result.)
    • Add the tofu to the paella pan in the last few minutes of cooking, so it absorbs some of the flavors of the rice while retaining its firmness.
    • I like adding lima beans that are frozen or canned and therefore don’t require much cooking to my paella when I have them on hand. I didn’t use them this time but if you want an extra hit of protein and fiber add them to the paella. If you use canned lima beans make sure you drain them first before adding them to the pot.
    A skillet containing a just-cooked vegetable paella with tofu, veggies like bell peppers and mushrooms, and a parsley garnish.

    Recipe FAQs

    What is the best rice to use for paella?

    The most authentic varieties of rice to use for paella would be a shortgrain rice cultivated in Spain, like bomba rice or calasparra rice. You can easily find these online, but I used arborio rice, which I keep on hand for risottos and makes a perfectly acceptable replacement.

    Do I need a paella pan to make a paella?

    Not at all. While paella pans can be found easily here in the United States, and some are reasonably priced, I am a big believer in using what you already have in your kitchen and making it work. For the paella, I use my biggest, widest skillet and it works perfectly. Just don’t use a pot with high sides and make sure the skillet is big enough to hold all the veggies, rice and liquid.

    What is socarrat?

    Socarrat is the layer of “scorched,” caramelized rice at the bottom of the pan that gets brown and crispy and adds a unique flavor dimension all its own. This is a technique also used in other global cuisines that eat rice abundantly, including Persian, Chinese and Latin American.

    To create a soccarat in your paella, cook the paella on a high flame in the last five or 10 minutes, but keep your nose engaged to ensure it doesn’t burn.

    More rice dishes from around the world

    A closeup of a plate of vegan paella with bell peppers, leeks, onions, tomatoes, saffron and tofu.

    Overhead shot of a vegan paella cooked in a wide skillet with

    Vegan Paella

    Vaishali · Holy Cow Vegan

    A fresh, flavorful Spanish vegan paella packed with veggies like leeks, onions, bell peppers, mushrooms and tomatoes with tofu standing in for the seafood. It’s a vibrant pop of nutrition and flavor, all in one dish–and one pot.

    Prep Time 20 minutes

    Cook Time 35 minutes

    Total Time 55 minutes

    Course Main

    Cuisine Spanish

    Servings 6 servings

    Calories 343 kcal

    Equipment

    • Wide skillet or paella pan

    Ingredients  

    For the “seafood” tofu

    • 14 oz extra firm tofu (or super firm tofu. Press out water if using extra firm, then cube into ½-inch pieces)
    • ½ teaspoon paprika
    • ½ teaspoon garlic powder
    • 1 teaspoon Old Bay Seasoning (optional)
    • 2 teaspoon extra virgin olive oil

    For the paella rice

    • 1 tbsp extra virgin olive oil
    • 6 cloves garlic (minced)
    • 1 small onion (finely diced)
    • 1 leek (cleaned of all grit, then white and green parts chopped. Optional)
    • 2 medium bell peppers (any color, finely diced)
    • 8 oz cremini mushrooms or button mushrooms (sliced. Button mushrooms or portobello mushrooms are fine too)
    • ¼ cup white wine (optional)
    • 2 medium tomatoes (diced)
    • 1 heaping tbsp tomato paste
    • 16 oz lima beans (frozen or canned. Drain if using canned. Optional)
    • 2 teaspoon oregano
    • ½ teaspoon smoked paprika
    • ½ teaspoon cayenne
    • 1 cup arborio rice
    • cups vegetable stock (or water)
    • A generous pinch saffron
    • Salt to taste
    • 1 bunch parsley (chopped)

    Instructions 

    Make the tofu

    • Toss the tofu with the garlic, paprika, Old Bay seasoning, if using, and salt and black pepper.

    • Heat 2 teaspoon oil in a paella pan or any wide skillet. Add the tofu in a single layer and cook, stirring so all sides come in contact with the pan and get lightly golden brown. This is much better done in the air fryer. If using the air fryer, toss the tofu in the oil along with the other spices, place in the air fryer basket and air fry 16 minutes at 400 degrees. Toss the cubes around halfway through to ensure they all cook and crisp up evenly.

    Make the paella rice

    • Heat the oil. Add the garlic, onions, leeks and bell peppers. Season with salt and ground black pepper and saute until the onions are soft and translucent.

    • Add the mushrooms and the wine, if using. Cook until most of the moisture in the pot has evaporated, then add the tomatoes, tomato paste and lima beans, if using.

    • Mix well, add the oregano, smoked paprika and cayenne and stir in. Then add the rice and stir it in until it’s merged in with the veggies and spices.

    • Add the rice to the skillet and cook, stirring, until the grains appear translucent, a couple of minutes. Add the vegetable stock or water to the pot, add salt to taste (the water should taste saltier than you want your rice to be) and mix well. Let the rice cook, uncovered, until the stock or water boils. Add the saffron strands and stir them in lightly.

    • Cover the pot and let the rice cook over low heat for 15 minutes. Uncover the pot, place the tofu on top, cover again, and let the rice cook another 10 minutes. If you want the layer of burnt rice, socarrat, at the bottom, turn up the heat in the last five minutes of cooking.

    • Let the rice stand, covered, for 10 minutes, then open, fluff gently with a fork, and serve, garnished with parsley.

    Nutrition

    Calories: 343kcalCarbohydrates: 57gProtein: 16gFat: 6gSaturated Fat: 1gPotassium: 1003mgFiber: 9gSugar: 8gVitamin A: 3096IUVitamin C: 73mgCalcium: 94mgIron: 6mg

    Tried this recipe?Let us know in the comments below!

    About Vaishali

    Hi! I’m Vaishali, a journalist turned food blogger. At Holy Cow Vegan I share easy, tasty recipes made with clean, wholesome ingredients that the entire family can enjoy.

    Reader Interactions

    Read More

  • Vegan Cheesy Spinach and Artichoke Scones

    Vegan Cheesy Spinach and Artichoke Scones

    recipe image

    by Lauren Hartmann 5 Comments

    dsc_0001

    Spinach and Artichoke is amazing, I feel like we can all agree upon that. This is right here is a way you can have that flavor for breakfast, or I suppose anytime. These babies taste exactly like spinach  and artichoke dip, with all it’s cheesy goodness in a portable package. I toasted one and threw some vegan butter on it, holy crap!

    dsc_0027

    How my brain works, and what my thought process is, is taking flavors I love that are almost never vegan and turning them into delicious plant-based treats! In the 90’s, spinach and artichoke dip became really popular. My mom would make it for every special occasion where we would have people over. She would put it in a bread bowl and use the inside of the bread for dipping purposes, it was glorious! I knew when guests were coming I could count on that happening, and I was always super pumped. It was the first thing she would set out, and I would sneak my fair share before people got there.

    dsc_0004

    dsc_0006

    dsc_0010

    dsc_0011

    These savory scones are so reminiscent of my childhood favorite it is uncanny. This is a really easy one bowl recipe, that is great for a quick portable breakfast! So cheesy and delicious! If I don’t have something ready to eat in the morning, I will forget to eat. I have very busy mornings and need something to grab quickly. I made these in the evening, and had them ready for everyone in the morning. My husband made an vegan egg sandwich with one, and I was pretty jealous of it! There are many options, great for a snack or anytime. These are light, fluffy, flaky and insanely delicious! I hope you enjoy!

    If you have any questions or feedback, I would love to hear from you!

    Tools I used:

    Winco 5 Blade Pastry Blender, Stainless Steel


    OXO Good Grips 4-inch Pizza Wheel and Cutter


    Cook N Home Marble Rolling Pin with Wood Base, 18″, White

    Vegan Cheesy Spinach and Artichoke Scones

    Created by Lauren Hartmann on October 17, 2016

    • Prep Time: 15m
    • Cook Time: 15m
    • Total Time: 30m
    • Serves: 4
    • Yield: 8 scones
    • Category: Breakfast, Sides, Snack

    Ingredients

    • 3 c All purpose flour
    • 1 tbsp. Baking powder
    • 1/2 tsp. Baking soda
    • 1 tsp. Salt
    • 2 tsp. Garlic powder
    • 1/2 c Vegan butter (I use Earth Balance),cold
    • 1/4 c Nutritional yeast
    • 1 c Frozen spinach, defrosted and drained
    • 3/4 c Artichoke hearts, chopped
    • 1 c Almond milk
    • 1 Flax egg (2 Tbsp. Flax meal+3 Tbsp. water=1 egg)

    Instructions

    1. Preheat oven to 400.
    2. In a large mixing bowl, sift all the dry ingredients together.
    3. Cut the cold vegan butter into the dry ingredients using a pastry cutter or fork until the vegan butter is in pea sized pieces.
    4. Add the nutritional yeast, artichokes and spinach and stir to start combining.
    5. Whisk together the almond milk and flax egg, then add to the rest of the ingredients and stir to start combining.
    6. Begin to knead with hands until everything is fully combined.
    7. Turn dough out onto a floured surface and form a ball. Pat out or roll with a rolling pin into a disk about two inches thick. Cut into eight triangles, and place onto a prepared baking sheet. Brush tops with melted vegan butter.
    8. Bake at 400 for 15-20. Enjoy with vegan butter, other spreads or just plain!

    Reader Interactions

    Trackbacks

    1. […] Vegan Cheesy Spinach and Artichoke Scones […]

    Read More

  • Vegan Zucchini Brownies

    Vegan Zucchini Brownies

    recipe image
    Ingredients:

    • 1¼ cup all-purpose flour
    • ¼ cup + 2 tablespoons natural cocoa powder
    • ¾ teaspoon baking soda
    • ¼ teaspoon baking powder
    • ¼ teaspoon instant espresso powder
    • ¼ teaspoon salt
    • ½ cup granulated sugar
    • ¼ cup brown sugar, packed
    • ½ cup unsweetened applesauce
    • 1 teaspoon white vinegar
    • ½ teaspoon vanilla extract
    • 2 cups of shredded zucchini – do not drain/squeeze after grating!
    • ½ cup vegan chocolate chips + extra for garnish

    Read More

  • Vegan Cinnamon Rolls

    Vegan Cinnamon Rolls

    recipe image

    If you are looking for a treat for a breakfast party or brunch, but have a few guests with dietary restrictions on the RSVP list, whip up a delicious vegan cinnamon rolls recipe. This lactose-free baked good will allow you to show off your skills while wowing your friends with a menu item that tastes remarkably similar to its dairy-and-egg-laden counterpart. The substitutes are easy—soymilk or almond milk replaces traditional milk, nondairy margarine makes a great substitute for butter, and vegan cream cheese completes the icing on top. Like most homemade baked products, vegan cinnamon rolls are moderately labor intensive. But if you’re skilled in baking yeasted bread, this creation will seem like a walk in the park.


    Cook Mode
    (Keep screen awake)

    • 1 cup warm nondairy milk (e.g., soy milk, almond milk)

    • 1 (0.25-ounce) packet active dry yeast (2 1/4 teaspoons)

    • 2/3 cup nondairy margarine, plus 1/4 cup for icing

    • 1/2 cup granulated sugar

    • 1 dash salt

    • 4 1/2 cups all-purpose flour

    • 1 cup brown sugar, packed

    • 2 tablespoons ground cinnamon

    • 1 tub vegan cream cheese

    • 2 cups confectioners’ sugar

    • 1 teaspoon pure vanilla extract

    • 2 tablespoons water

    The first time you make these delicious rolls, it may seem like a chore. But once you get the hang of it, you’ll enjoy whipping up a batch, even when there’s no occasion. 

    Making the Dough

    1. Gather the ingredients.

      The Spruce / Ahlam Raffii
    2. Preheat your oven to 400 F.

    3. Warm the soy or almond milk in a small saucepan on the stove.

      The Spruce / Ahlam Raffii
    4. In a large bowl, mix the yeast with the warm nondairy milk and let the mixture rest for 5 minutes or until frothy.

      The Spruce / Ahlam Raffii
    5. With a mixer, cream 1/3 cup margarine, sugar, and salt.

      The Spruce / Ahlam Raffii
    6. Gradually add the yeast mixture and flour and knead, using a dough hook, for 8 minutes. (Alternately, you can knead by hand.)

      The Spruce / Ahlam Raffii
    7. Form the dough into a ball and place it into a lightly greased bowl. Set the bowl in a warm location in your kitchen to rise for 1 hour.

      The Spruce / Ahlam Raffii
    8. On a lightly floured surface, roll the dough into a 16-by-20-inch rectangle. (The bigger the rectangle, the more layers in your cinnamon rolls.) 

      The Spruce / Ahlam Raffii

    Preparing the Filling and Rolls

    1. In a small bowl, whisk together the brown sugar, cinnamon, and 1/3 cup margarine until fluffy.

      The Spruce / Ahlam Raffii
    2. Spread it over the entire surface of the dough in an even layer.

      The Spruce / Ahlam Raffii
    3. Beginning at one end of the dough, roll it lengthwise, tightly, into a 20-inch long roll. 

      The Spruce / Ahlam Raffii
    4. Cut the roll into approximately 12 even pieces.

      The Spruce / Ahlam Raffii
    5. Place each slice into a 9-inch by 13-inch baking pan. Cover the pan loosely with a clean kitchen towel and let the rolls rise for about 30 minutes.

      The Spruce / Ahlam Raffii
    6. Bake for 15 to 20 minutes, or until the rolls are dark golden brown on the edges.

      The Spruce / Ahlam Raffii

    Icing the Rolls

    1. Combine the vegan cream cheese, 1/4 cup margarine, confectioner’s sugar, vanilla, and water and mix vigorously with a whisk until fluffy. (The consistency of the icing should be similar to thick molasses.)

      The Spruce / Ahlam Raffii
    2. Remove the rolls from the oven. Immediately flip them over onto a clean sheet to allow the gooey filling to re-coat the rolls.

      The Spruce / Ahlam Raffii
    3. Let the rolls cool for approximately 10 minutes, and then spread on the icing. Serve warm.

      The Spruce / Ahlam Raffii
    Nutrition Facts (per serving)
    496 Calories
    17g Fat
    79g Carbs
    7g Protein

    ×

    Nutrition Facts
    Servings: 12
    Amount per serving
    Calories 496
    % Daily Value*
    17g 22%
    Saturated Fat 5g 26%
    0mg 0%
    164mg 7%
    79g 29%
    Dietary Fiber 2g 8%
    Total Sugars 42g
    7g
    Vitamin C 0mg 0%
    Calcium 65mg 5%
    Iron 3mg 15%
    Potassium 114mg 2%
    *The % Daily Value (DV) tells you how much a nutrient in a food serving contributes to a daily diet. 2,000 calories a day is used for general nutrition advice.

    (Nutrition information is calculated using an ingredient database and should be considered an estimate.)

    Rate This Recipe

    I don’t like this at all.
    It’s not the worst.
    Sure, this will do.
    I’m a fan—would recommend.
    Amazing! I love it!
    Thanks for your rating!

    Read More

  • Vegan Pumpkin Pie and Crust

    Vegan Pumpkin Pie and Crust

    recipe image

    “I got this recipe from vegan.org and I altered the ingredients slightly. I was nervous about the crust because I never work with dough, but my friends said that the crust was actually their favorite part of the pie because it had such a nice, crumbly texture and a delicious, light taste. The filling was awesome. Exactly how I remember “real” pumpkin pie tasting. The freshly ground cinnamon and nutmeg really make the difference, so don’t use any pre-ground stuff!”

    Ready In:
    1hr 25mins

    Ingredients:
    13

    • For the Crust

    • 1 12

      cups whole wheat pastry flour
    • 14

      teaspoon salt
    • 14

      cup canola oil
    • 4 -8

      tablespoons soymilk, cold
    • For the Filling

    • 1

      (15 ounce) can pumpkin
    • 1

      (12 ounce) package firm silken tofu
    • 34

      cup vegan sugar
    • 1

      teaspoon cinnamon, freshly ground
    • 12

      teaspoon nutmeg, freshly ground
    • 14

      teaspoon salt
    • 14

      teaspoon ground ginger
    • 14

      teaspoon allspice
    • 14

      teaspoon ground cloves

    directions

    • Preheat the oven to 400°F Set aside a 9” pie plate. In a mixing bowl, sift together the flour and salt. Cut in the oil, drizzling bit by bit and stirring with a fork until all of the oil is added and the flour resembles a coarse meal. Sprinkle the soy milk over the flour, 2 tablespoons at a time, and mix with your hands until you form a solid dough. Be careful not to overwork the dough or to add too much liquid. It should have a drier texture, not moist or soggy.
    • Form the dough into a ball and set on a piece of wax or parchment paper. Place another piece of paper on top and roll out the dough into a circle 1-2 inches wider than the pie plate. Remove the top paper and carefully transfer the crust to the plate. Smooth out the sides, trim off extra dough, and crimp the edges of the crust. Poke all over with a fork before placing in the oven. Cook for 12-15 minutes, until the crust is golden brown. Let cool before pouring in the filling.
    • To make filling, empty the silken tofu into a food processor and blend until smooth. Add the rest of the ingredients and blend until everything is well combined. Pour into the crust and smooth out the top. Bake in a 375F oven for one hour, or until a toothpick comes out almost clean. Let the pie cool for at least 30 minutes before serving.

    Questions & Replies


    Got a question?


    Share it with the community!

    Want a Second Helping?

    Sign up for our newsletter to get recipes, easy dinner ideas, tasty treats and more delivered straight to your inbox.

    To withdraw your consent or to learn more about your rights, see the Privacy Policy.

    RECIPE SUBMITTED BY

    “>

    I’ve been vegan since February of 2005, and I was vegetarian for almost a year before that. I love cooking vegan food. People always ask me, “What do you eat?” or, “Doesn’t being vegan make it harder to cook?” Nope! In fact, I’ve found that going vegan opened up a whole new world of cooking for me. I’ve tried ingredients I otherwise never would have heard of, and found vegan products that are even better than their non-vegan counterparts. I love creating new dishes and recipezaar has been a wealth of inspiration.

    Photo Sharing and Video Hosting at Photobucket

    View Full Profile

    Read More

  • Allergy-Friendly Vegan Lemon Shortbread

    Allergy-Friendly Vegan Lemon Shortbread

    recipe image

    “So, when I set about creating an allergy-friendly shortbread recipe that my niece could indulge in this Christmas, it was quite a frustrating endeavor.
    Thankfully, there are some wonderful vegan spreads on the market that work quite well. My favorites are the Earth Balance vegan buttery sticks and Nuttelax spread. Both work well in this recipe. But if you are not refraining from dairy or need to make these soy-free, feel free to use conventional butter, which will make these shortbread cookies taste even better. I have deliberately chosen to use coconut sugar in this recipe, as it adds a gorgeous caramel-like quality that comes the closest to replicating the richness of butter. But if you want to make these more forgiving on the purse strings, feel free to use conventional cane sugar. The secret ingredient in this blend is the vanilla extract and lemon zest. If you want these really lemony, feel free to add more zest, But two teaspoons was juuuuust right for me.”

    Read More

  • Vegan Chocolate Pecan Pie

    Vegan Chocolate Pecan Pie

    recipe image

    The page you are looking for no longer exists. Perhaps you can return back to the homepage and see if you can find what you are looking for. Or, you can try finding it by using the search form below.

    Read More

  • Roasted Cauliflower Chowder {Vegan}

    Roasted Cauliflower Chowder {Vegan}

    recipe image

    Encore post.  Originally published 12/15/14, I thought I’d bring our popular recipe for Roasted Cauliflower Chowder back this year.

    By now, you’ve likely seen my recipe for Whole Roasted Cauliflower and many of you have been asking…how do I serve it?  This Roasted Cauliflower Chowder is by far one of my all time favorite recipes to date!  We cut the whole roasted cauliflower into florets and reduced the simmering liquid.  To that, we added sauteed onions, carrots, leeks, celery and garlic.   Doesn’t it look amazing? Well, I can assure you…it tastes even better than it looks!

    Roasted Cauliflower Chowder

    Roasted Cauliflower Chowder

    The Whole Roasted Cauliflower recipe is where we begin…

    Whole Roasted Cauliflower

    Whole Roasted Cauliflower

    The cauliflower is first par-cooked in a flavorful broth.  It contains white wine, vegetable broth, olive oil, salt, lemon juice, vegan margarine, red pepper flakes, sugar, a bay leaf and water.  Bring that to a boil.

    Poaching Liquid

    Poaching Liquid

    Then, add the cauliflower (leaves and stem removed, but enough left to keep it intact).  Reduce the heat and simmer, turning occasionally until a knife easily inserts into the center.  About 15-20 minutes.  For the full simmering liquid recipe, click here…

    Poached Cauliflower

    Poached Cauliflower

    Cut the roasted cauliflower into florets.   There is already SO much flavor in this cauliflower!

    Roasted Cauliflower Chowder

    Roasted Cauliflower Chowder

    While the cauliflower is roasting, I reduced the simmering liquid down by about half.

    Meanwhile, in a saute pan with 2 Tbl of  vegan margarine, I sauteed onions, garlic, carrots, celery and leeks over medium-high heat.  Once the vegetables become tender, I added a bit of flour to thicken and cooked for about 1 minute.  This removes that raw flour taste.    Then, I added another cup of vegetable broth and 1 C of almond milk along with the reduced simmering liquid.  Cook for a few minutes, whisking to combine.  Season, if necessary, with salt and pepper.  It should be very flavorful and not need much more seasoning at this point.

    Cut the roasted cauliflower into bite-sized florets and add to the chowder.  Cook just unti heated through.

    Roasted Cauliflower Chowder

    Roasted Cauliflower Chowder

    Serve with a crusty loaf of bread to sop up all of those A-M-A-Z-I-N-G juices.  This soup is one I will make again and again.  I was thrilled with how well it came out.  My only regret is that I didn’t make more!  This serves about 4 people.

    Roasted Cauliflower Chowder

    Roasted Cauliflower Chowder

    Before you go, why not check out some of our recent videos and be sure to subscribe to the YouTube Channel! 🙂

    Author Veg Life Staff

    Ingredients

    • FOR THE POACHING LIQUID:
    • 1 C White Wine
    • 1-1/2 C Vegetable Broth
    • 1/3 C Olive or Grapeseed Oil
    • 1 Tbl Salt
    • 2 Tbl Lemon Juice
    • 2 Tbl vegan Margarine such as Earth Balance
    • 1-1/2 tsp Red Pepper Flakes
    • 1 Tbl Sugar
    • 1 Bay Leaf
    • 3 C Water
    • 1 head of Cauliflower leaves & most of the stem removed
    • *****
    • FOR THE CHOWDER BASE:
    • Reduced Simmering Liquid from the Whole Roasted Cauliflower Recipe
    • 2 Tbl vegan Margarine such as Earth Balance
    • 1 clove Garlic minced
    • 1 Onion diced
    • 2 large Carrots peeled and diced
    • 2 large Celery Stalks diced
    • 1 Leek chopped, rinsed well and dried
    • 1/4 C All-Purpose Flour
    • 1 C Low-Sodium Vegetable Broth I like Imagine brand, it’s really dark and flavorful
    • 1 C Almond Milk
    • Salt and Pepper to taste
    • Parsley for garnish
    • Soy Bacon-Flavored Bits for garnish if desired

    Instructions

    • Preheat oven to 475 degrees.

    • Combine all poaching liquid ingredients to a boil in a large pot.

    • Add the cauliflower, reduce to a simmer, turning occasionally until a knife inserts easily. This should take about 15-20 minutes.

    • Using two slotted spoons, or a mesh spider, transfer the poached cauliflower to a rack over a rimmed sheet pan. This will help to catch any remaining juices.

    • Roast, turning halfway through, until golden brown all over. This should take approximately 35-40 minutes.

    • While the cauliflower is roasting, reduce the simmering liquid by half over a medium boil.

    • In a large skillet with 2 Tbl of vegan margarine, saute the onions, garlic, carrots, celery and leeks until tender.

    • Once cooked, add 1/4 C of flour to the vegetables and continue to cook for 1-2 minutes. This cooks out that raw flour taste.

    • Add the reduced liquid to the vegetables along with 1 C almond milk and another 1 C of vegetable broth.

    • Continue to cook, whisking occasionally, until it incorporates and thickens slightly.

    • Cut the cauliflower into florets and add to the broth, cooking just until heated through.

    • Garnish with fresh parsley and soy bacon-flavored bits, if desired.

    • Serve with a crusty bread (perfect for catching all of those delicious juices).

    Read More