Author: PatagoniaLlami

  • Delicious Gluten-free Vegan Chocolate Chip Cookies

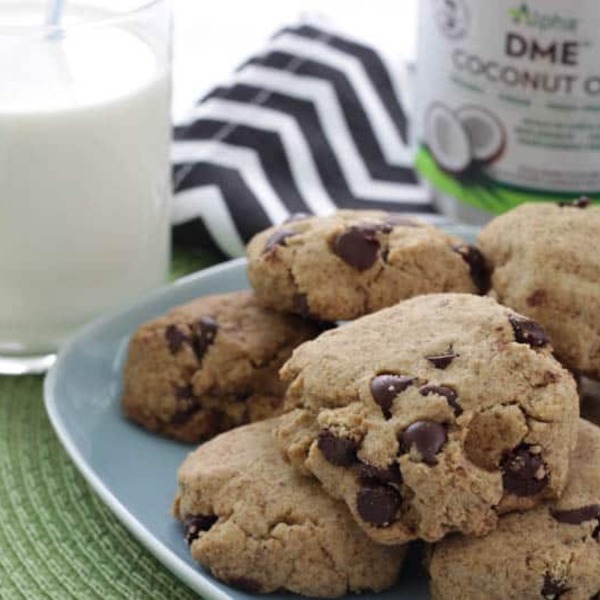
    Delicious Gluten-free Vegan Chocolate Chip Cookies

    recipe image

    These cookies are adapted from The Cornucopia At Home Cookbook, a wonderful vegetarian cookbook.

    If you ever get a chance to visit the Cornucopia Restaurant in Dublin, do. It is an oasis of really great food, made with love. These cookies take no skill to make, and can feed a diverse crowd because they taste great and are dairy, gluten, nut and egg free. These are even better the second day, if you can save any for the next day! Enjoy!

    Ingredients:

    2 tbsp. ground flax seeds


    5 tbsp. cold water


    1 cup coconut blossom sugar or granulated sugar


    3/4 cup of DME Coconut Oil


    1 tbsp. vanilla extract


    2 cups brown rice flour


    1/2 tsp. sea salt


    1 cup vegan chocolate chips

    Directions:

    Preheat oven to 350F°. Line two cookie sheets with a silicon mat or parchment paper.

    Mix flax and water in a small dish and let sit 5 minutes.

    In the bowl of a standing mixer, cream coconut oil, sugar, and flax mixture.

    Add vanilla and beat until combined.

    Add flour and salt, and combine.

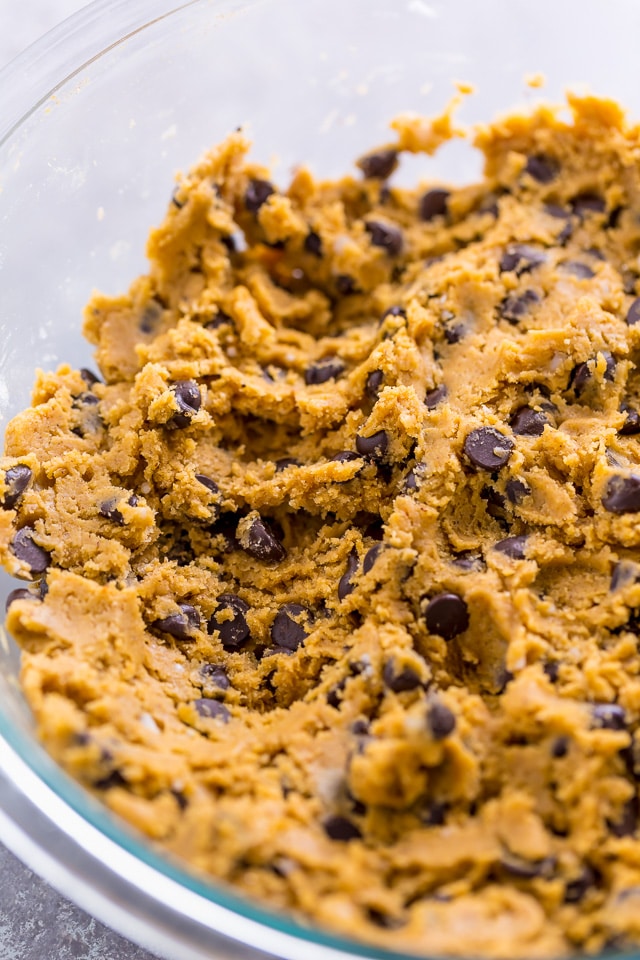
    Fold in chocolate chips.

    Take about 1.5 Tbsp. of dough and form into a cookie shape. Place on cookie sheet 1″ apart from the next.

    Bake 20 minutes. Let cool.

    Read More

  • Vegan banoffee pie

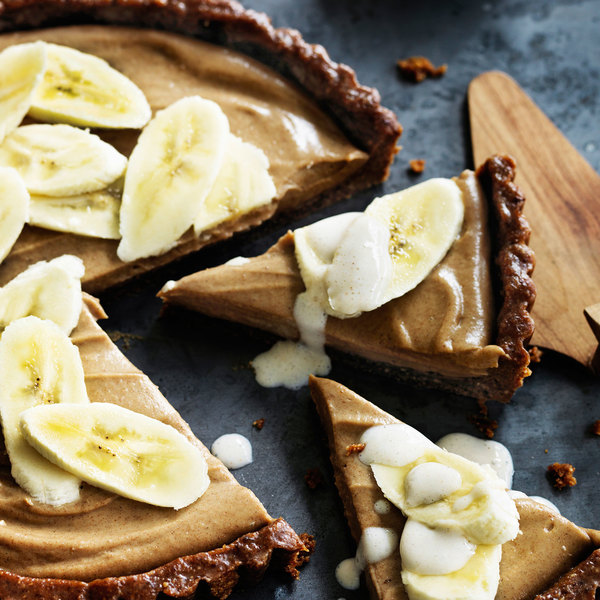
    Vegan banoffee pie

    recipe image
    Ingredients:

    • 3/4 cup (90g) pecans
    • 250 gram vegan biscuits
    • 1/2 cup (115g) coconut oil, at room temperature
    • 1 tablespoon cacao powder
    • 12 fresh dates (230g), pitted
    • 1/3 cup (50g) coconut sugar
    • 1 tablespoon water
    • 1 tablespoon cornflour (cornstarch)
    • 270 millilitre canned coconut cream
    • 1 teaspoon vanilla extract
    • 3 medium bananas (600g)
    • 300 gram silken tofu
    • 2 tablespoon pure maple syrup
    • 1/2 teaspoon ground cinnamon

    Read More

  • Vegan Breakfast Sausages

    Vegan Breakfast Sausages

    recipe image

    “>

    My rating system (Which I stole from HeatherFeather, I think she put it perfectly) —

    5 Stars: Outstanding,a special find that I will make over and over again.

    4 Stars: Very good, something I highly recommend others to try, I would make this again, although I might make minor changes to suit my tastes.

    3 Stars: Good, but not something I will make again often. Might need some slight changes, but in general the recipe works and others might enjoy this more than I did.

    2 Stars: Fair, recipe did not work out well for me and I cannot recommend it. Not what I was expecting.

    1 Star: Poor, recipe did not work at all and I would caution others to consider another recipe.

    —————————–

    Well, obviously I love to cook since I’m here on Zaar! Besides that (in the food dept) I’ve got my hands in a little of everything. I do a lot of canning these days. As well as drying and freezing. I do a lot of berry picking in the summer as well as other wild foraging. I’m just learning, but I’m coming along fast. I love plants and botony so learning about local eatables and herbs has always been an interest. Plus home gardening ofcoarse 🙂 But I don’t have much room right now.

    I’ve just started experimenting with home brewing (trying some basic and easy wines and meads) Hopfully I’ll eventually become adept at that and be the family’s Merry maker lol Any tips are welcomed!

    Ideally I spend most of my time trekking around the woods and mountains here in PA looking for adventures and hidden treasures, old ruins, and historical trails. ( I may have an overactive imagination :). I love backpacking and camping. If there wasn’t anyone around to drag me home I’d probably just disppear into the wilderness never to return.

    I have a major interest in Mythology and History (focusing mainly on Ancient Greece, but I’m enthralled by all ancient history and interested in anything up until the second half of the 20th century)

    I really enjoy learning the old ways of doing things. I’m definitely not suited to this cellphone infested, computer run, digitalized existence we’re living, it all just hurts my head and makes me wonder if anyone has any original thought or imagination left.

    Halloween (Samhain) is another of my favorite things in the world. I wait for it all year and make a full week out of it. Building props and setting up yard displays keeps my head spinning strait through Sept and Oct. I admit I still go trick or treating some years. Other years I try to organize scavenger hunts or treasure hunts etc. Wish I could get more people interested though! Usually just 3 or 4 of us. I also do all the traditional things for a proper Pagan New Year so it’s a very busy week!

    I love summer and I live for the heat. 90 degrees is when I feel the best. I hate the cold! Despite that Autumn is my favorite time of year though! Fairs, festivals (anyone who lives in PA knows we have some of the most crazy, odd and fun festivals!), Harvest feasts, Fall foraging and gathering, corn field fights, haunted hayrides, pumpkin patches, crafts, all the fresh veggies! The leaves ,the trees, the colors, dressing up, popcorn balls, candy apples, apple picking, apple cider, Mabon and Halloween, the smell of fires, and herbs…. I could go on and on here.

    My dream in life is basically to live off the grid. To own a large piece of land in the middle of nowhere surrounded by forest. Enough room to grow the majority of our own food (“our” is still up in the air) To have a little cabin, some chickens, a couple of horses, my cats and a barn big enough to accommodate a small wildlife rehab center (I’m hoping to become certified in the next couple of years.

    I’ve rambled on enough I think. I have a dreaded myspace page (link below) if anyone wants to know anything more.

    Read More

  • Vegan Quinoa-Stuffed Acorn Squash

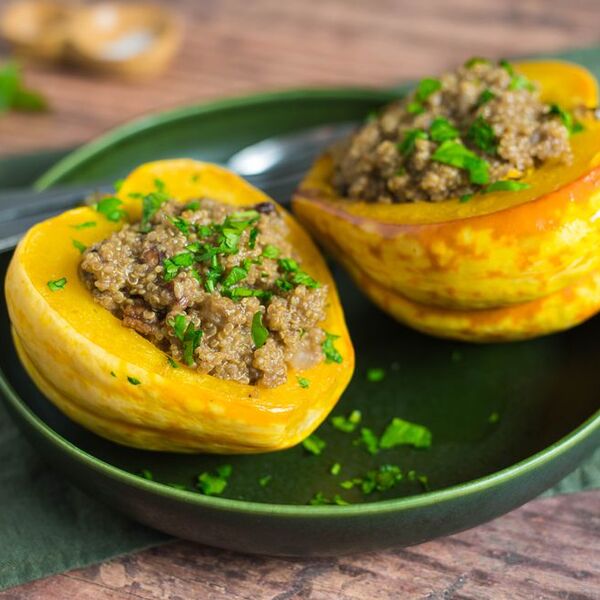
    Vegan Quinoa-Stuffed Acorn Squash

    recipe image

    The Spruce / Victoria Heydt


    Vegetarian stuffed acorn squash is easy to prepare yet makes an elegant entree for a vegetarian Thanksgiving or any special meal. This recipe is both vegetarian and vegan. Serve topped with a vegetarian gravy if desired. Scroll down for more vegetarian stuffed squash recipes.


    Cook Mode
    (Keep screen awake)

    • 3 large acorn squash

    • 2 tablespoons margarine, softened

    • 2 tablespoons olive oil

    • 1 medium onion, minced

    • 2 stalks celery, diced

    • 2 medium apples, coarsely chopped

    • 1/4 cup maple syrup

    • 1/2 cup raisins

    • 1/4 teaspoon parsley

    • 1/2 teaspoon dried sage

    • 1/2 teaspoon rosemary

    • 1/2 teaspoon thyme

    • Salt, to taste

    • Freshly ground black pepper, to taste

    • 1 package store-bought vegan cornbread stuffing mix

    1. Gather the ingredients and preheat oven to 400 F.

      The Spruce / Victoria Heydt
    2. Slice each acorn squash in half and remove the seeds. Brush the squash with the softened margarine and set aside.

      The Spruce / Victoria Heydt
    3. In a large skillet, saute the onion, celery, and apple in the olive oil for 6 to 8 minutes.

      The Spruce / Victoria Heydt
    4. Reduce heat and add the maple syrup, raisins, herbs, salt and pepper and stir to combine.

      The Spruce / Victoria Heydt
    5. In a large bowl, mix together the stuffing mix with the onion, celery and apple mixture until well combined. Spoon this mix into each squash half.

      The Spruce / Victoria Heydt
    6. Place on baking sheet and cover each squash with foil.

      The Spruce / Victoria Heydt 
    7. Bake for 40 to 45 minutes, or until squash is soft.

      The Spruce / Victoria Heydt
    8. Serve with vegetarian gravy if desired and enjoy!

      The Spruce / Victoria Heydt
    Nutrition Facts (per serving)
    276 Calories
    10g Fat
    48g Carbs
    3g Protein

    ×

    Nutrition Facts
    Servings: 6
    Amount per serving
    Calories 276
    % Daily Value*
    10g 13%
    Saturated Fat 2g 9%
    0mg 0%
    204mg 9%
    48g 18%
    Dietary Fiber 7g 27%
    Total Sugars 23g
    3g
    Vitamin C 16mg 79%
    Calcium 85mg 7%
    Iron 2mg 9%
    Potassium 714mg 15%
    *The % Daily Value (DV) tells you how much a nutrient in a food serving contributes to a daily diet. 2,000 calories a day is used for general nutrition advice.

    (Nutrition information is calculated using an ingredient database and should be considered an estimate.)

    Rate This Recipe

    I don’t like this at all.
    It’s not the worst.
    Sure, this will do.
    I’m a fan—would recommend.
    Amazing! I love it!
    Thanks for your rating!

    Read More

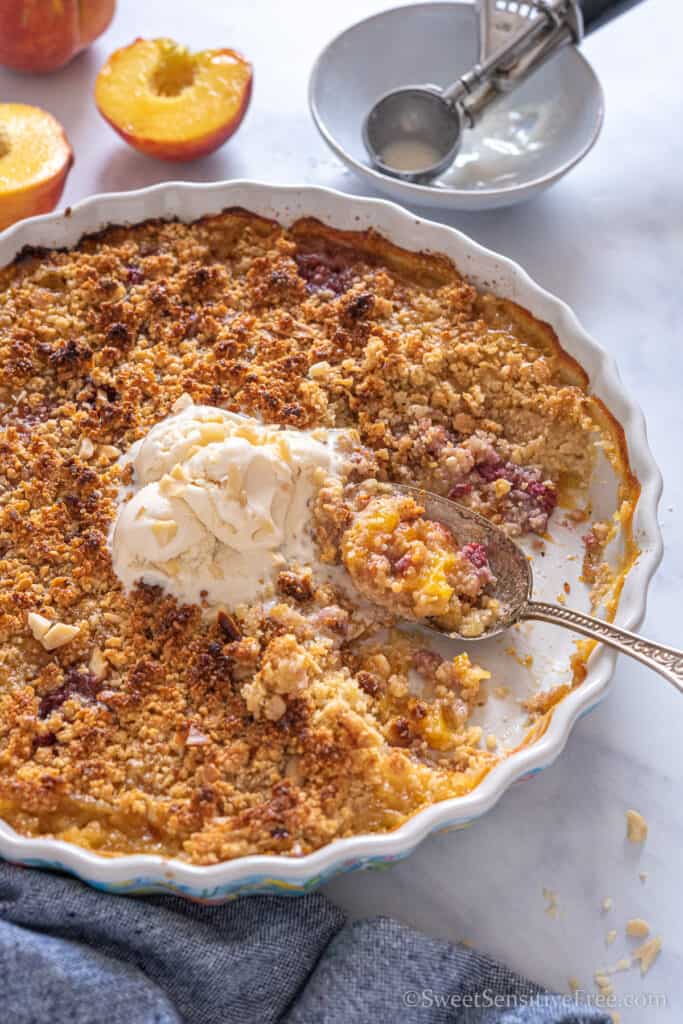
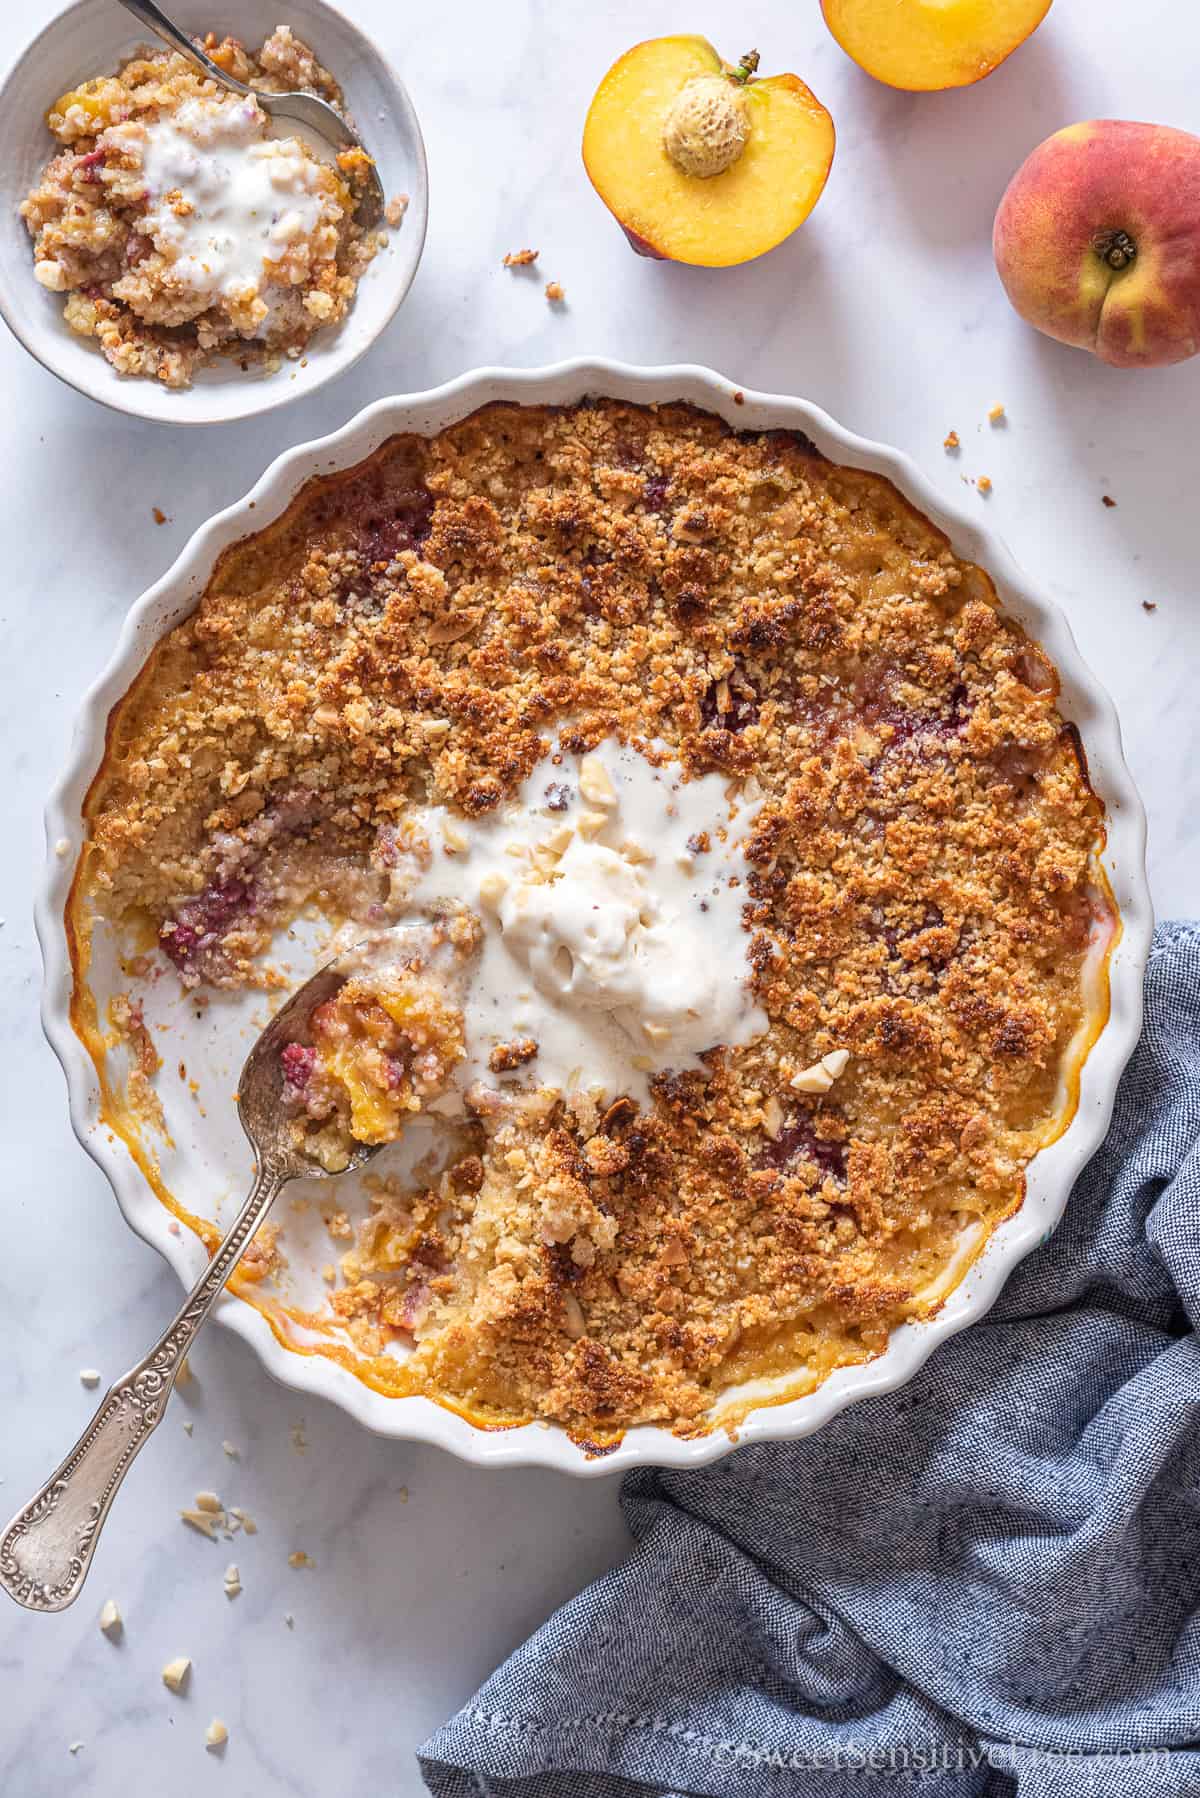
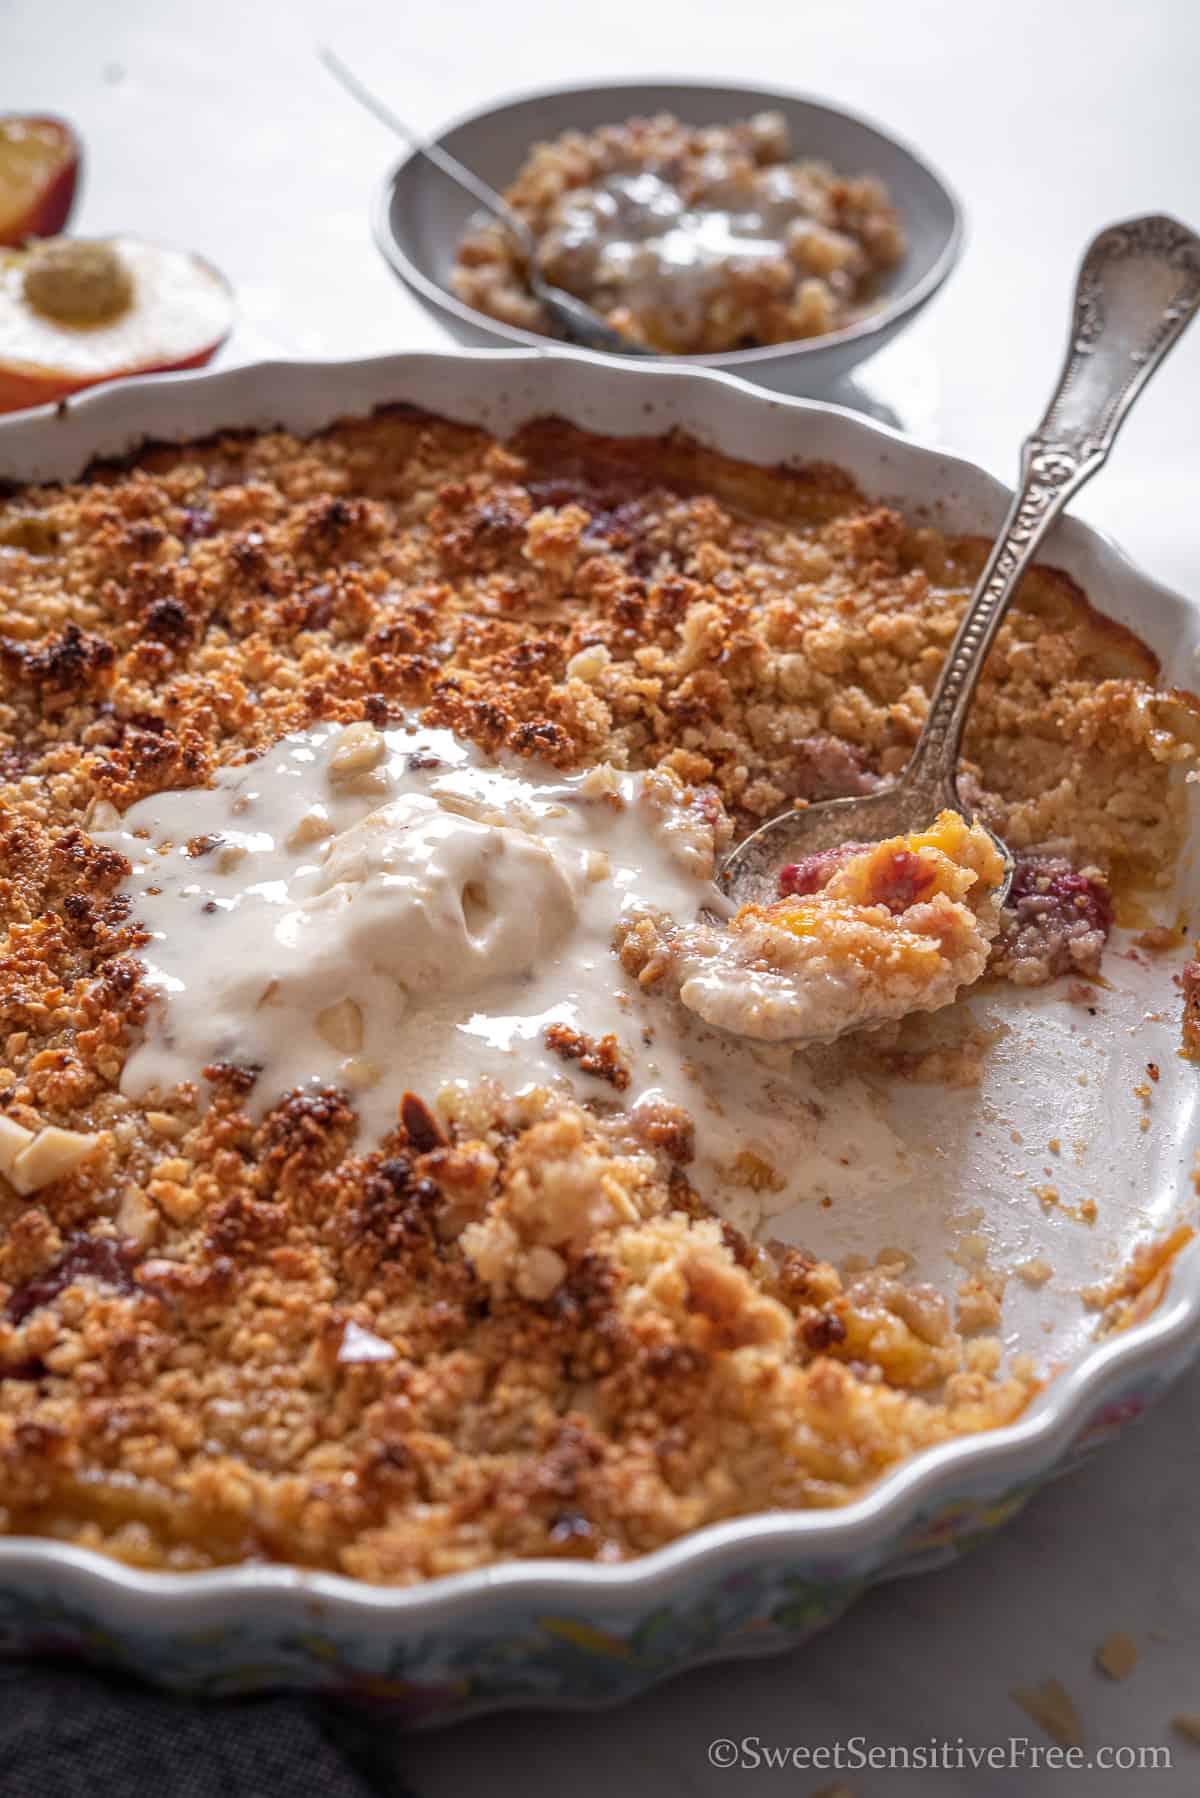
  • Peach Crumble | Gluten free * Vegan

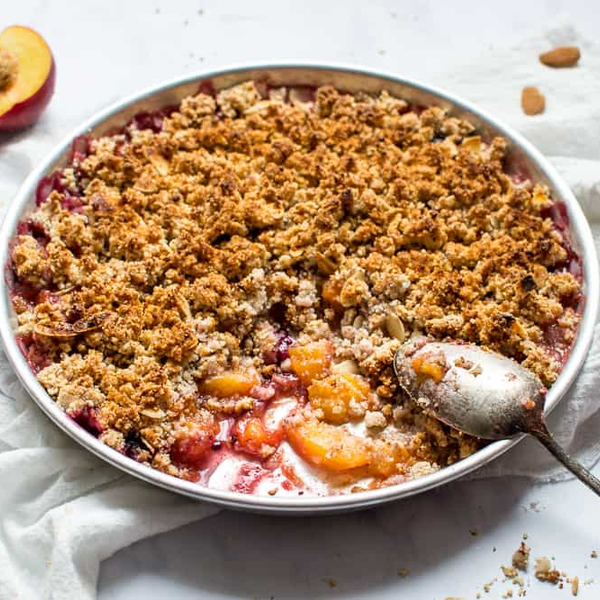
    Peach Crumble | Gluten free * Vegan

    recipe image

    Modified: by Sweet Sensitive Free

    A delicious vegan peach dessert! This gluten free peach crisp is so simple to make, it is dairy free and without oats and it’s the perfect amount of crispy, sweet and juicy!

    Jump to:
    • Ingredients
    • Instructions
    • Tips and Substitutions
    • 📖 Full Recipe

    It is the season of peaches, some of the most juicy and delicious fruits of the whole year, which (as you may already know) I can’t eat raw because of cross reactivity with my pollen allergy. Urghhh!

    So I decided tomake a gluten free vegan peach crumble, a baked dessert with a juicy fruit base and a crunchy sweet topping.

    Looking for another deliciously summer-y dessert? Check out this gluten free vegan lemon cake with coconut frosting!

    Ingredients

    As you know, for most of my recipes I like to keep things as simple as possible.

    For the fruit base you will need:

    • fresh peaches, they shouldn’t be over ripe
    • brown sugar, you can omit it or use another sweetener of your choice of course
    • rum, this one is definitely optional but nice for an extra kick
    • berries (optional), I usually add them when I have a handful of frozen ones that need to be used up

    For this vegan peach crisp topping without oats you will need:

    • almond flour, or make your own almond meal by finely grinding raw almonds in a food processor or blender
    • margarine or vegan butter, it has to be cold and not softened/room temperature
    • brown sugar, here too you can omit it or use another sweetener of your choice
    • vanilla extract, this is optional or can be replaced with grated lemon zest too
    • pinch of salt, to contrast the sweetness
    • sliced or chopped almonds for extra crunch
    • plant based and gluten free ice cream or yogurt, great for that warm/cold contrast when you serve this gluten free peach crisp slightly warm!

    Find all the quantities in the recipe card below

    Instructions

    Here’s how to make your homemade non dairy peach crisp gluten free and without oats:

    • slice the peaches as you prefer, either into wedges or irregular pieces
    • place them in a non-sticking pan, add the sugar and let simmer on medium-low heat for a few minutes
    • if desired, add the rum and let simmer for another 5 minutes
    • add almond flour, sugar (optional), salt, vanilla (optional), margarine and the chopped almonds to a bowl and mix well, squeezing all the ingredients together with your hands
    • refrigerate for 30 minutes
    • pre-heat the oven at 180 C / 350 F
    • spread the cooked peaches in a baking pan, sprinkle a handful of (frozen) berries (optional) and crumble the almond mixture all over the peaches
    • bake for 20-30 minutes or until the fruit base is bubbly and the topping is nice and golden-brown
    • serve warm topped with ice cream or yogurt

    Tips and Substitutions

    Can I replace some of the almond flour with other gluten free flours?

    Yes, you can replace 100 gr of almond flour with (brown) rice flour or quinoa flour for an even crispier topping

    Can I make this gluten free peach crisp with frozen peaches or canned peaches?

    Yes, when using frozen raw peaches cook them as per recipe, while if you are using canned peaches, place them directly in the baking pan without pre-cooking them

    What could I replace the rum with?

    You can replace it with lemon or orange juice

    What other fruits would work great with this vegan peach crisp?

    I love to add apricots and plums. I also love to add a handful of fresh or frozen berries, either blueberries, raspberries or strawberries.

    Making this gluten free peach dessert is easy and quick. It is also lighter and healthier than a gluten free peach cobbler.

    It definitely calls for (vegan) ice cream or yogurt on top, even better when the peach crisp is served still warm!

    If you make this recipe or have questions, leave me a comment down here! And a 5 star rating if you have loved it would help me grow the blog 😉

    For all the updates, follow me on Pinterest and Instagram and tag me if you make this or any of my recipes! I absolutely LOVE to see what you make and share it in my stories!

    Ciao!

    Sonia

    📖 Full Recipe

    gluten free peach cobbler topped with vegan icecream

    Gluten free Peach Crisp | Vegan + Oat free

    A super easy recipe for vegan gluten free peach crisp, an easy dairy free dessert to serve warm and topped with ice cream or yogurt!

    Prep Time 20 minutes

    Cook Time 30 minutes

    Resting time for the crumble 30 minutes

    Total Time 1 hour 20 minutes

    Course Dessert

    Cuisine American

    Equipment

    • 1 knife

    • 1 non sticking pan

    • 1 bowl

    • 1 10-inch baking pan or pie dish

    • 1 kitchen scale

    Ingredients  

    For the fruit base

    • 7-8 yellow peaches
    • 3 tablespoon brown sugar or other sweetener (optional)
    • 3-4 tablespoon rum (optional)

    For the crumble

    • 300 gr almond flour (or homemade finely ground almond meal) Alternatively you can also use 200 gr almond flour + 100 gr rice flour
    • 3 tablespoon brown sugar or other sweetener (optional)
    • ¼ teaspoon of salt
    • 100 gr margarine or vegan butter
    • vanilla extract to taste (optional)
    • 2 tablespoons sliced or chopped almonds
    • (vegan) yogurt or icecream for serving

    Instructions 

    • slice the peaches as you prefer, either into wedges or irregular pieces

    • place them in a non-sticking pan, add the sugar and let simmer on medium-low heat for 5-10 minutes, until the peach juices come out

    • if desired, add the rum and let simmer for another 5 minutes

    • in a bowl add almond flour, sugar (optional), salt, vanilla (optional), margarine and the chopped almonds and mix well, squeezing all the ingredients together with your hands, until big crumbs form

    • refrigerate the almond mixture for 30 minutes

    • pre-heat the oven at 180 C / 350 F

    • spread the cooked peaches in a baking pan, sprinkle a handful of (frozen) berries (optional) and crumble the almond mixture all over the peaches

    • bake for 20-30 minutes or until the fruit base is bubbly and the topping is nice and golden-brown

    • serve warm, topped with ice cream or yogurt

    Keyword baked, dessert, gluten free, oat free, summer, vegan

    Loved this recipe?Let me know how it was! Leave a comment and rating down below!

    Reader Interactions

    Read More

  • Paleo (or Vegan!) Sweet Potato Casserole

    Paleo (or Vegan!) Sweet Potato Casserole

    recipe image

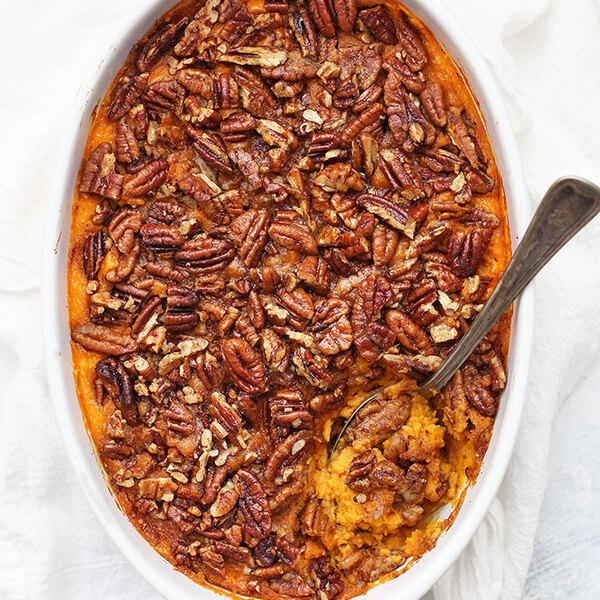
    Our favorite holiday side dish is better than ever! This paleo or vegan sweet potato casserole recipe is a naturally sweetened combination of mashed sweet potato filling and a crunchy maple pecan topping your whole family will LOVE.

    spoon scooping into a pan of healthy sweet potato casserole

    Since 2016, this paleo sweet potato casserole recipe has been a staple on our holiday table and hundreds of your holiday tables. It’s THE BEST!

    • It’s EASY to make. No fancy skills or special equipment required! You won’t need any fancy flours or hard-to-find ingredients either.
    • It’s DELICIOUS. Velvety smooth sweet potato puree is topped with a crunchy maple pecan topping. Every bite has a delicious combination of textures and balanced flavor.
    • It’s HEALTHIER than classic sweet potato casserole. This gluten-free sweet potato casserole is naturally sweetened, easily dairy-free, and paleo AND vegan friendly. It works for so many different dietary needs!
    • It’s a CROWD FAVORITE. This is always one of the first Thanksgiving side dishes to disappear! The creamy sweet potatoes, the perfect crunch of the pecans? ALWAYS a hit! 
    • It’s MAKE-AHEAD FRIENDLY. Another great thing about this classic side dish is that you can absolutely make it in advance, which frees up time on Thanksgiving Day!

    Here’s all you need to get started on this healthy sweet potato casserole recipe…

    ingredients for healthy vegan or paleo sweet potato casserole

    Simple Ingredients To Start

    So, what makes this paleo/vegan sweet potato casserole different from traditional sweet potato casserole? A few simple ingredient swaps! Let’s take a look:

    • Fresh Sweet Potatoes. To start, you’ll need peeled, diced sweet potatoes. Look for orange-flesh sweet potatoes, rather than purple sweet potatoes or white sweet potatoes. (Some stores in the U.S. label these as yams).
    • Dairy-Free Milk. Next up is your favorite non-dairy milk. Use whatever you drink at home–almond milk, cashew milk, oat milk, coconut milk, and soy milk all work! (For paleo, avoid soy milk.)
    • A Little Fat. Next, you’ll need some melted butter, ghee, melted vegan butter (like Earth Balance), or melted coconut oil. Choose the one that fits your dietary needs best! 
    • Pure Maple Syrup. No white sugar or brown sugar here! Maple syrup (NOT pancake syrup!) adds just the right amount of subtle sweetness to both the sweet potato filling and the crunchy pecan topping.
    • Salt & Vanilla. Some kosher salt and vanilla extract round out the flavors beautifully.
    • Eggs or An Egg Substitute. For paleo, feel free to use regular eggs. For vegan, use 2 Tablespoons powdered egg substitute (such as Ener-G egg replacer or The Neat Egg), or 1 Tablespoon cornstarch).
    • Raw Pecans. For the maple pecan topping, you’ll need RAW pecans. If you use toasted or roasted pecans, they’ll burn in the oven. Start with raw pecans for best results!
    • Cinnamon. A little bit of cinnamon adds the perfect finishing flavor!

    How To Make Vegan or Paleo Sweet Potato Casserole, Step By Step

    As always, you can find the full recipe with ingredient amounts, detailed instructions, and tips in the recipe card below.

    making paleo sweet potato casserole, step by step

    First, Make The Sweet Potato Filling

    1. Cook Sweet Potatoes. Place sweet potato cubes in a large pot and cover by at least 2-3 inches of water. Bring to a boil over medium-high heat. Boil until fork tender (potatoes will pierce easily with a fork). Drain sweet potatoes.
    2. Combine. Transfer cooked sweet potatoes to a large bowl. Add milk, butter/oil, syrup, salt, vanilla, and egg/egg sub.
    3. Mash with a potato masher, fork, or hand mixer until no lumps remain. If needed, add 2-3 Tbsp additional milk if your mixture seems too thick. (For perfectly smooth mash, you can work in batches and puree in a food processor or blender!)
    4. Transfer. Pour the mashed sweet potato mixture into an 8×8 or 2 quart baking dish and smooth the surface. (You can make the sweet potato casserole up to this point the day before Thanksgiving, if desired. Simply cover the baking dish and refrigerate)
    making pecan topping and baking paleo sweet potato casserole

    Next, Make The Pecan Topping & Bake

    1. Preheat. When ready to bake the sweet potatoes, preheat the oven temperature to 375 degrees F.
    2. Combine. In a medium bowl, combine pecans, butter/oil, syrup, cinnamon, and salt.
    3. Sprinkle pecan crumble mixture on top of the sweet potatoes.
    4. Cover the dish with foil and bake 20 minutes at 375 degrees.
    5. Remove foil and bake another 20-25 minutes. If pecans begin to brown too quickly, simply cover with foil again.
    6. Serve & Store. Enjoy warm from the oven. Store leftovers covered with plastic wrap or foil in the fridge 2-3 days. (You *can* transfer it to an airtight container, but I find the layers preserve better in the casserole dish.) 

    If you’ve got multiple things in the oven (like for Thanksgiving Dinner!), allow yourself some extra time. If your oven is set to a lower temperature or full of other dishes, you’ll need to bake this closer to an hour. Be sure to watch your pecans, so they don’t burn. (I only remove the foil when there’s about 20 minutes to go.)

    spoon scooping into a pan of paleo sweet potato casserole

    FAQ + Tips And Tricks For The Best Paleo or Vegan Sweet Potato Casserole

    Make-Ahead Tips. For best results, I recommend making the sweet potato filling and pecan topping and storing them separately until right before baking. You can keep them both in the fridge 1 day in advance, then assemble right before baking the next day. 

    Vegan Notes. For vegan, be sure to use dairy-free milk, vegan butter or coconut oil in place of butter, and either cornstarch or powdered egg substitute. If using powdered egg substitute, follow the directions on the package. Most call for about 1 Tbsp of water per 1 Tbsp of powder.

    Double The Recipe. If you’re feeding a crowd, feel free to double the recipe to fit a 9×13 casserole dish! The bake time & instructions will stay the same.

    CAN I MAKE THIS WITH MARSHMALLOW TOPPING INSTEAD? If you prefer your sweet potato casserole with marshmallows, you can use vegan marshmallows or try this paleo marshmallow fluff or this vegan marshmallow fluff topping! 

    a pan of paleo sweet potato casserole with maple pecan topping

    Recipe Card

    🌟 Did you make this recipe?

    Leave a star rating below when you try our Healthy Paleo Sweet Potato Casserole recipe! We can’t wait to hear what you think!

    Print

    Description

    A healthy take on a classic recipe! This paleo or vegan sweet potato casserole recipe has never been better. Tender mashed sweet potatoes topped with a crunchy pecan topping, and no refined sugar in sight! 


    Sweet Potato Mash Ingredients:

    • 2 pounds sweet potatoes (about 3 medium potatoes), peeled and diced
    • 1/3 cup non-dairy milk (I use unsweetened almond milk, cashew milk, or coconut milk)
    • 3 Tablespoons butter, ghee, vegan butter, or coconut oil (melted)
    • 1/4 cup pure maple syrup
    • 1 teaspoon kosher salt
    • 1 teaspoon vanilla extract
    • 2 eggs, 2 Tbsp egg substitute (such as Ener-G egg replacer or The Neat Egg), or 1 Tbsp. cornstarch

    Pecan Topping Ingredients:

    • 1 1/2 cups pecans, roughly chopped
    • 2 Tablespoons butter, ghee, vegan butter, or coconut oil (melted)
    • 3 Tablespoons pure maple syrup
    • 1/2 teaspoon cinnamon
    • pinch kosher salt or sea salt


    Make The Sweet Potato Mash:

    1. Cook Sweet Potatoes. Place sweet potato cubes in a large pot and cover by at least 2-3 inches of water. Bring to a boil over medium-high heat. Boil 8-10 min or until fork tender (potatoes will pierce easily with a fork). Drain sweet potatoes.
    2. Combine. Transfer cooked sweet potatoes to a large mixing bowl. Add milk, butter/oil, syrup, salt, vanilla, and egg/egg sub.
    3. Mash with a potato masher, fork, or hand mixer until no lumps remain. If needed, add 2-3 Tbsp additional milk if your mixture seems too thick. (For perfectly smooth mash, you can work in batches and puree in a food processor or blender!)
    4. Transfer. Pour the mashed sweet potatoes mixture into an 8×8 or 2 quart baking dish and smooth the surface. (You can make the sweet potato casserole up to this point the day before Thanksgiving, if desired. Simple cover the baking dish and refrigerate)

    Make The Topping & Bake:

    1. Preheat. When ready to bake the sweet potatoes, preheat the oven to 375 degrees F.
    2. Combine. In a medium bowl, combine pecans, butter/oil, syrup, cinnamon, and salt.
    3. Sprinkle pecan streusel topping over the sweet potato mash.
    4. Cover the dish with foil and bake 20 minutes at 375 degrees.
    5. Remove foil and bake another 20-25 minutes. If pecans begin to brown too quickly, simply cover with foil again.
    6. Serve & Store. Enjoy warm from the oven. Store leftover sweet potato casserole covered in the fridge 2-3 days. (You *can* transfer it to an airtight container, but I find the layers preserve better in the casserole dish.) 

    **If you’ve got multiple things in the oven (like on Thanksgiving), allow yourself some extra time. If your oven is set to a lower temperature or full of other dishes, you’ll need to bake this closer to an hour. Be sure to watch your pecans (I only remove the foil when there’s about 20 minutes to go).

    Notes

    • Vegan Notes. For vegan, be sure to use dairy-free milk, vegan butter or coconut oil, and either cornstarch or powdered egg substitute. If using powdered egg substitute, follow the directions on the package. Most call for about 1 Tbsp of water per 1 Tbsp of powder.
    • Double The Recipe. If you’re feeding a crowd, feel free to double the recipe to fit a 9×13 casserole dish! The bake time & instructions will stay the same. 
    • Make-Ahead Tips. For best results, I recommend making the sweet potato filling and pecan topping and storing them separately until right before baking. You can keep them both in the fridge 1 day in advance, then assemble right before baking. 

    • Prep Time: 30 minutes
    • Cook Time: 40 minutes
    • Category: Side Dish
    • Method: Baking
    • Cuisine: American

    Originally shared November 2016. Updated Nov 2021, then updated and republished again October 2024.

    Read More

  • Vegan Pumpkin Chocolate Chip Cookies

    Vegan Pumpkin Chocolate Chip Cookies

    recipe image

    by Ashley Manila 84 Comments

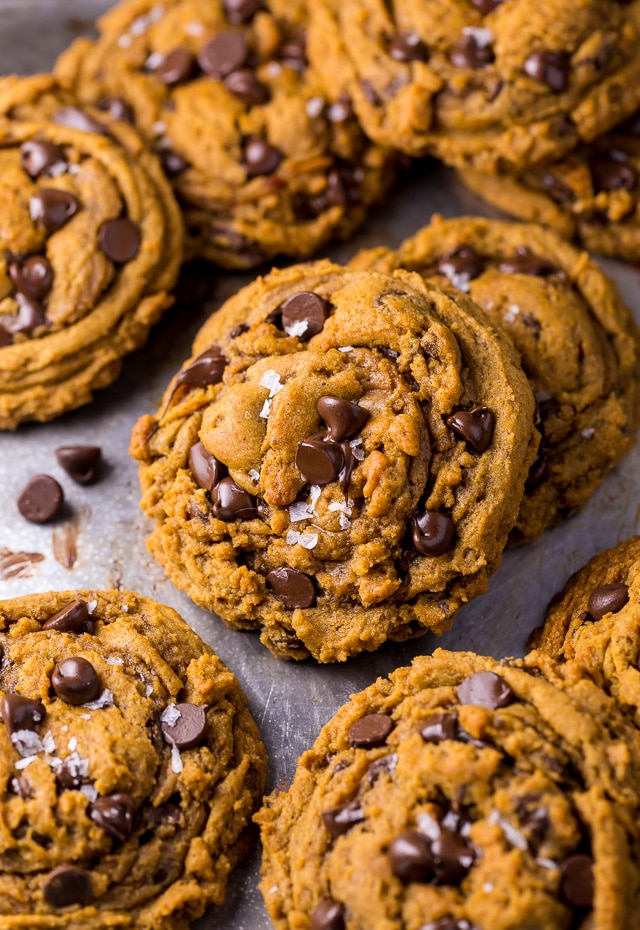
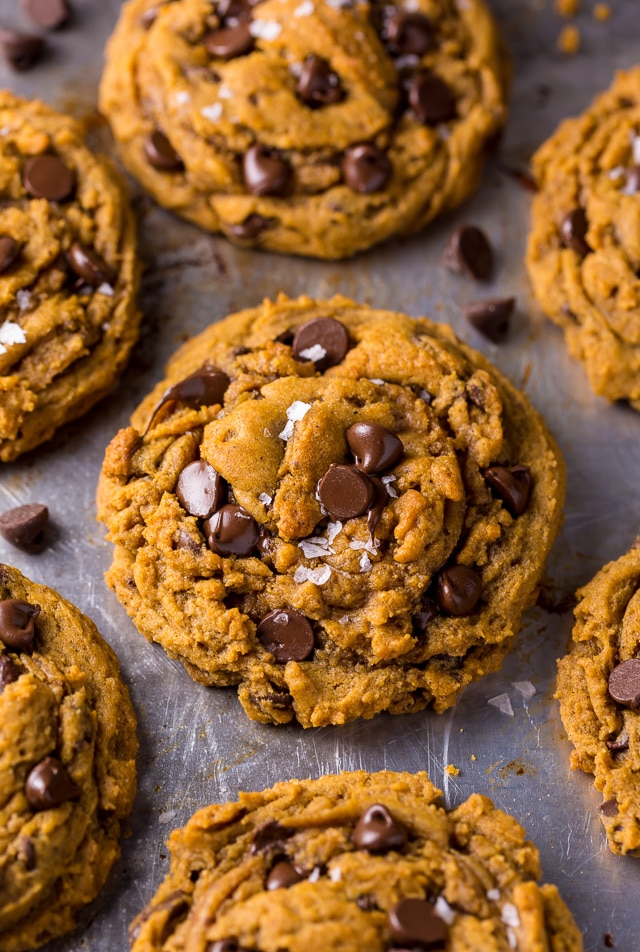
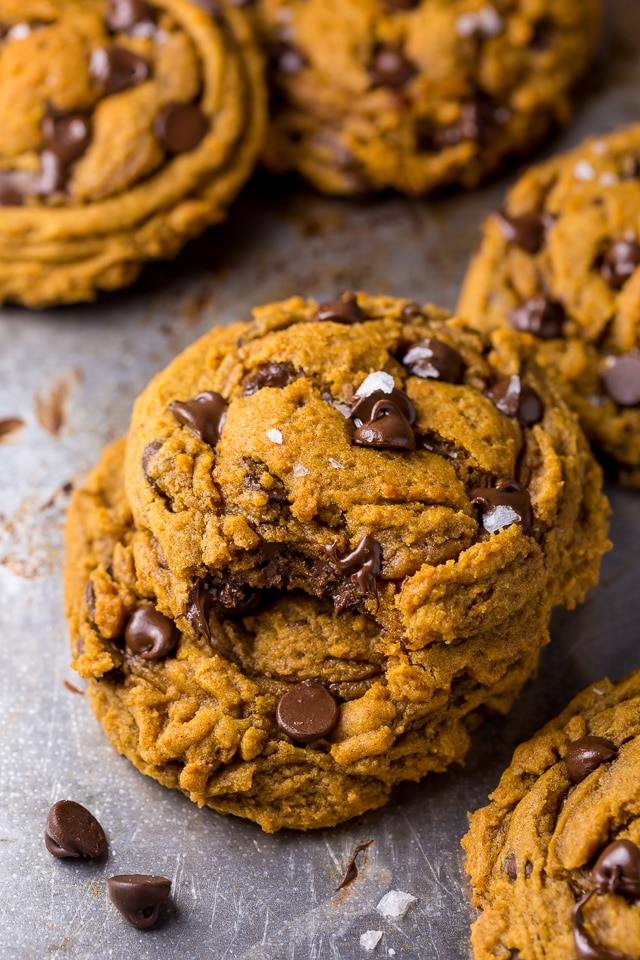
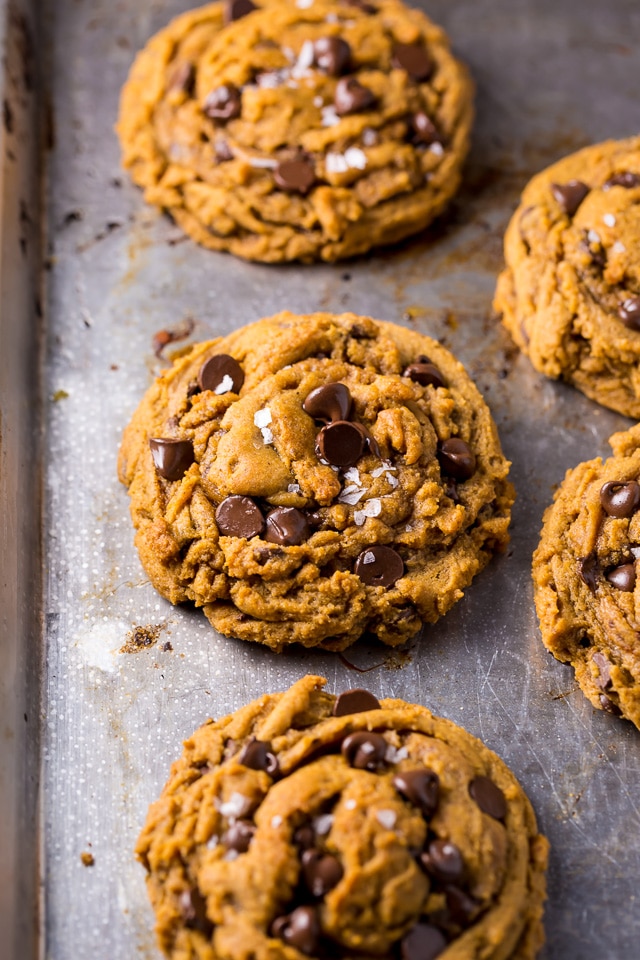
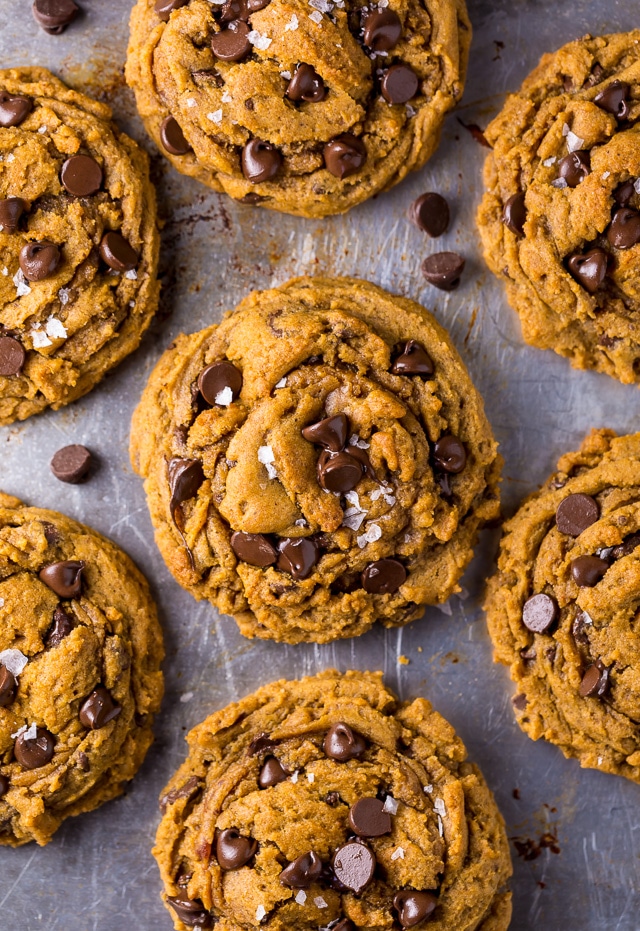
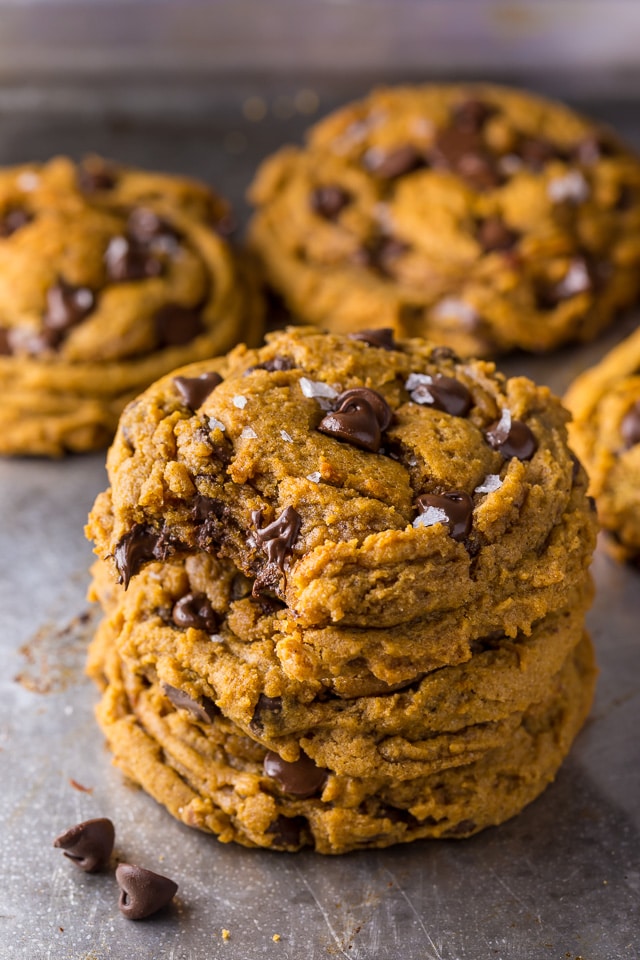
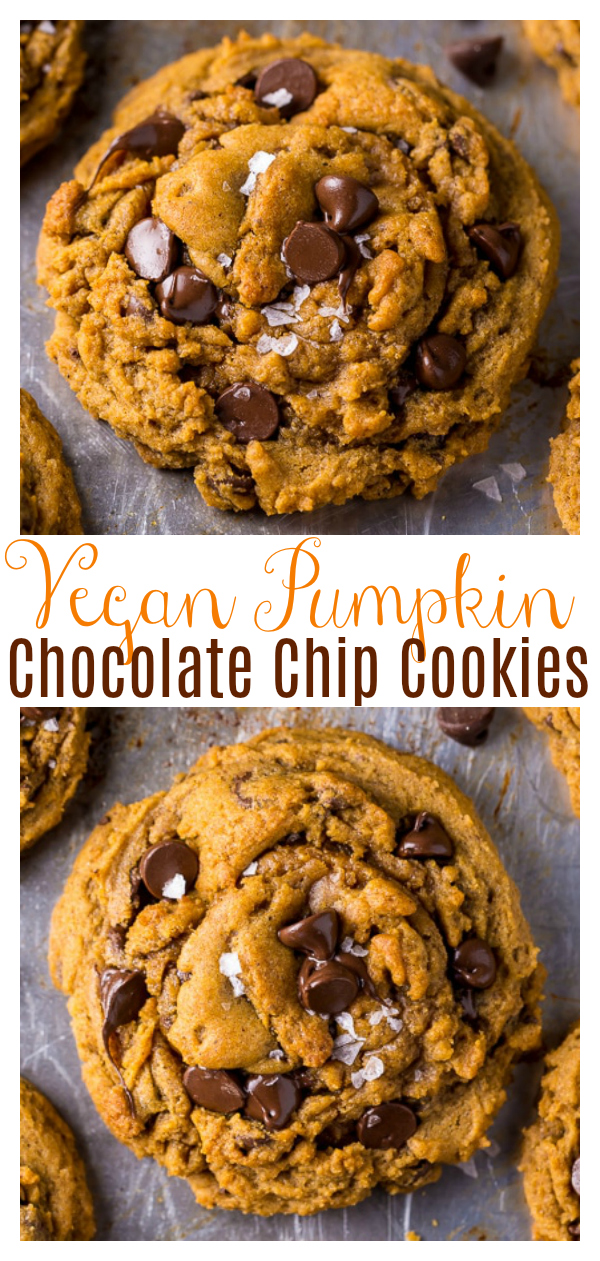
    Say hello to the BEST Vegan Pumpkin Chocolate Chip Cookies ever! Thick, chewy, and loaded with real pumpkin flavor! The trick is to let them rest on the baking until cool… then they won’t be cakey!

    Say hello to the BEST Vegan Pumpkin Chocolate Chip Cookies ever!

    Vegan Pumpkin Cookies

    Do you have a can of pumpkin in your kitchen right now? Please, tell me you do… because you’ll need it to make these easy pumpkin chocolate chip cookies! And trust me, you’re definitely going to want to make these beauties ASAP.

    Because let’s be real: can you think of any better way to spend a chilly Fall afternoon than baking and then devouring these pumpkin chocolate cookies? ↓

    Say hello to the BEST Vegan Pumpkin Chocolate Chip Cookies ever!

    Say hello to the BEST Vegan Pumpkin Chocolate Chip Cookies ever!

    Pumpkin Chocolate Chip Cookies

    • First of all, let’s talk about texture! These cookies are crunchy on the outside and chewy on the inside. They are NOT cakey pumpkin chocolate chip cookies. But they do come out of the oven VERY soft. So it’s crucial to cool the cookies on the baking sheet for at least 30 minutes before serving. But if you can, I suggest letting them cool a full hour! The longer they sit, the firmer and chewier and they get. The silver lining is that these cookies taste even better with time!
    • So now that we’ve covered texture, let’s move onto flavor. Because these vegan pumpkin chocolate chip cookies have a lot of it! In addition to real pumpkin puree (be sure not to grab pumpkin pie mix by accident!), these cookies are flavored with brown sugar, vanilla, molasses, and pumpkin spice. Yum ♥

    If you try this recipe for Butter Pecan Cookies, let me know! Leave a comment below and don’t forget to snap a pic and tag it #bakerbynature on instagram! Seeing your kitchen creations makes my day.

    Say hello to the BEST Vegan Pumpkin Chocolate Chip Cookies ever!

    • These pumpkin choc chip cookies don’t spread out too much while they bake, so be sure to scoop the dough into mounds, then lightly press down the top of the mound before baking.
    • I make VERY large cookies with this recipe, and usually get about 1 dozen. However you can make smaller cookies, just be sure to decrease the bake time a minute or two.
    • For extra pretty – and extra chocolatey – cookies, press a few chocolate chips on top of them right when they come out of the oven. You can also add a sprinkle of flaky sea salt!
    • If you don’t like coconut flavor, you should use refined coconut oil, which does not have a coconut taste or scent. If you don’t have coconut milk, almond milk or soy milk will work fine!
    • Finally, be sure not to over bake your cookies! As I mentioned earlier, they will be very soft when you remove them from the oven, but they firm up a lot while they cool.

    Say hello to the BEST Vegan Pumpkin Chocolate Chip Cookies ever!

    These are hands down the tastiest pumpkin chocolate chip cookies I’ve ever eaten! Not cakey, plenty of pumpkin flavor, and soooooo many chocolate chips… I mean, what’s not to love? The fact that they’re vegan is really just the icing on the cake 😉 Say hello to the BEST Vegan Pumpkin Chocolate Chip Cookies ever!

    If you try this recipe for Vegan Pumpkin Chocolate Chip Cookies, let me know! Leave a comment below and don’t forget to snap a pic and tag it #bakerbynature on instagram! Seeing your kitchen creations makes my day.

    Say hello to the BEST Vegan Pumpkin Chocolate Chip Cookies ever! Thick, chewy, and loaded with real pumpkin flavor! The trick is to let them rest on the baking until cool... then they won't be cakey!

    More Vegan Cookie Recipes:

    • The Most Wonderful Chocolate Chip Cookies Ever
    • Vegan Oatmeal Chocolate Chip Cookies
    • Chewy Chocolate Fudge Cookies (Vegan)

    Reader Interactions

    Read More

  • Vegan Egg Salad Sandwich

    Vegan Egg Salad Sandwich

    recipe image

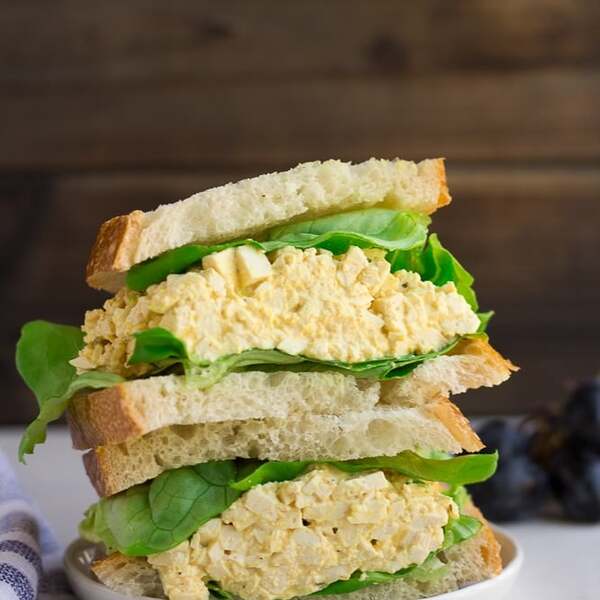
    This is the best Vegan Egg Salad, period. Made with finely chopped tofu and a flavorful, creamy dressing, it’s the perfect meal to bring to the potluck or stuff into sandwiches.

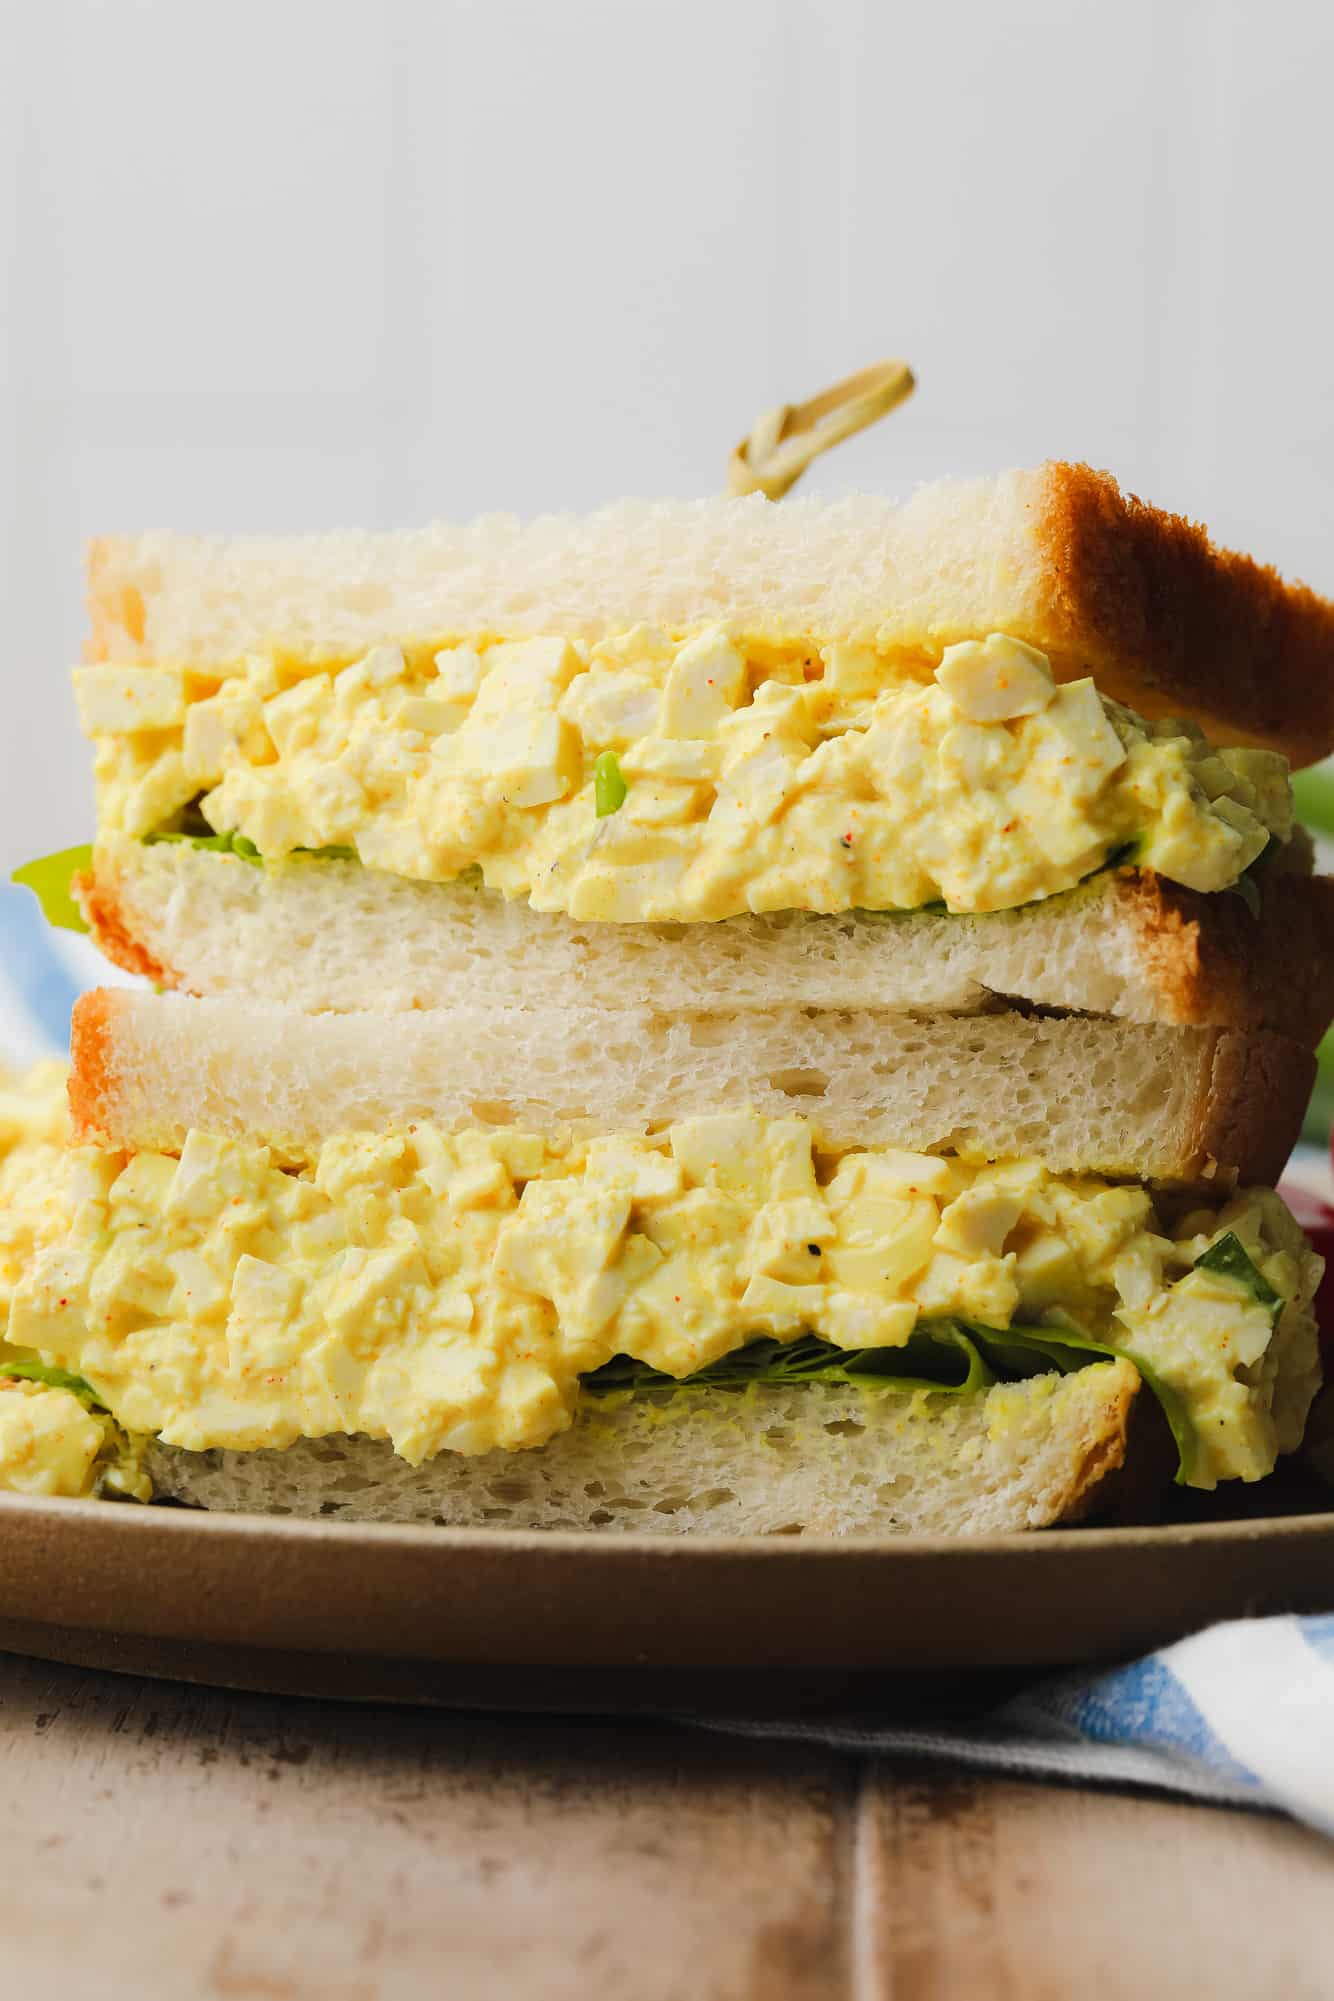
    two vegan egg salad sandwiched piled on top of each other.

    Whether you need an epic recipe for vegan meal prep, a healthy after-school snack, or a dish that’s guaranteed to be a hit at the picnic, this Vegan Egg Salad recipe is the right choice!

    Just like my Vegan Tuna Salad, it looks, tastes, and feels so much like real egg salad, but is completely vegan! The realistic texture is all thanks to a secret chopping technique. By pressing, then slicing a brick of firm tofu into pea-sized pieces, it takes on the same texture as real hard-boiled eggs.

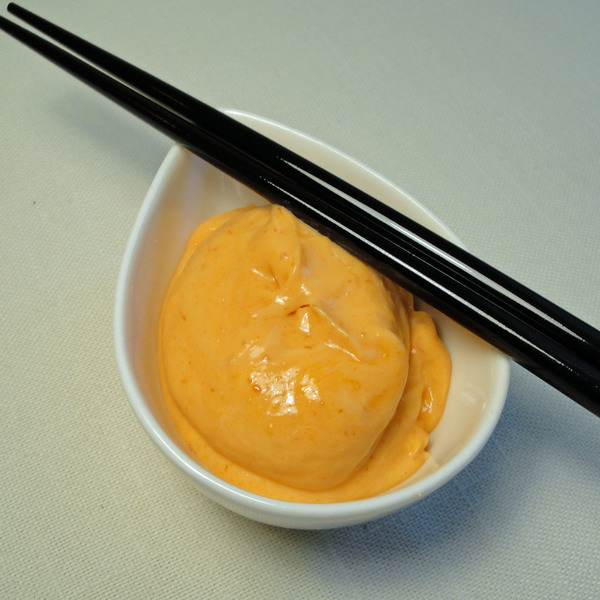
    And all bets are off when the tofu is combined with the creamy vegan egg salad dressing. It’s easy to make using a mix of vegan mayo, simple spices, relish, and pickle juice, and can even be prepped ahead of time when you need faux egg salad in a hurry.

    My favorite way to enjoy this recipe is in vegan egg salad sandwiches, but you can also use it as a topping on salads, stuff it in lettuce cups, enjoy it as a protein-packed snack, and more. The possibilities are endless!
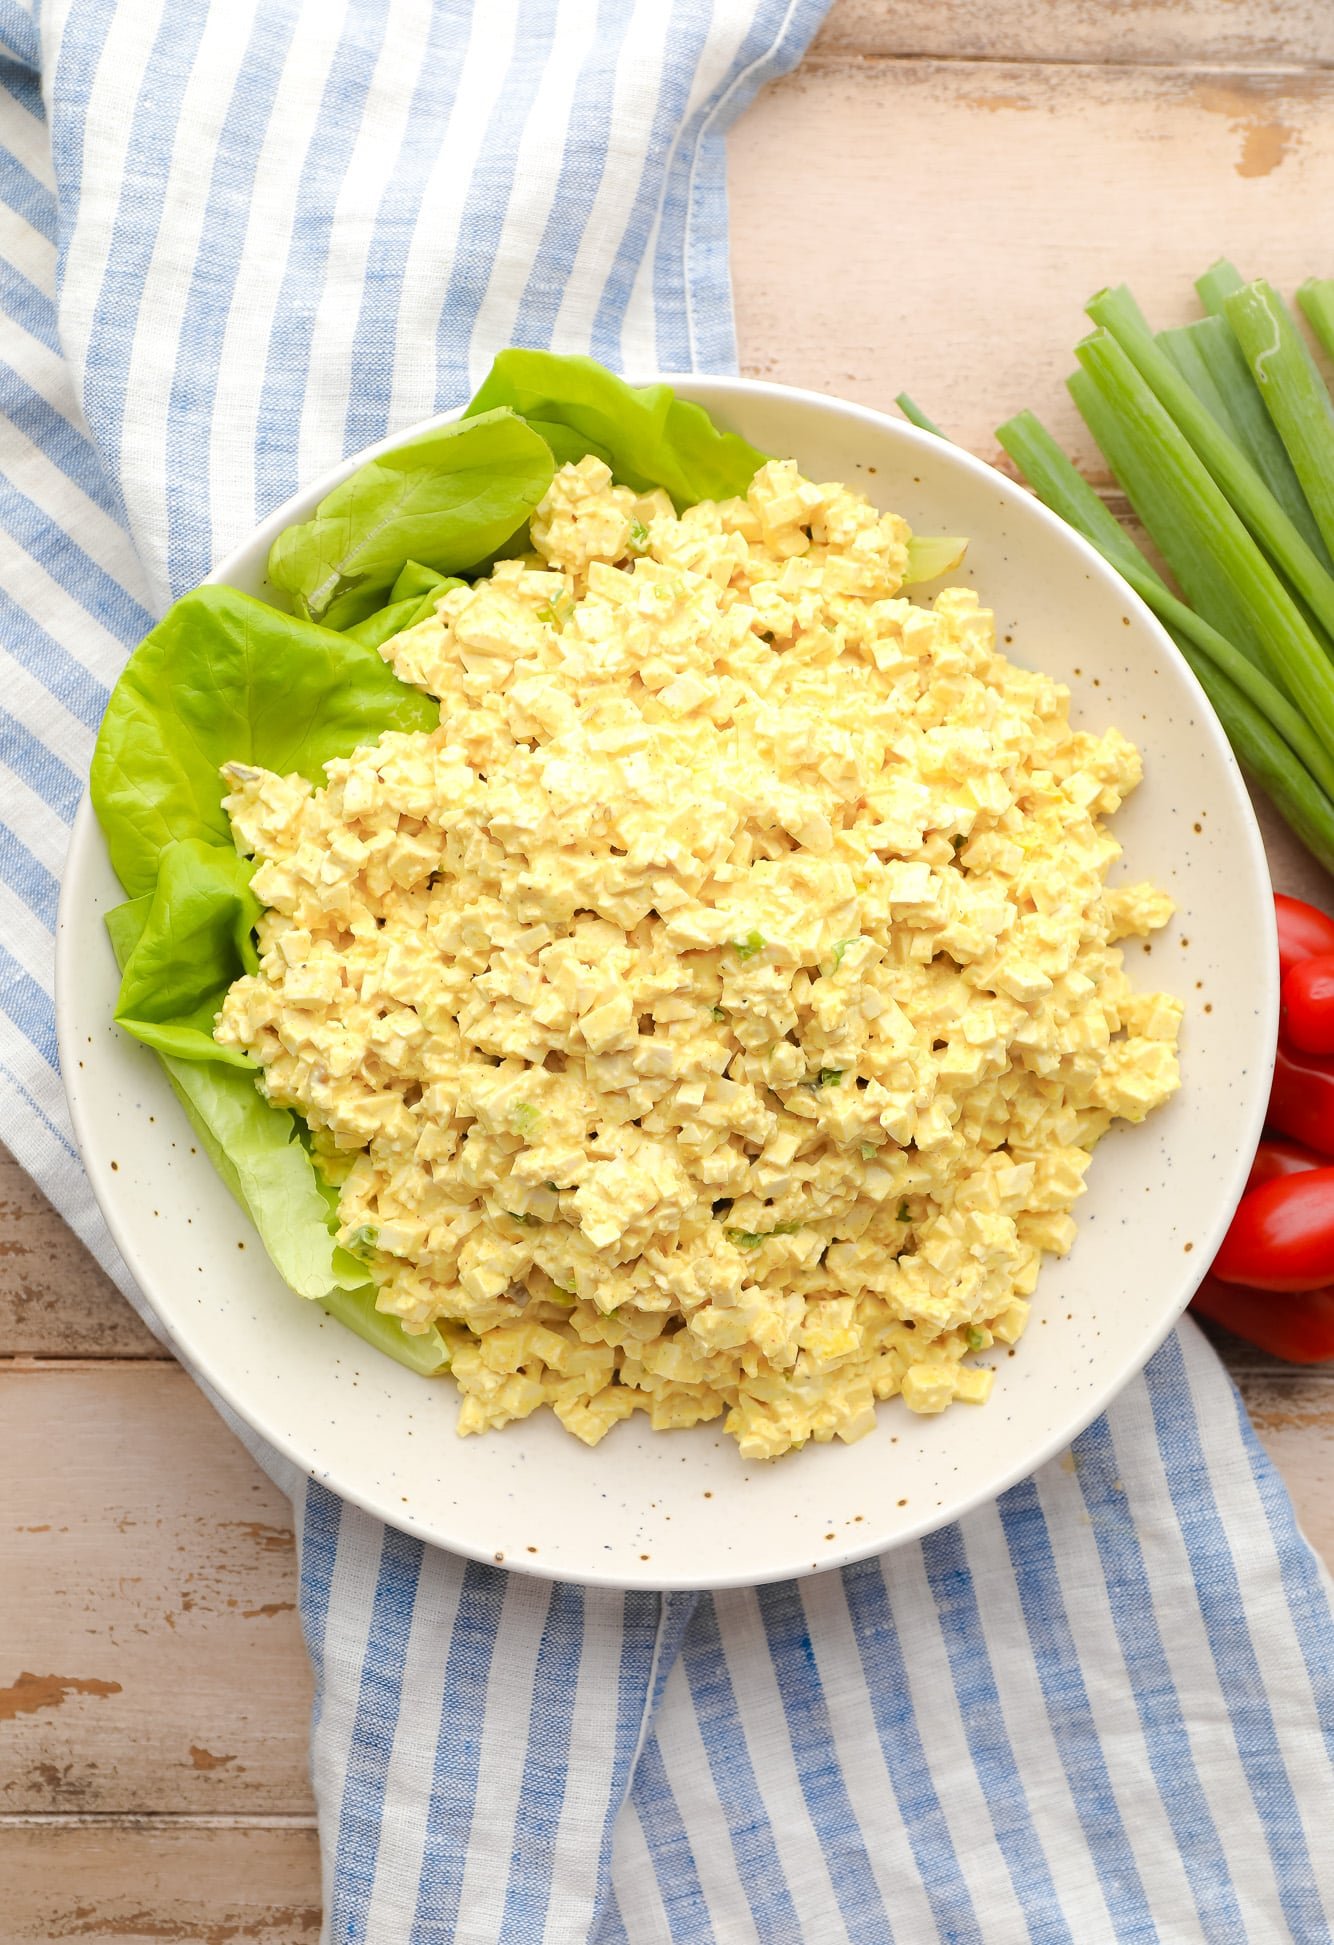
    a large batch of vegan egg salad on a large white plate.

    Ingredients needed (with substitutions) 

    • Firm tofu – Remember to press the brick of tofu before you get started! You want to remove as much liquid from the tofu as possible to help it take on the firm, chewy texture of real hard-boiled eggs.
    • Vegan mayonnaise – Mayo and egg salad are the dream team. It gives the dressing a rich and creamy consistency and helps to tone down the other tangy and briny flavors. Feel free to use your favorite store-bought vegan mayo (I like the Just brand and Veganaise) or try my homemade vegan mayo or tofu mayo. If you don’t have vegan mayonnaise at home, you can use plain vegan yogurt, cashew cream, or vegan sour cream instead.
    • Yellow mustard – Or you can use Dijon mustard for a deeper flavor profile.
    • Dill pickle juice – This, along with the sweet relish, gives the dressing a punchy and briny flavor. 
    • Sweet relish
    • Dry spices – A mix of smoked paprika, turmeric, black salt, and black pepper will give the vegan egg salad dressing a realistic color and flavor.
    • Green onion
    • Bread – To make vegan egg salad sandwiches! Butter lettuce leaves hold the faux egg salad just as well if you want egg salad lettuce wraps. Or enjoy with some yummy crackers (gluten free if needed).

    How to make vegan egg salad

    Find the complete printable recipe with measurements below in the recipe card.

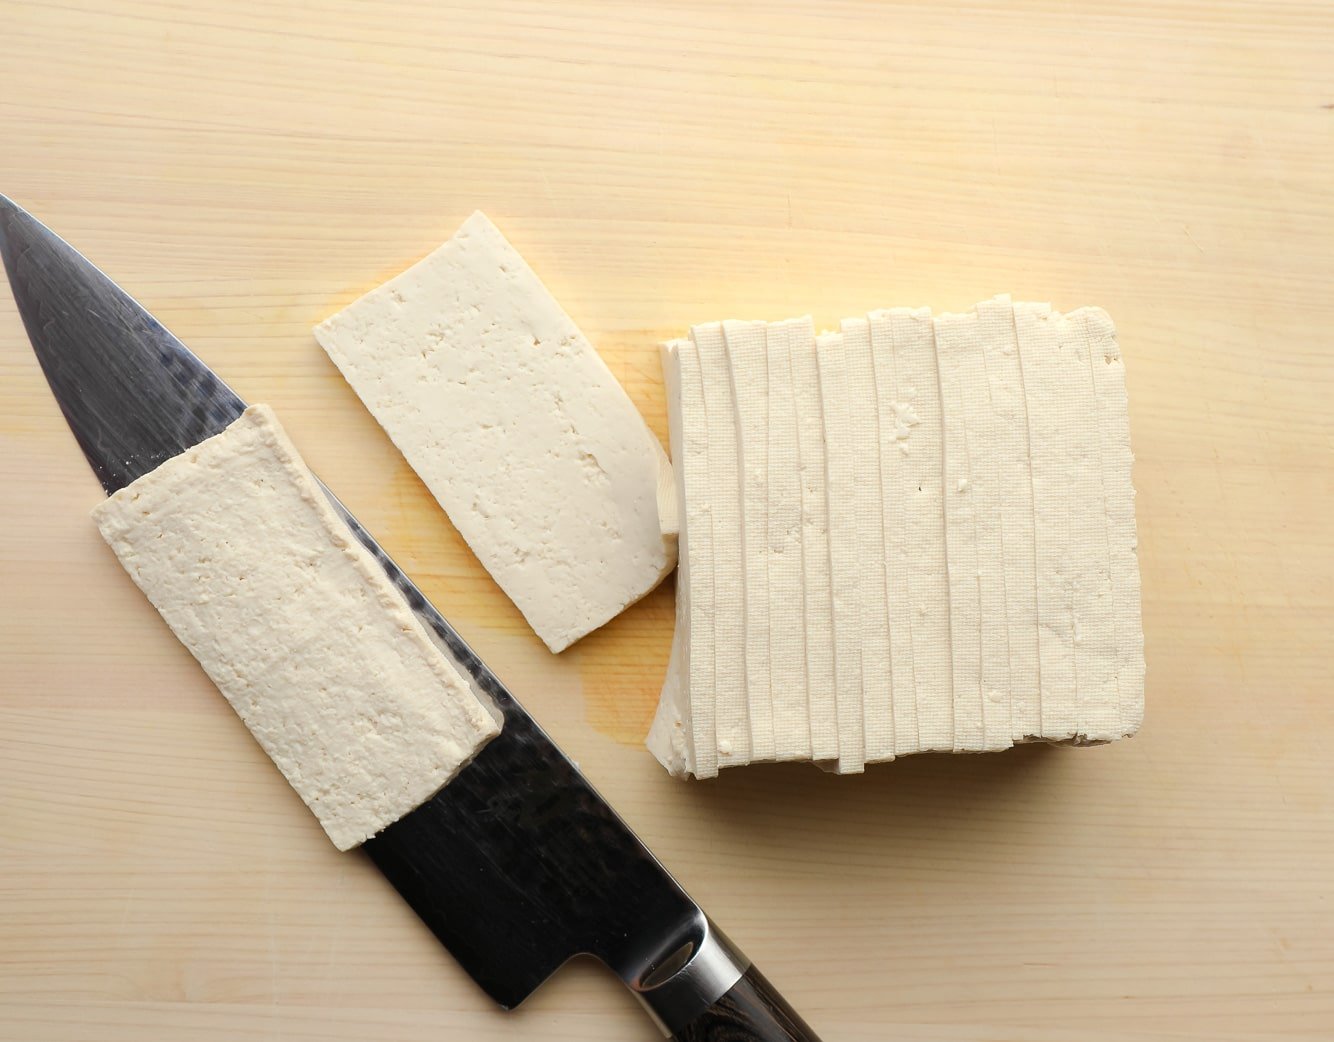
    After pressing the tofu, slice the block into thin, rectangular strips.

    using a chef's knife to slice a brick of tofu into thin, rectangular strips.

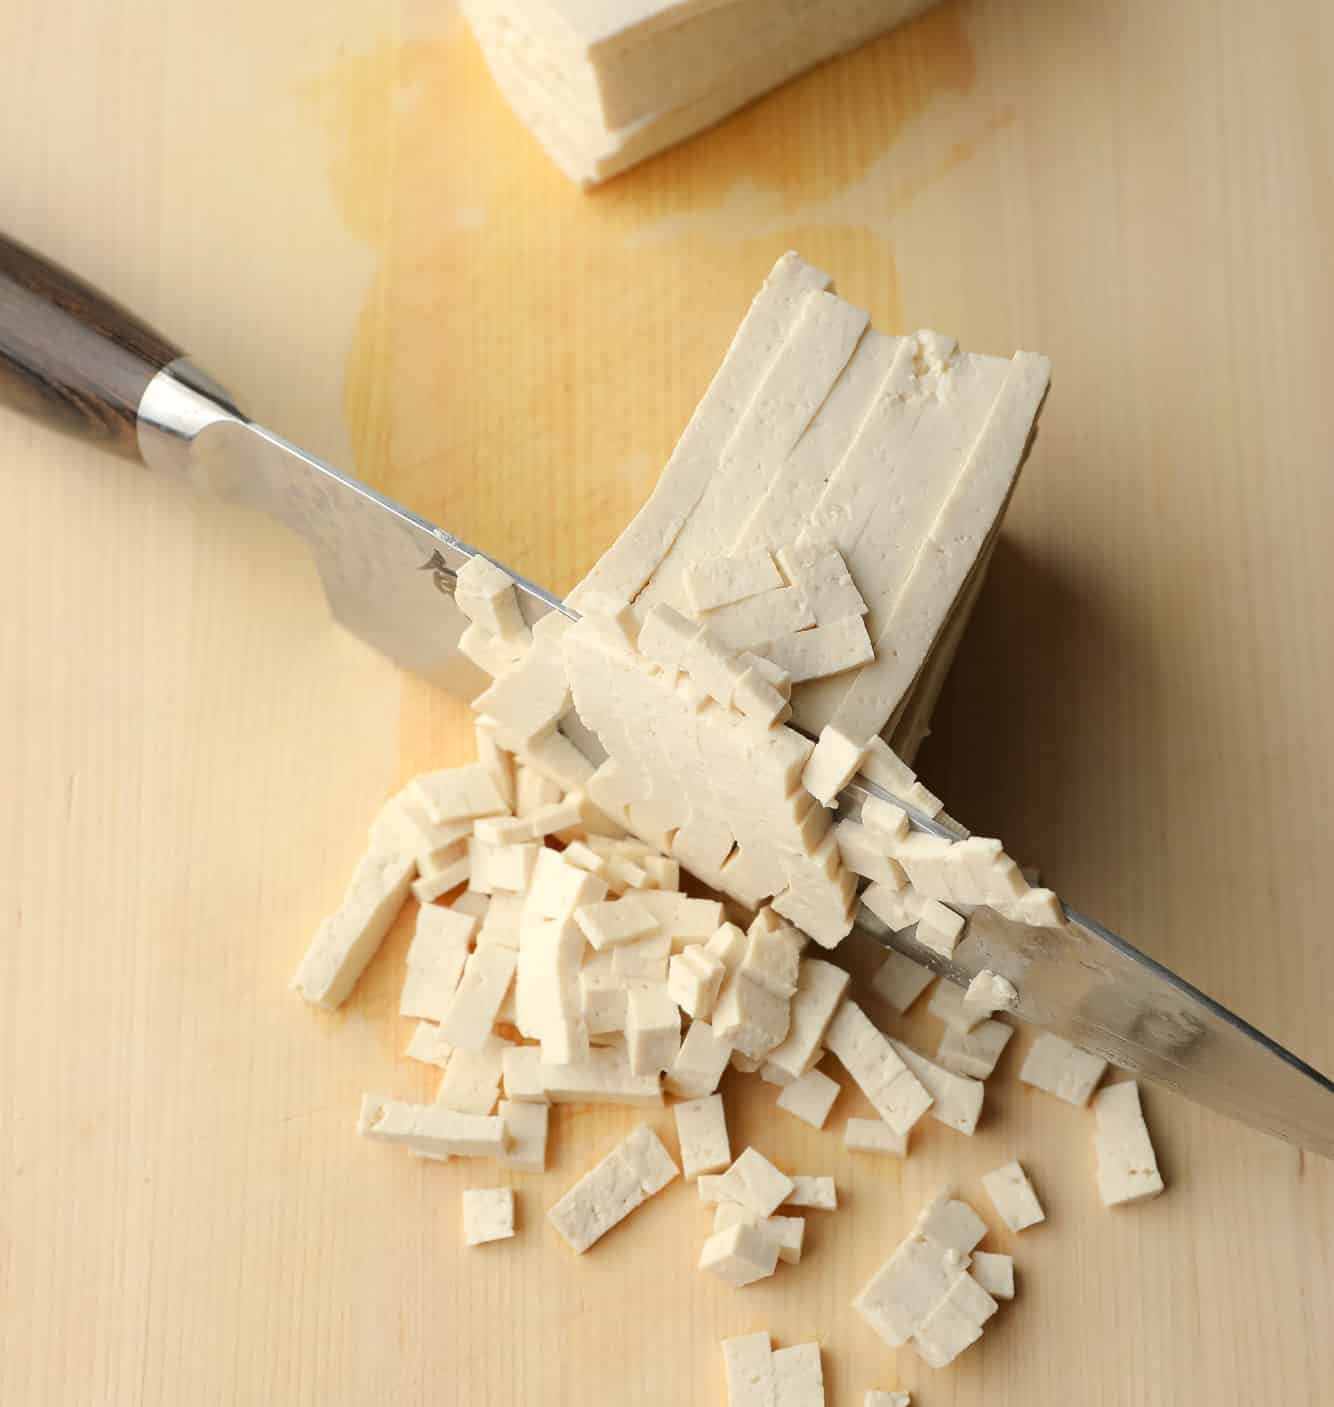
    Pile the strips on top of each other, then, in the opposite direction, slice them into smaller pieces. Don’t worry about making them all the same uniform size!

    using a chef's knife to chop sliced tofu into very small squares.

    To make the dressing, whisk the vegan mayo, mustard, pickle juice, sweet relish, and dry spices together in a large mixing bowl.

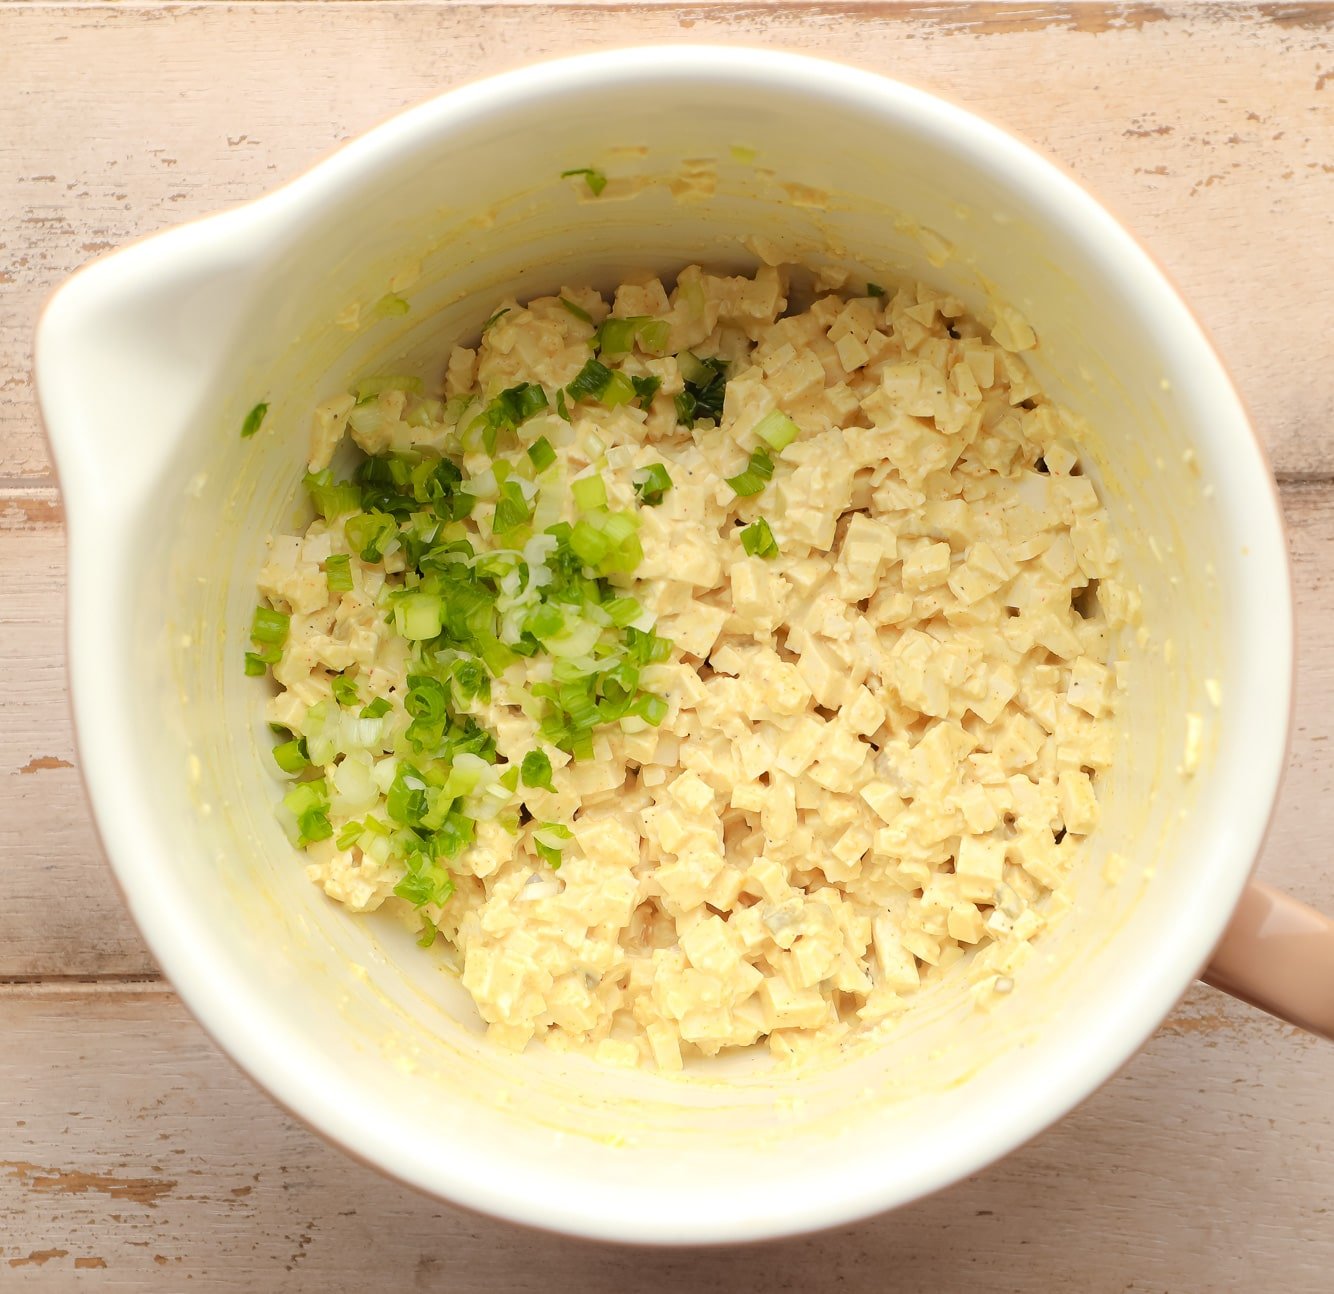
    Add the chopped tofu pieces to the bowl with the dressing, along with the sliced green onions. Stir to coat. 

    Cover the bowl with plastic wrap and place it in the fridge so the salad can chill for about 30 minutes. Afterward, serve the salad in sandwiches, on salad, or as a delicious snack!

    Tips for success

    • Always press the tofu to drain the excess water. Skipping this step could leave you with watery egg salad, and no one wants that. You can do this using a tofu press or by wrapping the brick in paper towels (or a clean tea towel) and placing something heavy on top. Let it sit and drain for at least 20 minutes.
    • Finely dicing the tofu into small, pea-sized pieces is the secret to the realistic egg-like texture. If you’d rather simply crumble the tofu, that’s fine too.
    • If you have the time, chill the assembled salad in the refrigerator for 30 minutes before serving. This gives all of the amazing flavors time to get to know each other, yielding a much more flavorful salad!
    • You can make the egg salad dressing up to 1 week in advance. Just mix the ingredients together and store the dressing in an airtight container in the fridge until it’s time to serve.
    Variations

    There’s lots of room for add-ins in vegan egg salad! Check out these tasty suggestions:

    • Herbs – For a more vibrant flavor, stir fresh dill and/or chives into the egg salad mixture. 
    • Veggies – Feel free to add finely diced red onion or celery, shaved carrots, or halved cherry tomatoes for extra crunch and texture.
    • Vegan bacon – Crumbled tofu or tempeh bacon will give it a smoky, savory twist.
    • Black salt – Black salt or kala namak will give the salad an even more intense eggy, sulfur-like flavor. I usually use this for a more “eggy” salad.
    vegan egg salad topped with scallions in a large white bowl.

    Serving suggestions

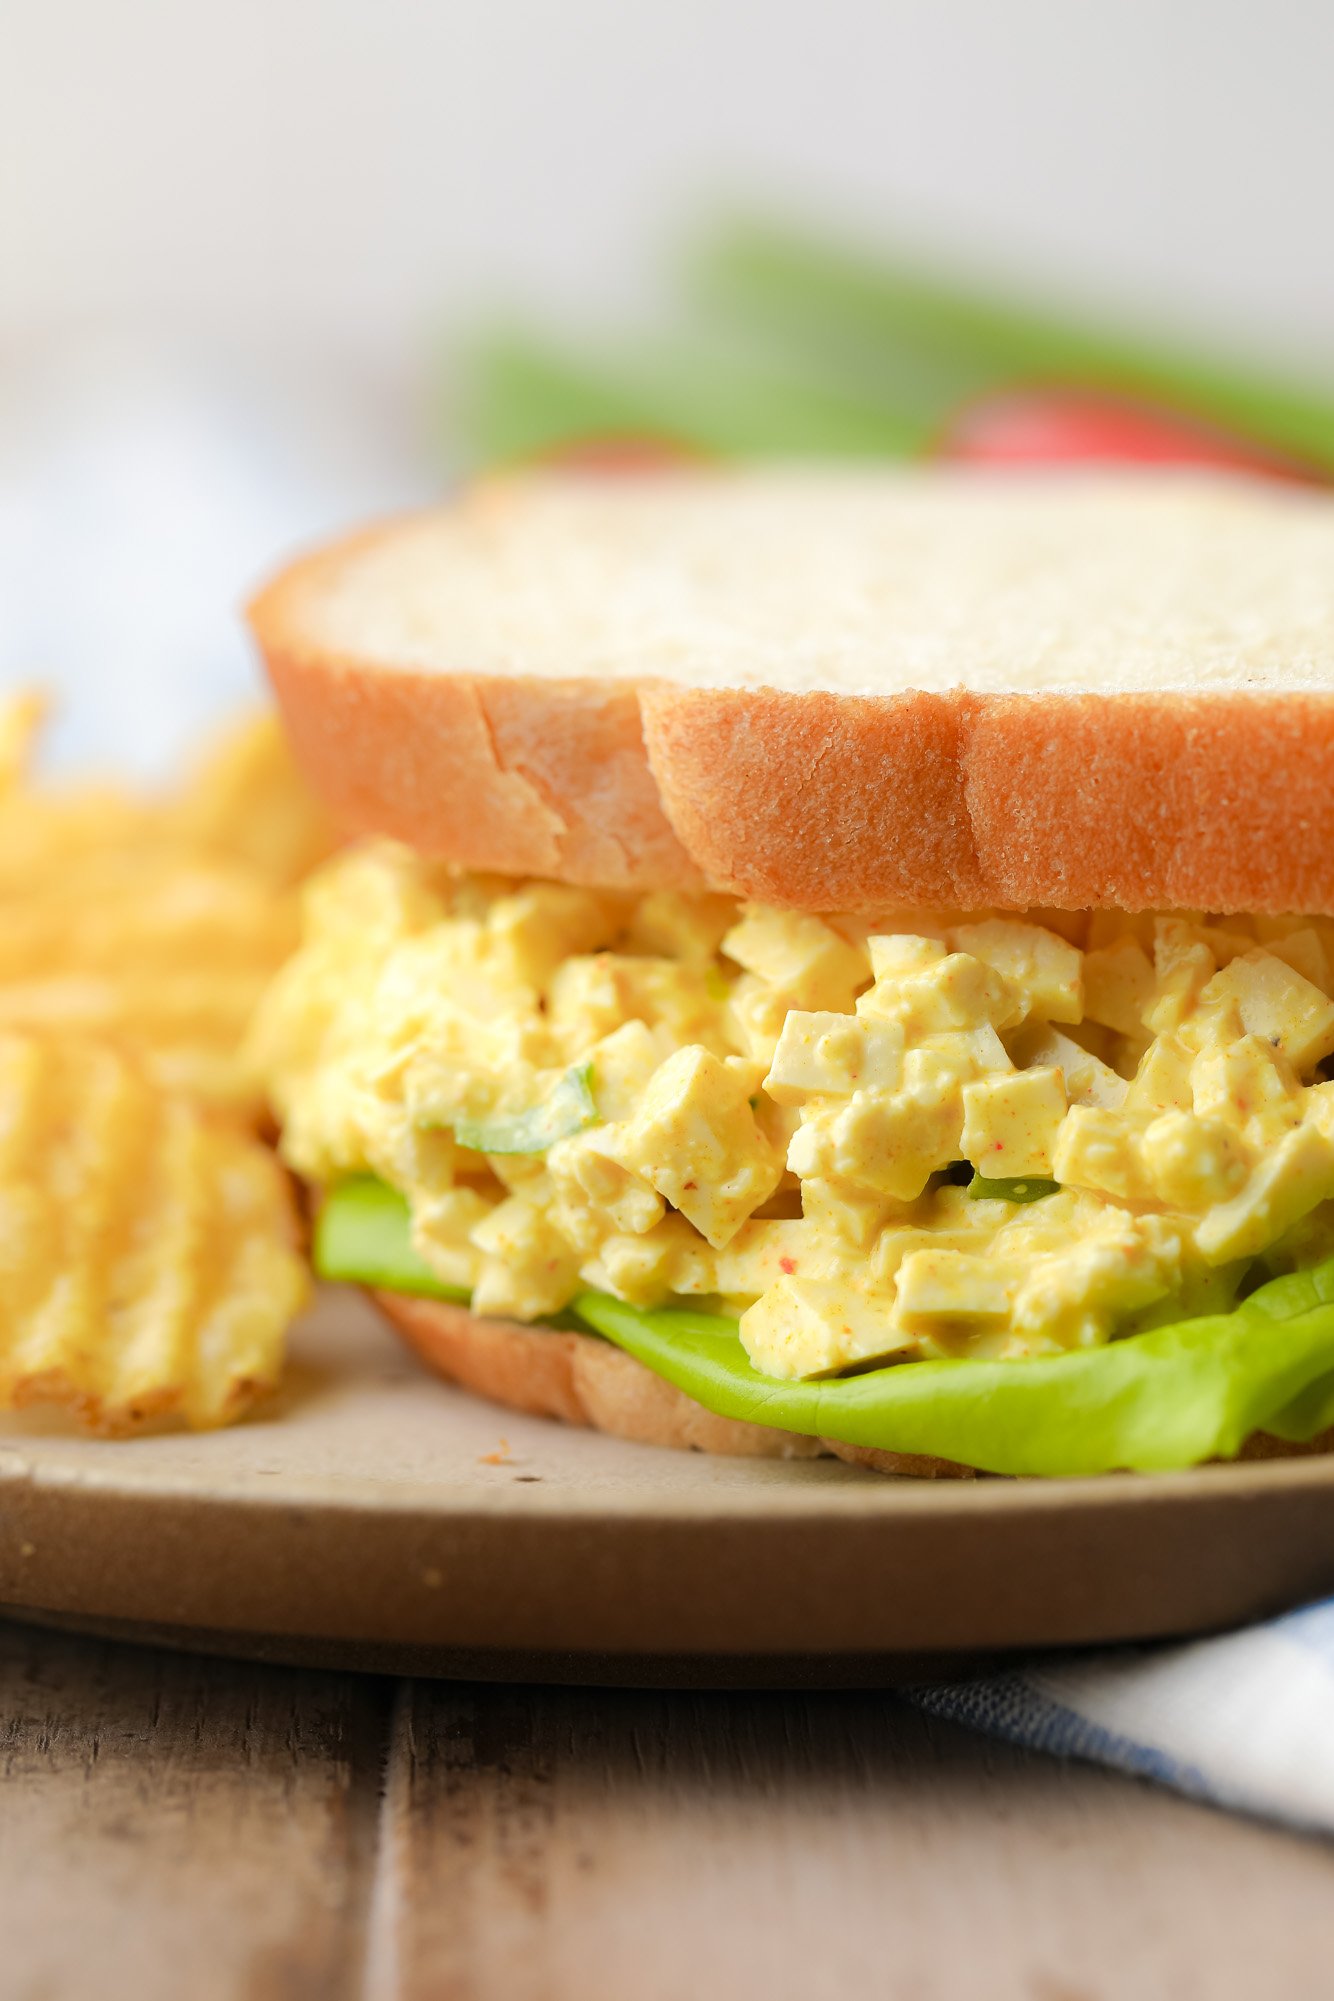
    The best way to put this vegan egg salad recipe to use is in vegan egg salad sandwiches. Top the sandwiches with lettuce leaves, sliced avocado, pickled red onions, radishes, sliced tomatoes, then dig in!

    You can also use the egg salad as a topping on salad greens or stuff it into lettuce wraps. Serve it alongside Vegan Potato Salad or Vegan Coleslaw for a complete (and delicious) meal or picnic.

    And if you end up with leftovers, scoop them up with crackers for a quick, easy, and protein-packed snack!

    Frequently asked questions

    What kind of tofu is best for tofu egg salad?

    Extra firm or firm tofu is best because it contains the least amount of water. Watery varieties, like medium, soft, or silken tofu, won’t work as well and could leave you with soggy egg salad.

    Does it taste like real eggs?

    A lot of commenters can attest that the taste is just like real egg salad! However, you can give it an even stronger “eggy” taste by stirring black salt (kala namak) in place of or in addition to the regular salt in the dressing.

    How long does tofu egg salad last in the refrigerator?

    It will last for 4 to 5 days in the fridge when it’s stored in an airtight container.

    Can you freeze vegan egg salad?

    No, do not freeze tofu egg salad! Once it thaws, the tofu will release a lot of liquid, which will water it down and ruin the creamy consistency.

    Can I make it without tofu?

    You could scramble up a bottle of JUST Egg, then mix it with the dressing for a tofu-free vegan egg salad.

    close up on a vegan egg salad sandwich.

    Want more creamy vegan salads?

    • Curry Chickpea Salad
    • Pesto Pasta Salad
    • Vegan Chicken Salad
    • Best Vegan Potato Salad
    • Vegan Macaroni Salad
    • 14.5 ounce block firm tofu or extra-firm
    • 1/4 cup Vegan Mayo
    • 1 teaspoon yellow mustard
    • 1 1/2 tablespoons dill pickle juice
    • 2 teaspoons sweet relish
    • 1/8 teaspoon smoked paprika
    • tiny pinch turmeric
    • 1/2 teaspoon black salt or regular salt, + more to taste
    • 1/4 teaspoon black pepper
    • 1 green onion, white and light green parts, thinly sliced
    • loaf of bread, butter lettuce for serving
    • Press the tofu: Wrap the block of tofu in paper towels or a clean tea towel. Place something heavy on top of it, like a cast iron pan, and let it sit for 20 minutes.

    • Make the dressing: While the tofu presses, whisk together the vegan mayo, yellow mustard, dill pickle juice, sweet relish, smoked paprika, turmeric, salt and black pepper. Set aside.

    • Slice the tofu: Once the tofu is pressed, slice the block into thin strips, then slice thinly the other way. Chop into even smaller pieces.

    • Add the tofu to the bowl with the creamy dressing, along with the sliced green onions. Stir well. Cover and refrigerate for 30 minutes if possible before eating, to let the flavors meld together. Serve on bread of choice with butter lettuce, sliced tomatoes, sprouts and whatever else you like. Enjoy!

    1. Store leftovers in a covered container in the refrigerator for 4-5 days.
    2. To make it without tofu, you could probably scramble up a bottle of JUST Egg, then mix it with the dressing.

    Serving: 1serving | Calories: 122kcal | Carbohydrates: 3g | Protein: 6g | Fat: 9g | Saturated Fat: 1g | Polyunsaturated Fat: 2g | Monounsaturated Fat: 1g | Sodium: 328mg | Potassium: 9mg | Fiber: 1g | Sugar: 1g | Vitamin A: 62IU | Vitamin C: 0.4mg | Calcium: 88mg | Iron: 1mg

    Course: Main Course, Salad

    Cuisine: American

    Read More

  • Vegan Nanaimo Bar Pie

    Vegan Nanaimo Bar Pie

    recipe image

    vegan-nanaimo-bar-pie

    vegan-nanaimo-bar-pie

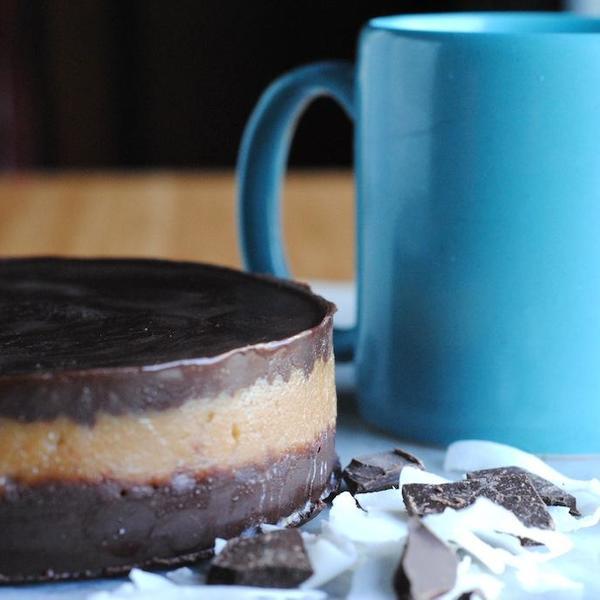
    If you are not Canadian, the name of this recipe might leave you scratching your head. What the heck is a “Nanaimo”? Nanaimo is a city on Vancouver Island. My mom was born there. One of Nanaimo’s greatest claims to fame is the Nanaimo Bar. A traditional Nanaimo Bar is an intensely sweet treat, commonly sold in bakeries and coffee shops. My Nanaimo Bar Pie is an homage, but not a replica of the original recipe. My version has been adapted to be a healthier alternative; it is gluten-free, dairy-free, egg-free and primarily raw.

    vegan-nanaimo-bar-pie-3

    A traditional Nanaimo Bar has three layers. The bottom layer is a coconut/chocolate/cookie mixture, the second layer is a vanilla custard icing, the top layer is a mixture of chocolate and butter. When I developed my recipe, I really wanted to stay true to the traditional textures. I think I’ve done a pretty good job! Since I use nuts to replace the icing/custard layer, mine is definitely nuttier. I chose macadamia nuts and cashews for their mild flavour. You could always use another type of nut, but traditional Nanaimo Bars are not nutty.

    Vegan-Nanaimo-Bar-Pie

    Anyone who has had a Nanaimo Bar will tell you that a little goes a long way. The same can be said for my recipe. I used a 6-inch cake pan, and got 8 servings out of it. Although I used a round pan, I highly recommend using a square pan instead. This treat is easier to eat when its cut in to squares. Another word of advice, after you initially freeze it…let it stand at room temperature for an hour or so before you try to cut it. If it’s still frozen, the top will crack when you cut in to it.

    Print

    Ingredients

    • Bottom Layer:
    • 1 cup unsweetened shredded coconut
    • 1/4 cup cocoa or cacao
    • 1/4 cup almond meal
    • 1/4 cup granular sweetener of choice
    • ¼ cup coconut oil (melted)
    • Middle Layer:
    • 1.5 cups macadamia nuts or cashews
    • 2 tbsp granular sweetener of choice
    • 3 tbsp coconut oil (melted)
    • 2 tbsp vanilla protein powder (I used Sun Warrior Raw Vegan Protein)
    • Top Layer:
    • 3 oz Dark Chocolate 70% or darker
    • 1 tbsp coconut oil

    Instructions

    1. Starting with the base layer, mix all the dry ingredients together in a blender, food processor or bowl. Don’t over-process this layer. You want to get some texture from the shredded coconut.Mix in the melted coconut oil with a fork.
    2. Press this mixture in to the lined cake or loaf pan. Put this in the freezer while you work on the middle layer.
    3. In a high-powered blender or food processor, mix up all the middle layer ingredients. I did it in the Vitamix. If you don’t have a blender of food processor, you could use pre-made cashew butter. You want this layer to be smooth, no chunks.
    4. Pour this layer on top of the coconut layer and spread it evenly.
    5. Put this all back in the freezer and get started on the top layer.
    6. Chop up your chocolate in to small pieced for easier melting.
    7. Melt it over low heat (double boiler if possible) with the coconut oil.
    8. Once it’s melted, pour it on top of the other two layers and make sure it’s evenly spread.
    9. Put that bad boy in the freezer for atleast 30 minutes.
    10. Let it defrost slightly before cutting.

    Notes

    As with many of my recipes, I advocate tasting as you go along. You can tweak the sweetness to meet your preference.

    Read More