WordPress Blog

Author: PatagoniaLlami

  • Gluten-Free Vegan Blueberry Muffins Recipe

    Gluten-Free Vegan Blueberry Muffins Recipe

    recipe image
    Ingredients:

    • 15 dates, pitted
    • ½ cup unsweetened applesauce
    • 1 cup vegan milk (almond, rice, coconut, etc.)
    • Juice and zest of 1 lemon
    • 1/2 teaspoon vanilla extract
    • ½ teaspoon almond extract
    • 3 tablespoons ground flaxseeds
    • 2 cups brown rice flour
    • 1 teaspoon baking soda
    • 2 teaspoons baking powder
    • ½ teaspoon salt
    • 1 cup fresh blueberries
    • ½ cup sliced almonds, toasted

    Read More

    June 1, 2025
  • Vegan Tex Mex Egg Rolls

    Vegan Tex Mex Egg Rolls

    recipe image

    June 24, 2018 by Lauren Hartmann 41 Comments

    Cotton candy, sweetie go, let me see the Egg Roll. 

    These little bundles of goodness are vegan tex mex egg rolls. Easy egg rolls filled with taco tofu, beans, corn, cilantro and vegan cheese if you want. They can be baked or fried and served with all kinds of delicious dips. I made mine with an avocado buttermilk ranch dip. However, I can see salsa as a dip in my future!

    These vegan tex mex egg rolls are one of the fastest appetizers I have ever made. Which is saying a lot. Since appetizers is my middle name. With very few ingredients, you are on your way to the tastiest egg rolls ever! Tofu is crumbled and quickly browned, followed by black beans and corn. Then you just need your favorite taco seasoning. You all should know by now, I’m a Trader Joe’s girl. Which made this a very inexpensive appetizer as well.

    I have had a lot of questions about a vegan egg roll or spring roll wrapper brand in the past. I always use Dynasty. They should be easy to find, or if you are having trouble, they do sell them on Amazon! 

    These vegan tex mex egg rolls are perfect for all your summer parties! Or any party really! They are everything I want in an appetizer. Few ingredients, fast and maximum dippage! 

    Print Recipe

    Vegan egg rolls filled with taco tofu, black beans, corn and cilantro. With an avocado buttermilk ranch dip!

    Prep Time 10 minutes mins

    Cook Time 20 minutes mins

    Total Time 30 minutes mins

    Servings 10 rolls

    Author Lauren Hartmann

    Ingredients

    • 1/2 Block Extra firm tofu (about 8 oz.)
    • 2 tsp. Olive oil
    • 1/2 C. Black beans, canned
    • 1/2 C. Corn, canned
    • 1 1/2 Tbsp. Taco seasoning
    • 1/4 C. Cilantro
    • 8-10 Egg roll wrappers, vegan (I used Dynasty)
    • Oil for frying

    Instructions

    • Heat the olive oil in a non stick pan on medium high. 

    • Squeeze the half block of tofu over the sink, squeezing as much liquid out as you can. It is okay if it starts to crumble, you will be crumbling it anyways. 

    • Next, crumble the tofu into the non stick pan. Break up any large pieces with a wooden spoon. Press the crumbled tofu into the pan and saute, reducing heat as needed for a few minutes, until the tofu is starting to brown, then toss and press back into the pan. Repeat until all of the tofu is light brown. 

    • Then add about half the taco seasoning, and toss to coat. 

    • Now, drain the black beans and corn, then add them to the pan. Stir to combine and add the remaining taco seasoning. At this point if the black beans and corn don’t have enough liquid to mix around the seasoning, add a splash of water. 

    • Saute for another minute to heat the black beans and corns. Remove from the heat. 

    • Next, begin to heat about 1/2 an inch of light oil in a skillet on medium high. 

    • Now, make the egg rolls, take one wrapper, place a line of about 2 tablespoons of filling in the center. Then place a few cilantro leaves on top of that. Then fold the sides on to it. Then roll the entire thing. Rub a little water on the end to seal the egg roll. Repeat with all the filling. 

    • When the oil is hot, place a few egg rolls in the oil at a time, seam side down. Fry on each side for a minute or two until they are nice a brown. 

    • Make the dip if you are using it, whisk together the almond milk and apple cider vinegar, set aside for a minute. 

    • Now cut the avocado in half, remove the pit and scrap all of the avocado into a blender. Then add the almond milk and remaining dip ingredients. Blend, scraping down sides as needed until it is nice and smooth. Add a few pinches of salt and pepper. Taste and adjust seasoning. 

    • When all the egg rolls are done and so is the dip, serve immediately!

    Notes

    I have made a variation by adding vegan cheese to the egg rolls before frying. Which is totally delicious and a great option if you are so inclined.

    These egg rolls can be baked as well! Spray a baking sheet with non stick spray. Place the egg rolls on the pan, seam side down. Spray the tops with more non stick spray and bake at 425 degrees for 10-15 minutes!

    Reader Interactions

    Trackbacks

    1. […] See full recipes here […]

    2. […] via Vegan Tex Mex Egg Rolls — Rabbit and Wolves […]

    3. […] Recipe:Vegan Tex Mex Egg Rolls […]

    4. […] From: Rabbit and Wolves […]

    5. […] #81. Vegan Egg Rolls filled | Image Credit & Recipe – rabbitandwolves.com […]

    6. […] tex mex vegan recipes? Try my Vegan Tex Mex Egg Rolls […]

    Read More

    June 1, 2025
  • Fudgy Vegan Chocolate Chip Brownies

    Fudgy Vegan Chocolate Chip Brownies

    recipe image
    Ingredients:

    • 4 tsp ground flaxseed
    • 1 cup almond flour
    • ¾ cup all-purpose flour
    • ½ cup unsweetened cocoa powder
    • ½ tsp salt
    • ¼ tsp baking soda
    • 1 cup non-dairy chocolate chips, divided
    • 6 Tbsp vegan butter (I used Earth Balance)
    • 1 cup granulated sugar
    • ¼ cup unsweetened almond milk
    • 1 tsp vanilla extract

    Read More

    June 1, 2025
  • Vegan Chocolate Bourbon Pecan Pie

    Vegan Chocolate Bourbon Pecan Pie

    recipe image

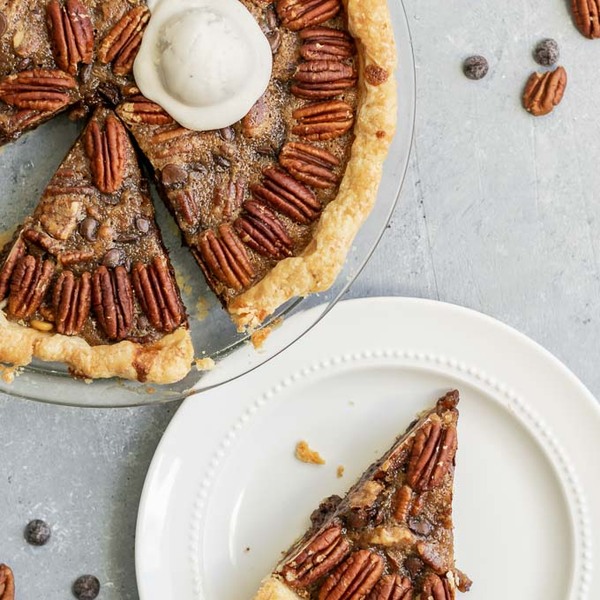
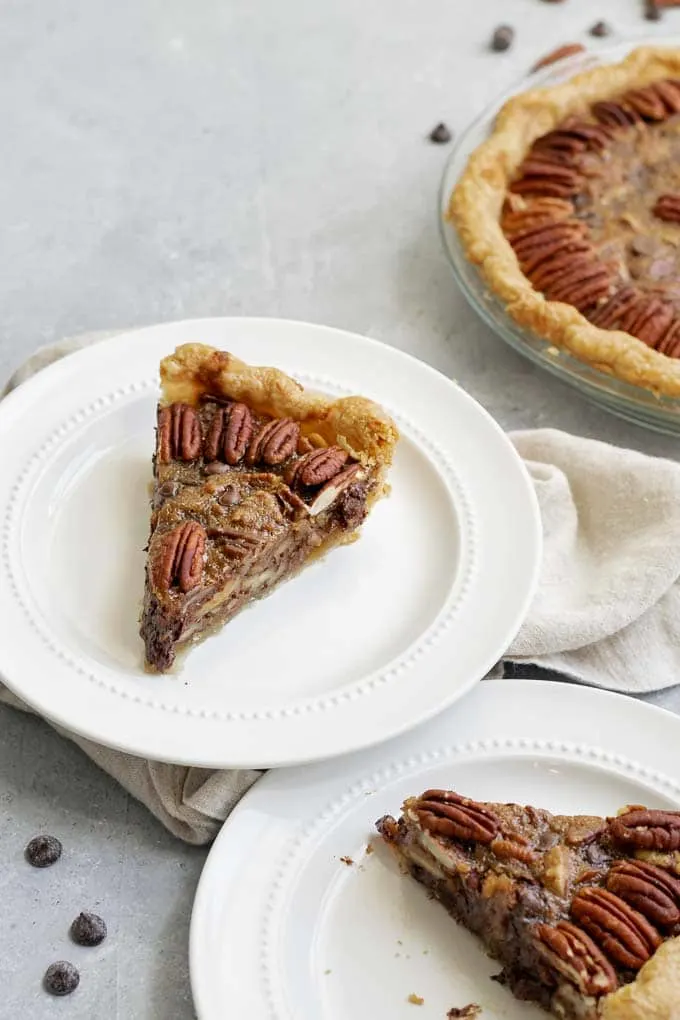
    This vegan chocolate bourbon pecan pie is a chocolatey, maple scented pie with toasty pecans & notes of bourbon. Enjoy a slice or two with a scoop of non-dairy vanilla ice cream for an extra special treat!

    vegan chocolate bourbon pecan pie with a scoop of ice cream and two slices cut out, one on a plate

    If you’ve never made a chocolate bourbon pecan pie you should probably stop everything you’re doing and make this right now. It might just be the most delicious treat to ever exist! It kind of tastes like a warm and gooey giant cookie encased in a crisp and buttery crust. Sounds pretty perfect, right?

    This isn’t your average pecan pie. Those are typically goopy, saccharine pies made with corn syrup and eggs. Apparently they don’t even contain chocolate! Which goes pretty far in explaining why I didn’t think I liked pecan pie for most of my life.

    But this pie is perfection. We’re talking toasted pecans, bittersweet chocolate, maple-scented, bourbon infused pie. Nothing complicated, just good old fashioned flavor.

    two slices of vegan chocolate bourbon pecan pie

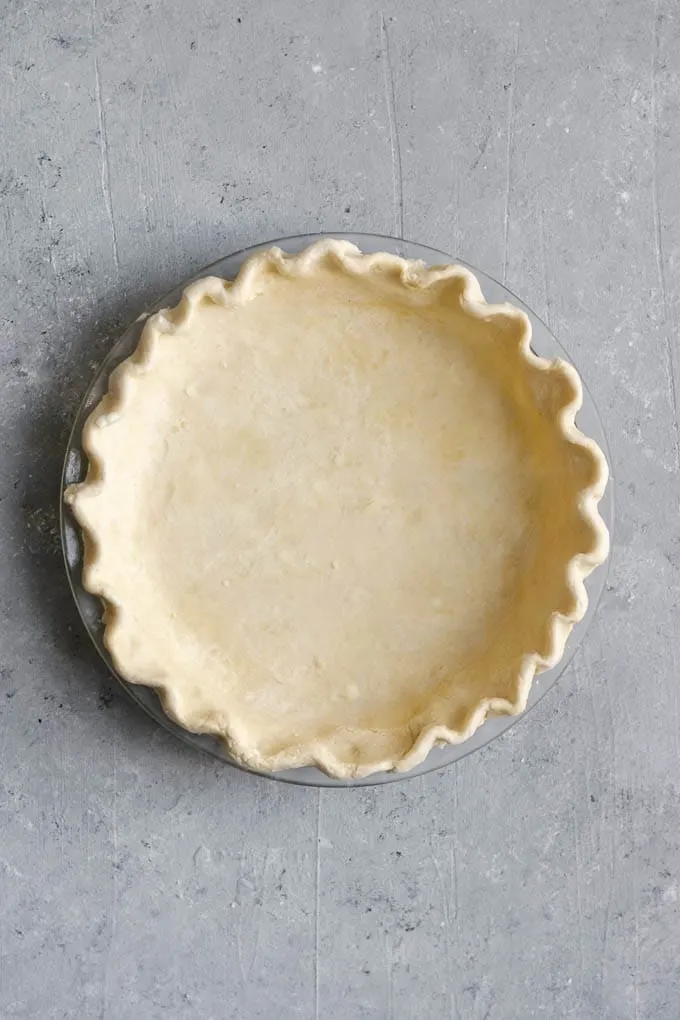
    Making this pie is as easy as 1-2-3! First, start with a good pie crust. I’m partial to my easy vegan pie dough, but I suppose we can still be friends if you use store bought 😉 . This pie doesn’t spend a ton of time in the oven so first we blind bake the crust so it is partially cooked before the filling is added.

    Blind bake the pie dough:

    Blind baking pie dough is a technique that’s used when a pie is not going to be baked or is not going to be baked for very long. The crust is either parbaked or fully baked depending on the recipe. I recently adapted Stella Parks method of blind baking, where you use sugar for pie weights and bake for a long time at a low temperature.

    empty pie dough shell before baking

    I find this method to work beautifully, though note a thorough chilling of your pie dough before baking is ideal to hold the shape of your crust. You want the gluten in the dough to be fully relaxed before it hits the oven or the heat will cause it to contract and expand and you’ll end up with a slouchy pie.

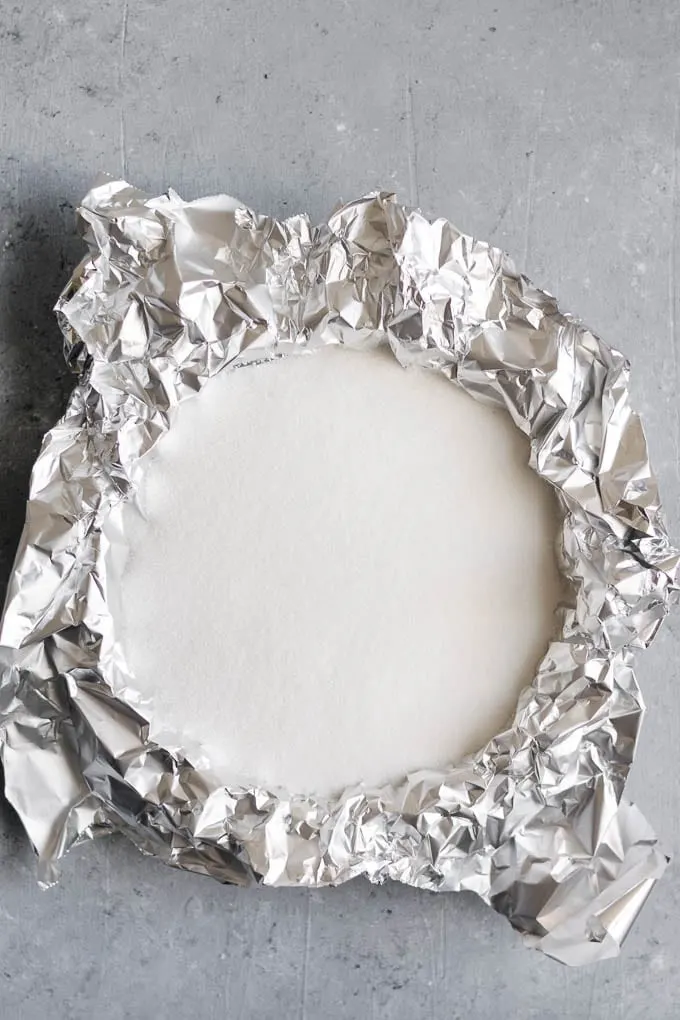
    Essentially take a well chilled rolled out and shaped pie dough and line it with aluminum foil. Then pour a bunch of sugar into the foil to fill the pie. Sugar settles in all the nooks and crannies to hold the pie dough in place while it cooks. Then bake the pie at 350 ºF for about 45 minutes until it’s just starting to turn golden and is fully set. Take it out and let it cool enough to handle before removing the sugar.

    The sugar can be used normally in recipes after this, or used to blind bake more pies. Eventually the sugar will start to caramelize and turn a pale golden at which point you can still use it and it’s going to be damn good! I might actually retire those old beans I’ve been using for pie weights these past few years.

    pie shell lined with aluminum foil and filled with sugar for blind baking

    Make your chocolate bourbon pecan pie:

    The first step to making this chocolate bourbon pecan pie filling is to toast the pecans. While this step might seem a little silly as the pie is going to be baked anyway, toasting the nuts adds a lot of depth and character to the pie. I just toast the nuts alongside the crust while it blind bakes which makes everything easy peasy.

    chocolate bourbon pecan pie filling mise en place and parbaked pie crust

    chocolate chips, toasted pecans and bourbon in the pecan pie batter to be folded in

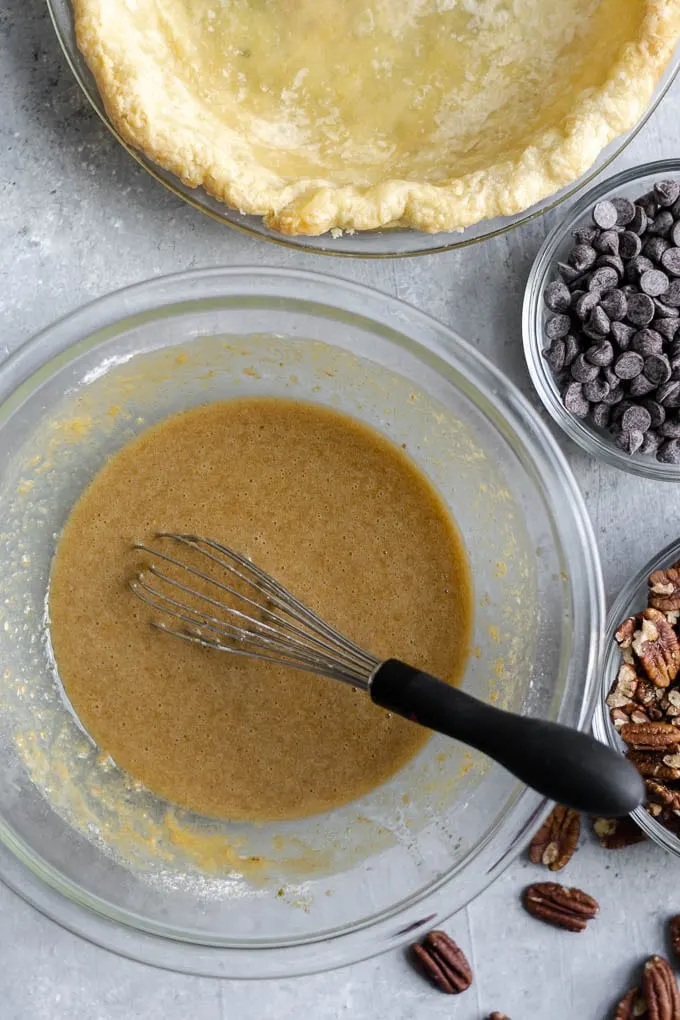
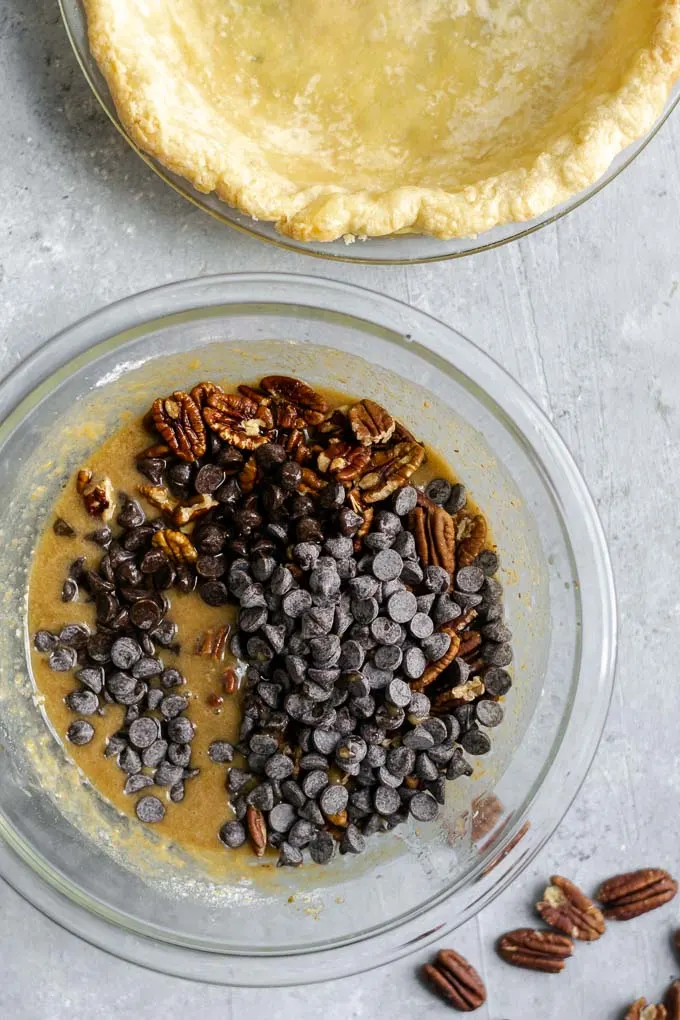
    Start the rest of the pie after the crust comes out of the oven. Whisk up the flax and plant milk and let is sit for 10 minutes to activate the flax and create a thick, and yes, gloopy egg-like mixture. Then we stir in some melted vegan butter, brown sugar, maple syrup, and flour to create a sticky batter. To this batter fold in the toasted pecans (reserving some to decorate the top of the pie), chocolate chips, bourbon, and vanilla extract.

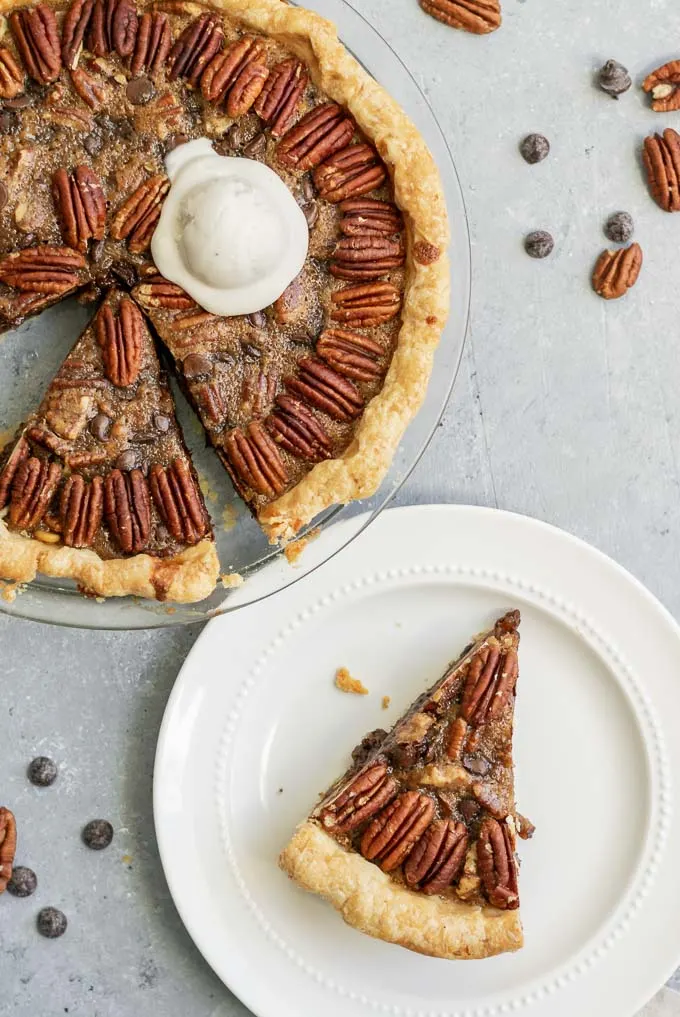
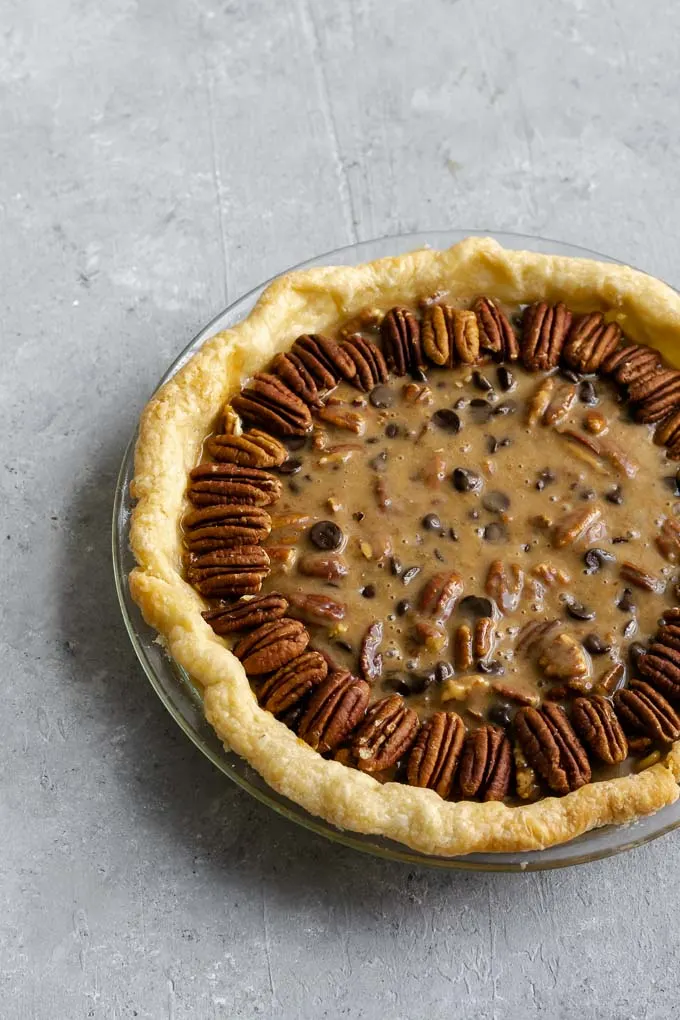
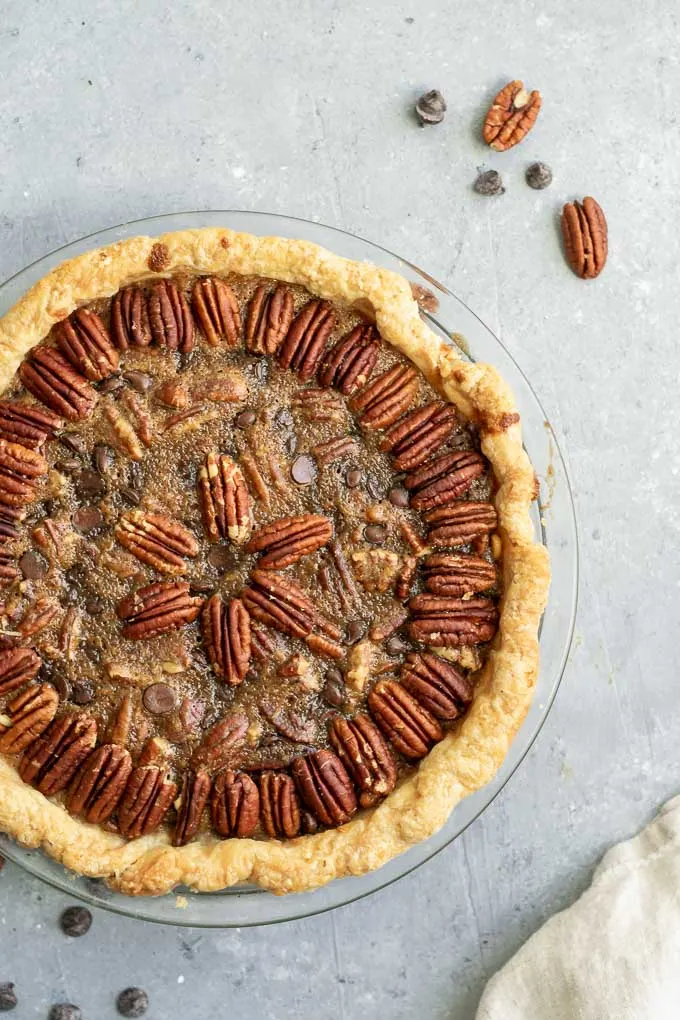
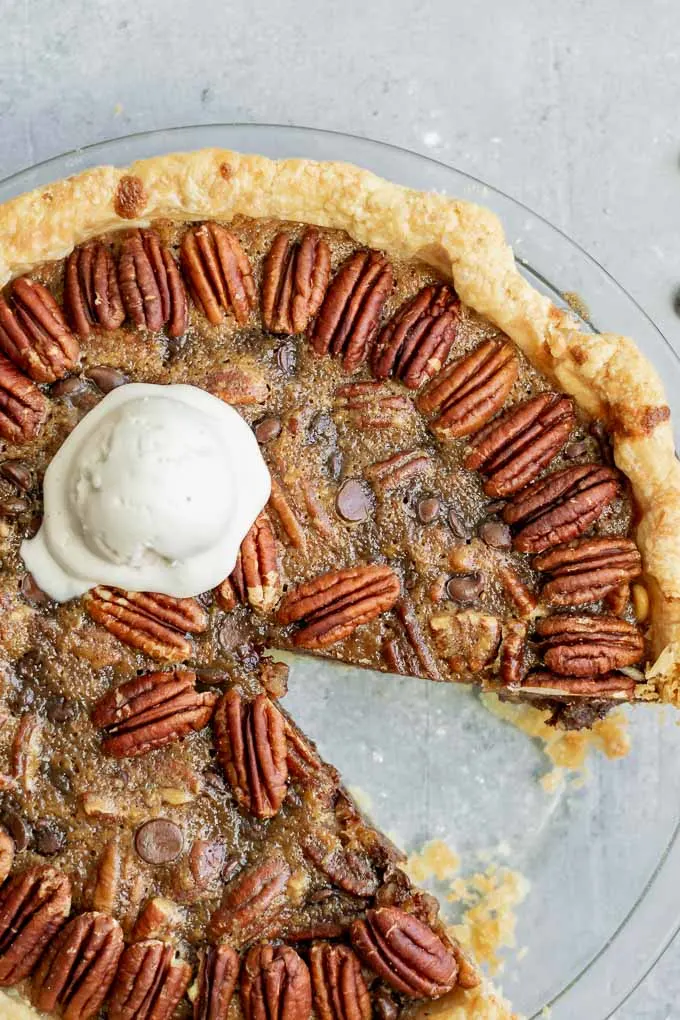
    Transfer the pie filling to the par-baked crust, and decorate with some toasted pecan halves. Bake the pie for 35-40 minutes or until the center of the pie is set, then let cool before slicing into. This pie stays good for a day or two at a cool room temperature (meaning, it’s perfect for making the day before a big feast–like Thanksgiving maybe??), if longer than that I’d stick it in the fridge. You can rewarm the pie to serve if you want that ice cream topping to get melty, about 15 minutes at 325 ºF does the trick!


    filled pie crust decorated with pecan halves before baking

    Now enjoy your pie!

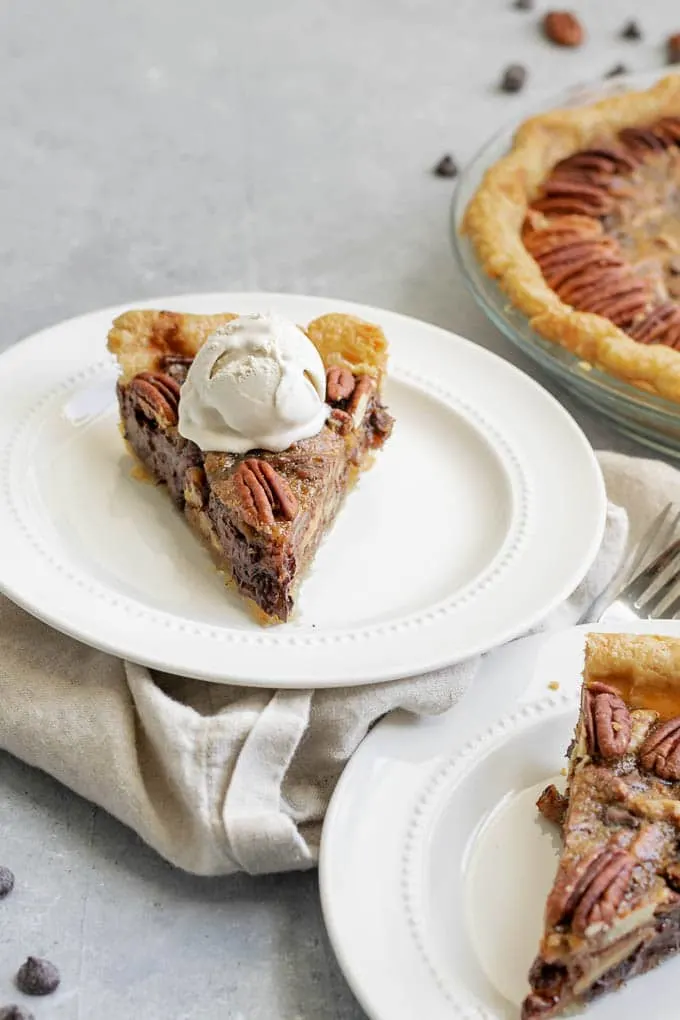
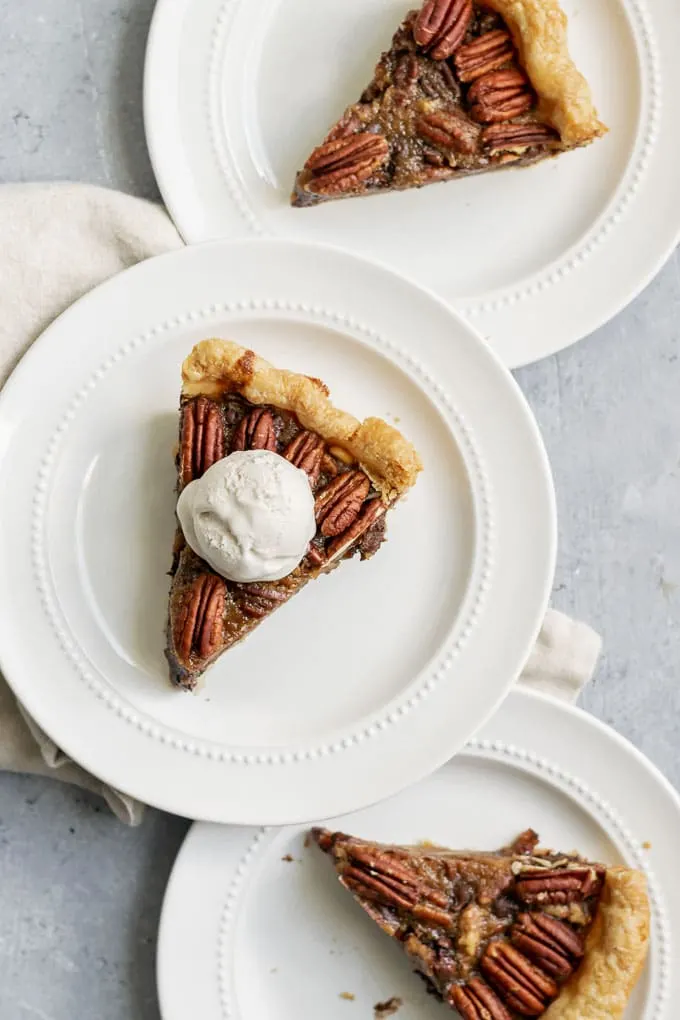
    This pecan pie might not be the one you grew up with, but personally I see this as a good thing. It’s delicious, richly flavored, maple and vanilla-sweet. It pairs so well with a scoop of [vegan] vanilla ice cream or some whipped coconut cream.

    Everyone loves this pie, vegan or not! And how could you not? The smell alone was enough to drive me crazy while I was standing over and photographing the pie. It was still faintly warm from the oven and wafting up the most delicious smells. Digging in at the end was one of the most satisfying food eating experiences.

    a whole vegan chocolate bourbon pecan pie, after baking

    Some people might recognize this pie as being reminiscent of a Derby Pie, and in fact, I first became acquainted with this variation on pecan pie while researching Kentucky Derby foods. While I’m against celebrating the Kentucky Derby due to the mistreatment of the racehorses and the side business of horse slaughter, I was throwing a mini-benefit party with my friends to donate some money to a local Illinois (where I lived at the time) retired race horse rescue organization.

    I’m a fan of bourbon so this recipe of course caught my eye and I had to make it! One bite and I was sold. This vegan derby pie (aka chocolate bourbon pecan pie) quickly became a regular in my repertoire, and from there found its way onto my family’s regular Thanksgiving menu.

    A slice of vegan chocolate bourbon pecan pie with a scoop of vanilla ice cream on top

    Whether or not you’re a fan of traditional plain old pecan pie you need this recipe and chocolatey boozy pie in your life. I suppose if you need you can use less or no bourbon and still have an amazing pie, but the barrel-aged alcohol brings a robust depth of flavor to the pie that’s just fantastic.

    If I was hard pressed to pick a favorite pie, and I do hate being asked to choose favorites, this one might just be it! I hope you guys love it as much as everyone I’ve ever served it to does! Now don’t be afraid of making pie and get to baking!

    close up of a vegan chocolate bourbon pecan pie with a scoop of non-dairy vanilla ice cream and a slice taken out

    Let me know if you have any questions or leave a rating and comment if you’ve tried the recipe! Share your creations with me on Instagram, tag @thecuriouschickpea and #thecuriouschickpea, I absolutely love seeing your photos!

    LIKE WHAT YOU SEE? FOLLOW ALONG ON INSTAGRAM, FACEBOOK, AND PINTEREST!
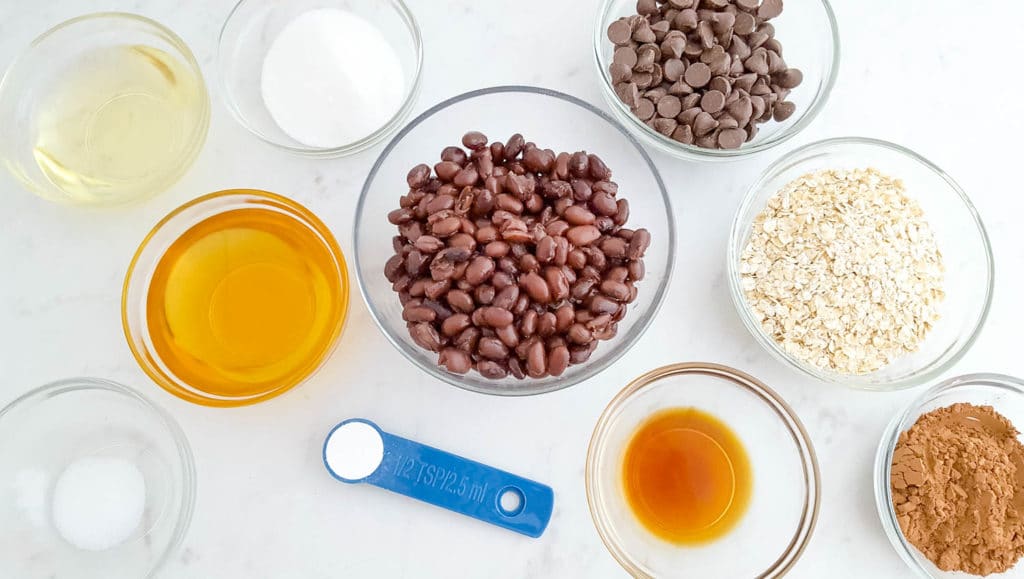
    Three slices of vegan chocolate bourbon pecan pie with a scoop of vanilla ice cream

    Ingredients

    • 1 single crust pie dough
    • 2 cups pecan halves and pieces
    • 2 tbsp ground flax
    • 6 tbsp plant milk
    • 1/4 cup melted vegan butter
    • 1/2 cup loosely packed brown sugar
    • 1/4 cup maple syrup
    • 1/2 cup all purpose flour
    • 1 cup semisweet chocolate chips
    • 3 tbsp bourbon
    • 1 tsp vanilla extract

    Instructions

    Blind bake the pie crust:

    1. Preheat the oven to 350 ºF.
    2. Roll out the pie dough on a piece of parchment paper. Dust the parchment paper and the dough with flour and gently hit the dough with rolling pin to flatten it out and soften it a little to prevent cracking as you roll. Roll away from you and rotate the pie dough with each roll about 1/6″ of a turn so that the dough is rolled out evenly and in a circle. Add more flour as needed as you rotate the dough to prevent sticking or flour your rolling pin if needed. If the edges crack just press them back together with your hands.
    3. Once you’ve rolled the dough out to fit into the pie dish, fold it in half and then half again to create a triangle. Transfer this to the pie dish so the point sits in the middle of the pan and then unfold to fill the dish. Gently ease and don’t stretch the dough to fit into the pan, then trim the excess from the edges, leaving about 1/2″. Fold the dough under and crimp between your thumbs or press with a fork onto the edges of the pie dish.
    4. Loosely cover the pie dough with plastic and place it in the freezer for about 30 minutes to thoroughly chill and firm back up. Once the dough is firm to the touch line the dough with aluminum foil and fill with sugar.
    5. Bake the pie dough for 45 minutes, or until the dough is a pale golden color. It will get cooked further so we are only partially par-baking it. Remove from the oven and let cool for a few minutes before removing the sugar, which can be saved and baked with or used to blind bake more pies.

    Make the chocolate bourbon pecan pie:

    1. Toast the pecans while the pie dough is blind baking. Line the nuts on a baking tray and bake for 10-15 minutes or until they are a shade darker and small toasty. Let cool.
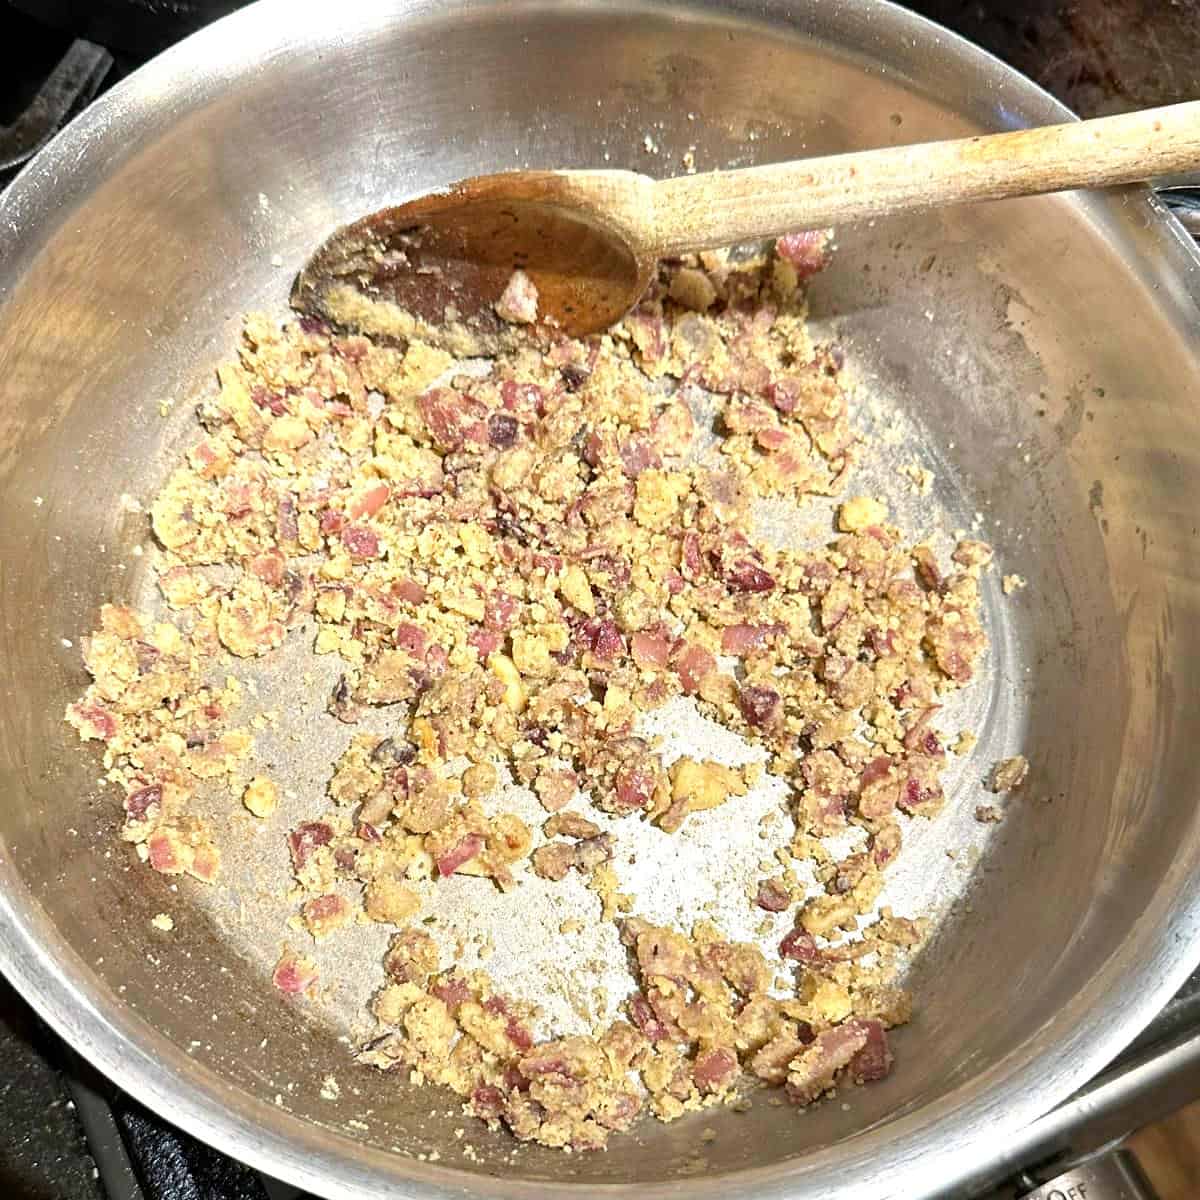
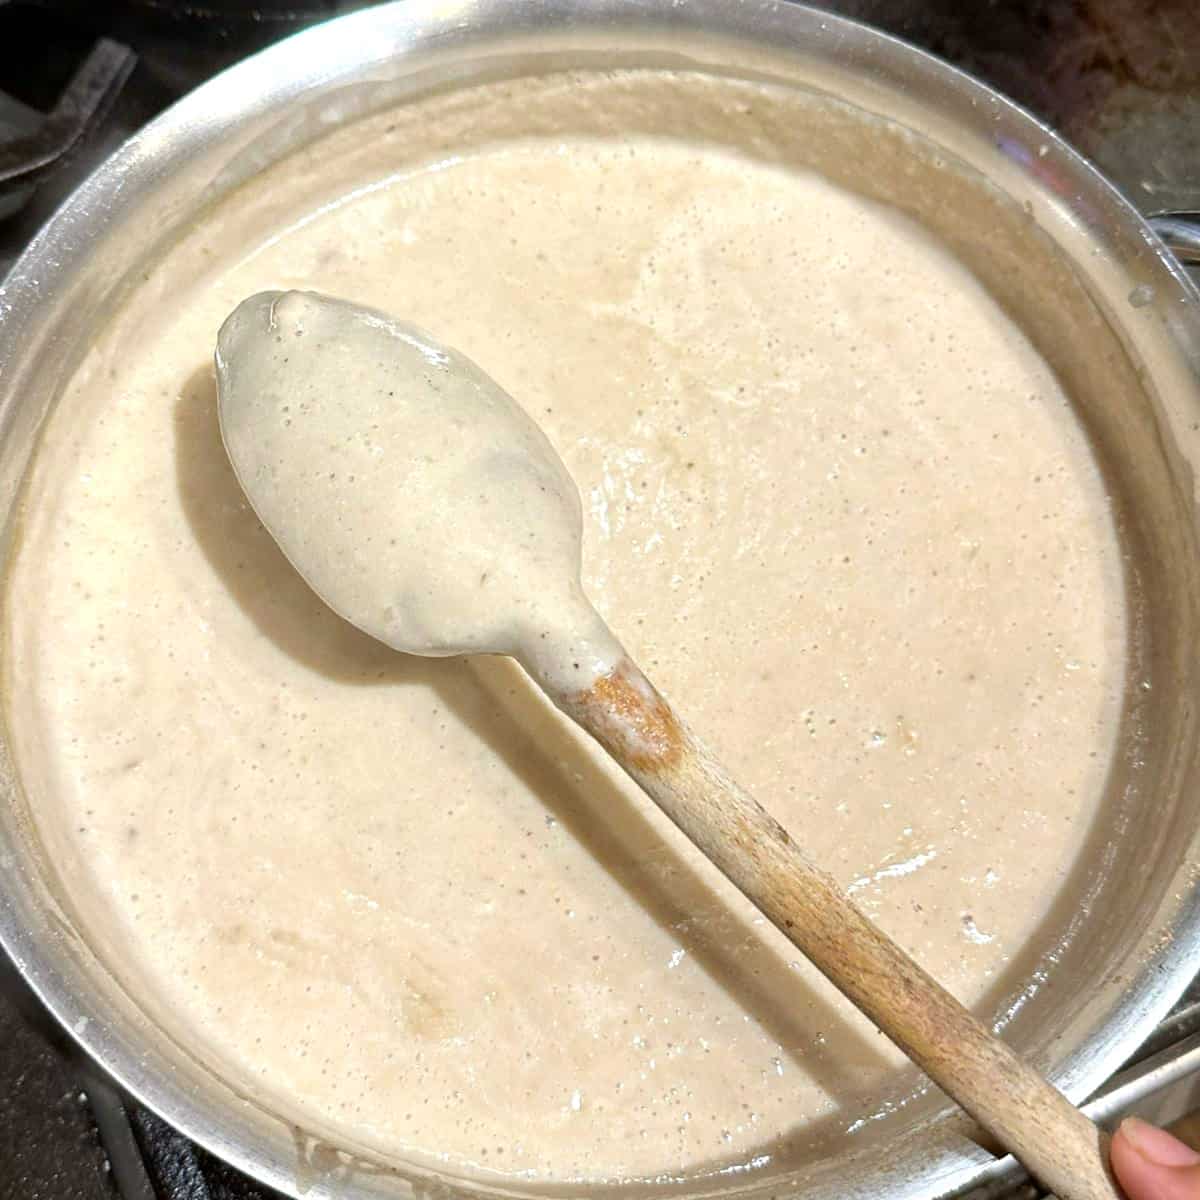
    2. Whisk together the ground flax and plant milk vigorously for 30 seconds. Let sit 10 minutes to turn thick and gloopy.
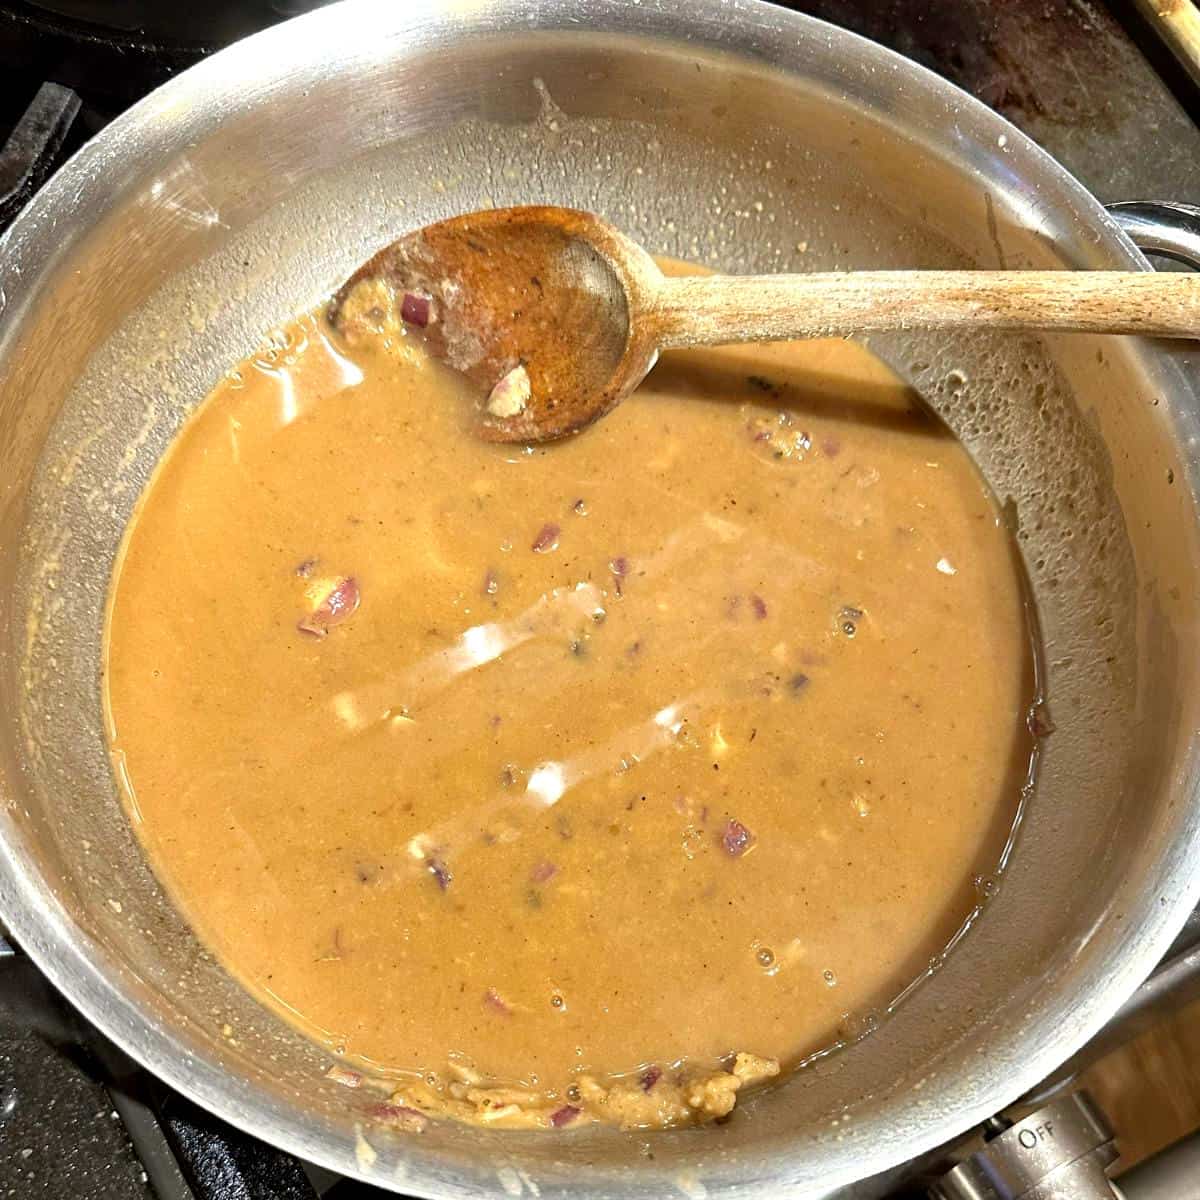
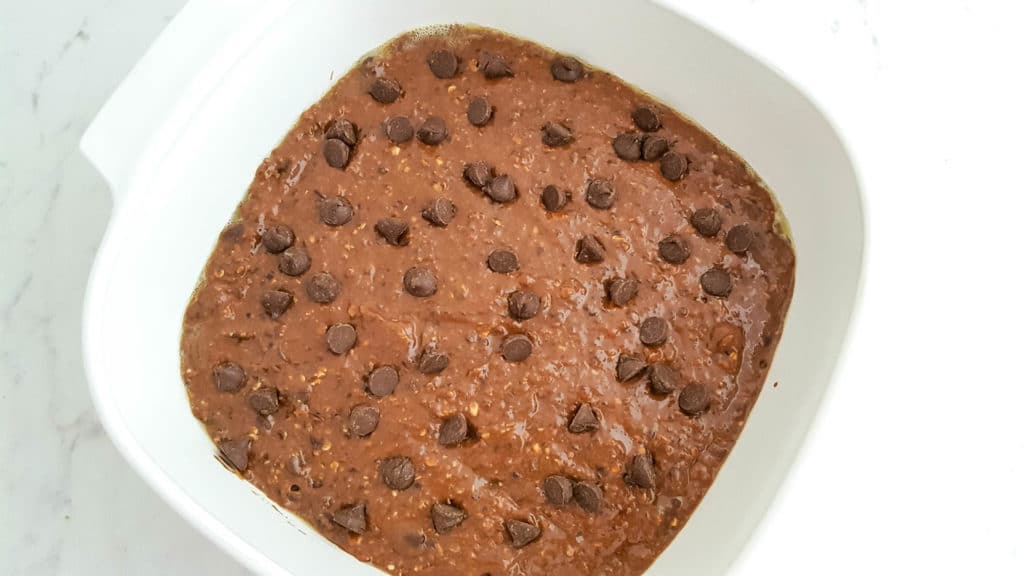
    3. Add in the melted butter, brown sugar, maple syrup, and flour and whisk to combine into a sticky batter. Fold in the chocolate chips, bourbon, vanilla extract, and 1 1/2 cups of the pecans, reserving a generous 1/2 cup to decorate the top of the pie.
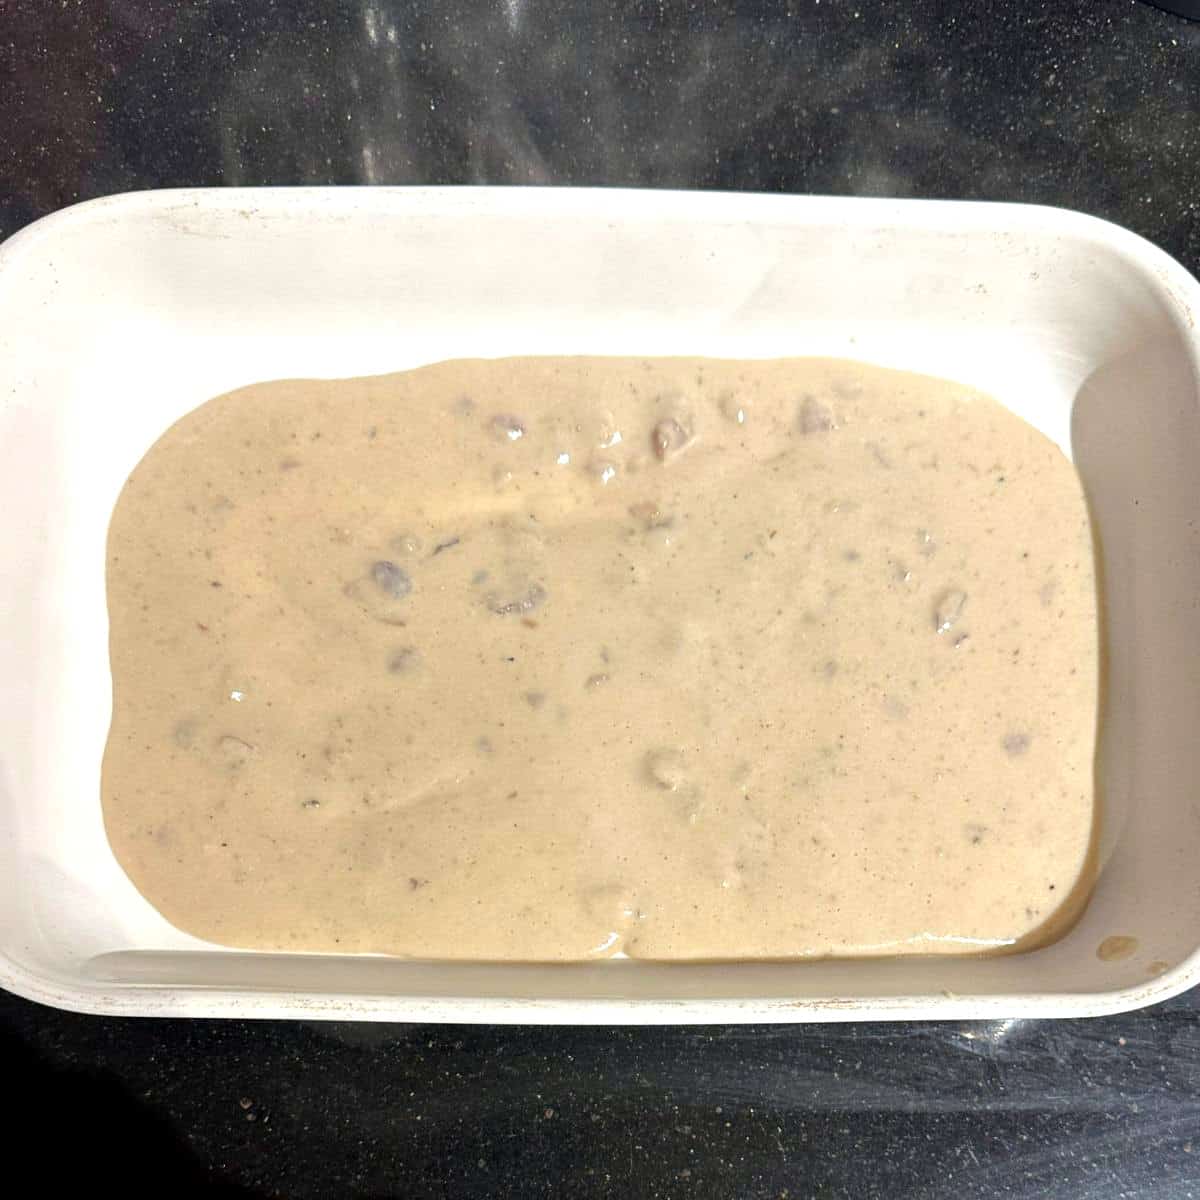
    4. Pour the batter into the par-baked pie crust and smooth the top. Arrange the remaining 1/2 cup of pecan halves along the rim and a few in the center to make a star shape.
    5. Bake the pie at 350 ºF for 35-40 minutes, or until the filling is just set. Let cool completely before serving.

    Notes

    You can use either pecan halves or halves and pieces, but note you’ll want to save the full halves for decorating the top of the pie.

    You can use a store bought pie crust if you prefer, still follow the instructions to blind bake.

    Recipe adapted from Food & Wine and Your Vegan Mom.

    Read More

    June 1, 2025
  • Cornbread Muffins (Vegan & Gluten Free

    Cornbread Muffins (Vegan & Gluten Free

    recipe image
    Adapted from the Skokie Lodge Cookbook

    Ingredients:

    • * 2 flax egg (mix 1 tablespoon flaxseed with 2.5 tablespoon of
    • water, per egg), or 2 regular egg
    • * 1 1/4 cup cornmeal
    • * 1 cup buckwheat flour
    • * 1/2 teaspoon salt
    • * 1/2 teaspoon baking soda
    • * 2 teaspoon baking powder
    • * 1/2 cup coconut oil
    • * 1 cup almond milk
    • * 1/2 cup honey (sub agave or maple syrup for vegan)

    Instructions:

    1. Preheat oven to 400 degrees fahrenheit and line a standard muffin tin with 12 muffin liners.
    2. In a small mixing bowl, mix flax eggs and let sit for 5 minutes
    3. In a large mixing bowl, mix all dry ingredients and set aside
    4. Melt coconut oil over the stove in a saucepan or in the microwave and add to the flax eggs.
    5. Add remaining wet ingredients to the flax eggs and mix well.
    6. Poor the wet ingredients into the dry ingredients and mix until well incorporated and the consistency is that of wet sand.
    7. Fill the muffin liners with the batter, almost all the way to the top.
    8. Bake for 15-18 minutes, or until a toothpick inserted into the middle of a muffin comes out clean. Mine took 15 minutes.
    9. Let cool completely, then store in an airtight container.

    Read More

    June 1, 2025
  • Vegan Wild Mushroom Lasagna

    Vegan Wild Mushroom Lasagna

    recipe image

    In this elegant Vegan Mushroom Lasagna, delicious mushrooms is layered with a creamy white vegan bechamel sauce, jewel-green leeks, vegan mozzarella and vegan parmesan. It’s the perfect dish to impress family and guests!

    For more lasagna deliciousness, try this classic vegan lasagna or this low-carb zucchini lasagna.

    Vegan mushroom lasagna slice on gray plate with fork.

    Get a double dose of decadence and deliciousness with my Vegan Wild Mushroom Lasagna drunk on a creamy, silky bechamel sauce.

    The lasagna noodles cook up perfectly tender and toothsome, absorbing the delicious bechamel and the flavors of the mushrooms. I used a mix of dried wild mushrooms and fresh cremini mushrooms, but the recipe is versatile enough that you can use any mushrooms of your choice.

    Most lasagna recipes can be time consuming, but not this one. You can get the prep work done in minutes, and you can also make the different elements, or the whole lasagna, ahead of time. Assemble and/or bake before serving and you’ll have a dish to wow!

    Table of Contents
    • Why you will love this vegan mushroom lasagna
    • Ingredients
    • How to make vegan mushroom lasagna
    • Tips for success
    • Recipe FAQs
    • Make-ahead and storage instructions
    • Perfect pairings with vegan mushroom lasagna
    • Vegan Mushroom Lasagna Recipe
    • Reviews

    Why you will love this vegan mushroom lasagna

    • Differently delicious. Everyone loves a classic lasagna, but if you’re looking for something different to serve for dinner you can’t go wrong with this vegan mushroom lasagna. The creamy sauce and chewy mushrooms along with the al dente lasagna offer a vivid interplay of textures and flavors.
    • Healthy recipe. I use whole-wheat lasagna in this recipe, and the homemade cashew cream adds a boost of healthy protein. Mushrooms, a health star, and leeks or scallions, add more yummy nutrition.
    • Easy recipe. This is a pretty simple recipe and although, like with any lasagna, there are a few different elements and steps, you can’t go wrong if you follow the directions.
    • Soy-free and vegan, can be gluten-free and nut-free. You can make this recipe with gluten-free lasagna noodles and you can use a nut-free milk for the bechamel.

    Ingredients

    • Extra virgin olive oil. EVOO acts as a wonderful flavoring agent in addition to being a cooking medium.
    • Herbs: garlic and oregano
    • Mushrooms: I used a mix of 12 oz cremini mushrooms and 2 ounces of dried wild mushrooms, which I rehydrated. You can choose to use just one kind of mushroom, like crimini or portobello, or use fresh wild mushrooms.
    • Leeks or scallions. You can use either in this recipe, with great results.
    • Lasagna noodles. I used whole wheat lasagna noodles but I sometimes make this recipe with regular lasagna noodles with equally good results. The whole wheat noodles I used were not oven-ready, so I added more liquid to the baking dish to help them cook to the perfect texture, without having to cook the noodles separately first. You can also use gluten-free noodles in this recipe if you can’t or won’t eat wheat.
    • Vegan mozzarella shreds and vegan parmesan cheese. I buy the mozzarella shreds and make my own vegan parmesan cheese, which is fabulous. You can make the parm several days ahead and store it in the refrigerator to sprinkle on your favorite pasta dishes.

    For the vegan bechamel

    • Raw cashews or non-dairy milk. I like making my own cashew milk for the bechamel because it adds a boost of protein, but you can also use a store-bought non-dairy milk of your choice. If you can’t eat nuts, you can also make a protein-rich homemade milk by blending pumpkin seeds.
    • Garlic. To add flavor to the bechamel.
    • Shallots or red onions. Shallots with their garlicky flavor are great here, but you can use red onions if that is what you have on hand.
    • Nutmeg. Nutmeg is essential in a bechamel sauce and it adds amazing flavor.

    How to make vegan mushroom lasagna

    Wild mushrooms reconstituting in water.

    Place the dried mushrooms in a bowl with 2 cups boiling water. Set aside for 30 minutes for the mushrooms to rehydrate. Before using the mushrooms, squeeze out all the stock and reserve the stock.

    Mushrooms and olive oil in skillet with oregano.

    In a wok or skillet, place 1 tablespoon of olive oil with garlic, cremini mushrooms and oregano. Season with salt and freshly ground black pepper.

    Mushrooms with wine added in wok.

    Saute until the mushrooms begin to brown and express juices. Stir in the drained dried mushrooms. Add the wine and continue cooking over medium-high heat until most of the liquid has evaporated and the wild mushrooms are still chewy but tender.

    Wild mushrooms added to skillet.

    Evaporating the liquid will take a few minutes. (When adding wine or any alcohol to a pan on a gas stove, reduce flame to the lowest setting or turn off the flame temporarily for safety).

    Scallions added to mushrooms in skillet or wok.

    Stir in the leeks or scallions and saute another couple of minutes. Add salt and more ground black pepper as needed. Set aside.

    Onions and garlic sauteing in olive oil.

    In a saute pan or saucepan, heat remaining 1 tablespoon olive oil with garlic and onions. Add salt and ground black pepper. Saute the onions over medium heat until they are soft and translucent.

    Flour added to saute pan with garlic and onions.

    Add the flour to the pan and mix well to form a roux.

    Roux ready after roasting in saute pan.

    Saute the roux until it is no longer lumpy and becomes grainier and aromatic.

    Mushroom stock added to roux in saute pan.

    Whisk in the mushroom stock from the reconstituted mushrooms slowly, making sure you get all the lumps out.

    Cashew milk added to saucepan with ladle.

    Pour in all of the nondairy milk and mix well.

    Nutmeg added to cashew milk in saucepan for vegan bechamel.

    Add the nutmeg to the milk.

    Sauce should coat spoon when cooked.

    Bring the sauce to a boil over medium heat. Continue cooking and turn off the stove once the sauce is thick enough to coat the back of a spoon. Add more salt and pepper if needed.

    Bechamel sauce in bottom of lasagna dish.

    Place one fourth of the bechamel sauce in the lasagna pan, spreading it around evenly.

    Lasagna noodles in bottom of pan over vegan bechamel.

    Layer five noodles over the bechamel. (These instructions are for no-boil noodles or oven-ready noodles. If using regular noodles see FAQs below for instructions).

    Bechamel sauce over mushrooms in lasagna pan.

    Ladle a fourth of the sauce over the lasagna noodles…

    Mushrooms layered over bechamel in lasagna pan.

    …followed by a third of the mushroom mixture.

    Parmesan and mozzarella scattered over mushroom layer in lasagna pan.

    Sprinkle a third of the vegan parmesan cheese and vegan mozzarella shreds over the mushrooms. Follow with another layer of five lasagna noodles followed by a third of the mushrooms and the cheeses.

    Vegan mushroom lasagna ready to bake.

    Once you have topped the final layer of lasagna noodles with the mushrooms, parm and mozzarella, cover the lasagna pan tightly with aluminum foil and bake in a preheated 350-degree Fahrenheit/180-degree Celsius oven for 45 minutes. Remove the foil and continue baking another 15 minutes. Let stand 10 minutes before cutting.

    Vegan mushroom lasagna, baked.

    Tips for success

    • Save and use the mushroom stock from reconstituting the noodles. It adds amazing umami. If you don’t use dried mushrooms, you can use a good quality or homemade mushroom stock or vegetable broth to make the bechamel.
    • Using a mix of dried and fresh mushrooms gives great texture to the lasagna, which would satisfy even a meat-eater. But you can use only fresh mushrooms if you want to.
    • Because the vegan parmesan cheese and the vegan mozzarella can both be salty, factor that saltiness in when you salt the bechamel and the mushrooms.
    • For a golden-brown color to the top of the lasagna, turn on the broiler for a minute or two at the end of baking. Be careful and watch the lasagna so you don’t burn the cheese.

    Recipe FAQs

    Can I use regular noodles instead of no-boil noodles?

    You definitely can, and you can either cook them first, according to package directions, or do this: Carefully add 1 ½ cups of hot mushroom stock or vegetable stock to the sides of the pan after assembling the lasagna and before you cover it with aluminum foil. The added water will help cook the noodles perfectly. Add 5 more minutes to baking time with the aluminum foil on.

    Can I add more veggies to the mushroom lasagna?

    Yes, spinach or chard would be a great addition. You can add the leafies instead of the leeks or scallions or along with them. Be sure you cook out the liquid they express.

    What other mushrooms would work in this recipe?

    You can use any fresh or dried mushrooms in this recipe. I use a mix because they add great texture. That said, cremini, button mushrooms, portobello mushrooms, oyster mushrooms, shiitake mushrooms and chanterelle mushrooms would all work beautifully here.

    Make-ahead and storage instructions

    • Make-ahead: You can make the vegan parmesan, the mushroom mixture and the bechamel up to three days ahead and refrigerate. You can also assemble the mushroom lasagna and refrigerate it, unbaked, for up to three days. Or cover with two layers of freezer-safe wrap and freeze for up to two months.
    • Refrigerate: The baked mushroom lasagna can be refrigerated for up to three days.
    • Freeze: Freeze the mushroom lasagna for up to three months.
    • Reheat: Thaw overnight in the fridge and reheat in a 350-degree F/180-degree C oven until warmed through.

    Perfect pairings with vegan mushroom lasagna

    • A fresh salad, like a vegan Caesar salad or a shaved Brussels sprouts salad.
    • Roasted Brussels sprouts or air-fryer Brussels sprouts.
    • Creamy mashed potatoes with vegan gravy or mashed orange sweet potatoes.

    More yummy pasta recipes

    If you make this recipe, be sure to leave a comment and a star rating below. Or tag us on Instagram #HolyCowVegan.

    Slice of vegan mushroom lasagna in plate,

    Vegan mushroom lasagna slice on gray plate.

    Vegan Mushroom Lasagna Recipe

    Vaishali · Holy Cow Vegan

    This delicious vegan mushroom lasagna has an assortment of mushrooms layered with a creamy white vegan bechamel sauce, leeks or scallions, vegan mozzarella and vegan parm. The recipe is soy-free and it can be gluten-free and nut-free.

    Prep Time 20 minutes mins

    Cook Time 1 hour hr

    Total Time 1 hour hr 20 minutes mins

    Course Main Course

    Cuisine Italian

    Servings 8 servings

    Calories 567 kcal

    Equipment

    • Skillet or wok

    • Wide saucepan or saute pan

    • 3 to 4 quart lasagna pan

    Ingredients  

    • 15 sheets oven-ready lasagna noodles (you can use oven-ready gluten-free lasagne noodles as well. If using noodles that are not oven-ready, see FAQs below.)
    • 2 tablespoons extra virgin olive oil (divided)
    • 8 cloves garlic (finely sliced, divided)
    • 12 oz cremini mushrooms or button mushrooms
    • 2 oz dried mushrooms
    • 2 teaspoon dried oregano
    • ¼ cup white wine (optional)
    • 2 leeks (or six to eight scallions, green and white parts finely chopped)
    • 1 shallot or small red onion, minced
    • ¼ cup all purpose flour (substitute gluten-free all purpose flour or rice flour if gluten-free)
    • 1 cup raw cashews (to make the cashew milk. You can skip making this and use 3½ cups of any non-dairy milk of your choice instead).
    • ½ teaspoon nutmeg
    • 16 oz vegan mozzarella shreds
    • 1 cup vegan parmesan cheese (if nut-free, use pumpkin seeds to make vegan parmesan following my recipe)
    • Salt and ground black pepper to taste

    Instructions 

    • If making your own dairy-free milk, blend the 1 cup cashews with 3 cups water until a creamy milk forms.

    • Place the dried mushrooms in a glass or steel bowl with 2 cups boiling water. Set aside for 30 minutes for the mushrooms to rehydrate. Before using the mushrooms, remember to squeeze out all the stock and reserve it.

    Make mushroom mixture

    • In a wok or skillet, place 1 tablespoon of olive oil with garlic, cremini mushrooms and oregano. Season with salt and freshly ground black pepper. Turn heat to medium low and saute until the mushrooms begin to brown and express juices. Stir in the drained, dried mushrooms.

    • Add the wine and continue cooking over medium-high heat until most of the liquid has evaporated and the wild mushrooms are still chewy but tender. This will take a few minutes. (When adding wine or any alcohol to a pan on a gas stove, reduce flame to the lowest setting or turn off the flame temporarily for safety).

    • Stir in the leeks or scallions and saute another couple of minutes. Add salt and more ground black pepper as needed. Set aside.

    Make vegan bechamel sauce

    • In a saute pan or saucepan, heat remaining 1 tablespoon olive oil with garlic and shallots or onions. Add salt and ground black pepper. Saute the onions over medium heat until they are soft and translucent.

    • Add the flour to the pan and mix well to make a roux. Saute the roux until it is no longer lumpy and becomes grainier and aromatic.

    • Whisk in the mushroom stock from the reconstituted mushrooms slowly into the roux, making sure you get all the lumps out. Then pour in all of the nondairy milk and mix well.

    • Add the nutmeg to the milk. Bring the sauce to a boil over medium heat. Continue cooking and turn off the stove once the sauce is thick enough to coat the back of a spoon. Season if needed with more salt and pepper and turn off the heat.

    Assemble and bake lasagna

    • Preheat the oven to 350 degrees F/180 degrees C.

    • Place one fourth of the bechamel sauce in the lasagna pan, spreading it around evenly.

    • Layer five noodles over the bechamel. (These instructions are for no-boil noodles or oven-ready noodles. If using regular noodles see FAQs for instructions).

    • Ladle a fourth of the bechamel sauce over the lasagna noodles followed by a third of the mushroom mixture.

    • Sprinkle a third each of the vegan parmesan cheese and vegan mozzarella shreds over the mushrooms.

    • Follow with another layer of five lasagna noodles followed by the mushrooms and the cheeses. Once you have topped the final layer of lasagna noodles with the mushrooms, parm and mozzarella, cover the lasagna pan tightly with aluminum foil and bake 45 minutes.

    • Remove the foil and continue baking another 15 minutes. Let the lasagna stand 10 minutes before cutting.

    Notes

    • To make the mushroom lasagna with regular noodles instead of oven-ready noodles, you can either cook the noodles first, according to package directions, or do this: Carefully add 1 ½ cups of hot mushroom stock or vegetable stock to the sides of the pan after assembling the lasagna, before you cover it with aluminum foil. The added water will help cook the noodles perfectly.

    Make ahead and storage instructions

    • Make-ahead: You can make the vegan parmesan, the mushroom mixture and the bechamel up to three days ahead and refrigerate. You can also assemble the mushroom lasagna and refrigerate it, unbaked, for up to three days. Or cover with two layers of freezer-safe wrap and freeze for up to two months.
    • Refrigerate: The baked mushroom lasagna can be refrigerated for up to three days.
    • Freeze: Freeze the mushroom lasagna for up to three months.
    • Reheat: Thaw overnight in the fridge and reheat in a 350-degree F/180-degree C oven until warmed through.

    Nutrition Information

    Serving: 1slice mushroom lasagnaCalories: 567kcalCarbohydrates: 63gProtein: 14gFat: 30gSaturated Fat: 2gPolyunsaturated Fat: 2gMonounsaturated Fat: 6gCholesterol: 15mgPotassium: 554mgFiber: 6gSugar: 5gVitamin A: 380IUVitamin C: 3mgCalcium: 38mgIron: 2mg

    Tried this recipe?Let us know in the comments below!

    About Vaishali

    Hi! I’m Vaishali, a journalist turned food blogger. At Holy Cow Vegan I share easy, tasty recipes made with clean, wholesome ingredients that the entire family can enjoy.

    Reader Interactions

    Read More

    June 1, 2025
  • Loaded Vegan Nacho Plate

    Loaded Vegan Nacho Plate

    recipe image

    Loaded Vegan Nacho Plate - ilovevegan.com

    Let’s talk nachos! There are few things as delicious as a loaded nacho plate – loads of bubbling cheese, fresh veggie toppings, heaps of guacamole, tangy salsa… Ugh, so good!

    Never eating nachos again was a real fear of mine when we were making the transition to veganism. Sour cream and tons of cheese were the highlight of eating nachos, right? And our first few vegan nacho plates just weren’t as “stuff-yourself-delicious” as our previously perfected non-vegan plates. Thankfully, through many trials, our vegan nacho plates are now just as good, if not better, than our non-vegan ones! Today I’m going to share all of our tips and tricks for making a kickass vegan nacho plate that will have you, and everyone you serve it to, in total awe.

    Now get ready for this because I’m downright passionate about what it takes to make a mindblowing nacho plate, okay? You’ve been warned!

    Loaded Vegan Nacho Plate - ilovevegan.com

    First things first, a fantastic nacho plate requires a good, sturdy base. That means high quality tortilla chips AND proper chip placement. Our favourite brand is Que Pasa, they’re organic, lightly-salted, and just the perfect restaurant style tortilla chips. (They also have these awesome O’Canada red and white corn tortilla chips that are perfect for Canada Day nachos! Add some blue corn chips to the mix for a 4th of July theme!)

    Now onto the chip placement. This is so important! Don’t pile up a mountain of tortilla chips, smother it with toppings, and bake. This is how you end up with a top layer of chips that are covered in gobs of cheese and toppings with a ton of toasty but totally naked chips underneath. That is not how you make an awesome nacho plate. The key is to take your time layering the chips in just one slightly overlapping layer. Just like the picture above. See how there’s a little overlap so you’ve got a good strong base, but a lot of the chips are exposed? That’s perfect. No need to spend all day, just make sure to put in a little extra effort here.

    Loaded Vegan Nacho Plate - ilovevegan.com

    We prefer Daiya cheese shreds for nachos, a ½ and ½ mix of cheddar and mozzarella style shreds. In my opinion, the shreds have the best consistency. They also save you time – no grating required, yay!

    Now, let’s talk toppings. Finely chopped toppings are key for proper topping dispersion and variety. Now, how to get those toppings to stay stuck to your chips? First, sprinkle you’re entire nacho plate with a light layer of “cheese”, then add your finely chopped veggies, and finish off with another light sprinkle of cheese. After melting your toppings will be as good as glued to your chips.

    Loaded Vegan Nacho Plate - ilovevegan.com

    Now onto the cooking – this is where personal preference comes in. Do you like your cheese all melty and gooey? Make sure you don’t cook your nachos for too long, just long enough for the cheese to start bubbling.  Do you prefer your cheese to be kind of crisp with lots of toasty chips? Let the cheese bubble under the broiler for a couple of minutes until the edges of your chips are toasty brown. MMmmm…

    Loaded Vegan Nacho Plate - ilovevegan.com

    Now it’s time to take these nachos to a whole ‘nother level: vary the taste and texture by adding fresh crisp veggie toppings, ON TOP of the hot cooked toppings. I always top a nacho plate with fresh shredded lettuce, a little extra chopped tomato, and a little bit of cilantro. (A note of caution on the cilantro: I used to DESPISE cilantro but it’s grown on me over time and I really enjoy a sparse amount with Mexican food (especially in guacamole, yum!) William hates cilantro like there’s literally nothing worse. So decide for yourself whether or not to include it.)

    Loaded Vegan Nacho Plate - ilovevegan.com

    Last, but certainly not least, the dipping sauces – Salsa and homemade guacamole are obvious choices that just have to be included with every vegan nacho plate. We always include some roasted garlic hummus too. Salsa, guacamole and hummus is our holy trinity of dips for all things nachos, burritos, tacos, but our Best Vegan 7 Layer Dip would be perfect too!

    Loaded Vegan Nacho Plate - ilovevegan.com

    That’s it, that’s all you need to know to make a completely out-of-this-world-delicious and totally vegan nacho plate! Cook some up the next time you’re entertaining. Canada Day (or 4th of July for our American friends!) might be the perfect occasion! Happy nacho eating everyone!

    Print

    Loaded Vegan Nachos - ilovevegan.com


    • Author:
      Brittany at ilovevegan.com

    • Prep Time:
      20 minutes

    • Cook Time:
      10 minutes

    • Total Time:
      30 minutes

    • Yield:
      2 –4 1x

    • Category:
      Appetizer, Main, Snack

    • Cuisine:
      Vegan


    Description

    Is there anything quite as satisfying and delicious as an awesome nacho plate? I don’t think so! Try our tips for making the perfect, veggie-loaded, 100% vegan nacho plate. Yum! Serves 2 very hungry people as a meal or 3-4 as an appetizer.


    • Approx. 6 cups or ½ 425g bag of tortilla chips (we recommend Que Pasa brand)
    • ½ cup finely chopped vine-ripened tomato (seeds removed)
    • ½ cup finely chopped green bell pepper
    • ¼ cup finely chopped red onion
    • ¼ cup sliced black olives
    • ¼ cup black beans
    • 2 tbsp finely minced jalapeño (seeds removed) (optional)
    • ½ cup vegan mozzarella shreds (we recommend Daiya)
    • ½ cup vegan cheddar shreds (again, Daiya)

    To serve

    • ½–1 cup shredded iceberg lettuce
    • ⅓ cup chopped tomato (seeds removed)
    • 2 tbsp chopped cilantro
    • ½ cup guacamole
    • ½ cup roasted garlic hummus
    • ½ cup salsa


    Instructions

    1. Preheat oven to 425F.
    2. Spread chips out in a single layer.
    3. Combine the mozzarella and cheddar and top the chips with ½ of the cheese mixture.
    4. Evenly sprinkle the tomato, green pepper, red onion, black olives, black beans, and jalapeño over the cheese. Sprinkle the remaining ½ of the cheese over top.
    5. Bake for 5-7 minutes, until the cheese melts.
    6. Turn the oven on to broil. Cook for 30 seconds to 1 minute (or until the cheese is just bubbling) for gooey melt-y cheese. For crunchier cheese and toastier chips, let the cheese bubble for 2-3 minutes before removing from the oven. Take care not to allow the chips to burn.

    To serve:

    1. Top with shredded lettuce and cilantro. Serve with hummus, guacamole, and salsa. Serve immediately.


    Notes

    We thinly sliced the jalapeños into rounds for this recipe to show the distinction between the chopped green bell peppers and the jalapeño. Nachos with the rounds with SUPER spicy, so you may prefer to remove the seeds and finely chop the jalapeño for a milder kick. The jalapeño can be omitted if you prefer milder foods.

    Read More

    June 1, 2025
  • Vegan Wild Mushroom Stroganoff Soup

    Vegan Wild Mushroom Stroganoff Soup

    recipe image


    Edward & Sons Recipes – Edward & Sons Trading Co.<br />


    Skip to content


    Go to top

    Read More

    June 1, 2025
  • Vegan Double Chocolate Black Bean Brownies

    Vegan Double Chocolate Black Bean Brownies

    recipe image

    Modified: Sep 9, 2020 by Stefanie Fauquet · This post may contain affiliate links · Leave a Comment

    This flourless double chocolate Vegan Black Bean Brownies recipe is so delicious that you won’t even know it’s dairy-free (or made with black beans!)

    Vegan Black Bean Brownies Recipe

    When I was a little girl, I distinctly remember my mom using a KitchenAid mixer in the kitchen. It was how she whipped up delicious baked goods for our family holidays. I remember asking to lick the stainless steel bowl any time she made cookies or brownies — for whatever reason, back then it wasn’t an issue to consume raw eggs and she happily obliged to my whims. It’s funny how those little memories stick with you.

    Fast forward to adulthood, where for the longest time I coveted a KitchenAid Artisan Stand Mixer. I even had one on my wedding registry, which sadly went unfulfilled. My mom offered me her mixer, but I didn’t have the heart to take it from her as I knew how many memories were attached to the appliance.

    I vowed to have my own one day, but it wasn’t until this year that I finally had a KitchenAid mixer in my possession thanks to Best Buy.

    Mini Kitchenaid Artisan Mixer

    The wait was worth it though because I received a KitchenAid Artisan Mini Stand Mixer, which is 25% smaller with all the same features as a standard kitchen aid mixer.

    When we purchased our first home last year we downsized by 50%— I thought I would never find appliances that would fit in our tiny kitchen, but the KitchenAid Artisan Mini is perfect. It can be stored on our counter or under the cabinets with ease. For the first time in my life, I’m looking forward to holiday baking!

    Meet the Mighty Mini – Mini Mixer. Powerful Performance.

    Kitchen Aid is excited to introduce the Artisan Mini – a new and innovative addition to the KitchenAid Stand Mixer Family.

    With the launch of the new Artisan Mini, there is now a smaller mixer that takes up less counter space, is lighter in weight so you can easily move it around your kitchen and has the same iconic design and power as our other tilt-head stand mixers.

    The NEW Artisan Mini Stand Mixer from Best Buy is 20% smaller and 25% lighter, making it the ideal culinary tool for smaller spaces and kitchens. The compact size and lighter weight perfectly suit the needs of a city dweller who loves to cook in their smaller spaces. Artisan Mini is made for your lifestyle, made for your kitchen, made for you.

    Though mini in size, the NEW Mini Stand Mixer can make up to 5 dozen cookies in its 3.5-quart stainless steel bowl. The Artisan Mini Stand Mixer also features 10 mixing speeds and comes with a coated flat beater, dough hook, and 6-wire whip.

    Kitchenaid Artisan Mini Red

    It’s going to be a few months until I put this baby to good use (the holiday season!) but for now, I’m using it on tried and true recipes. One of the first is on these decadent double chocolate vegan black bean brownies…. Yes, BLACK BEAN BROWNIES! I know, I had doubts too until I tried them for myself. The black beans add a ton of protein without compromising on the chocolate flavor, and they’re dairy-free too! Here’s the yummy recipe:

    Black Bean Brownies Ingredients:

    • 1 15 oz. can black beans, rinsed well
    • ½ cup quick oats
    • ⅓ cup agave (can substitute maple syrup)
    • ¼ cup vegetable oil or coconut oil
    • ½ cup vegan chocolate chips
    • 2 tablespoons cocoa powder
    • 2 teaspoons vanilla extract
    • ½ teaspoon baking powder
    • ¼ teaspoon salt
    • Additional chocolate chips to place on top

    vegan black bean brownies ingredients

    How to Make Vegan Black Bean Brownies:

    1. Preheat oven to 350 degrees F. Grease an 8×8” pan and set aside.

    2. Add all ingredients (except for chocolate chips) in KitchenAid Artisan Mini and mix until combined. Add ½ cup chocolate chips and mix to incorporate.

    Kitchenaid Artisan Mini

    3. Pour ingredients into the prepared pan. Place additional chocolate chips on top, and bake in the preheated oven for 15-18 minutes. Allow the brownies to cool for a minimum of 10 minutes before cutting.

    Black Bean Brownies Recipe

    Tips for Making Black Bean Brownies:

    → If the black bean brownies still appear to be slightly undercooked after 18 minutes of baking, place them in the refrigerator for 2 hours to allow them to firm up.

    → Store black bean brownies in the refrigerator until ready to eat.

    Vegan Black Bean Brownies Recipe

    vegan chocolate black bean brownies recipe

    Vegan Double Chocolate Black Bean Brownies

    Servings: 9 brownies

    Author: Stefanie Fauquet

    Ingredients

    • 1 15
      oz.
      can black beans
      rinsed well
    • ½
      cup
      quick oats
    • ⅓
      cup
      agave
      can substitute maple syrup
    • ¼
      cup
      vegetable oil or coconut oil
    • ½
      cup
      vegan chocolate chips
    • 2
      tablespoons
      cocoa powder
    • 2
      teaspoons
      vanilla extract
    • ½
      teaspoon
      baking powder
    • ¼
      teaspoon
      salt
    • Additional chocolate chips to place on top

    Instructions

    1. Preheat oven to 350 degrees F. Grease an 8×8” pan and set aside.

    2. Add all ingredients (except for chocolate chips) in KitchenAid Artisan Mini and mix until combined. Add ½ cup chocolate chips and mix to incorporate.

    3. Pour ingredients into the prepared pan. Place additional chocolate chips on top, and bake in the preheated oven for 15-18 minutes. Allow the brownies to cool for a minimum of 10 minutes before cutting.

    vegan black bean brownies recipe

    Other Chocolate Dessert Recipes You Might Like:

    • Chocolate Truffles
    • Chocolate Glazed Donuts
    • Chocolate Chip Cookie Cake
    • Cosmic Brownies
    • Chocolate Chip Cookie Cake
    • Lactose-Free Fudge Brownies

    The reviewer has been compensated in the form of a Best Buy Gift Card and/or received the product/service at a reduced price or for free.

    Read More

    June 1, 2025
  • Best Vegan Peanut Butter Cookie Recipe (with a Chocolate Chip Variation)

    Best Vegan Peanut Butter Cookie Recipe (with a Chocolate Chip Variation)

    recipe image

    Posted on December 25, 2011 •

    Merry Christmas, everyone! Hope you are having a joyful time with your family and friends.

    Last night, after attending a Christmas church service, hubby and I perfected my new Peanut Butter Cookie recipe. I tried making them once before, but having never had a peanut butter cookie (I know, pity me) 😉 I did not really know what I was looking for, so he was my taste guide. After my first attempts we established that cookies needed to be crunchier and more peanut-buttery. I even went as far as going to the nearby Whole Foods to try one of theirs to have a point of reference. 😉 And, last night hubby’s dream for home-made Peanut Butter Cookies came true–they turned out to be everything that he thinks a peanut butter cookie should be.

    So, in the spirit of sharing, try this Peanut Butter Cookie recipe and enjoy!

    Vegan Peanut Butter Cookie Recipe

    yields 18-20 cookies

    [click image to enlarge]

    WARNING: THIS IS NOT A HEALTH FOOD, ALTHOUGH IT IS ALL PLANT BASED! 😉 As such it is to be made and eaten only occasionally and sparingly. 

    Ingredients

    • 1/4 cup brown sugar
    • 1/2 cup white, unbleached sugar
    • 1/8 tsp Himalayan salt (if you use other kinds scale down, since Himalayan salt is milder in taste)
    • 2 tsp vanilla
    • 1 tsp baking soda
    • 2 tsp lemon juice
    • 1/4 cup Earth Balance butter (vegan)
    • 1/2 cup fresh peanut butter
    • 1/4 cup almond milk
    • 1 cup unbleached white flour
    • 1/4 cup vegan chocolate chips

    Preparation

    • Place all ingredients, except for chocolate chips, into a food processor and blend until well combined (you will end up with a slightly flaky batter, which you will finish mixing by hand, pressing all particles in)

    • If you would like to make some cookies with chocolate chips, transfer dough into a bowl and divide into 2 parts; if not, you can keep it in the food processor container
    • If you are making half of the cookies with chocolate chips, add 1/4 cup of chips into the half of the dough and mix them in by hand, as you are rolling cookies
    • Preheat oven to 350 F
    • Line two baking sheets with parchment paper
    • For plain cookies: form 1 inch hockey pucks/balls out of the dough, place on the baking sheet 2-3 inches apart; using a fork create beautiful indentations and press the dough down to form round disks

    • For chocolate chip cookies: form 1 inch hockey pucks/balls out of the dough, press each down with your hands to form round disks, place on the baking sheet 2-3 inches apart

    • You will end up with 18-20 cookies
    • Bake for 10-11 minutes or until golden–if you have a narrower oven and have to place one sheet on the bottom rack and one on top, make sure to switch them up after 5 minutes–do not over-bake, as cookies will turn out to be EXTRA crunchy
    • Cool cookies off on a cooling rack and enjoy with a cold cup of almond milk
    • Store remaining cookies in an air tight container

    NOTE: If you don’t want cookie as crunchy use all white sugar instead of using brown sugar.

    Merry Christmas!

    Read More

    June 1, 2025
←Previous Page
1 … 53 54 55 56 57 … 235
Next Page→

WordPress Blog

  • Blog
  • About
  • FAQs
  • Authors
  • Events
  • Shop
  • Patterns
  • Themes

Twenty Twenty-Five

Designed with WordPress