This post may contain affiliate links. Please read our disclosure policy.
I’ve had about 20 friends lately ask me if I am now a vegan. I suppose that’s due to the fact that I’ve posted quite a few vegan recipes in the past few weeks. Truth is, I just really enjoy experimenting with odd ingredients (that just so happen to be vegan) and finding healthier alternatives to traditionally un-healthy treats. Like donuts.
I’ve made these donuts quite a few times now and in quite a few ways. I experimented with coconut flour, different kinds of protein powder, and some other weird ingredients. Every time they’ve turned out great but every time they’ve tasted rather different.
These donuts are inspired by Aloha and their healthy “social gathering menus” initiative. I wish I could show their recipes to everyone I work with because nothing gets me more than free food at work. It’s both a blessing and a curse that I work in a place that has an abundance of free breakfast, lunch, and dinner meetings and receptions. Why is free food exponentially harder to say no to?
The donuts are the worst of all the free foods for me. They’re always there. They’re always fresh. And they’re almost always delicious. Here’s my compromise:
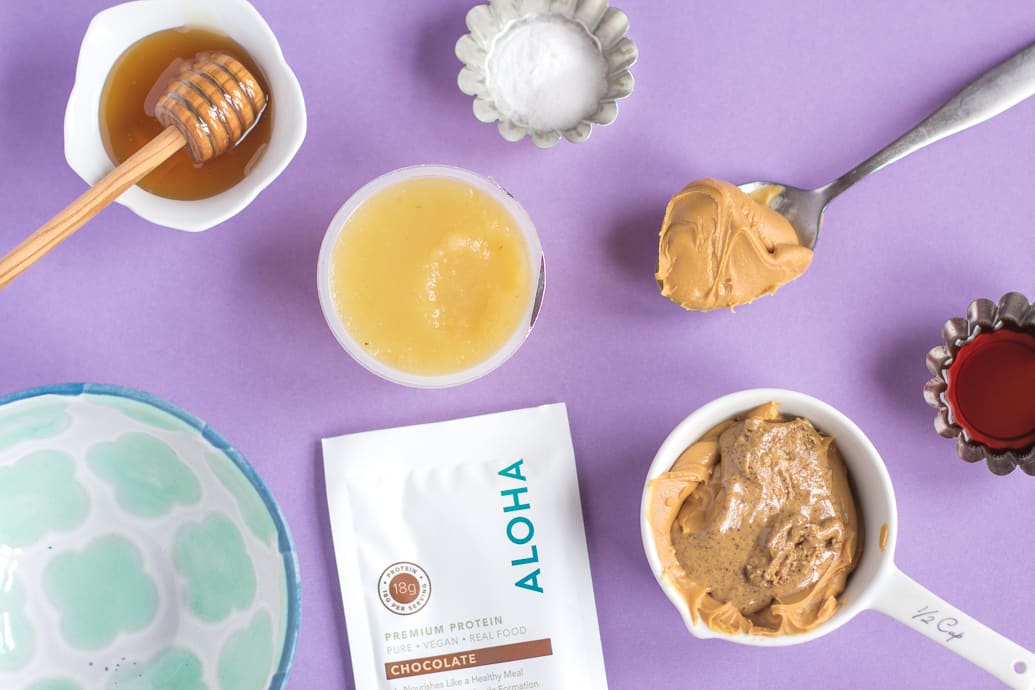
While I had heard about them for awhile, it wasn’t until recently that I finally tried out some of Aloha’s products. I signed up for their free trial membership so that I could try out a few products before committing to anything.
I’m kind of a sucker for good packaging and they do it so well:
I tried out their protein powders (because, as you know, I’m always on the hunt for the best protein powder!) and some of their whole food powders.
After browsing the healthy recipes on their website, I was inspired by this chocolate cake recipe. I used the icing recipe from this recipe for my donuts.
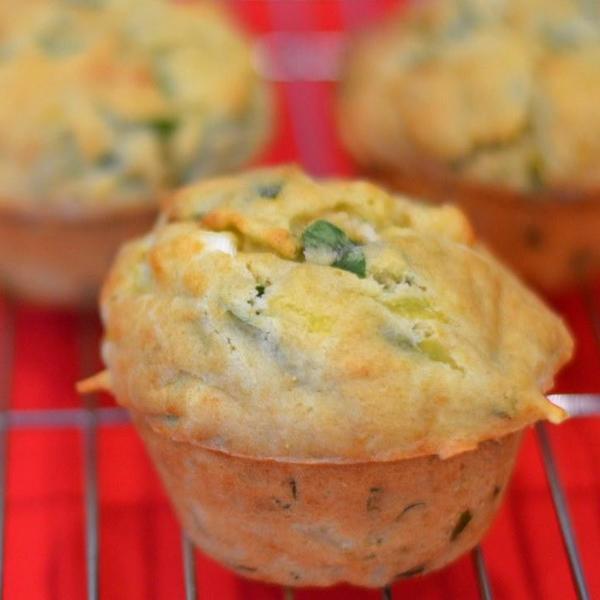
These Vegan Protein donuts are dairy and egg free. They’re also flour-less and yet still delicious!! These are pretty similar to the muffins that we made a couple weeks ago, except they have protein in them and the egg was replaced with some apple sauce.
I was also running out of almond butter so I used half almond butter and half peanut butter.
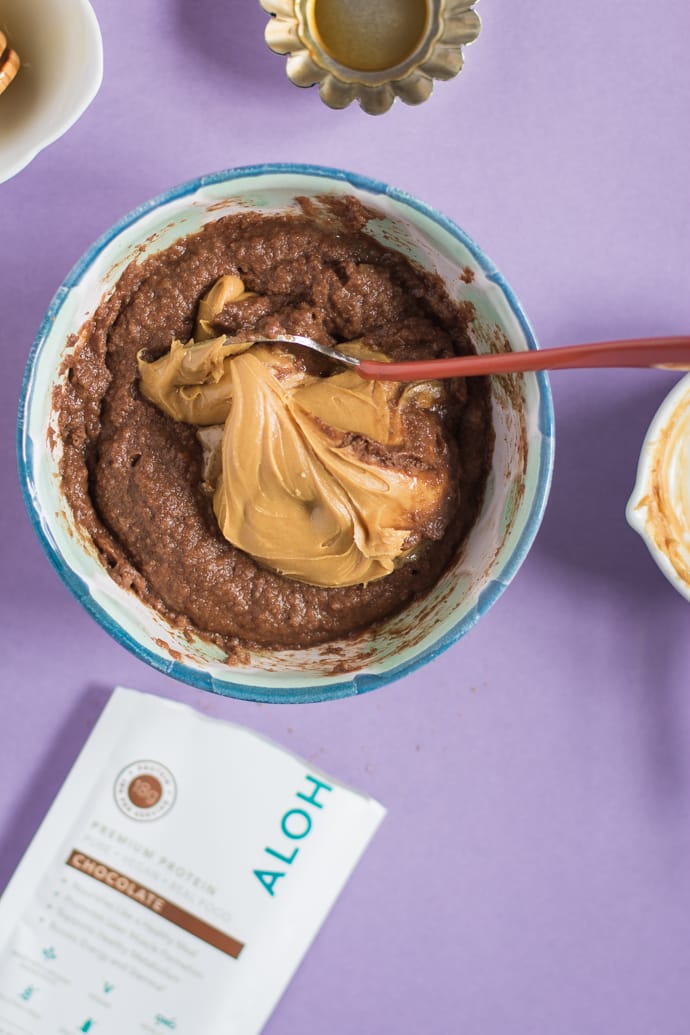
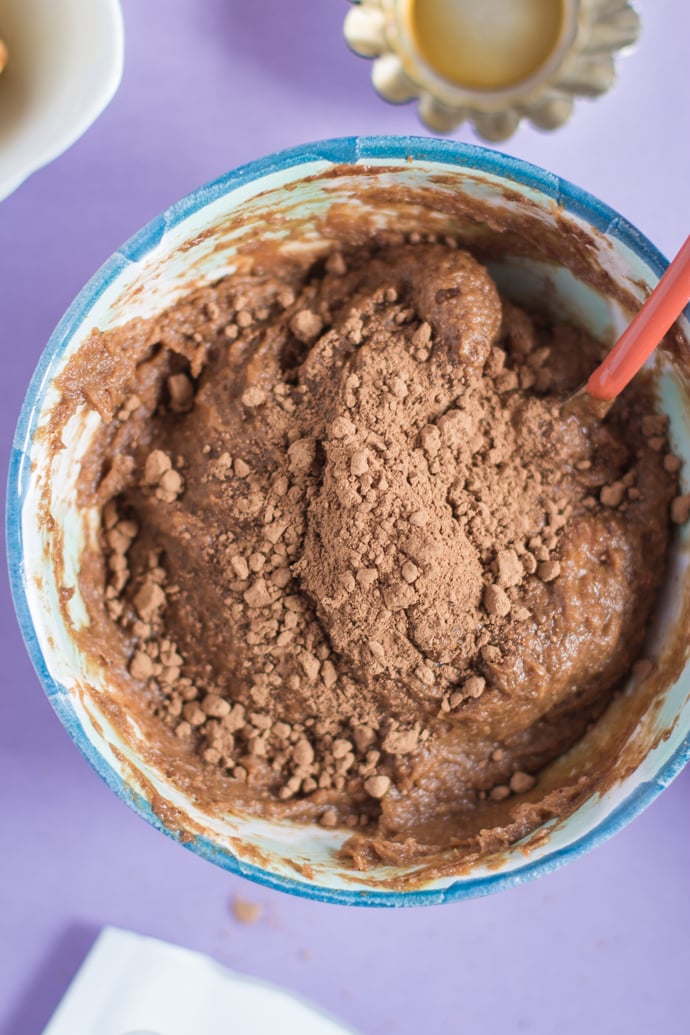
Everything is mixed together thoroughly in a bowl.
Once everything was said and done, I decided to add a bit of cocoa powder into the mix as well.
Again, stir it all up nice and good making sure there are no big lumps left in the batter.
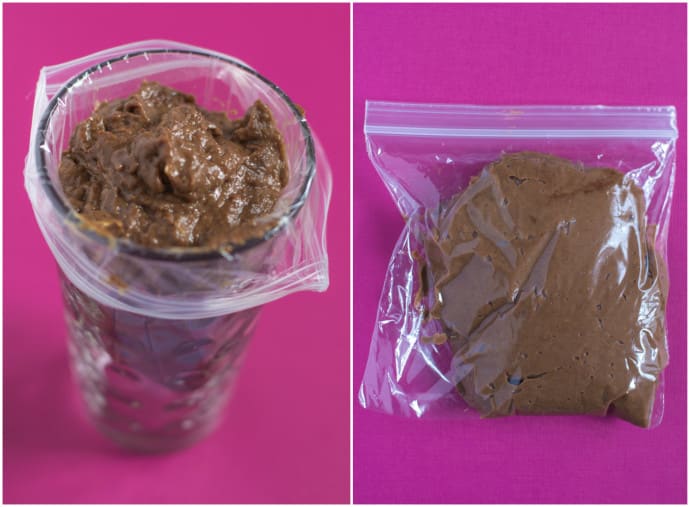
To make things all a bit easier, I put the batter into a plastic baggie so that I can get it into the donut pan without making a huge mess.
Cutting a hole in one corner of the baggie, the batter is piped into a greased donut pan.
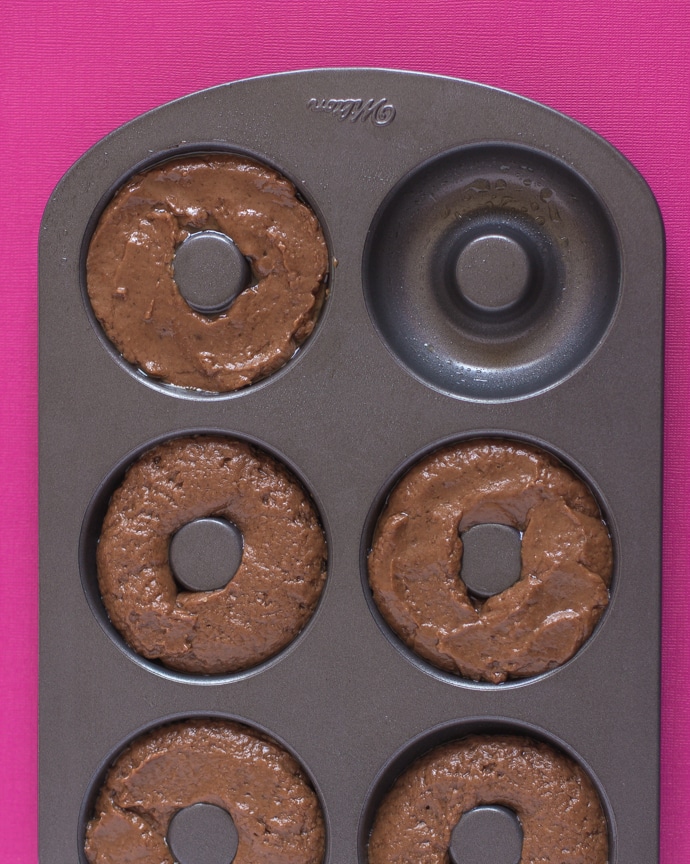
This recipe makes exactly 5 donuts. Sorry to all the OCD people out there who really wanted an even number of donuts 🙂
Bake for 8-13 minutes. The time of these really depend on exactly what ingredients you use. The first time I made them, I used sunflower seed butter and they baked perfectly in 8 minutes. The next time I used peanut butter and it took them about 3-4 minutes longer. After about 8 minutes, take your donuts out of the oven and see if they’re done by sticking a toothpick into one of the donuts.
Once they’re done, it’s important to let them cool completely before icing them. If you don’t want to ice them however, the donuts taste pretty good warm out of the oven!!
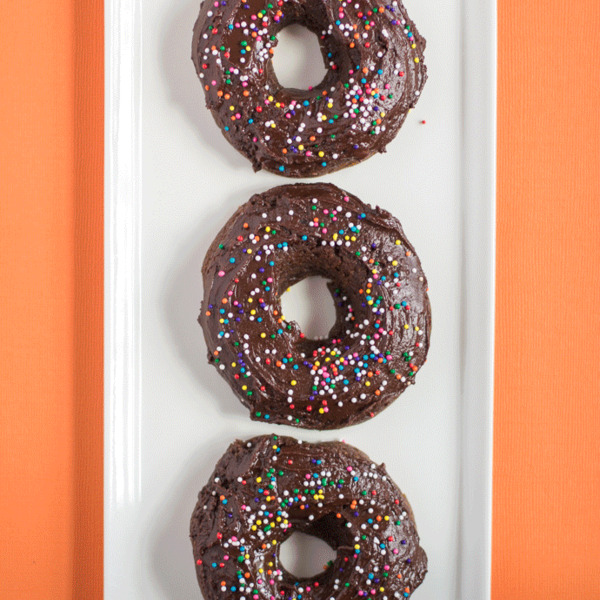
The icing is a combination of dark chocolate, vegan butter, and cocoa powder
Top with sprinkles and let sit for a while to let the icing harden. Alternatively, dig in and just lick the gooey chocolate off of your fingers afterwards.
These donuts are SO good and I feel a little bit better about eating them than the giant donuts people always bring to work.
How about one more gif 🙂
For donuts:
½cupof unsweetened applesauce, or one 3.9 ounce single serve container
½cupof any nut/seed butter, I’ve tried these with almond, peanut, and sunflower seed butters
2tablespoonsof maple syrup
1teaspoonof vanilla extract
¼teaspoonof salt
¼teaspoonof baking soda
1scoop of protein powder, ~1/8 of a cup. You can also replace this with 1/8 cup of coconut flour
1tablespoonof cocoa powder
For Icing (which is optional):
⅔cupdark chocolate
1tablespoonof cocoa powder
1tablespoonof vegan butter
Optional: sprinkles for topping
Pre-heat oven to 400 degrees F and grease a donut pan.
Make the donut batter by combining the applesauce, nut/ seed butter, honey, vanilla, salt, baking soda, protein powder, and cocoa in a medium bowl. Stir until it is thoroughly combined and there are no more big lumps left.
Spoon the batter into a piping bag or small plastic baggie (with a hole cut in the corner) to make it easier to get the batter in the donut pan.
Pipe the batter into the pan evenly. You’ll end up with 5 donuts.
Bake for 8-13 minutes. After 8 minutes, take the pan out of the oven and test to see of the donuts are done by poking one with a toothpick. The donuts are done when the toothpick comes out clean. The bake time depends largely on the kind of nut/seed butter that you use.
Once done let cool completely before icing.
Make icing by melting chocolate and stirring in the butter and cocoa powder.
Ice each donut evenly and top with a few fun sprinkles. the icing will harden quite a bit if that’s what you want but it will take up to a few hours to do so.
ENJOY!!
About Brita Britnell
Brita is the author of Food with Feeling which is a vegetarian based food blog. She creates easy and delicious recipes that encourage people to try more meat-free recipes!
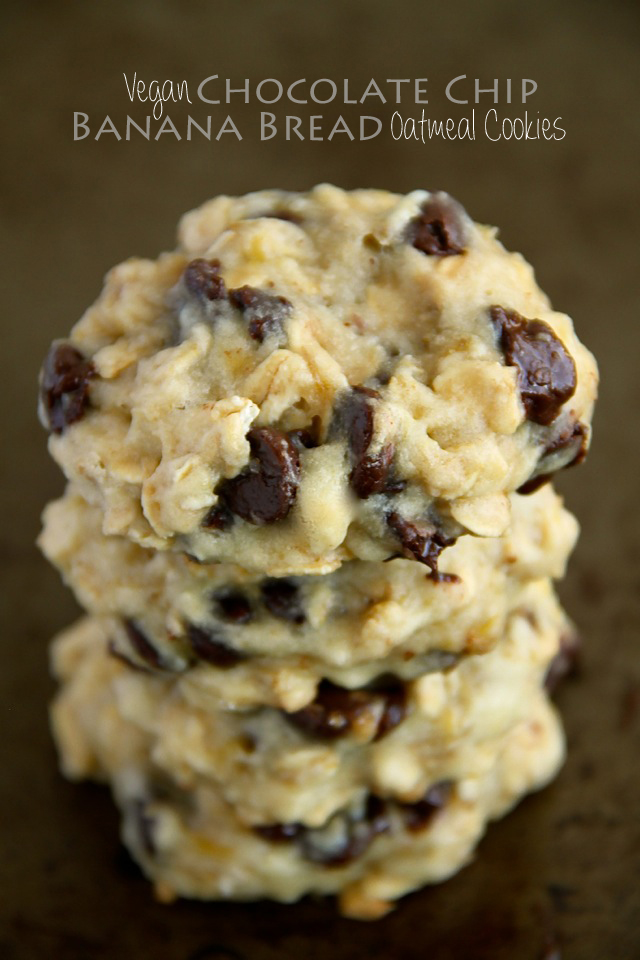
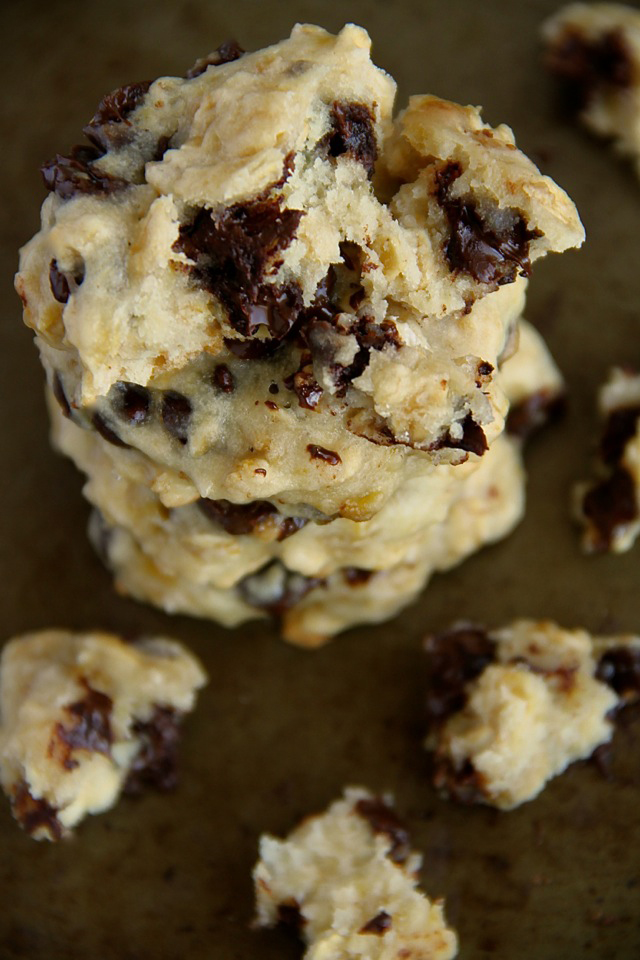
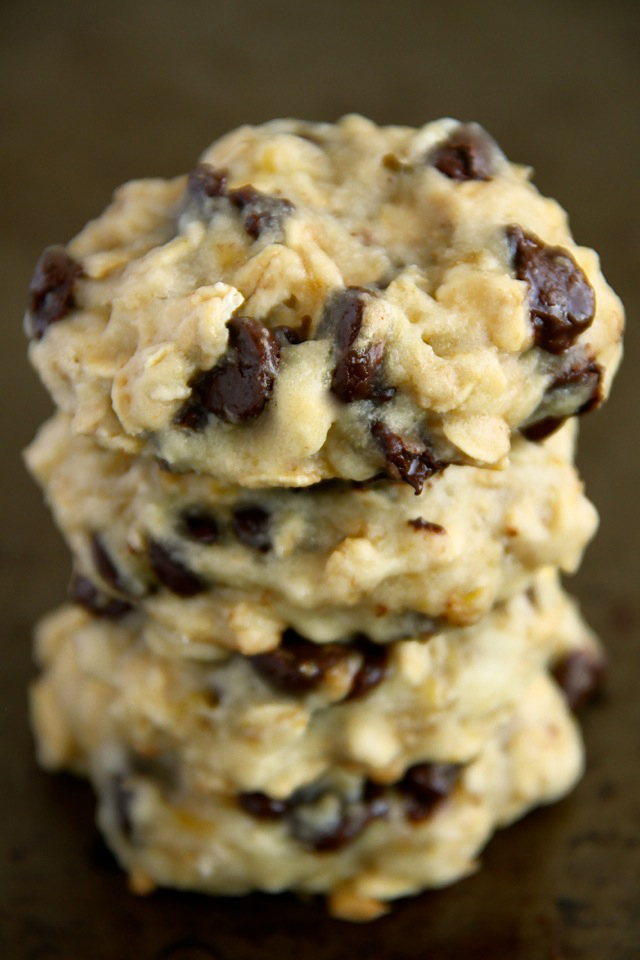
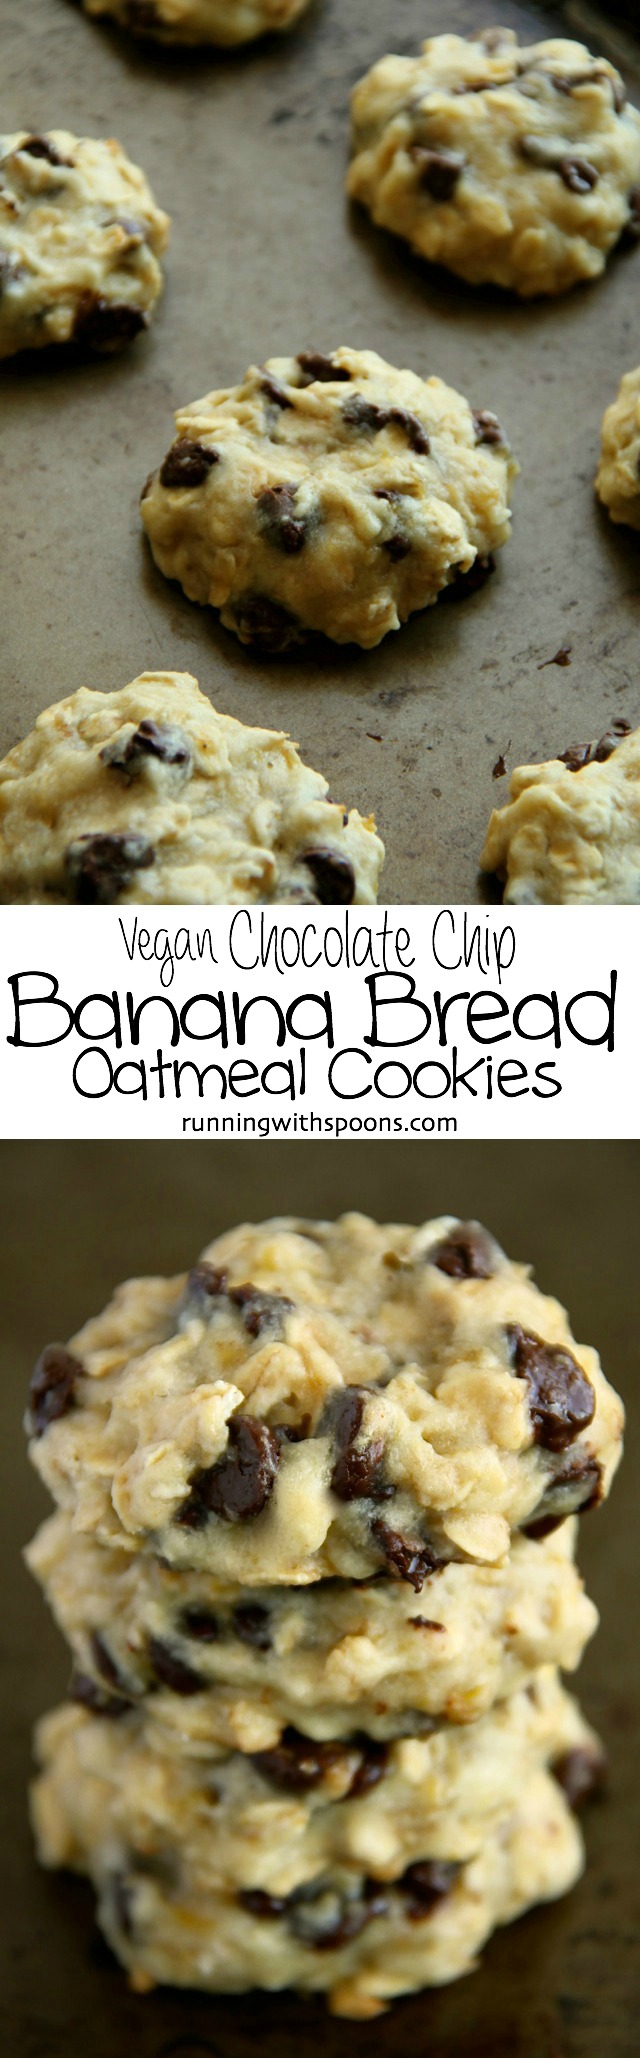
These soft and chewy chocolate chip banana bread oatmeal cookies are super easy to whip up and are made with NO butter or eggs. They’re low in added sugar, low in fat, and BIG on banana bread flavour.
I feel like everyone has that one staple food that they always need to have on hand. That one food that they’d be willing to brave a blizzard to go out and buy. That one food they could happily survive off in the event of a zombie apocalypse. And for me, that one food is bananas. Perfectly pre-packaged, no cooking required, full-of-health-benefits bananas. Love those things.
Given my slightly higher than average consumption of them, I’ve fallen into the habit of picking up a bunch or two whenever I’m in the store, even if I still have plenty at home. This way I know that I’ll always have some nice spotty ones on hand, which is especially helpful during the cold winter months when they take forever to ripen and stores like to sell them when they’re still basically neon green. Any extras I might end up with are frozen or turned into cookies.
Okay, that last one isn’t entirely true. I don’t normally make cookies out of bananas, but I do when I get hit by the baking bug at 5 AM only to realize that I don’t have any eggs in my fridge. Womp, womp. I know eggs are a lot of peoples One Food, but evidently they’re not mine.
Luckily, in addition to things like chia, flax, yogurt, oil, pumpkin, and applesauce, bananas can be used to replace eggs in a lot of recipes… and bananas I have in spades. I mean — yes — they make the end result taste banana-y, but I can’t think of how that could ever be a bad thing… especially when chocolate is involved…
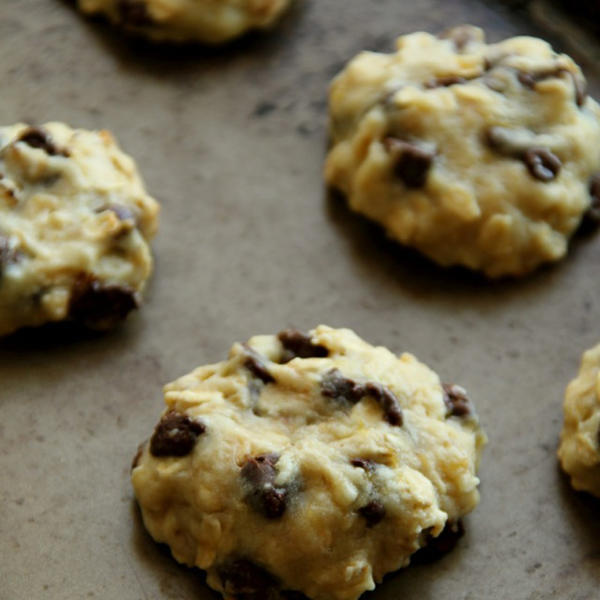
Oh.my.word. Can we just talk about how soft and pillowy these cookies are? And how each bite presents you with the perfect combination that is bananas and chocolate? These cookies legit taste like a slice of banana bread, and their texture is somewhere in between a cookie and a quick bread — a little cakey, but still wonderfully chewy.
They also aren’t overly sweet and only contain 1/4 cup of sugar for the whole recipe… which is a good thing considering I polished off the entire batch in just under two days. On my own. Mmm hmm. I blame a weekend of snowboarding and a few days of study-induced munchies, but by the time you read this, these cookies are no more. Well, not unless you want to get into specifics about the whole digestion, absorption, and elimination process… which I’d rather not do.
Instead, I’d like to remember them as they were when they were whole. Soft. Chewy. Banana-y. Egg-free. Dairy-free. Healthy. Easy. And delicious.
I’d love to know if you make this (or any!) recipe! Tag @runwithspoons on Instagram and Twitter, and be sure to subscribe to our mailing list to receive more healthy and delicious recipes straight to your inbox!
Print
Vegan Chocolate Chip Banana Bread Oatmeal Cookies
5 Stars 4 Stars 3 Stars 2 Stars 1 Star
4.8 from 12 reviews
Author:Amanda @ Running with Spoons
Total Time:24 mins
Yield:12 cookies 1x
3/4 cup (90 g) whole wheat flour
1/2 cup (40 g) rolled oats
1/2 tsp baking powder
1/4 tsp salt
1 Tbsp (15 ml) coconut oil, melted
1 medium-sized ripe banana, mashed (100 g or 1/2 cup)
1/4 cup (50 g) brown sugar
1 tsp vanilla extract
1/3 cup (60 g) vegan chocolate chips
Instructions
Preheat oven to 350ºF (176ºC) and line a large baking sheet with parchment paper or a non-stick baking mat. Set aside.
In a large mixing bowl, combine flour, oats, baking powder, and salt. Set aside.
In a medium-sized mixing bowl, whisk together coconut oil, banana, sugar, and vanilla.
Add wet ingredients to dry ingredients, mixing until just combined. Do not overmix. Fold in chocolate chips.
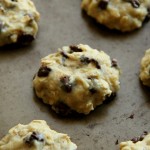
Using a rounded tablespoon, drop dough onto prepared baking sheets, and flatten them slightly.
Bake 12-14 minutes, or until edges begin to turn golden brown.
Remove from oven and let cool for 5 minutes before transferring to a cooling rack to cool completely. Store cookies in an airtight container at room temperature for up to a week.
Prep Time:10 mins
Cook Time:14 mins
Looking for more vegan cookie recipes? Try one of these!
Ray ID: 94b2e3775e1acd80 • 2025-06-05 21:50:57 UTC
DNS resolution error
What happened?
You’ve requested a page on a website (sweetnsavorylife.com) that is on the Cloudflare network. Cloudflare is currently unable to resolve your requested domain (sweetnsavorylife.com). There are two potential causes of this:
Most likely: if the owner just signed up for Cloudflare it can take a few minutes for the website’s information to be distributed to our global network.
Less likely: something is wrong with this site’s configuration. Usually this happens when accounts have been signed up with a partner organization (e.g., a hosting provider) and the provider’s DNS fails.
Please see https://developers.cloudflare.com/support/troubleshooting/http-status-codes/cloudflare-1xxx-errors/error-1001/ for more details.
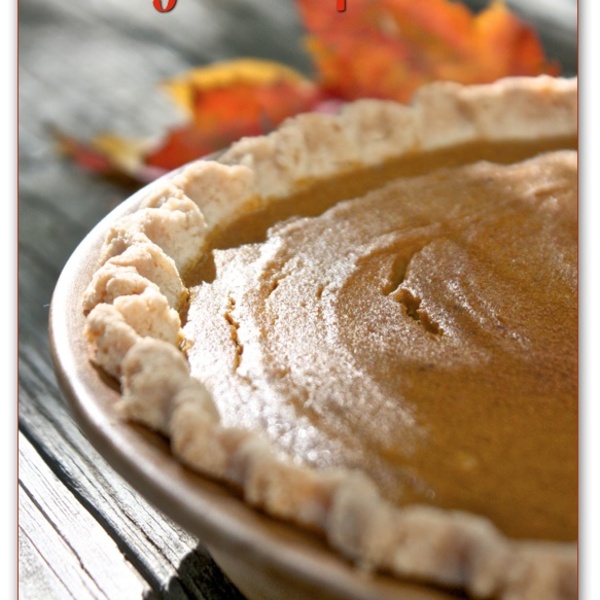
“Based on the Post Punk Kitchen’s pumpkin muffin recipe, these are vegan, nutritious, and totally delectable! These are my go-to dessert for Thanksgiving, Halloween, Christmas, or just as a tasty breakfast treat or potluck contribution. Loved by vegans and omnivores alike!”
Ready In:
35mins
Ingredients:
18
Serves:
24
For the cupcakes
2 1⁄2
cups and 2 tbsp whole wheat pastry flour
1 3⁄4
cups and 2 tbsp unrefined sugar
1 1⁄2
tablespoons baking powder, aluminum-free
3⁄4
teaspoon sea salt
1 1⁄2
teaspoons ground cinnamon
3⁄4
teaspoon ground nutmeg
3⁄4
teaspoon ground ginger
1⁄4
teaspoon ground allspice
1⁄4
teaspoon ground cloves
1 1⁄2
cups pumpkin puree
3⁄4
cup almond milk (may sub any creamy non-dairy milk)
6
tablespoons natural applesauce
6
tablespoons coconut oil (may sub extra light tasting olive oil)
3
tablespoons pure maple syrup
For the icing
4
ounces vegan non-hydrogenated margarine (I like Earth Balance)
4
ounces vegan cream cheese (I like Daiya brand because it is tapioca-based and tastes the best)
2
cups unbleached icing sugar (8.82 oz.)
1
teaspoon pure vanilla extract
directions
Preheat oven to 400 degrees F. Use paper muffin liners or lightly grease muffin tins (recipe makes 24 full-sized or 48 mini cupcakes–I like to do half and half, so 12 full-sized and 24 mini cupcakes).
Whisk together flour, sugar, baking powder, salt, and spices.
In a separate bowl, mix pumpkin puree, almond milk, applesauce, coconut oil (heated to liquid), and maple syrup. Pour wet ingredients into dry and mix thoroughly by hand.
Fill muffin liners 2/3-3/4 full. Bake full-sized cupcakes for 18-20 minutes, or until toothpick or knife inserted into center of cupcake comes out clean. Bake mini cupcakes for 10-14 minutes. (TIP: If you are doing half full-sized and half mini, fill the full-sized tin first and put it in the oven. Fill the mini tin and put it in the oven when there are 10-14 minutes remaining so both will be done at about the same time.).
Allow cupcakes to cool on cooling racks while you prepare the icing.
Using a stand or hand mixer, blend all four icing ingredients until smooth and creamy. Fill 16 inch pastry bag and pipe swirls atop each cupcake (be sure cupcakes are cooled completely before icing).
NOTE: These will do okay on the countertop or buffet table for a couple of hours, but they keep best for long periods in the refrigerator.
Questions & Replies
Got a question?
Share it with the community!
Want a Second Helping?
Sign up for our newsletter to get recipes, easy dinner ideas, tasty treats and more delivered straight to your inbox.
To withdraw your consent or to learn more about your rights, see the Privacy Policy.
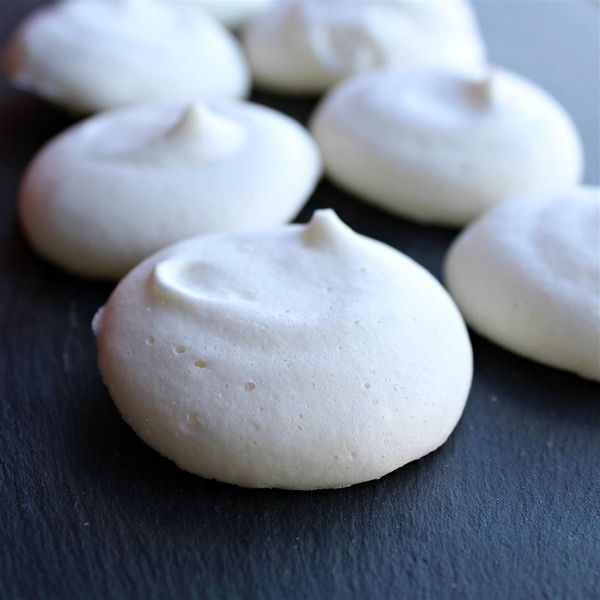
This vegan meringue cookies use the liquid from a tin of chickpeas as a substitute for egg whites — genius! Use this as a replacement for egg white meringue in recipes such as summer fruit pavlova and Eton mess.
Submitted by ritaturner
Updated on November 19, 2023
Total Time:
2 hrs 15 mins
Cook Mode (Keep screen awake)
Ingredients
This recipe was developed at its original yield. Ingredient amounts are automatically adjusted, but cooking times and steps remain unchanged. Note that not all recipes scale perfectly.
Preheat the oven to 210 degrees F (100 degrees C). Line a baking sheet with parchment paper.
Drain chickpeas, reserving 1/2 cup liquid from the can; save chickpeas for another use. Pour chickpea liquid into a large bowl and add cream of tartar. Beat with an electric mixer until soft peaks form. Add sugar, 1 tablespoon at a time, beating until glossy peaks form, about 20 minutes. Stir in vanilla.
Spoon mixture into a piping bag. Pipe into small circles, about 1 inch in diameter, onto the prepared baking sheet.
Bake in the preheated oven until meringues are firm and separate easily from the parchment paper, about 90 minutes. Remove from the oven and allow to cool completely, at least 15 minutes.
Recipe Tip
You can use the liquid from cooking chickpeas at home instead of using canned. Simply strain well and be sure to cool the liquid to room temperature.
Editor’s Note:
Nutrition data for this recipe includes the full amount of chickpeas and chickpea liquid; however, the chickpeas are not used in this recipe.
Nutrition Facts (per serving)
37
Calories
0g
Fat
9g
Carbs
1g
Protein
Nutrition Facts
Servings Per Recipe 25
Calories 37
% Daily Value *
Total Fat
0g
0%
Sodium
34mg
1%
Total Carbohydrate
9g
3%
Dietary Fiber
1g
2%
Total Sugars
6g
Protein
1g
1%
Vitamin C
0mg
0%
Calcium
4mg
0%
Iron
0mg
1%
Potassium
25mg
1%
* Percent Daily Values are based on a 2,000 calorie diet. Your daily values may be higher or lower depending on your calorie needs.
** Nutrient information is not available for all ingredients. Amount is based on available nutrient data.
(-) Information is not currently available for this nutrient. If you are following a medically restrictive diet, please consult your doctor or registered dietitian before preparing this recipe for personal consumption.
Photos of Vegan Meringues
Photo by Allrecipes Member
Photo by
maryksu
These were so good. Followed directions, except for the following: I used peppermint flavor and added a small drop of red food coloring; baked at 225 for 90 minutes then left in oven until cool. These are so light and delicate I may never go back to egg whites!
Photo by
RuthW
This is unbelievably good. You can’t tell the difference if you follow the recipe do NOT omit the vanilla extract. It is needed to fool your taste buds. No one could tell this was vegan. Will definitely make it again.
Photo by
Devan Weber
They look and taste great! I have made a batch using peppermint extract and a batch using almond extract. If using peppermint, I recommend adding a 1/2 tsp of vanilla, as well. It helps the meringues taste less like mouthwash. ??
Photo by
Lindsay M
Soooo easy and so delicious! These came out PERFECT!
Photo by
bianca
This is the first time I’ve made meringues EVER so I wasn’t skilled at all in this case. The recipe is pretty foolproof: drain the chickpea liquid, add the sugar and cream of tartar, and whip it. I didn’t experience any difficulties in this case. I added vanilla chai tea mix and it gave these a really delicious, unique flavor. But these are more of a crunchy meringue, but I think you could adjust the cooking time to make them chewy inside (if that’s what you’re into). Overall, LOVE this recipe.
Important Disclaimer: We may get commissions for products or services purchased via links on our site. cookgem.com is a participant in the Amazon Services LLC Associates Program, an affiliate advertising program designed to provide a means for sites to earn advertising fees by advertising and linking to Amazon.com. Product prices and availability are accurate as of the date/time indicated and are subject to change. Any price and availability information displayed on Amazon at the time of purchase will apply to the purchase of this product. Content, discounts, offers, images, prices and availability are subject to change or removal at any time.Amazon, any store or brand displayed on this website does not support, sponsor or endorse this website or its content. CERTAIN CONTENT THAT APPEARS ON THIS SITE COMES FROM AMAZON SERVICES LLC. THIS CONTENT IS PROVIDED ‘AS IS’ AND IS SUBJECT TO CHANGE OR REMOVAL AT ANY TIME. The third-party product names, logos, brands, and trademarks are the property of their respective owners and not affiliated with cookgem.com. These parties not support, sponsor or endorse this website or its content, or services.
1 15-ouncecan chickpeasdrained and rinsed, garbanzo beans
1teaspoonkelp granulestry Sea Seasonings
1stalk celeryfinely diced
⅛ yellow onionfinely diced, about 2 tablespoons
1clovegarlicminced
½cupvegan mayonnaise (try Just MayoEarth Balance, or Vegenaise)
1tablespoonmustard
2teaspoonslemon juice
1teaspoonvegan Worcestershire sauce
½teaspoonsalt
½teaspoonblack pepper
3tablespoonsolive oil
1tablespoonbalsamic or red wine vinegar
1teaspoonmustard
½teaspoonblack pepper
¼teaspoonsalt
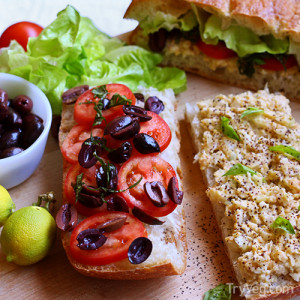
1loaf focaccia or baguette
1large tomatosliced
½cupKalamata or black olivespitted and cut in half
2cupsred leaf or butter lettucetorn
½cupFresh basilshredded or torn
In a large bowl, mash the chickpeas with a potato masher until mostly smooth. Add kelp, celery, onion, and garlic and stir to combine. Stir in the mayonnaise, mustard, lemon juice, and Worcestershire sauce. Add salt and pepper to taste.
Whisk together the vinaigrette ingredients in a small bowl.
To assemble the sandwich, slice the focaccia in half horizontally. Drizzle the vinaigrette on the cut side of each half. Arrange tomato slices on the bottom half and sprinkle with a little salt. Scatter the olives over the tomato layer. Spread a layer of chickpea salad on the top half and finish with the lettuce and basil.
Cover with the top of the focaccia and press down. If eating immediately, place something heavy (like a pot) on top of the sandwich for about five minutes before cutting. If packing or eating later, wrap the entire focaccia tightly with plastic wrap. When ready to serve, unwrap the sandwich and cut crosswise into individual portions
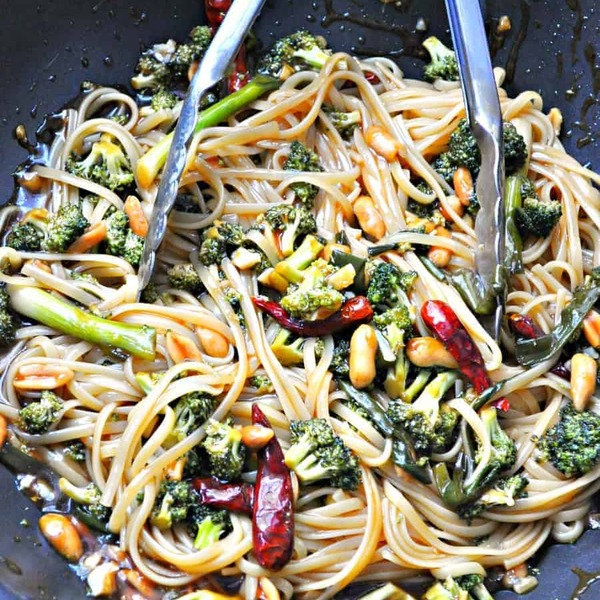
The weather is getting cooler and there is only one thing to do, make my vegan kung pao broccoli lo mein! It is spicy and delicious! It is easy and quick, it is the perfect weeknight meal! Broccoli marinated in soy sauce and rice wine vinegar. Sauteed with garlic, ginger, green onions and chilies! Topped with peanuts! It is so freaking good!
This is a 30 minute dish, max. I usually have the broccoli ready in the time it takes to boil the water and cook the lo mein. Then all you have to do is toss the lo mein with the broccoli and sauce and you are good to go!
The marinade has cornstarch already in it, so when you pour the broccoli and marinade into the pan to saute, it thickens in no time! No extra steps to thicken this super flavorful and amazing sauce! Sauteing chilies, green onions, garlic and ginger first in some sesame oil before adding the marinade gives this sauce an extremely wonderful depth of flavor!
The sauce is then thickened and hoisin is added! Tossed with the lo mein, and topped with peanuts! I could eat this vegan Kung Pao broccoli lo mein, every. damn. day. It has all the flavors I dream of! Spicy, sweet, salty, garlicky, gingery, it is everything!
You can definitely use less chilies of you would like, but I love spicy food, and I would have to say even using 8-10 chilies, it wasn’t too spicy. That is up to you though, everyone knows their own spice threshold. If you know you really only want it to be mild, try maybe 4-6 chilies. It will be delicious no matter what! This is a meal that anyone will love!
Vegan Kung Pao Broccoli Lo Mein
Print Recipe
Kung Pao marinated broccoli sauteed with chilies, garlic and ginger. Tossed with Lo mein noodles and topped with peanuts.
Prep Time 15 minutesmins
Cook Time 15 minutesmins
Total Time 30 minutesmins
Servings 4Servings
Author Lauren Hartmann
Ingredients
1/3C.Soy sauce
1/3C.Rice wine vinegar
1/3C.Water
2Tbsp.Agave
2Tbsp.Corn Starch
1Head ofBroccoli, cut into florets
1Tbsp.Sesame oil
6Green onions, chopped in large pieces
4ClovesGarlic, chopped
2Tbsp. Ginger, grated
8-10Arbol chilies
1tsp.Hoisin sauce, vegan
1Box.Lo mein noodles
1/2C.Peanuts, roasted and salted, chopped
Instructions
Start boiling the water for the lo mein and cook according to package instructions.
Make a marinade for the broccoli. In a shallow mixing bowl, whisk together the soy sauce, rice wine vinegar, water, agave and corn starch until fully combined and the corn starch has dissolved. Now add the broccoli to the bowl. Stir to coat and make sure the broccoli is fully covered by the marinade. Set aside to marinate for about 5 minutes or so. Stirring every minute or so.
Now in a wok or large non stick skillet, heat the sesame oil on medium high. Add the green onions, garlic, ginger, and chilies. Saute for 1-2 minutes, until the garlic and ginger are soft. Reducing heat as needed.
Now add the broccoli and the marinade to the wok or skillet. Saute until the sauce has thickened. 1-3 minutes. Now add the hoisin sauce and half the peanuts. Toss together.
Once the lo mein noddles are done, drain and add to the wok. Toss the noodles to coat with sauce. Serve immediately topped with the remaining peanuts and more chopped green onions.
Published: · Modified: by Rebecca Pytell · This post may contain affiliate links.
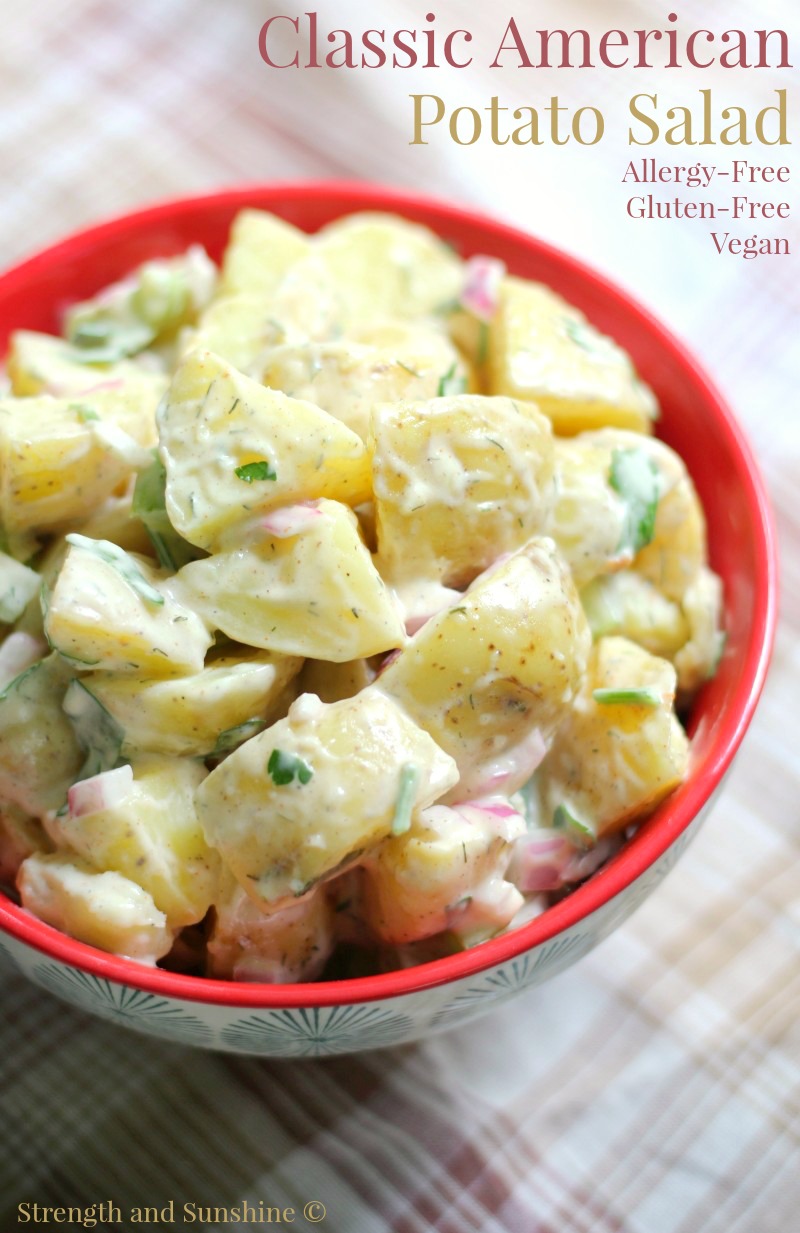
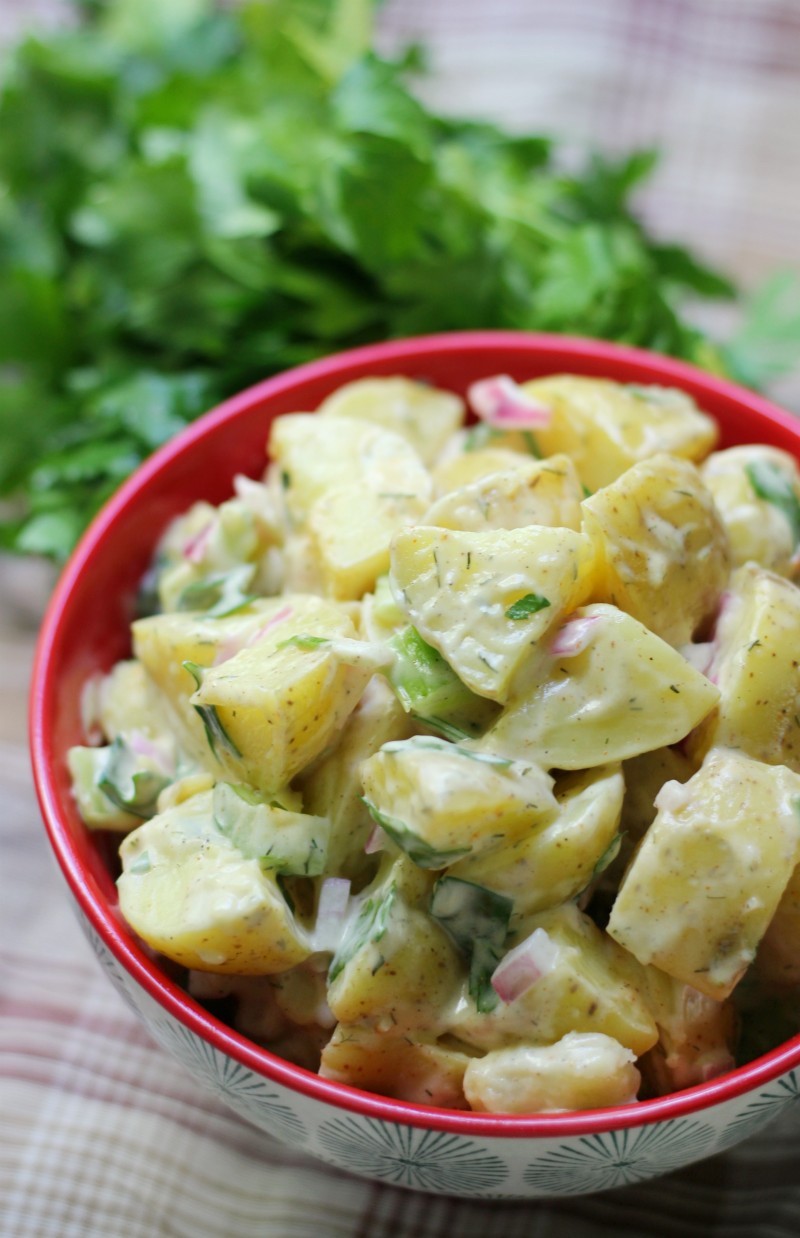
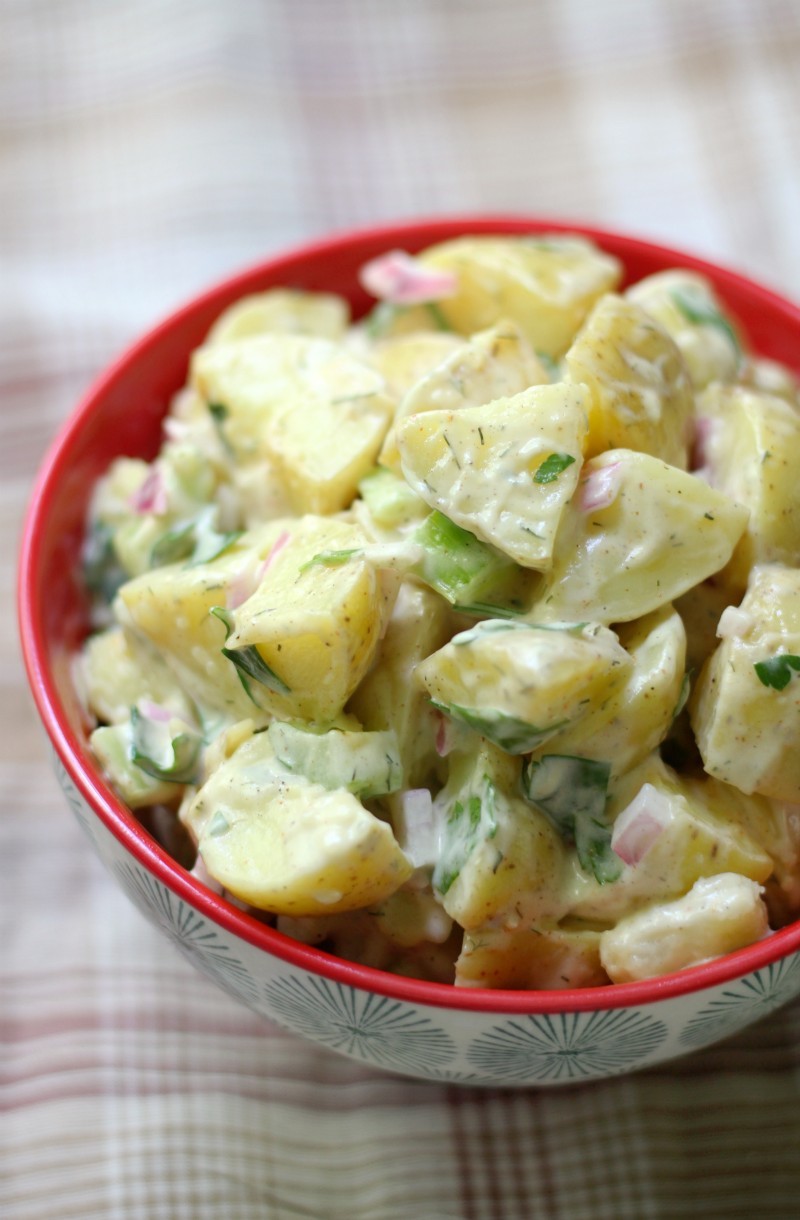
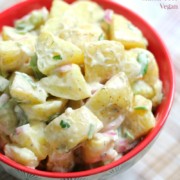
An essential to any summer bbq or cookout! The Classic American Potato Salad, now as a gluten-free, vegan, and top allergy-free recipe! Super easy to whip up and serve to your guests. You’ll be turning everyone into a potato salad fan!
It is happening! Potatoes just couldn’t be a more perfect food in my potato-loving eyes. We’ve done the Tahini Celeriac Potato Salad and the Harissa Potato Salad, but I just couldn’t stop until I recreated the Classic American Potato Salad! Potato salad was always my favorite side dish at summer bbqs and cookouts. In all its cold, creamy white potato and mayo glory. Give me a big scoop, pile it high, and no one gets hurt! Potato salad wasn’t just a summer dish in my house. My mom would buy the Boar’s Head pre-made potato salad in the grocery store year-round.
My mom and I would eat it up; my brother? Not a fan. He wasn’t a fan of any of the typical cookout side dishes. He’s more of a “give me the burger” type and I’m more of the “give me all the sides” type! But hey, that’s okay, more potato goodness for me! I was a lover of any kind of potato salad too. The traditional mayo-filled American potato salad and every other in-between. My favorites though, would be potato salads made with red-skinned potatoes with the skin left on. I remember a super delicious one that was made at our grocery deli counter that I would always beg my mom to get.
However, for this Classic American Potato Salad recipe today, I was aiming for the full-on traditional. I used white skinned potatoes (but I did leave the skin on!) No need for food waste, my friends! Along with those potatoes, we just have the simple classic ingredients. The best vegan and soy-free homemade mayo or delicious options like Trader Joe’s, Target’s, or Hellman’s vegan mayonnaise! Also some celery, red onion, dijon, vinegar, dill, parsley, black pepper, and a hint of sweet paprika! Nothing fancy, just good ole’ American potato salad essentials!
Remember how I said my brother isn’t a fan of potato salads? Well…he was a fan of this one! Vegan mayo and all! My mom was also a huge fan, but if I was able to get my brother’s seal of approval…I knew this was a winner. So even if you think you don’t like classic potato salad or you have a picky eater on your hands…think again and try this out!
More Potato Salads To Try:
Vegan German Potato Salad
Harissa Potato Salad
Sweet Potato Potato Salad
Southern Potato Salad
Tahini Celeriac Potato Salad
Sour Cream and Onion Potato Salad
Classic American Potato Salad
Print
Classic American Potato Salad (Gluten-Free, Vegan)
5 Stars 4 Stars 3 Stars 2 Stars 1 Star
5 from 1 review
An essential to any summer bbq or cookout! The Classic American Potato Salad, now as a gluten-free, vegan, and top 8 allergy-free recipe! Super easy to whip up and serve to your guests. You’ll be turning everyone into a potato salad fan!
Author: Rebecca Pytell
Prep Time:5 Minutes
Cook Time:10 mins
Total Time:10 mins
Yield:4-6 1x
Category:Side
Method:Boil
Cuisine:American
Instructions
Boil the potatoes for just 7-8 minutes until slightly soft. Cool and cut them into cubes.
Place the cubed potatoes in a large bowl along with all the other ingredients.
Mix well to combine.
Serve chilled.
As indicated in my notes, if you use a steamable bag of potatoes…this is even easier 😉 Lazy American Potato Salad now! But I’m telling you, this will become a new staple at all your summer bbqs and cookouts this year and for years to come! But, I won’t blame you if you decide to make a few different potato salads. Tahini and Harissa make for some great eats too! A trio of potato salads sounds good to me!
So tell me:
+ Are you a potato salad fan?
———————————————-
Stay connected:
Facebook: Strength and Sunshine
Twitter: @RebeccaGF666
Instagram: rebeccagf666
Pinterest: RebeccaGF666
Bloglovin’: Strength and Sunshine
Related
Reader Interactions
This site uses Akismet to reduce spam. Learn how your comment data is processed.