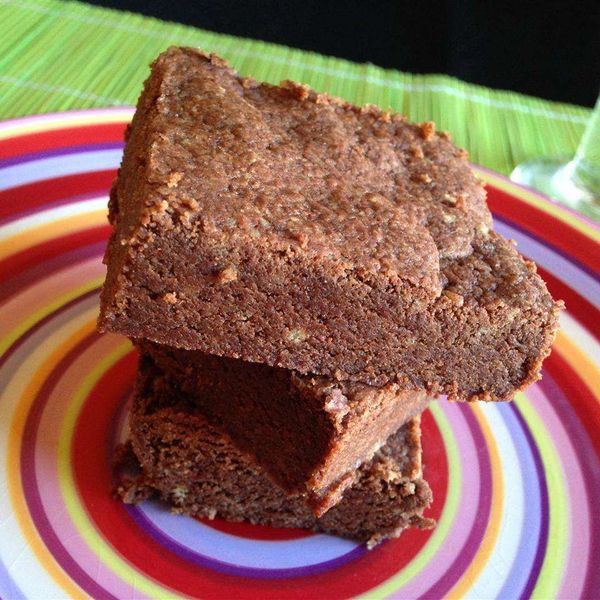
I was wondering if I could use PB instead of egg in brownies. I couldn’t find much online, so I came up with my own. I worked with my favorite brownie recipe and got this recipe. They do have a vegan taste and the dough will seem wrong, but I was happy with the final product!
Submitted by AudB
Updated on January 14, 2022
Cook Mode (Keep screen awake)
Ingredients
This recipe was developed at its original yield. Ingredient amounts are automatically adjusted, but cooking times and steps remain unchanged. Note that not all recipes scale perfectly.
Original recipe (1X) yields 24 servings
2cupswhite sugar
1cuppeanut butter
1teaspoonvanilla extract
½teaspoonsalt
1cupall-purpose flour
¾cupcocoa powder
⅓cupcanola oil
⅓cupsoy milk
Directions
Preheat oven to 350 degrees F (175 degrees C). Grease a 9×13-inch baking dish.
Beat sugar, peanut butter, vanilla extract, and salt together in a bowl until smooth and creamy. Mix flour and cocoa powder into peanut butter mixture; add canola oil and soy milk and stir until batter is moist, crumbly, and stiff. Spread batter into the prepared baking dish using your hands or a spoon.
Bake in the preheated oven until the top is dry and the edges have started to pull away from the sides of the pan, about 25 minutes.
Cook’s Note:
Any type of milk can be used in place of the soy.
Nutrition Facts (per serving)
183
Calories
9g
Fat
24g
Carbs
4g
Protein
Nutrition Facts
Servings Per Recipe 24
Calories 183
% Daily Value *
Total Fat
9g
12%
Saturated Fat
2g
8%
Sodium
100mg
4%
Total Carbohydrate
24g
9%
Dietary Fiber
2g
6%
Total Sugars
18g
Protein
4g
8%
Calcium
10mg
1%
Iron
1mg
4%
Potassium
121mg
3%
* Percent Daily Values are based on a 2,000 calorie diet. Your daily values may be higher or lower depending on your calorie needs.
** Nutrient information is not available for all ingredients. Amount is based on available nutrient data.
(-) Information is not currently available for this nutrient. If you are following a medically restrictive diet, please consult your doctor or registered dietitian before preparing this recipe for personal consumption.
Photos of Vegan Peanut Butter Brownies
Photo by Allrecipes Member
Photo by
Jillian Hawkins
Fantastic brownies !!! I added some chopped peanuts to mine and kept them on the fudgy side and they were amazing ! Highly recommend!
Photo by
Jillian Hawkins
Fantastic brownies !!! I added some chopped peanuts to mine and kept them on the fudgy side and they were amazing ! Highly recommend!
This recipe was developed at its original yield. Ingredient amounts are automatically adjusted, but cooking times and steps remain unchanged. Note that not all recipes scale perfectly.
Original recipe (1X) yields 6 servings
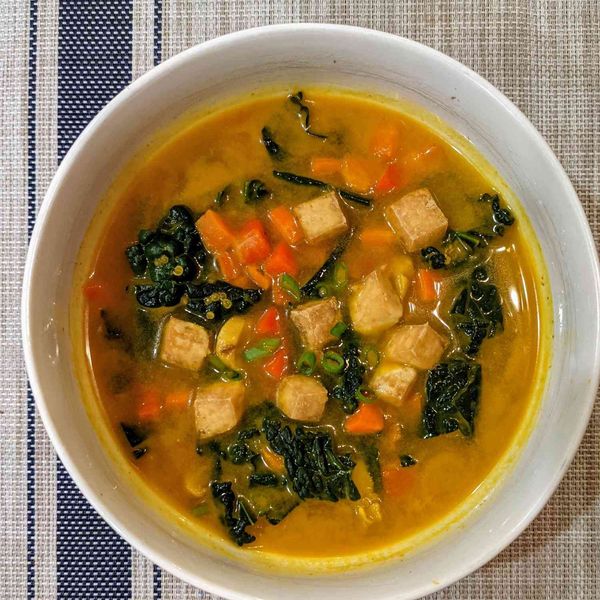
1(12 ounce) packagefirm tofu, diced into 1/2-inch pieces
3teaspoonsolive oil, divided
1teaspoonground black pepper
4carrots, diced
1largeonion, chopped
½cupsliced fresh mushrooms
4large clovesgarlic, minced
1tablespoonground turmeric
2cupswater
2cupsvegetable broth
¼cupquinoa
1bunchkale, chopped
¼cupmiso paste
1red bell pepper, chopped
3green onions, sliced
Directions
Set an oven rack about 6 inches from the heat source and preheat the oven’s broiler. Coat tofu with 2 teaspoons olive oil and black pepper. Place on a baking sheet.
Broil in the preheated oven, stirring occasionally, to lightly crisp tops and bottoms, 3 to 5 minutes.
Heat remaining olive oil in a Dutch oven over medium-high heat. Add carrots and onion and stir-fry until tender, about 5 minutes. Add mushrooms, garlic, and turmeric. Stir in water, vegetable broth, and quinoa. Reduce heat and let simmer for 5 minutes. Add tofu and kale; cover, and let simmer for 3 minutes. Whisk in miso; turn off heat and stir in bell pepper and green onions. Serve immediately.
Nutrition Facts (per serving)
207
Calories
7g
Fat
28g
Carbs
11g
Protein
Nutrition Facts
Servings Per Recipe 6
Calories 207
% Daily Value *
Total Fat
7g
9%
Saturated Fat
1g
5%
Sodium
652mg
28%
Total Carbohydrate
28g
10%
Dietary Fiber
6g
20%
Total Sugars
6g
Protein
11g
22%
Vitamin C
122mg
136%
Calcium
352mg
27%
Iron
6mg
34%
Potassium
767mg
16%
* Percent Daily Values are based on a 2,000 calorie diet. Your daily values may be higher or lower depending on your calorie needs.
** Nutrient information is not available for all ingredients. Amount is based on available nutrient data.
(-) Information is not currently available for this nutrient. If you are following a medically restrictive diet, please consult your doctor or registered dietitian before preparing this recipe for personal consumption.
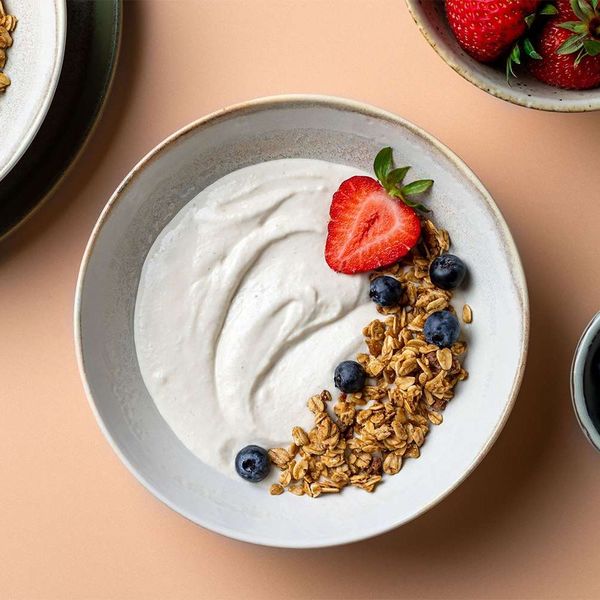
This raw food version of plain yogurt can be enjoyed in many ways. You can flavor it for a simple yogurt. It can be served with homemade raw vegan granola or some fresh fruit. The process is the same as raw nut cheese recipes, but with a different nut-to-water ratio for a thinner, more spoonable result.
As with store-bought yogurt, a little water will settle at the bottom of this yogurt. It is the more sour part of the equation but is perfectly safe to consume. The water adds a tangy flavor if that suits you. Otherwise, you may want to scoop the yogurt off and pour out the water.
Add fruit, nuts, or a drizzle of raw vegan sweetener (agave nectar or maple syrup or whatever you like) and enjoy a delicious raw vegan breakfast or snack!
Never Lose a Recipe Again!
Love a Spruce Eats recipe? With MyRecipes, your personal home for recipes, easily save and organize your favorites, plus thousands more, in one convenient place.
“Making homemade yogurt is easier than you may think, and this dairy free version is a great way to get started. I chose to use cashews for their mild flavor and “meatiness” and it came out delicious. I let mine sit for about 24 hours before adding a little bit of lemon for more tang.” —Tracy Wilk
Cook Mode (Keep screen awake)
1cupmacadamia nuts, or cashew nuts, soaked in water for 2 hours, then drained
1cupwater
1tablespoonlemon juice, optional
Gather the ingredients.
The Spruce Eats / Bahareh Niati
Place the nuts in the blender with half of the water. Blend for 20 seconds.
The Spruce Eats / Bahareh Niati
Add the remaining water. Blend until a creamy, smooth consistency is reached.
The Spruce Eats / Bahareh Niati
Transfer the mixture to a clean glass jar and cover with plastic wrap, held on with a rubber band. Leave in a warm place to ferment, 16 to 24 hours. The longer it sits, the more fermentation that will occur.
The Spruce Eats / Bahareh Niati
Stir in lemon juice, if using, and refrigerate to chill.
The Spruce Eats / Bahareh Niati
Nutrition Facts (per serving)
241
Calories
25g
Fat
5g
Carbs
3g
Protein
×
Nutrition Facts
Servings: 4
Amount per serving
Calories
241
% Daily Value*
25g
33%
Saturated Fat 4g
20%
0mg
0%
4mg
0%
5g
2%
Dietary Fiber 3g
10%
Total Sugars 2g
3g
Vitamin C 0mg
2%
Calcium 30mg
2%
Iron 1mg
7%
Potassium 123mg
3%
*The % Daily Value (DV) tells you how much a nutrient in a food serving contributes to a daily diet. 2,000 calories a day is used for general nutrition advice.
(Nutrition information is calculated using an ingredient database and should be considered an estimate.)
Rate This Recipe
I don’t like this at all. It’s not the worst. Sure, this will do. I’m a fan—would recommend. Amazing! I love it! Thanks for your rating!
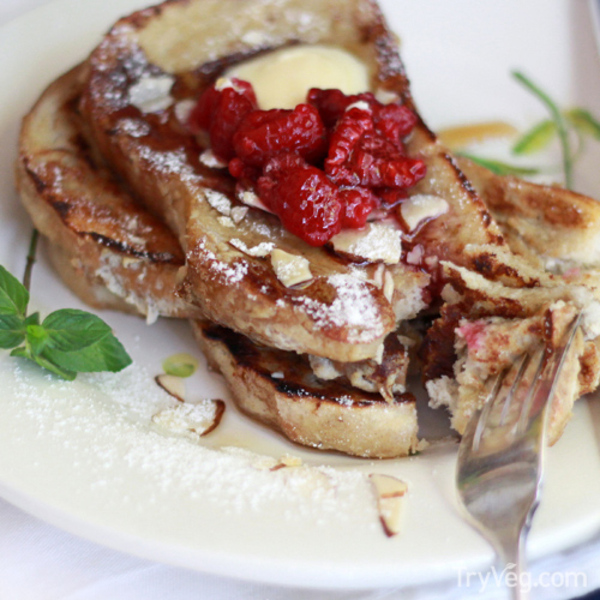
In a bowl, blend the tofu, dairy-free milk, syrup, cinnamon, and banana on high until smooth. If too thick add a few tablespoons extra dairy-free milk or water. Pour the coating mixture into a shallow dish and dip the bread into the mixture, thoroughly coating both sides.
Melt a teaspoon of oil or vegan butter on the hot skillet, then add your soaked bread.
Cook for 2-3 minutes and flip to cook the other side once the edges begin to turn golden brown. Repeat with remaining bread.
Serve with fresh fruit, powdered sugar, or maple syrup.
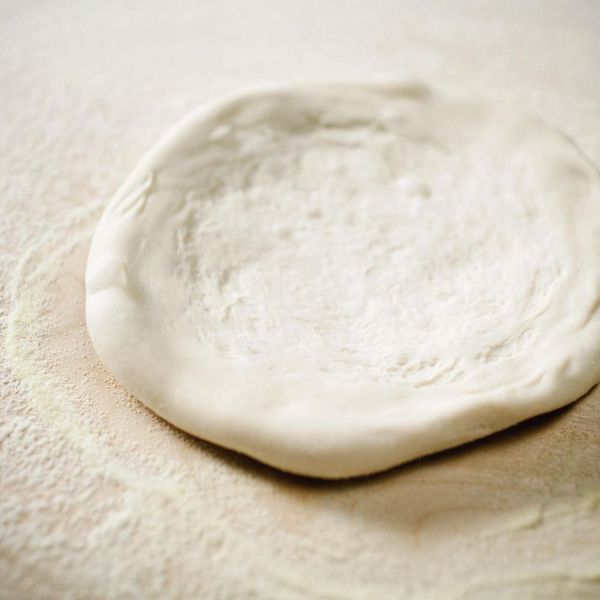
Homemade pizza is often a family favorite, but if there is a vegan in the household, you need to make sure all of the components are dairy- and animal-free. This recipe is for a basic pizza dough that is vegan, making the perfect base for a variety of dairy-free and meat-free pizzas.
All you need are active dry yeast, water, sugar, olive oil, all-purpose flour, and salt; just be sure the sugar is vegan as some brands can include animal bone char, which is used as part of the refining process. If the yeast you are using has been in the pantry for a while, you may want to check it for freshness. And if you prefer, you can substitute whole wheat flour in place of the all-purpose. Plan for about an hour of rising time once the dough comes together. Then punch it down, knead it a bit, and top the pizza dough with pizza sauce and your favorite vegan toppings and bake.
This dough makes a 10-inch pizza, enough for two people, but you can also use it to make calzones, breadsticks, and garlic knots. This vegan pizza dough can be used right away or wrapped well and stored in the fridge for up to two weeks; you can also freeze it for three weeks.
Never Lose a Recipe Again!
Love a Spruce Eats recipe? With MyRecipes, your personal home for recipes, easily save and organize your favorites, plus thousands more, in one convenient place.
Cook Mode (Keep screen awake)
1 package (2 1/4teaspoons) active dry yeast
1cup warm water (105 F to 110 F)
1tablespoonsugar
2tablespoonsolive oil
2cupsall-purpose flour, more as needed
1teaspoonsalt
Gather the ingredients.
In a large mixing bowl, combine the yeast, warm water, and sugar, mixing gently until combined. Allow the mixture to rest for about 5 minutes, or until bubbly.
Add the olive oil, flour, and salt, adding more flour as necessary until it forms a soft dough. The dough should pull away from the sides of the bowl and feel just a little sticky.
On a lightly floured surface, knead the dough for 5 to 7 minutes, or until elastic.
Place the dough in a well-oiled bowl, cover, and let sit in a warm place for about 1 hour, or until the dough has doubled in bulk.
Once the dough has doubled in bulk, punch down the dough and turn it out onto a lightly floured surface. Knead the dough for several minutes until smooth and elastic.
Use the dough immediately or wrap tightly in plastic wrap and refrigerate or freeze until ready to use.
Enjoy.
Tip
If your yeast does not bubble when you combine it with the water and sugar, you may have “dead” yeast or the water was too hot.
Vegan Pizza Ideas
Get creative and try something new.
Spinach and artichokes with vegan mozzarella
Buffalo cauliflower
Hummus, kalamata olives, tomatoes, and red onion
Grilled peppers, zucchini, and eggplant
Butternut squash with apples and nuts
Nutrition Facts (per serving)
605
Calories
15g
Fat
102g
Carbs
14g
Protein
×
Nutrition Facts
Servings: 2
Amount per serving
Calories
605
% Daily Value*
15g
19%
Saturated Fat 2g
10%
0mg
0%
1066mg
46%
102g
37%
Dietary Fiber 4g
14%
Total Sugars 7g
14g
Vitamin C 0mg
0%
Calcium 24mg
2%
Iron 6mg
33%
Potassium 153mg
3%
*The % Daily Value (DV) tells you how much a nutrient in a food serving contributes to a daily diet. 2,000 calories a day is used for general nutrition advice.
(Nutrition information is calculated using an ingredient database and should be considered an estimate.)
Rate This Recipe
I don’t like this at all. It’s not the worst. Sure, this will do. I’m a fan—would recommend. Amazing! I love it! Thanks for your rating!
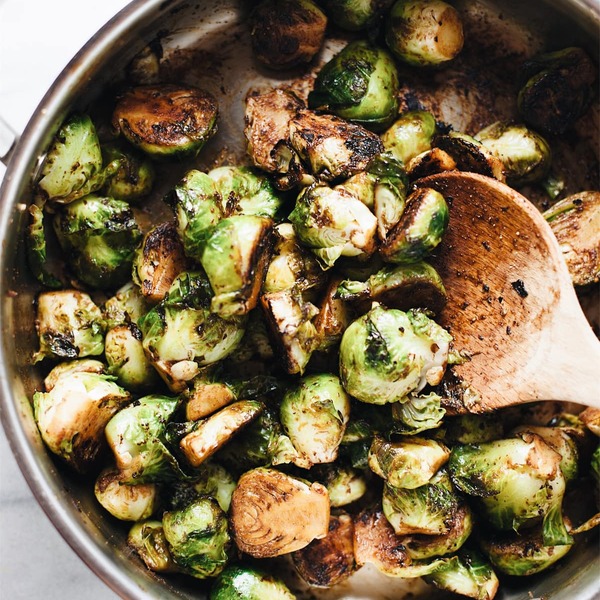
Sauteed Brussels sprouts are among the most underrated side dishes! They’re shredded for a quicker cooking time and become perfectly tender. They’re flavored with butter and a little salt, and yet the flavor is far from typical bland Brussels sprouts. Each bite is surprisingly delicious, and it’s a dish I could easily eat the whole pan of!
We’ve shared roasted Brussels sprouts on the blog, but have you ever made sauteed Brussels sprouts? They don’t sound that exciting, but don’t knock it until you’ve tried them! This method for sprouts has become one of my favorites.
Somehow it takes all the sprouty flavor away, and, with the richness of the butter, adds such delicious flavor. When I make them, I often find myself standing at the stove and eating half the pan as they cook – they are that good! And I can’t say that for many Brussels sprout recipes I’ve tried.
It’s the perfect side dish if you’re short on time or don’t want to use the oven for roasting. The Brussels sprouts come out perfectly tender and flavored to perfection!
Recipe Highlights
I love so many things about this dish, but to name a few, it’s…
THE PERFECT LAST-MINUTE SIDE DISH. This has to be one of the easiest & fastest recipes I have on my blog! If you are running behind on dinner and need a quick side dish, make this recipe, and you won’t be sorry you did.
SURPRISINGLY FLAVORFUL. I say surprisingly because there aren’t a lot of ingredients in this dish. It’s incredibly simple, yet the flavor is absolutely delicious! Instead of just cooking the sprouts in olive oil, which would yield little flavor, they’re cooked in a combo of oil and butter to coat each piece with a salty, rich buttery flavor.
NOT YOUR AVERAGE SPROUT RECIPE. I know many people do not like Brussels sprouts because of their distinct flavor, but this is not your average sprout recipe. It’s a dish I could eat every night with my dinner and one that I will happily eat the whole pan of. They are far more delicious than any roasted Brussels sprouts I’ve made or had!
Key Ingredients
The great thing about this recipe is the ingredients are so minimal! You’ll need Brussels sprouts as the star of the show, butter to add richness and the majority of flavor, a little olive oil to cut the richness of the butter, and salt and a little black pepper. It’s simple, and the preparation is even easier!
How to Make Sautéed Brussels Sprouts
1
Sauté the sprouts. Melt the butter in a large pan, and then add the olive oil and shredded Brussels sprouts. Sauté until they are tender when tested with a fork (about 8-10 minutes).
2
Season and serve. Season the sprouts with salt until the flavor is just right, along with a healthy pinch of black pepper. Then serve!
Recipe Variations
Drizzle with balsamic – brussels sprouts and balsamic are an amazing pairing. I specifically like using a balsamic glaze because of its sweet taste! Regular balsamic vinegar works, but you’ll need to cook the vinegar off for a few minutes with the sprouts to remove the vinegar/sour taste.
Add bacon, ham, or pancetta – for a salty addition, brussels sprouts and pork are a delicious combo. Once the sprouts are cooked, add the cooked meat (preferably cut into small pieces).
Add more vegetables – more often than not, I will add more vegetables to this dish! My favorite is green cabbage, but I also love sliced carrots, red bell peppers, string beans, yellow onions, garlic, or kale.
Add a little sweetness – if want a pop of fruit and color, pomegranate seeds added at the very end make for a delicious pop of brightness! You could also do dried cherries or cranberries too.
Frequently Asked Questions
How to shred the Brussels sprouts (3 ways) – if you have a food processor that comes with a shredding attachment, this is the fastest way to shred all the Brussels sprouts. You can also use a mandoline slicer or a chef’s knife and individually slice them into 1/4-inch pieces.
Where did Brussels sprouts get its name? These tiny little cabbages have long been a popular vegetable in Brussels, Belgium. Which is where the famous name came from!
What are the best ways to cook Brussels sprouts? There are many ways to cook Brussels sprouts, but different cooking methods yield different results. Sauting them will give them a tender texture, but not any char. Roasting the sprouts uncovered in the oven gives them a nice char while roasting them covered gives them a steamed texture. You can also grill or boil them too!
What to Pair it With
These buttery Brussels sprouts go great with so many dishes! But some of our favorites to serve it with are…
Chicken. Whether that be our whole roast chicken, autumn roasted chicken thighs with butternut squash, or these crispy chicken thighs!
Turkey. Serving these alongside a Thanksgiving or Christmas turkey makes for a delicious pairing! Also, with our air fryer maple herb turkey breast.
Steak. We love to serve this with a ribeye or New York strip steak or our steak and gorgonzola salad!
Balsamic Sautéed Brussels Sprouts
Sauteed Brussels sprouts are among the most underrated side dishes! They’re shredded for a quicker cooking time and become perfectly tender. They’re flavored with butter and a little salt, and yet the flavor is far from typical bland Brussels sprouts. Each bite is surprisingly delicious, and it’s a dish I could easily eat the whole pan of!
Prep Time 10 minutesmins
Cook Time 10 minutesmins
Total Time 20 minutesmins
Ingredients
3cupsbrussels sprouts, shredded or sliced into 1/4-inch thick pieces
2Tablespoonssalted butter
1Tablespoonolive oil
salt to taste
1healthy pinch of black pepper
Instructions
Slice the sprouts: remove the stem and outer leaves, and slice the Brussels sprouts into 1/4-inch thick pieces. (This can be done with a chef’s knife, a mandoline slicer, or a food processor with a slicer attachment.)
Saute the sprouts: melt the butter in a large pan with olive oil and add the Brussels sprouts. Saute them for 8-10 minutes until they are soft and wilted. Salt them, taste and adjust the salt level until the flavor is just right. Top with a healthy pinch of black pepper and serve when tender when tested with a fork.
Notes
Drizzle with balsamic – brussels sprouts and balsamic are an amazing pairing. I specifically like using a balsamic glaze because of its sweet taste! Regular balsamic vinegar works, but you’ll need to cook the vinegar off for a few minutes with the sprouts to remove the vinegar/sour taste.
Course Side Dish
Cuisine American
Keyword how to cook brussels sprouts on the stove, sauteed brussels sprouts
Hi everybody, it’s Christine here with a special edition of Sweet-Tooth Friday. Today we’re going to look at the flipside of the baking world and make our own bread.
Don’t panic though — in this foolproof recipe there’s no yeast, no kneading, and no lengthy rising times. And I promise, this flatbread recipe will bring just as many cheers to the table as any dessert!
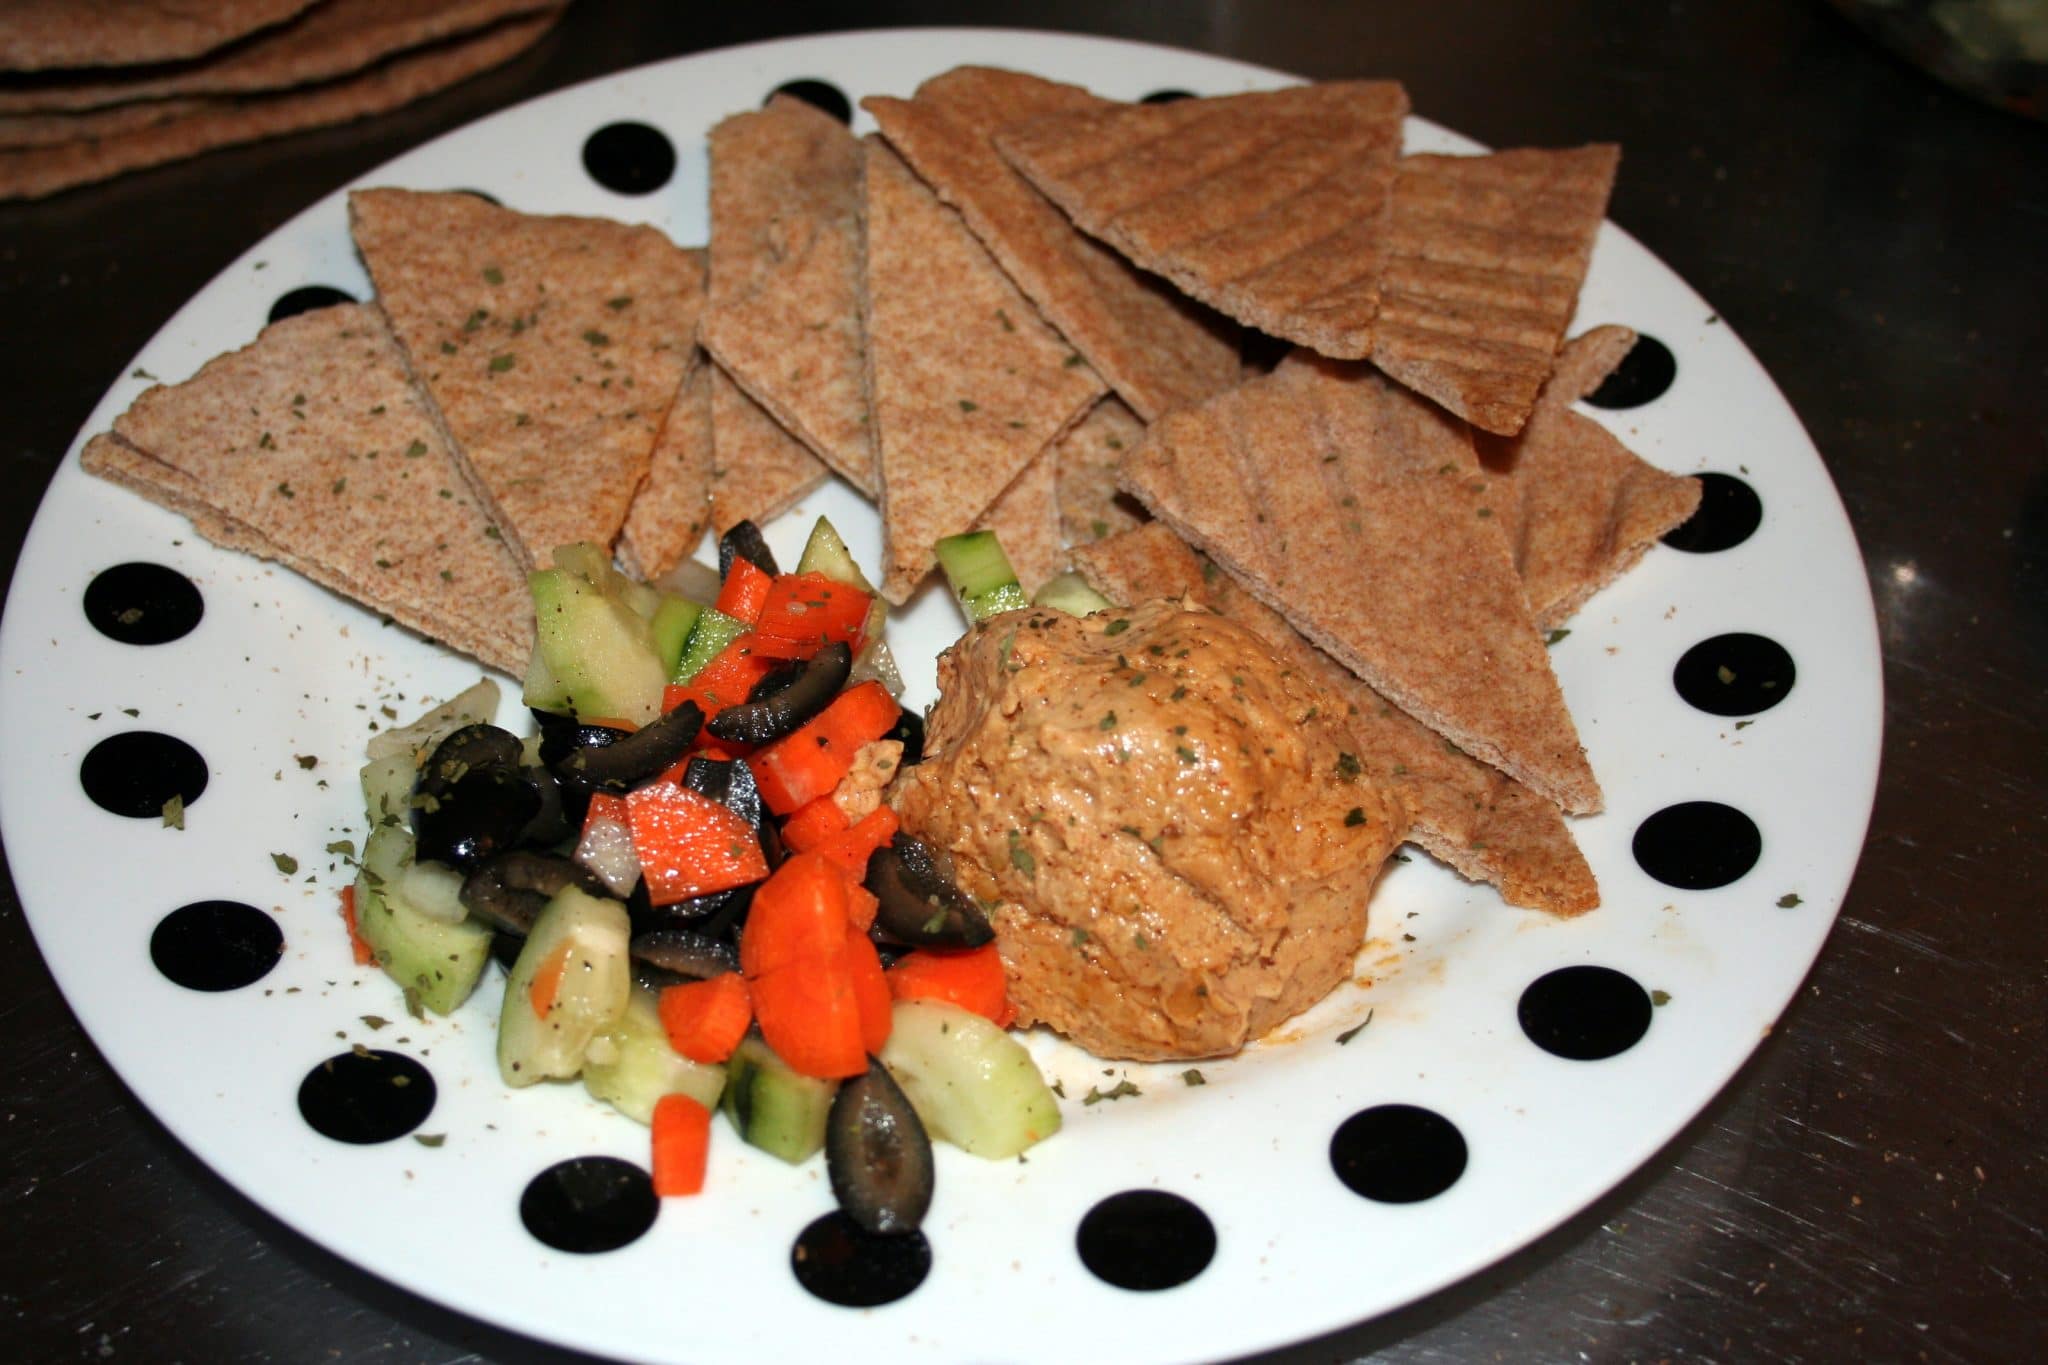
Even though Sweet-Tooth Friday is supposed to be, well, sweet, this week I wanted to instead share a staple recipe in my repertoire, something I bake probably twice a month at home. When I was making a batch of flatbread this week to go with some homemade hummus, I realized that if I found this recipe to be so useful, maybe you guys would appreciate it too. Then I couldn’t believe I kept it to myself for so long!
It all started with the quest to make authentic naan at home. Over the past two years I have tried recipes with yeast, both quick rises and overnight. I tried recipes made with yogurt, made with eggs, and made with ghee. I tried recipes cooked on a stovetop skillet, I played with focaccia recipes, and I even tried passing plain pizza dough off as the Indian classic.
All of these were pretty time-consuming and deep down I wanted something weeknight-whip-up-able. I might have been willing to compromise if any of the tastes had been a real homerun, but I was starting to think I needed to build a clay tandoor oven to actually get it right.
On top of all this, I was searching for a recipe without animal products. The prices of pita and naan at the grocery store are appalling — I knew it would be possible to bake these at home for just pennies as long as there were no eggs and dairy.
I finally found the simplicity I was looking for without sacrificing a light texture and a nice chew. I’ve been using this formula for awhile and can’t remember where I stumbled on the original. However it’s been through several rounds of my tweeks by now so probably isn’t too recognizable anymore.
Even though it’s not exactly authentic naan, I use some whole wheat flour to let myself be more comfortable eating the bread on a regular basis. I also use canola oil as a healthy alternative to shortening or ghee. I bake mine in a cast-iron skillet in the oven. If you don’t have cast iron I would suggest a baking stone first, and finally a cookie sheet.
Put ice in the water to really get it cold while you prepare the ingredients.
Mix together the flours, salt, baking powder, and baking soda.
Stir in the canola oil until uniformly distributed. If you want, stir in garlic or handful of chopped cilantro to taste, but it is just fine served plain.
Measure one cup of water (don’t use the ice) and stir into mixture until the dough becomes one ball.
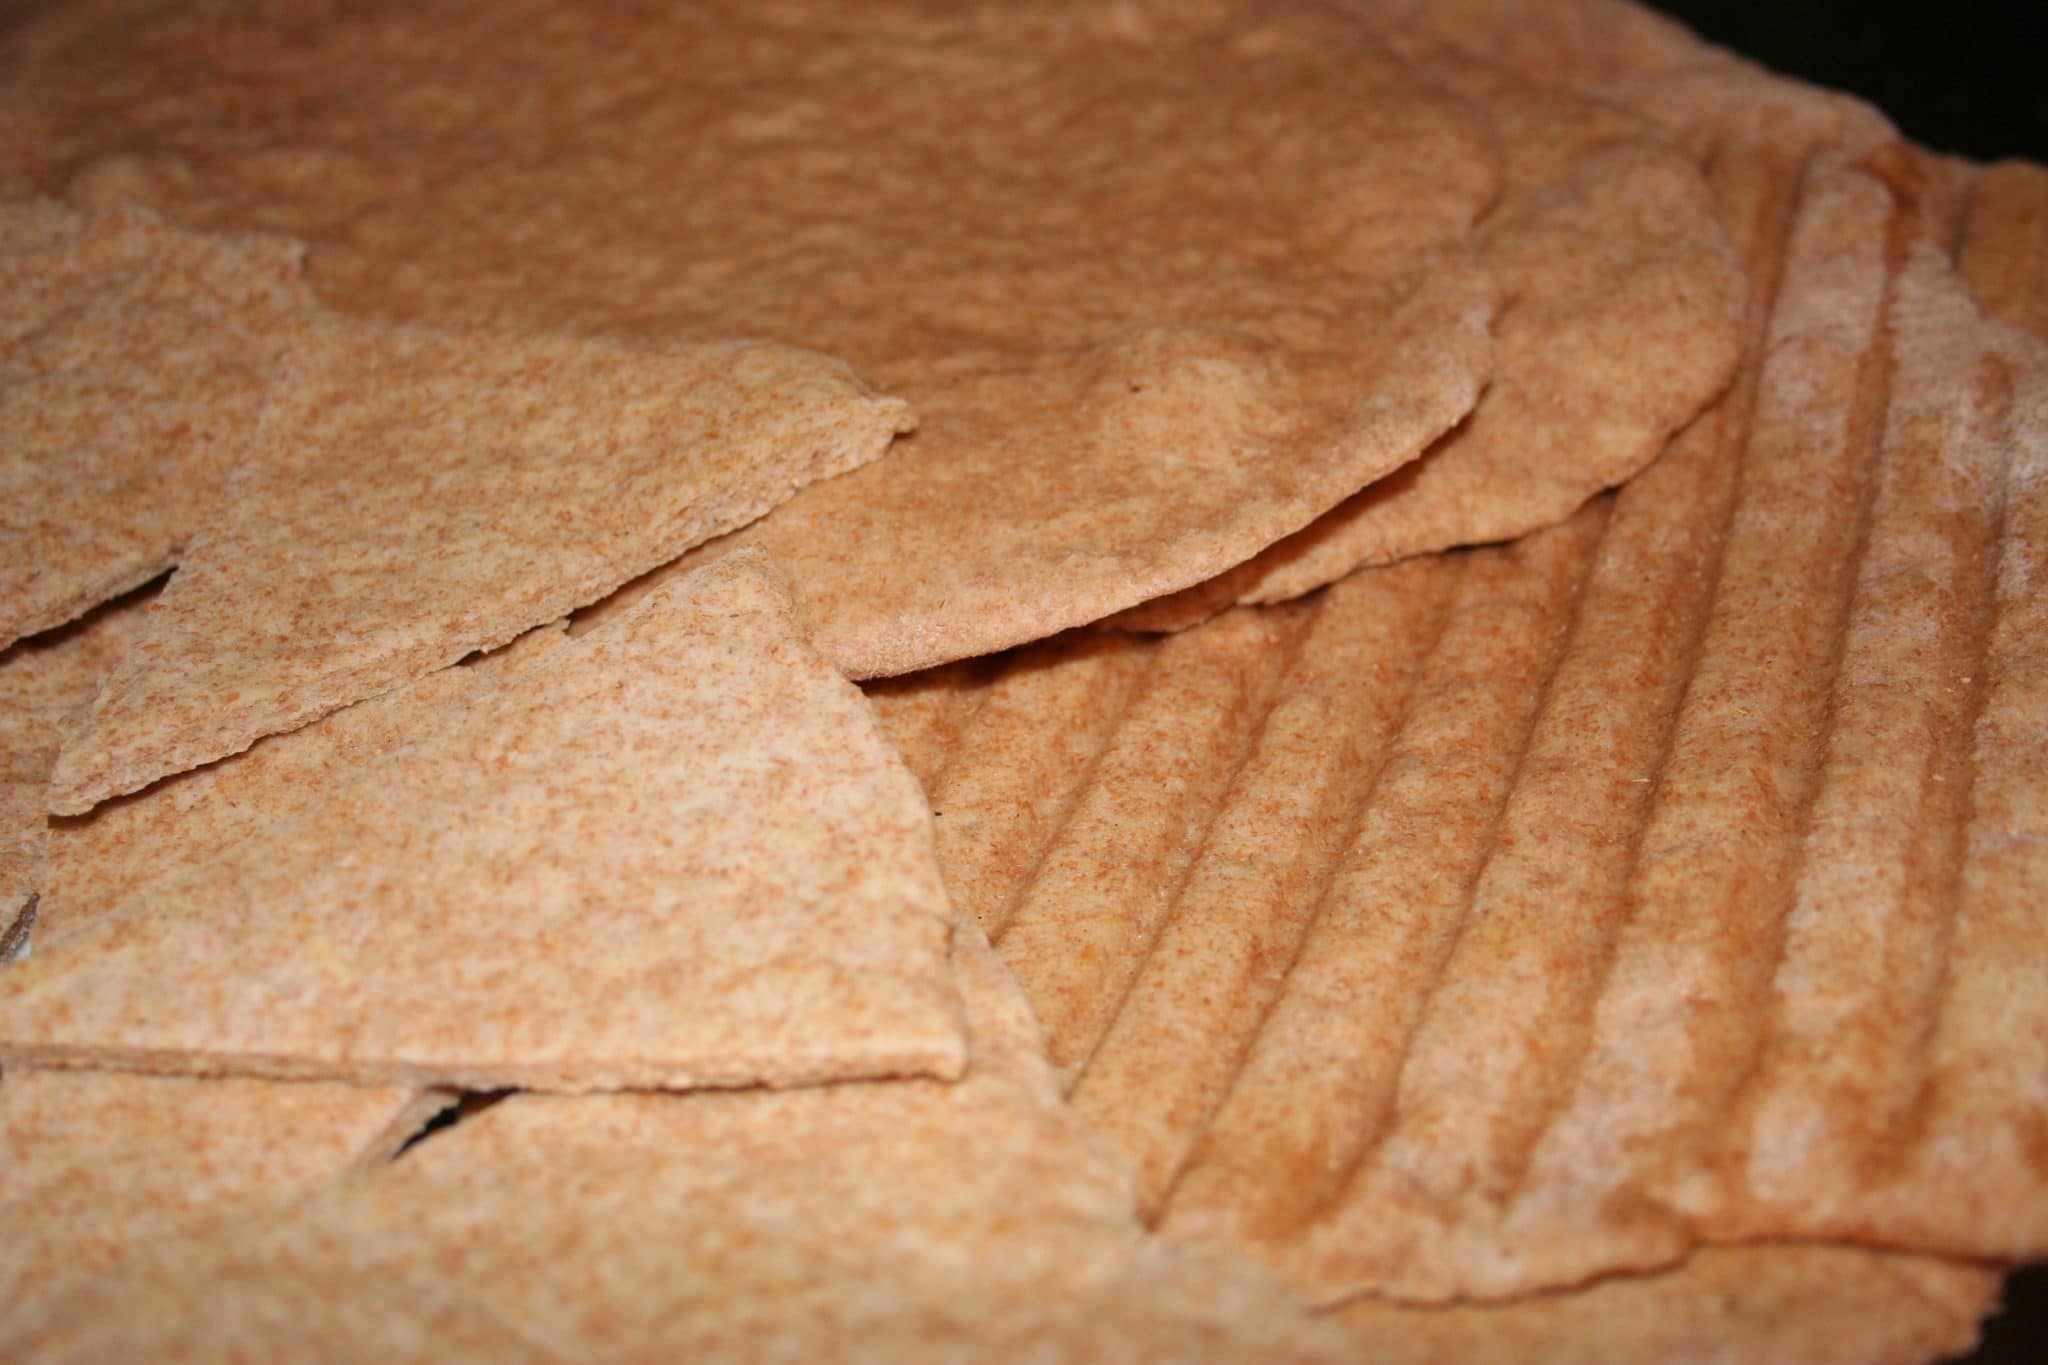
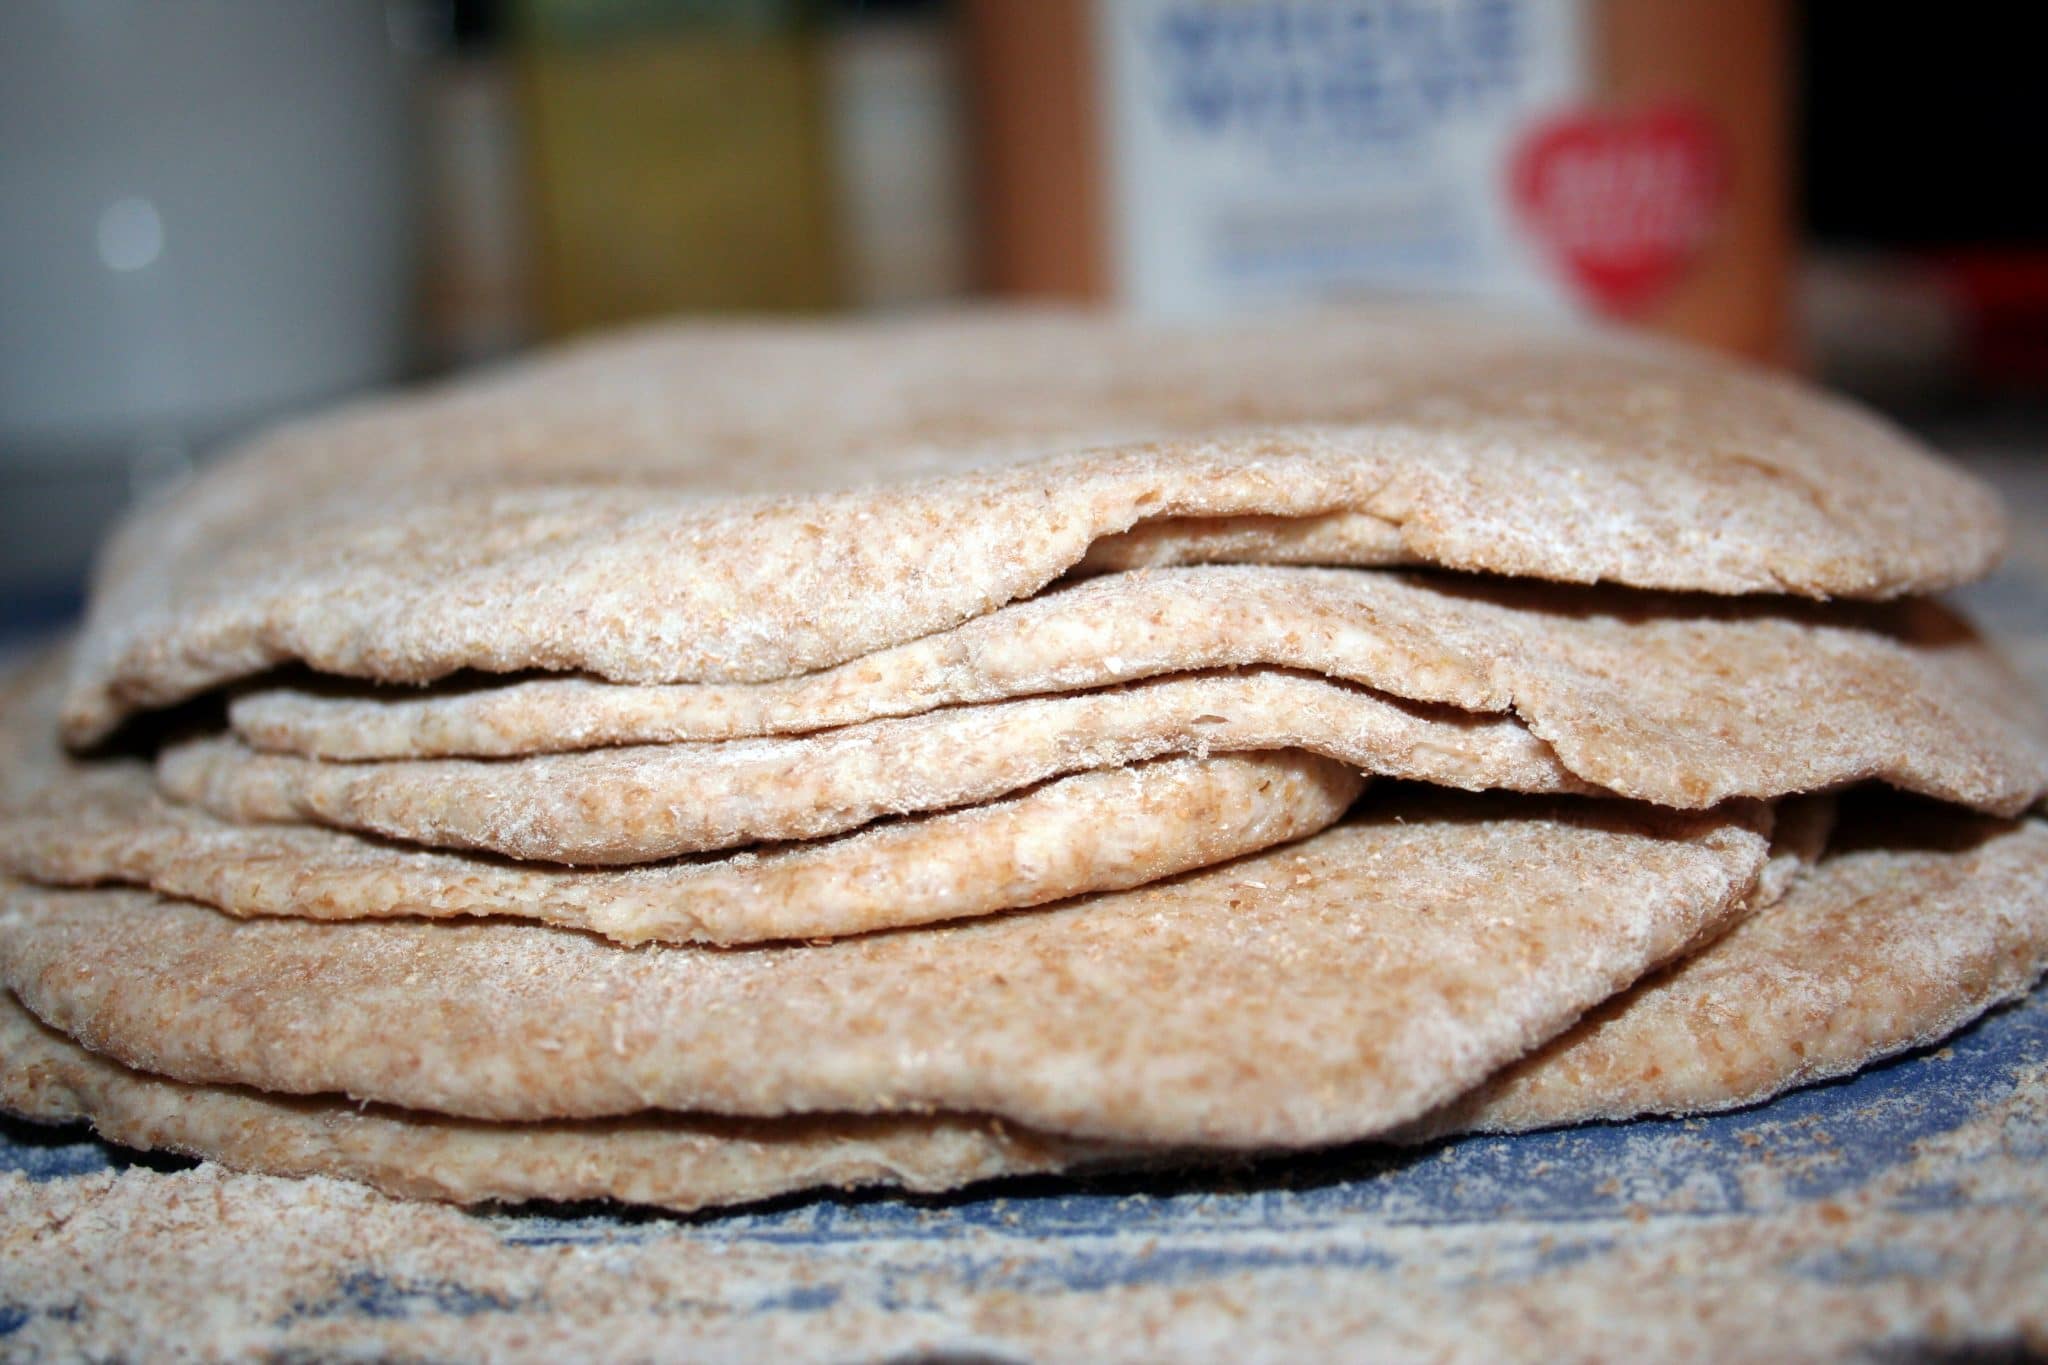
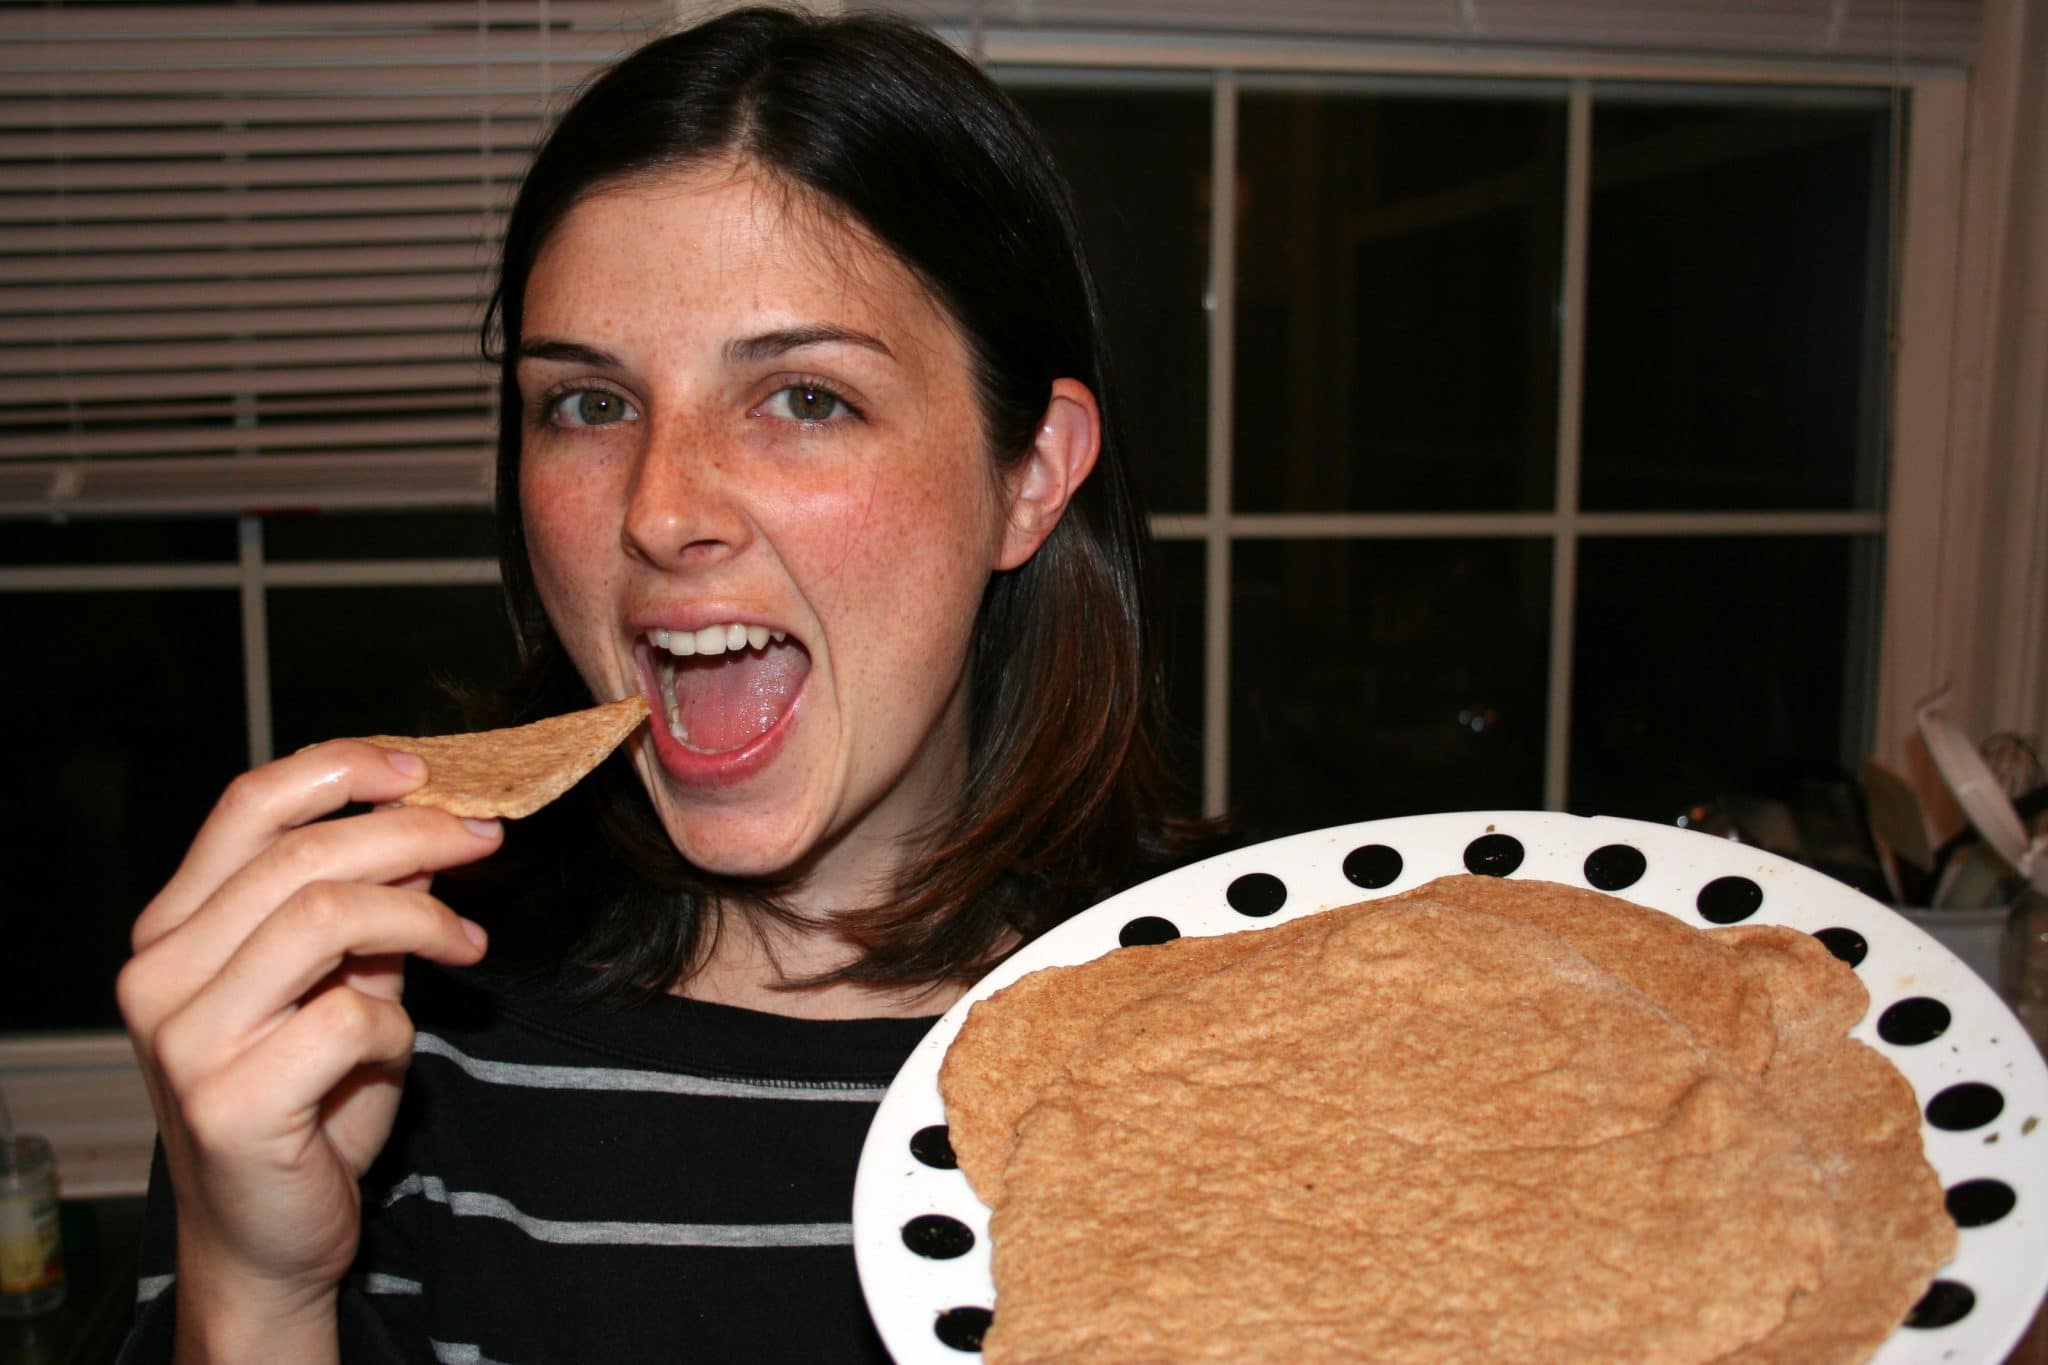
On a clean countertop or smooth cutting board, spread out a nice handful of flour. Coat your hands with the flour and place the dough on floured surface. Fold it in half just a few times so it is easy to work with and not sticky. Divide the dough into 8 roughly equal balls. (Divide the dough in half, then each half in half, then each of those halves in half.) Add some more flour to the surface if you need to, then take one ball and smoosh it with your palm. Rub some flour on your rolling pin, then roll the dough until it is about a 6 to 8 inch circle. Usually half way during rolling, I pick the circle up and flip it over to make sure it isn’t sticking. If the dough is snapping right back, just put the circle to the side and start with a new ball.
When all the balls are rolled into flat discs, redust your surface with flour and further roll out the ones that were not cooperating. They should behave after their time-out. I like to roll them all a second time to get them pretty thin, to almost 9-10 inches in diameter.
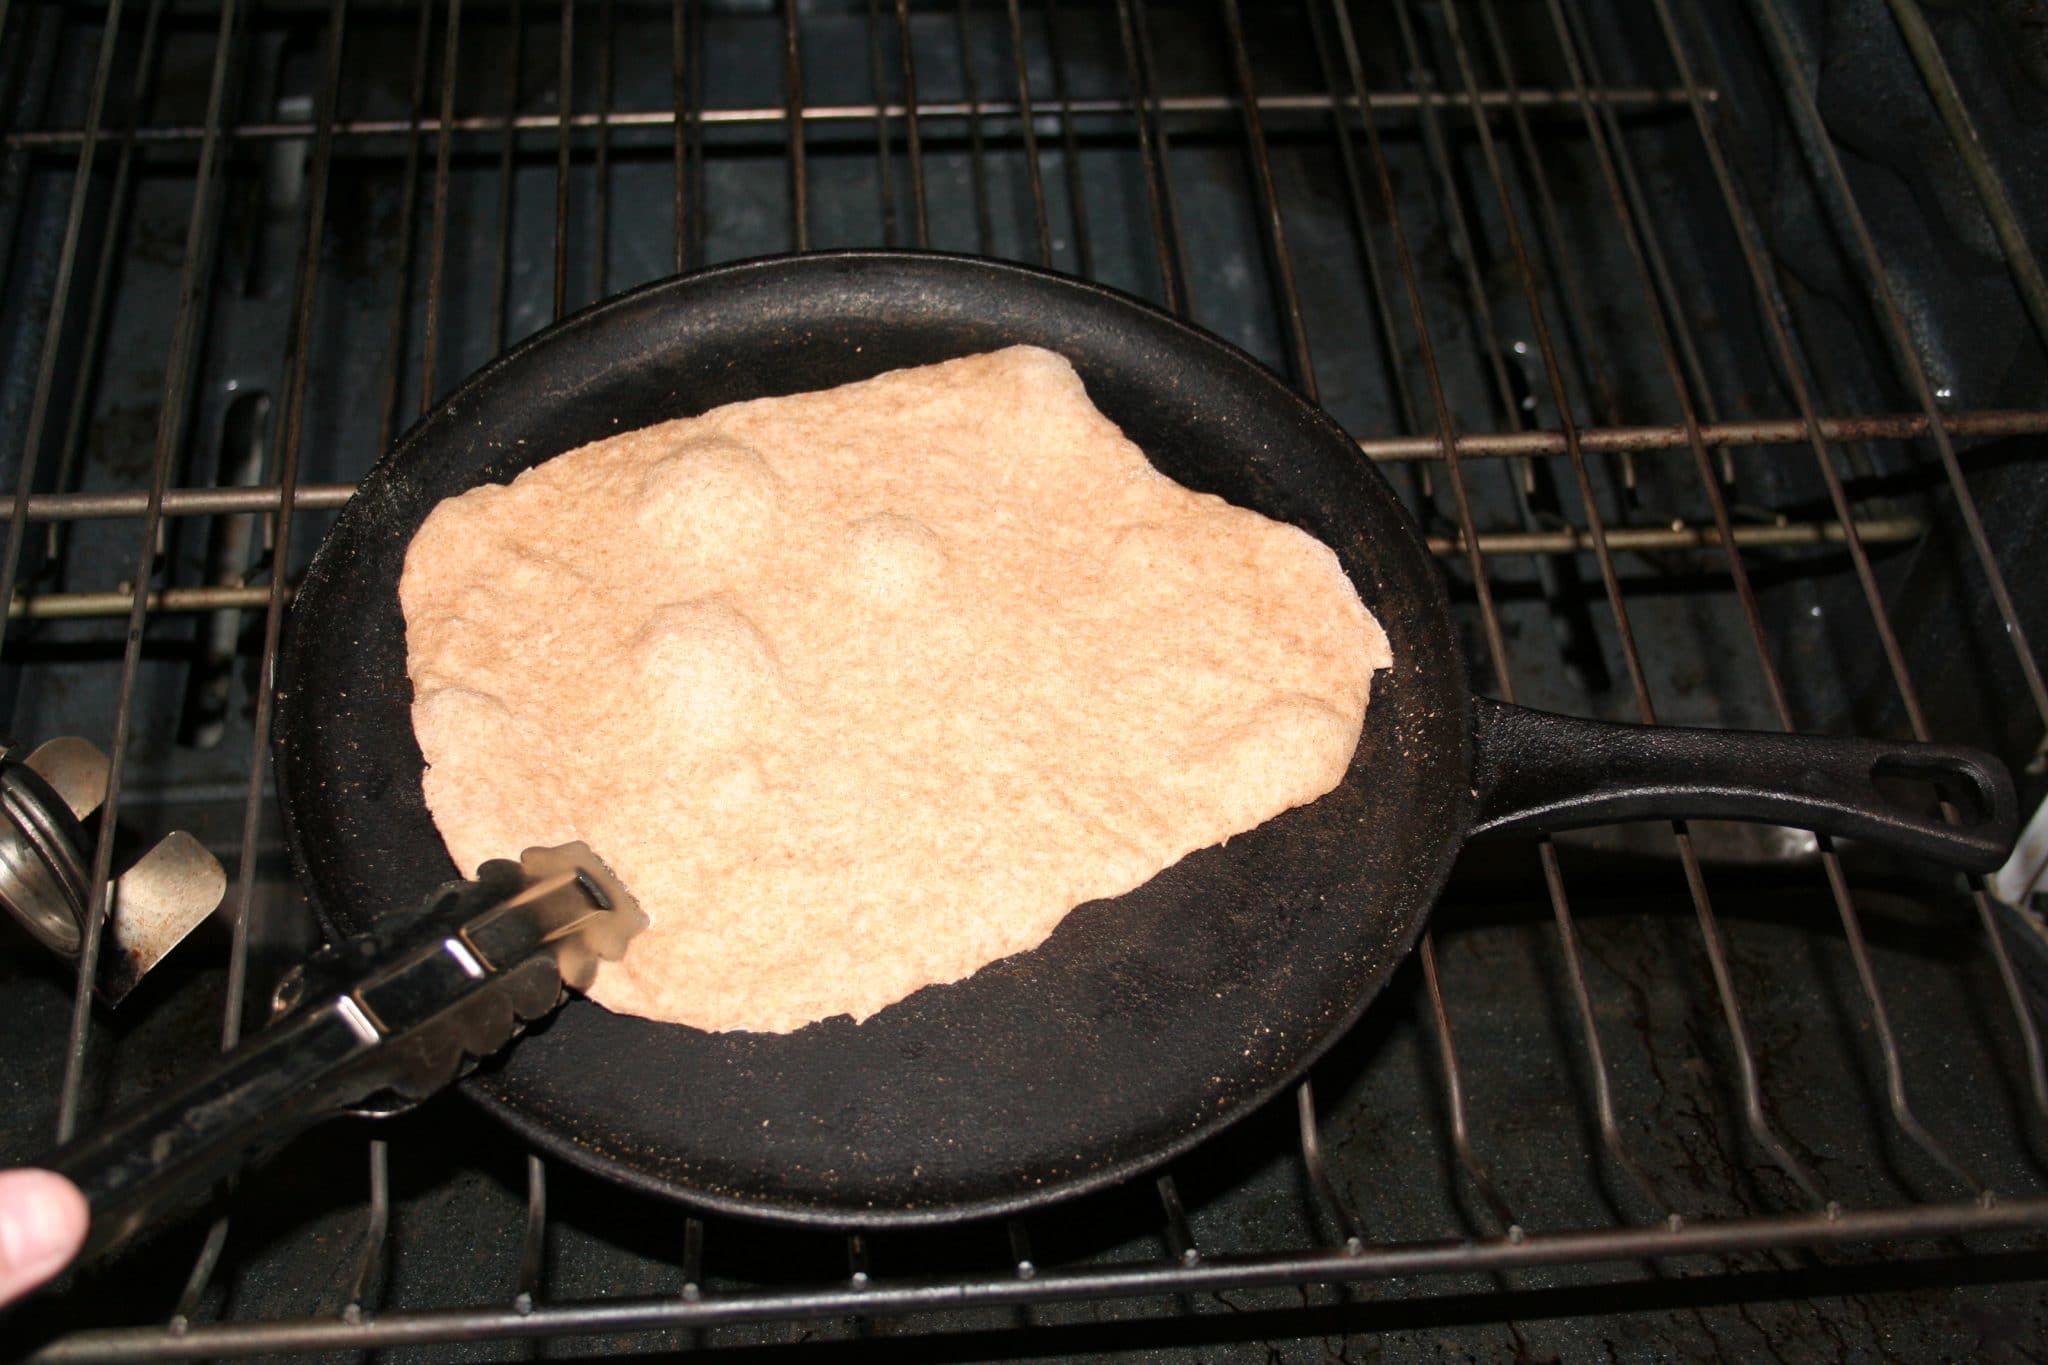
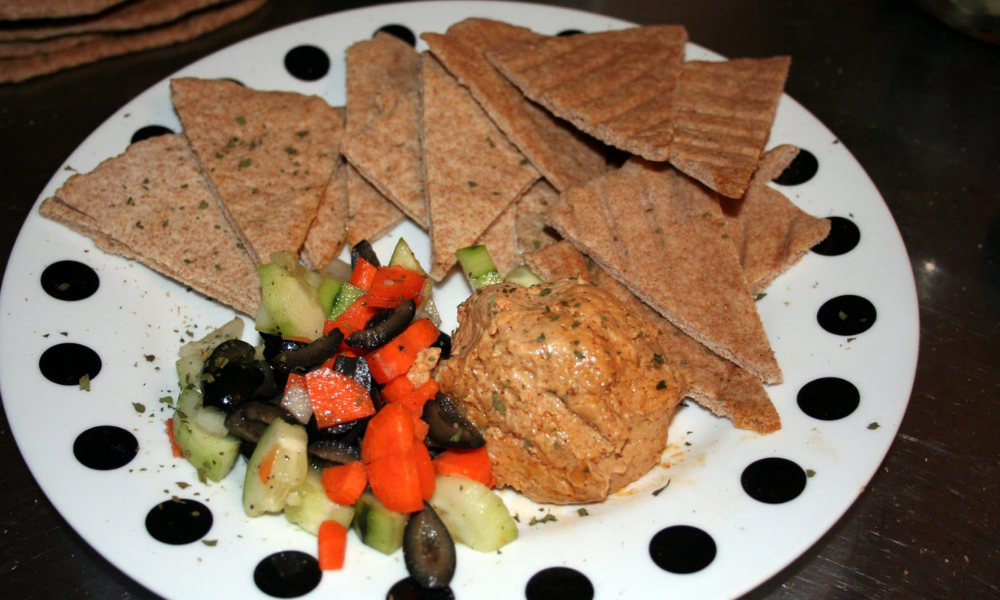
Carefully place a disk of dough into the pan in the oven. I didn’t have to grease my cast-iron pan because it is seasoned. Bake for 3 minutes, then remove with tongs. It should have several blistery bubbles. If you are using a ridged pan, the ridges should be indented and the rest of the dough slightly puffy. If you want a very flat bread like the triangles pictured, flip the disk over using tongs after a minute and a half of baking.
Repeat with the remaining disks.
So that’s it! Easy-peezy, cheap, and quick! Once you get the hang of it, it only takes about 10-15 minutes to mix the dough and roll out the circles. The total baking time for all 8 pieces is 24 minutes (unless you have two pans going), so I try to plan and use that time for chopping veggies or cleaning up the dishes.
This recipe is super versatile. I’ve served it as naan to go with Matt’s sweet-potato and chickpea curry, as the pita-like dipping vehicle for black bean hummus, and even as a Taco Bell “Gordita” style tortilla with bean tacos. It’s also an excellent addition to “peasant” themed meals.
I hope you find this recipe as useful as I do! There is nothing like being able to bring freshly baked bread to the dinner table. This recipe is definitely a keeper.
I promise next week I’ll put the SWEET back in Sweet-Tooth Friday!
xoxo, Christine
Looks good, I don’t know why I never think to make my own.
Do you think spelt flour would work?
This looks wonderful! I love making my own bread and it’s amazing how many little ingredients it has 🙂
.-= EatingRD´s last blog ..amazing experience =-.
AWESOME! I want to try! I can think of a million uses for this bread. Thanks for the recipe
Can’t wait to try this! Sounds delicious. Will have to go dig out the cast iron pan.
Great recipe! Like Megan, I’m interested in trying it with spelt flour so I’ll report back to see if it works just as well.
.-= Heather´s last blog ..happy love your body day! =-.
Hey Megan and Heather,
I’ve never tried this recipe with spelt flour. Spelt is cool because it has higher protein, vitamins and minerals than normal wheat. However, subbing spelt can be a problem with breads because it has a lower gluten content, but since this is flatbread we don’t have to worry about the rising, though it may not be as chewy. Spelt is pretty soluble in liquid which can make the dough too wet, so start with just 3/4 cup of the water and then add more tablespoon by tablespoon as needed. I think using spelt in combination with whole wheat or all-purpose will bring the best results. Let me know how it goes!!
Hi Christine, I tried to make this today using spelt flour and following this guide. It was rather salty for my taste so next time I’ll cut the salt. Also it tasted more like a biscuit. 😀
I was actually looking for no-yeast bread recipe and no baking soda or powder, either. I know it’s kinda chewy but my husband wants me to make it and I can’t seem to find a recipe for it. Shall I just omit the yeast in my normal bread recipe?
Vegan flat bread looks great, easy enough for me to try out too.
.-= Nicci@NiftyEats´s last blog ..Hello Mates, It’s Monday =-.
Yuuum! I just pulled these out of the oven and they are fantastic! I can’t stop eating them. My first attempt at bread – very exciting! Thank you so much!
Hi Flannery,
THANKS for trying out my recipe and commenting! It really makes my day to hear that you enjoyed it!
-Christine
Saw your link from the flatbread recipe page. I really need to make my own bread more often. The less preservatives we all eat the better. You’ve inspired me!
Dear all Vegans,
I would like to apologize, for the several years I have been anti vegeterian and anti vegan due to it getting pounded into my head by old school chefs. After a couple months of research, wishing to rejuvenate a restaurant I stumbled on the wonderful and delicious world of vegan cuisine. Thanks to mother nature I am able to put out some of the healthiest and flavorful meals of my life which has been a great help in rebuilding the restaurant.
Christine,
Thanks for your Vegan Flatbread recipe. I just finished making a batch and it came out great. I am not a big fan of white flour so I wonder how this recipe would be with all whole wheat flour. Have you ever tried it? What changes would you make to amounts if any?
This recipe rocks! I did a little tweeking though. I use 2c whole wheat flour with 1c brown rice four instead of the white and I use olive or sesame oil instead of canola. My whole family loves it. I put a little vegan spread on and it tastes like a homemade biscuit.YUM!!!
I’m really excited to try this, but as a single girl, I doubt I can eat the entire batch before it goes stale. Has anyone tried freezing this bread (pre- or post-bake)?
Thanks!
Just try cutting the recipe in half, that is what I did 🙂
Thanks SO much for this recipe!! I am in the process of converting our home to vegan, and this is definitely going to be a go-to recipe for a lot of dinners! I altered it a bit, I added 1/2 cup of rice protein powder (for the kids’ needs), so I had to add 1/2 – 3/4 cup of extra water, and then I also added a tablespoon or so of oil – I used olive oil instead of canola. I also don’t have any whole wheat flour on hand, so I used all purpose for all 3 cups. And I tried the oven for the first piece, and it didn’t turn out right, so I heated up a skillet on the stop top instead and it came out perfect! We paired it as a sandwich with some eggplant that I cooked up! It was so filling and delicious! Thanks again!
Great recipe! I added garlic as suggested but substituted sage for the cilantro and it was really nice with bean burgers. I’m sure we will use this a lot, so thanks 🙂
Very much looking forward to trying this recipe this evening, to go with chickpea curry and brown basmati rice! <3
I tried these today and they went great with my hummus, “they were sooo good” –my boyfriend’s words! I am a newbie-vegan and still trying to find easy, cheap recipes. This is a deliciously affordable pita recipe.
I just made these and they turned out awesome! Thanks for the recipe. I substituted pureed apples (applesauce) for the oil along with 1/2 cup flax seed meal and 1/2 cup of oat flour for the 1 cup of all purpose flour.
So smart, getting rid of the oil…NO OIL!
This was delicious! We used these to make vegan flatbread pizzas, and they worked perfectly. Thanks so much for the recipe! 🙂
This is so amazing. Usually whole wheat is dense and lacks that soft pliableness of it’s white counterpart…..BUT THIS! I used all wheat and voilaaaaaaa. It stores well in the refrigerator and is delicious reheated (with hummus!). Made it last week and am making it again today.
Thank you SO much!
Very easy and Very Yummy. I cooked them stove top with my cast iron skillet. I found I got more of the bubbles that way. I triples the garlic and cut the salt by half. Perfect!
Does it work with rye flour instead of whole wheat?
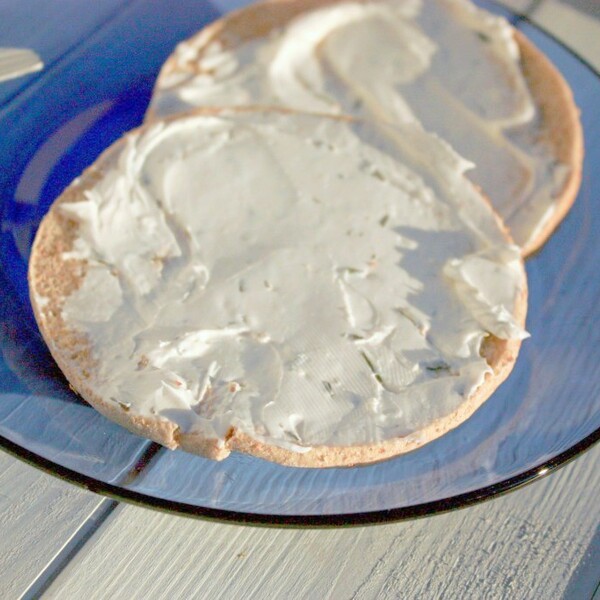
Just want to thank you the recipe. It has become a sort of staple. Also wanted to mention that you can use a regular stainless steel oven proof frying pan (with no plastic handle) instead of cast iron, or you can use a regular baking dish as well. Both worked really well for me. I’ve been making pizza with these as the dough. Amazing.
I’ve looking for a crust recipe for vegy pot pie, Do you think this will work?
I suspect it will work amazingly, but use less salt (1tsp not a Tbsp)
Thank you for this. A quick and simple no-yeast pita bread is just what I need to stop buying store bread without removing PB&J and garlic dip from my life!
I think there may be an error with the salt, I used only 2 tsp instead of a tbsp (3 tsp) and still found the finished product to be aggressively salty. Personally I also found they required slightly more than 3 minutes to cook, but I was using a cookie sheet not a warm cast-iron which I believe explains that.
EXCELLENT recipe though, so easy and good. Use olive oil instead of canola for a mediterranean flavor (goes great with the original salt value)
I made this as written and I am very sad to say, I am going to have to throw it out. It is insanely salty as written. Also, it was unpleasantly dry. I wish I had seen the other comments about the salt error or had not second guessed myself. I should have known that was at least 3 times too much salt.
Thanks for reminding me how easy a flat bread is to make. Onward towards our journey!
I have been using this recipe for upwards of 6 years now as a great pizza crust. I half the recipe and add things such as chia seeds, hemp hearts. I then bake it for 5 mins before I put toppings on. Such a great recipe, and I feel somewhat healthy when I make pizza now!
Try this one…
1 cup mashed sweet potato
1 cup whole wheat flour
1/2 tsp sea salt
Divide into 6 – 8 pieces. Roll out flat. Cook on a hot griddle 1 minute each side.
As a general rule, I love to cook, but don’t love to bake. Well, actually, I’m just not very good at it. All that exact measuring stuff is just not in my wheelhouse 😉 However, I love desserts, especially a blondie. So, I created the most foolproof blondie recipe and it just happens to be naturally gluten free and vegan. Win win! There is also a secret healthy ingredient (don’t ever tell my husband and kids!) that adds protein and fiber, making these blondies even better. Hope you’ll give my Vegan Blondies a try and let me know what you think. Don’t forget to tag @livlight_ and #livlight!
Ingredients:
1 can (14oz) unsalted chickpeas
1/3 cup nut butter* (I use Nuttzo)
1 tsp vanilla
2/3 cup maple syrup
2 tbsp coconut oil
1/2 lemon, juiced
1/2 tsp baking soda
1/4 tsp baking powder
1/4 tsp salt
3/4 cup mini chocolate chips (I use Enjoy Life brand)
*you could use peanut, almond, cashew, etc. or sunflower butter to make them allergy-friendly
Directions:
Preheat over to 350 degrees and coat the bottom and sides of an 8×8 glass baking dish with coconut oil, using a paper towel. Add all ingredients, except chocolate chips, to a high-speed blender. I use my Vitamix. Blend until smooth. Stir most of the chocolate chips in, leaving some to spinkle on top! Pour batter into glass dish and bake for about 30 minutes, checking to see if a toothpick comes out clean. Allow to cool completely before cutting.
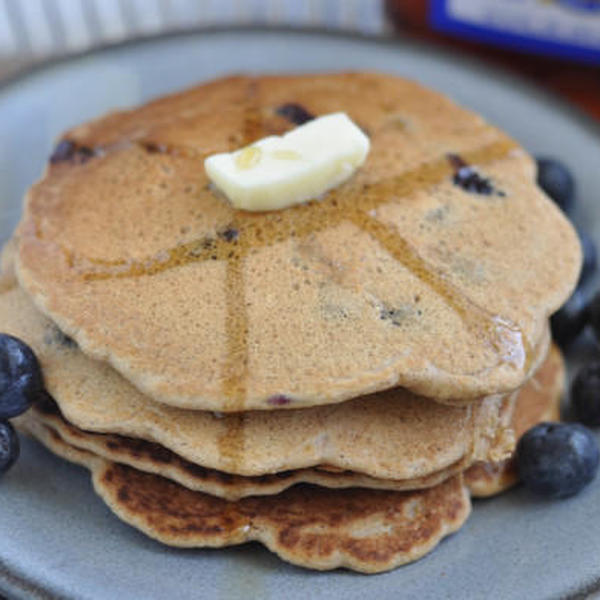
* 1 1/4 cup whole wheat flour or whole wheat pastry flour
* 2 teaspoon baking powder
* 1/2 teaspoon salt
* 1 teaspoon ground cinnamon
* 2 tablespoon vegetable oil
* 1/3 cup water
* 1 1/4 cup soy milk
* 1 teaspoon vanilla extract
* 2 tablespoon pure maple syrup (use the good stuff)
* 1 1/4 cup blueberry, washed and free of stem
Instructions:
Mix together all the dry ingredients. Mix together wet ingredients in a separate bowl. Combine wet to dry and stir until just combined. Don't over mix.
Fold in blueberries. Let mixture sit while you heat your non-stick griddle or skillet on medium heat.
Coat griddle with cooking spray and using a ⅓ cup measuring cup pour batter onto pan. Cook for a few minutes until bubbles start to form and under side of pancake is lightly browned. Flip and cook another minute or two. Keep on plate in a warm oven until all the pancakes are done. Yield: 10 pancakes.


:max_bytes(150000):strip_icc()/homemade-raw-vegan-yogurt-recipe-3377513-tracy-wilk-2022-d4fdbfc9d8b64feda0717f7b484d7c34.jpg)


 Hi everybody, it’s Christine here with a special edition of Sweet-Tooth Friday. Today we’re going to look at the flipside of the baking world and make our own bread.