
Cook Mode
(Keep screen awake)
Ingredients
Original recipe (1X) yields 24 servings
-
cooking spray
-
2 cups soy milk
-
¾ cup unsweetened applesauce
-
2 tablespoons white vinegar
-
4 teaspoons vanilla extract
-
2 ½ cups white whole wheat flour
-
2 cups turbinado sugar
-
1 cup whole wheat flour
-
1 cup rolled oats
-
2 teaspoons baking soda
-
1 teaspoon salt
-
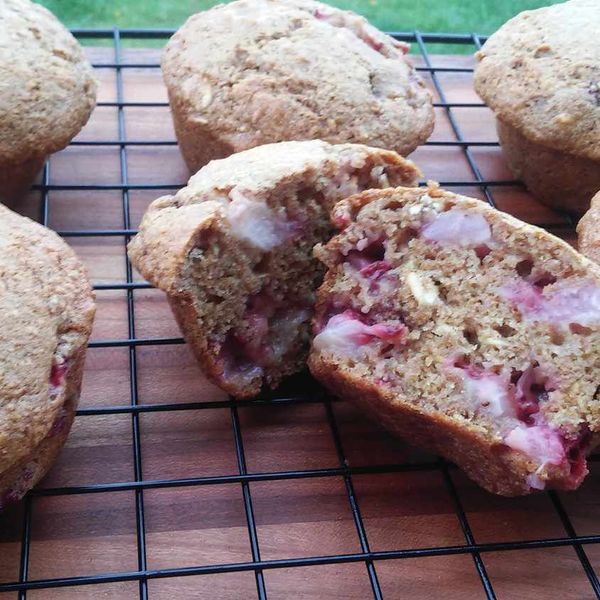
1 cup diced strawberries
Directions
-
Preheat oven to 350 degrees F (175 degrees C). Grease 2 muffin tins with cooking spray.
-
Mix soy milk, applesauce, vinegar, and vanilla extract together in a bowl.
-
Sift white whole wheat flour and whole wheat flour together into a separate bowl. Add oats, baking soda, and salt in a separate bowl. Mix in soy milk mixture until smooth. Let batter sit for 5 minutes.
-
Fold strawberries into the batter. Fill muffin tins 2/3 full of batter.
-
Bake in the preheated oven until muffin tops are brown and sides pull away from the tin, 30 to 40 minutes.
Nutrition Facts (per serving)
| 155 | Calories |
| 1g | Fat |
| 35g | Carbs |
| 4g | Protein |
| Nutrition Facts | |
|---|---|
|
Servings Per Recipe 24 |
|
|
Calories 155 |
|
| % Daily Value * | |
|
Total Fat 1g |
1% |
|
Saturated Fat 0g |
1% |
|
Sodium 219mg |
10% |
|
Total Carbohydrate 35g |
13% |
|
Dietary Fiber 3g |
11% |
|
Total Sugars 18g |
|
|
Protein 4g |
7% |
|
Vitamin C 4mg |
5% |
|
Calcium 24mg |
2% |
|
Iron 1mg |
8% |
|
Potassium 188mg |
4% |
* Percent Daily Values are based on a 2,000 calorie diet. Your daily values may be higher or lower depending on your calorie needs.
** Nutrient information is not available for all ingredients. Amount is based on available nutrient data.
(-) Information is not currently available for this nutrient. If you are following a medically restrictive diet, please consult your doctor or registered dietitian before preparing this recipe for personal consumption.


Inline Feedbacks
View all comments