Photo by Linda Xiao. Prop stylist: Amanda Widis. Food Stylist: Monica Pierini
Prep time
30 minutes
Cook time
1 hour 30 minutes
makes
3 dozen
Author Notes
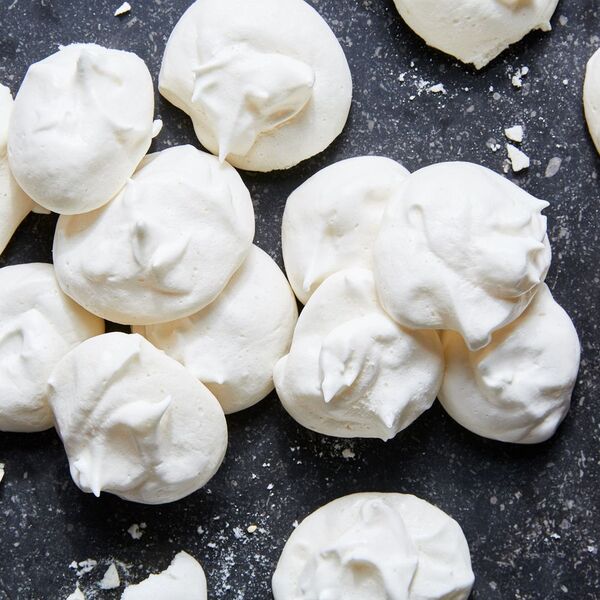
In a time when zucchini can be “noodles” and a slice of cauliflower can be a “steak,” it shouldn’t have surprised me that someone had figured out the leftover liquid from a can of chickpeas could be the answer to a vegan meringue recipe. The concept seems impossible, but you simply whip what would normally go down the drain, and within a few minutes, beautiful firm peaks will rival the delicate egg whites crafted by pastry chefs. Not only does it work, it’s pure genius.
This miraculous liquid has been labeled “aquafaba,” based on the Latin words for “water” and “bean.” Beans release proteins and carbohydrates into their cooking water, which in turn transforms that water into a viscous substance with properties similar to egg whites. While the liquid from other beans will work as well, chickpeas have the lightest color and flavor. Unlike egg whites, which a strong forearm and a little dedication can whip up to firm peaks, aquafaba requires an electric hand mixer or stand mixer fitted with a wire whisk to achieve the same results.
When making vegan meringues, be sure to select a sugar that is also vegan-friendly. Not all sugars are considered vegan, since bone char is frequently used in the refining process for granulated sugar. I tested this recipe with a vegan granulated white sugar as well as with raw cane sugar and demerara. All three worked well and yielded just slightly different flavors. I did notice the coarser sugar did make a “clicking” sound as it was incorporated into the aquafaba in the mixer. Not to worry, though, the sugar soon dissolved into the meringue and the end result was the same.
Classic vanilla meringues can be made with just a dash of vanilla extract added into the mix. However, these treats are a blank slate for your own creativity. Feel free to swap the vanilla extract for almond, orange, or mint. Food coloring can be added for variety or a dusting of sanding sugar for fun. —KristinaVanni
Test Kitchen-Approved
Ingredients
1
15-ounce can chickpeas
1/4 teaspoon
cream of tartar
1/2 cup
vegan granulated, demerara, or raw cane sugar
1 teaspoon
vanilla extract
Directions
Preheat oven to 200°F. Line two baking sheets with parchment paper and set aside.
Drain the liquid from the can of chickpeas through a fine mesh sieve into a measuring cup. The can will yield about 3/4 cup of aquafaba. Save the chickpeas in an airtight container in the refrigerator for another use.
In the bowl of a stand mixer fitted with the wire whisk attachment, beat the aquafaba with the cream of tartar on medium speed for 3 minutes. The aquafaba will begin to increase in volume and become foamy.
With the motor still running, gradually add the sugar, a few tablespoons at a time, until completely incorporated. Add the vanilla extract. Continue to beat at medium speed for 5 minutes until firm peaks form.
The meringues can be formed by either dolloping heaping spoonfuls onto the prepared baking sheets, or they can be piped into 1-inch rounds using a piping bag fitted with a star tip.
Bake the meringues until completely dry to the touch. Depending on the size of your meringues, this can take up to 1 1/2 to 2 hours.
Remove the meringues from the oven and cool completely before enjoying or storing in an airtight container.
In transitioning my household to quasi-vegan, most changes went great. But moving to a plant-based diet and keeping up our beloved Friday night pizza habit didn’t. Our favorite local takeout joint does not offer vegan cheese, and their sauce has Parmesan in it.
Meanwhile, the vegan mozzarella from the store felt overpriced and underwhelming. It seemed there had to be a better way. Curious, I searched “DIY vegan mozzarella” on my phone and hit the Holy Grail. This quick homemade vegan mozzarella is easy, cheap, free from weirdo ingredients, and unbelievably superior to anything from the store. Most importantly, it’s hot and gooey, delivering proper pizza night satisfaction in this classic cheesy vegan pizza recipe.
Dough and Sauce: Vegan by Default
Making pizza vegan from the ground up starts off easy. Most pizza doughs and pizza sauces (including ones from the store) fall in that glorious “vegan by default” category. To be safe, check the label to verify it’s vegan.
I can’t get good refrigerated pizza dough where I live, so I make my own with this recipe. I throw it together the morning of our designated pizza night, divide it into balls, and let it rise in the fridge while I’m at work so it’s ready and waiting when I come home.
Simply Recipes / Ciara Kehoe
DIY Vegan Pizza Cheese: A Game Changer
Now, on to the pay dirt: the cheese. Longtime vegans know that mozzarella-style shreds have made it a long way since their iffy inception, but they are still often reluctant to melt. And their cost has gone up in a manner disproportionate to their quality.
I’ve made fancypants nut-based cheeses at home and even fermented them. They’re good, but they’re not cheesy. I wanted homemade vegan cheese that hit basal pizza pleasure zones of melty and goopy.
The food blog School Nite Vegan offered a brilliant solution: use tapioca flour to make what’s essentially a pre-melted blob. Tapioca flour, once it’s boiled with liquid, gets a stringy texture that’s convincingly like melted cheese. Nutritional yeast provides the flavor, and neutral oil gives the richness. Throw it all together in a saucepan and the result belies its underwhelming ingredients. You can make it while the oven preheats.
Melty vegan pizza cheese requires no grating; you just blorb it right on the pizza, then bake. Leftovers, if you have any, keep in the fridge for a few days, allowing you a lunchtime quesadilla or two.
Using Storebought Cheese Is Okay!
Look, you don’t have to be a superstar and make your own vegan pizza cheese. You’re already rocking it by making homemade pizza. The meltiest shreds are Daiya Mozzarella Style Shreds. My boyfriend has been a vegan since forever and this is his go-to.
For more of a Margherita-style pizza, shredded or finely cubed Miyoko’s Cashew Milk Mozzarella will hit those notes.
Simply Recipes / Ciara Kehoe
Toppings for Vegan Pizza
When it comes to any type of pizza, I’m in the camp of keeping it light. Piling on the toppings leads to a soggy crust. Consider the following toppings:
Vegan pepperoni slices
Thinly sliced mushrooms, raw (they’ll cook on the pizza, but be sparing, as they give off a ton of moisture)
Browned mushrooms (these you can add more of, since they’re already cooked)
Handfuls of baby arugula or spinach (it’ll wilt down in the oven)
Whole or halved pitted olives
Drained, jarred piquillo peppers or Calabrian chiles, cut into ribbons
A few basil leaves and a drizzle of good olive oil once the pizza’s straight out of the oven
Crumbled, browned vegan sausage grounds, or slices of ready-to-eat vegan sausage links
More Vegan Party Food
Vegan Nachos
Black Bean Smash Burgers
Vegan Macaroni and Cheese
BBQ Pulled Jackfruit Tacos
Vegan Chicken Nuggets
If you’re making the homemade vegan mozzarella, you’ll have leftovers. It’ll keep in the fridge, tightly covered, for 4 days. It’s great on loaded quesadillas.
Cook Mode (Keep screen awake)
2poundspizza dough, homemade or store-bought
Olive oil, for greasing the pizza dough and baking sheet
Flour, for dusting the counter
Cornmeal, for dusting the pan or pizza peel
3/4 to 1cuppizza sauce, homemade or jarred (check to see it’s vegan)
1 batch homemade vegan mozzarella (see below), or 7 to 8ouncesvegan mozzarella-style shreds
1 or more hours before you plan to make the pizza, grease a baking sheet with olive oil. Divide the dough into 2 balls (for two 14-inch pizzas) or 4 balls (for four 8-inch pizzas). Stretch the outer skin of each dough piece tightly and pinch at the bottom to create a tight ball, then rub lightly with olive oil and place seam-side-down on the sheet. Cover and let rise until doubled, about 8 hours in the refrigerator or 1 hour on the counter.
Simple Tip!
I like to divide the dough in the morning and let it rise in the refrigerator. The cold pizza dough is less sticky, making it easier to shape.
Simply Recipes / Ciara Kehoe
Simply Recipes / Ciara Kehoe
Preheat the oven:
About 20 to 30 minutes before you plan to bake the pizzas, preheat the oven to 500°F. Position a rack in the center and set a baking stone or an inverted rimmed baking sheet on top to heat up.
Make the cheese:
Meanwhile, as the oven heats, make the homemade vegan mozzarella, if using. Put the tapioca flour, nutritional yeast, sugar, and salt in a deep medium saucepan. Add the water, oil, and vinegar and whisk to combine. Set the burner to medium-high and cook, whisking often. After 3 to 5 minutes, the mixture will start turning from thin and watery to thick and bouncy.
Decrease the heat to medium and continue cooking, whisking continuously, until you see large bubbles slowly rising to the surface. When it’s ready, the cheese will be a gooey, clingy blob. It might not look particularly appealing, but don’t worry; it’ll work great once it’s baked on the pizza. Remove from heat and set aside.
Simply Recipes / Ciara Kehoe
Simply Recipes / Ciara Kehoe
Simply Recipes / Ciara Kehoe
Shape the pizza:
On a lightly floured counter, gently stretch out one dough ball with your hands, working from the center. If you like varied bubbles in the crust once it bakes, try not to mash down the edges of the dough. If the dough snaps back, set it aside and let it rest for a few minutes as you work on shaping the other crust.
If you’re making two pizzas, form a roughly 14-inch circle. If you’re making four smaller pizzas, aim for a circle that’s 7 to 8 inches.
Dust a pizza peel or rimless cookie sheet with cornmeal and transfer one dough round to the sheet.
Simple Tip!
If you are not confident sliding the pizzas on the baking stone, shape the pizzas on squares of baking parchment, which makes them easier to slide in the oven without sticking. The edges of the parchment will char in the oven, but it won’t affect the pizza crust itself.
Simply Recipes / Ciara Kehoe
Simply Recipes / Ciara Kehoe
Top the pizzas:
For the large pizzas, spread 6 tablespoons of sauce over each, leaving a 1/2 to 1-inch border around the crust. For the smaller pizzas, use 4 tablespoons per pizza.
If you’re using vegan cheese shreds, just sprinkle it over the pizza.
If you made the homemade cheese, use a tablespoon to evenly space out dollops of cheese over the pizza. The cheese mixture will fall from the spoon in rubbery blorps. Just do your best to get mostly even coverage, leaving some patches of sauce visible. You’ll end up using around 4 to 5 tablespoons of cheese per small pizza and about 1/2 cup total per large pizza.
Simple Tip!
You may be tempted to really load up on the homemade vegan cheese. Don’t give in! A little goes a long way and it will achieve a nicer texture in the oven if you add it in smaller, thin blobs.
Add any other toppings you like, but be conservative. An overloaded pizza will bake up soggy.
Simply Recipes / Ciara Kehoe
Simply Recipes / Ciara Kehoe
Bake the pizzas, then serve:
Slide the pizza onto the preheated stone or inverted baking sheet. The large pizzas will take about 15 to 20 minutes; the smaller ones will take about 10 to 15 minutes.
Simple Tip!
If you’re baking the pizzas on pizza pans, they’ll take a little longer.
To assess doneness, slide a metal spatula between the stone and the crust and peek underneath; you want to see some browning. The top crust should be browned. If you’re using the homemade vegan mozzarella, it will bubble up in spots.
Simple Tip!
If you are using vegan mozzarella shreds, some brands melt but don’t actually brown.
Once the pizza is done to your liking, transfer to a cutting board, then slice and serve immediately.
Shape, bake, and assemble the remaining pizzas.
If you have leftovers, refrigerate them, wrapped in foil or plastic wrap, for up to 3 days. I like to reheat slices in the air fryer for 5 to 7 minutes at 375°F, but you can also reheat them in a skillet.
Love the recipe? Leave us stars and a comment below!
Simply Recipes / Ciara Kehoe
Simply Recipes / Ciara Kehoe
Nutrition Facts (per serving)
600
Calories
24g
Fat
83g
Carbs
12g
Protein
×
Nutrition Facts
Servings: 4
to 6
Amount per serving
Calories
600
% Daily Value*
24g
31%
Saturated Fat 2g
10%
0mg
0%
869mg
38%
83g
30%
Dietary Fiber 5g
16%
Total Sugars 5g
12g
Vitamin C 5mg
24%
Calcium 44mg
3%
Iron 5mg
26%
Potassium 291mg
6%
*The % Daily Value (DV) tells you how much a nutrient in a food serving contributes to a daily diet. 2,000 calories a day is used for general nutrition advice.
Nutrition information is calculated using an ingredient database and should be considered an estimate. In cases where multiple ingredient alternatives are given, the first listed is calculated for nutrition. Garnishes and optional ingredients are not included.
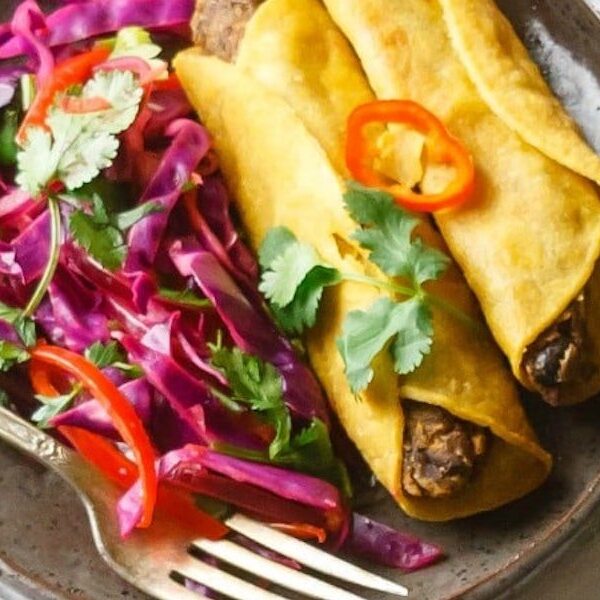
Served with an avocado sauce, these vegan black bean taquitos are a fun, crunchy bite you’ll truly enjoy. Plus, they’re super easy to make too.
Three ingredients and 30 minutes are all you need to make these vegan rolled tacos. Black bean burgers from the grocery store make the quick and easy filling!
The secret to making these super quick rolled tacos is using pre-made black bean burgers as the filling. From what I’ve seen they’re usually vegan and I always love the way they’re seasoned, no matter what brand I get. The texture is perfect to fill a crunchy taco shell.
Black bean burgers are so easy to use as rolled taco filling they’re even pre-measured. Once they’re thawed I just tear them in half, roll them into little logs and boom: I’ve just made rolled taco filling. Are we getting into dangerously easy territory here or what?!?
If black bean burgers aren’t regulars on your shopping list, stay calm. Just head for the frozen section of a big grocery store and you’re likely to find them.
They’re actually pretty fun to make. I wrap the filling with a corn tortilla, give it a good spritz of my favorite spray oil du jour and repeat until I have enough rolled tacos. Or I run out of ingredients. Then, pop them in the oven.
They come out smelling like a Mexican restaurant, golden brown and packing serious crunch!
When I want something to dip them in, I sometimes whip up a quick batch of avocado dipping sauce. It’s rich and creamy and just spicy enough to have a little kick. You’ll need a blender or food processor to make it but it’s extremely easy. I also like to pick up some guacamole from the store sometimes for dipping.
Click here for the avocado sauce recipe.
Print
5 Stars 4 Stars 3 Stars 2 Stars 1 Star
No reviews
Author:Gin Butters
Total Time:32 minutes
Description
Served with an avocado sauce, these vegan black bean taquitos are a fun, crunchy bite you’ll truly enjoy. Plus, they’re super easy to make too.
Rolled Tacos
4 pre-made vegan black bean burgers (thawed (see notes))
8 small corn tortillas
your choice of cooking spray
Avocado Dipping Sauce
Click the link above for the recipe.
Instructions
For the rolled tacos:
Heat the oven to 350. Coat the inside of an 8″x8″ or 10″x7″ baking dish with cooking spray.
Thaw the burgers in the microwave according to the package.
Tear each burger in half and shape into a little sausage.
Heat a small skillet on medium heat.
Place a tortilla in the skillet for a few seconds until warm, then flip and warm the other side.
Loosely wrap the tortilla around a burger-sausage. Secure with a toothpick.
Spray generously with cooking spray and set toothpick-side down in the dish. Repeat with the rest of the burgers and tortillas.
Slice the tempeh into 1⁄2cm thick slices. Mix 1 tbsp of the olive oil in a bowl with the paprika, oregano, a pinch of salt, crack of black pepper and 1 tbsp water. Add the tempeh, tossing to coat. Cover and leave in the fridge overnight if you can, or set aside at room temperature while you continue the recipe.
step 2
Beat the mayonnaise with 1⁄2 tbsp water and the crushed garlic in a small bowl. Heat the flatbreads in a dry pan over a medium heat for 30 seconds on each side. Slather the garlic mayonnaise over both flatbreads and top with the pickled cabbage and half the salad leaves.
step 3
Heat the remaining 1 tbsp oil in a large frying pan over a high heat. Fry the marinated tempeh for 2-3 mins on each side over a medium heat until crispy and browned. Pile on top of the flatbreads, fold over and serve alongside the remaining salad.
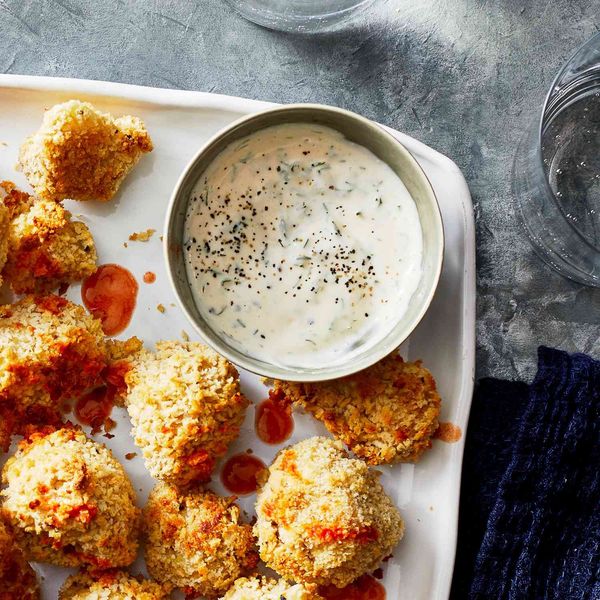
Serve this creamy vegan ranch dressing alongside fresh or roasted veggies for dipping, as a spread for vegan sandwiches or as a salad dressing for hearty greens. It’s also great with Vegan Cauliflower Buffalo Wings.
Updated on April 19, 2024
Photo: Jennifer Causey
Cook Mode (Keep screen awake)
Ingredients
¼cupvegan mayonnaise
2tablespoonschopped fresh dill
1tablespooncider vinegar
½teaspoongarlic powder
½teaspoononion powder
¼teaspoonground pepper
Directions
Whisk mayonnaise, dill, vinegar, garlic powder, onion powder and pepper in a small bowl.
Originally appeared: EatingWell.com, April 2021
Nutrition Facts (per serving)
Nutrition Facts
Servings Per Recipe 8
Serving Size 1 Tbsp.
Calories 47
% Daily Value *
Total Fat
5g
6%
Saturated Fat
1g
5%
Vitamin A
11IU
0%
Sodium
40mg
2%
Potassium
7mg
0%
Nutrition information is calculated by a registered dietitian using an ingredient database but should be considered an estimate.
* Daily Values (DVs) are the recommended amounts of nutrients to consume each day. Percent Daily Value (%DV) found on nutrition labels tells you how much a serving of a particular food or recipe contributes to each of those total recommended amounts. Per the Food and Drug Administration (FDA), the daily value is based on a standard 2,000 calorie diet. Depending on your calorie needs or if you have a health condition, you may need more or less of particular nutrients. (For example, it’s recommended that people following a heart-healthy diet eat less sodium on a daily basis compared to those following a standard diet.)
(-) Information is not currently available for this nutrient. If you are following a special diet for medical reasons, be sure to consult with your primary care provider or a registered dietitian to better understand your personal nutrition needs.
Mix the flour and baking powder with ½ tsp salt in a bowl. Mix the vegan butter with the caster sugar in a separate bowl. Combine the soy milk with 175 ml water in a jug. Pour this gradually into the dry ingredients, continually stirring, then add the butter and sugar mixture and keep stirring to form a smooth batter. Add a little more water or soy milk if the mixture is very thick – you should be able to spoon it out. Heat the waffle iron. Butter both sides of the waffle iron.
step 2
Spoon about 3 tbsp of the batter into the hot waffle iron, close and cook for 4-6 mins until golden brown (the time will vary depending on your waffle iron). Remove the finished waffle and cook the rest of the batter in the same way. The dough makes about 10-12 vegan waffles. Serve straightaway with your favourite toppings.
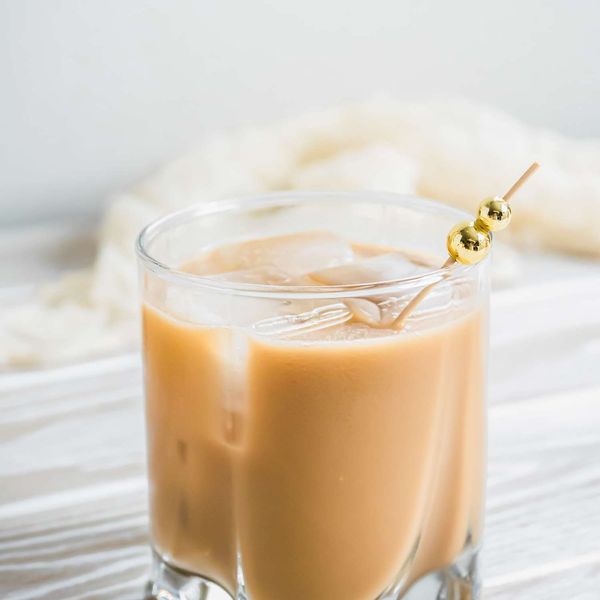
This vegan White Russian cocktail is made with vodka, coffee liqueur, plus coconut milk and cashew milk. It’s dairy-free, so all your guests can have a glass. Cheers!
Published September 08, 2022
Simply Recipe / Elana Lepowski
A cocktail can live for decades in obscurity until a single movie or TV show catapults it to vernacular culture. Like Cosmos in Sex in the City, the White Russian cocktail saw a renaissance thanks to its co-starring role in the film The Big Lebowski. A creamy cocktail with a high-energy kick, the White Russian presents itself as an anyone, any-time-of-day drink.
Except, if you’re following a vegan lifestyle, it’s out of reach! Here’s why, and how to fix that.
Simply Recipe / Elana Lepowski
Wait… Kahlúa Isn’t Vegan?
There are only three ingredients in a traditional White Russian: vodka, Kahlúa, and cream. But, two of them are not vegan-friendly. Kahlúa, a rum-based coffee liqueur, contains sugar that has been processed with bone char from animals, and it’s therefore not suitable for vegans.
But vegan alternatives to Kahlúa exist!
Tia Maria, another rum-based coffee liqueur, is vegan.
So is St. George Spirits’ NOLA Coffee Liqueur.
Make yourown! My coffee liqueur is an easy recipe that only requires standing over a stove for a few minutes, then gently shaking the jar of steeping liqueur every few days for a few weeks.
Vegan Alternatives to Cream
Then there’s the cream. Although a wealth of vegan cream substitutes exist, not all of them work here. Some are too fatty, resulting in floaty bits in your drink, while others fail to provide the proper mouthfeel for the drink that dairy cream does. My solution is to use a 50/50 blend of light coconut milk and cashew milk. While the coconut gives a pleasant mouthfeel, the cashew milk adds more flavor. Here are a few tips and tricks for working with both.
Simply Recipe / Elana Lepowski
When choosing coconut milk, opt for a “light” variety, not regular or cream, as these two have a higher fat content that tends to glob together instead of dispersing evenly into the cocktail. Here, I use Whole Foods “light” canned coconut milk, and it mixes evenly every time. Pacific Food’s’s coconut milk (the kind in an aseptic package) mixes well also, but results in a darker drink as it has a thinner consistency.
Make sure your coconut and cashew milk are at room temperature, as it makes them easier to mix. Want to make it now but it’s fridge cold? Microwave in short (5-10 second) bursts, stirring in between to gently warm. No microwave? A small saucepan can also warm up your milk on the stove.
If you make your own coconut milk at home, try toasting the coconut first for a more robust base to the drink.
Cashew milks can vary in thickness. Pacific Food’s cashew milk, similar to their coconut, is more “milk”-like and mixes evenly. I also like Forager brand cashew milk, as it already includes coconut cream mixed in—so I can use just the one bottle instead of two!
Shaking is key to getting a uniformly even drink! Yes, “The Dude” pours all of his components into a glass and then gulps it down, but this laissez-faire attitude will not result in a properly made cocktail, vegan or otherwise! Please always shake a cocktail with cream!
Simply Recipe / Elana Lepowski
The Best Vodka for White Russians
Lastly, there’s the vodka. First, save the top shelf vodka for your martini. The focus of a White Russian is on the coffee liqueur and creamy finish, and shouldn’t taste strongly of vodka anyway. Grab a moderately priced bottle—nothing fancy, but nothing that could result in a headache later on either. I enjoy Tito’s here, but if you want yours more on the Russian side, Russian Standard is a fine pick.
Ice in the Glass Is Optional
While a rocks glass with ice is traditionally how you see a White Russian served—which is 100% a by-product of building the drink in the glass—here, shaking makes the ice optional. However, as the drink borders on decadently creamy, you can try including the ice, which will cut through some of that heaviness as it melts. Alternatively, if you opt to forgo the ice, you can serve this “up” (strained without ice) in a coupe instead of a rocks glass. As I always suggest, try it both ways and see which is more to your liking.
Simply Recipe / Elana Lepowski
More Cocktails From Pop Culture
Classic Cosmopolitan
Gin and Tonic
Tequila Sunrise
Mint Julep
Piña Colada
Not all commercially produced coffee liqueurs are vegan. Kahlúa is made with sugar that’s processed with animal bone charcoal, and therefore some vegans choose not to drink it. Vegan alternatives include Tia Maria, St. George Spirits’ NOLA Coffee Liqueur, and our own homemade version.
Although this recipe is for a vegan version of the drink, most of these tips and tricks also apply to a standard White Russian, so feel free to use these ideas interchangeably.
Cook Mode (Keep screen awake)
1 3/4ouncesvodka
1 1/4ounces vegan coffee liqueur (see recipe note)
1/2ouncelight coconut milk
1/2ouncecashew milk
Combine the ingredients and shake:
In a shaker filled 2/3 of the way with ice, add the vodka, coffee liqueur, and coconut and cashew milks. Shake vigorously to combine, about 20 seconds.
Simply Recipe / Elana Lepowski
Serve:
Strain into an iced-filled rocks glass. Enjoy!
Did you love the recipe? Leave us stars below!
Simply Recipe / Elana Lepowski
Nutrition Facts (per serving)
259
Calories
1g
Fat
15g
Carbs
0g
Protein
×
Nutrition Facts
Servings: 1
Amount per serving
Calories
259
% Daily Value*
1g
2%
Saturated Fat 1g
5%
0mg
0%
5mg
0%
15g
5%
Dietary Fiber 0g
0%
Total Sugars 14g
0g
Vitamin C 0mg
0%
Calcium 3mg
0%
Iron 0mg
1%
Potassium 26mg
1%
*The % Daily Value (DV) tells you how much a nutrient in a food serving contributes to a daily diet. 2,000 calories a day is used for general nutrition advice.
Nutrition information is calculated using an ingredient database and should be considered an estimate. In cases where multiple ingredient alternatives are given, the first listed is calculated for nutrition. Garnishes and optional ingredients are not included.
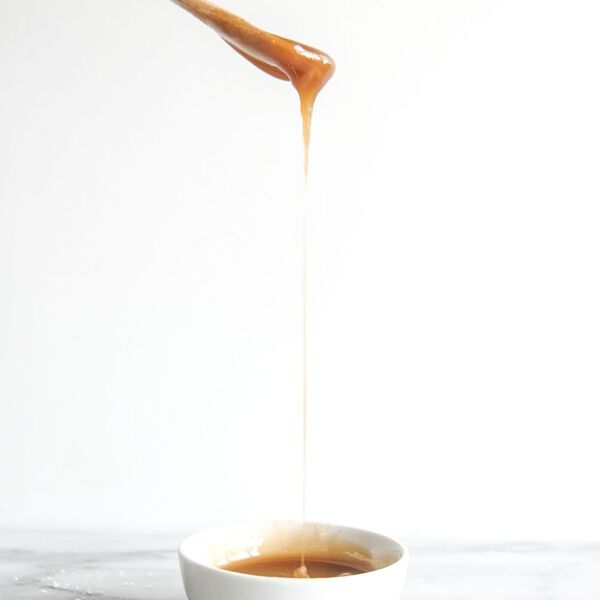
For about a year now i have been trying to master caramel sauce. The reason is this is something my husband hasn’t had in many years and its delicious on ice cream. I have tried the coconut milk caramel and i can honestly say i am just not a fan, the idea of that perfect caramel taste mixed with the saltness of sea salt flakes – sounds like perfection right? —Bianca Virtue
Ingredients
1 cup
Caster Sugar
1/2 cup
Water
1 tablespoon
Vegan Butter
1/2 cup
Soy Milk
Directions
In a saucepan that has a lid place sugar and water on to a low heat and wait until sugar has completely dissolved.
Making this in a lidded pot allows the water and sugar to come off the sides with the steam created.
Once sugar is dissolved allow the sugar syrup to simmer until its starts to turn a caramel / amber colour. To make sure its eventually colouring simply swirl the pot around, do not stir.
When it becomes the right colour take it off the heat, place in butter and stir to combine.
When the butter is combine gradually add in the milk whist stirring at the same time, be careful with this part as it will bubble. Once combine place back on heat, add in the salt and allow to simmer until thickened.
This recipe can be modified to be sugar free or not vegan, simply replace ingredients to your chosen ones.
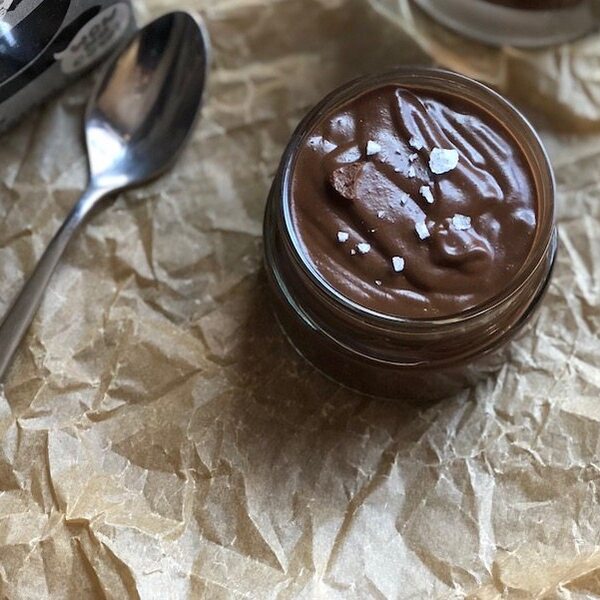
This vegan chocolate pudding is a thick, decadent texture and so rich thanks to avocado, tahini and super creamy oat milk.
Our circles are filled with family and friends that are avoiding dairy, allergic or have chosen a vegan lifestyle so we are constantly trying to revamp our favorite recipes so that everyone can dig in. Case in point, our decadent chocolate pudding, but this time ditching the cream and eggs.
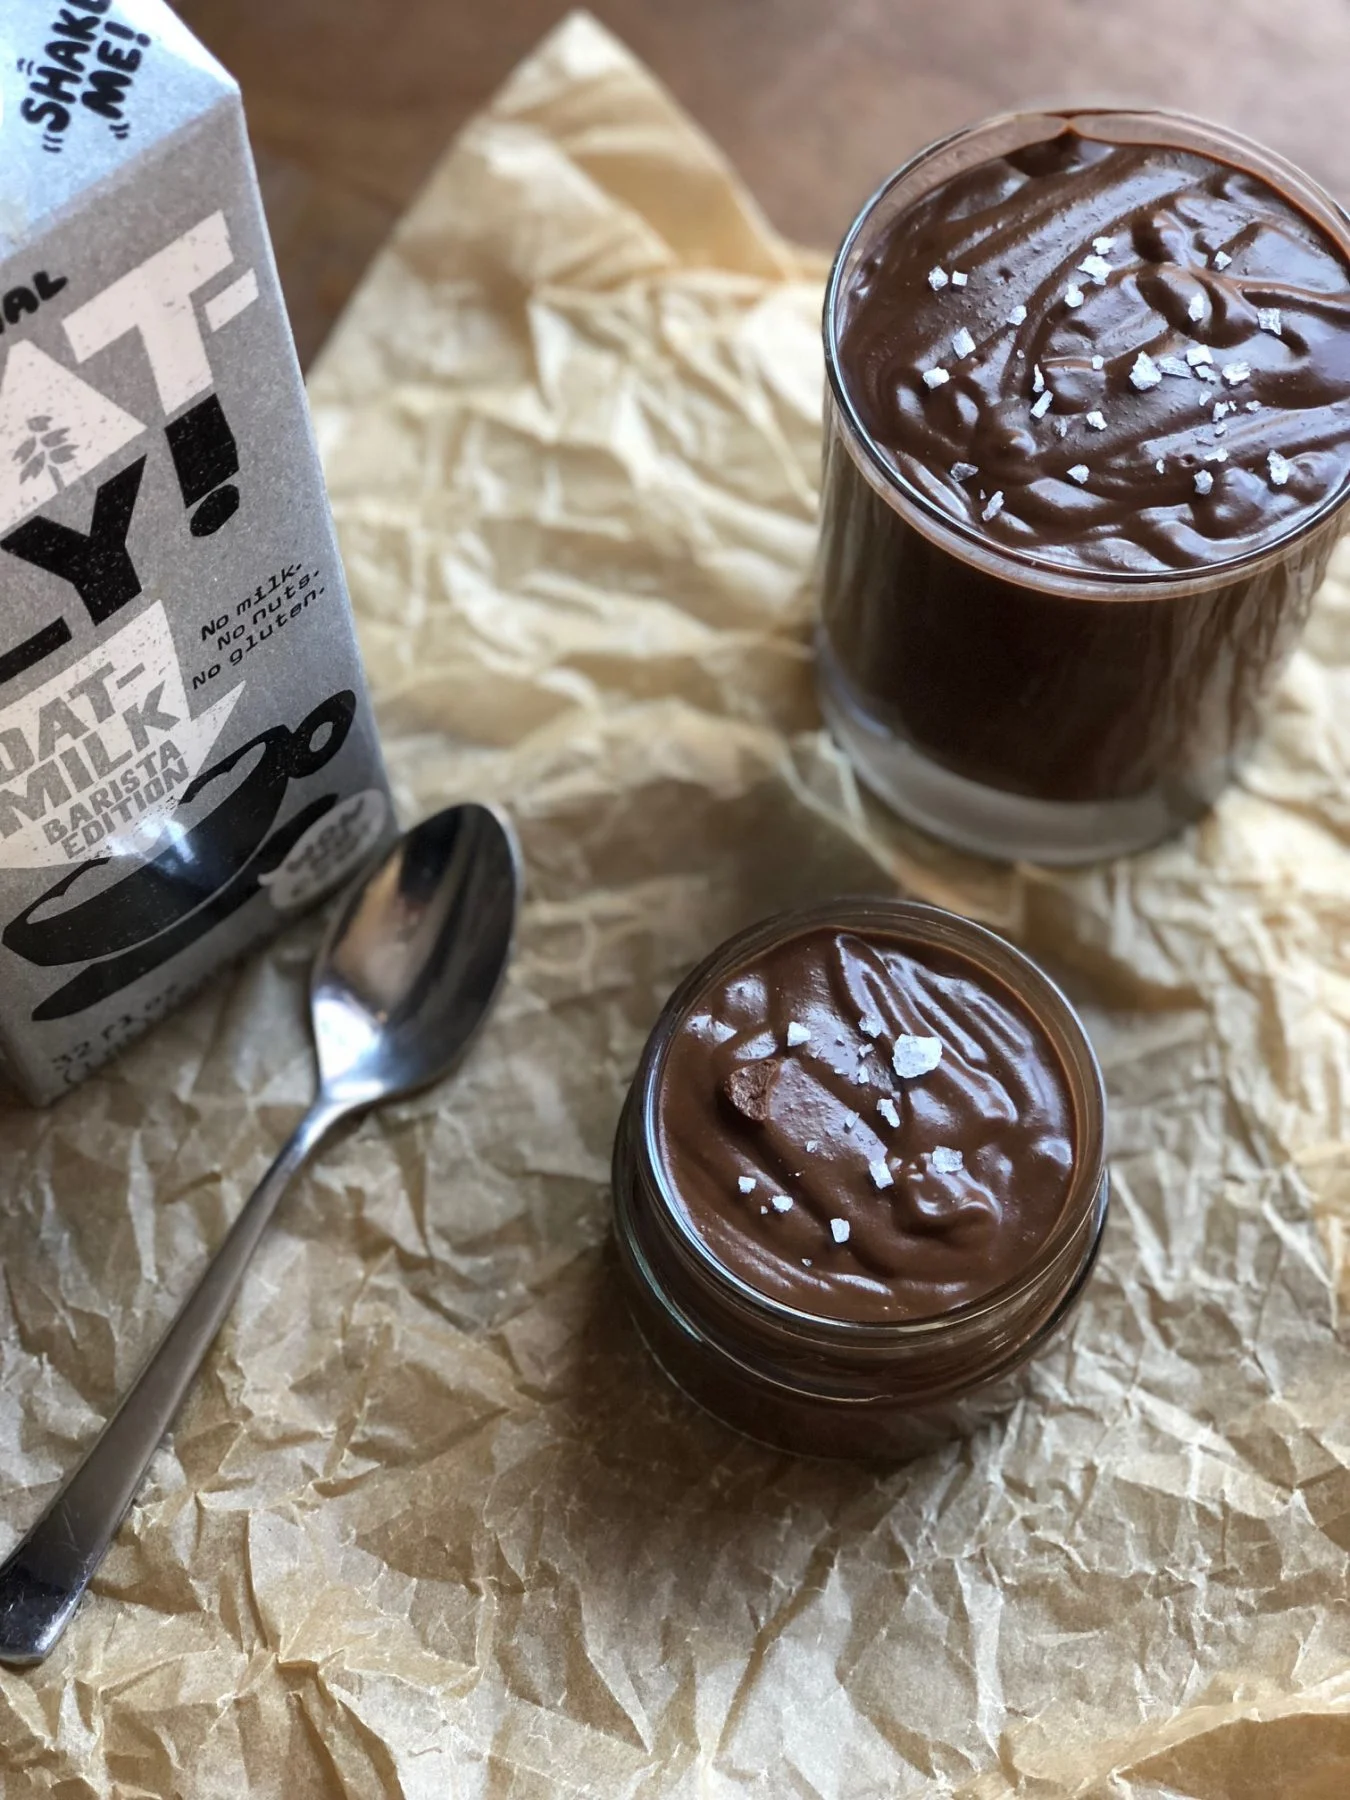
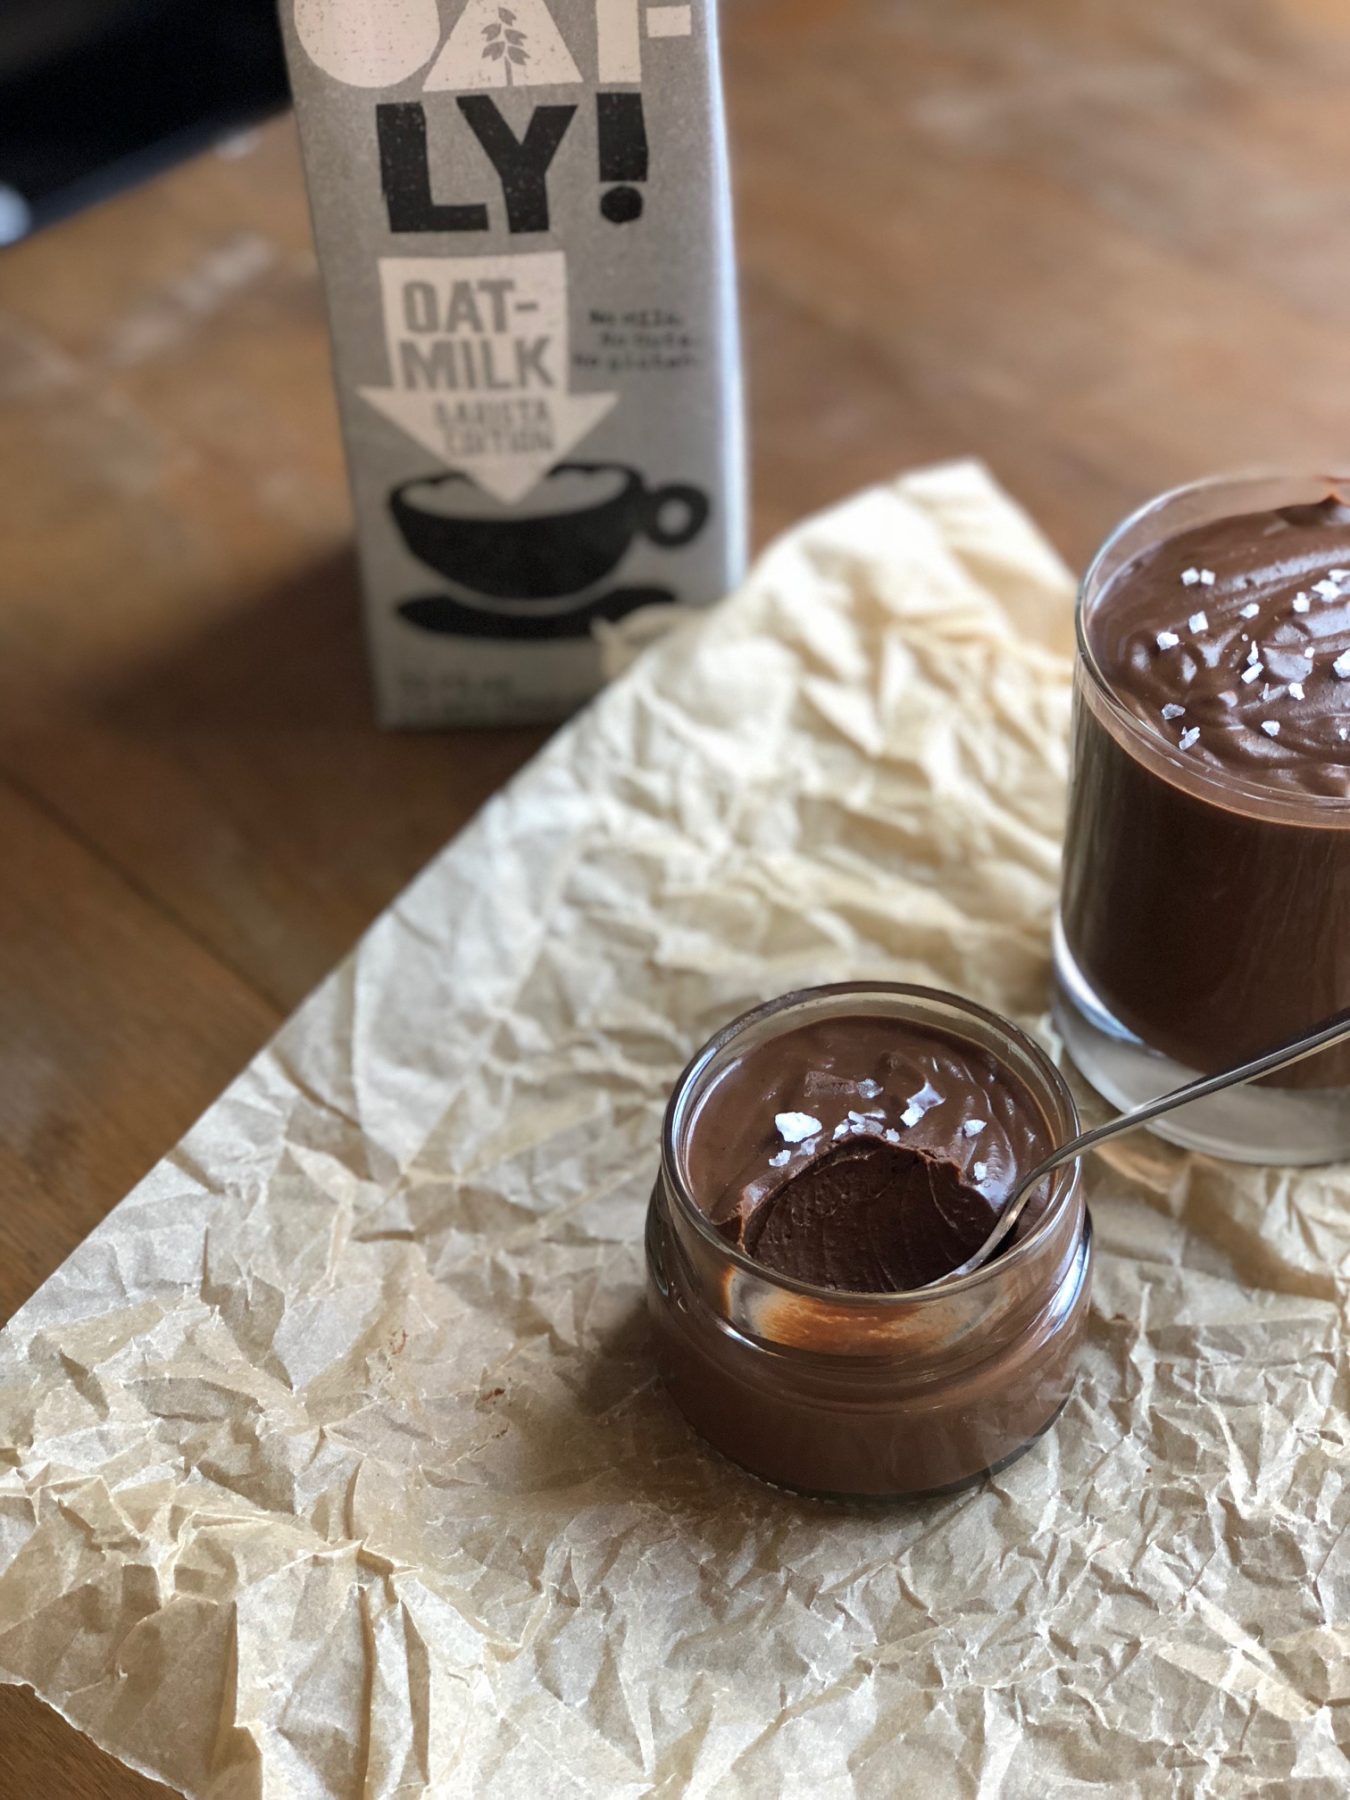
We had the opportunity recently to try a new dairy-free, milk-like drink called Oatly. Oatly is made from oats and is super creamy and delicious. We’ve especially fallen in love with their Barista Edition. Not only does it foam up perfectly for coffee drinks, but it’ great for dessert and baking. Plus, it has no funky ingredeints. We’re on board!
This milk gave our pudding the perfect creamy flavor and a smooth, thick texture that we want in any chocolate-loaded dessert. It has seriously made us rethink ever using regular cream in our pudding again. Check out the other cool dairy-free foods Oatly makes here. You’re about to fall in love.
Disclosure: We were not compensated for this post. We were however provided with free Oatly product to make this recipe. To be honest, we really just love this stuff!
Print
5 Stars 4 Stars 3 Stars 2 Stars 1 Star
5 from 2 reviews
Yield:0 About 5 small servings 1x
1 cup Oatly Oat Drink Barista Edition
1 tablespoon Instant espresso powder
1 1/4 cups vegan dark or semisweet chocolate (chopped)
1/2 of a large avocado
2 tablespoons tahini
a pinch of sea salt (plus more for garnish)
Instructions
Place chopped chocolate in a bowl and set aside.
In a small saucepan, bring espresso powder and Oatly milk to a simmer.
Pour over chopped chocolate and let sit for 30 seconds. Then whisk until chocolate begins to melt.
In a blender or food processor, combine chocolate-oat milk mixture, avocado, tahini and salt. Blend until smooth.
Pour into a container or jars you will serve in. Allow to chill in the fridge for 1 hour or more.
Before serving, top with flakes of sea salt.
Notes
This vegan pudding is so rich and decadent. Plan on serving small portions. While it can be enjoyed right out of the fridge, we like to sit it out on the counter for 30 minutes or so and allow it to come to room temperature.
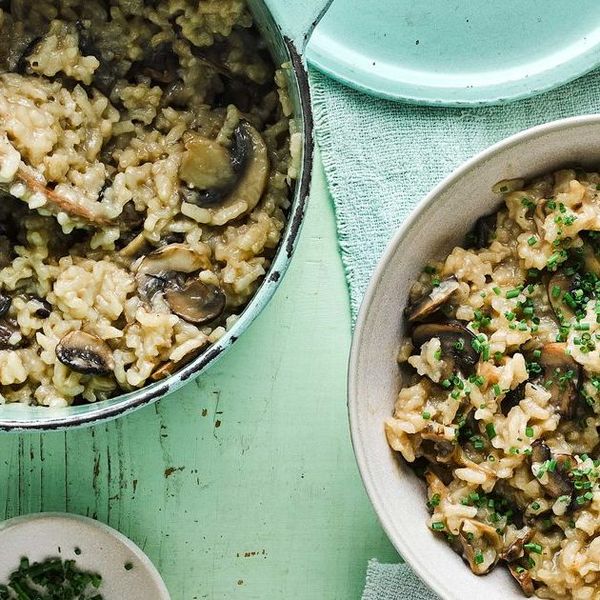
Put the dried mushrooms and stock in a saucepan over a high heat and bring to a boil, then lower the heat and keep warm while you start the risotto.
step 2
Heat 2 tbsp vegan butter and oil in a wide, shallow pan over a medium heat, and fry the shallot for 6-8 mins or until tender. Stir in the garlic for a minute, then add the chestnut mushrooms. Strain the rehydrated mushrooms from the stock with a slotted spoon and add those, too. Fry for 8-10 mins or until tender and golden. Stir in the rice and coat in the vegan butter and oil. Add the wine and simmer for 2 mins to reduce.
step 3
Add the stock a ladleful at a time, stirring regularly until absorbed before adding the next ladle. Keep adding and stirring for 20-25 mins until most of the stock has been absorbed (leave the last bit of stock in the pan as this will hold any grit from the dried mushrooms) and the rice is tender.
step 4
Remove from the heat, stir the remaining 2 tbsp vegan butter and the herbs into the risotto, then rest, covered, for 5 mins before serving.

/604cbd45-5e85-4f57-bc05-f3a9ea5d79b1--2021-0316_vegan-meringue_3x2_linda-xiao_379.jpg)


/54e57815-6e78-4bbe-aa00-6452b13e51e6--DSC07518.jpg)