
by Kathy Patalsky · updated: · published: · About 5 minutes to read this article. Leave a Comment

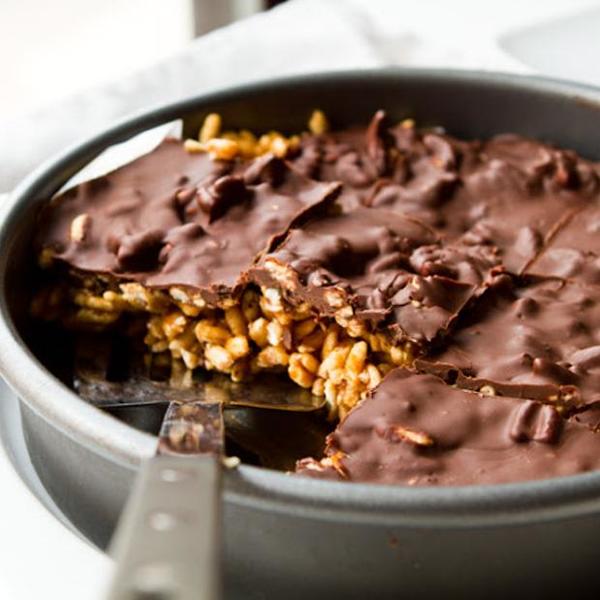
Yesterday, while strolling through DC’s Eastern Market, I spotted some beautiful peanut butter chocolate crispy bars at a coffee shop. They weren’t vegan. But the craving stuck with me. So I veganized the classic confection and enjoyed my own homemade peanut butter bliss. Try these easy vegan Peanut Butter Chocolate Crispy Bars…


This weekend was a hot one. Humid, upper ninety degree weather mixed with random thunderstorms and sudden gushing downpours. Most of the time it feels like you are strolling around in a steam shower. Swimming is a better word. Thick heavy air, wet and soggy. It’s enough to make even the most enthusiastic outdoorsy person retreat with a grumpy huff to a nice air conditioned building. Ah, August in DC. Not my favorite month in our nations capital.
But summer is also a time for exploration. Vacation. Even in your own backyard. My husband and I are always thinking of weekend ‘adventures’ to have here in DC to fight our “we miss NYC” fatigue. I love DC, don’t get me wrong, but the energy level can certainly be less vibrant than New York – which can be nice at times as well.
Yesterday, for our adventure, we took the Metro out to Eastern Market. I have been meaning to go for the past .. 5 years or so .. and so finally it happened. Eastern Market, completed in 1873, was designed by a German-born immigrant named Adolf Cluss. In 2007 it was victim of a horrible fire – but in the past few years has gotten back on its feet quite well. This public market carries goods of all sorts in various indoor and outdoor venues.
Market. You step off the Metro and walk a few blocks to the central market area. The US Capitol building right in view. It was hot, sticky, the crammed vendors looked not so cheerful to be sitting out in almost triple digit heat. But still, plenty of DC-ers scurried around the market buying art, produce, bohemian-style clothing, sparkly handmade jewelery, some clever crafts and some furniture. Compared the the outdoor and indoor markets in NYC (Essex, Eataly, Union Square Farmer’s Market, Brooklyn Markets), I was pretty underwhelmed. However, I was glad we went – and I did manage to pick up some gorgeous summer tomatoes, peaches and peppers..

As we were leaving, I managed to get stung by something – on my foot. Or maybe it was a painful heat blister, not sure. But it hurt! So we wandered into a little espresso cafe and picked up two soy iced lattes. I didn’t realize how overheated I was until I gulped down that chilled icy coffee.
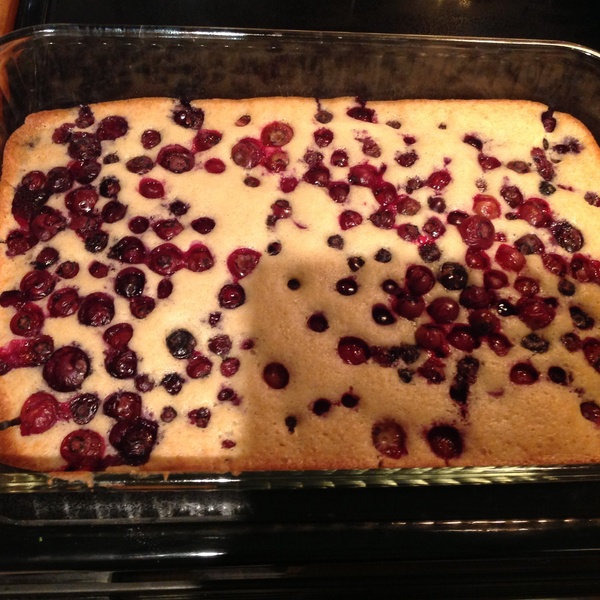
Out of the corner of my eye I spotted a display of confections. Brownies, cookies and then these gorgeous peanut butter chocolate rice bars wrapped in shiny cellophane. Not vegan. So I went home and made some veganized bars of my own. Perfect cool “icebox dessert bar” for a warm summer day.
This recipe is quite easy. You can whip these bars up in under twenty minutes and not even have to turn on the oven. You can soften the vegan butter and peanut butter in the microwave and melt the chocolate on your stove top with a double broiler. Then chill for at least an hour – I put my bars in the freezer to speed things along. And serve!
Recipe Notes: My initial concept for this recipe included melting in 2 cups of vegan marshmallows instead of the maple syrup. This would make a “stickier” bar. But actually the flavor of these bars were fabulous. I would imagine that adding a tad more vegan butter would make them stick together better. Or another way to solidify them is to put a chocolate layer on both the bottom and the top – creating a choco pb bar sandwich. But either way (well solidified or not), they were yu-mmy…
And also, I used “puffed” cereal which made my bars more tender rather than “crispy” – if you want a crispier/crunchier bar, use crispy rice rather than thick puffed grains.

Easy Peanut Butter Bars
makes about 16 2″ bars
3 cups puffed rice cereal (use crispy rice cereal for crispier bars)
2 cups puffed kamut cereal
¾ cup maple syrup, grade B
1 cup vegan butter, softened
1 teaspoon vanilla extract
1 cup creamy peanut butter, softened
1 cup vegan dark chocolate chips
1 teaspoon veg oil
¼ teaspoon sea salt
Directions:
1. Combine the maple syrup, peanut butter, vanilla and softened butter in a large mixing bowl. You want to have a thin liquid mixture.
2. Melt the chocolate chips – with the oil and sea salt – on your stovetop – or very carefully in your microwave.
3. Add your rice and kamut crisps to your butter/maple mixture. Fold until all the crisps are coated.
4. Pour your crisps into a wax-paper lined dish. Flatten with a spoon.
5. Drizzle the melted chocolate over top. Note: You can also double the chocolate amount and do a top and bottom later of chocolate. Or you can even fold the chocolate right into the crispies to create true peanut butter chocolate crispy bars.
6. Chill in the freezer until hardened. Store in the fridge.


 Hello everyone! Before we start today’s post on our delicious Vegan Pizza Margherita, we just want to let you know that our cat Richard Parker sends his heartfelt appreciation to each and every one of you for your great response to the post he authored last week. However, Richard feels like he just isn’t that interested in Food Blogging (neither does he care for vegan pizza recipes), and thus he has decided to retire from the food blogging scene. Three cheers for Richard Parker, you will be missed!!!!!!
 Anyway…. before moving on to our vegan pizza recipe, I’m just wondering… Has anyone ever come across PIZZA CAT? Pizza cat is adorable. Pizza cat is amazing. Pizza cat is CAT MIXED WITH PIZZA.


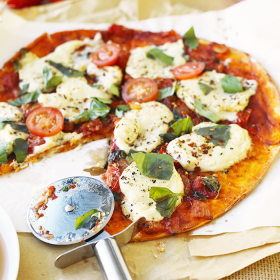
 After looking at thousands of photos of Pizza Cat, I decided that it was time I cooked up a delicious Vegan Pizza Margherita for this humble blog of ours. I mean, who doesn’t like Vegan Pizza? Even bad vegan pizza is good vegan pizza. Okay, maybe not, that’s stretching it! But, anyways, our simple, homemade pizza was so good that even Little Tommy couldn’t lay his filthy hands off it! See, that’s how good this Vegan Pizza Margherita recipe is. Sadly, Tommy is now in jail. Scumbag thief that he is.
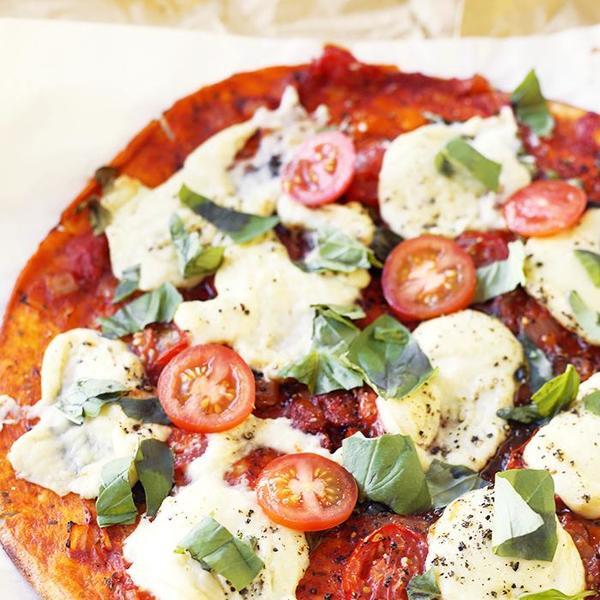
 We bought a crispy vegan Pizza Base from an Italian Deli at the South Melbourne Market, then topped it off with Homemade Tomato Sauce and Homemade Vegan Mozzarella. Feel free to make your own base if you want, but it’s Humpday and we don’t have time for that. Plus, anything made in an Italian Deli is sure to be better than anything I could make at home. All this being said, I’m sure some of you might be thinking… Vegan pizza? YUCK! Rabbit food much? Well, I’m here to tell you that you’re completely wrong and NOT YUCK! I promise you this vegan pizza recipe is just as tasty as any non-vegan pizza you may have had. In fact, you can hardly even tell it’s Vegan (whatever that means).
 The delicious Vegan Mozarella or “Moxeralla” as it’s known online was a recipe I found on Vedged Out and adapted to my taste. And oh my, was it amazing. It’s made from a teeny portion of cashews, water, nutritional yeast, salt, apple cider vinegar and the key ingredient: tapioca starch. Once everything is cooked together, you end up with a super nice, stretchy, gooey, delicious ball of cheese which could replace normal Mozzarella in almost all uses. Plus, Moxarella is SO much healthier for you than normal cheese – it doesn’t have the copious amounts of fat and grease than dairy cheese has and it is so cheap and simple to make. You need to try making this asap! Thr