Author: PatagoniaLlami

  • Vegan Gyoza

    Vegan Gyoza

    recipe image

    Updated: | First Posted: | Marc Matsumoto | 37 Comments

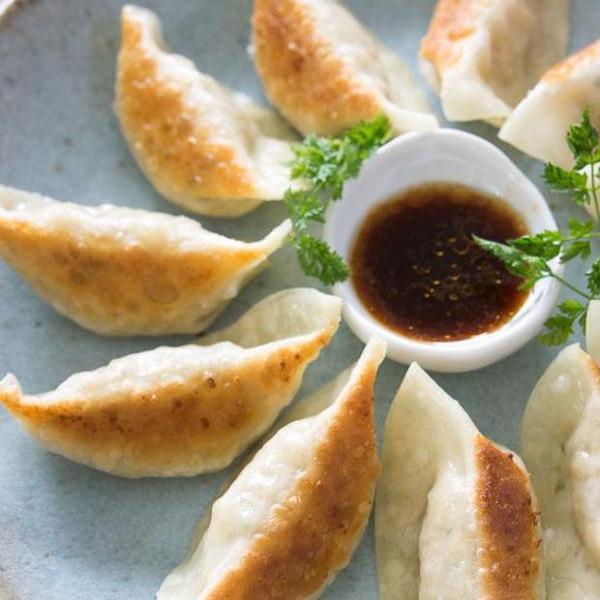
    These authentic meatless gyoza(餃子) are so full of flavor that they can be enjoyed by vegans, vegetarians, and carnivores alike.

    Recipe

    Gyoza(餃子) is the Japanese version of the Chinese dumpling Jiaozi(饺子). Better known as “potstickers” in the US, they’re delightful little dumplings made with garlicky meat and vegetables, wrapped in a thin noodle-like wrapper with pleated edges. I created this meatless version for a vegan client, but they turned out so well, I may never use pork in my gyoza again!

    That’s because these Japanese potstickers are perfectly suited to going meatless, thanks to a filling that is brimming with the pungent flavors of garlic, ginger, and sesame oil. Add in some umami enhancers like powdered shiitake mushroom and soy sauce, and these dumplings couldn’t possibly be accused of being bland, even by the most ardent carnivore. In this dish, the challenge wasn’t in the flavor department, but in the texture. For this, I enlisted the help of my recent go to for vegetarian ground meat, paired with some quinoa.

    By freezing the tofu and defrosting it, it takes on a crumbly spongy texture that’s close to ground meat. While it lacks the firmness of cooked ground meat, the quinoa fills in with its toothsome texture. The quinoa not only lends a meaty firmness, it adds a ton of protein, fiber, vitamins and minerals, and if you use red quinoa it even has the color of meat.

    I know a lot of people are intimidated by the thought of folding these dumplings, but it’s not hard, and after you’ve done a few dozen, you’ll get pretty fast. In case you’re wondering if you can skip the pleating and just fold them in half, the pleats actually serve a purpose beyond their decorative value. When you cook the gyoza, they need to sit in the pan with the folded edge facing up. If you merely fold the dumpling in half, they won’t have a flat side. By pleating the seam, you create a convex side and concave side, with a crescent shaped flat surface on the bottom. This allows the gyoza to sit neatly in the pan without falling over.

    Steaming the gyoza results in an al dente noodle-like wrapper, while deep-frying creates a crisp wrapper. But why settle for one when you can have both by steaming AND frying. The process is simple, just start off frying them until they take on a bit of color, add some water and steam then till the top is done, then let the remaining water evaporate until the bottoms crisp up golden brown. With a crisp base and tender top, you get the best of both worlds in every bite. And if you’re a fan of crisp, golden crust, try my method for Winged Gyoza.

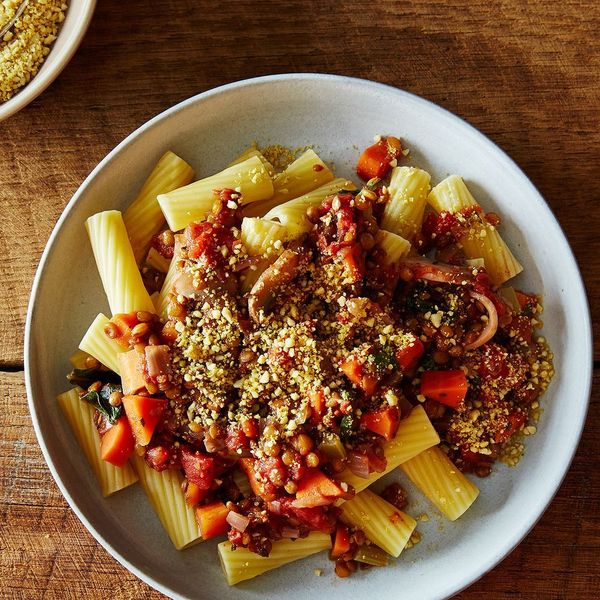
    These gyoza also make a fantastically comforting soup. My Gyoza Soup recipe isn’t vegan, but you can just substitute the dashi stock for veggie broth and use vegan gyoza and you’re set.

    Be sure to check out my Gyoza Dipping Sauce post for a trio of tasty dumpling sauces that range from traditional to bold and spicy.

    📖 Recipe

    Vegan Tofu Gyoza

    Print
    Pin

    Prep Time 40 minutes

    Cook Time 10 minutes

    Total Time 50 minutes

    Yield 40 gyoza

    Units

    Ingredients 

    • 400 grams firm tofu (frozen, thawed, washed)
    • ½ cup quinoa
    • 200 grams cabbage
    • 4 scallions (minced)
    • 7 grams garlic (grated)
    • 2.5 centimeters fresh ginger (about 1 tablespoon)
    • 2 tablespoons toasted sesame oil
    • 1 tablespoons soy sauce
    • 1 tablespoon sake
    • 1 tablespoon potato starch
    • 1 teaspoon salt
    • ¼ teaspoon white pepper
    • 2 dried shiitake mushrooms
    • 40 gyoza wrappers (a.k.a. potsticker wrappers)
    • vegetable oil (for frying)
    • 2 tablespoons soy sauce
    • 2 tablespoons rice vinegar
    • chili oil (optional)

    Instructions

    • Freeze the tofu overnight. Defrost, thoroughly wash and squeeze as much water out of the tofu as you can. See my post on “vegetarian ground meat” for more detailed instructions.

    • Wash the quinoa and cook it in 1 cup of water. Add it to the bowl with the tofu when cooked.

    • Boil the cabbage until it’s not crisp anymore, but not until it’s fully soft (about 1-2 minutes). Drain it and run under cold water so it’s cool enough to handle. Shake out of the excess water but do not squeeze. Mince the cabbage and add it to the bowl with the tofu and quinoa.

    • Add the scallions, garlic, ginger, sesame oil, soy sauce, sake, potato starch, salt and white pepper to the bowl. Use a Microplane to grate the dried shiitake into a powder and add it to the bowl.

    • Put on a food-safe glove and mix the filling with your hand, using a kneading action to coax the crumbly mixture to come together. It will never stick together like a meat-based filling, but it should hold its shape when scooped together with a spoon.

    • If you’re right handed, place 1 wrapper in the palm of your left hand, then place a spoonful of filling into the center of the wrapper.

    • Dip the fingers of your right hand in a bowl of water, and wet the entire rim of the wrapper. This is what seals the pleats into place.

    • Continue holding the dumpling in your left hand and fold the wrapper in half but don’t seal the edges yet.

    • Pinch the left edge shut and hold it shut with your left thumb and forefinger.

    • Fold a pleat with your right thumb and forefinger.

    • Pinch the pleat shut with your left thumb and forefinger. While using the fingers on your right hand to keep the filling from squeezing out.

    • Continue pleating and pinching until you’ve reached the right edge. Repeat until you run out of filling or wrappers. If you’re not going to fry them right away, put the dumplings on parchment paper and leave some space between each one to keep them from sticking. You can freeze them like this and transfer them to a freezer bag after they’re frozen.

    • Add 2 tablespoons of oil to non-stick frying pan and heat over medium-high heat. Add the gyoza in rows.

    • Fry until the gyoza are just starting to turn tan on the bottom. With a lid at the ready, add ¼ cup of water to the pan and immediately cover with a lid. The oil is going to spatter quite a bit so be careful and use the lid as a shield to protect yourself.

    • Let the gyoza steam for 2 minutes. If the water runs out before the 2 minutes are up, crack open the lid and add a little bit more.

    • After steaming, remove the lid and let the remaining water burn off. Let the gyoza fry in the remaining oil until the bottoms are golden brown and crispy. Plate with the crispy side up so they don’t get soggy.

    • To make the sauce for the gyoza, combine equal parts soy sauce and rice vinegar and add chili oil to taste.

    Recipes in your inboxDon’t miss out SIGN UP!

    Read More

  • Vegan Lentil Bolognese with Cashew Parmesan

    Vegan Lentil Bolognese with Cashew Parmesan

    recipe image

    Vegan Lentil Bolognese with Cashew Parmesan

    Photo by James Ransom
    • Prep time
      20 minutes
    • Cook time
      47 minutes
    • Serves
      6
    Author Notes

    Nearly this entire meal can be made with pantry ingredients, which makes it ideal for last-minute entertaining or for a weeknight supper. There’s some simmering involved, but the recipe is simple to make, and the leftovers keep (and freeze) beautifully. The cashew Parmesan is an optional but tasty topper: Keep some handy for pasta dishes, for sprinkling on grain bowls, or even for topping roasted vegetables. —Gena Hamshaw

    • Test Kitchen-Approved
    Ingredients
    • For the vegan lentil bolognese:

    • 2 tablespoons

      olive oil, divided


    • 1 cup

      yellow or white onion, chopped


    • 1

      large rib celery, chopped


    • 2

      medium-sized carrots, chopped


    • 1 cup

      button mushrooms, cleaned and sliced


    • 3

      cloves garlic, minced


    • 1 cup

      brown or green lentils, rinsed


    • 1

      28-ounce can diced or crushed tomatoes


    • 3 tablespoons

      tomato paste


    • 1/2 cup

      red wine


    • 3/4 cup

      water


    • 1 tablespoon

      chopped fresh rosemary, or 1 teaspoon dried rosemary


    • 2 teaspoons

      fresh thyme leaves, or 1 teaspoon dried thyme


    • 2 teaspoons

      oregano, or 1 teaspoon dried oregano


    • 1 pinch

      red pepper flakes


    • 1/4 teaspoon

      salt, or to taste


    • 1/3 cup

      fresh basil leaves, chopped


    • 12 ounces

      penne or rigatoni pasta (or linguine, if you prefer)

    • For the cashew Parmesan:

    • 1 cup

      raw cashews


    • 1/4 cup

      nutritional yeast


    • 3/4 teaspoon

      salt


    • 1 teaspoon

      olive oil

    Directions
    1. For the vegan lentil bolognese:
    2. Heat 1 1/2 tablespoons of the olive oil in a large pot or Dutch oven over medium heat. Add the onion, celery, and carrots. Cook for 8 minutes, or until the onions are clear and all of the vegetables are soft.
    3. Add the mushrooms and garlic. Cook for 4 to 5 minutes, or until the mushrooms are soft and have released some liquid and the garlic is fragrant.
    4. Add the lentils, tomatoes, tomato paste, red wine, water, rosemary, thyme, and oregano to the pot, along with a dash of red pepper flakes and the salt. Stir the mixture well, and bring it to a boil. Reduce it to a simmer and cover. Cook for 30 to 35 minutes, stirring occasionally, until the lentils are cooked through but not mushy. If the mixture becomes overly thick (if it’s tough to stir and no liquid is visible at the bottom), add some water by the 1/4 cup. When the sauce is finished, stir in the fresh basil.
    5. When the sauce is fifteen minutes from being done, heat a large pot of salted water to boil. Add the pasta and cook according to package instructions. Drain the pasta and toss it with the remaining 1/2 tablespoon olive oil.
    6. Divide the pasta into six serving bowls and top with the bolognese sauce. Serve with an extra sprinkle of basil and cashew Parmesan (see below), if desired.
    1. For the cashew Parmesan:
    2. Add all the ingredients to a food processor fitted with the S blade. Pulse repeatedly, until the cashews are broken down, and then process the mixture until it’s taken on a crumbly texture (similar to the size of grated parmesan). Serve with any pasta dish.
    3. Stored in the refrigerator in an airtight container, the cashew Parmesan will keep for 2 weeks.

    Read More

  • Creamy Cashew Garlicky Sage Sauce

    Creamy Cashew Garlicky Sage Sauce

    recipe image

    Creamy Cashew Garlicky Sage Sauce

    • Serves
      8-12
    Author Notes

    Sauces transform any dish. But the creamiest, most tasty sauces are laden with fatty creams, oils and glutenous nightmares like flour or starch to thicken them. However, cashews make for an incredible base to cream sauces, be they savory or sweet, and are actually good for you. Packed with protein and good fats to keep you healthy, pour your cashew cream sauce on veggies or tofu, pastas or rice. Try it any which way and play with herbs and spice but for this easy recipe, go savory with fresh garlic and sage! —HealthyVoyager

    Ingredients

    • 1 cup

      raw cashews (soaked for at least 3 hours up to overnight), drained


    • 1 cup

      water


    • 1

      vegan chicken bullion cube


    • 1-2 tablespoons

      nutritional yeast


    • 1 tablespoon

      vegan butter or olive oil


    • 1-2

      garlic cloves, finely minced


    • 10-15

      medium to large fresh sage leaves, minced


    • Salt and pepper, to taste

    Directions
    1. Saute garlic in olive oil or butter over medium heat.
    2. Add in sage until well coated and remove from heat.
    3. In a blender, add in the cashews and 3/4 cups water, nutritional yeast and bullion cube and puree. If the sauce is thick enough, don’t add anymore water but if you want it thinner, add in the remaining water 1 tablespoon at a time until it’s the right thickness.
    4. Then add in the sauteed garlic and sage, blend and season with salt and pepper to taste.
    5. Pour over veggies, pasta, rice or meat substitute and enjoy!

    Read More

  • Smoothie bowl

    Smoothie bowl

    recipe image

    Method

    • step 1

      Put the berries, banana, oat milk, maple syrup and protein powder in a powerful blender and blend until smooth. Add a splash more milk if needed, but remember it needs to be quite thick.

    • step 2

      Spoon the smoothie into a bowl and dot over the fresh fruit, granola and mixed nuts and seeds. Drizzle over the almond butter to serve.

    Read More

  • step 1

    First, make the marzipan by mixing the almonds and sugars together. Stir in the almond extract and knead together. Add cold water, 1 tsp at a time, kneading after each addition. Stop adding water once the marzipan is smooth and firm. Shape into a rectangular block, wrap and chill.

  • step 2

    Next, make the dough. Gently warm the milk and butter in a pan until the butter has melted. Leave to cool to body temperature. In a large bowl, mix the flour, yeast, mixed spice, sugar and salt. Tip in the milk mixture and almond extract, and bring together into a rough dough. Knead on a lightly oiled surface for 8 mins or in a stand mixer for 5-6 mins until smooth and stretchy. Put in a lightly oiled bowl, cover with a damp tea towel and leave to prove for 1-2 hrs until doubled in size.

  • step 3

    Meanwhile, for the filling, gently heat the fruit, nuts, orange zest and juice and brandy or rum (if using) in a pan until the fruit absorbs the liquid. Leave to cool.

  • step 4

    Lift the dough onto a lightly oiled surface and knead in the fruit mixture for 2 mins. Roll the dough out to a 30 x 40cm rectangle. Roll the chilled marzipan out to a 20 x 30cm rectangle, then put it on top of the dough. Roll up tightly from a short edge, as you would a swiss roll. Remove any dried fruit from the surface, as this might burn. Put on a baking sheet lined with baking parchment, seam-side down. Tuck the ends under and leave to prove for 45 mins.

  • step 5

    Heat the oven to 180C/160C fan/gas 4. Bake for 50-60 mins until golden and risen. Lift onto a wire rack. Brush with melted butter and dust generously with icing sugar, then leave to cool completely. Will keep in an airtight container for five days.

Read More

  • Vegan Marshmallows

    Vegan Marshmallows

    recipe image

    I suspect that, for many of you reading this, baking for friends and loved ones is an enjoyable pastime. But as a regular giver of edible gifts, I was caught off-guard when I offered some crispy rice bars and a vegetarian friend kindly reminded me that the gelatin in marshmallows is animal-derived. Feeling a bit daft, I set the treats aside and made an immediate mental note to try my hand at a vegan version. And this is it! Now those s’mores and other marshmallow treats can be enjoyed by all with this vegan recipe.

    Forget everything you know about the regular way to make marshmallows. For vegan marshmallows, each component must be considered anew. These luxurious marshmallows fall on the firmer side, so keep that in mind if you’re comparing those that come from the store. 

    Aquafaba and Agar-Agar: Key to Vegan Marshmallows

    After many, many trial-and-error recipes, it seemed I’d hit a dead end. Nothing was quite right! Until I figured out a winning combo: aquafaba and agar-agar.

    Egg whites and gelatin in standard marshmallows are what stabilizes the meringue. In our vegan recipe, we substitute with aquafaba as an egg white alternative and agar-agar as a stand-in for the animal-derived gelatin. 

    Simply Recipes / Elana Lepkowski


    What Is Aquafaba?

    Aquafaba, which translates to “bean water”, is just that! Bean water! The cooking liquid from chickpeas can be used as a replacement for egg whites in recipes to make the dish vegan. 

    I’ve tested both methods for aquafaba: using the liquid from homemade chickpeas (just make sure you’ve cooked them in plain water as opposed to a flavorful broth, unless you’re looking to make savory marshmallows), and by using the liquid from canned, store-bought chickpeas, and both will whip up into stiff whites, no problem. If you’re having trouble finding “chickpeas” in your grocery store, they might also be listed as garbanzo beans.

    Tip

    You can freeze leftover aquafaba. I measure mine out in ice cube trays, freeze, and then pop them into freezer storage containers for pre-measured projects.

    Agar-Agar: A Vegan Gelatin

    Agar agar is derived from algae, making it suitable for vegetarians and vegans. 

    Agar-agar comes in powder, flakes, and bars. 1 teaspoon of agar-agar can be substituted for 1 teaspoon of unflavored gelatin granules with much the same effect when called for in a recipe. However, keep in mind that the strength of agar-agar is more powerful and whatever you are gelling will be firmer. 

    The powder also incorporates better into liquid compared to the other two. For this recipe I have only used the powdered form of agar-agar and would suggest you do too.

    Simply Recipes / Elana Lepkowski


    The Key to Cooking With Agar-Agar

    Agar-agar doesn’t behave like gelatin—its presence in sugar syrup will disrupt chemical reactions necessary for creating a proper marshmallow texture after they’ve set. Only by adding the simmered agar-agar to the whipped aquafaba can you create a stable structure that will combine with the hot sugar syrup, and ultimately create a marshmallow base similar to store bought or animal-derived marshmallows. 

    It might seem like a hassle to dirty an extra pan, but believe me, it’s way less of a hassle than trying to clean congealed sugar syrup from your pan and mixing bowl.

    Tips for Making Vegan Marshmallows

    Stay calm, keep your eyes on the clock, and don’t leave your stove. Oh, and here are a few more tips and tricks for making vegan marshmallows.

    • Have absolutely everything measured out and ready. Your sugar can reach 245°F rapidly or slowly depending on your stove, the weather, etc. (You don’t want to be stuck with a syrup ready to go, and the pan not dusted, or you’re missing the vanilla.)
    • Your sugar syrup will bubble up as it cooks. To avoid a very sticky mess make sure your saucepan is large enough to accommodate those big bubbles.
    • Do not bring the agar-agar to a rolling boil, as it will solidify it into a massive jelly. 3 minutes might not seem like a lot of time, but it’s enough to activate the agar-agar to make it set later, and it will still be in a state where it will pour easily into the whipped aquafaba.

    Simply Recipes / Elana Lepkowski


    • If you’re worried about an errant fruit fly getting into your marshmallow mixture while it’s setting up, keep it in someplace that is dry but closed, like a toaster oven, or the actual oven. Just make sure everyone in the house knows it’s there and doesn’t turn it on (I unplug our toaster oven so my husband doesn’t unknowingly turn it on to use it for toast early in the morning).

    Amazing Marshmallow Variations

    Marshmallows provide a blank canvas for flavors, and colors! Try a few of these combos after you’ve mastered the vanilla version.

    • Peppermint: 2 teaspoons of pure peppermint extract, and optionally, a few drops of red food coloring added at the end of combining everything together, will give you a dessert made for holiday gifting.
    • Coffee: 2 teaspoons of coffee extract. Extract, as opposed to brewed coffee, will give a more intense coffee flavor without adding too much liquid to the final product.
    • Tie-dye: Swirl multiple colors into your marshmallows by adding a drop of food coloring, one at a time, and then mixing once around the bowl. Then move the bowl around the pan as you pour into your prepared tray to create a swirled color effect.
    • You can even make mini marshmallows. Instead of an 8×8 pan, transfer the mixture to a lipped cookie sheet and spread evenly. Let set at least 4 hours and then, using a sharp knife, cut into small pieces. Roll into more powdered sugar mix and allow to continue to set up another hour before moving to an airtight container.

    Simply Recipes / Elana Lepkowski


    More Vegan Treats to Make 

    • Super Easy, Super Moist Chocolate Cupcakes
    • Vegan Chocolate Pudding
    • Vegan Chocolate Chip Cookies
    • Vegan Mint Chocolate Chip Ice Cream
    • Vegan Chocolate-Peanut Butter Pudding Cups

    This recipe yields 25 large marshmallows or 50 medium marshmallows.

    To make this a truly vegan marshmallow, don’t forget to check your sugar! Most commercial, non-organic sugars go through a filtration process that uses animal bone char. Any organic sugar does not use this process, but if you’re unsure, check the company’s website, as it will usually list whether it is vegan or not. 


    Avoid throwing leftover ingredients down the drain. As much as you can, get it in the garbage as the sticky syrup and the marshmallow mix can build up and cause clogs.


    Cook Mode
    (Keep screen awake)

    • 1/2 cup organic powdered sugar (see recipe note)

    • 1/2 cup cornstarch (or arrowroot flour)

    • 1/2 cup (120g) aquafaba, from 1 (15-ounce) can chickpeas

    • 1 1/4 cups (248g) organic granulated sugar (see recipe note)

    • 3/4 cup (250g) light corn syrup

    • 1 cup (240g) water, divided

    • 2 teaspoons powdered agar-agar

    • 2 tablespoons vanilla extract (yes, that’s 2 tablespoons)

    1. Combine the powder sugar and cornstarch:

      In a large bowl, using a whisk, gently combine powdered sugar and cornstarch.

    2. Prep the pan:

      Grease an 8×8-inch square baking pan with a small amount of oil and then lightly sift about half the powdered sugar and cornstarch mix all over the bottom and sides of the pan. Set aside. Reserve the remaining powdered sugar-cornstarch mix for dusting the cut marshmallows later on.

      Simply Recipes / Elana Lepkowski


    3. Whip the aquafaba:

      Pour the aquafaba into the bowl of a stand mixer (or deep mixing bowl if using a hand mixer) fitted with the whisk attachment. Begin to whip the aquafaba on low until it looks foamy or frothy, about 20 seconds. 

      Then increase the speed to medium-high until stiff peaks are achieved, 10 to 12 minutes (it might take longer depending on temperature, age of aquafaba, and other factors in the kitchen). Once stiff peaks are reached (which means that your whipped aquafaba should stand straight up off the beater without flopping over), turn off the mixer.

      Tip

      Unlike egg whites, there’s no danger in overwhipping aquafaba, so don’t worry about leaving the mixer running too long.

      Simply Recipes / Elana Lepkowski


      Simply Recipes / Elana Lepkowski


    4. Cook the syrup: 

      First measure out ingredients for syrup. In a medium saucepan add the granulated sugar, corn syrup, and 1/4 cup of the water. Whisk together until it looks like wet sand.

      Using a pastry brush dipped in water, gently sweep any sugar crystals back into the pan (this will help keep the syrup from crystalizing). Attach a candy thermometer to the side of the pan, careful not to touch the bottom, and place over medium-high heat. Let the mixture come to a boil without stirring. You’ll want the syrup mixture to reach 285°F (soft crack), which may take around 10 minutes (this time can vary a lot—keep a close eye on the thermometer). 

      As soon as the syrup reaches 285°F, lower your heat as low as it will go and let the mixture sit on low until ready to use.

      Simply Recipes / Elana Lepkowski


      Simply Recipes / Elana Lepkowski


    5. Cook the agar-agar mixture:

      In a small saucepan, mix the agar-agar and the remaining 3/4 cup water. Turn the heat on medium-low until the mixture begins to simmer, whisking constantly. Cook until small bubbles form around the edges (watch the heat; if the agar-agar starts to boil, it will congeal). 

      Let it simmer for 3 to 5 minutes, until the mixture thickens slightly and coats the back of a spoon. Remove it from the heat, whisking a final time.

      Simply Recipes / Elana Lepkowski


      Simply Recipes / Elana Lepkowski


    6. Add the agar-agar into the whipped aquafaba:

      Remove the bowl from the mixer. Using a rubber spatula, gently fold in the agar agar mixture into the whipped aquafaba until just combined, (a few small lumps are okay). You’re doing this by hand so the agar mixture does not splash way up on the sides of the bowl the way it would if the mixer were running.

    7. Add the hot syrup into the aquafaba and agar-agar mixture:

      Return the bowl and the whip attachment to the mixer. With the mixer on low speed, slowly pour the hot syrup (watch your hands!) into the bowl. 

      You may have to turn it on and off a few times if it expands too much. Once all the syrup is in the bowl, turn the mixer on high. It’s normal for the mixture to deflate at this point. 

      Mix on high until the bottom of the bowl is no longer hot to the touch and the mixture is glossy, about 10 minutes. Towards the end of the 10 minute mark, pour in the vanilla extract and continue to whip.

      Tip

      Two tablespoons of vanilla may seem like a lot, but it’s what gives these marshmallows their irresistible flavor.

    8. Pour the marshmallows into the pan:

      Pour the slightly cooled marshmallow mixture into the prepared pan, smoothing the top with a rubber spatula.

      Simply Recipes / Elana Lepkowski


    9. Allow the marshmallows to sit:

      Allow the marshmallows to sit, uncovered, for 4 to 6 hours, depending on how thick your mixture is, and how dry the environment is. You can test for doneness by nudging the area between the pan and the marshmallow with a spatula or butter knife. If it moves without sticking to the pan, it’s dry.

    10. Cut the marshmallows:

      Sprinkle the top of the marshmallows with the reserved powdered sugar and cornstarch mix (if yours has clumped together, gently stir with a whisk to re-mix). Sift more of the powdered sugar-cornstarch mixture onto a cutting board, then turn the marshmallow from the pan onto the board. Cut to the desired size with a sharp knife, then toss the marshmallows in a bowl with more of the powdered sugar mix.

      Simply Recipes / Elana Lepkowski


      Simply Recipes / Elana Lepkowski


      Simply Recipes / Elana Lepkowski


      Simply Recipes / Elana Lepkowski


    11. Serve and store:

      Transfer to an airtight container and keep at room temperature up to 1 week. 

      Enjoyed the marshmallows as a sweet snack, use to top your hot chocolate, or make s’mores.     

      Did you love the recipe? Leave us some stars below!

      Simply Recipes / Elana Lepkowski


    Nutrition Facts (per serving)
    188 Calories
    0g Fat
    47g Carbs
    0g Protein

    ×

    Nutrition Facts
    Servings: 12
    Amount per serving
    Calories 188
    % Daily Value*
    0g 0%
    Saturated Fat 0g 0%
    0mg 0%
    23mg 1%
    47g 17%
    Dietary Fiber 0g 1%
    Total Sugars 42g
    0g
    Vitamin C 0mg 0%
    Calcium 6mg 0%
    Iron 0mg 0%
    Potassium 9mg 0%
    *The % Daily Value (DV) tells you how much a nutrient in a food serving contributes to a daily diet. 2,000 calories a day is used for general nutrition advice.

    Nutrition information is calculated using an ingredient database and should be considered an estimate. In cases where multiple ingredient alternatives are given, the first listed is calculated for nutrition. Garnishes and optional ingredients are not included.

    Read More

  • Vegan Black Bean Burgers

    Vegan Black Bean Burgers

    recipe image

    These easy vegan black bean burgers have a healthy dose of fiber thanks to the combination of black beans and quinoa. Cumin and chipotle chile powder give these vegan burgers a Southwestern spin. Using your hands to combine the mixture creates a soft, uniform texture.

    Updated on April 19, 2024


    Cook Mode
    (Keep screen awake)

    Ingredients

    • 1 (15.5 ounce) can no-salt-added black beans, rinsed

    • 1 cup cooked quinoa

    • ½ cup whole-wheat panko breadcrumbs

    • ½ cup chopped scallions

    • 1 tablespoon no-salt-added tomato paste

    • 1 ½ teaspoons ground cumin

    • ½ teaspoon chipotle chile powder

    • ½ teaspoon garlic powder

    • ½ cup vegan mayonnaise, divided

    • ½ teaspoon salt, divided

    • 1 medium avocado

    • 2 tablespoons lime juice

    • 2 tablespoons chopped fresh cilantro

    • 2 tablespoons water

    • 2 tablespoons extra-virgin olive oil

    • 6 small whole-wheat hamburger buns, toasted

    • 6 thin slices tomato

    Directions

    1. Place beans, quinoa, panko, scallions, tomato paste, cumin, chile powder, garlic powder, 1/4 cup mayonnaise and 1/4 teaspoon salt in a large bowl; mash the mixture together with your hands. Shape into six 3/4-inch-thick patties. Arrange the patties on a plate; refrigerate for 10 minutes.

    2. Combine avocado, lime juice, cilantro, water and the remaining 1/4 cup mayonnaise and 1/4 teaspoon salt in a food processor; process until smooth, about 30 seconds.

    3. Heat oil in a large cast-iron skillet over medium-high heat. Add the patties; cook until golden brown, 3 to 4 minutes per side.

    4. Divide the avocado mixture evenly among top and bottom bun halves. Arrange the bean patties and tomato slices evenly on the bottom bun halves; replace the top bun halves.

    Tips

    To make ahead: Wrap the patties (Step 1) and refrigerate for up to 2 days.

    Originally appeared: EatingWell.com, February 2020

    Nutrition Facts (per serving)

    452 Calories
    26g Fat
    47g Carbs
    11g Protein
    Nutrition Facts
    Servings Per Recipe
    6
    Serving Size
    1 burger
    Calories
    452
    % Daily Value *
    Total Carbohydrate
    47g
    17%
    Dietary Fiber
    10g
    37%
    Total Sugars
    5g
    Added Sugars
    3g
    5%
    Protein
    11g
    21%
    Total Fat
    26g
    34%
    Saturated Fat
    3g
    16%
    Vitamin A
    223IU
    4%
    Vitamin C
    7mg
    8%
    Folate
    60mcg
    15%
    Sodium
    549mg
    24%
    Calcium
    98mg
    8%
    Iron
    3mg
    19%
    Magnesium
    102mg
    24%
    Potassium
    544mg
    12%

    Nutrition information is calculated by a registered dietitian using an ingredient database but should be considered an estimate.

    * Daily Values (DVs) are the recommended amounts of nutrients to consume each day. Percent Daily Value (%DV) found on nutrition labels tells you how much a serving of a particular food or recipe contributes to each of those total recommended amounts. Per the Food and Drug Administration (FDA), the daily value is based on a standard 2,000 calorie diet. Depending on your calorie needs or if you have a health condition, you may need more or less of particular nutrients. (For example, it’s recommended that people following a heart-healthy diet eat less sodium on a daily basis compared to those following a standard diet.)

    (-) Information is not currently available for this nutrient. If you are following a special diet for medical reasons, be sure to consult with your primary care provider or a registered dietitian to better understand your personal nutrition needs.

    Read More

  • Homemade Coffee Liqueur

    Homemade Coffee Liqueur

    recipe image

    The eye-opening aroma of coffee is not exclusively reserved for mornings. Coffee liqueur can be enjoyed on its own as a simple and stimulating after-dinner drink or added to a cocktail to provide a robust earthy flavor.

    If you just like to make your own boozy concoctions or if you’re vegan this is the recipe for you. Many of the most popular on-the-shelf coffee liqueurs, such as Kahlua, use a bone char filtration process for their sugar that makes them unsuitable for people following a vegan diet.

    You can make your own coffee liqueur right at home! With a little time and planning, making it only requires standing over a stove for a few minutes, transferring the liquid to a jar and gently shaking the jar every few days, for a few weeks. That’s it!

    Then, from the fruits of your labor, you’ll be prepared to make a Vegan White Russian whenever you’d like.

    Elana Lepkowski

    What Is Coffee Liqueur?

    A liqueur is a sweetened liquor that has added sugars and additional flavorings. Here, coffee beans are steeped in aged rum and then combined with a simple syrup and vanilla extract.

     Ingredients and What Makes It Vegan

    This vegan coffee liqueur is made with aged rum, arabica coffee beans, vegan dark brown sugar, water, and vanilla extract.

    The specific type of sugar being used in this recipe is what makes this version of coffee liqueur vegan—all other ingredients listed also have no animal by-products. But wait! Sugar isn’t vegan?

    Not necessarily; many sugars go through a filtration system of bone char, making them unsuitable for a vegan diet, which a lot of the time includes the sugars used in most store-bought coffee liqueurs. Bone char filtration is made, literally, from charred animal bones, and has been in use since the 19th century for sugar refining.

    However, vegan sugar isn’t an unattainable ingredient—in fact, you might have some on your shelf right now and not even know it. A quick Google search will confirm whether your brand is vegan or not, and, if it’s organic sugar, then it’s highly likely that it’s vegan as well.

    Vanilla extract is also used in this recipe instead of vanilla beans because it’s easier to control the flavoring and you’ll get more consistent vanilla flavor upon subsequent batches. Start with the minimum amount of extract in the recipe below and if you desire more, do so in 1/4 teaspoon increments.

    When making the simple syrup, you don’t want it to be too rich or viscous when mixing it into cocktails. Remember, you’re making a liqueur, not a syrup! A one-to-one ratio for the syrup gives the final product a nice mouthfeel without being too heavy.

    How Do You Use It?

    Coffee liqueur is predominantly used in White Russians. A White Russian can easily be made vegan by substituting the cream in the recipe with coconut cream or an alternative dairy product that has a similar viscosity.

    Many grocery stores have “barista” alternative milks that blend and whip up like cream, that might be a great alternative here. Coffee liqueur can also be enjoyed over ice as an after-dinner drink or digestif. But don’t stop there!

    Try it in an Espresso Martini, in a Negroni by replacing the sweet vermouth or alongside some bourbon in an Old Fashioned cocktail—the coffee will introduce bold vanilla and caramel notes that make for an exciting drink.

    Elana Lepkowski

    Tips and Tricks for Making Homemade Coffee Liqueur

    Don’t want to forget about your coffee liqueur as it sits out of sight in the pantry? Set a calendar reminder! This is the most effective way to remember projects that are brewing (especially if you’re like me, and possibly have several going at once).

    You’ll also want to be careful with how you strain the beans from the rum. Think of straining this mixture much like you would a regular coffee—with a coffee filter!

    You can also use a nut milk bag, which is my preferred method, or very fine cheese cloth that has been folded over a few times and used in conjunction with a mesh strainer. If you notice any beans floating in your strained rum, filter it again—no one wants to get a coffee bean in their mouth when drinking a cocktail!

    Variations, Swaps or Substitutions

    Dark brown sugar is used in the recipe as it gives the coffee rich caramel flavor with a hint of earthiness and just the right amount of sweetness.

    Light brown sugar can also be used though the result has a softer caramel flavor. Granulated sugar is also an option if you cannot have molasses, but the resulting liqueur will be sweeter and may need an additional 1/2 teaspoon of vanilla.

    Elana Lepkowski

    Storage

    I store all of my homemade liqueurs and infusions in the refrigerator for a prolonged shelf life. This Coffee Liqueur can be stored for up to 1 year refrigerated in an airtight container.

    More Perfect Coffee Recipes

    • How To Make Cold Brew Coffee
    • Coconut White Russian
    • White Russian Cocktail

    Please note that the liqueur requires three weeks of steeping time before using.


    Cook Mode
    (Keep screen awake)

    • 1 1/2 cups Arabica coffee beans, coarsely ground

    • 2 cups aged rum

    • 1 cup vegan dark brown sugar

    • 1 cup water

    • 1/2 teaspoon vanilla extract

    1. Place ground coffee and rum in container and shake:

      Combine ground arabica coffee beans and rum in an airtight container with a tight seal, a large mason jar works perfectly.

      Shake gently and store in a cool, dark place for three weeks, gently shaking the jar every few days.

      Elana Lepkowski
    2. Strain coffee liqueur:

      After the infusion is ready, strain the mixture using a nut milk bag or coffee filter, squeezing the bag or filter to extract all of the liquid. Discard coffee beans and set aside.

    3. Make simple syrup:

      Combine the brown sugar and water in a small saucepan over medium-high heat, whisking constantly to dissolve the sugar. Once the sugar is dissolved and it barely reaches a boil, turn off the heat, and set aside to cool slightly.

    4. Finish coffee liqueur and store:

      Whisk the vanilla extract into the brown sugar simple syrup. Pour the coffee-infused rum into the simple syrup and stir to combine. Pour liqueur into a clean airtight container like a swing-top bottle. Seal and refrigerate until ready to use.

      Did you love the recipe? Give us some stars and leave a comment below! 

    Nutrition Facts (per serving)
    87 Calories
    0g Fat
    11g Carbs
    1g Protein

    ×

    Nutrition Facts
    Servings: 20
    Amount per serving
    Calories 87
    % Daily Value*
    0g 0%
    Saturated Fat 0g 0%
    0mg 0%
    4mg 0%
    11g 4%
    Dietary Fiber 1g 2%
    Total Sugars 9g
    1g
    Vitamin C 0mg 1%
    Calcium 12mg 1%
    Iron 0mg 2%
    Potassium 63mg 1%
    *The % Daily Value (DV) tells you how much a nutrient in a food serving contributes to a daily diet. 2,000 calories a day is used for general nutrition advice.

    Nutrition information is calculated using an ingredient database and should be considered an estimate. In cases where multiple ingredient alternatives are given, the first listed is calculated for nutrition. Garnishes and optional ingredients are not included.

    Read More

  • Vegan Dark Chocolate Cake

    Vegan Dark Chocolate Cake

    recipe image

    1. To prepare cake: Preheat oven to 375 degrees F. Coat three 8-inch round cake pans with cooking spray. Line the bottoms with parchment paper and coat the paper with cooking spray.

    2. Combine flaxseed (or chia seeds) with 9 tablespoons water in a small bowl; set aside.

    3. Meanwhile, combine the remaining 3/4 cup water, chocolate and espresso in a small saucepan. Heat over medium heat, stirring, until the chocolate is melted. Let cool for 5 minutes.

    4. Combine brown sugar and oil in the bowl of a stand mixer fitted with a whisk attachment. Beat until combined. Add the flaxseed (or chia) mixture and beat until smooth, about 1 minute. Stir in the melted chocolate mixture. Switch to the paddle attachment.

    5. Sift all-purpose flour, whole-wheat flour, cocoa, baking powder, baking soda, cinnamon and salt into a medium bowl. Mix milk, vanilla and orange zest in a small bowl. Add the flour mixture to the chocolate mixture, alternating with the milk mixture, and beat until well blended. Divide the batter evenly among the prepared pans. Tap them lightly on the counter to remove any air bubbles.

    6. Bake until the cake is just coming away from the sides of the pans, 18 to 20 minutes. Let cool in the pans for 5 minutes before turning out onto a wire rack. Remove the parchment and let cool completely, about 45 minutes.

    7. To prepare frosting: Combine granulated sugar and water in a small saucepan. Cook over medium-low heat, whisking, until the sugar has dissolved to form a simple syrup. Attach a candy thermometer to the pan with the tip in the liquid but not touching the bottom. Increase heat to medium and bring to a lively simmer. Cook until the syrup reaches 235 degrees F.

    8. Meanwhile, place 1/2 cup of the chickpea liquid (aquafaba) in a clean bowl of a stand mixer fitted with a whisk attachment. (Reserve the chickpeas for another use.) Beat on low speed.

    9. When the syrup reaches 235 degrees, increase the mixer speed to high and beat the aquafaba until very stiff peaks form, at the same time continuing to cook the syrup until it reaches 248 degrees. Carefully pour the syrup slowly into the stiff aquafaba with the mixer on high speed and beat until the mixture is as thick as marshmallow fluff. Switch to the paddle attachment and beat on high speed until the outside of the bowl is cool to the touch, about 5 minutes. Add butter, a spoonful at a time, until it’s completely incorporated. (If the mixture starts to look curdled, don’t panic! It will come back together as it mixes.) Add vanilla and beat on medium-low speed, scraping the sides occasionally, until the frosting is thick and glossy.

    10. To assemble cake: Place one cake layer on a serving plate. Using an offset spatula, spread 1 cup frosting on the first layer. Top with another layer and another 1 cup frosting. Top with the third layer and frost the top with 1 cup frosting. Frost the sides with the remaining 1 cup frosting.

    Tips

    To make ahead: Refrigerate frosted cake for up to 1 day. Serve at room temperature.

    Equipment: Three 8-inch round cake pans, parchment paper, candy thermometer

    Read More

  • Vegan custard

    Vegan custard

    recipe image

    Combine the custard powder with the sugar. Add 2-4 tbsp coconut milk from a 400ml can and mix to a smooth paste. Heat the rest of the coconut milk from the can in a pan with another 400ml can coconut milk and the water until almost boiling. Whisk some of the coconut milk mixture into the custard powder mixture until it looks like a smooth custard sauce, then tip this into the pan with the rest of the hot coconut milk. Return to the boil over a low heat, stirring continuously, until you have a thick, smooth custard.

    Read More