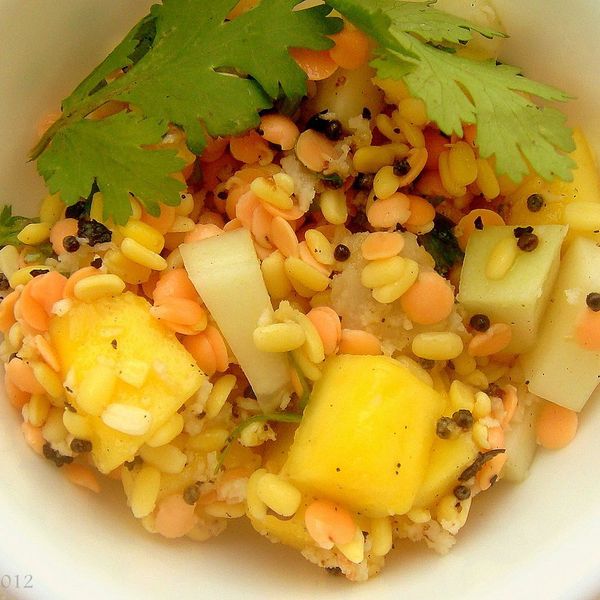
A traditional South Indian dish with a twist of fruit- vegan, light and healthy. —Cinnamin
Ingredients
For The Salad
1/4 cup
moong dal (green gram or mung) soaked for an hour and drained
1/4 cup
masoor dal (red lentils) soaked for an hour and drained
1/4 cup
grated coconut
1/4 cup
raw papaya or cucumber, cubed
1/4 cup
mango, cubed
Juice of 1 lime or small lemon
Salt to taste
For The Tempering
2 teaspoons
oil
1 teaspoon
mustard seeds
1 teaspoon
red chilli flakes
1/2 teaspoon
asafoetida powder
Directions
Put all the ingredients (except for the tempering agents!) together in a large bowl and combine well so that everything is evenly mixed.
Next, put the tadka (tempering) together. Heat the oil in a tadka dish or very small wok. When it gets hot, add the mustard seeds and allow them to pop, then add the chilli flakes. The chilli flakes may char a little, this is ok, it will add a smoky flavor. Add the asafoetida powder, and pull off heat immediately. Pour the seasoning over the salad and toss well.
If you are unable to source asafoetida powder, the same amount of garlic powder will do.
This is an awesome side dish that can also work as a main meal for vegans, vegetarians, and omnivores alike. Serving it at room temperature maximizes the flavours and makes it a great dish for lunch or a picnic.
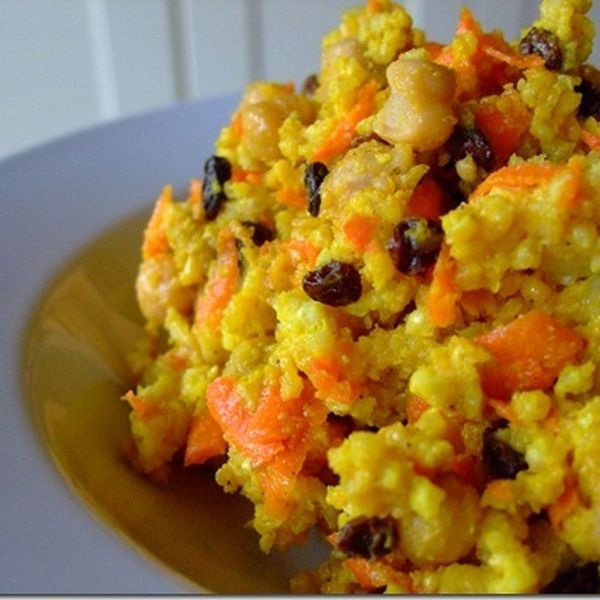
You won’t be able to stop eating it, I promise. —Samantha Angela
Ingredients
1 1/2 cups
cooked millet, room temperature
3 tablespoons
olive oil
1 teaspoon
white balsamic vinegar
1 teaspoon
curry powder
1/4 teaspoon
turmeric
1 teaspoon
kosher salt
1 teaspoon
cracked black pepper
1/2 cup
grated carrots
1/2 cup
currants
1
can, chickpeas, drained and rinsed
2
scallions, thinly sliced, white & green parts
Directions
Whisk together the olive oil, vinegar, curry, turmeric, salt, and pepper. Pour over the millet, and mix with a fork.
Add the carrots, currants, and scallions, mixing well and seasoning to taste.
Serve at room temperature.
These chocolate beetroot brownies are gluten-free, relatively low in sugar and easily adaptable to be vegan. They are soft, moist and thoroughly delicious. —carolinescooking
Ingredients
1 cup
coconut milk
4.5 ounces
dark chocolate (at least 63% cocoa solids)
9 ounces
cooked beetroot (approx 8oz peeled)
3.5 ounces
medjool dates
2
eggs
1 teaspoon
vanilla essence
1/2 cup
almond flour
1/4 cup
chestnut flour
1/3 cup
rice flour
1 teaspoon
baking powder
Directions
Preheat the oven to 350F/175C.
Gently warm the coconut milk and chocolate together in a small pan until the chocolate melts.
Blend together the beetroot and dates.
Add the eggs to the beetroot-date mixture, one at a time and blend in.
Mix in the vanilla then the flours, baking powder and coconut milk-chocolate mixture.
Once thoroughly mixed, pour into an oiled tray, right to the top of the mini muffin mould. Bake for approx 15mins until they have risen, slightly cracked on the top, and a skewer comes out only slightly sticky or clean.
If you prefer, pour into an 8x8in tray instead. If doing so, they will need approx 30mins cooking time.
Wait until cooled a few minutes before removing from tray and cutting, if appropriate.
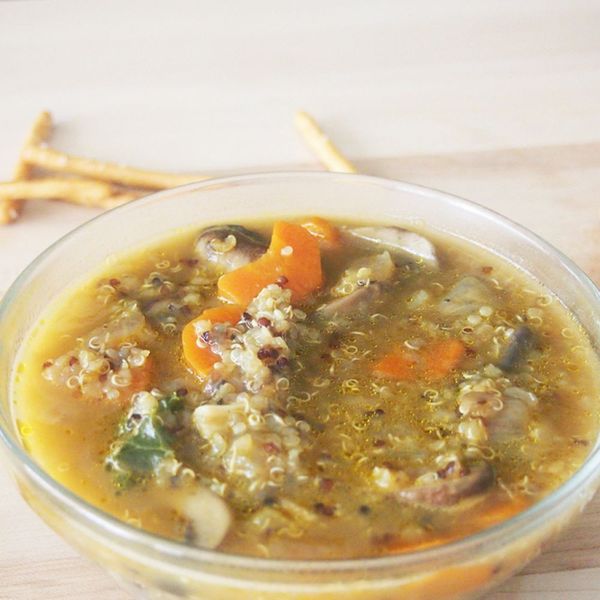
This is my favorite comfort food. Even though it’s healthy, vegan, and gluten free, it is so hearty and filling. It warms me inside and out. I love it so much, I can’t even resist making it in the middle of summer. —Laura Dembowski
Ingredients
2 tablespoons
olive oil
1
large onion, chopped
1
head of garlic, cloves separated and peeled
1 pound
button or cremini mushrooms, sliced
4
carrots, peeled and sliced
4 cups
low sodium vegetable stock
2 cups
water
1/2 cup
uncooked quinoa
2 cups
packed kale leaves
1/2 teaspoon
black pepper
1/2 teaspoon
kosher salt
Directions
Preheat a large pot over medium high heat. Once hot add the oil. Allow to heat for 1 minute. Add the onion, garlic, and mushrooms, and sauté 5-10 minutes, until the mushrooms are beginning to caramelize.
Add the carrots and sauté a minute or two more. Add the stock and water and bring to a boil. Reduce to a simmer and add the quinoa. Cook for about 15 minutes, until the quinoa is tender. Add the kale and cook just until it starts to wilt. Season with pepper and salt.
Serve immediately. Soup may be stored in an airtight container in the refrigerator for up to 2 days. Reheat in the microwave for 1-2 minutes, until heated through.
This quinoa salad is vegetarian, vegan and gluten-free friendly! It is a light salad, but also heavy enough to keep you full. The combination of the citrus fruits and hearty bean and quinoa base is tough to beat. Enjoy this quinoa dish at the pool, on the beach, or in the comfort of your home. It won the hearts of many of my friends! —Kristin
Ingredients
2
cans (15 oz) black beans
1/2
red onion, minced
2
grapefruits
1
red pepper, chopped
1 cup
cooked corn
1 cup
quinoa, uncooked
1
large avocado
1 bunch
cilantro
3
limes, juiced
2 teaspoons
cumin
.25 teaspoons
sea salt
Directions
Cook 1 cup of quinoa, according to directions
Rinse the beans, corn and chop the veggies and garnishes.
Mix the cooked quinoa, lime juice, cumin, and salt. Place as a bottom layer in the pan.
Layer with onions, peppers, grapefruit, black beans, corn, avocado and cilantro. Refrigerate to cool.
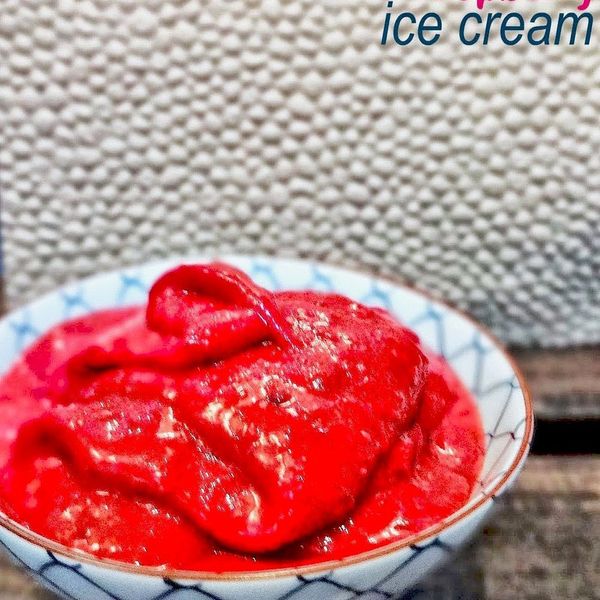
This is a delicious and vibrant frozen dessert bursting with different flavors that come together harmoniously. The color is shockingly beautiful, not quite red not quite orange….The flavor is intense – sweet, sour, spicy. Maca adds an unexpected jolt of energy to the mix, making this a great pre-workout treat or just an energizing snack to fuel your day. Best of all, this ice cream is vegan, gluten-free and fruit-sweetened! —DUZE @BakingBackwards
Ingredients
2.5 cups frozen raspberries
1 cup frozen mango ( I suggest freezing the mango yourself, using very ripe and sweet mango)
0.5 large lime, juice of
2 tbsp chia seeds
2-3 tbsp raw maca powder
3-5 small pitted dates
dash coarse sea salt
1/3 tsp chilli powder
Directions
Combine all ingredients (only 3 dates to start) in food processor until very smooth. Taste!
Adjust sweetness by incorporating more dates if necessary. Serve immediately or transfer mixture to an airtight container, seal and freeze for up to an hour before serving.
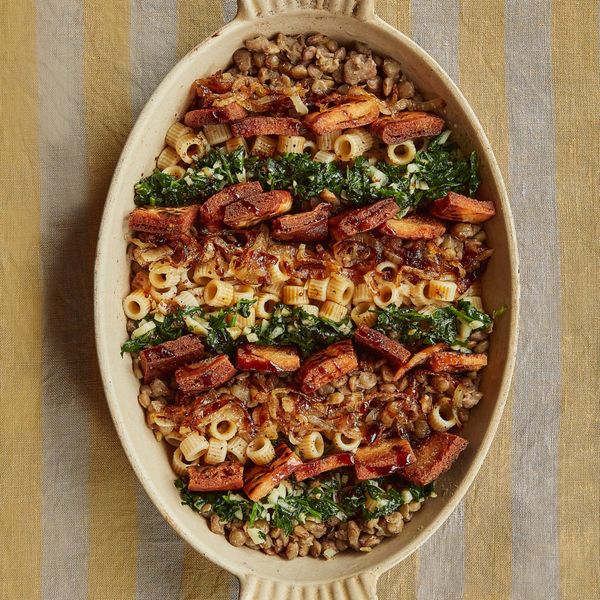
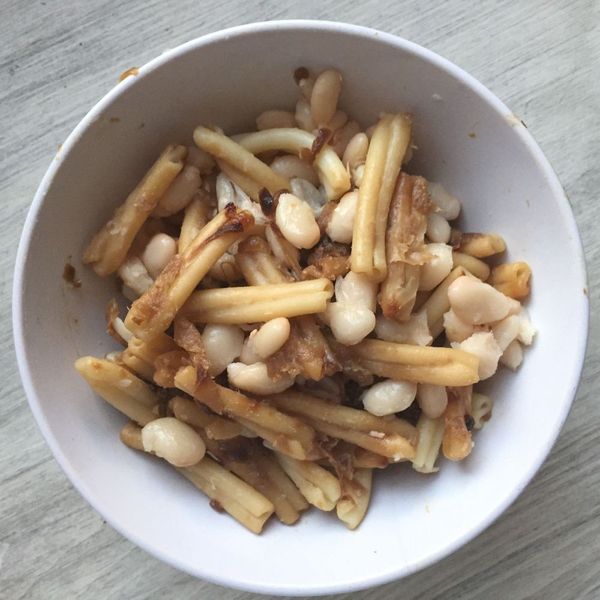
this pasta dish is really rich tasting while ultimately being very light, super sweet and savory, and can be customized many different ways — I added some cooked white beans as you can see from the photo, I could see either raw or sundried tomatoes being delicious here, roasted mushrooms or zucchini, any kind of cheese really — or you can make this completely vegan by caramelizing the onions in olive oil instead of butter —Lily Applebaum
Ingredients
1 pound
pasta, any shape
2 pounds
white or yellow onions, around 4 medium
2 tablespoons
unsalted butter, or olive oil
3/4 cup
beer, any kind will work but use something cheap and try to avoid the super-hoppy; it will cook down to be bitter
salt and pepper to taste
Directions
Set your largest pot filled with water to boil, and cook your pasta to al dente. Just before draining the pasta, reserve 1/4 C of the pasta water to use later. Drain and rinse the pasta, and set aside.
While the pasta water is boiling, start slicing your onions. Slice onions in half, and then into as thinly sliced half-moon shapes as possible.
In a stainless steel or cast iron pan, melt the butter or heat the olive oil until hot over medium heat.
Add all of the onions to the pan, and cook until soft and translucent and onions have released a lot of liquid. This step doesn’t need to be precise.
Pour in all of the beer to the onions and stir. Leave this to cook, stirring occasionally, until all of the beer is cooked out. You’ll be tempted to turn the heat up to get this to go faster, but the slow cooking is what the caramelization is all about!
Continue cooking the onions, keeping a close eye on them but not stirring too often, until they are so deeply brown they’re almost burned. Pour in all of the reserved pasta water, and use it to scrape up all of the onion that stuck to the bottom. If you can’t get it all up with the 1/4 C of pasta water, add tap water 1 tablespoon at a time, or use any leftover beer.
Toss the caramelized onions with the pasta, season with salt and pepper liberally. If the pasta looks dry, toss in a tablespoon or two of olive oil.
This keeps several days in the fridge, and as I mentioned in the top note is very customizable! Lots of different add-ins work here.
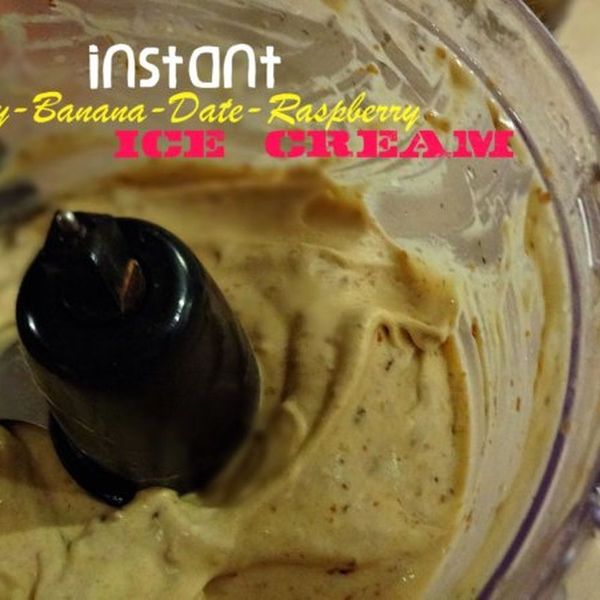
This recipe, and many more, can be found on my blog: Baking Backwards! It is easy, vegan, gluten-free, coconut-free, soy-free and absolutely awesome. —DUZE @BakingBackwards
Ingredients
3 very large frozen bananas
1 tsp ground cinnamon
2 tsp vanilla extract
1 big dash sea salt
10 small pitted Sayer dates (I buy Parnoosh brand honey dates) (about 70g)
1 tsp baking soda
1 tsp baking powder
1 tbsp gluten free Whiskey (Jack Daniels or Maker’s Mark)
1/2 cup frozen raspberries ( I like Stahlbush Farms brand)
1 tsp – 1 tbsp chia seeds
Directions
In a food processor, pulse and then blend bananas, dates, vanilla, sea salt, baking soda and baking powder, lemon and chia together until smooth and mixture resembles soft serve with small chewy bits of dates throughout, scraping down the sides with a spoon occasionally. Add whiskey and blend to incorporate. Add frozen raspberries and pulse briefly 3 times to marble the ice cream.
Serve immediately or pour into a plastic tupperware container and seal shut. Freeze sealed container until ready to serve, I don’t recommend freezing for more than a few hours.
A blend of dried whole chiles gives you better flavor than any dried-chili powder.
Simmering the chiles and puréeing them eliminates any gritty texture.
Whether you’re preparing Texas-style chili con carne (no beans, please!); an everything-but-the-kitchen-sink short rib and bean chili; a pork and three-bean chili; or even a vegan bean chili, the best thing you can do to up your chili game is to leave those jars of pre-ground chili powder on the shelf. Starting your chili with real, honest-to-goodness whole dried chiles will save you money, while adding layer upon layer of complex flavor that you never thought was possible.
How to Buy Chiles
Dried whole chiles can be found in most large supermarkets and any Latin market. They come in a baffling array, so I decided to taste every variety of whole chiles I could find, taking note of both its spice level and its flavor profile. I saw that most of them fell into one of four distinct categories:
Sweet and fresh: These peppers have distinct aromas reminiscent of red bell peppers and fresh tomatoes. They include costeño, New Mexico (a.k.a. dried Anaheim, California, or Colorado), and choricero chiles.
Hot: An overwhelming heat. The best, like pequín chiles, also have some complexity, while others, like árbol, deliver more heat than anything else.
Smoky: Some peppers, like chipotles (dried, smoked jalapeños), are smoky because of the way they are dried. Others, like ñora, cascabel, and guajillo chiles, have a natural musty, charred-wood smokiness.
Rich and fruity: Distinct aromas of sun-dried tomatoes, raisins, chocolate, and coffee. Some of the best-known Mexican chiles, like anchos, mulatos, and pasillas, are in this category.
Just as I occasionally like to mix up my Beatles Rock Band with a bit of Super Mario or old-school Street Fighter II, variety is what keeps you coming back to the chili pot. For a batch of chili, I like to pick at least one type of pepper from each category.
When you’re buying chiles, look for ones that are still pliable and leathery. If they feel hard or crack when you bend them inside their packaging, they’re too old and have lost much of their flavor. If you’re not planning on using your chiles right away, or if you’re planning on buying them in bulk, the best way to store them is in an airtight zipper-lock bag inside the freezer. They take about a minute to thaw at room temperature and will last almost indefinitely.
How to Prepare Chiles for Cooking
Cooking with chiles is a three-step process. First, you’ve got to clean them by removing their stems and seeds. (Wear gloves if you’re in any way sensitive to spicy food or have sensitive skin!) Next, I recommend toasting them for maximum flavor. Finally, they need to be ground or puréed. I’ll walk you through each of these processes.
How to Clean Long, Straight Chiles
Serious Eats / J. Kenji López-Alt
To clean a long, straight chile, like a guajillo, start by snipping off the stem into a bowl, using clean kitchen shears.
Serious Eats / J. Kenji López-Alt
Next, make a slit along one edge.
Serious Eats / J. Kenji López-Alt
Open up the chile, and use your fingers to scrape out the seeds and any ribs.
Serious Eats / J. Kenji López-Alt
The cleaned chile should look like this.
How to Clean Short, Wrinkled Chiles
Serious Eats / J. Kenji López-Alt
For wrinkled chiles in which the stem is inverted (think innie versus outie), start by cutting the chile in half, making sure to cut below the point where the internal portion of the stem ends up.
Serious Eats / J. Kenji López-Alt
Scrape the seeds and ribs out of the bottom half.
Serious Eats / J. Kenji López-Alt
Next, turn the top half inside out so that the inner portion of the stem is exposed.
Serious Eats / J. Kenji López-Alt
Cut the stem off from the inside.
Serious Eats / J. Kenji López-Alt
You should end up with a clean, ring-shaped piece of chile, the stem falling neatly into the bowl below.
How to Toast Chiles
Toasting chiles, just like toasting spices, can improve their flavor and add complexity. It’s not 100% necessary, but it takes only a few minutes. There are a number of ways to do it.
The oven is the best method if you’re toasting lots of chiles. Spread them out on a rimmed baking sheet, and place them in an oven preheated to 350°F (180°C), turning them occasionally, until they smell roasted and are very pliable. (If you toast the chiles before cleaning them, they’ll also puff up.)
A skillet is a decent choice if you’re doing only a few. Place them in a dry skillet, and heat over medium heat, tossing them occasionally, until they’re toasted and pliable. It’ll take about three minutes.
The microwave is an even better tool for the job than the stovetop, and it’s my method of choice for a single batch of chiles. Just lay the chiles on a microwave-safe plate, and microwave them on high in 15-second intervals until they’re toasted and pliable. It should take around 30 seconds.
How to Grind Chiles
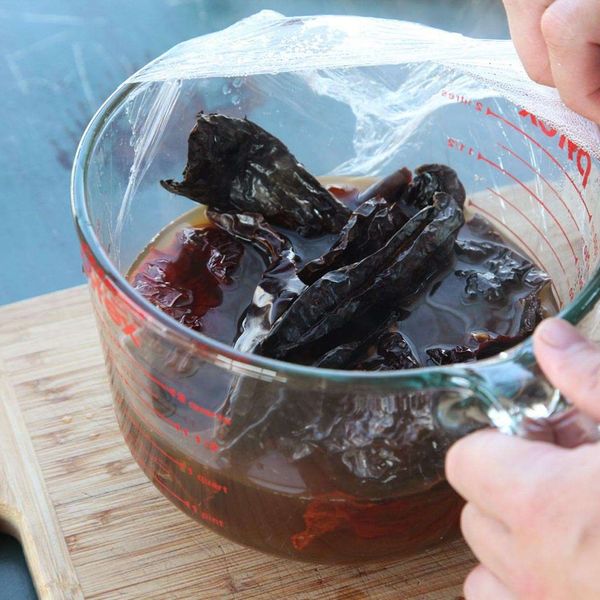
Once those chiles are toasted, you could just throw them into a blender or spice grinder to make your own chili powder. However, I prefer to purée them with liquid for better texture. Start by either simmering the chiles in water or chicken stock, or, even easier, placing them in a covered microwave-safe container and microwaving them on high power for a few minutes.
Once the chiles have softened (it takes five to 10 minutes), they can be puréed along with the liquid, using either a hand blender or a standing blender.
As a general rule of thumb, use about four times as much chile purée as you would powder (so, use four tablespoons of purée for every tablespoon of powder called for in a recipe). The purée can be stored by freezing it in an ice cube tray, popping out the cubes, and placing them in a freezer bag for up to six months.
January 2015
Basic Chili Paste to Replace Chili Powder Recipe
Cook Mode (Keep screen awake)
3wholesweet fresh dried chiles, such as costeño, New Mexico, or choricero, stems and seeds removed
2smallhot dried chiles, such as árbol or cascabel, stems and seeds removed
3whole rich, fruity dried chiles, such as ancho, mulato, negro, or pasilla, stems and seeds removed
2wholechipotle dried chiles canned in adobo sauce, plus 2 tablespoons (30ml) sauce
1quart (950ml) homemade or store-bought low-sodium chicken stock
Place chiles on a microwave-safe plate and microwave on high at 15-second intervals until hot, pliable, and toasted-smelling, about 30 seconds total.
Combine all chiles in a medium saucepan and add chicken broth. Simmer over medium-high heat until chiles are completely tender, about 10 minutes. Alternatively, place chiles and chicken broth in a 2-quart microwave-safe container, cover with plastic wrap, and microwave on high power until liquid is simmering, about 5 minutes. Let stand 5 minutes. Transfer to a countertop blender or hand blender cup and blend until completely smooth.
Store chile paste in the refrigerator for up to 1 week. Alternatively, divide paste into ice cube trays, freeze, and transfer frozen chile paste cubes into freezer bags to store in the freezer for up to 6 months.
Special Equipment
Countertop blender or immersion blender
Notes
Chile purée can be substituted about 4:1 for chili powder (i.e., use four tablespoons of purée for every tablespoon of powder called for in a recipe). It can be stored by freezing it in an ice cube tray, popping out the cubes, and placing them in a freezer bag for up to six months.
Read More
What to Do With Dried Chiles: Recipes, Cooking Techniques, and Shopping Tips
Mix and Match Chile Flakes and Powders for Layers of Flavor and Heat
The Best Chili Ever Recipe
1-Hour Pressure Cooker Texas-Style Chili con Carne Recipe


/86d25293-d1a8-4750-9302-f659d8ddc5cd--DSC03725.JPG)

/40f59fa4-7791-4e85-8919-e552e4cfc756--millet.jpg)


/acc815d8-de55-4b9b-8c53-5fb488f7c91f--P1052863-1_zoom.jpg)

/11280a6b-a55b-40cb-addb-3c7324c2b20d--quinoa_soup.jpg)
![Black Bean, Quinoa and Citrus Salad [v] [veg] [gf]](https://patagoniallami.cl/wp-content/uploads/2025/02/1643-black-bean-quinoa-and-citrus-salad-v-veg-gf.jpg)

![Black Bean, Quinoa and Citrus Salad [v] [veg] [gf]](https://images.food52.com/MPawr0nDRLSzzUKJA7a71ihwtAg=/2016x1344/filters:format(webp)/a84adbca-25ab-450e-b624-716c154e2cb3--DSC_1691-1024x682_2.jpg)

/9876ce19-9f4c-4a4f-8218-45e96f479666--photo-74-.jpg)

/4a63a7fd-8fdd-4443-b960-ac50198ea2ac--IMG_9262.JPG)

/928bfcc3-8b0c-4831-bf10-ba9f03f9b6b4--photo-66-.jpg)