Author: PatagoniaLlami

  • Soy & Dairy Free Cream Cheese Frosting

    Soy & Dairy Free Cream Cheese Frosting

    recipe image

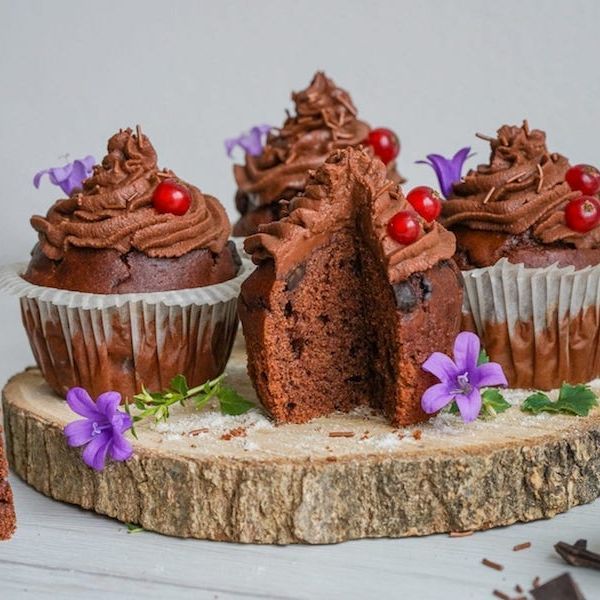
    Can you think of anything better to top cakes, muffins and cupcakes than a chocolate-rich, soy and dairy free cream cheese frosting. Whether you need to stay away from dairy or you are simply looking for a twist on traditional buttercream frosting, this thick and delicious vegan cream cheese frosting is way healthier than the regular one and it’s also free from gluten and very low in sugar!

    Soy & Dairy Free Cream Cheese Frosting

    If you are wondering what’s the secret ingredient of my soy and dairy free cream cheese frosting, the answer is “Mozzarisella Cremoso”, a super-delicious spread made from germinated brown rice, apple vinegar and cold pressed coconut oil.

    You probably remember seeing “Cremoso” featured on my dairy free cheese platter post. Well, what’s cool about this product, is that it has a hint of sourness that makes it perfect for both savory and sweet preparations. And how could I not to put it to the test in a mouthwatering, healthy dessert!?

    Now that Plant Based Foods USA started to distribute my favorite dairy free Italian cheese line from “Mozzarisella” in the US, I love to be able to create recipe with these products that you guys can try and recreate at home!

    You can either purchase it on their site, or in smaller quantities in all Wegmans stores on the East Coast, at Orchard Grocerin NY, Riverdel, Brooklyn and on this online store. Not only is “Mozzarisella” made with organic ingredients, it’s also free from the main 8 food allergens and very easy to digest. And I promise, after you try it, you’ll fall in love with how delicious it is (better than real cheese) and with how clean the ingredients are, and you’ll never buy another type of vegan cheese!

    Soy & Dairy Free Cream Cheese Frosting

    Now, back to our soy and dairy free cream cheese frosting! It has the same taste and consistency of regular frosting and it does not get melty at room temperature, and it holds the shape beautifully, even when you need to pipe it out of the pastry bag, so it’s perfect to decorate healthy treats to serve at a party!

    Also, you know I am all about limiting the amount of sugar I put in my recipes as much as possible, but if you want it to be a little more sweet, you can add a pinch of green stevia in it the mixture or an extra 1/2 a teaspoon of agave syrup.

    Soy & Dairy Free Cream Cheese Frosting

    But let’s go straight to the recipe: the amount of soy and dairy free cream cheese it yields is enough to decorate 8 large muffins or 16 small ones. And if you want to try it over a different type of muffin, you are welcome to use my recipe for Gluten Free Vanilla Chocolate Muffins or my Grain Free Orange Muffins. Test them out and let me know what you think!

    Print

    Soy & Dairy Free Cream Cheese Frosting


    5 Stars 4 Stars 3 Stars 2 Stars 1 Star

    No reviews


    • Author:
      Ambra Torelli


    • Yield:
      8 1x
    • 1 package of Mozzarisella Cremoso cream cheese (200 gr)
    • 2 tbsp Agave Syrup
    • 2 tbsp Raw Cacao
    • 1 tsp Vanilla Extract
    • 30 gr 90% Dark Chocolate (melted)
    • 1 1/2 tbsp Coconut Oil (melted)


    Instructions

    1. Cream together your dairy free cream cheese, together with the agave syrup, raw cacao and vanilla.
    2. Melt the dark chocolate in a double boiler and mix it into the cream cheese mixture.
    3. Add in the melted coconut oil and continue mixing until smooth and creamy.
    4. Transfer you soy and dairy free cream cheese frosting into a pastry bag and store it in the refrigerator before using it to topped your healthy treats!

    • Category: Dessert
    • Cuisine: American

    I think you are going to love this soy and dairy free cream cheese frosting and I can’t wait to see your recreations! Don’t forget to share this recipe on your Facebook and to save it on your favorite Pinterest board, and subscribe to my weekly newsletter so that you never miss a post!!

    Lots of love!!

    Ambra

    Soy & Dairy Free Cream Cheese Frosting


    BUY HONEST COOKING’S NEW COOKBOOK TODAY

    NØRTH – Scandinavianish Cooking by Kalle Bergman

    ★★★★★

    About the Book

    Step into the world of Scandinavianish with NØRTH. From Swedish comfort classics to Danish smørrebrød and new twists on Nordic flavors, this cookbook invites you to explore the rich taste of the North in your own kitchen.

    All recipes are presented with both imperial and metric measurements. Available in premium paperback, and for instant download for tablets, phones and computers.

    Digital Version

    $9.99

    Works on all devices and screens

    Buy Now


    Previous Post

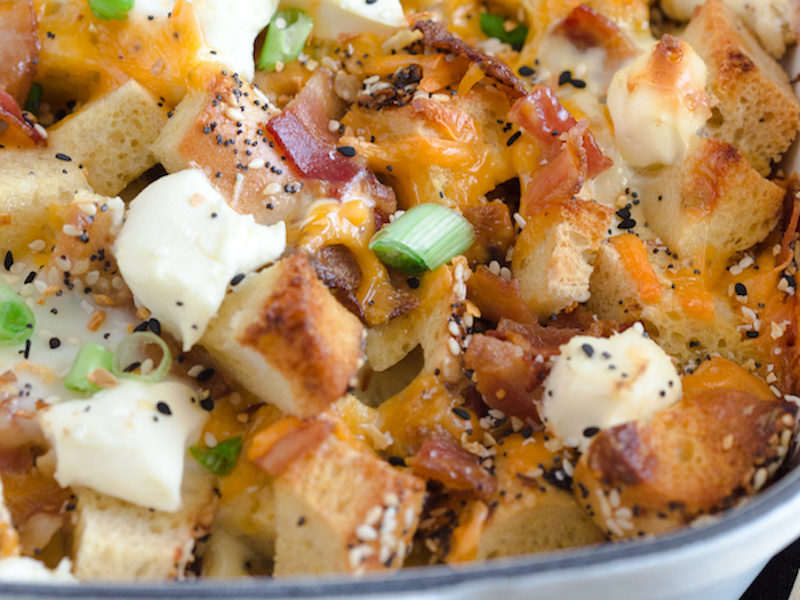
    Everything Bagel Breakfast Bake

    Next Post

    Gluten Free: Double Chocolate Chip Cookies

    Read More

  • Orange and Strawberry Quinoa Salad

    Orange and Strawberry Quinoa Salad

    recipe image

    Orange and Strawberry Quinoa Salad

    • Serves
      4
    Author Notes

    This strawberry and orange quinoa salad is refreshing and perfect on a warm sunny day and a good way to use any leftover cooked quinoa. Perfect for picnics and barbeques and lunch boxes. The ingredients quantities are a guideline only – throw in more or less of what you want. Omit the cheese if making this for vegans. —Bintu

    Ingredients

    • 2

      handfuls of baby salad leaves


    • 2.6 ounces

      cooked quinoa


    • 1

      orange peeled, pith removed and sliced


    • 8

      strawberries quartered


    • 1.8 ounces

      cubed feta


    • 2 tablespoons

      chopped toasted nuts


    • 6 tablespoons

      olive oil


    • 2 tablespoons

      balsamic vinegar


    • 1 teaspoon

      1 grainy mustard


    • Pinch

      salt


    • Pinch

      ground black pepper

    Directions
    1. Mix all the ingredients from the salad leaves to the chopped nuts together.
    2. Whisk all the ingredients for the balsamic vinaigrette (from the oil to the pepper) together until combined.
    3. Adjust seasoning and drizzle on as much dressing as you would like onto your salad.
    4. Serve with fresh crusty bread and grilled fish, meats or vegetables.
    5. You can keep the rest of the vinaigrette on your counter top for another salad.
    6. You can easily double or triple the recipe to feed a crowd.

    Read More

  • Everyone Bagel Breakfast Sandwich

    Everyone Bagel Breakfast Sandwich

    recipe image

    Everyone Bagel Breakfast Sandwich

    Photo by Emily Smith
    • Prep time
      5 minutes
    • Cook time
      10 minutes
    • Serves
      1
    Author Notes

    Add a better-for-you boost of protein to your morning with Everyone Bagel Hummus! Ithaca’s deliciously bold flavors bring out the best in every bite–whether you omit the turkey bacon and egg to make it vegan, add yesterday’s leftover veggies, or opt for a lazy no-cook version, the possibilities are endless with this fool-proof hummus to tie it all together. The best part? Every pack of Everyone Bagel Hummus sold gives back to a community-based nonprofit. —Emily Smith

    Ingredients

    • 2 pieces

      sourdough bread, toasted


    • 1/2

      avocado, sliced


    • 1/4 cup

      onions, caramelized on the stove


    • 2 tablespoons

      Ithaca Everyone Bagel Hummus


    • 2 pieces

      turkey bacon


    • 1

      egg, over easy

    Directions
    1. Layer all ingredients together between two slices of sourdough bread.
    2. Bite in and enjoy!

    Read More

  • Giant couscous salad with charred veg & tangy pesto

    Giant couscous salad with charred veg & tangy pesto

    recipe image

    Method

    • step 1

      Heat the oven to 200C/180C fan/gas 6. In a bowl, toss the beetroot, onions and peppers together with the oil, then spread out on a large roasting tray lined with baking paper and roast for 35 mins. Scatter over the cherry tomatoes, then return to the oven for 10 mins more until the tomatoes have softened and the vegetables are tender.

    • step 2

      Meanwhile, cook the couscous following pack instructions, then rinse and drain. To make the pesto, put the coriander and half the parsley in a bowl with the garlic, chilli, cumin, vinegar, oil and 25g of the pine nuts. Add 2 tbsp water, then blitz with a hand blender until smooth or use a small food processor.

    • step 3

      Toss the roasted veg and chopped parsley through the couscous and pile on the pesto, then scatter with the remaining pine nuts. If you’re following the Healthy Diet Plan, serve half of the salad immediately then chill the rest for another day.

    Read More

  • Healthy Zucchini Soup

    Healthy Zucchini Soup

    recipe image

    Healthy Zucchini Soup

    • Serves
      2-3
    Author Notes

    Adapted from Daphne Oz’s Relish, I changed the soup up to make it vegan. In addition, I changed up the flavors, removing the tarragon and wine and adding more garlic. This is a light summer soup that is sure to make a zucchini lover out of anyone. The creamy texture is enhanced when the soup is served with avocado slices.


    Be warned, you’ll want to make extra! —Laura Dembowski

    Ingredients

    • 2 tablespoons

      olive oil


    • 5

      garlic cloves, peeled


    • 1

      large white onion, diced


    • 4

      medium zucchini, diced


    • 2 1/4 cups

      vegetable stock


    • 1 teaspoon

      freshly ground black pepper


    • 1/2 teaspoon

      kosher salt

    Directions
    1. In a large pot, heat olive oil over medium heat. When hot, add the garlic and onion and sauté about 3 minutes, until softened, stirring frequently so the garlic does not burn. Add the zucchini, 1 cup of stock, and salt and bring to a boil. Reduce to a simmer and cook, covered for 15-20 minutes, until the zucchini is tender.
    2. Transfer the soup carefully to a blender and blend until smooth. Once pureed, pour the soup back into the pan and add the remaining 1 ¼ cups stock and black pepper. Return to a simmer and cook, uncovered, for about 5 minutes. Serve immediately. Leftover soup may be stored in the refrigerator in an airtight container for up to 3 days. Reheat in a pot on the stove or in the microwave.

    Read More

  • Classic Homemade Granola

    Classic Homemade Granola

    recipe image

    Classic Homemade Granola

    • Serves
      10
    Author Notes

    Tastier and healthier than store bought, this granola, adapted from The Kitchn, is vegan and gluten free and full of oats, nuts, and dried fruit with the perfect hint of sweetness. —Laura Dembowski

    Ingredients

    • 3 cups

      Gluten Free Rolled Oats


    • 1 1/2 cups

      walnuts


    • 1/2 cup

      pecans


    • 1/2 cup

      flaked coconut


    • 1/2 teaspoon

      kosher salt


    • 2 teaspoons

      ground cinnamon


    • 1/2 cup

      canola oil


    • 1/2 cup

      maple syrup


    • 1/2 cup

      dried tart cherries


    • 1/2 cup

      golden raisins

    Directions
    1. Preheat oven to 350 degrees F. Line a baking sheet with parchment.
    2. In a large bowl, stir together oats, walnuts, pecans, coconut, salt, and cinnamon until combined. Add the oil, and maple syrup and stir until the oats and nuts are fully coated. Spread into an even layer on the prepared baking sheet.
    3. Bake for about 25 minutes, stirring after 15. Add the dried fruit. Stir it in and bake for 5 additional minutes. The granola should be fragrant, golden brown and toasted. Cool completely on pan. May be stored in an airtight container (I used zipper bags) for up to 2 weeks at room temperature.

    Read More

  • Refried Beans & Quinoa Burger Patties

    Refried Beans & Quinoa Burger Patties

    recipe image

     Refried Beans & Quinoa Burger Patties

    • Makes
      8
    Author Notes

    No story here, I’m trying to cut down on carbs (anyone who’s tried that knows how difficult that is) Quinoa provides a texture as well as an added shot of proteins, making this a great vegan burger.. I simply wrapped it in Romaine lettuce leaves & scarfed it down.


    The recipe has since morphed into a go to standard for my 3rd grader’s lunches. Kids being kids, its ‘cool’ to eat food that mimics fast food. If he thinks of a healthy vegan burger as cool, who am I to question that?


    I simply melt a slice of cheese (his favorite is mozzarella) over the cooked patty and slap it between a burger bun or dinner roll. A bit of lettuce and voila.. —Panfusine

    Ingredients

    • 1 cup

      cooked Quinoa


    • 1 cup

      fat free refried beans


    • 2 1/2 cups

      Panko bread crumbs


    • 1 teaspoon

      Garam Masala


    • 1

      small Fresh birds eye chilli deseeded & finely minced


    • 1/4 cup

      Finely diced Shallots


    • 1/2 cup

      Finely chopped Cilantro


    • Juice of 1 lemon


    • Salt to taste


    • Oil for Pan frying


    • 8

      Hamburger rolls


    • 8

      slices mozzarella cheese


    • lettuce, sliced tomatoes & onions as needed

    Directions
    1. To obtain 1 cup of cooked Quinoa, add 1/2 a cup of the seeds to 1. 1/4 cups of hot water. Bring to a boil, reduce heat, cover & cook for ~ 15 min (until the seeds sprout their little tails out & turn translucent. Drain off any excess water.
    2. Combine the Quinoa, refried beans and all the other ingredient along with 3/4 cup of Panko bread crumbs. (reserve the remaining for coating the patties). Bring together into a mass. Taste and adjust for seasonings. Divide into 8 patties. Coat each patty in the Panko bread crumbs prior to pan frying.
    3. Drizzle the grill pan with oil and cook until the surface turns a deep brown and the aroma emanates from the patties. Place a slice of mozzarella over the patty and allow it to melt.
      Warm the burger rolls, slather with your choice of condiments, layer the patties and the onions, lettuce and tomatoes as per your preference. Serve warm with any chutney or aioli of your choice.

    A biomedical engineer/ neuroscientist by training, currently a mommy blogger on a quest for all things food – Indian Palate, Global perspective!

    Read More

  • Almond Brownies

    Almond Brownies

    recipe image

    Without eggs or dairy, these vegan brownies are loaded with almond flavor and fudge-y goodness.

    PARTNER POST: Discover how delicious dairy-free sweet and savory cooking can be with DREAM Ultimate Almond.


    Without eggs or dairy, these vegan brownies are loaded with almond flavor and fudge-y goodness.

    Almond Brownies

    These vegan Almond Brownies are delicious, fudgey, and melt-in-your-mouth made with Dream Ultimate Almond.

    In almond brownies, I have replaced milk/eggs with the Dream Ultimate Almond and it turned out really well. The brownies were delicious, mouth melting blended with sweetness and aroma of almond. It is my personal experience and suggestion that this beverage is an awesome and an excellent vegan substitute for milk and eggs.

    Almond Brownies

    Say goodbye to watery, bland almond milk and welcome DREAM Ultimate Almond into your life. Made with four times more California almonds in every cup, you can immediately taste the difference. This beverage is rich, creamy, and packed with 5g of natural protein from almonds. This beverage comes in Original, Unsweetened, and Vanilla flavors that can soon be found on the shelf-stable or in the refrigerated section of the grocery store.

    Almond Brownies

    The new DREAM Ultimate Almond beverage can be found now at Whole Foods and soon at your local Sprouts. Click here for a coupon.

    For more inspiration, check out this easy ice cream, no dairy or churning needed!

    Print


    5 Stars 4 Stars 3 Stars 2 Stars 1 Star

    No reviews

    • 1 cup all purpose flour
    • 1 1/2 cup Dream Ultimate Almond
    • 1/2 cup olive oil
    • 3/4 cup sugar
    • 1 teaspoon vanilla extract
    • 1 teaspoon baking powder
    • 1/2 teaspoon baking soda
    • 1/4 cup cocoa powder
    • 1/2 cup chocolate chips
    • 1/2 cup almonds (chopped)


    Instructions

    1. Preheat oven to 350 degrees.Grease a square baking tray with oil or parchment paper.
    2. In a mixing bowl whisk dream ultimate almond and olive oil.
    3. Add sugar and vanilla extract.Whisk again until combined.
    4. Add in sifted cocoa powder,flour,baking powder,baking soda.Gently combine all the ingredients.
    5. Finally add in chocolate chips and half of the chopped almonds.Mix well.
    6. Pour the brownie batter in the greased tray.Sprinkle remaining chopped almonds and tap it on the counter.
    7. Bake in preheated oven for 20 to 25 minutes until a toothpick inserted in the center comes out clean.
    8. Cool the brownie completely before cutting into pieces.
    9. Slice and serve.

    • Category: Baking, Dessert
    • Cuisine: Vegan

    Read More

  • Sweet Potato and Onion Tempura With Chive Mayo

    Sweet Potato and Onion Tempura With Chive Mayo

    recipe image

    Ingredients

    1

    cup mayonnaise

    1

    Tbsp. Dijon mustard

    Zest of 1 small lemon

    2

    Tbsp. fresh lemon juice

    cup chopped chives, plus more for serving

    tsp. Diamond Crystal or ¾ tsp. Morton kosher salt, divided, plus more

    Freshly ground black pepper

    2

    medium sweet potatoes (about 1½ lb.), scrubbed, sliced into ¼”-thick rounds

    2

    medium yellow or red onions, sliced into ¼”-thick rounds

    cups (156 g) all-purpose flour

    1

    cup (122 g) cornstarch

    1

    12-oz. can chilled seltzer

    Vegetable oil (for frying; about 8 cups)

    Preparation

    1. Step 1

      Whisk 1 cup mayonnaise, 1 Tbsp. Dijon mustard, zest of 1 small lemon, 2 Tbsp. fresh lemon juice, ⅓ cup chopped chives, and ½ tsp. Diamond Crystal or ¼ tsp. Morton kosher salt in a medium bowl to combine; season chive mayo with freshly ground black pepper. Cover and chill until ready to serve.

      Step 2

      Place 2 medium sweet potatoes (about 1½ lb.), scrubbed, sliced into ¼”-thick rounds, in a medium bowl. Separate 2 medium yellow or red onions, sliced into ¼”-thick rounds, into rings, leaving the very centers intact, and place in another medium bowl. Whisk 1¼ cups (156 g) all-purpose flour, 1 cup (122 g) cornstarch, and 1 tsp. Diamond Crystal or ½ tsp. Morton kosher salt in a third medium bowl. Pour in one 12-oz. can chilled seltzer and stir briefly with chopsticks or a fork just until coarsely combined and still lumpy (you want to be careful not to overmix as batter will become doughy).

      Step 3

      Pour vegetable oil into a large heavy pot fitted with a deep-fry thermometer to come 1½” up sides. Heat oil over medium until thermometer registers 340°–350˚. (If you don’t have a thermometer, you can test the readiness of the oil by dropping in some batter; if it sinks to the bottom, the oil is not hot enough; if it immediately starts sizzling, the oil is too hot. If the oil is at the right temperature, the batter will sink slightly, then quickly rise back to the surface and start to sizzle.) Working with 1 piece at a time, dredge sweet potatoes in batter, allowing excess to drip back into bowl, and carefully drop into oil until surface of oil is just about covered (don’t overcrowd or oil temperature will drop). Using chopsticks or tongs, separate sweet potatoes so they don’t stick together and fry, turning once or twice, until batter is light golden and hard (it should feel hard if you tap it), about 5 minutes. Using a slotted spoon, transfer to a wire rack set over paper towels; immediately season with salt. Working in 2 or 3 more batches, repeat process with remaining sweet potatoes. Repeat process with onion rings, frying about 4 minutes and transferring to another wire rack set over paper towels.

      Step 4

      Transfer sweet potatoes and onion rings to a large platter; sprinkle with some chives. Top reserved chive mayo with more chives and lots of pepper and serve alongside for dipping.

    Read More

  • Caramelized Cauliflower With Tahini

    Caramelized Cauliflower With Tahini

    recipe image

    Caramelized Cauliflower With Tahini

    Photo by Megan Olson
    • Serves
      3
    Author Notes

    Golden roasted Caramelized Cauliflower with Tahini & fried onions. A delicious gluten free, Paleo, Vegan, low calorie dish that makes a tasty side or appetizer! —Megan Olson

    Ingredients

    • 1

      head of cauliflower, cleaned, leaves removed & cut into florets (about 4 cups)


    • 1

      small white onion, halved & sliced thinly (about 2 cups)


    • 1 tablespoon

      extra virgin olive oil


    • 4 tablespoons

      lemon juice


    • 3 tablespoons

      minced garlic


    • 2 teaspoons

      paprika


    • 2 tablespoons

      parsley


    • 1/2 teaspoon

      salt


    • 1/2 teaspoon

      pepper


    • 1/8 cup

      tahini

    Directions
    1. Preheat oven 425 degrees F
    2. Place cauliflower in a single layer on a baking sheet lined with parchment paper
    3. Add 1/4 tsp each salt & pepper to cauliflower
    4. Bake cauliflower 15 minutes then turn on the broiler on high to cook another 5 minutes
    5. Remove cauliflower from oven & place aside
    6. While cauliflower is cooking, heat a medium pan to medium high
    7. Add extra virgin olive oil to the pan
    8. Once the oil is hot, add the onions to the pan
    9. Cook the onions until tender, stirring constantly
    10. The onions can burn fast so watch carefully & remove when tender 8-10 minutes otherwise they will burn
    11. Place onions on a paper towel & add 1/2 tsp salt & pepper
    12. To the pan you used to cook the onions, turn the heat to low & add minced garlic
    13. You should have enough oil left in the pan otherwise add a tiny bit more
    14. After a minute, turn heat off add lemon juice, paprika, 1 tbsp parsley, tahini & whisk in 12 tbsp warm water to thin (I added 12 tbsp to mine)
    15. Be sure to continuously whisk the sauce as you’re adding the water or it may burn
    16. Place cauliflower in a bowl, add onions to the top then spoon tahini over it (I like to reserve about half the sauce for dipping)
    17. Sprinkle remaining cauliflower on top & enjoy!

    Read More