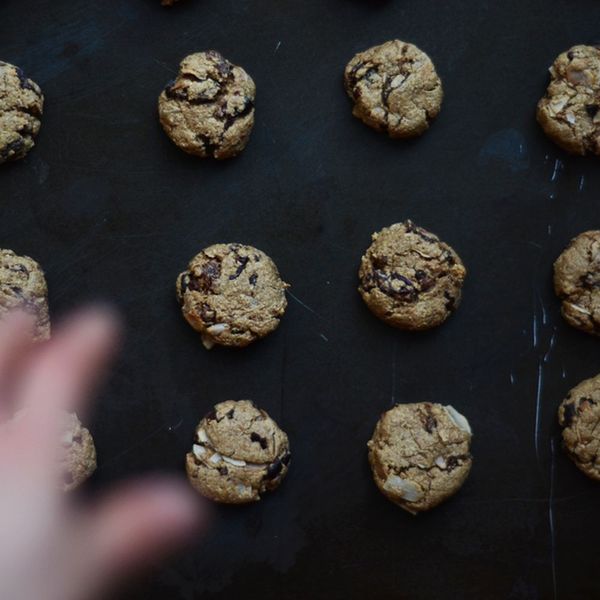
healthy / vegan oatmeal-raisin cookies with a lovely twist that can be enjoyed for breakfast with a tall glass of (dairy-free) milk
(gluten-free option)
adapted from mangia —izzy rael
Ingredients
1 1/2 cups
rolled oats (gluten-free if necessary)
1/2 teaspoon
baking soda
1/2 teaspoon
salt
1 teaspoon
cinnamon
1/4 cup
brown sugar
2 tablespoons
olive oil
1/4+ cups
unsweetened almond milk (more if dough is too dry)
1/4 cup
raisins (or other dried fruit)
large handfuls
cacao nibs
1/3 cup
toasted coconut flakes**
Directions
Preheat oven to 375 degrees F
Use a food processor to grind the oats, baking soda, salt, cinnamon, and brown sugar into a fine flour
Pour “flour” into a large bowl and fold in olive oil, almond milk, and raisins, and cacao nibs
Gently fold in coconut flakes (**toasted on pan at medium-high heat for about 4 minutes), as not to break them (entirely)
Take small piece dough, and roll into a ball (be sure to taste test, just to make sure that it’s not poison or anything…) and place on a baking sheet. repeat.
Flatten balls into round disks (unless you want baked cookie truffles, which is totally OK.)
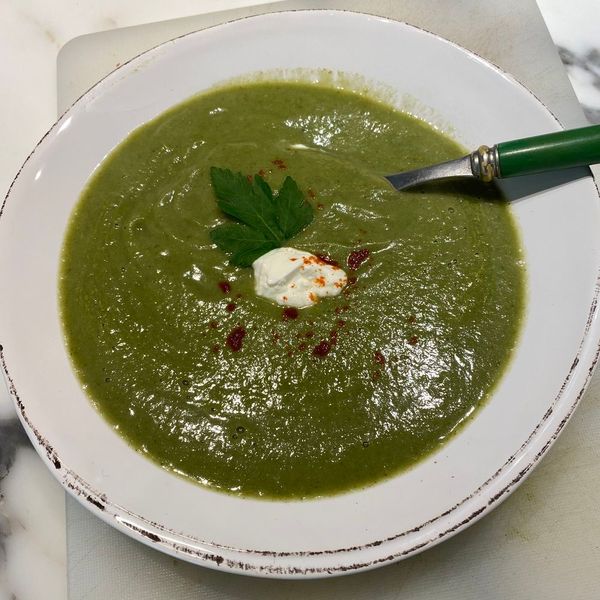
No one will believe this velvety soup is great for a diet. Loaded with vitamins and fiber, this soup is brimming with fresh flavors and easy to make. For a vegan version, simply substitute the butter with olive oil and omit the sour cream or yogurt garnish. —sally Uhlmann
Ingredients
1 tablespoon
butter
1
onion
1
clove garlic, chopped
2
stalks celery, chopped
4
mushrooms, chopped
1/2 teaspoon
salt and pepper
1/4 teaspoon
red chili pepper flakes
3 cups
baby spinach
2 cups
Each: stemmed and chopped broccoli, cauliflower, and Romanesco
2 1/2 cups
water
1 1/2 cups
unsweetened almond milk
1
vegetable bullion cube
dollop of yogurt or sour cream to serve
sprinkle of smoked paprika to serve
Directions
Melt butter in a stock pot. Add onion, garlic, celery, mushrooms, salt and pepper, and red chili pepper flakes. Saute over low to medium heat until onion is translucent, about 10 minutes. Stir as needed.
Add remaining ingredients except for sour cream or yogurt, and paprika. Bring to a boil, then reduce heat so it simmers and cook until vegetables are fall-apart tender, about 20 minutes. Remove from heat.
Carefully puree soup in a blender until creamy smooth. Taste and adjust seasonings. Serve warm, garnished with sour cream or yogurt and a sprinkle of papriks.
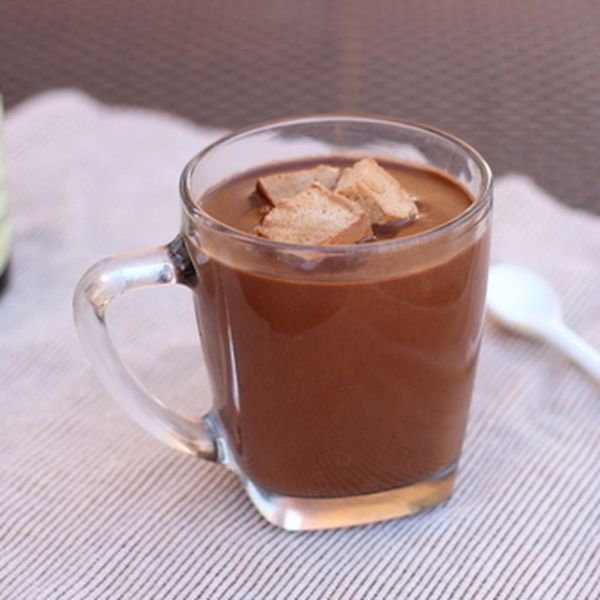
A thick and creamy hot chocolate that is dairy-free, gluten-free, and vegan….the addition of cocoa butter adds an unforgettable taste and texture! —Lauren Goslin
In a saucepan, whisk together the water, cocoa, carob, sugar, and salt, and place it over medium heat.
In a separate bowl, whisk together the milk with the arrowroot until the arrowroot has dissolved.
Once the water/cocoa mix is warmed, add the milk arrowroot mix to it, and continue heating it through until the mixture has thickened (about 1 minute). Don’t boil the mix!
Once thickened, remove the pan from the heat and stir in the vanilla, cinnamon, stevia, and cocoa butter (this enhances the chocolate flavor even more!).
Pour into a couple of mugs and share with a loved one!
Skip the bread roll and pass the cornbread! These gluten free, vegan friendly Pumpkin Cornbread Muffins are dense and chewy thanks to its hidden pumpkin ingredient. —Megan Olson
Ingredients
1/2 cup
pumpkin puree
1/4 cup
maple syrup
2 teaspoons
cinnamon
1 cup
unsweetened vanilla almond milk
1/2 teaspoon
baking soda
1 cup
cornmeal
1 cup
almond flour
1/3 cup
GF oat flour
1/4 cup
Truvia brown baking sugar
1/4 teaspoon
sea salt
1 tablespoon
apple cider vinegar
Directions
Preheat oven 350 degrees
Prepare a muffin tin with cooking spray or liners (or baking dish if making the bread version)
In a food processor, combine pumpkin, almond milk, apple cider vinegar, oats, sugar, honey & cinnamon and combine
To the mixture, add by hand baking soda, cornmeal, almond meal & salt and combine well
Let the batter sit 1 hour in the refrigerator to allow the batter to thicken, the cornmeal will absorb all the ingredients to make fluffier and thicker muffins (trust me!)
Pour the batter into the cavities
Bake 30 minutes until muffins appear golden & a toothpick can be inserted cleanly in the center
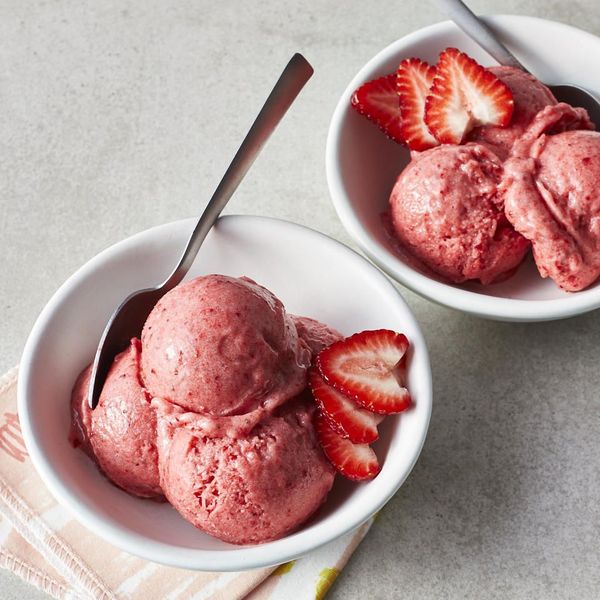
This luscious strawberry nice cream is a wonderful healthy ice cream alternative. It’s all fruit, dairy-free, vegan and contains no added sugar, but is bursting with sweet berry flavor. And it takes just minutes to whip up this easy healthy dessert in a food processor if you freeze the fruit ahead. While you’ll get the best flavor from fresh berries, if you don’t have them on hand, feel free to use store-bought frozen fruit in this recipe. Serve the nice cream on its own or top it with more fresh berries for a refreshing summer treat.
Updated on April 19, 2024
Additional Time:
12 hrs 15 mins
Total Time:
12 hrs 30 mins
Jump to Nutrition Facts
Cook Mode (Keep screen awake)
Ingredients
1poundfresh strawberries
2mediumbananas
1tablespoonfresh lemon juice
¼cupice-cold water, as needed
Directions
Hull and coarsely chop strawberries. Peel and coarsely chop bananas. Spread the strawberries and bananas on separate sides of one baking sheet or on two sheets. Freeze until solid, at least 12 hours.
Let the strawberries thaw at room temperature for 15 minutes. Transfer to a food processor; pulse until finely chopped, about 10 pulses. Add the frozen bananas and lemon juice; process until smooth, 1 to 1 1/2 minutes, adding up to 1/4 cup cold water if needed to achieve desired consistency, stopping to scrape down sides of bowl as needed. Serve immediately or, for a firmer texture, transfer to a freezer-safe container and freeze for up to 30 minutes.
Jennifer Causey
Tips
To make ahead: Freeze fruit (Step 1), transfer to separate sealable plastic bags and freeze for up to 6 months.
Originally appeared: EatingWell.com, April 2019
Nutrition Facts (per serving)
191
Calories
1g
Fat
23g
Carbs
1g
Protein
Nutrition Facts
Servings Per Recipe 4
Serving Size 1 cup
Calories 191
% Daily Value *
Total Carbohydrate
23g
8%
Dietary Fiber
4g
14%
Total Sugars
13g
Protein
1g
3%
Total Fat
1g
1%
Saturated Fat
0g
1%
Vitamin A
52IU
1%
Vitamin C
73mg
81%
Folate
40mcg
10%
Sodium
2mg
0%
Calcium
22mg
2%
Iron
1mg
3%
Magnesium
31mg
7%
Potassium
389mg
8%
Nutrition information is calculated by a registered dietitian using an ingredient database but should be considered an estimate.
* Daily Values (DVs) are the recommended amounts of nutrients to consume each day. Percent Daily Value (%DV) found on nutrition labels tells you how much a serving of a particular food or recipe contributes to each of those total recommended amounts. Per the Food and Drug Administration (FDA), the daily value is based on a standard 2,000 calorie diet. Depending on your calorie needs or if you have a health condition, you may need more or less of particular nutrients. (For example, it’s recommended that people following a heart-healthy diet eat less sodium on a daily basis compared to those following a standard diet.)
(-) Information is not currently available for this nutrient. If you are following a special diet for medical reasons, be sure to consult with your primary care provider or a registered dietitian to better understand your personal nutrition needs.
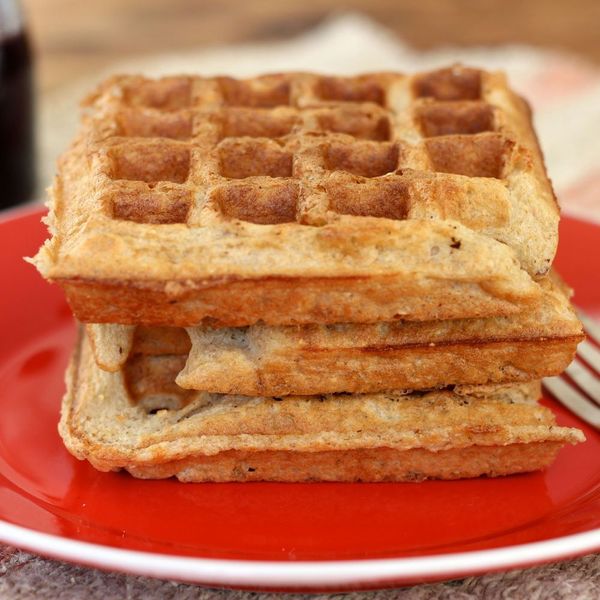
Adapted from Alicia Silverstone’s recipe for Protein-Packed Waffles in her book Kind Mama, the base for these vegan and gluten-free waffles are beans, soaked overnight and pureed – no pre-cooking. At first I was skeptical – would they be too starchy, or cause too much, ahem, discomfort. Nope. They’re amazing, hefty and satisfying with a very subtle bean flavor. I tweaked the recipe, reducing the oat quantity, adding more flax, plus a touch of honey and EVOO (the latter crucial to prevent sticking). These are now in constant rotation in our household – even the baby loves them (his first finger food!) —WineWithDinner
Ingredients
1 cup
dried white beans (I use great northern or navy), soaked overnight and drained
4 1/2 cups
water
3 cups
rolled oats
4 tablespoons
whole flaxseed
2 tablespoons
baking powder
2 teaspoons
sea salt
2 tablespoons
honey
3 tablespoons
extra virgin olive oil (or melted coconut oil)
Directions
Add the soaked beans to a blender with the water (yes, you don’t need to cook them first!) Start on low and gradually increase the speed until the beans are completely smooth. Add the remaining ingredients and blend until fully incorporated. You may need to do this in two batches, especially if you don’t have a high-speed blender (like a Vita-mix).
Heat your waffle iron. I don’t oil mine, as it’s pretty good at living up to the non-stick promise. If yours isn’t, brush on some coconut butter or use some coconut oil spray to prevent sticking.
When fully heated, pour in batter and cook until waffles are golden brown and cooked all the way through – about 6-8 minutes.
Leftovers are great for quick breakfasts – just reheat in a toaster. These also freeze really well.
Serves
2 dozen cookies [varies with cookie cutter size]
Author Notes
Some people’s hearts are made of gold, or so they say. I’m 99% sure mine is made of chocolate…and that’s as good as gold in my book.
This recipe is gluten free, dairy free, egg free, soy free, peanut free, tree nut free, wheat free, corn free, legume free, and vegan. —Kait Turshen
Ingredients
3 tablespoons
warm water
1 tablespoon
ground flaxseed
1/2 cup
organic white sugar
6 tablespoons
allergy friendly shortening
1 teaspoon
vanilla extract
1 1/4 cups
gluten free all-purpose flour
1/4 cup
natural cocoa
1/2 teaspoon
baking soda
1/2 teaspoon
fine sea salt
Directions
Preheat oven to 425 degrees. Line a baking sheet with parchment paper.
In a small mixing bowl, combine ground flaxseed and water. Whisk well and set aside for 5 minutes. This will serve as your “egg” in the recipe.
In a large mixing bowl, combine shortening and sugar; beat until light and fluffy. Add flaxseed mixture and vanilla; continue to beat until well combined. Gradually mix in flour, cocoa, baking soda, and salt.
Roll out dough on a floured surface to ¼ inch thick. Using a heart cookie cutter, or shape of choice, cut out cookies. Roll out scraps and repeat until all dough has been used.
Transfer hearts to baking sheets. Bake for 10 minutes. Remove from oven; let cool on baking sheet for 2 minutes, then transfer to a wire rack to cool completely before decorating. Decorate however your Valentine heart desires! I frosted mine in melted chocolate and finished off with fun sprinkles and a simple powdered sugar glaze.
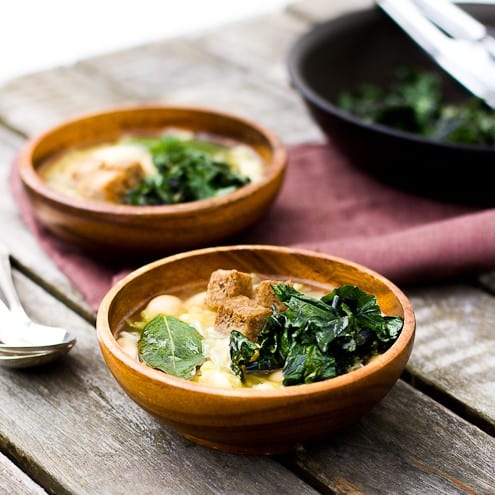
An easy to make soup that’s delicious and very satisfying no matter the season with the added benefits of kale.
Next time you’re craving something light and nutritious, go for this delicious kale soup.
By Martyna Candrick
Kale is so en vogue right now! Everyone is talking about it, cooking it and eating it and now so can you. But why should you?
Because, in a nutshell, it is very high in beta carotene, vitamin K, vitamin C, lutein, zeaxanthin, and reasonably rich in calcium. Kale also contains sulforaphane (particularly when chopped or minced), a chemical with potent anti-cancer properties and it is said to help the body in a natural detocification process.
And the soup itself is very satisfying no matter the season. So why not try it next time you’re craving something light and nutritious?
Print
Cabbage, Bean and Crispy Cale Soup
5 Stars 4 Stars 3 Stars 2 Stars 1 Star
5 from 1 review
Author:Martyna Candrick
Total Time:35 minutes
Yield:41x
Description
The following recipe is vegan, but please feel free to use good quality (organic) chicken stock and cultured butter if you wish. Hard boiled eggs or shredded chickengo very well in this soup as well. Add extra stock if you’d like more broth. I used fresh bay leaves.
For the Cabbage, Bean and Crispy Kale Soup:
1/4 medium green cabbage, shredded
1 leek, white part only, sliced
4–5 cups vegetable stock
1 (440g / 15.5oz) can butter beans, drained
4 whole kale leaves
2 fresh bay leaves // or 4 dried
4 tsp cooking oil // or butter
For the croutons:
4 slices (dark rye) sourdough, cut into 1cm squares
1 tbsp cooking oil // or butter
Instructions
To make the soup:
heat 2 teaspoons of oil in a large stock pot over medium heat. Add shredded cabbage and leeks. Cook, stirring, until the cabbage has wilted and reduced volume by half. Add stock and bring to a boil. Simmer for 15 minutes or until the cabbage has softened. Add canned beans and simmer for another 5 minutes. In the meantime prepare kale (and croutons).
To perpare the kale:
wash leaves and stems under cold running water, shake off excess water. Chop across the leaves into 1cm wide ribbons. Heat 2 teaspoons of cooking oil in a medium frypan over medium heat. Add kale and cook, stirring, until wilted and becoming crisp. Turn off the heat and leave until serving.
To make the croutons:
heat 1 tablespoon of cooking oil in another fry pan over medium high heat. Add bread squares and cook, stirring, until the croutons are lightly browned and crip.
To serve:
divide soup between serving bowls. Top with crispy kale and serve croutons on the side. Pop a few croutons into the soup at a time so that they can retain their crunch in every bite.
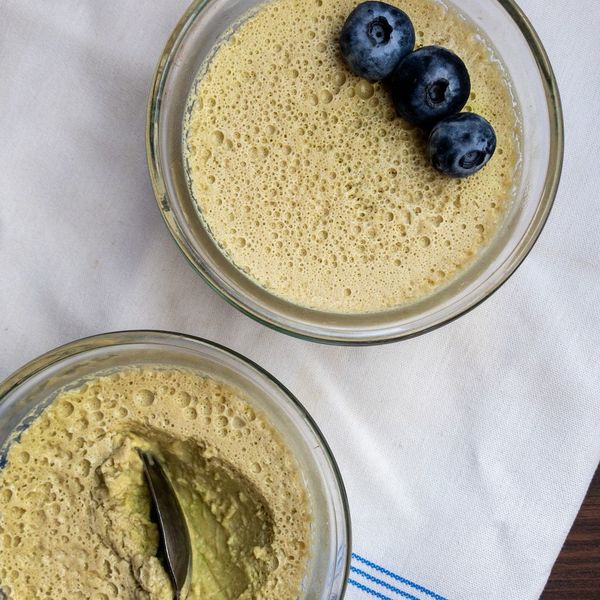
I was inspired by a vegan pudding recipe I found on one of my favorite sites, Golubka Kitchen. Since I love all things matcha, especially matcha lattes with oat milk, I thought it would be fun to try this recipe with a few tweaks!
I’m very happy with the texture- its so creamy and just like regular pudding! —Jennifer Hutzel
Ingredients
1.5 cups
oat milk
2 tablespoons
oat milk
3 to 4 tablespoons
maple syrup or honey
1 tablespoon
agar agar flakes
2 tablespoons
arrowroot powder
3 tablespoons
chopped cacao butter
1 teaspoon
vanilla extract
1 pinch
sea salt
2 teaspoons
matcha powder (preferably ceremonial grade)
Directions
Combine 1.5 cups of oat milk with the maple syrup, vanilla, agar agar flakes and salt in a medium saucepan and bring to a boil over medium high heat. Lower the heat to a simmer and cook for 5 minutes, stirring frequently.
Combine the arrowroot powder with the 2 tbsp of oat milk in a small bowl. Slowly pour the arrowroot mixture into the agar-agar milk, whisking, until thickened.
Add the cacao butter and matcha powder to a blender along with the milk mixture. Blend until smooth. Taste for sweetness and add more maple syrup, if desired.
Pour into small ramekins or glasses and chill for about 2 hours.
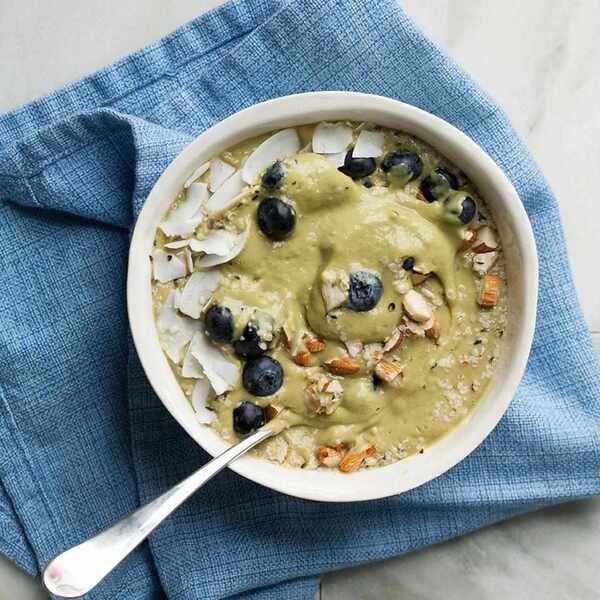
While bananas are high in sugar, the sugar is natural and is a great source of energy. In this recipe, the banana is paired with avocado, a healthy fat source. This combination helps keep blood sugar steady. Both bananas and avocados provide a wealth of nutrients and have been linked to disease reduction.
Is non-dairy milk good for you?
For people who cannot consume dairy products, plant-based beverages can be a great replacement. Coconut milk and almond milk are often fortified with vitamins B12 and D to boost their nutrition. Both are also high in calcium. It’s important to note that unless fortified with it, coconut and almond milks lack protein. To boost the protein content in this recipe, you could add a scoop of your favorite protein powder.
How can I make the smoothie thicker?
For a thicker texture, freeze your banana slices to make it more of an ice cream-style smoothie. To freeze bananas for smoothies, peel and slice bananas, then spread the banana slices out in a single layer on a parchment-paper-lined baking sheet. Make sure the banana slices are not touching each other so they don’t stick together when they freeze. Place the baking sheet in the freezer until the banana slices are frozen. Transfer the frozen banana slices to an airtight, freezer-safe container or bag. Label and date the bag before placing it in the freezer. For the best quality, plan to use frozen banana slices within two months of freezing.
What’s the best way to store a cut avocado?
Use half of the avocado for the smoothie and store the rest for another recipe. To store the remaining avocado, leave it in the skin and keep the pit intact if you can. The skin and the pit block oxygen from reaching the flesh, limiting how much is exposed and will inevitably turn brown. To help preserve the rest of it, place plastic wrap directly on the flesh so there’s no chance of air getting to it and store it in the fridge. It should stay green for at least two days.
Can I double this recipe?
This recipe easily doubles to make two servings. Make the doubled recipe at once and serve immediately. To make it in advance, pour into Mason jars with tight-fitting lids. Store in the freezer. The night before serving, transfer the jars to the fridge to thaw.

/b3e174b8-30f1-4952-ae47-aa1b352aa345--DSC_3412.jpg)

/a5461599-92e4-4493-8ff4-179fec934cd5--AD0C114E-A634-491A-A213-62AC19203718.jpeg)

/87c8009a-cd1a-4652-9f19-29c7321262e5--IMG_0218.JPG)


/088559a0-3ca3-464d-9270-6bab55ffd987--vegan-pumpkin-cornmbread-1402.jpg)


/9f2ba604-1bcf-4fc3-8924-b6b455b8cdf2--IMG_0114.JPG)


/08caa3c7-dd75-4d1e-a041-2281fb7a5067--WEB.IMG_5081.jpg)


/79a0db32-8fe2-4b30-8aa0-a1b7656a9919--APC_0670.jpg)