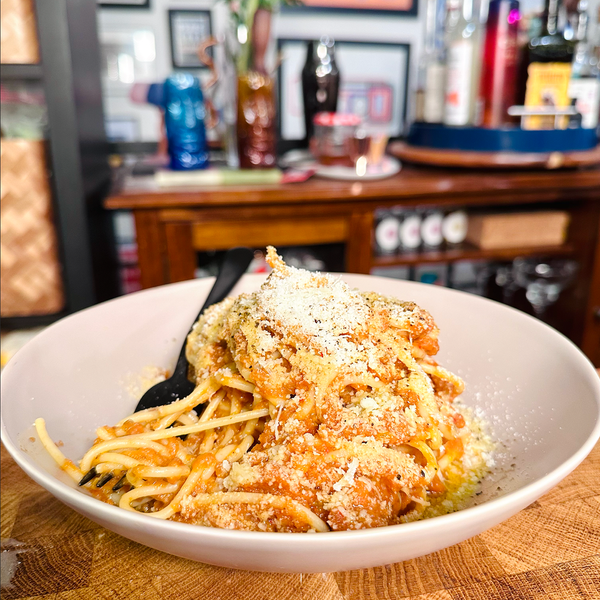
This dish is a unique fusion of comfort food and bold flavors. As the weather cools down, indulge in the warmth of red sauces and cozy pasta dishes. This recipe combines the classic structure of bolognese with the complexity and bite of kimchi. For a vegan twist, we’ve used eggplant, but you can opt for ground turkey, beef, or pork. The sauce strikes a harmonious balance between sweet, savory, and funky, making it a delightful pairing with thick spaghetti noodles and generous helpings of grated Parmesan cheese. —Will Coleman
Ingredients
2 tablespoons
olive oil
1
large yellow onion
2 cups
chopped celery
2 cups
chopped carrots
4 cups
chopped eggplant
3
large garlic cloves
4-6
thyme sprigs
2 cups
chopped kimchi
4 cups
crushed tomatoes
2 cups
vegetable broth
1 pound
cooked pasta
grated parmesan cheese, for serving
Directions
Place a large pot over medium heat and add olive oil.
Once the oil begins to shimmer, add in the onions, celery, carrots, and eggplant. Cook for 10 minutes or until the onions become translucent.
Stir in the garlic, thyme sprigs, and chopped kimchi. Cook for an additional 5 minutes or until the garlic becomes fragrant.
Add in the crushed tomatoes and broth and bring to a simmer. Cook for 30 minutes, while stirring every 10 minutes. Once the sauce has been slightly reduced and the vegetables are tender, remove from the heat.
Serve the sauce over cooked pasta and garnish with parmesan cheese.
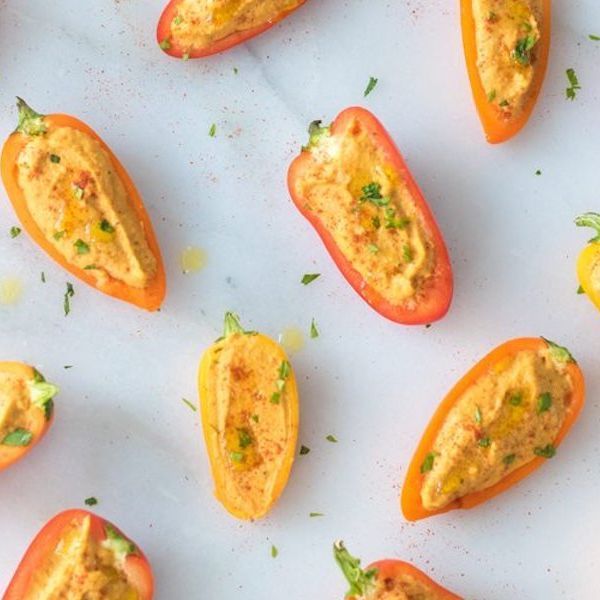
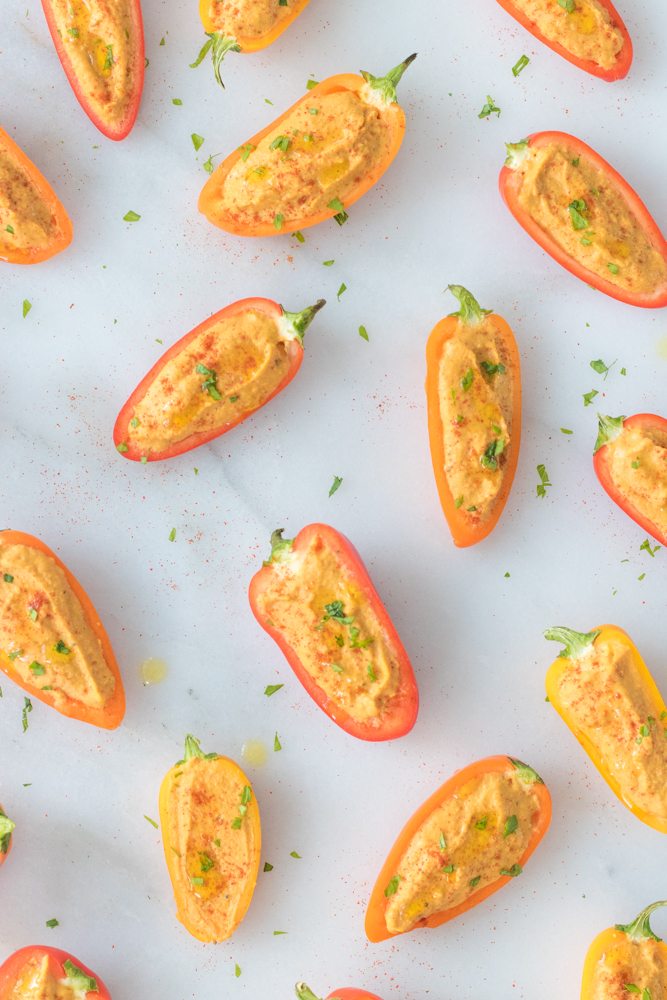
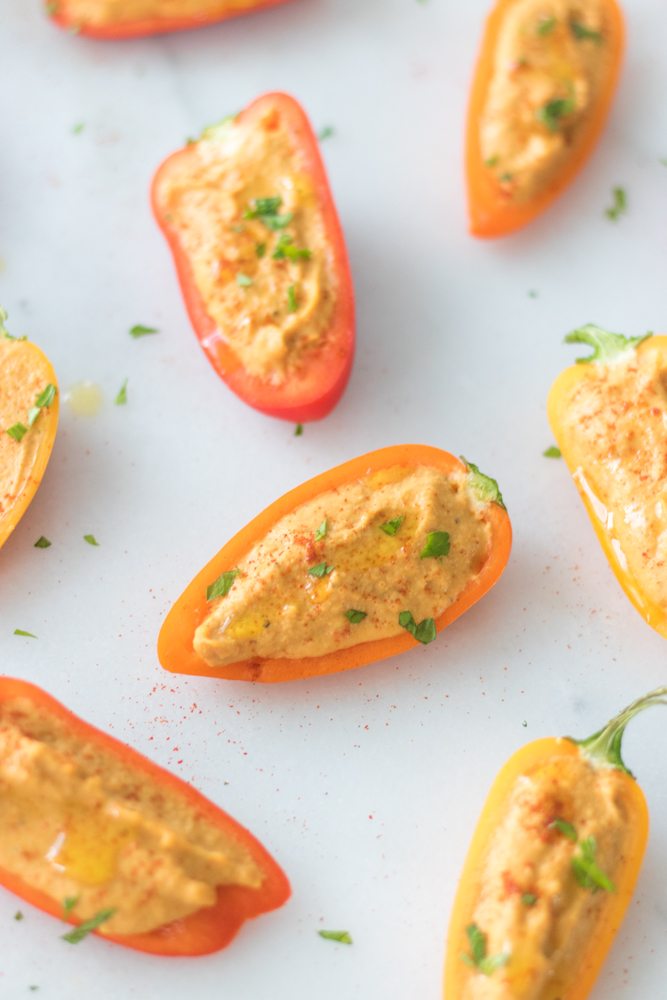
These hummus-stuffed mini sweet peppers are bite-sized game day snacks that pops right in your mouth. They are bursting with flavor and work for everyone .
SPONSORED: We get excited about good food and great ingredients, so we’ve teamed up with Divine Flavor to bring you delicious recipes for each season made with their fresh produce. These hummus-stuffed mini sweet peppers are bite-sized game day snacks that pops right in your mouth. They are bursting with flavor and work for everyone since they are vegan, gluten-free, nut-free and refined sugar free. Whether you are serving these yummy bites on game day or any gathering they are sure to please a crowd while still being healthy.
I’m a huge fan of easy-to-pull-together nutritious finger-food. These Mini Peppers Stuffed with Roasted Sweet Pepper Hummus are delicious bite-sized pop-able party appetizers. They are also vegan, gluten-free, nut-free and contain no refined sugar. With the Super Bowl right around the corner, I thought this recipe would provide some inspiration for a fun, colorful plant-based appetizer to serve on game day. Your guests will go crazy over these adorable little bites stuffed with creamy hummus that is bursting with roasted pepper flavor.
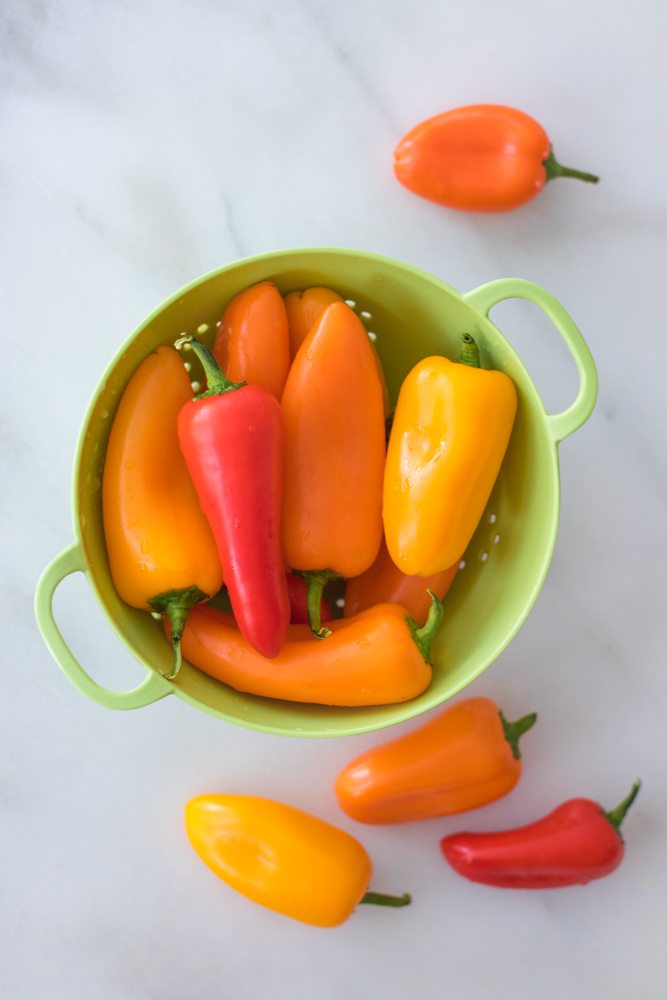
The recipe starts with colorful mini sweet bell peppers (aka Tribelli peppers grown by Divine Flavor). They are adorable. They fit in the palm of your hand and come in vibrant red, orange and yellow colors. To prepare this recipe you simply roast them in the oven, use them to make the hummus and then stuff the Tribelli peppers with the hummus. Garnish if desired and serve!
If you are short on time you could prepare the hummus and simply serve that with chips, pita bread or veggies. It really just depends on your preference and how much time you have. If you do opt for the stuffed peppers, the perfect little bite-sized portions are easy to serve to your guests. I provide instructions for all these options in the recipe below.
These bite-sized appetizers are always a huge hit when throwing a party. Plus, this recipe makes so many that you are sure to have enough for everyone!
This post is sponsored by Divine Flavor, a Mexican family-run and grower-owned fruit and vegetable distribution company based out of Arizona. Divine Flavor believes in growing better food for a better world meaning taking care of both its people and the environment. As such, the company produces fresh, non-GMO foods grown in nutrient-rich, never over-farmed soil.
Print
5 Stars 4 Stars 3 Stars 2 Stars 1 Star
No reviews
½ pound ~11 mini peppers Divine Flavor Tribelli Peppers (for roasting)
1, 15 ounce can garbanzo beans (rinsed and drained)
½ cup ice cold water
1/4 cup raw tahini (runny not hardened)
1 large garlic clove
1 teaspoon salt
1/4 teaspoon ground black pepper
1.5 pounds Divine Flavor Tribelli Peppers (~33 mini peppers, halved lengthwise with seeds removed (for stuffing)*)
Instructions
Roast the peppers: Preheat oven to 450 degrees F. Line one large baking sheet with parchment paper. Once the oven preheats, place ½ pound of peppers on the baking sheet. Leave the peppers whole for roasting (no need to remove stems or seed them at this point). Bake on middle rack for 20-25 minutes until the skin is lightly charred and soft. The peppers should slightly collapse. Remove baking sheet from oven and allow peppers to cool before handling. Once cooled, the stem should easily pop off along with the seeds. These peppers do not have many seeds and it is okay if some seeds remain. Discard the stems and any seeds and place the roasted peppers in a large food processor. There is no need to remove the skin off the peppers.
Make the hummus: To the food processor, add the garbanzo beans, water, tahini, garlic, salt and pepper. Process for at least one minute. For an even smoother hummus, continue to process another couple minutes if you have time. Taste and adjust seasonings if needed. You can serve this hummus on its own with raw veggies, chips, crackers or pretzels. If serving as a dip, place hummus in a bowl and garnish with a drizzle of extra virgin olive oil, fresh parsley and a sprinkle of smoked paprika. Or, you can use the hummus to stuff additional peppers for a fun, bite-sized, easy pick-up appetizer.
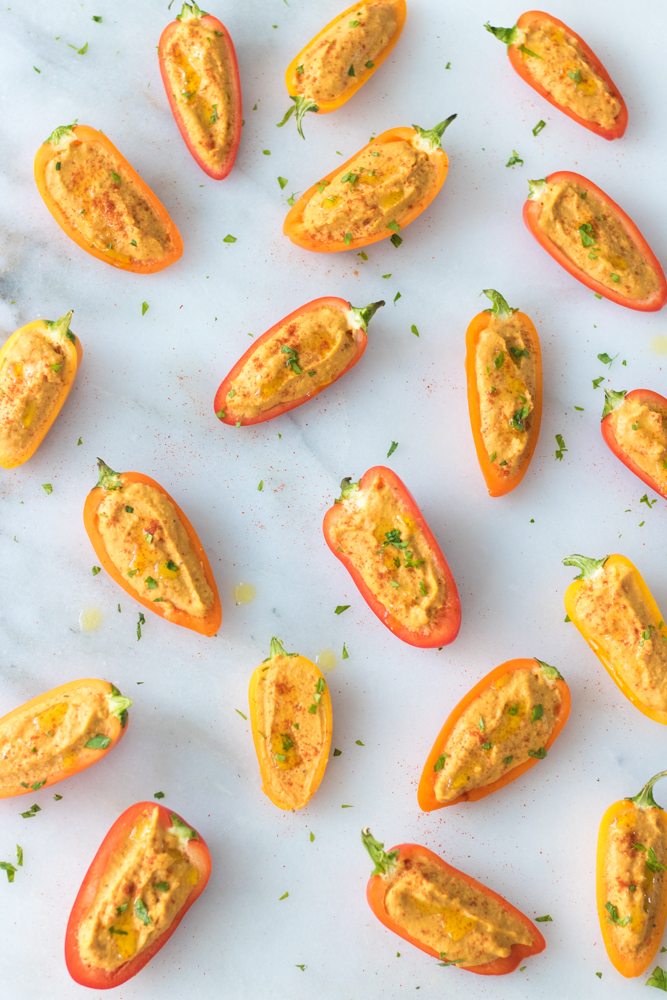
Stuff the peppers: If stuffing the peppers, halve them lengthwise, remove seeds and gently fill with hummus using a small spoon. Sprinkle each mini pepper bite with a small drizzle of extra virgin olive oil and a sprinkle of fresh parsley and smoked paprika (as shown in pictures).
Notes
*You can leave the stem on the stuffed mini peppers for serving (as pictured). Additionally, you can roast the mini bell pepper “boats” prior to stuffing if desired. I find the recipe even more flavorful this way if you have time. Simply toss them with 1 tablespoon olive oil and a sprinkle of salt and pepper. Roast them on a parchment lined baking sheet skin side up for 12 minutes at 350 degrees. Allow to cool before handling them, then stuff with the hummus and garnish with a drizzle of olive oil and sprinkle of parsley and smoked paprika.
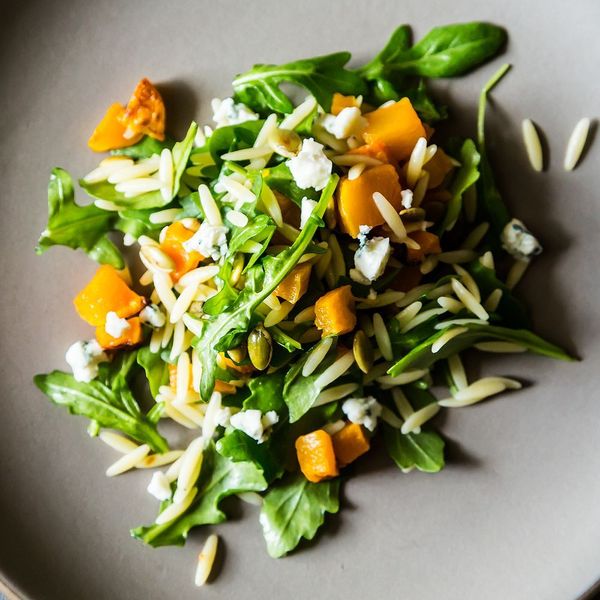
I love fall’s flavors … especially roasted butternut squash. Combined with an orzo pasta and some microgreens — your choice of watercress, arugula or any dark green, and you have the lushness of a roasted fall veggie with the lightness of a summer salad. I use fresh sage leaves when roasting the squash and a rich Maytag blue cheese to complement the dish, but you could sub a mild chevre or leave it off for a vegan side dish. This salad holds well and is as good at room temp as it is warm, or even cold from the fridge. If transporting, just add the cold blue cheese when ready to serve. —lorigoldsby
Test Kitchen-Approved
Ingredients
2 pounds
butternut squash, cut into bite-sized cubes
1/4 pound
orzo
2 ounces
Maytag blue cheese
1/4 cup
oil (scant)
1 bunch
fresh sage leaves
Fresh cracked pepper and coarse kosher, sea, or alder salt
1 bunch
watercress, arugula, or any microgreen
1 ounce
roasted pepitas
Directions
If you didn’t purchase the precut butternut squash, then peel and cube the squash. If you did purchase the precut squash, give it a good rinse and pat dry.
Drizzle the butternut squash with a good quality oil. Salt and pepper to taste. If you have some smoked salt (like alder), you can substitute a pinch of it for regular kosher salt.
Arrange clusters of sage on top of squash. Reserve 2 to 3 sage leaves. If you don’t have fresh sage, you can substitute some dried “rubbed sage” — sprinkle liberally like salt.
Bake at 450 F for 30 to 40 minutes (depending on your cube size) or until golden caramelization and deliciousness occurs.
Cook orzo according to package directions. At my farmer’s market there is a vendor that sells an “autumn blend” of tricolor orzo. Boil in approximately 4 cups salted water for 15-17 minutes (normal orzo will probably take much less time — check your package to be sure). Drain and chill.
Combine cooked butternut squash, pepitas, and orzo and toss. (The leftover oil in the roasting pan will serve as your “dressing” — use leftover oil in pan to minimally coat orzo). Personally I don’t think you need any acid (like lemon or vinegar) because of the “tang” of the blue cheese — but if you are omitting the cheese, you may want to try a few splashes of a good balsamic vinegar.
Add crumbled blue cheese (or feta or chevre or omit cheese) and choice of greens. Add a few chiffonaded strips of fresh sage as a garnish.
I learned to cook with my Gran. I can still see her reading a recipe and figuring out how she would make it better. She was fearless about substituting ingredients–but also knowledgeable. She approached food in the same way she built her antique business–appreciate quality ingredients and workmanship, but don’t be a snob. I think I carry those same beliefs in my approach to cooking. I love family style dinners, I love a fancy ladies’ luncheon with my wedding china, or a backyard seafood boil to celebrate my husband’s birthday…I love to share food with others.
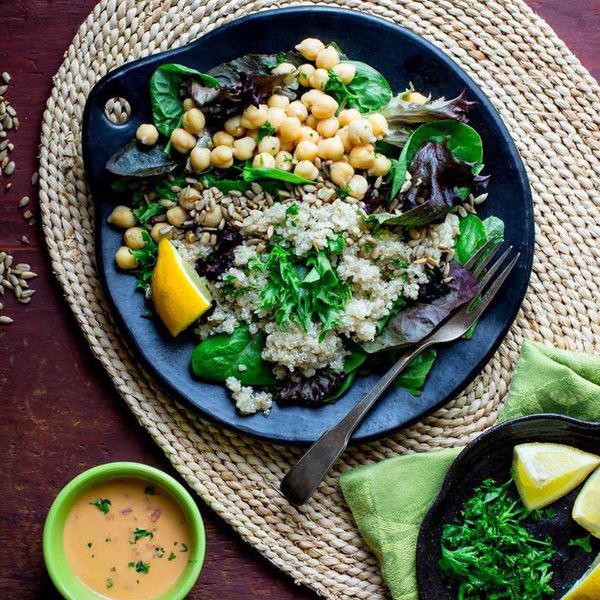
This hearty vegan salad is loaded with plant-based power ingredients: chickpeas, quinoa and hummus. We love the crunch of the sunflower seeds and the unexpected flavor of roasted peppers.
Updated on April 22, 2024
Cook Mode (Keep screen awake)
Ingredients
2tablespoonshummus, original or roasted red pepper flavor
1tablespoonlemon juice
1tablespoonchopped roasted red pepper
2cupsmixed salad greens
½cupcooked quinoa
½cupchickpeas, rinsed
1tablespoonunsalted sunflower seeds
1tablespoonchopped fresh parsley
Pinch of salt
Pinch of ground pepper
Directions
Stir hummus, lemon juice and red peppers in a small dish. Thin with water to desired consistency for dressing.
Arrange greens, quinoa and chickpeas in a large bowl. Top with sunflower seeds, parsley, salt and pepper. Serve with the dressing.
Originally appeared: EatingWell.com, August 2017
Nutrition Facts (per serving)
379
Calories
11g
Fat
59g
Carbs
16g
Protein
Nutrition Facts
Servings Per Recipe 1
Serving Size 3 1/2 cups
Calories 379
% Daily Value *
Total Carbohydrate
59g
21%
Dietary Fiber
13g
47%
Total Sugars
3g
Protein
16g
32%
Total Fat
11g
13%
Saturated Fat
1g
7%
Vitamin A
4185IU
84%
Vitamin C
45mg
50%
Folate
300mcg
75%
Sodium
607mg
26%
Calcium
139mg
11%
Iron
6mg
32%
Magnesium
156mg
37%
Potassium
892mg
19%
Nutrition information is calculated by a registered dietitian using an ingredient database but should be considered an estimate.
* Daily Values (DVs) are the recommended amounts of nutrients to consume each day. Percent Daily Value (%DV) found on nutrition labels tells you how much a serving of a particular food or recipe contributes to each of those total recommended amounts. Per the Food and Drug Administration (FDA), the daily value is based on a standard 2,000 calorie diet. Depending on your calorie needs or if you have a health condition, you may need more or less of particular nutrients. (For example, it’s recommended that people following a heart-healthy diet eat less sodium on a daily basis compared to those following a standard diet.)
(-) Information is not currently available for this nutrient. If you are following a special diet for medical reasons, be sure to consult with your primary care provider or a registered dietitian to better understand your personal nutrition needs.
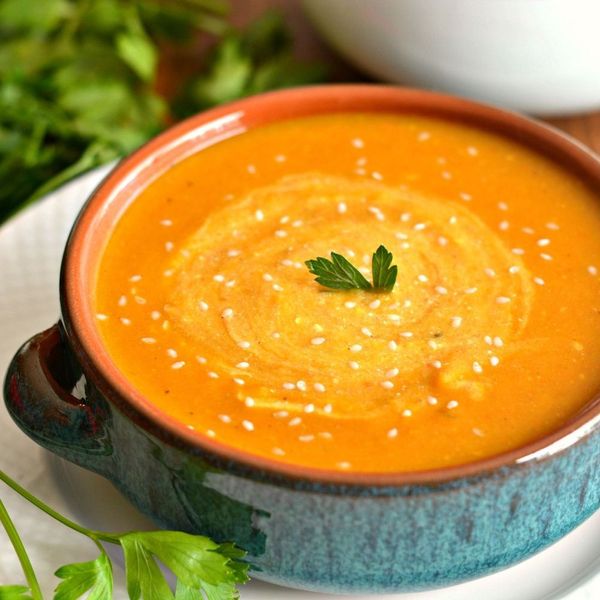
Nothing like a warm, comforting bowl of veggie packed soup on a cold day. This nutritious Butternut Sweet Potato Soup is loaded with vitamins A & C. A healthy & delicious bowl that’s gluten free, Paleo, low calorie & Vegan too! —Megan Olson
Ingredients
5 cups
butternut squash, diced (you can also used canned)
1
large sweet potato, peeled and diced
2
medium carrots, peeled & chopped roughly
1/2 cup
white onion, diced
2 tablespoons
minced garlic
1 tablespoon
minced ginger
2 tablespoons
extra virgin olive oil
4 cups
gluten free, low sodium vegetable broth
1/4 cup
unsweetened almond milk
1/4 teaspoon
cayenne pepper
1/4 teaspoon
ground nutmeg
salt & pepper to taste
Directions
Preheat oven 425 degrees
Place carrots, butternut squash (if not using canned) & sweet potato on a baking sheet lined with parchment paper & spray with nonstick cooking spray
Roast veggies 40 minutes until tender
Remove veggies from the oven & place in a blender or food processor with almond milk
Puree the veggies until smooth
Heat a large pot over medium heat
Add extra virgin olive oil, garlic, ginger & onions
Saute a few minutes until onions are tender
Add veggie puree, vegetable broth & spices to the pot
Bring to a boil then cover & simmer for 20 minutes
Serve immediately with optional toppings: nonfat Greek yogurt & sesame seeds as desired
Refrigerate up to one week or freeze up to a month
The thought of a fall smoothie; when the weather is chillier seems far-fetch. But should it be? Just like in the summer, when we toss seasonal fruits and vegetables into a blender to create delicious, healthy on the go smoothies – the process can be applied in the fall too. Simply swap out the peaches and mangoes with ingredients such as maple, pumpkin, and cinnamon. For an additional boost of energy try adding in a shot or more of caffeine from popular brewers such as Toby’s Estate and Bulletproof. Or make it vegan by using a milked nut beverage by Elmhurst. Tis’ the season for new smoothie blends and of course a slice or more of pie.
Bulletproof Pumpkin Spice Fall Smoothie
Bulletproof-Pumpkin-Spice-Fall-Smoothie
Ingredients:
1 peeled and frozen green banana
1/2 cup cold-brewed or chilled coffee from mold-free beans
Combine all ingredients in a saucepan. Over medium heat, simmer for approximately five minutes. Stir well to evenly blend spices and oils.
In a high-speed blender, add 2 1/2 cups Bulletproof coffee (brewed strong), add pumpkin spice mixture from saucepan – blend on high for 30 seconds until creamy and frothy.
(Option: if you don’t have a blender, add premade coffee to pumpkin mixture and use a hand blender in saucepan – blend till smooth and frothy.)
Optional: add xylitol, monk fruit, stevia, or other natural sweetener.
Optional: add raw cream/whipped cream on top for a special treat, if you can find it!
Note: Recipe and image are courtesy of Bulletproof
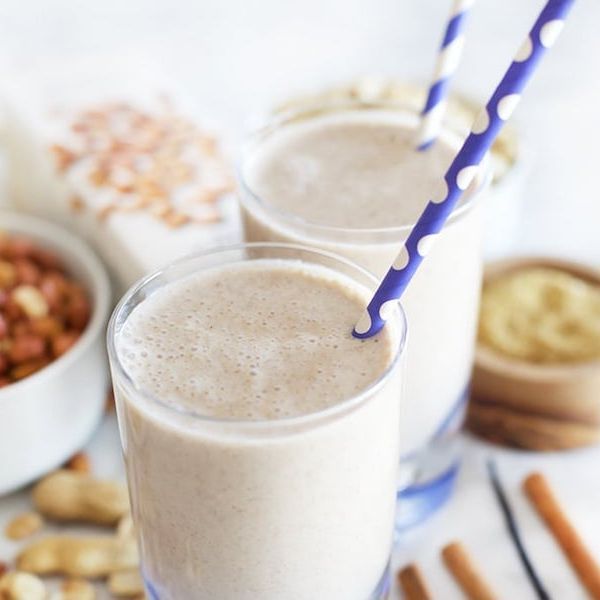
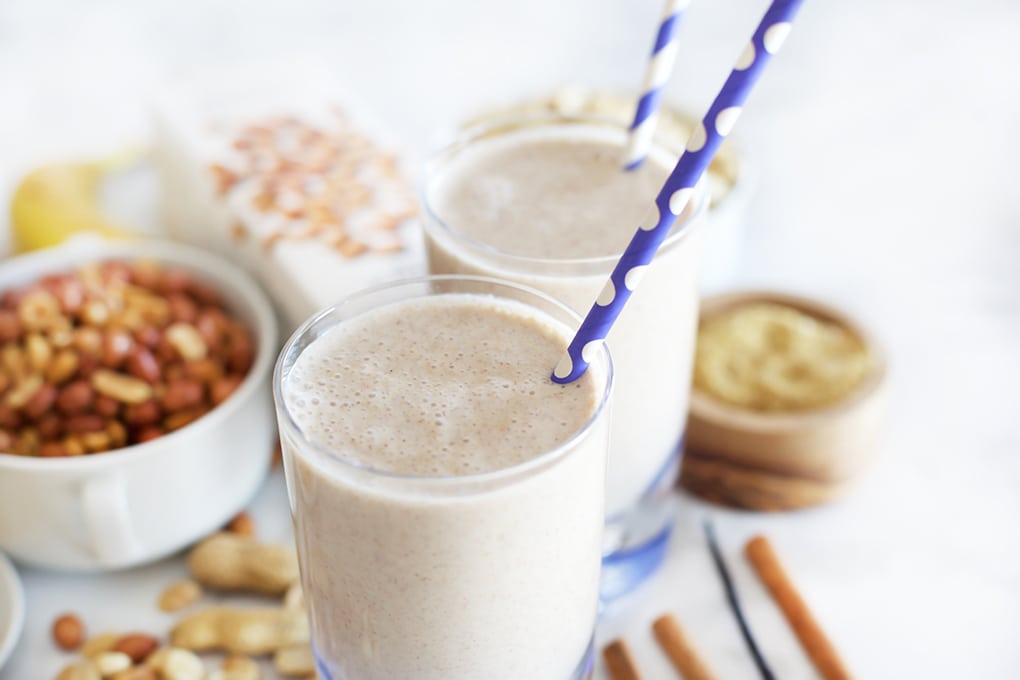
Maple Vanilla Peanut Fall Smoothie with Elmhurst
Maple Vanilla Peanut Fall Smoothie with Elmhurst
Ingredients:
1.5 cups Elmhurst Milked Peanuts™
1 cup frozen banana
2 Tbsp ground flaxseed
1 Tbsp maple syrup
1 Tbsp vanilla extract
1 tsp cinnamon
Directions
Blend together all ingredients until completely liquefied and no chunks are remaining.
Enjoy!
Note: Recipe and image are courtesy of Elmhurst
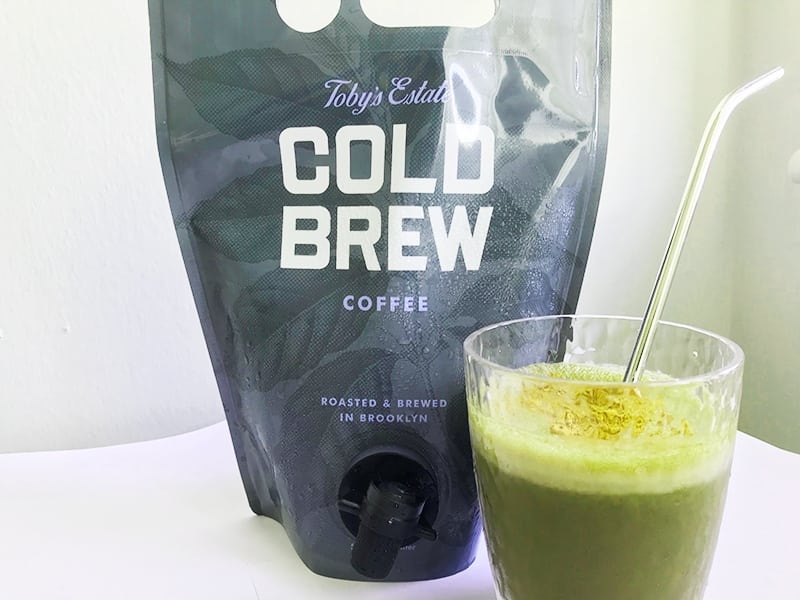
Green Mocha Fall Smoothie with Toby’s Estate
Green Mocha Fall Smoothie with Toby’s Estate
Ingredients:
2 large handfuls of greens (spinach or kale)
1/2 cup of almond milk
1 cup of Toby’s Estate Cold Brew coffee
1 frozen banana
2 tablespoons of cocoa powder
1 tsp cinnamon
Directions
Blend together the green,almond milk, and coffee in a blender until the greens are completely liquefied and no chunks are remaining.
Add in the remaining ingredients and blend until creamy.
Enjoy!
Note: All of the smoothies below make 1 serving. To make, blend all of the ingredients together until smooth. Add water a little bit at a time to thin the smoothie, if desired.
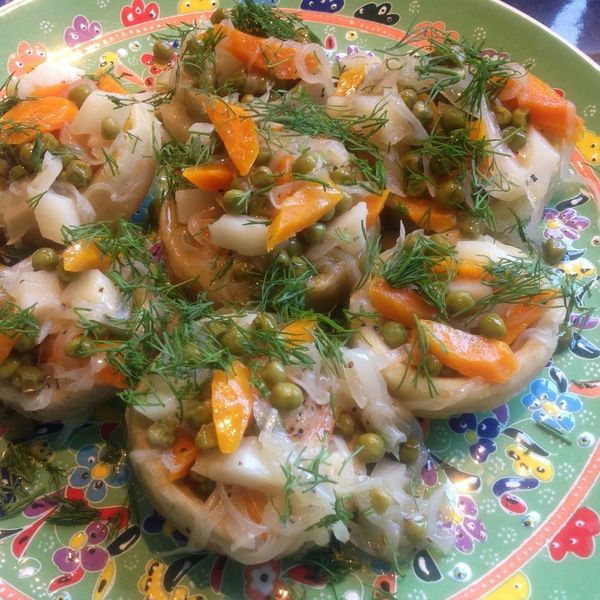
Among the most elegant and sophisticated of the Turkish olive oil dishes, Zeytinyağlı Enginar — a gorgeous, completely vegan side dish made of whole artichoke bottoms cooked in olive oil, filled with delicate bites of carrot, potato, onion, and peas, and garnished with plenty of fresh dill — charms the eyes as well as the taste buds. This is one of my lovely mother-in-law Güler’s signature dishes, and I can only try to do justice to it, as among her many other gifts and talents, she is an artistic and fearless cook! —Mandy Bora
Ingredients
1
14 ounce bag of frozen artichoke bottoms
2
Carrots
2
Waxy Potatoes
1
White Onion
1/2 cup
Fresh or Frozen Peas (thawed)
1/2 cup
Extra Virgin Olive Oil
Pinch
Sugar
1 teaspoon
Salt
2 tablespoons
Fresh Lemon Juice
1/2 cup
Fresh Dill (chopped)
Directions
Defrost artichokes and blot away any wetness with clean paper towels.
Peel and dice carrots and potatoes (measuring about 1 cup each). I like an angular dice that is uniform in size and visually attractive.
Peel and slice onion into thin, vertical slices.
Pour olive oil into a shallow pot and sauté the onion for a few minutes until the onion just gets soft. Then add the carrots and continue to sauté for a few minutes longer. Next add in the potatoes and peas, along with sugar and salt, and very gently combine the ingredients.
Carefully insert the artichokes (bottom down) in between the other vegetables and add lemon juice. Pour 1 cup of boiling hot water over the vegetables and let everything cook together on medium heat for about 10 minutes, and then cover the pot and reduce the heat to simmer.
Allow everything to simmer for 45 minutes, until most of the liquid has evaporated and the artichokes are fork tender, and then turn off the heat and let everything rest in the pot until it comes to room temperature.
Finally, adjust the seasonings, arrange the artichokes on a serving dish, fill with the cooked vegetables (allowing some to spill over onto the serving dish, and garnish with chopped fresh dill.
Makes
about 12 individual appetizers, 1 1/2 cups tapenade
Author Notes
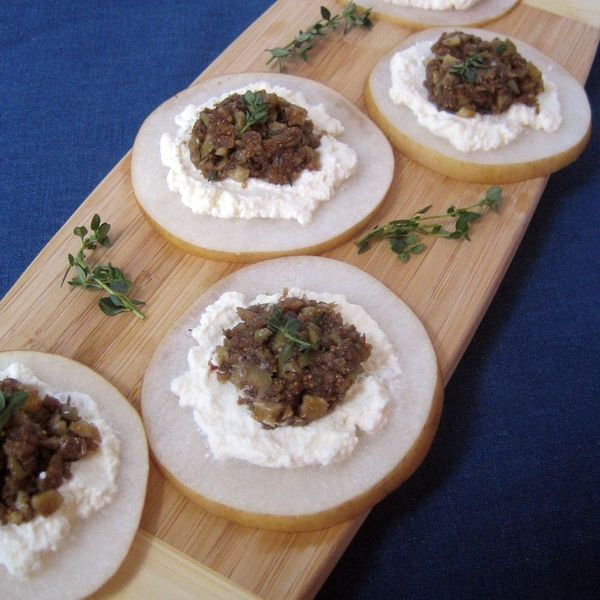
What is it about the holiday season that lends itself so well to appetizers? This is a tasty little bite that’s a lovely addition to a party menu, and if you leave off the ricotta it is a vegan option. The tapenade combines olives, figs and walnuts for a salty, sweet and crunchy flavor. The slices of Asian pear provide a crisp, juicy alternative to crackers. —BlueKaleRoad
Ingredients
1 cup
dried figs, roughly chopped
1/3 cup
water
1/3 cup
green olives, finely chopped
3 tablespoons
olive oil
1 tablespoon
balsamic vinegar
1/2 teaspoon
salt
1 1/2 teaspoons
fresh thyme leaves, chopped (plus a few sprigs for garnish)
1/2 cup
walnuts, toasted and finely chopped
1
large Asian pear
1 cup
fresh ricotta cheese, store-bought or homemade (use Jennifer Perillo’s recipe!)
Directions
In a small saucepan, combine the figs and water and bring to a simmer. Cook until the liquid evaporates and the figs are soft, about 5 minutes. Remove from heat, and when cool, puree until smooth.
In a small bowl, stir together the fig puree, olives, oil, vinegar, salt, thyme leaves and walnuts. Taste for seasoning. The tapenade can be prepared ahead of time. Cover it and set aside at room temperature.
When ready to serve, slice the Asian pear cross-wise into roughly 12 1/4 inch slices (the very middle ones will have some core that you can cup out). Arrange the slices on a serving platter. Scoop about 1 tablespoon of ricotta cheese on to each slice and spread gently. Top each with 1 tablespoon of tapenade (you will have extra tapenade leftover). Garnish with a sprig of thyme and serve.
I am a passionate home cook and love gathering my family and friends around the table.
I’ve finally managed to get spelt muffins light and fluffy! The use of coconut oil and fruit sugar make these healthy as well as moist. It was a lovely surprise, as usual attempts at delicious AND healthy baking never seem to work out. One could make these wheat- free and dairy-free muffins also Vegan by using chia seeds in place of egg; I’ve read somewhere you can make some sort of chia ‘egg’ binder. —Becky Gilhespie
Ingredients
2 tablespoons
Coconut oil, melted
1
Egg, lightly beaten
3/4 cup
Light Coconut Milk
1/2
Large banana, mashed
1 cup
Spelt flour
1/3 cup
fruit sugar or other NATURAL sugar substitute (I used Fruisana. Stevia/Truvia would also work nicely. Change quantities as necessary for product. 1/3 Fruisana = 1 cup normal sugar)
2 teaspoons
baking powder
1/2 teaspoon
cinnamon
1 teaspoon
vanilla extract
1 cup
blueberries
1/4 cup
desiccated coconut , plus more for sprinkling on top
pinch
salt
Directions
In a mixing bowl, mix together the wet ingredients. Add the flour, sugar baking powder, cinnamon and coconut to the wet ingredients and fold together until mixed. Fold in the blueberries.
Spoon into medium sized muffin tins (1st greased with more coconut oil). Sprinkle more coconut on top of each muffin
Bake in a 180c/375f oven for 15-18 mins or until a toothpick comes out dry when inserted.
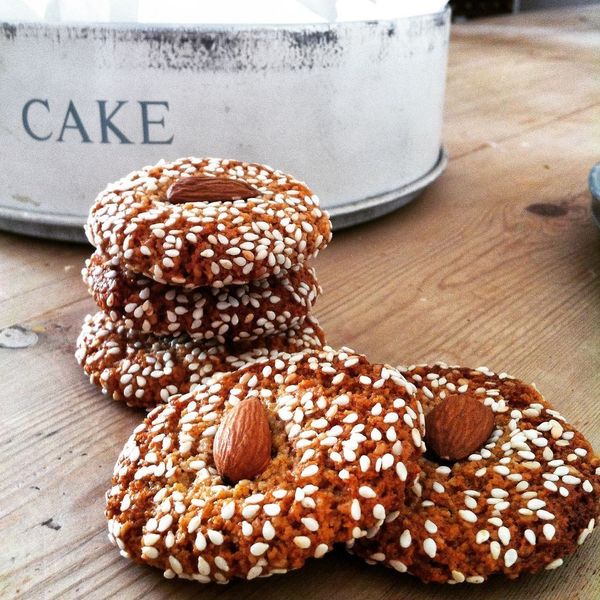
The Almond, Orange and Tahini Biscuits are wheat free, refined sugar free and chock full of almonds and tahini. They are also dairy free and egg free, making them suitable for vegans. While these do have honey in them they are not very sweet so they won’t kick your sweet cravings into high gear. The orange and cardamom flavours work beautifully with the nutty flavours of the tahini and almonds. The biscuits bake up crispy on the outside and chewy on the inside – just begging to be dunked in a cuppa! —Selma | Selma’s Table
Ingredients
175 grams
ground almonds/almond meal/almond flour
1/2 teaspoon
baking soda
1/4 teaspoon
salt
135 grams
honey
135 grams
tahini
1 teaspoon
vanilla extract
1
orange, zest only
4
drops cardamom extract or the seeds from 4 cardamoms ground to a fine powder
1/2 cup
sesame seeds
25
whole or halved almonds
Directions
Preheat oven to 180C/350F and line 2 baking sheets with parchment paper. The biscuits spread a little, so you will either need two baking sheets or should bake in two batches.
Whisk together the ground almonds, salt and baking powder in a small bowl to combine.
In a mixing bowl, combine the honey, tahini, vanilla and cardamom extracts and the orange zest. I used set honey and heated it up for few minutes so that it was easy to blend with the tahini.
Stir in the almond mixture and mix well. The dough should hold together firmly enough to shape into balls. If it’s too wet, sprinkle in some more ground almonds. If it’s too dry, spray a tiny amount of water on it.
This is quite a sticky mixture so to help with the rolling, fill a small bowl with water and wet the palms of your hands between rolling each of the balls. Using a teaspoon as a measure, roll into approximately 25 balls and roll in the sesame seeds to coat.
Place an almond on top of each ball. Flatten, using the bottom of a glass and place on the prepared baking sheet, leaving a little space between each one as they do spread.
Bake for 10 – 12 minutes or until golden brown. They will need to cool slightly on the sheet before transferring to a rack to cool completely.

/7cd82704-6b52-47e0-9feb-d0f572444f30--Screenshot_2023-10-31_at_12.22.29_PM.png)


/885c1d75-0351-4018-beae-75e8bd958bd8--food52_10-31-12-5545.jpg)


/acb02879-2e73-4c24-9aed-971d968869e0--Butternut-Carrot-Sweet-Potato-Soup-img10.jpg)


/e2997806-187f-40f8-8bc2-747bef1cf92f--Guler-s_Stuffed_Artichokes.jpg)

/12979bb0-7ac9-4095-83cd-7dd0834ed9a9--IMG_7381new.jpg)


/1e9c10db-b187-48d6-a2fb-356bf05f7be7--photo.JPG)

/8622d478-f533-4cdb-bd3b-85b9d438ce08--IMG_0824.JPG)