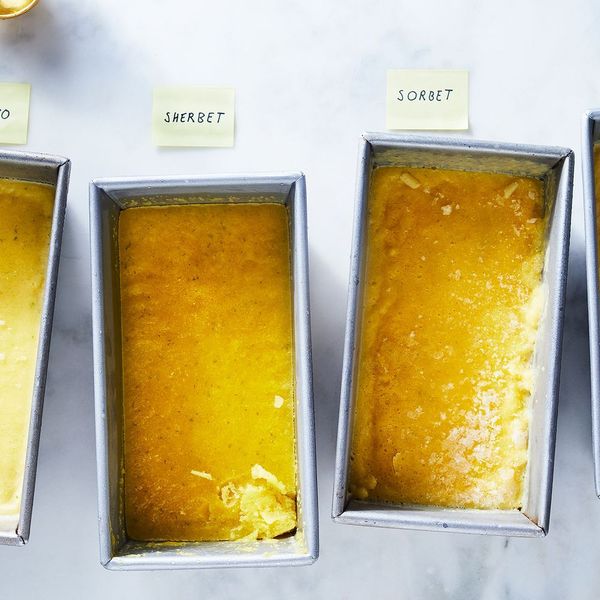
Nothing could be easier (and so much fun to play with) than food processor (aka no-churn) mango sherbet. With simple ingredient swaps you can make a vegan sorbet, frozen yogurt, or a rich mellow ice cream. If you keep a bag of pre-prepared mango chunks in the freezer, you’ll be all set to go. Mango sherbet is ultra refreshing spooned out of a dish—but don’t forget to turn it into popsicles or float scoops in a glasses of prosecco like tropical bellinis. Sherbet or ice cream also makes luscious sandwiches pressed between ginger cookies or coconut cookies.
Making sherbet (etc) in a food processor means you can taste and correct the flavors and sweetness as you go without having to second guess what it will taste like after it’s frozen—because the mixture is already mostly frozen in the processor. Mangoes, like bananas, have loads of soft fiber, which makes for ultra-smooth frozen treats without the need for fat or large quantities of sugar. —Alice Medrich
Test Kitchen-Approved
Ingredients
9 ounces
(255 grams) frozen mango chunks (or 1 cup mango puree that has been frozen and chopped into chunks)
2/3 cup
milk (non fat, low fat, or whole)
5-6 tablespoons
sugar
1-2
fresh limes
pinch
salt (I use fine sea salt)
Directions
Put the frozen mango chunks into a food processor fitted with a steel blade. Grate the zest of one lime directly into the bowl. Add the milk and 5 tablespoons of the sugar. Squeeze the lime(s) and add 1 1/2 tablespoons juice to the bowl with the salt.
Pulse and process until the ingredients are completely blended and resemble soft-serve ice cream. (If chunks are too frozen or large to process at first, let the contents of the bowl stand for a couple of minutes to soften very slightly before continuing). Taste and pulse in more sugar, lime juice, or salt as necessary. Transfer the mixture to a container and freeze until firm enough to scoop, or until needed. If the sherbet becomes too hard to serve, let it soften for a few minutes in the fridge or on the counter, or soften carefully in the microwave on low (or defrost) a few seconds at a time until scoop able.
Variations:
Mango Sorbet: Swap the milk for water.
Mango Frozen Yogurt: Swap the milk for plain yogurt.
Mango Basil Sherbet: Chop a handful of basil leaves and add them to the processor with the other ingredients.
Mango Jalapeno Sherbet: Make Mango Sherbet or Mango Basil Sherbet, adding 1/2-1 teaspoon minced jalapeno to the processor with the other ingredients.
Mango Ice Cream: Stir 3 tablespoons of sugar and 1/2 teaspoon pure vanilla extract into 1/2 cup heavy cream. Let the cream stand for a few minutes to dissolve the sugar. Omit the lime zest (but not the juice) and use the sweetened vanilla cream in place of the milk and sugar.
More ideas to play with: Trade the citrus juice for some fresh grated ginger or ginger juice. Infuse the milk with saffron. Flavor with rose water and or cardamom. Sweeten with piloncillo (panela), or honey, or agave, instead of sugar. Consider a little cinnamon or cardamom…
My career was sparked by a single bite of a chocolate truffle, made by my Paris landlady in 1972. I returned home to open this country’s first chocolate bakery and dessert shop, Cocolat, and I am often “blamed” for introducing chocolate truffles to America. Today I am the James Beard Foundation and IACP award-winning author of ten cookbooks, teach a chocolate dessert class on Craftsy.com, and work with some of the world’s best chocolate companies. In 2018, I won the IACP Award for Best Food-Focused Column (this one!).
Using several types of whole dried chiles with different flavor profiles creates a spicy, smoky, and well-rounded chili and toasting the chiles heightens their flavor.
A long simmer concentrates the chili’s flavor. Since the chili contains acidic ingredients, the texture of the beans and vegetables is preserved despite extended cooking.
Adding liquor at the very end volatilizes more flavor compounds, resulting in an intense chili aroma.
If certain folks had their way, chili would be made with nothing but beef, chiles, and the hair of a Texan’s back. If you’re one of those folks, well here’s a recipe for you. Yippie ki-yay, and all that. Move along, this is not the chili you are looking for.
If, however, you are open to such atrocities as beans in your chili, keep reading. Why does vegetarian chili get such a bum rap? I mean, there’s the obvious: Chili is a divisive issue, even (or especially?) amongst those who love chili.
But hey, guess what? Beans can taste good in chili. Tomatoes can taste good in chili. (Don’t believe me? Try out this recipe). Heck, even pork and tomatillos can taste good in chili.
So why shouldn’t we be able to make a completely meatless version that tastes great as well?
Turns out we actually have quite a few great tasting vegetarian chili recipes on the site already, but all of them (and pretty much every vegetarian chili recipe I’ve seen) fall under the fast-and-easy, 45-minutes-or-less category.
This in and of itself is not a bad thing—vegetarian chilis as a general rule don’t need to be cooked as long as meat-based chilis because vegetables tenderize faster than meat—but long, slow cooking also nets you another benefit in the flavor development. Fast chili recipes are inevitably not quite as rich and complex as you’d like them to be.
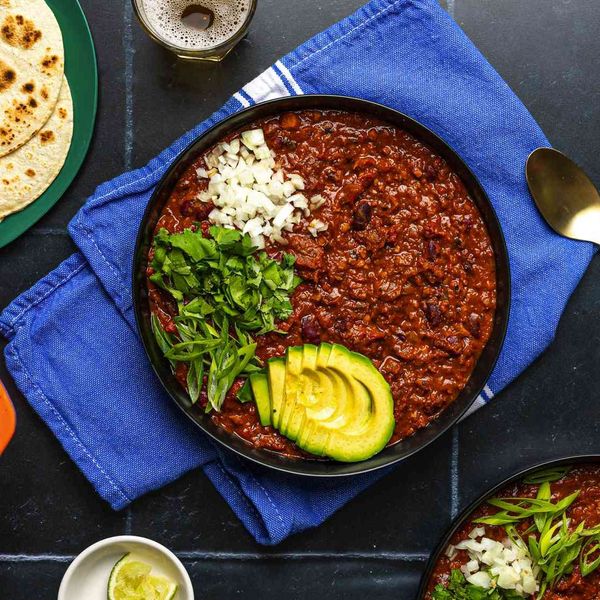
My goal: create a 100% vegan chili recipe that has all of the deep chili flavor, textural contrast, and rib-sticking richness that the best chili should have.
The Chiles
Serious Eats / J. Kenji López-Alt
First things first: Faux meat is not in the picture. I’ve already made my feelings on faux meat pretty clear, and this recipe is no different. I want my vegetarian chili to celebrate vegetables and legumes, not to try and imitate a meaty chili.
With that out of the way, we’ll move on to the second thing: Great chili has to start with great chiles. That’s what it’s all about. Heck, I’ve seen recipes calling for just a couple tablespoons of pre-fab chili powder for an entire pot of beans and tomatoes. That ain’t chili, that’s chile-scented tomato stew.
There’s nothing wrong with commercial chili powder—a pre-mixed combination of several different chile varieties, often mixed with cumin, oregano, and/or other aromatics—but it’s not going to lead you to chili greatness. The only way to achieve that is to blend the chiles up yourself, starting with whole dried chiles.
Dried chiles come in a baffling array of flavors, shapes, colors, and sizes, but in the past, I’ve found that for the most part, they can be divided into four categories:
Sweet and fresh: These peppers have distinct aromas reminiscent of red bell peppers and fresh tomatoes. They include: costeño, New Mexico (aka dried Anaheim, California, or colorado), and choricero.
Hot: An overwhelming heat. The best, like cascabels, also have some complexity, while others like the pequin or árbol, are all heat, and not much else.
Smoky: Some chile peppers, like chipotles (dried, smoked jalapeños), are smoky because of the way they are dried. Others, like ñora or guajillo, have a natural musty, charred wood, smokiness.
Rich and fruity: Distinct aromas of sun-dried tomatoes, raisins, chocolate, and coffee. Some of the best-known Mexican chiles, like ancho, mulato, and pasilla, are in this category.
The goal in a great, balanced bowl of chili is to mix and match from amongst those categories so that you develop a complex flavor profile that hits notes both high and low, mild and hot. You can vary the ratio to suit your own taste, but it’s always good to have at least a little bit of variety. Think of your chili pot as a 1990’s mix tape. Sure, GNR is great, but you need at least a bit of MJ in there to keep Axl in check, you know?
You can grind the chiles dry in a spice grinder to make your own chili powder, but I’ve found that a better way is to simmer the chiles in water on the stovetop until softened then blending them into a smooth purée. Not only do you get a completely smooth, grit-free chili base to work with, you also end up with chile-flavored water to use as the liquid base of your chili.
The Beans
For me, a great chili has to show some character and diversity. You don’t want completely uniform beans in every bite, you want a range of textures. Here’s where we’ve got to make some creative choices.
Many vegetarian chilis take the kitchen-sink, big-car-compensation approach: Hey, we can’t use beef, so let’s throw every damn type of bean and vegetable imaginable into this pot. That method definitely gets you textural contrast as well as variety in flavor, but personally, I feel it becomes a bit too jumbled. Better to make a couple of well-balanced choices and focus on perfecting them.
Kidney beans are a must in my chili. I grew up with kidney beans in my chili, and I will continue to enjoy eating kidney beans in my chili (you, on the other hand, are free to substitute them for whatever type of bean you want).
There’s certainly something to be said for dried beans, and I do occasionally opt to brine dried beans overnight to make chili 100% from scratch, but canned beans are a sure thing. They’re never over or undercooked, they’re never bloated or busted. They are lacking in the flavor department, but with a good simmer in a very flavorful liquid, you can easily make up for this.
“beans and vegetables soften very slowly in acidic liquid”
The great thing is that the liquid base for chili is naturally low in pH (both the chiles and the tomato are acidic), and—lucky for us—beans and vegetables soften very slowly in acidic liquid. This means you can simmer your canned beans for a significant period of time in your chili before they really start to break down.*
*It’s also why a dish like Boston baked beans—acidic from molasses—can take up to overnight to soften properly.
Serious Eats / J. Kenji López-Alt
But what about more texture? I tried using a mixture of kidney beans with other, smaller beans and grains (chickpeas, flageolets, barley) but the real key turned out to be using the food processor. By pulsing a couple cans of chickpeas in the food processor, I was able to roughly chop them into a mixture of big chunks and tiny pieces. Adding this to my chili gave it great body and a ton of textural contrast.
Amping Up Flavor
The key to rich flavor is twofold: first, a long simmer during which water is driven off so that flavors are concentrated and various volatile compounds break down and recombine to add complexity, and second, a good source of glutamic acid, the chemical responsible for the flavor we recognize as savory (sometimes called umami).
I have a number of go-to umami bombs in my arsenal.
Serious Eats / J. Kenji López-Alt
Soy sauce, Marmite (a byproduct of brewing that is essentially yeast extract), and anchovies are all packed with glutamates and they find their way into pretty much all of my savory soups and stews. Anchovies are out of the picture in this vegetarian version for obvious reasons, but a touch of marmite and soy sauce both added a ton of richness to my chili.
Other than that, the flavor base is pretty straightforward. Onions sweated in a little vegetable oil, garlic, oregano (the dried stuff is fine for long-cooking applications like this), and a couple of chipotle chiles canned in adobo sauce to add a touch of smokiness and heat.
Finally, as I’ve discovered in the past, there are certain aromas that are carried well with steam, while others are in fact carried better via vaporized alcohol. My chilis got plenty of liquid in it, so the steam bit’s covered. Adding a couple shots of booze just before serving takes care of the rest. I like bourbon or whiskey, because I’ve usually got it around, but cognac, tequila, even vodka will work well. Just make sure that it’s at least 80 proof (40% alcohol by volume), and unsweetened.
Serious Eats / J. Kenji López-Alt
The truth of the matter is that the key to great vegetarian chili is to completely forget that you’re working on a vegetarian chili. Chili greatness lies in the careful layering of real chiles, ensuring textural contrast with each bite, and a rich, thick consistency packed with savory flavor. Whether it’s made with beef, beans, pork, or ground yak hearts, for that matter, if you get the basics right you’re already off to a good start.
January 2012
The Best Vegetarian Bean Chili Recipe
Cook Mode (Keep screen awake)
3wholesweet dried chiles like costeño, New Mexico, or choricero, stems and seeds removed
2smallhot dried chiles like arbol or cascabel, stems and seeds removed (optional)
3whole rich fruity dried chiles like ancho, mulato, negro, or pasilla, stems and seeds removed
1quartwater
2wholechipotle chiles in adobo sauce with 2 tablespoons sauce from can
2 (14-ounce) canschickpeas
1 (28–ounce) can whole tomatoes packed in juice
2tablespoonsvegetable oil
1largeonion, finely diced
3clovesgarlic, grated on a microplane grater
1 1/2tablespoonscumin
2teaspoonsdried oregano
1tablespoonsoy sauce
1teaspoon marmite or vegemite
2 (14-ounce) cansdark red kidney beans, drained, liquid reserved separately
2tablespoonsvodka or bourbon
Kosher salt
2 to 3 tablespoonsmasa
Add dried chiles to a large heavy-bottomed Dutch oven or stock pot and cook over medium-high heat, stirring frequently, until slightly darkened with intense, roasted aroma, 2 to 5 minutes. Do not allow to smoke. Remove chiles to small bowl and set aside. Alternatively, place dried chiles on a microwave-safe plate and microwave on high power in 15-second increments until pliable and toasted-smelling, about 30 seconds total. Transfer to a 2-quart microwave-safe liquid measuring cup or bowl. Add water and chipotle chiles, cover with plastic wrap, and microwave on high power until gently simmering, about 5 minutes. Remove from microwave and set aside. Transfer chiles and liquid to blender and blend, starting on the lowest possible setting and gradually increasing speed to high (make sure to hold the lid down with a clean kitchen towel or a potholder to prevent it from blowing out). Blend until smooth, about 1 minute.
Serious Eats / Julia Estrada
Drain chickpeas, reserving liquid from can. Transfer chickpeas to a food processor and pulse until just roughly chopped, about three 1-second pulses. Set aside.
Serious Eats / Julia Estrada
Roughly squeeze tomatoes through your fingers into approximate 1/4-inch pieces. Add to chickpea water along with any juices.
Serious Eats / Julia Estrada
Heat oil in a large saucepan or Dutch oven over medium-high heat until shimmering. Add onions and cook, stirring frequently, until softened but not browned, about 4 minutes. Add garlic, cumin, and dried oregano and cook, stirring constantly, until fragrant, about 30 seconds. Add puréed chiles, soy sauce, and marmite and cook, stirring constantly, until fragrant, about 30 seconds. Add reserved chickpea/tomato water mixture and stir to combine. Add chopped chickpeas and kidney beans. Stir to combine.
Serious Eats / Julia Estrada
If beans are sticking out of the top, add reserved kidney bean liquid until just barely submerged. Bring to a boil over high heat, reduce to a bare simmer, and cook, stirring occasionally, until thick and rich, about 1 1/2 hours, adding more reserved kidney bean liquid as necessary if chili becomes too thick or sticks to the bottom of the pan.
Serious Eats / Julia Estrada
When cooked, add vodka or bourbon and stir to combine. Season to taste with salt and whisk in masa in a slow steady stream until desired thickness is reached. For best results, allow chili to cool and refrigerate for at least one night and up to a week. Reheat to serve.
Serious Eats / Julia Estrada
Serve, garnished with cilantro, chopped onions, scallions, avocado, lime wedges, and warm tortillas as desired.
Serious Eats / Julia Estrada
Special Equipment
Dutch oven, blender or immersion blender, food processor
Read More
The Best Chili Ever
Vegan Sweet Potato and 2-Bean Chili With Hominy
Quick and Easy Vegetarian Tamale Pie With Brown Butter Cornbread Crust
Serious Entertaining: A Comforting Vegetarian Dinner
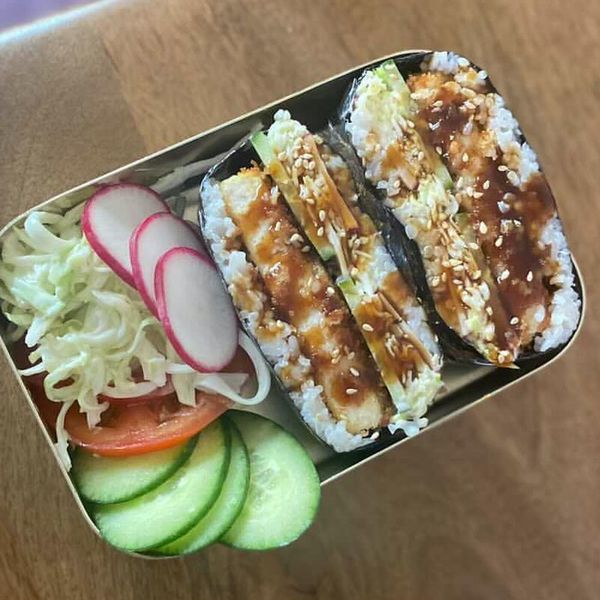
Onigirazu is a kind of sandwich made from seasoned rice and nori wrapped around a variety of fillings. Slice and serve this crispy tofu katsu onigirazu for a hearty, flavorful vegan lunch or snack that’s as pleasant to look at as it is to eat (and the tofu katsu on its own is really delicious too!) —Esther Choi
Watch This Recipe
Tofu Katsu Onigirazu
Ingredients
1/2
block firm tofu
1/2 cup
flour
1/2 cup
almond milk
2 cups
panko bread crumbs
kosher salt
freshly ground black pepper
1 cup
vegetable oil
2 cups
thinly sliced cabbage
2 tablespoons
mayonnaise (or plant-based spread)
1 teaspoon
wasabi paste
1 teaspoon
salt
1 tablespoon
sesame oil
2
sheets nori
1
mini seedless cucumber, thinly sliced on a bias
1
red globe radish, thinly sliced
1/4 cup
tonkatsu sauce
Directions
Slice tofu into 1/2-inch squares and pat dry with paper towels. Season with salt and pepper, and dredge in flour, then milk, then panko.
In a skillet on medium high heat, heat vegetable oil and pan-fry the tofu for 2 to 3 minutes on each side until golden brown. Drain on a paper towel.
In a medium bowl, mix sliced cabbage with mayonnaise or plant-based spread, wasabi paste, salt, and lemon juice.
Season warm cooked short-grain rice with rice vinegar, salt, and sesame oil, and mix well.
Place a piece of plastic wrap on a working surface, and put a sheet of nori on top, with the shiny side facing down and with a corner pointing up.
Evenly spread 1/2 cup of the rice in a thin layer and form into a square shape in the center of the nori sheet.
Place the shredded cabbage evenly on top of the rice and top with 2 pieces of tofu, half the slaw, cucumber slices, radish slices, and finish with another 1/2 cup of steamed rice.
Bring the left and right corners of nori sheet towards the center. Fold gently but tightly, wrapping around the layers at the center.
Bring the bottom and top corners towards the center. Flip around and then firmly wrap in plastic wrap. Set aside and continue with the second one.
Cut the onigirazu with a sharp knife. Wipe your onigirazu with a wet paper towel before cutting so that the cross-section will be clean.
Serve with sauce and sprinkle with toasted sesame seeds for garnish.
Combine the herbs, lime zest and juice, the sweet chilli sauce or jam, oil and soy sauce in a bowl. Toss in the noodles, cucumber, carrot and edamame. Top with the peanuts, sesame seeds, chilli sauce and spring onions to serve.
Without sugar, vegan (if you use vegetable milk), with surprising addition of vegetables. They are moist, sweet, veeery chocolate with deliciously crunchy nuts inside. An absolute guilt-free dessert that you can eat without end and without any pangs of guilt. Since I made them they are my favorite muffins – chocolate zucchini – carrot muffins with blueberries. —Flymetothespoon
Ingredients
1/2 cup
buckwheat flour (heaped cup)
1/2 cup
wheat flour (heaped cup)
2 tablespoons
hemp flour (optional)
2/3 teaspoon
baking powder
2/3 teaspoon
baking soda
2 tablespoons
cacao powder (heaped tbsp)
2 tablespoons
coconut shreds
1
middle sized zucchini
1
small carrot
1
ripe banana
2/3 cup
milk (vegetable milk or normal one)
8
chopped dates
1 handful
chopped nuts (almonds, cashews)
1 handful
blueberries
3
squeres dark chocolate (99%)
Directions
Mix all dry ingredients except chocolate in a big bowl.
Grate zucchini and carrot on a grater with large holes and add to the bowl.
Mash a banana with a fork and mix with milk and chopped dates. Add to the rest of ingredients and mix altogether with nuts, chocolate and blueberries.
Fill cupcake silicon forms up to ¾ of their height.
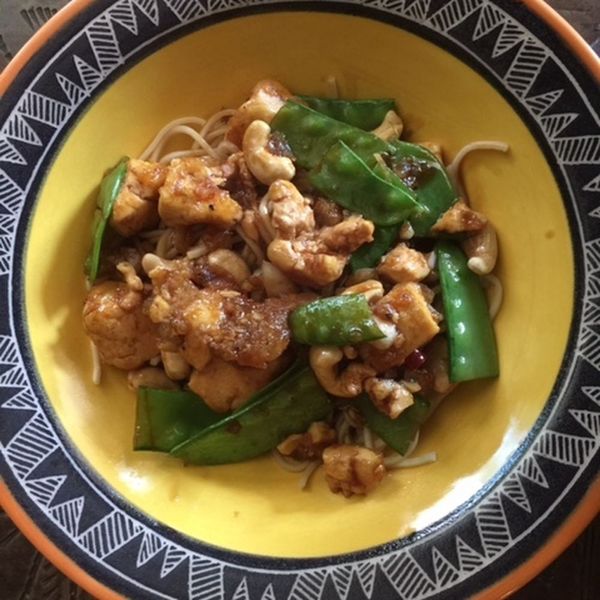
Back in my college days, Chinese Take-out was a must. One of my favorites was Cashew Chicken with snow peas. I decided to “veganize” the dish! So good – and make extra because it’s good as leftovers as well! —LouLou
Ingredients
16 ounces
package firm tofu
1/2 cup
Cornstarch
2 tablespoons
Canola Oil
1
Red chili pepper, sliced
2
cloves of garlic, minced
1 teaspoon
Grated ginger
1 cup
Cashews
1 cup
snow peas, cut in half
1/4 cup
hoisen sauce
1/4 cup
Tamari sauce
2 tablespoons
brown sugar
3 tablespoons
rice vinegar
1/4 cup
water
6 ounces
Lo Mein noodles
salt & pepper
to taste
Directions
With either a tofu press, or wrapping your tofu block in paper towels and weighing it down with a few bowls, get as much of the water out of the tofu as you can. Once the water is out, dice the tofu into 1-inch cubes.
Cook and drain the noodles and set aside.
In a medium bowl, combine the tofu squares with the cornstarch. Use your hands to gently mix and make sure the cornstarch covers the tofu well. Season with salt and pepper to taste. Heat the oil in a non-stick skillet, and saute the tofu until golden brown. Remove the tofu, and in the same pan, saute the red chili pepper, garlic, ginger, cashews, and snow peas until fragrant (about 1 minute).
To the cashew mix in the skillet, add hoisen sauce, Tamari sauce, brown sugar, vinegar, and water and stir to combine. Add the tofu to the skillet and cook for about 2 minutes more to let the tofu absorb the flavor.
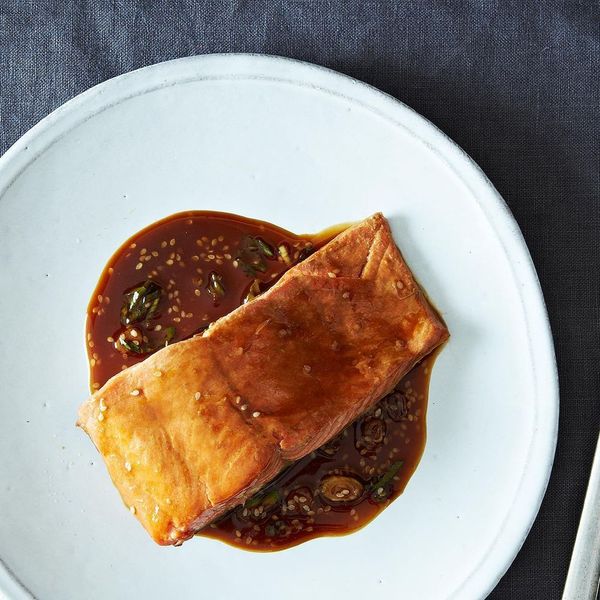
Even though I am a recent vegan, I continue cooking meals for friends and family that I used just because I know they will be a hit. I love Asian food and this recipe is super simple and delicious and really not complicated at all. Teriyaki sauce can be made in your home without the added chemicals in a prepared sauce you find in the store. Enjoy! – Singerinkitchen —Noelle
Test Kitchen Notes
Some recipes make you feel skilled and accomplished. Others are easy, weeknight go-tos. This Tangy Teriyaki Salmon tops the chart in both categories. I was intimidated by the idea of making teriyaki sauce from scratch, but it was shockingly easy. The beautiful plate was on the table in less than 20 minutes, and it tasted as good as it looked. The salmon is silky and tender, as it is essentially poached in the teriyaki sauce. I would recommend flipping only once and cooking for about 4 minutes on each side. Once the salmon is removed, the sauce reduces to a salty glaze that would be fantastic over any protein: steak, scallops, chicken or a vegetable stir-fry. A great excuse to make it again and again! – CatherineJagers
—The Editors
Test Kitchen-Approved
Ingredients
5
salmon filets
3/4 cup
mirin
1 cup
soy sauce
4 tablespoons
lime juice
3 teaspoons
ground ginger
2/3 cup
green onions, chopped
2 tablespoons
sesame seeds
Directions
In a large saucepan, add the mirin, soy sauce, lime juice, and ginger. Combine well and turn on medium heat.
Once the sauce starts simmering, add the salmon fillets with the flesh side turned down on the sauce. Cook for 5 minutes.
Rotate the fillets to sides every 5 minutes until the fish has cooked for a total of 15 minutes.
Remove salmon fillets on a plate.
Add green onions and sesame seeds to the sauce and simmer for 5 more minutes. The sauce should be thickened by now.
Serve salmon on each plate and drizzle with sauce. Serve with white rice and roasted broccoli for a complete meal.
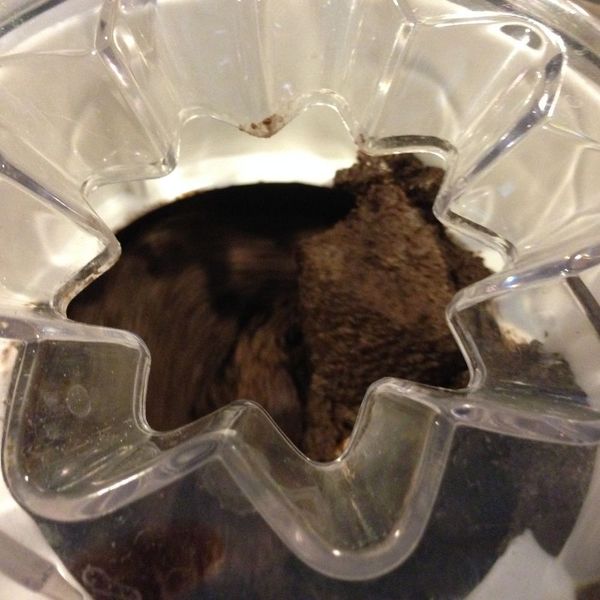
One of the many joys of aging for me has been an intolerance to dairy that isn’t wholly alleviated by taking lactase. As a lover of all things dairy, this has been a huge loss, especially in the summer when I usually eat ice cream almost every day. A lot of non dairy ice cream recipes call for coconut milk, and I really don’t like coconut. I’ve been curious about cashew cream–I’ve found it used as a vegan substitute for sour cream and to make creamy salad dressings–so I decided to try it in ice cream. This ice cream is very rich and creamy and chocolatety–my favorite qualities in an ice cream. —drbabs
Ingredients
2 cups
raw cashews
2 cups
fresh brewed coffee, cooled to room temperature
1 cup
sugar
3/4 cup
cocoa powder (either natural or Dutch process)
1/4 teaspoon
kosher salt
4 ounces
bittersweet chocolate (~70% cacao), chopped
1 teaspoon
vanilla extract
Directions
The day before you are planning to make the ice cream, place the cashews in a bowl, cover them with filtered water, and refrigerate overnight.
The day you plan to make the ice cream, strain the water from the cashews and place them in a high speed blender (at least 4 cup capacity) with about 1/2 cup of the coffee. Blend on high (liquefy) until the cashews form a smooth puree. (If it’s not entirely smooth, the ice cream will have tiny chunks of cashew in it, which will leave your ice cream somewhat grainy. It will still taste good, but may not have the texture you want. You can strain out the little pieces, but you will lose some of the thickness and body of the cashew cream, and will have a product that’s more sorbet than ice cream.)
In a medium sized bowl, whisk together the sugar, cocoa powder and salt. Add the chocolate to the cashew mixture and process on high, scraping the sides and bottom as necessary. Add in the rest of the coffee, and continue to process. Add the cocoa powder mixture, and continue to process on high. Add vanilla extract. Process until the mixture is completely smooth and creamy.
Pour the mixture into a pitcher and refrigerate for at least an hour. Process in ice cream maker according to instructions.
Serve right away or freeze in a separate container. The ice cream will not be scoopable from the freezer, so let it sit at room temperature for about 20 minutes before serving.
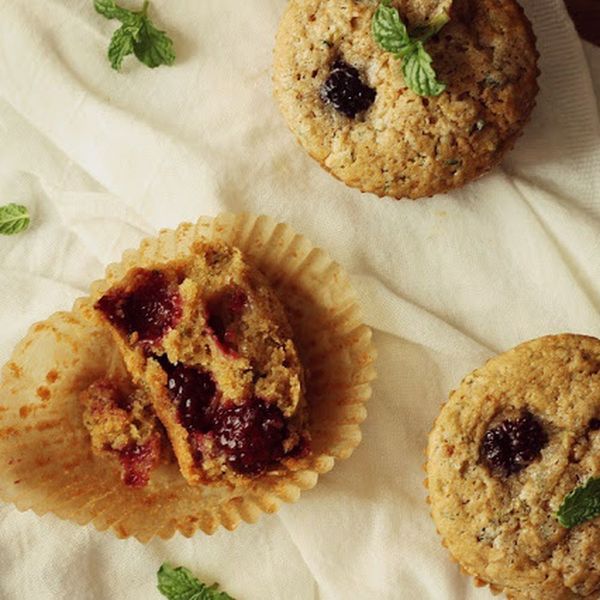
Fresh mint perks up these blackberry muffins while zucchini adds a bit of extra moisture and earthiness. Sweetened with coconut sugar, these gluten free and vegan muffins are perfect for breakfast, dessert, or a tasty snack. —Courtney
Ingredients
6.5 ounces
all purpose gluten free flour mix**
1 pinch
sea salt
1/2 teaspoon
ground ginger
1 teaspoon
baking powder
1/2 teaspoon
psyllium husk or xanthan gum
1/2 cup
coconut sugar
1 tablespoon
minced fresh mint
3 ounces
coconut milk (or other milk of your choice)
3 ounces
melted coconut oil
2 ounces
unsweetened applesauce
heaping 1/2 cups
blackberries
heaping 1/2 cups
grated zucchini
raw sugar to sprinkle on muffin tops (optional)
Directions
Preheat your oven to 350 degrees and place muffin liners in a tin with at least a 12 cup capacity. Line a colander with a couple of paper towels and place the grated zucchini on top. Press the zucchini so that the moisture begins to run out of the colander. Replace the wet paper towels with a dry one and set the zucchini on it while you prep the muffins.
In a bowl, whisk together the flour, salt, ginger, baking powder, psyllium, coconut sugar, and mint until well combined. In a separate bowl, whisk together the coconut milk, coconut oil, and applesauce until smooth and well combined. Add the wet ingredients to the dry and stir to combine. The batter should be relatively smooth and thick. Add the blackberries and zucchini and fold them in until evenly distributed.
Fill the muffin cups about 3/4 of the way full (I was able to fill 8) then sprinkle the tops with a bit of raw sugar if using. Tap the pan on the counter to release any air bubbles, then place it in the oven. Bake the muffins for 20 to 25 minutes until the tops are puffed and a tester inserted into the middle comes out with moist crumbs. You should be able to touch the tops of the muffins without leaving a dent.
Cool the muffins on a cooling rack for at least 15 minutes before eating. Store any leftovers in an airtight container. Makes about 8 muffins.
**I used 2 oz of arrowroot flour, 2 oz of sorghum flour, 1.75 oz oat flour, and .75 oz of millet flour

/f99fd5b2-4238-4b64-96e7-0e9febff67d8--2018-0803_no-churn-mango-ice-cream-sorbet-sherbet-froyo_3x2_julia-gartland_025.jpg)


/6cc11927-dbea-435f-8520-82b298253b9e--onigirazu_tofu.jpg)


/b19b8258-86ec-4dd5-8b0b-c904a6fed98e--Czekoladowe_muffiny_cukiniowe_z_borowkami.jpg)

/b7d6cfa2-d3ee-430b-ba3a-6eab9649578a--Tofu_Cashew_Stir_Fry_with_Snow_Peas.jpg)

/92ea8b5b-cd4a-4083-9987-508636f4908f--2013-1029_jenny_teriyaki-salmon-011.jpg)

/d2b57cbc-5a2d-4c1b-9bf2-9fdb6acd247f--IMG_1135.JPG)

/a6c5378e-71ea-4a53-a3f5-b4ae261ccf89--muffin_1.jpg)