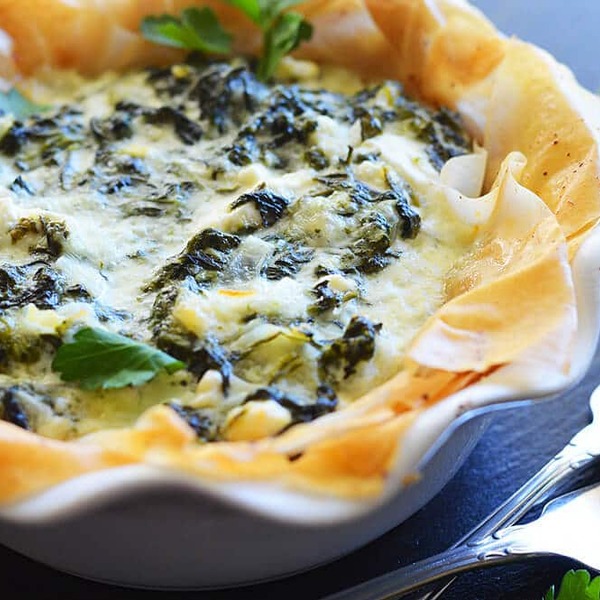
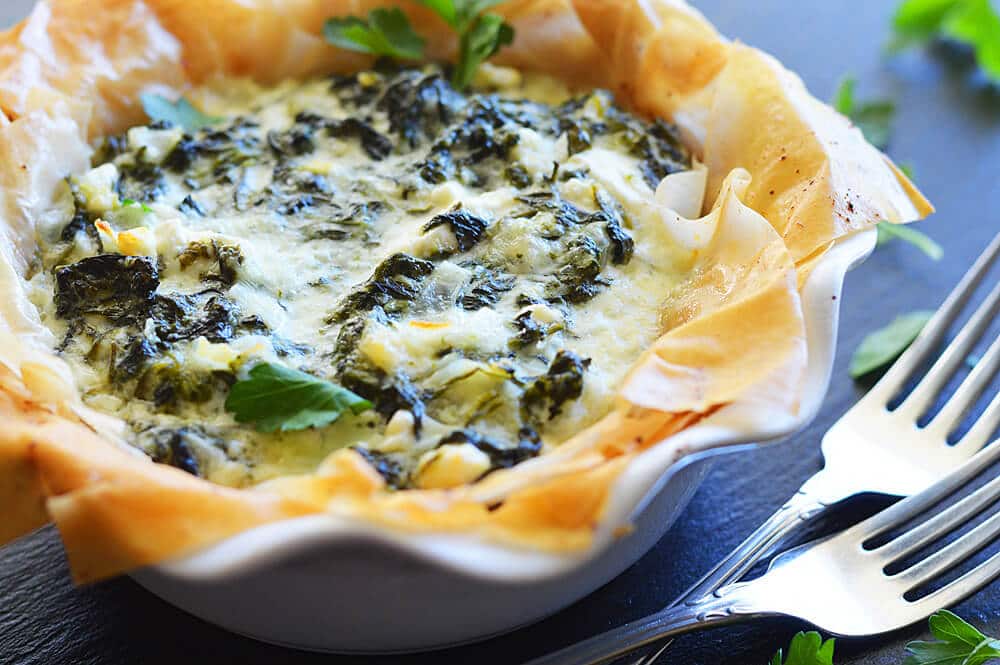
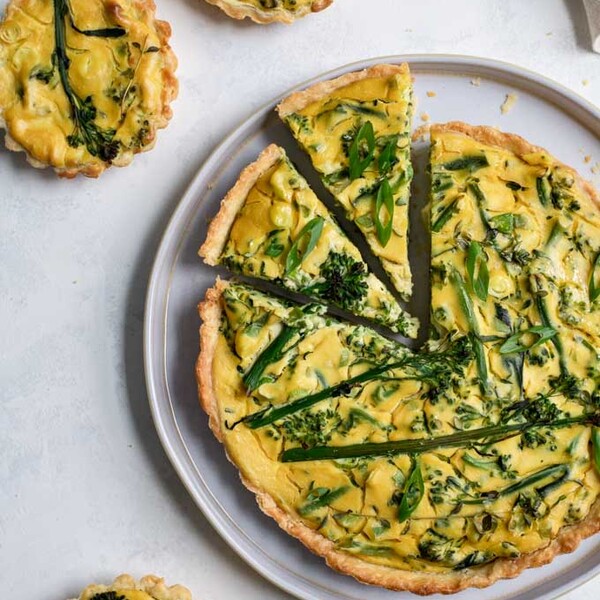
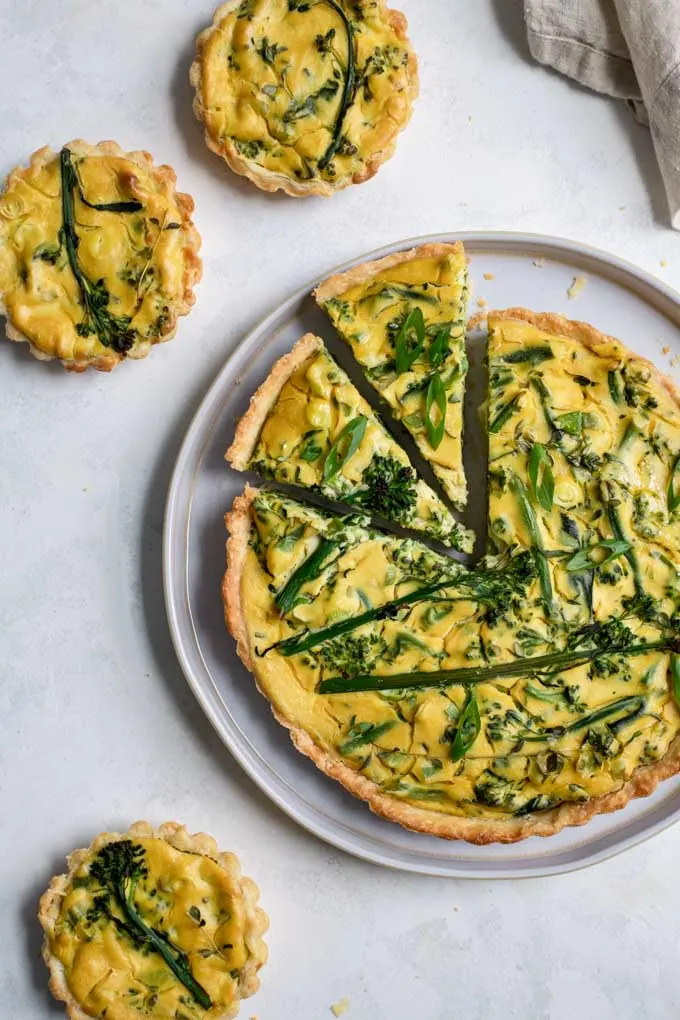
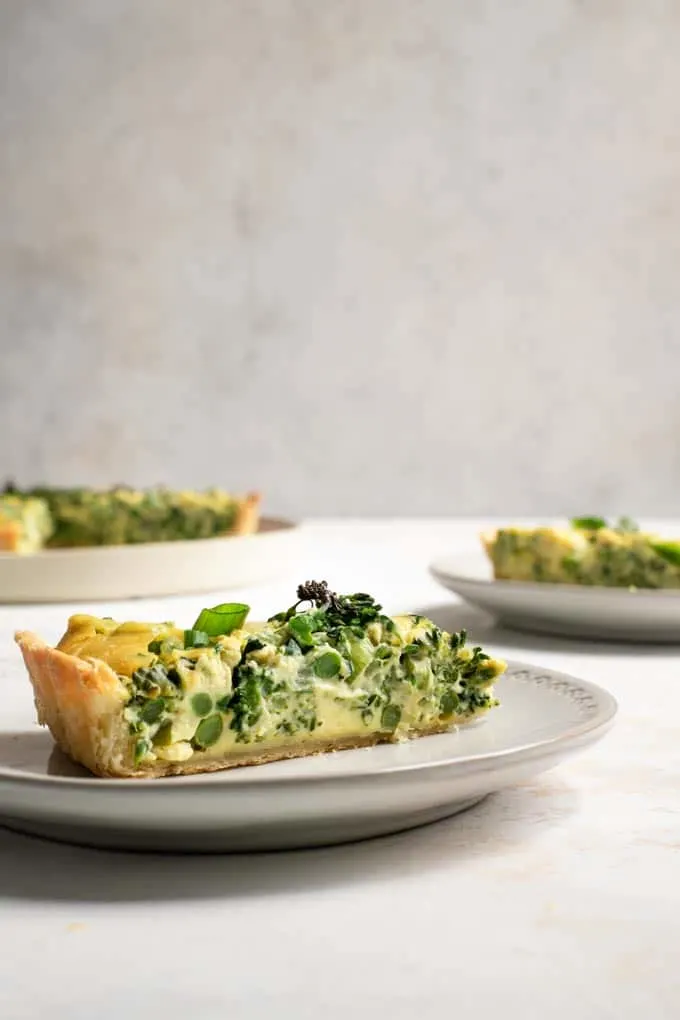
This vegan sprouting broccoli quiche is a delicious breakfast or brunch. It’s full of protein and good for you veggies, and is super easy to make! You can even make them ahead of time and reheat to serve, or enjoy at room temperature. If gluten free you can make a crustless quiche, or use a GF crust. It’s such a versatile treat!

I’m a big fan of vegan quiches. The flaky crusts and custardy centers. They’re packed with protein and you can load them up with veggies.
They’re delicious as well as cute, and something about them just elevates any meal!
These guys are loaded up with sprouting broccoli that I found at my local farmers market.
I think sprouting broccoli is more commonly found in the UK than the US, based on the recipes and articles I’ve come across. It looks a lot like broccolini, but from what I can gather, it’s not the same.
Broccolini is a cross between broccoli and gai lan (Chinese broccoli). Sprouting broccoli is its own cultivar with a long history.
That being said, if you don’t come across sprouting broccoli, broccolini would make a fine substitute. You can also just use regular broccoli, just trim them into florets!
For something a little different you could use rapini (also known as broccoli rabe). It’s a bit bitter and has a stronger flavor than sprouting broccoli, but I imagine it would make a tasty quiche!
No matter which variety of broccoli you use, the first step is to prepare your crust.
I like my easy vegan pie dough. For a single quiche you just need a half recipe, so go ahead and divide the recipe, or make the whole thing and keep the other half for another project (second quiche maybe?).
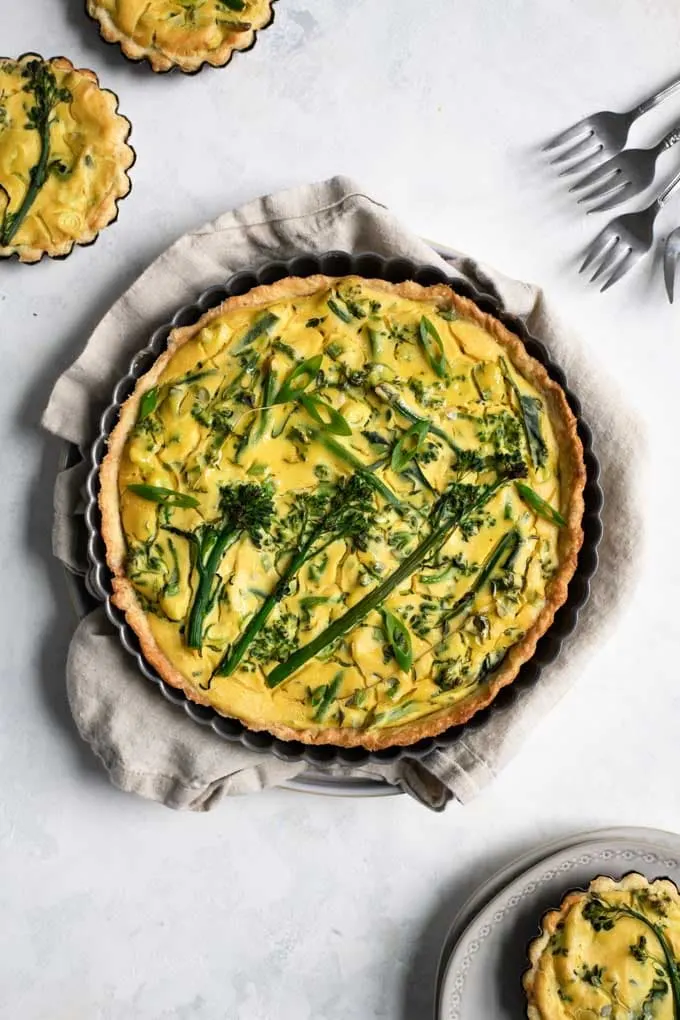
Roll it out and gently fit it into your baking dish of choice. Trim the edges and prick the bottom all over with a fork . I used a 9″ fluted tart pan and had enough leftover crust & filling to make 3 mini tarts. This would fit into one American-style pie dish as well for a single deep quiche.
Whenever possible don’t stretch the dough or push it to fill corners, but gently ease it into place. Stretching the dough activates the gluten, and makes the dough more likely to pull inwards when baking and lose its nice shape.
Because some gluten activation is inevitable and we want to give our pie dough the best possible chance to keep its shape, stick the pie dough lined baking pans into the freezer while the oven preheats. This chilling time gives the dough a chance to relax and literally chill out so the shortening and vegan butter don’t immediately turn to liquid in the oven. ?
Next, we blind bake the crust.
Blind baking the crust is a fancy term for par-baking. In other words, giving the crust a chance to cook through so that you don’t end up with a soggy bottom as the filling sets before the crust is done. *cue the great british bake off*
Line it with parchment paper, or parchment paper followed by aluminum foil. Add pie weights or dried beans (designated for just such purposes) to fill the entire pan. You want it going up the sides because this helps keep them in place while it bakes!
If you’re patient, this blind baking method via Stella Parks is a great one. It uses sugar as weights and bakes at a lower temperature. This means less worrying about the crust slipping and shrinking, but it does take longer. The granulated sugar even caramelizes slightly as the crust blind bakes and can be used in recipes calling for sugar adding a nice and rich flavor.
No matter which method you use, and I’ve outlined the first one in the recipe below, bake the crust until it holds its shape and is a pale golden.
While you’re blind baking the crust, it’s time to make the filling.
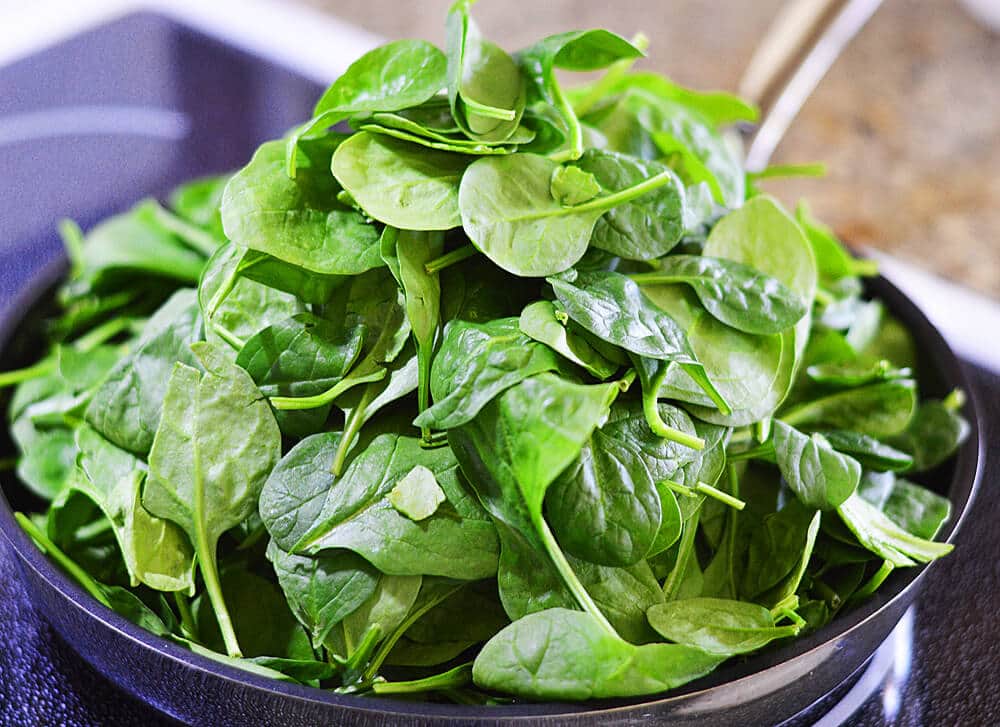
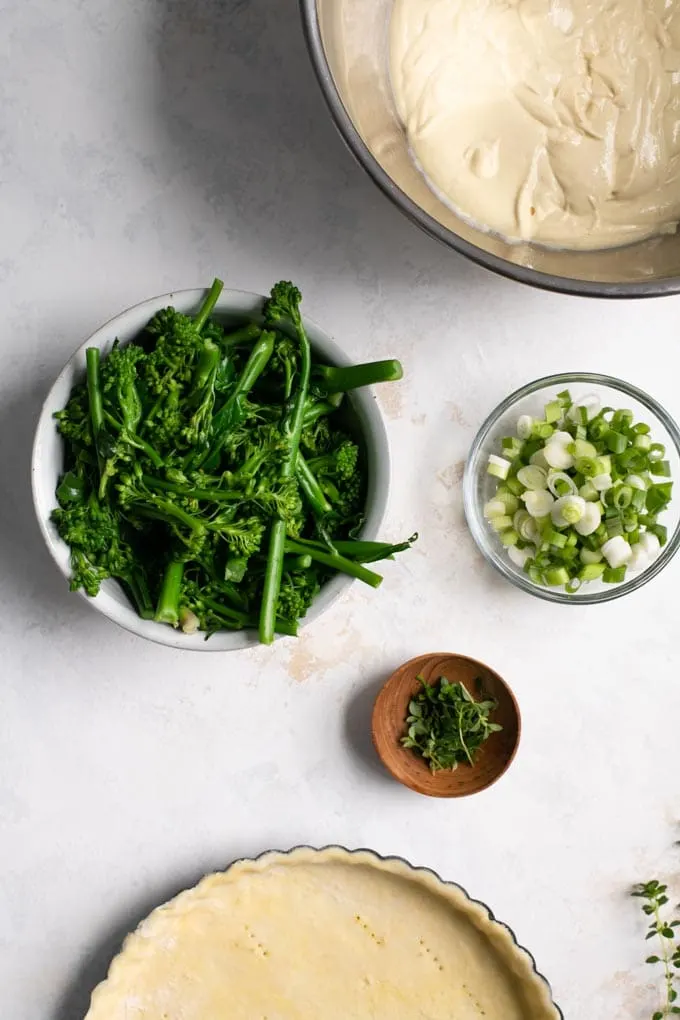
Blanch the sprouting broccoli.
Blanching is simply letting something boil for a couple of minutes, then draining out the boiling water before adding it to an ice bath. The ice water arrests the cooking, so the vegetable stays firm–unless you’re blanching a green like spinach and then it was never firm to begin with!
Blanching also brings out the most vibrant green colors from the vegetable and helps it hold the color. It’s a method I use to make the most crazy beautiful green vegan palak paneer.
Once the sprouting broccoli (or broccolini, or regular broccoli) cools off in the ice bath, drain it and set it aside.
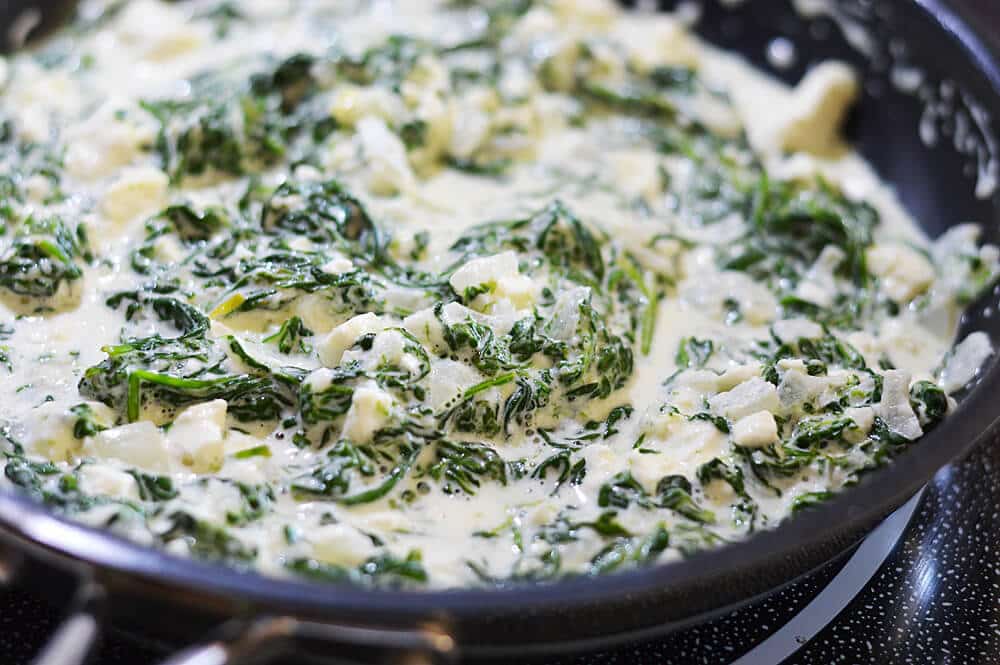
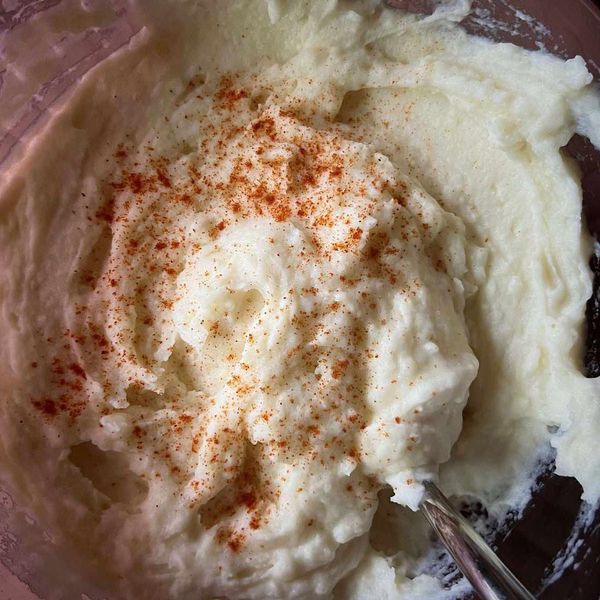
The quiche filling is super easy to make, just blend the ingredients until smooth!
This recipe uses tofu and chickpea flour to make the custardy filling. Tofu is a great vegan quiche base. It blends nice and creamy, and can cook up to be firm.
Chickpea flour has a bit of an eggy taste and texture when you add liquid and cook. Together with tofu it makes the most delicious quiches!
Related: Vegan eggy bacon and chive muffins
We need a few more ingredients to get the quiches right.
A bit of nutritional yeast for savory and cheesy flavor (you can also use your choice of vegan cheese). A pinch of turmeric for color.
Garlic, mustard, salt, broth, and cayenne pepper for seasoning. Refined coconut oil for richness. Cornstarch (or tapioca starch) to help set the quiche.
Blend everything up until its super creamy, then transfer it in a mixing bowl and stir in the sprouting broccoli, scallions, and some fresh thyme.
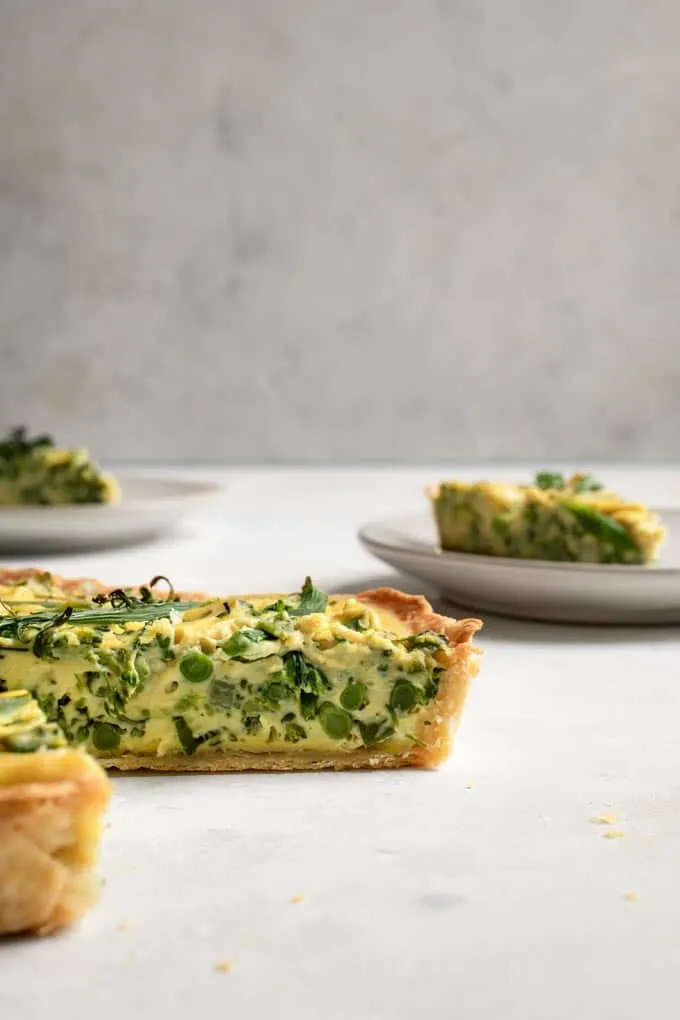
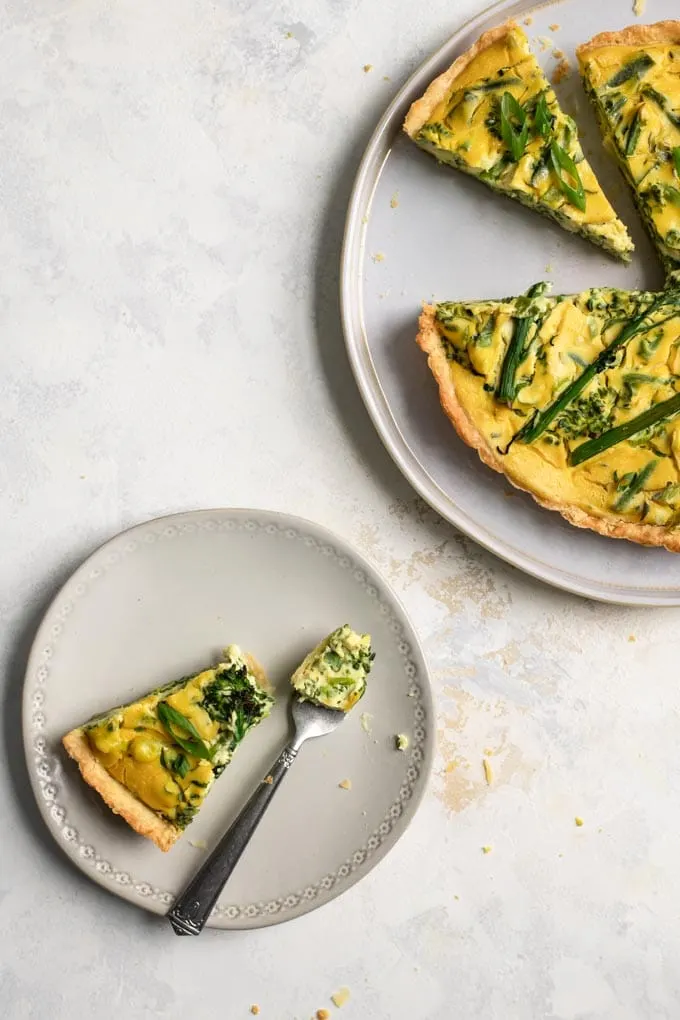
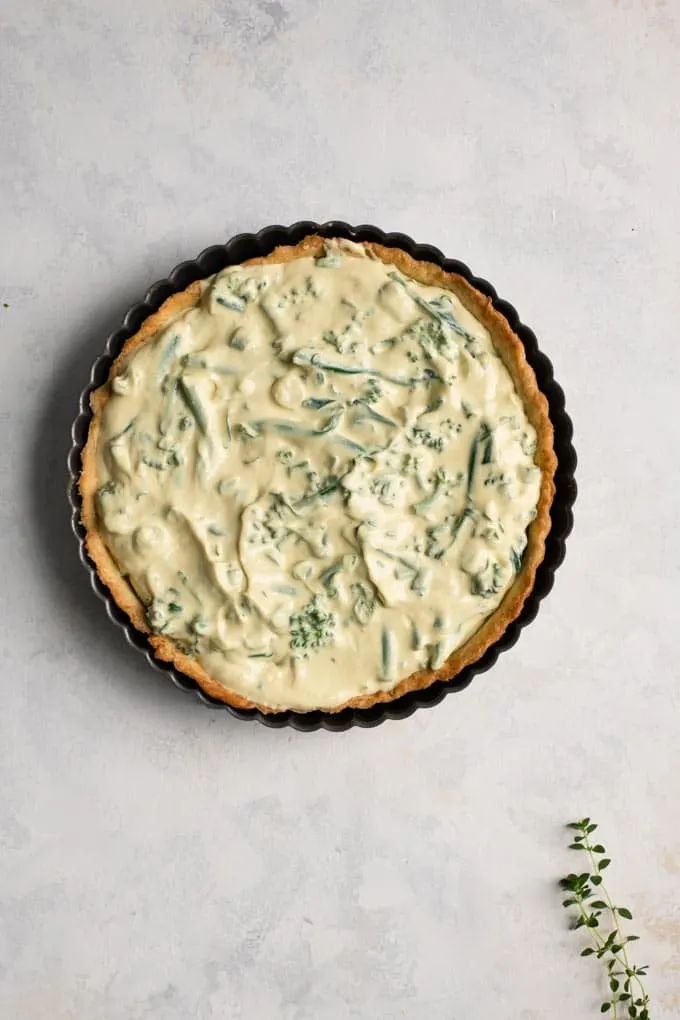
To finish, fill up the blind baked crust with the quiche mixture.
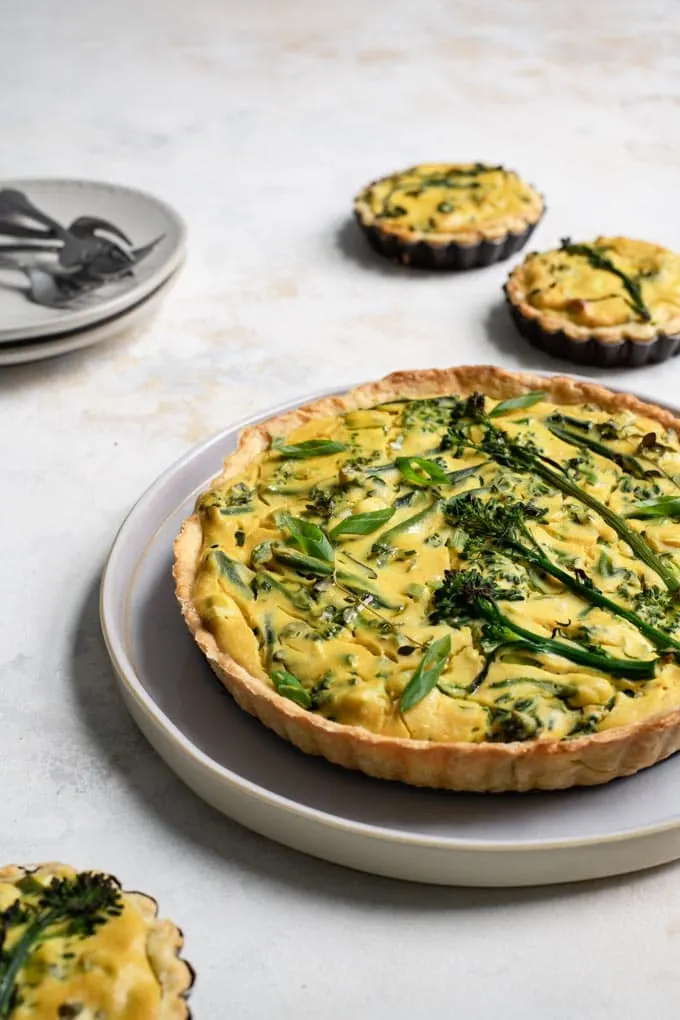
If you’d like, decorate the top with some extra pieces of broccoli. Then bake the whole thing for about 25-30 minutes. If the crust is getting too golden, cover the edges with foil. You can cut a large circle out of a piece of foil then place this on top, it covers the edges while leaving the filling open to the heat!
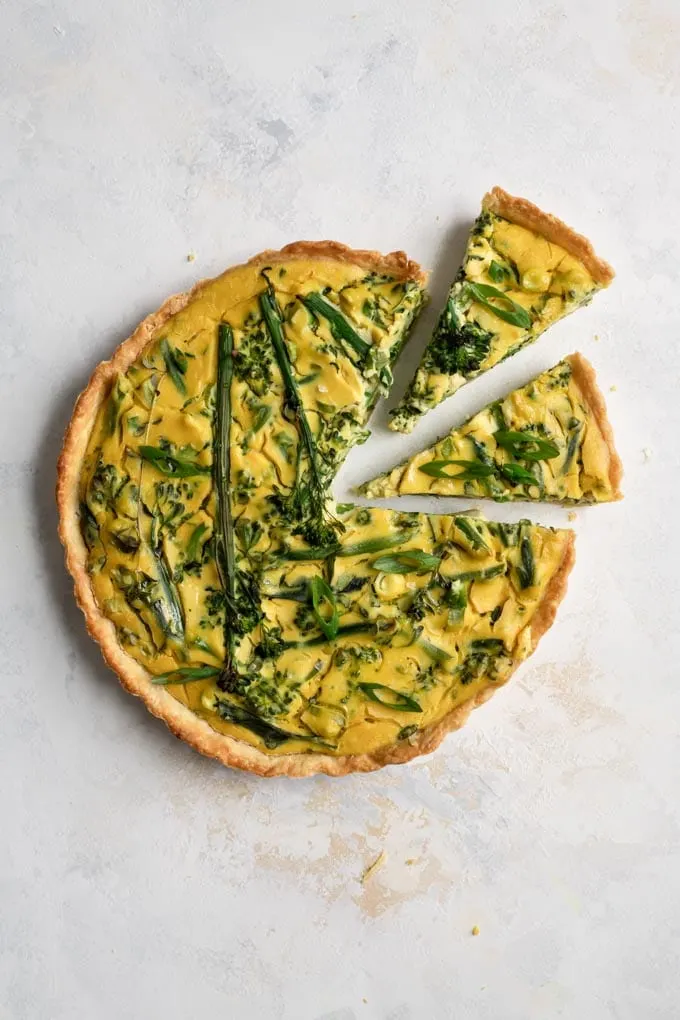
Once the filling has set and the top looks dry it’s done. Let the quiches cool a bit before eating. You can enjoy them room temperature or cold as well, and if you want to reheat just pop them into the oven at 375 ºF for about 10 minutes!
If making mini quiches
You can skip the blind baking, the smaller crusts are able to cook all the way through while the filling sets. Just line the tartlet pans with crust, fill it with the mixture, place on a baking tray for ease and bake 25-30m or until it’s done!
If you make this vegan sprouting broccoli quiche, leave a comment below and rate the recipe on the recipe card. And please share your photos with me on Instagram, tag @thecuriouschickpea and #thecuriouschickpea. I love seeing your recreations!
WANT MORE DELICIOUS VEGAN RECIPES? SIGN UP FOR MY EMAIL NEWSLETTER & FOLLOW ME ON INSTAGRAM, FACEBOOK, AND PINTEREST!
Ingredients
-
1/2 recipe easy vegan pie dough or vegan store bought crust
-
8oz sprouting broccoli, broccolini, or broccoli
-
1 lb firm tofu
-
1/2 cup chickpea flour
-
1/2 cup vegetable broth
-
2 tbsp refined coconut oil
-
2 cloves garlic
-
1 tbsp fresh thyme
-
1 tsp dijon mustard
-
2 tbsp nutritional yeast or vegan cheese
-
2 tbsp cornstarch or tapioca starch
-
3/4 tsp salt
-
1/4 tsp turmeric
-
1/4 tsp cayenne pepper
-
1/2 cup sliced scallions
Instructions
Blind bake the pie crust:
- Roll out the pie dough on a counter or parchment paper dusted with flour. Transfer the dough to a tart pan (or pie dish) and gently fold the dough to fit then ease it into the sides of the pan. Trim the edges and prick holes in the bottom with a fork. Freeze the crust for about 30 minutes while the oven preheats.
- Preheat the oven to 400 ºF. Put a piece of parchment or foil over the crust, then fill with pie weights or dried beans. Bake for 20 minutes, then remove the crust from the oven, take out the parchment or foil with the pie weights, then bake the crust an additional 5 minutes. Turn the oven down to 375 ºF and leave it on for the quiche.
Prepare the filling:
- While the crust is being prepared, bring a pot of salted water to a boil, add the sprouting broccoli, broccolini, or broccoli cut into florets. Let boil for 2 minutes, then drain and put into a bowl of ice water.
- In a blender or food processor add the tofu, chickpea flour, vegetable broth, refined coconut oil, garlic, dijon, nutritional yeast or vegan cheese, cornstarch, salt, turmeric, and cayenne pepper.
- Transfer the mixture to a large mixing bowl and stir in the scallions, fresh thyme, and blanched broccoli (drain the ice water). Reserve some florets for decorating the top if desired.
- Pour the quiche mixture to fill the blind baked crust and smooth the top. If you set aside some florets then add them to the top decoratively.
- Bake the quiche for 25-30 minutes at 375 ºF or until the top looks dry. If the crust is getting too brown, place aluminum foil over the edges.
- Let cool a bit before serving, but can enjoy warm, cold, or room temperature. Reheat leftover quiche at 375 ºF for about 10 minutes or until warm.
Notes
If you use a 9 or 10″ fluted tart pan to make the quiche, you will have leftover quiche mixture and pie dough. You can use this to make mini quiches, or make a smaller second quiche. You can also make a crustless quiche. My 9″ quiche had enough leftover for 3 mini quiches.
If making mini-quiches in tartlet pans, there is no need to blind bake the crust. Roll the scraps of dough, cut into circles ~1″ larger than the tart pans then fit the dough in. Trim the edges and freeze for ~20m to help keep the crust from shrinking too much when baked. Then fill with the leftover quiche mixture and place on a baking tray. Bake for 25-30 minutes or until the filling is dry on top and the crust is golden on the sides. The smaller size and baking tray underneath helps the crust bake fully without being blind baked.
To blind bake you can also use this method via Stella Parks.
Recommended Products
As an Amazon Associate and member of other affiliate programs, I earn from qualifying purchases.
-
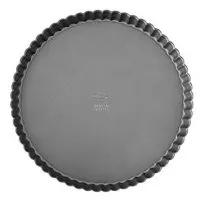
Wilton Excelle Elite Non-Stick Tart and Quiche Pan with Removable Bottom, 9-Inch
-
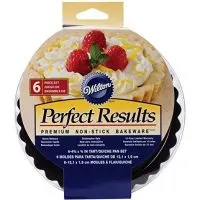
Wilton Perfect Results Premium Non-Stick Bakeware Round Tart and Quiche Pans, Sunday Brunch May Never be the Same Again, Fluted Edges Add a Touch of Flair, 4.75 Inch, Set of 6
-

365 Everyday Value, Organic Coconut Oil, 14 fl oz
-

KAL Nutritional Yeast Flakes | Vitamin B12, Vegan, Non-GMO, Gluten Free
-

Bobs Red Mill Garbanzo Bean Flour, 16 Ounce (Pack of 4)
Nutrition Information:
Yield: 8
Serving Size: 1
Amount Per Serving:
Calories: 247Total Fat: 13gSodium: 408mgCarbohydrates: 24gFiber: 3gSugar: 3gProtein: 10g