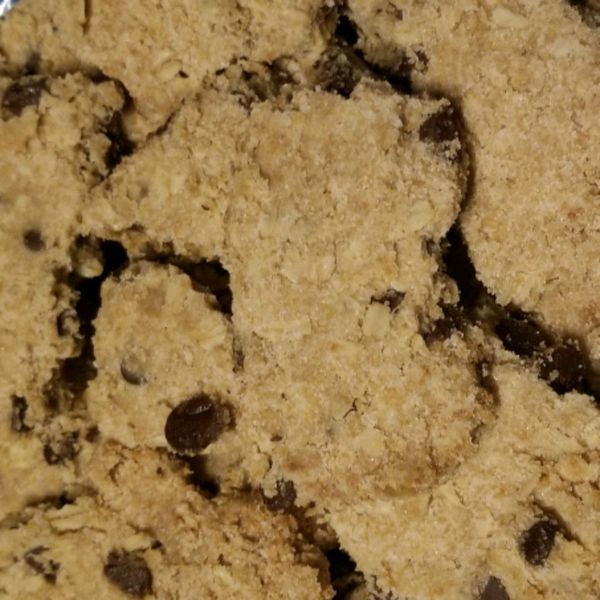
I read some reviews and followed the suggestions as follows: cut back on all Sugars by 1/4 cup and add 1/2 cup Apple Sauce. Also I made my brown sugar from scratch because I didn’t have any. I used 1 cup white sugar and 3 TBSPNS of King Syrup (molasses is recommended if you have but I didn’t). King Syrup is thick as Honey and is the only syrup I’d recommend for the replacement of Molasses, for its a Golden Syrup that has a light Molasses taste. Lastly as a result they came out GOOWEY AND CHEWY!
Photo by
isavarela
We made two dozen and ours weren’t chewy or gooey, but they were simply delicious! Depending on your taste, you may want to reduce the amount of sugar in the recipe, they were very sweet. Next time we make them, we’re not going to use as much sugar. Enjoy!
Photo by
isavarela
We made two dozen and ours weren’t chewy or gooey, but they were simply delicious! Depending on your taste, you may want to reduce the amount of sugar in the recipe, they were very sweet. Next time we make them, we’re not going to use as much sugar. Enjoy!
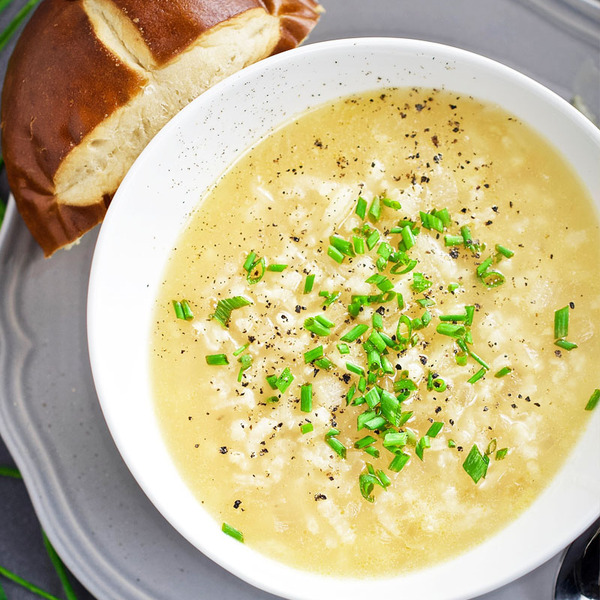
I have been vegetarian most of my life and vegan for the past decade, so there are many dishes I have never tried because they have animal products in them. One of those recipes is the greek lemon soup, commonly known as avgolemono.
I have heard of people’s appreciation for this soup, but could never try it because it contains scraps of chicken, chicken broth, and eggs. But it also has a ton of lemon in it (I have never met a lemon I didn’t love), so I set out to make my own vegan version of the soup. Instead of eggs, I used cabbage. And, instead of chicken broth, I used a vegan version of chicken broth flavoring. On the occasion I’m making it for guests, I’ll also add gardein’s vegan chicken to make it more authentic; however, I personally like it better without any meat alternatives.
This soup is:
hearty
tangy
lemony
filling
Here’s another soup recipe of mine that may interest you: No chicken noodle soup
vegan (greek) lemon soup
Patty Malcolm | Chickfoodtv
Prep Time 10mins
Cook Time 30mins
Total Time 40mins
Course dinner
Cuisine greek
Ingredients
2sweet onionssmall dice
grape seed oil
pinchof salt
6cupsvegan no-chicken broth No Chicken BaseVegan Certified
1/2cuparborio rice
1/2cupgreen cabbagefinely shredded
3lemonsjuiced
fresh ground pepper & saltto taste
chives or green onionschopped for garnish (optional)
Instructions
DICE. Peel and small dice the onion.
HEAT. Add oil to a soup pot and heat over low heat. Add onions and a generous pinch of salt and cover to let sweat and to keep onions moist. Sweat until the onions are translucent and soft, but have not started to brown, about 5 minutes. Then up the heat to medium and sauté until just starting to turn lightly brown, about 3 minutes. The onions should taste sweet and this is important to off-set the tartness from the lemons.
COMBINE. Mix 1 teaspoon of no-chicken broth paste with 6 cups warm water and stir until well combined. Add in the six cups of no-chicken broth to the onions, and bring to a boil. Then turn the heat down and let it simmer for about 10 minutes.
JUICE. Meanwhile, squeeze all three lemons, and set the juice aside.
ADD. Add rice the last 15 minutes of cooking time and simmer on low heat. Adding the rice later helps prevent mushy rice.
LASTLY. Add fresh lemon juice and shredded cabbage. Give a good stir then add salt & pepper to taste.
GARNISH. Garnish with chives or green onions and serve with bread of choice.
Notes
I often use the juice of 4 lemons but this makes a very lemony, tangy soup. For this recipe, I would start with the juice of three lemons and add more, if desired.
Gardein brand vegan chicken strips make a great addition to this soup recipe.
Makes great leftovers, but you might need to add water for subsequent servings as the rice tends to soak up the liquid as it sits.
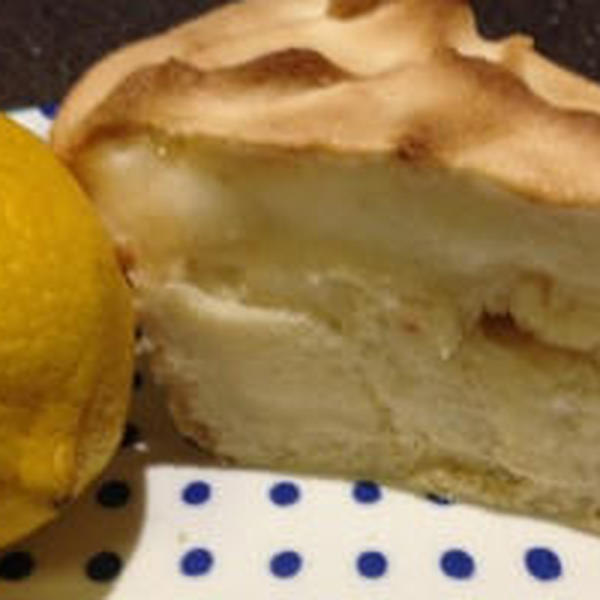
Here is one of the yummiest recipes, Lemon Meringue. At the Raw Vegan Culinary School, our students are taught cooked Vegan as well as Raw. We want them to have the most complete training possible, and be able to share this style of eating with all their family and friends. Sometimes cooked Vegan is a wonderful way to transition! As always, we are in awe of what our students create. We know you will love this one created by Ann Sheldon. Enjoy!
Ann said …
I wanted to re-create this classic dish for some time now, and with the subject matter of this week’s assignment, I thought it the perfect time. I used to watch my mother on many occasions in my childhood creating these wonderful tarts, and they tasted like heaven on a plate. I have never actually made one! Neither the standard way nor a vegan version.
So, now is my opportunity to re-create this wonderful classic, and I hope I can do it justice.
The Pastry
My first hurdle was to create a tasty sweet tart pastry shell. I haven’t made any pastry for a while, but wanted to give this a try. I combined light organic biodynamic white flour with some vegan margarine/butter – I used Nuttalex Buttery. I also added some Himalayan pink salt and filtered water. As I wanted this to be a sweet crust, I also added some raw castor sugar.
I pulsed the margarine through the flour in the food processor, as I find this a great piece of equipment for making pastry. I then added the rest of the dry ingredients and slowly added water. The pastry came together beautifully into a ball. I then rolled it out and added it to my tart case and pre-baked it in a moderate oven. Then, I left it out to cool whilst I made the rest of the tart.
The Lemon Custard
I knew the lemon custard would be a challenge as it is traditionally made with egg yolks – a very hard ingredient to replace. I had some beautiful organic lemons, and also added some lemon zest and a little drop or two of lemon flavour. To create a custardy feel, I used arrowroot along with the light white biodynamic flour, and some more of the raw castor sugar. To make it into creamy custard, I used a cup of firm tofu. I started by adding the dry ingredients to the pan – sugar, flour, arrowroot and salt – combining them together. I then added the wet ingredients – lemon juice, water, the essence and the zest. I brought the custard to a boil, and then lowered the heat. When I took it off the heat, I added a tablespoon of margarine to give it sheen.
I then processed the firm tofu in the blender and added the custard mix. It blended together into a really nice custardy blend. I then put it to one side next to the pastry whilst I made up the meringue.
The Egg-less Meringue
This is my favorite part. To replace the egg whites, I use the liquid from a tin of chickpeas, called Aqua Faba. It makes up really well like egg white and is a real buzz to work with. I have used this wonderful juice before to make a lovely marshmallow, which I placed between 2 peanut butter biscuits. It whips up really well. You can use any bean juice, but chickpeas seem to be the favorite.
Before I started, I placed the raw castor sugar in my dry blender, and blended it up to give it a more fine consistency. I placed the bean juice (aqua faba) in a bowl and used a mixer to whisk it up. It whisked up quite quickly and turned to a lovely white. Whilst mixing, I added the sugar, 1 teaspoon at a time. I then mixed until it was getting quite thick. Then, I added the vanilla and a half teaspoon of Xanthan Gum to make it come together more firmly. I didn’t want to add any cream of tartar, so I added a little lemon juice instead. Cream of tartar is acidic to help with the bubbles, and a little lemon juice works just as well.
Bringing It All Together
I then set about creating the tart. Firstly, I added the custard mix to the tart shell, and followed with my wonderful aqua faba meringue. Secondly, I placed in a moderate oven and baked for around 15-20 minutes. Finally, I let it stand on my counter for about 1 hour, and then, placed it in the fridge.
The tart turned out beautifully and was very delicious!
Vegan Lemon Meringue Tart
Author: Ann Sheldon
[b]Pastry[/b]
1 ½ cups Light biodynamic flour (plain)
3 tablespoons vegan margarine/butter – cut into small pieces
¼ cup water
¼ cup raw castor sugar
1 teaspoons pink Himalayan salt[br][br]
[b]The Custard[/b]
Step One (1)
1 cup raw castor sugar
4 tablespoons Arrowroot powder or cornstarch
2 Tablespoons Light biodynamic flour (plain)
½ teaspoon Himalayan pink salt
Step Two (2)
1 ½ cups filtered water
2 lemons juiced
1 tablespoon Agar Agar (to create a firm custard)
1 teaspoon lemon zest
1-2 drops lemon essence
Step Three (3)
1 cup firm tofu
1 tablespoon vegan margarine/butter[br][br]
[b]The Egg-Less Meringue[/b]
1 cup chickpea juice (bean juice)
2/3 cup raw castor sugar
½ teaspoon vanilla
½ teaspoon Xanthan gum
½ teaspoon lemon juice
[b]Pastry[/b]
Place flour salt and margarine in food processor and process until looks like fine breadcrumbs.
Then add the sugar and mix well.
Once all dry ingredients have come together add the water slowly through the top until the mixture comes together to form a ball a pastry.
Roll out to desired shape and place in a greased tart case. Bake in a moderate oven until nicely brown.
Place to one side to cool down or do this section the day before.[br][br]
[b]The Custard[/b]
Place the dry ingredients from step one into a saucepan and mix together well – heat the stove to a medium heat – then add the ingredients from step two and mix well.
Bring the mixture to a boil and then lower to a medium head and cook until the mixture comes together into a thick paste. Then bring off the heat, stir through the vegan margarine and rest for 5-10 minutes.
Whilst the custard is resting blend up the firm tofu in the blender and then add the custard mix. Blend until it becomes thick smooth lovely custard. Place to one side whilst you make the meringue.[br][br]
[b]The Egg-Less Meringue[/b]
First thing I did was to place the castor sugar in the dry blender and blend into a fine powder.
I then added the chickpea juice to the mixer and began to mix. As the mixture starts to turn white and thicken slowly add the sugar 1 teaspoon at a time until all combined. The mixture will then become quite thick – at this stage add the vanilla and lemon juice. Mix until these are combined and then add the Xanthan gum. The mixture will then turn quite thick. At this point it will be done, but can still be mixed for a little longer if required.[br][br]
[b]Putting it all together[/b]
You then pour the lemon custard into the pre-made pastry – then add the meringue on top and form it into little peaks.
Bake in a moderate oven until golden brown on the top. It is then advisable to leave on a bench for around 1 hour before putting into the fridge.
After 2 hours in the fridge, it is safe to slice your tart and serve. I wasn’t able to get some Agar Agar for this project, so the custard came out a little soft – I know next time I make it with the addition of the agar agar, it will turn out better. However, it tasted just like lemon meringue tart and everyone loved it. To correct the softness, I placed the tart in the freezer and that worked really well.
If you want to take your raw food journey to a more advanced level, consider our Raw Vegan Culinary Course.
Author: Sam Turnbull Updated: March 7, 2025 Published: December 27, 2016
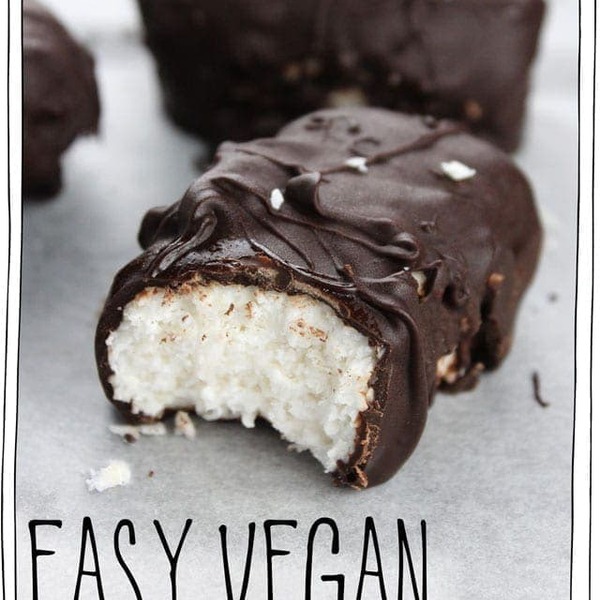
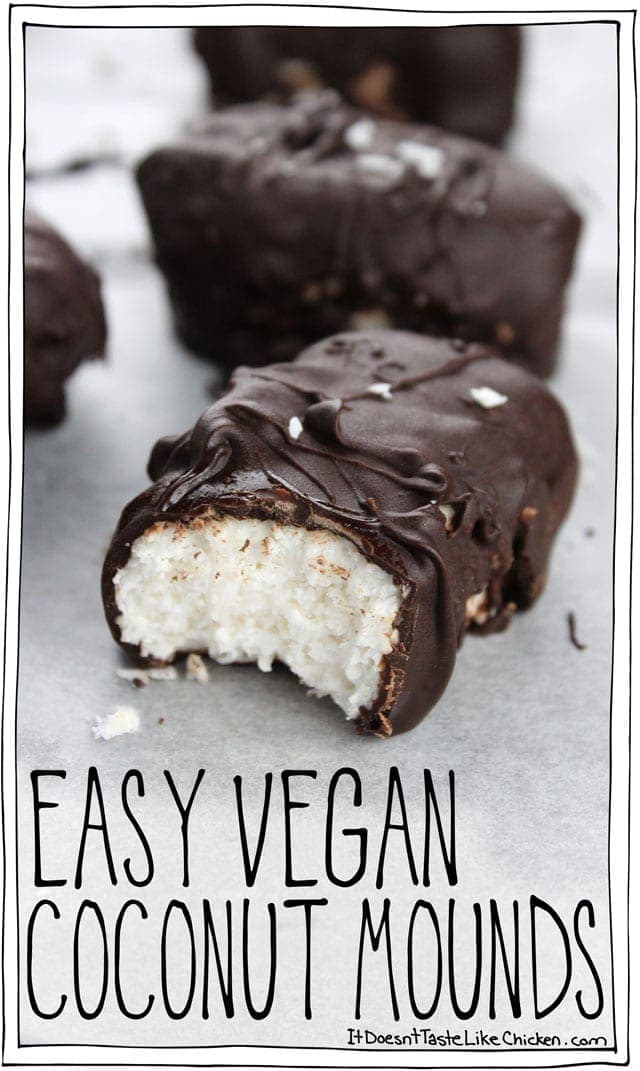
It’s after Christmas… is it too late for chocolate? Pffff, what am I thinking, it’s never too late for chocolate! Especially Easy Vegan Coconut Mounds!
Now that I’m starting to look back over my year of recipe posting (I will be posting a list of my most popular recipes of the year soon) I noticed a bit of a trend. You, my friends, LOVE all things chocolate. The Ultimate Vegan Chocolate Cake, Vegan Peanut Butter Cups, Vegan Oatmeal Chocolate Chip Cookies, and Vegan Chocolate Pudding Cake have all reached my top 50 most popular recipes of all time. And you know what? I’m so excited about it, because if you guys like chocolate recipes, that means I get to make more chocolate recipes. The ultimate win-win situation!
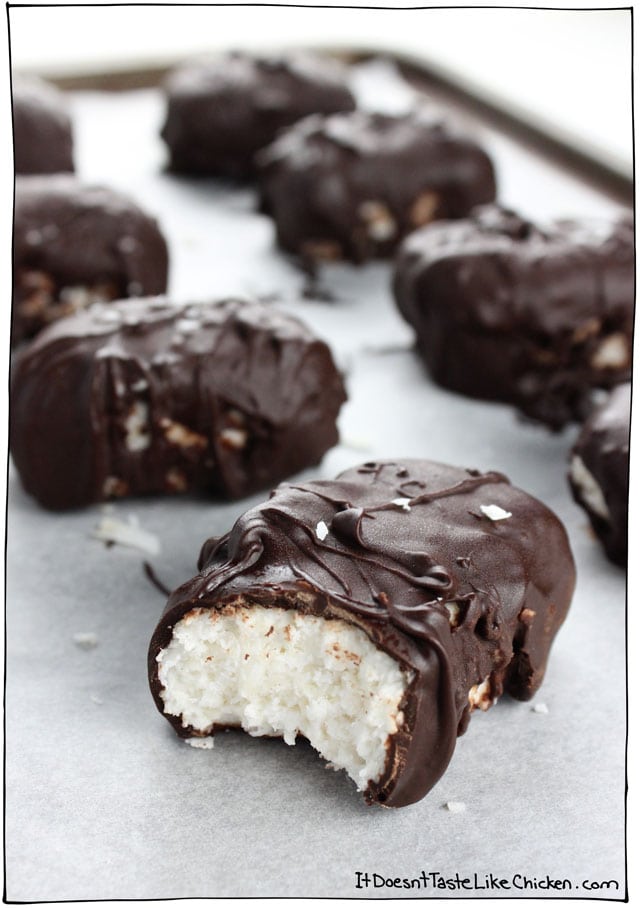
Mounds, bounty bars, snowballs, coconut scrumptiousness dipped in melty chocolate, whatever you want to call them, these are my Easy Vegan Coconut Mounds, and they are SO insanely yummy.
My favourite part is that even though these bars do require a few steps, they are actually super duper easy to make! Just form the bars, dip in chocolate, and done. No baking, no hours of work, just easy peasy chocolating.
They make a great gift too! (If you are willing to be that generous)… it’s a serious dilemma…maybe plan on making a double batch to be safe.
How To Make Easy Vegan Coconut Mounds:
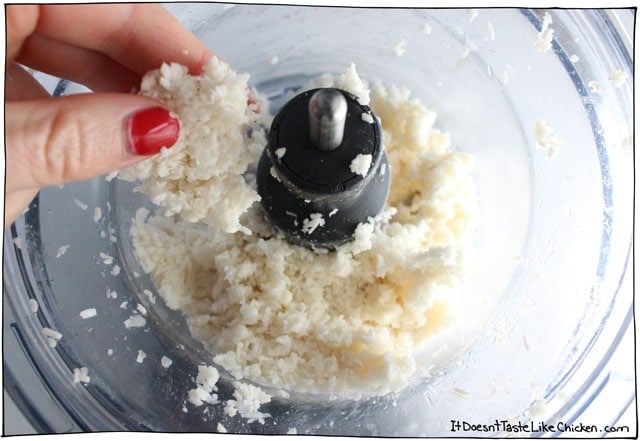
Add the shredded coconut, coconut milk, coconut oil, and agave to a food processor. Pulse several times, stopping to scrape down the sides as needed until the coconut mixture is blended but still has texture. You should be able to pinch the filling and it will hold together, but still be a bit crumbly. Try not to eat it all. (Fair warning).
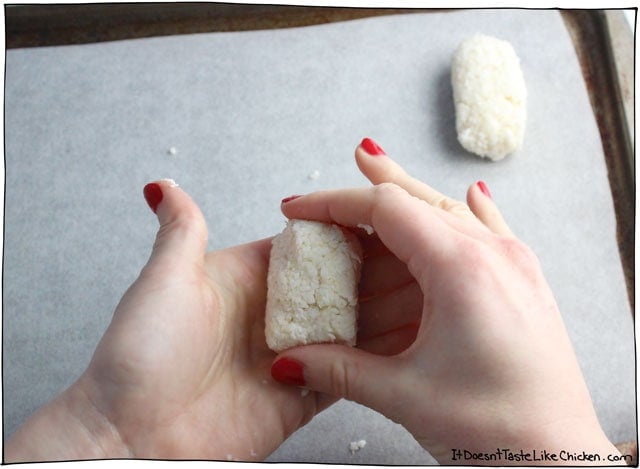
Take two tablespoons of the coconut mixture and form a bar shape, and place it on a parchment paper lined baking sheet.
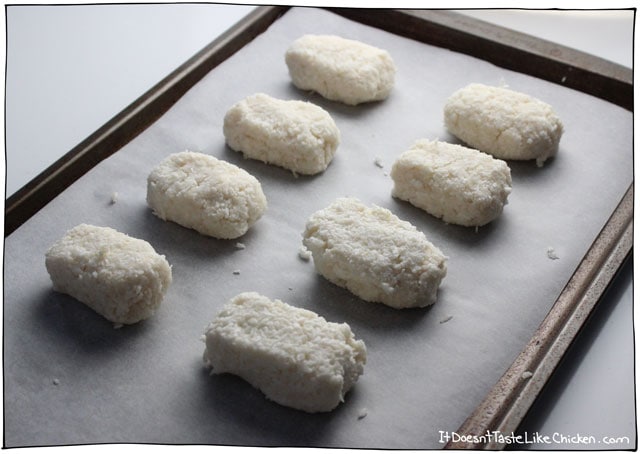
You should get about 8 bars.
Or, for smaller coconut balls, take one tablespoon of the coconut mixture and form a ball. This should make about 16 balls. Pop the tray into the freezer to firm up for 10 minutes.
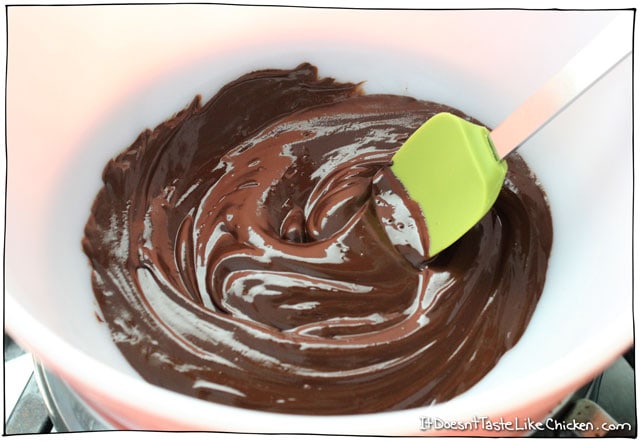
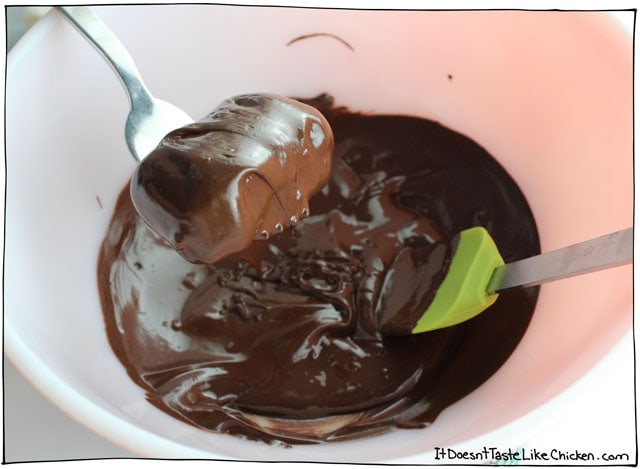
While the coconut is firming up, melt the chocolate chips in a double boiler.
If you don’t have a double boiler, you can just put a heat proof bowl over top of a pot with an inch or two of water in it. Presto you have made your very own double boiler! (This is the method I use). You could alternatively use a microwave to melt the chocolate being careful not to burn it.
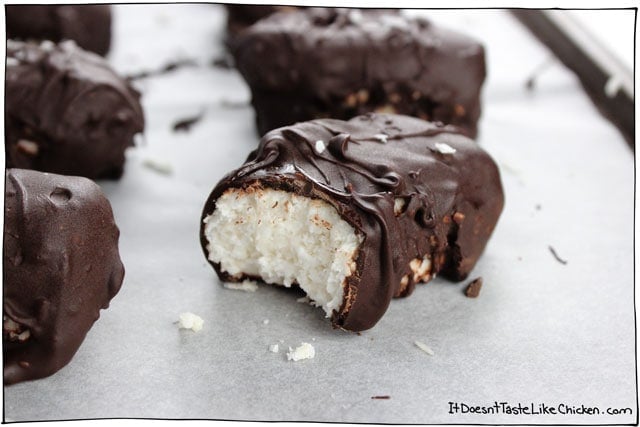
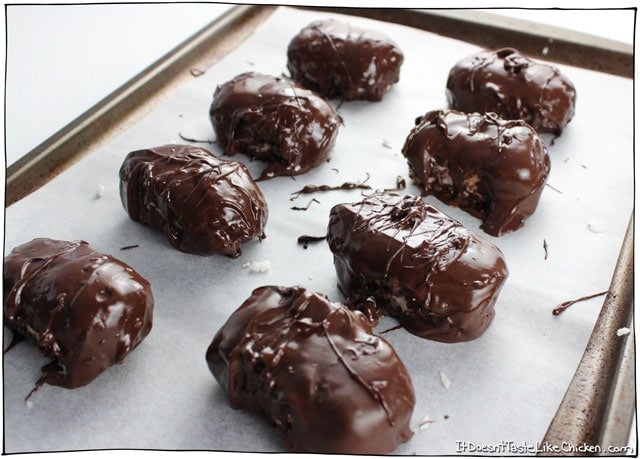
When the coconut bars or balls had become firm, drop them in the melted chocolate and use a spoon and fork to cover the bar. Shake off excess chocolate then place back on the parchment-lined baking sheet.
I had a bit of extra chocolate left over so I drizzled it on top, because: fancy. You could also sprinkle a little more coconut flakes on top.
Pop in the fridge or freezer to set the chocolate. Once set, store bars in an air-tight container in the fridge for up to a week. I like my bars at room temperature best, so I take them out to warm up about 30 minutes before I want to enjoy them.
(click stars to vote)
So easy to make and no baking is required. Makes a great gift (if you are willing to be that generous).
Prep: 30 minutesmins
Cook: 5 minutesmins
Total: 35 minutesmins
Servings: 16balls (or 8 bars)
PRINT
PIN
Save
COMMENT
Instructions
Add the coconut, coconut milk, coconut oil, and agave, to a food processor. Pulse several times, stopping to scrape down the sides as needed until the coconut mixture is blended but still has texture. You should be able to pinch the filling and it will hold together, but still be a bit crumbly.
Take two tablespoons of the coconut mixture and form a bar shape, and place it on a parchment paper lined baking sheet, you should get about 8 bars. Or for coconut balls, take one tablespoon and form a ball, making about 16 balls. Pop the tray into the freezer to firm up for 10 minutes.
While the coconut is firming up, melt the chocolate chips in a double boiler. When the coconut bars or balls have become firm, drop them into the melted chocolate one at a time and use a spoon and fork to cover the bar. Shake off excess chocolate then place back on the parchment-lined baking sheet. Repeat with all of the coconut bars. Pop in the fridge or freezer to set the chocolate. Once set, store bars in an air-tight container in the fridge for up to a week. I like my bars at room temperature best, so I take them out to warm up about 30 minutes before I want to enjoy them.
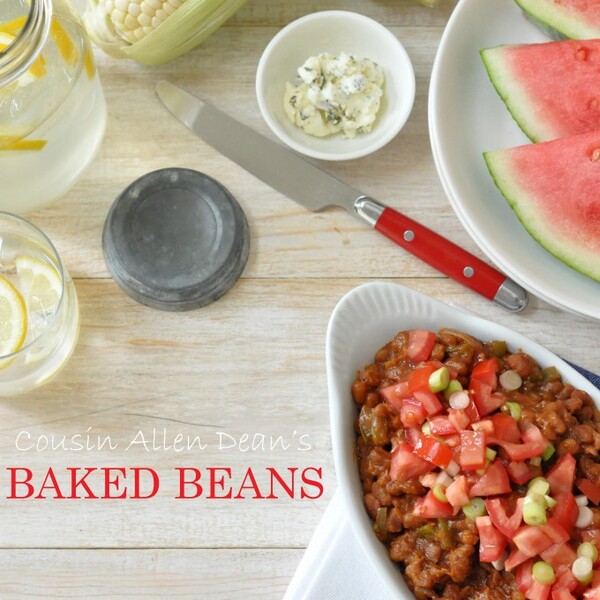
This Vegan Baked Beans recipe is a delicious blend of canned baked beans, onion, bell pepper, barbecue sauce and yellow mustard. They make a perfect side dish to serve at your next backyard barbecue!
This is a crowd-pleasing low-fat healthy baked beans recipe that will likely become your favorite side dish to take to potlucks and summertime barbecues.
The recipe for these Vegan Baked Beans comes from my cousin Allen in Missouri. His wife made these for their daughter, Allison, who is vegan. The best advice I can give you about making these easy baked beans is to double the batch. They are completely addicting. You don’t have to add chopped tomatoes and green onions to your baked beans. That was my addition to this recipe. I just happen to absolutely love tomatoes and green onions on mine. I was at a restaurant years ago that served their barbecue baked beans this way – and I’ve added tomatoes and green onions to mine ever since.
What Beans are Baked Beans
Baked beans are typically made with navy beans, though some people also make baked beans using black beans.
Vegan Baked Beans Recipe
The ingredient list is a short one, making this a super easy baked beans recipe to pull together!
2 28-ounce cans Bushes vegan baked beans
2 tablespoons barbecue sauce
1 tablespoon yellow mustard
2 tablespoons brown sugar
1/2 medium onion, cut into quarters and sliced
1/2 medium bell pepper, chopped (seeds and ribs discarded)
freshly ground black pepper to taste
How to Cook Baked Beans
This is a baked bean recipe using canned beans so this recipe comes together quicker than starting out with dried beans.
Preheat the oven to 325 degrees
Drain the beans and add them to a baking dish.
Add the onions and bell pepper and gently fold into the beans.
In a small bowl, mix the barbecue sauce, mustard and sugar and blend well.
Add the mixture to the beans and gently blend well.
Cover with foil and bake for 1 hour 45 minutes.
Remove the foil and bake for another 15 minutes.
Looking for More Healthy Side Dish Recipes?
Creamy Black Beans with Coconut Milk
How to Cook Black Beans
Mexican Pinto Beans
Vegetarian Borracho Beans
Mediterranean Bean Salad
Ingredients
2 28-ounce cans Bushes vegan baked beans
2 tablespoons barbecue sauce
1 tablespoon yellow mustard (I use Frenches)
2 tablespoons brown sugar
1/2 medium onion, cut into quarters and sliced
1/2 medium bell pepper, chopped (seeds and ribs discarded)
freshly ground black pepper to taste
Instructions
Preheat the oven to 325 degrees
Drain the beans and add them to a baking dish.
Add the onions and bell pepper and gently fold into the beans.
In a small bowl, mix the barbecue sauce, mustard and sugar and blend well.
Add the mixture to the beans and gently blend well.
Cover with foil and bake for 1 hour 45 minutes. Remove the foil and bake for another 15 minutes.
theharvestkitchen.com attempts to provide accurate information, however, this nutritional information is provided as a courtesy and is an estimate only. The nutritional information provided comes from online sources and calculations.
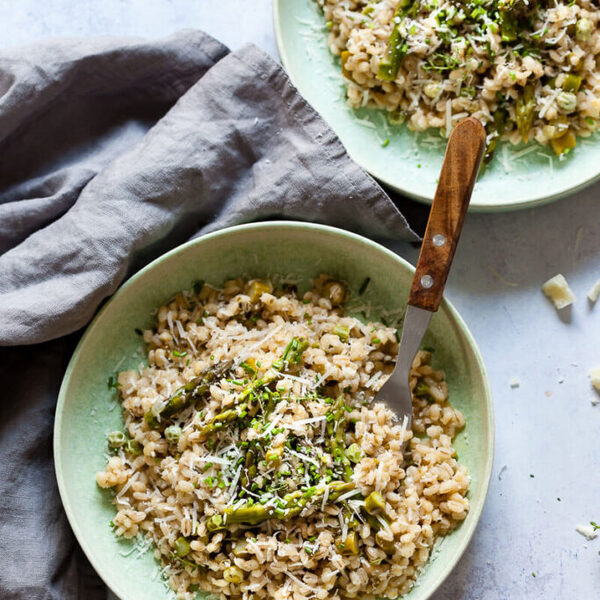
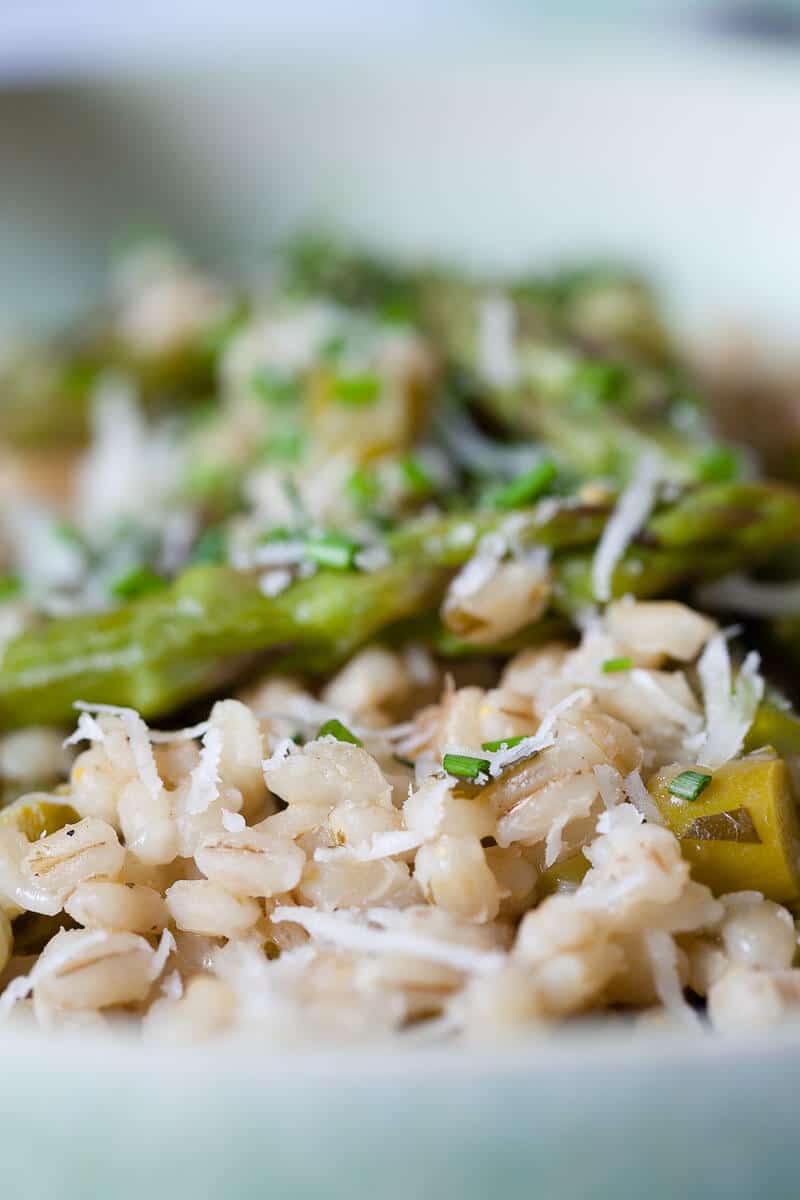
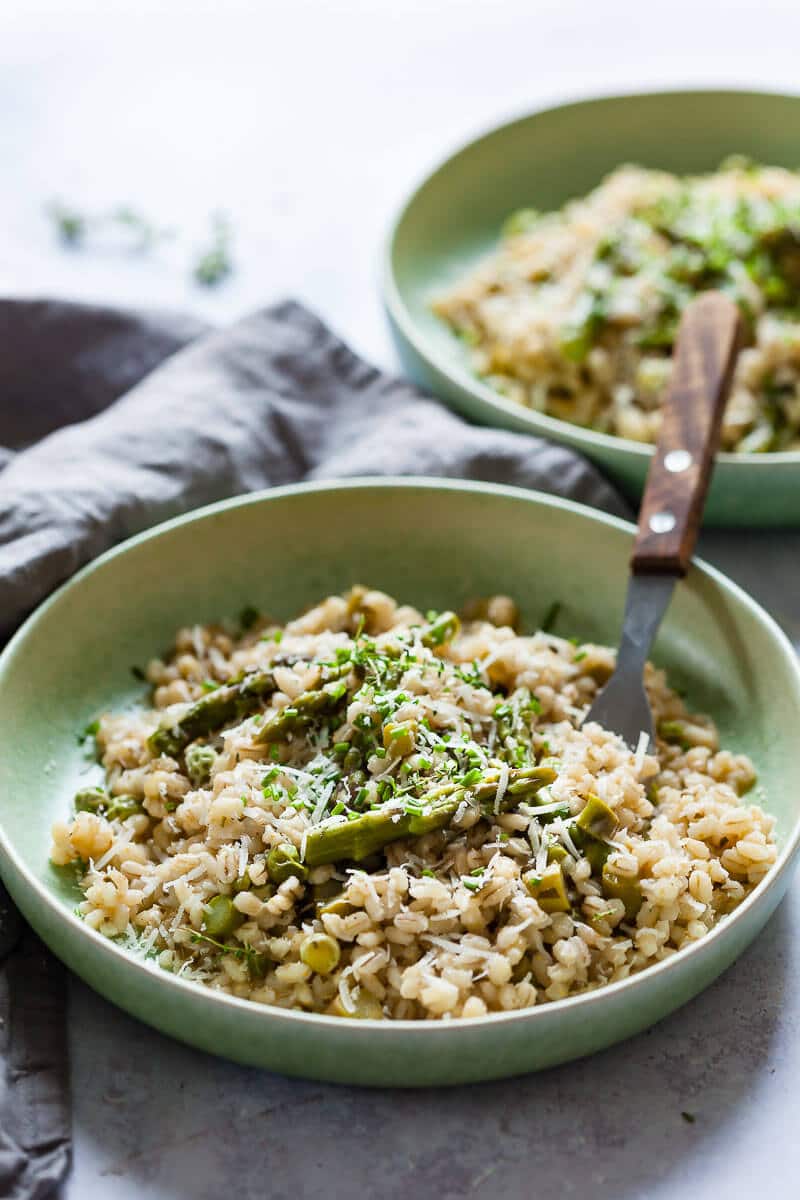
A tasty Vegan Pearl Barley Asparagus Risotto with Peas offers delicate flavors and a rich chewy texture. This recipe is Vegan & Dairy-Free.
We’ve eaten our share of asparagus this year, and although it is not our favorite vegetable, we keep sticking them in dishes, roasting them in the pan and just adding them everywhere!
If you are an asparagus lover, or simply want to eat a delicious and healthy meal, you cannot skip past this Vegan Barley Asparagus Risotto.
Why use pearl barley instead of rice
Besides the simple change of flavors, we often use pearl barley instead of rice in risottos because it offers a different texture and final taste of the dish. Nutritionally speaking there is no huge difference between the two ingredients, so if you do not have pearl barley at hand, you can easily substitute it with risotto rice (like arborio, st. Andrea,…). But barley is higher in protein and also richer in fiber, so it makes for a wholesome meal. Barley also contains gluten, so if you are eating gluten-free we recommend using rice instead.
How to make this Vegan Barley Asparagus Risotto
As with any risotto, making this dish is super simple! Divide the asparagus to stems and peaks. Chop the vegetables and fry them up in a pot, then add pearl barley and vegetable stock. Season to taste and let the risotto simmer away until the barley is cooked through, which should take about 25 minutes. Just before the risotto is done, toss in the asparagus peaks and peas and cook for another 5 minutes and you’re done!
We like to add a dollop of (vegan) butter and some parmesan cheese before serving, but you can totally skip that part.
And that’s it! So go make it now 🙂
Yield: 3
Prep Time: 10 minutes
Cook Time: 35 minutes
Total Time: 45 minutes
A delightful Vegan Pearl Barley Risotto with Asparagus and Peas offers delicate flavors and a rich chewy texture.
Ingredients
200 grams pearl barley
1 onion
3 cloves garlic
2 cups vegetable stock
1 tbs parsley
500 grams (1 pound) of asparagus
1/2 cup peas (fresh or frozen)
pinch of salt
dash of black pepper
2 tsp vegan parmesan
1 tsp vegan butter
1 tbsp oil
Instructions
Cut the tough stem off the asparagus, leaving the softer stem and the peaks. Cut the stem into chunks and set peaks aside. Peel ans finely dice onion and garlic cloves. Finely chop parsley. Wash pearl barley under running water and drain.
In a pan or skillet heat a tablespoon of oil, add onions and stir-fry until translucent. Then, add garlic, asparagus stems and chopped parsley. Lastly, add in pearl barley and vegetable stock.
Bring to a boil, then reduce heat and cook on low for about 20-25 minutes.
When the barley is almost cooked, add in peas and asparagus peaks, season with salt and pepper and cook for an additional 5-10 minutes.
Once cooked, add in a teaspoon of vegan butter and top with grated vegan parmezan cheese (optional). Serve.
Nutrition data is automatically calculated using Nutritionix and may not be accurate.
Did you make this recipe?
Let us know in the comments below or on social media using #vibrantplate and tag us @vibrantplate.
Oh, and don’t forget to check also the asparagus risotto recipe, using rice!
(btw, we have a delicious asparagus soup coming your way real soon!)
If you like this recipe, you can let us know in the comments below or on social media using #vibrantplate and tag us @vibrantplate. We’re always happy to read your feedback and LOVE seeing your take on our recipes.
Don’t forget to subscribe to our Newsletter – you’ll be notified when we post new recipes, plus you get a free gift from us 💚 A 15-recipe free e-book with our most beloved recipes!
You can connect with us on our Instagram, Facebook or on Pinterest. We share many behind-the-scenes photos and step-by-step recipes in our Instagram Stories, so be sure to check it out!
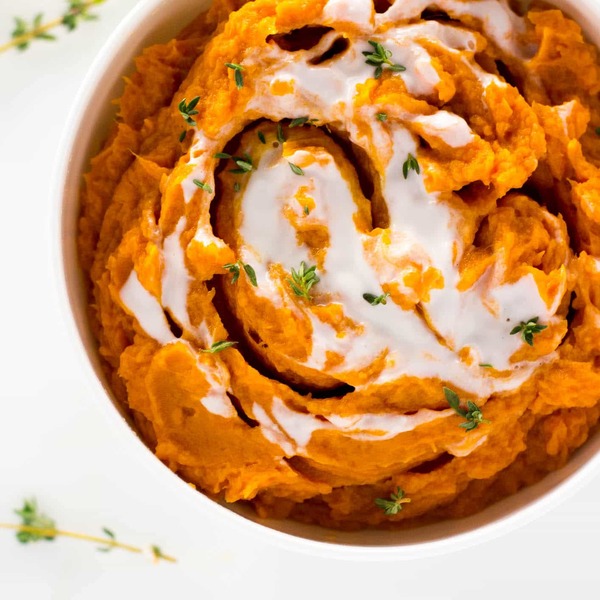
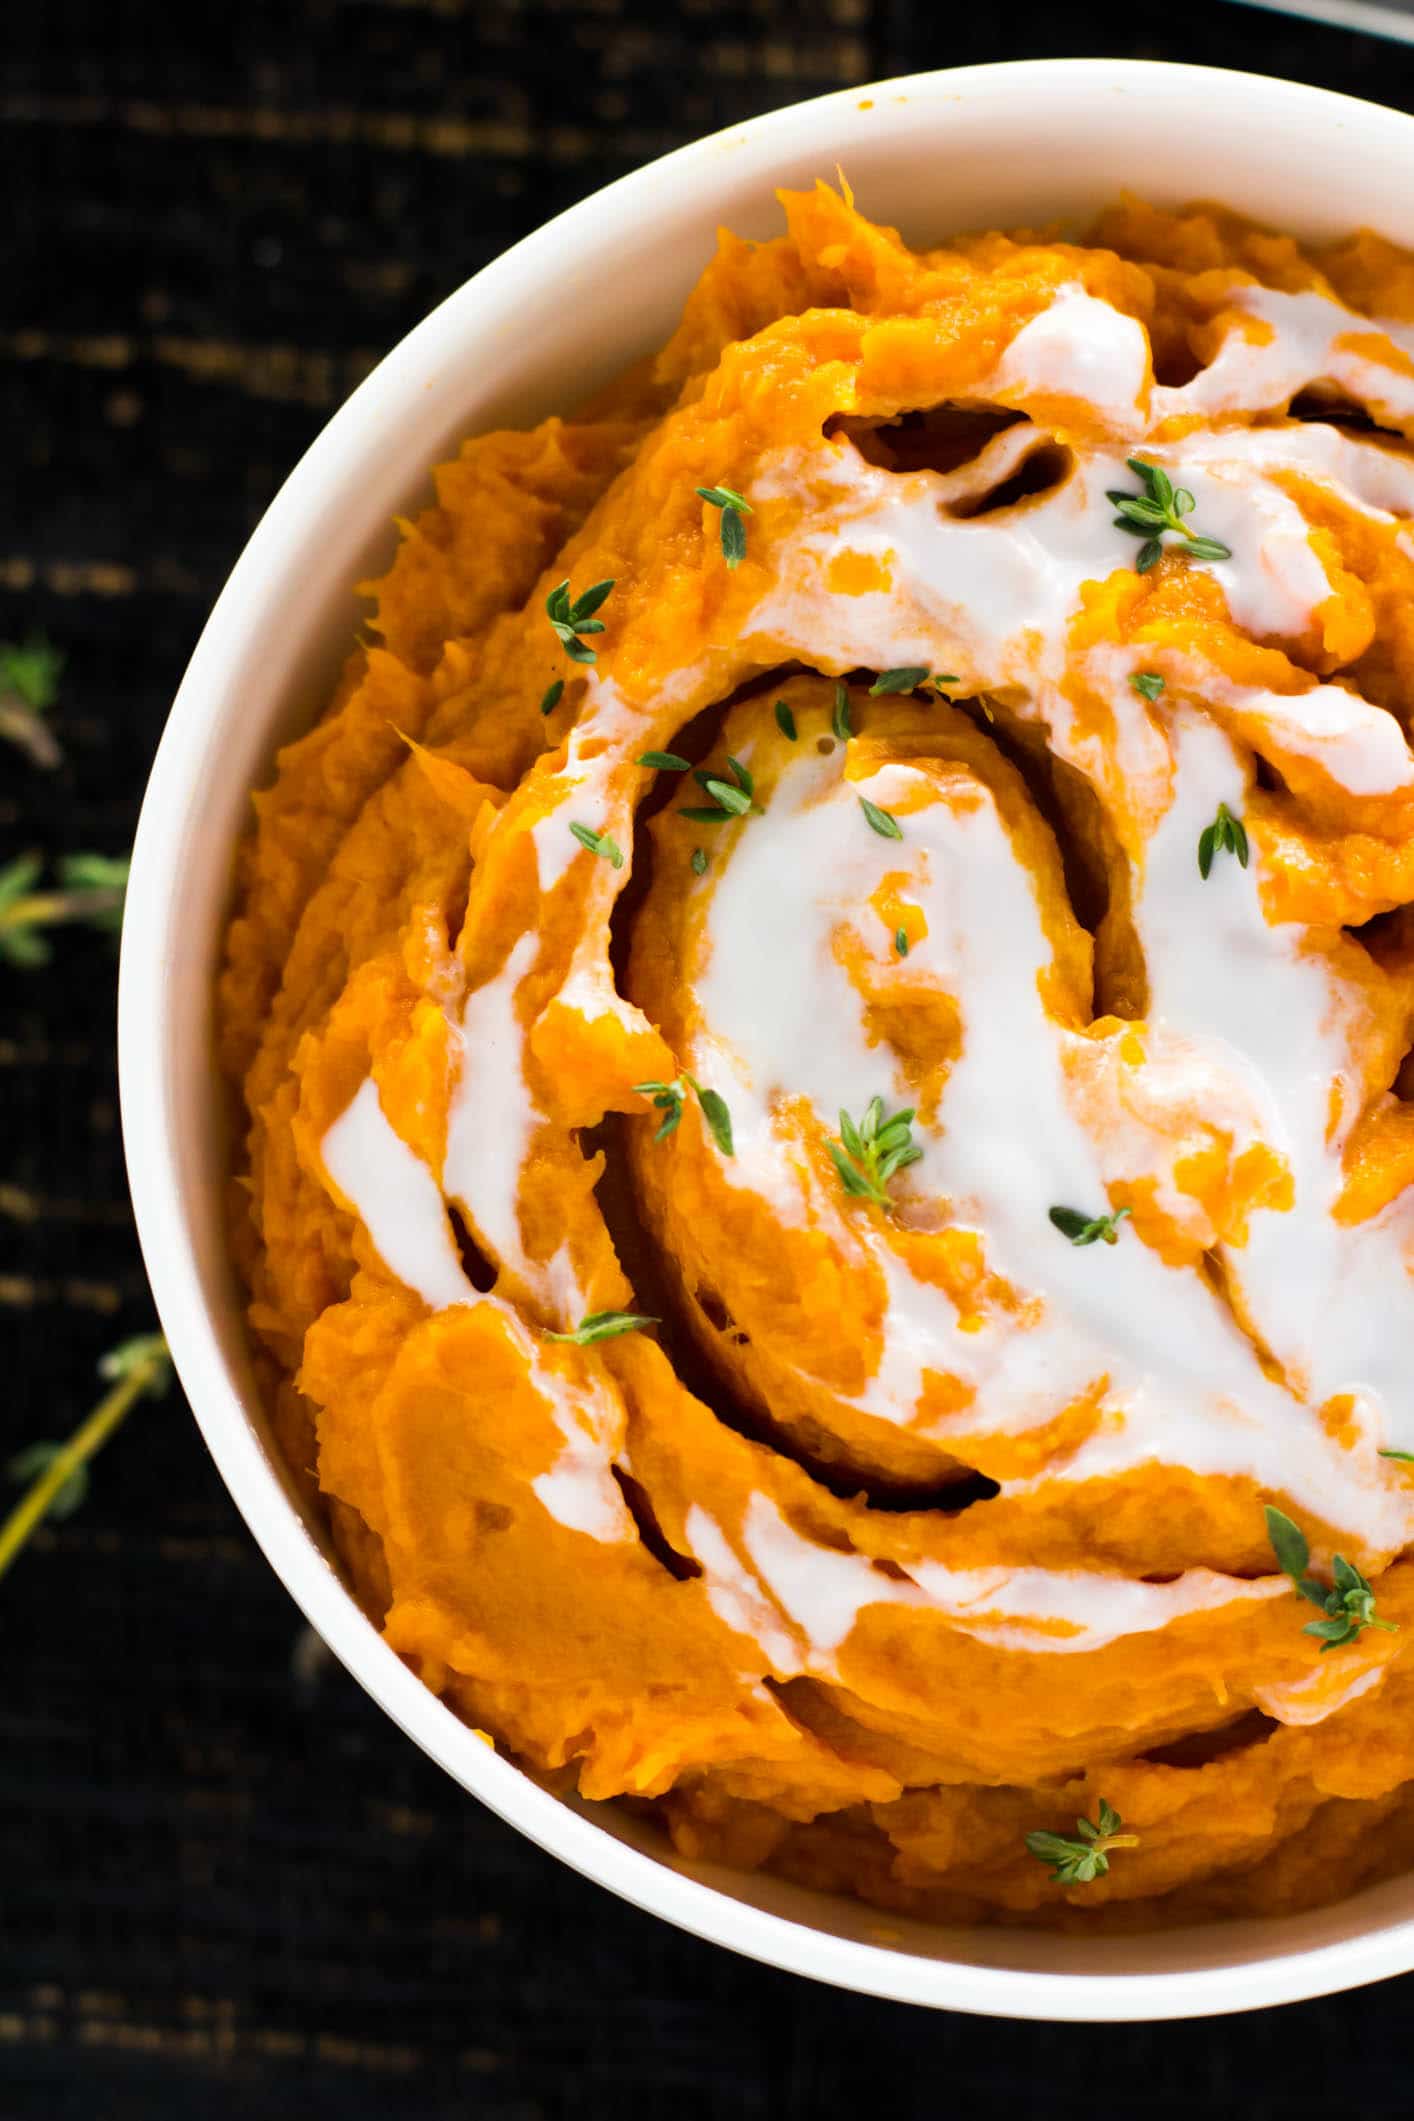
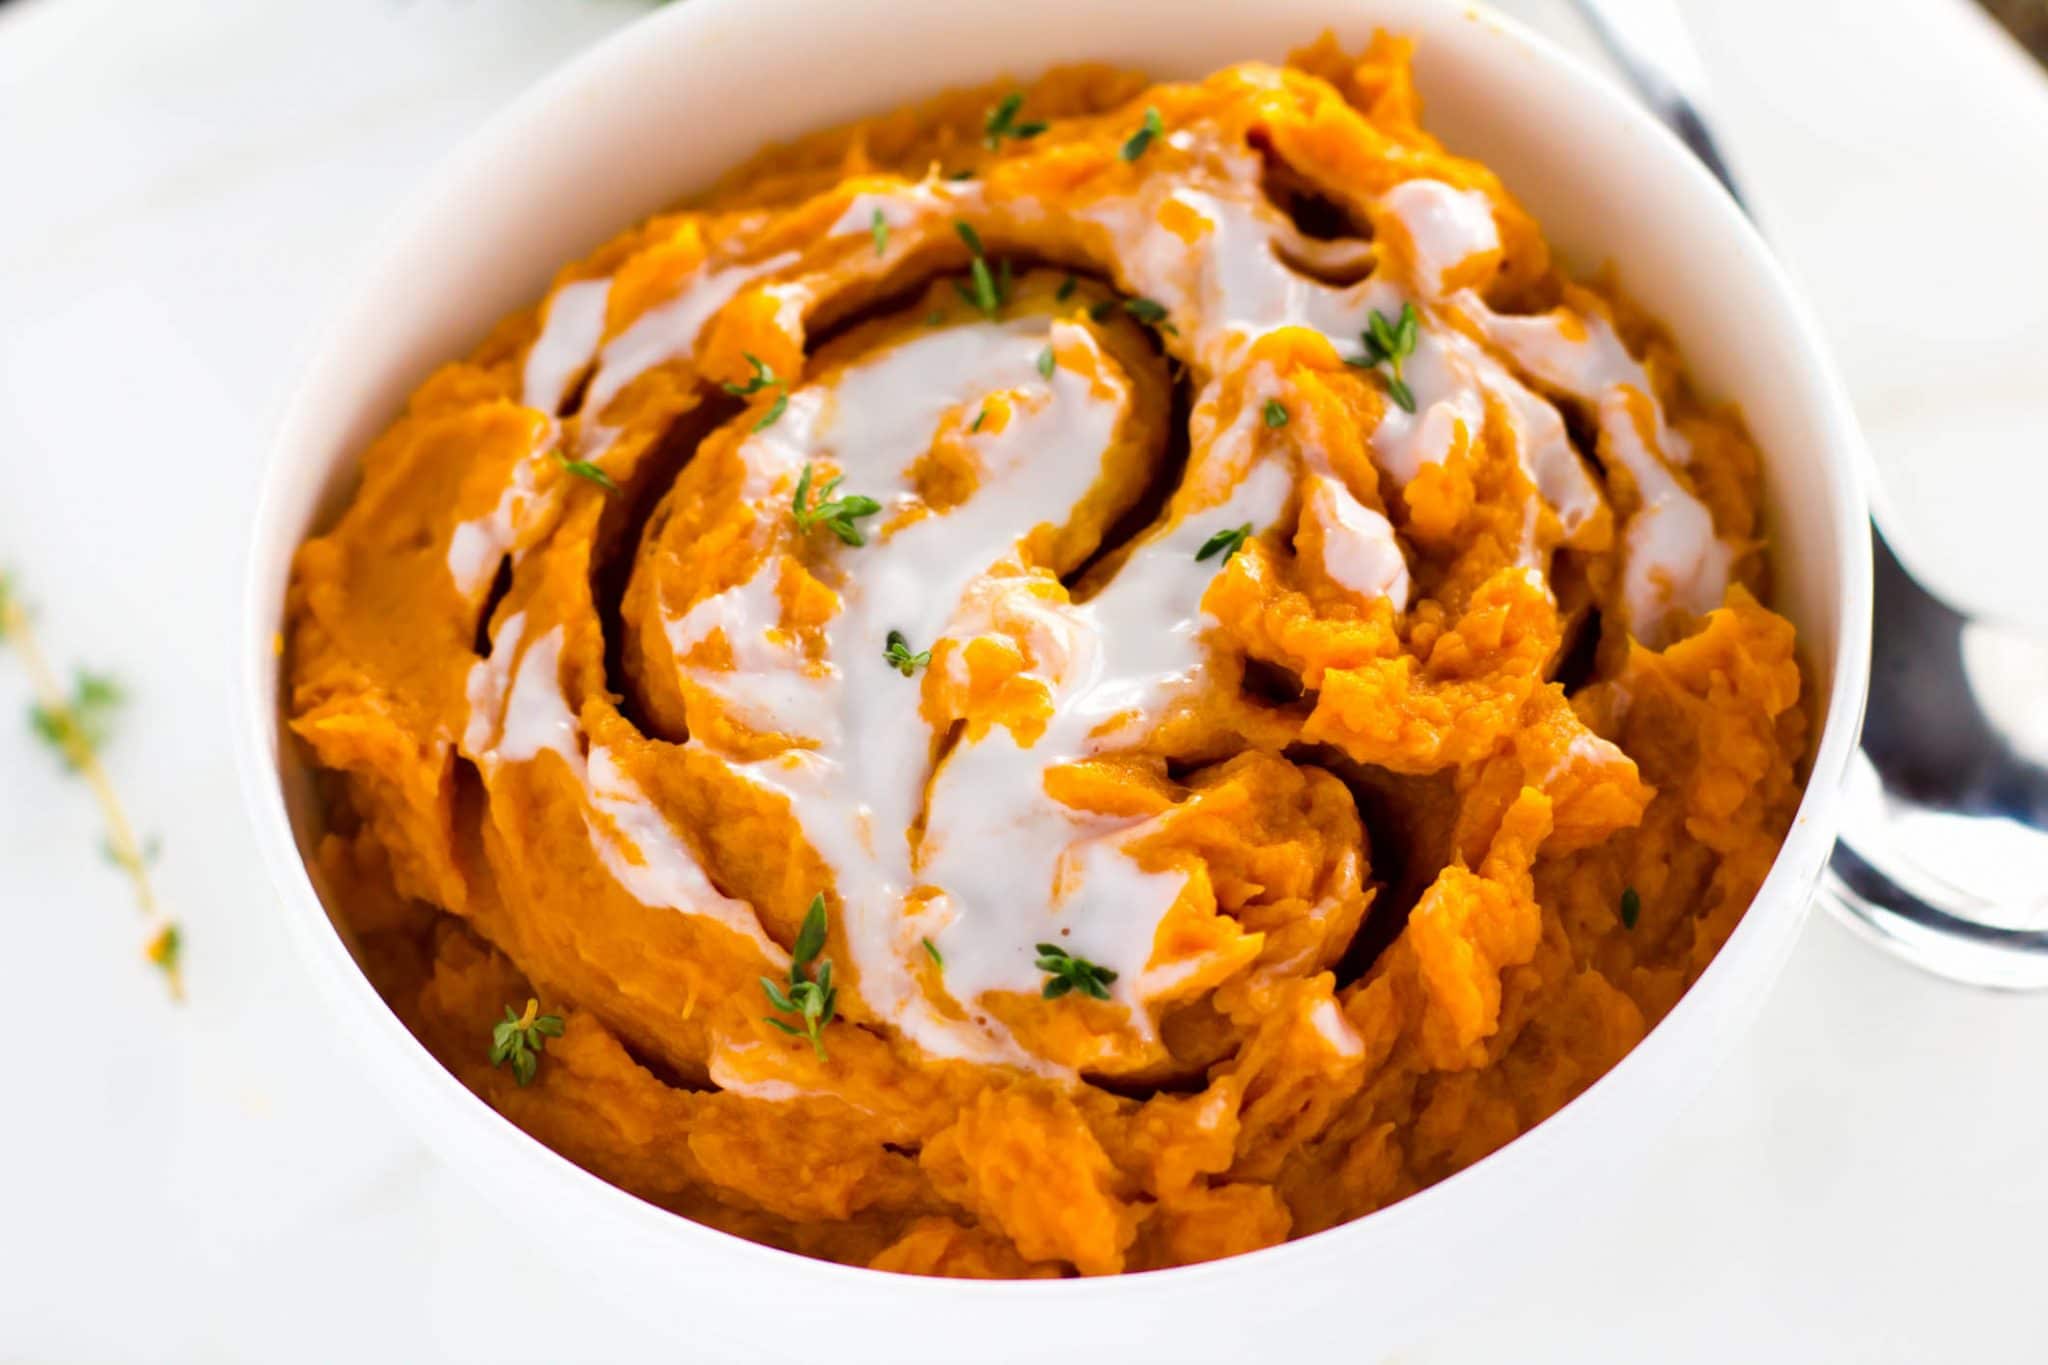
Did you ever think you can get creamy mashed sweet potatoes without all that butter and cream? I didn’t! But you can and it’s fantastic! Plus it’s vegan and healthier and tastier than EVER!
I happen to love Thanksgiving. A LOT. The family. The loud laughter. And the food. Ohhh the food!
When I do a holiday party there are a LOT of people at my house. The tables are breaking at the rims with food and liquor and the house aches to break at the seems with all the laughter and chatter. It is always a good time and everyone always leaves with full bellies and big smiles.
This year my cousin and I had decided to combine our Thanksgivings into one. You know the cousin that is married to the infamous Kenny. Anyhow, they have a beautiful house that actually has a gigantic basement complete with a fancy bar and a second kitchen. So cooking up a storm in that house was awesome!
When we started talking about the menu for the 20-some people attending the Thanksgiving feast this year it hit me…WHAT AM I GOING TO EAT? No really? I mean so many side dishes for Thanksgiving either are full of dairy or are laden with meat products. And my mashed potatoes. Literally I LOVE mashed potatoes. Creamy and delicious in all their glory…I could eat an entire bowl. And have.
And let me tell you…I love my family but if I even started telling them, particularly the men, that they are eating vegan they would sit me down and explain what a freak I am and how I am depriving my body of protein and how I need to be institutionalized. (Funny story I was informed by someone that the Russian radio had a debate about vegan vs omnivore eating and that the World Health Organization said that vegans are clinically insane. Don’t these people have cancer and diabetes to worry about?)
ANYHOW…So my goal for this year was to create ridiculously delicious food that just so happens to be vegan or at the very least vegetarian. And then at the end I will scream out…SURPRISE you have been punked! This is VEGAN!!!
Or not…Cuz then I really would be a lunatic 🙂
Anyhow…these vegan sweet mashed potatoes were born one night when I found 4 large sweet potatoes in my pantry looking sad and lonely. It happened to be the same night that I was making my Panera Copycat Vegan Butternut Squash soup and I was inspired by the magic ingredient in the soup that makes it so unbelievably creamy…coconut milk.
Chef note…when I talk about coconut milk I am talking about the stuff in a can not in the cartons next to the milk. That stuff is thinned out and watered down and while it is good as a drink it is not for cooking and to add creaminess to dishes.
After the potatoes were boiled, I drained them really well.
Chef note: No one wants soggy mashed potatoes. Water and cream do not mix. Drain them really well in a colander so they are nice and dry.
I added a bit of vegan butter once the potatoes were cooked and some coconut milk as well as a secret ingredient I use in my Crazy Creamy Mashed Potatoes…sour cream. Except I used vegan sour cream. I added a very good pinch of salt and pepper and some fresh thyme. Then I whizzed it up in my mixer. I think this was imperative as it really got the taters nice and creamy.
Chef note: Check out my super special make ahead tip in the notes of the recipe.
The result? It was FANTASTIC. Hubs loved it. And he was in disbelief how creamy and delish they were without all that cream and butter.
Mission accomplished. Dish 1 of 36 for Thanksgiving was complete. Experience creamy vegan mashed sweet potatoes, a dairy-free delight that’s as healthy as it is tasty.
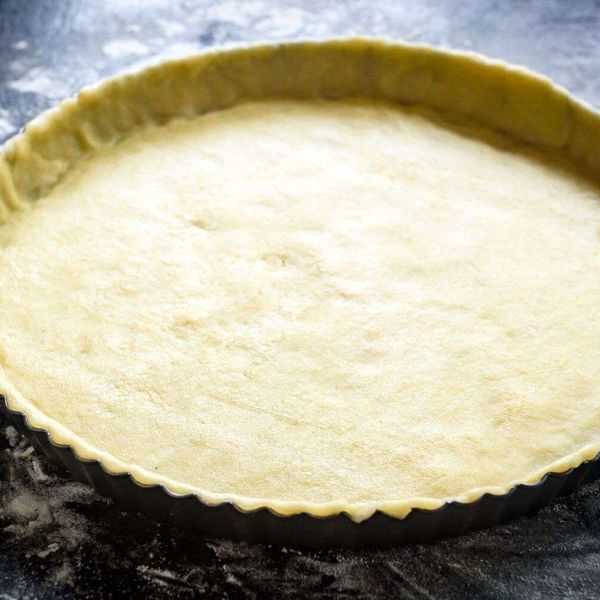
This is an easy vegan pie crust recipe made with margarine and oil, instead of Crisco or solid shortening. And since it has just a tiny touch of sugar, this pie crust is indeed perfect for both savory pies and sweet dessert pies. Store-bought pie crusts are not all vegan-friendly, so making a homemade one ensures you’re getting what you want—a vegan pie crust. This recipe is so simple it’s practically fool-proof, and, chances are, you probably already have all the necessary ingredients sitting at home in your cupboard.
Six ingredients are all it takes to make this easy vegan pie crust, but make sure to chill it in the refrigerator for easier rolling. You can even make it ahead of time with our tips below. Fill it with your favorite fruit, or whatever filling strikes your fancy.
Along with this basic homemade vegan pie crust recipe, you might also want to try a simple vegan granola pie crust.
The Spruce
“If you are looking for a vegan or dairy-free pie crust, you have come to the right place. Swapping vegan butter/margarine, plus adding vegetable oil is really helpful. This recipe can work well for a sweet or savory pie base, making it perfect for a “beet” Wellington, pumpkin pie, strawberry hand pie or galette!” —Tracy Wilk
Cook Mode (Keep screen awake)
2cupsflour
1 1/2tablespoonssugar
1/2teaspoonsalt
1/2cup plus 2 tablespoons vegan margarine
2tablespoonsvegetable oil
3tablespoonswater, cold
Gather the ingredients.
The Spruce
Combine the flour, sugar, and salt in a large bowl.
The Spruce
Cut in the vegan margarine, mixing until crumbly.
The Spruce
In a separate bowl, whisk together the vegetable oil and water.
The Spruce
Then add to the flour and sugar mixture, mixing just until dough forms. You may want to use your (clean) hands at this stage, in order to make sure all the flour gets incorporated well.
The Spruce
Once the dough pulls together and there’s no extra flour, cover the dough with plastic wrap, then chill in the refrigerator for at least 30 minutes.
The Spruce
After 30 minutes, remove the dough from the refrigerator and roll out onto a lightly floured surface to about 1/4-inch thickness.
The Spruce
Once your dough is rolled out, gently press it into a pie tin, trimming any extra bits along the edges.
The Spruce
Your perfect flaky vegan pie crust is now ready to be filled up with whatever amazing ingredients you have planned. Enjoy!
The Spruce
Tip
Don’t be tempted to skip the step of chilling the dough. This step not only allows the fat from the butter to become more firm, making rolling out your dough easier, it also creates an environment for the fast melting of the fat when you put the dough in the oven, which in turn results in the flaky crust for this pie.
For a make-ahead option, keep the dough in the refrigerator for longer than 30 minutes and even overnight. Remove it and use it when you are ready to fill and bake. If you roll out the dough and fill it, don’t store it unbaked. The dough will become soggy and you’ll lose that crispy crust.
To bake the unfilled crust, preheat the oven to 375 F and bake for 8 to 10 minutes, or until lightly golden brown.
Recipe Variation
Use coconut oil in place of the butter, at a one to one ratio.
Nutrition Facts (per serving)
280
Calories
18g
Fat
26g
Carbs
3g
Protein
×
Nutrition Facts
Servings: 8
Amount per serving
Calories
280
% Daily Value*
18g
23%
Saturated Fat 3g
15%
0mg
0%
133mg
6%
26g
10%
Dietary Fiber 1g
3%
Total Sugars 2g
3g
Vitamin C 0mg
0%
Calcium 5mg
0%
Iron 1mg
8%
Potassium 37mg
1%
*The % Daily Value (DV) tells you how much a nutrient in a food serving contributes to a daily diet. 2,000 calories a day is used for general nutrition advice.
(Nutrition information is calculated using an ingredient database and should be considered an estimate.)
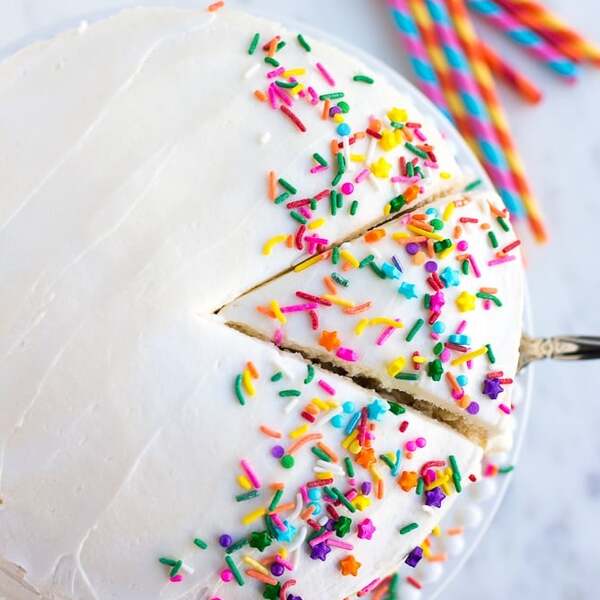
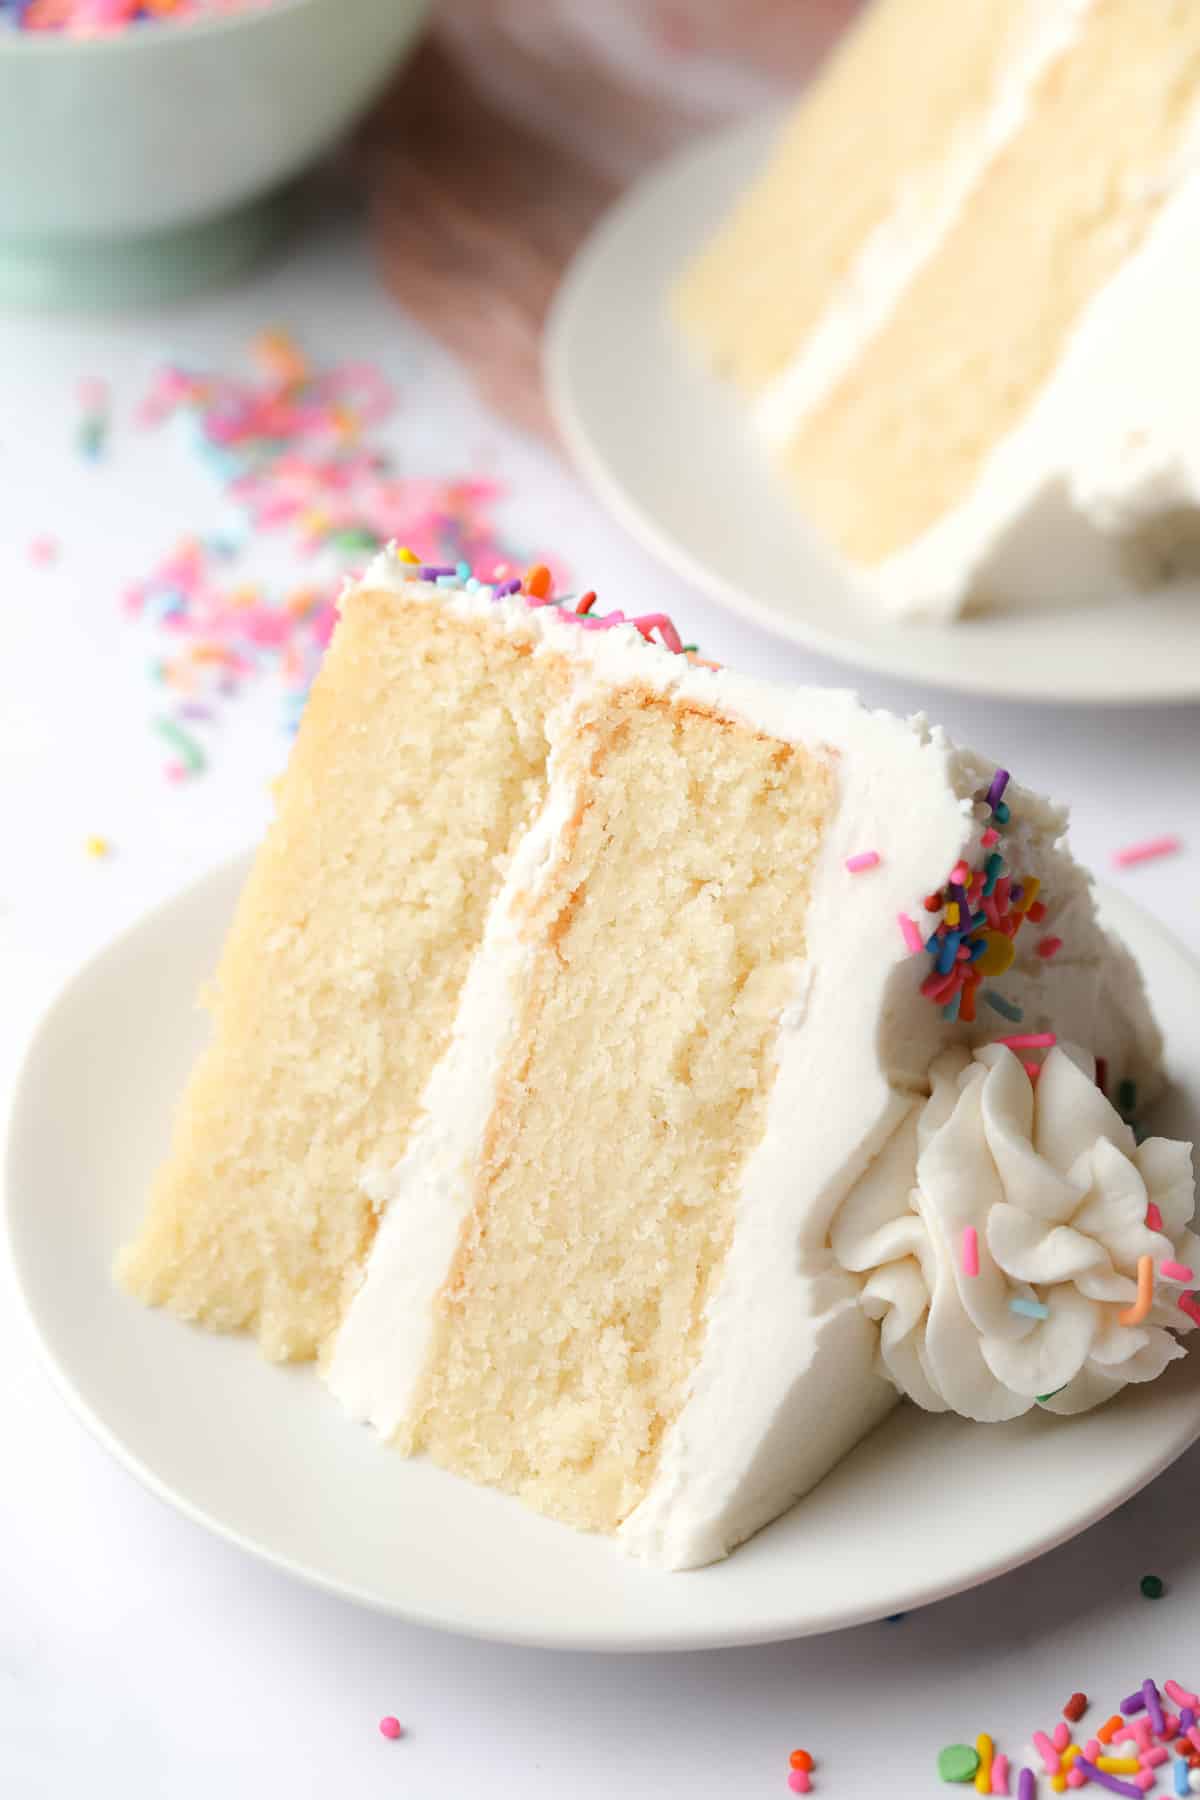
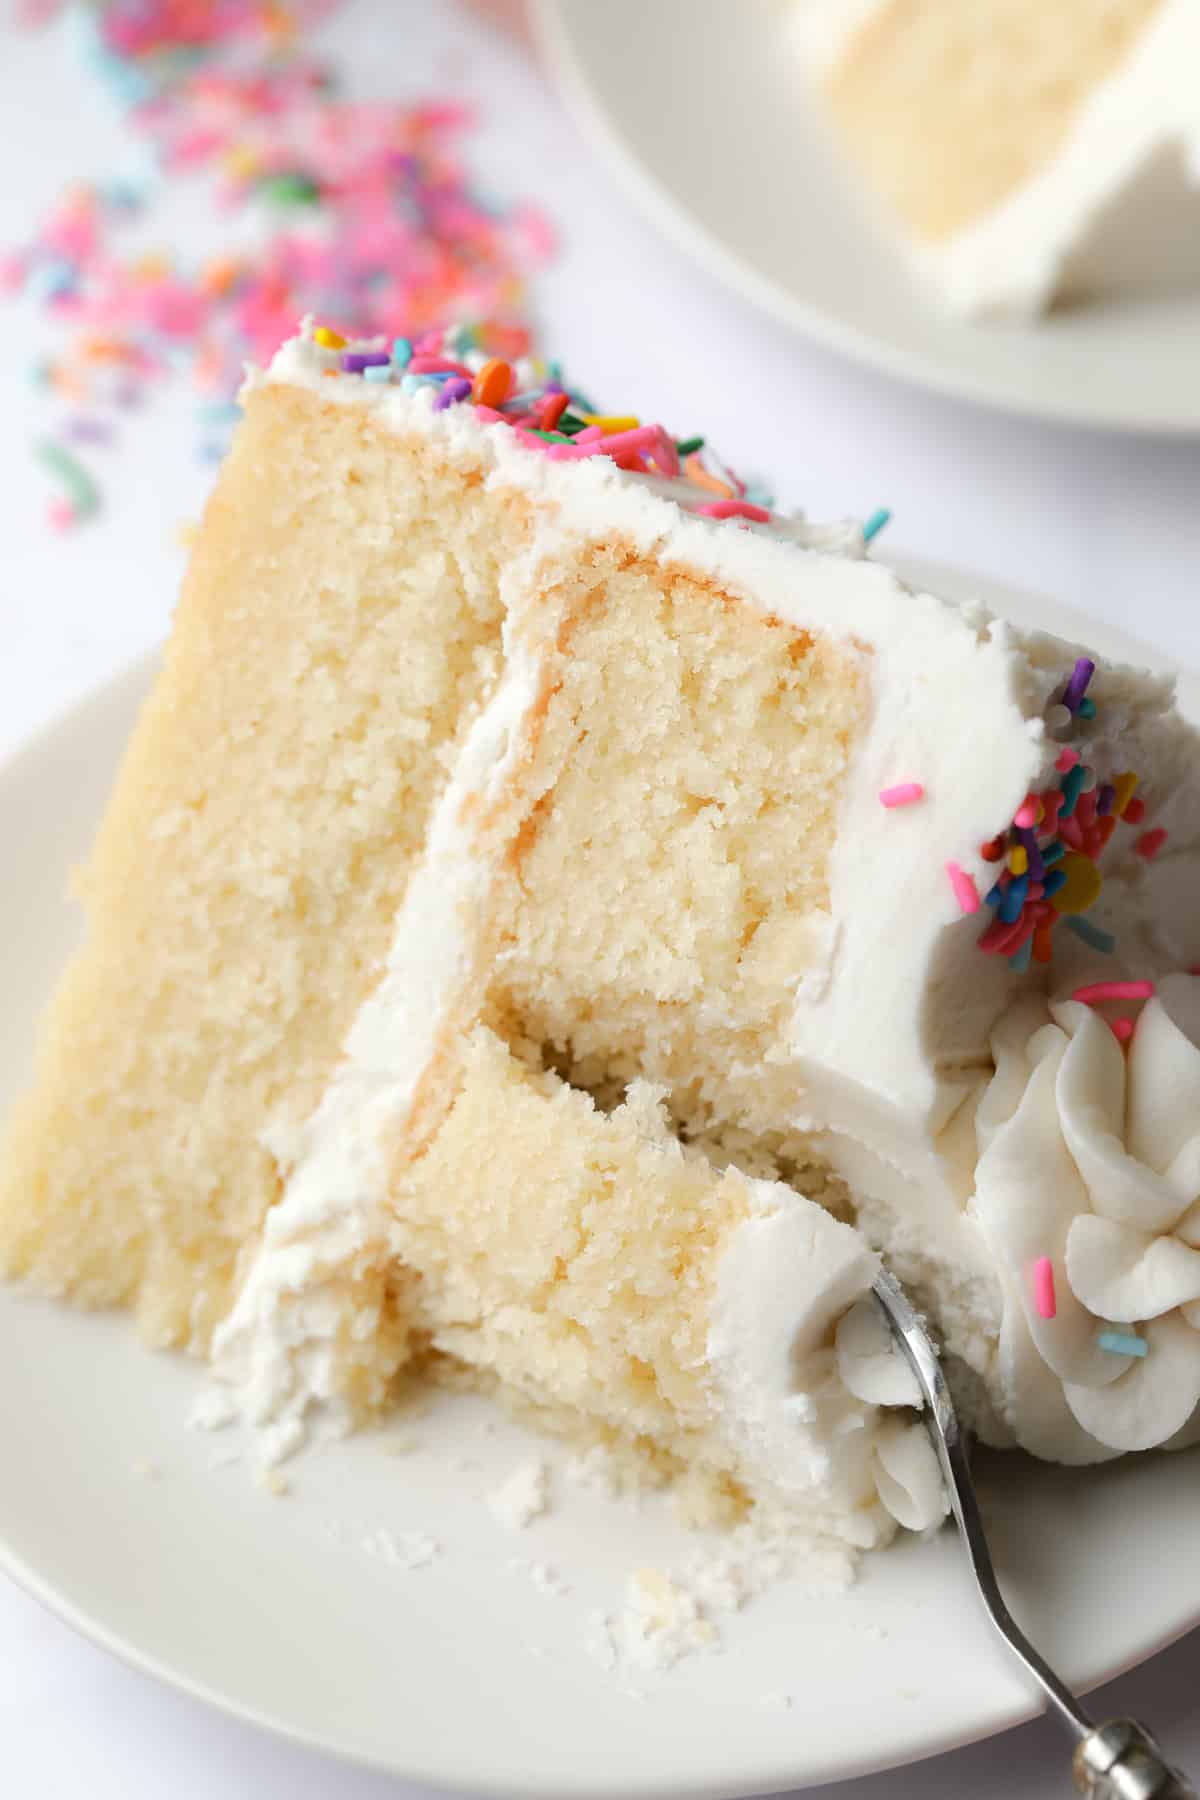
With a moist and fluffy crumb and decadent vanilla flavors, you’ll fall head over heels for this Vegan Vanilla Cake recipe. It’s perfect for all kinds of occasions and no one will guess it’s vegan!
You won’t ever have to search for a vegan cake recipe again with my vanilla cake, Vegan Chocolate Cake, and Vegan Yellow Cake recipes in your back pocket.
Introducing the only vegan vanilla cake recipe you’ll ever need!
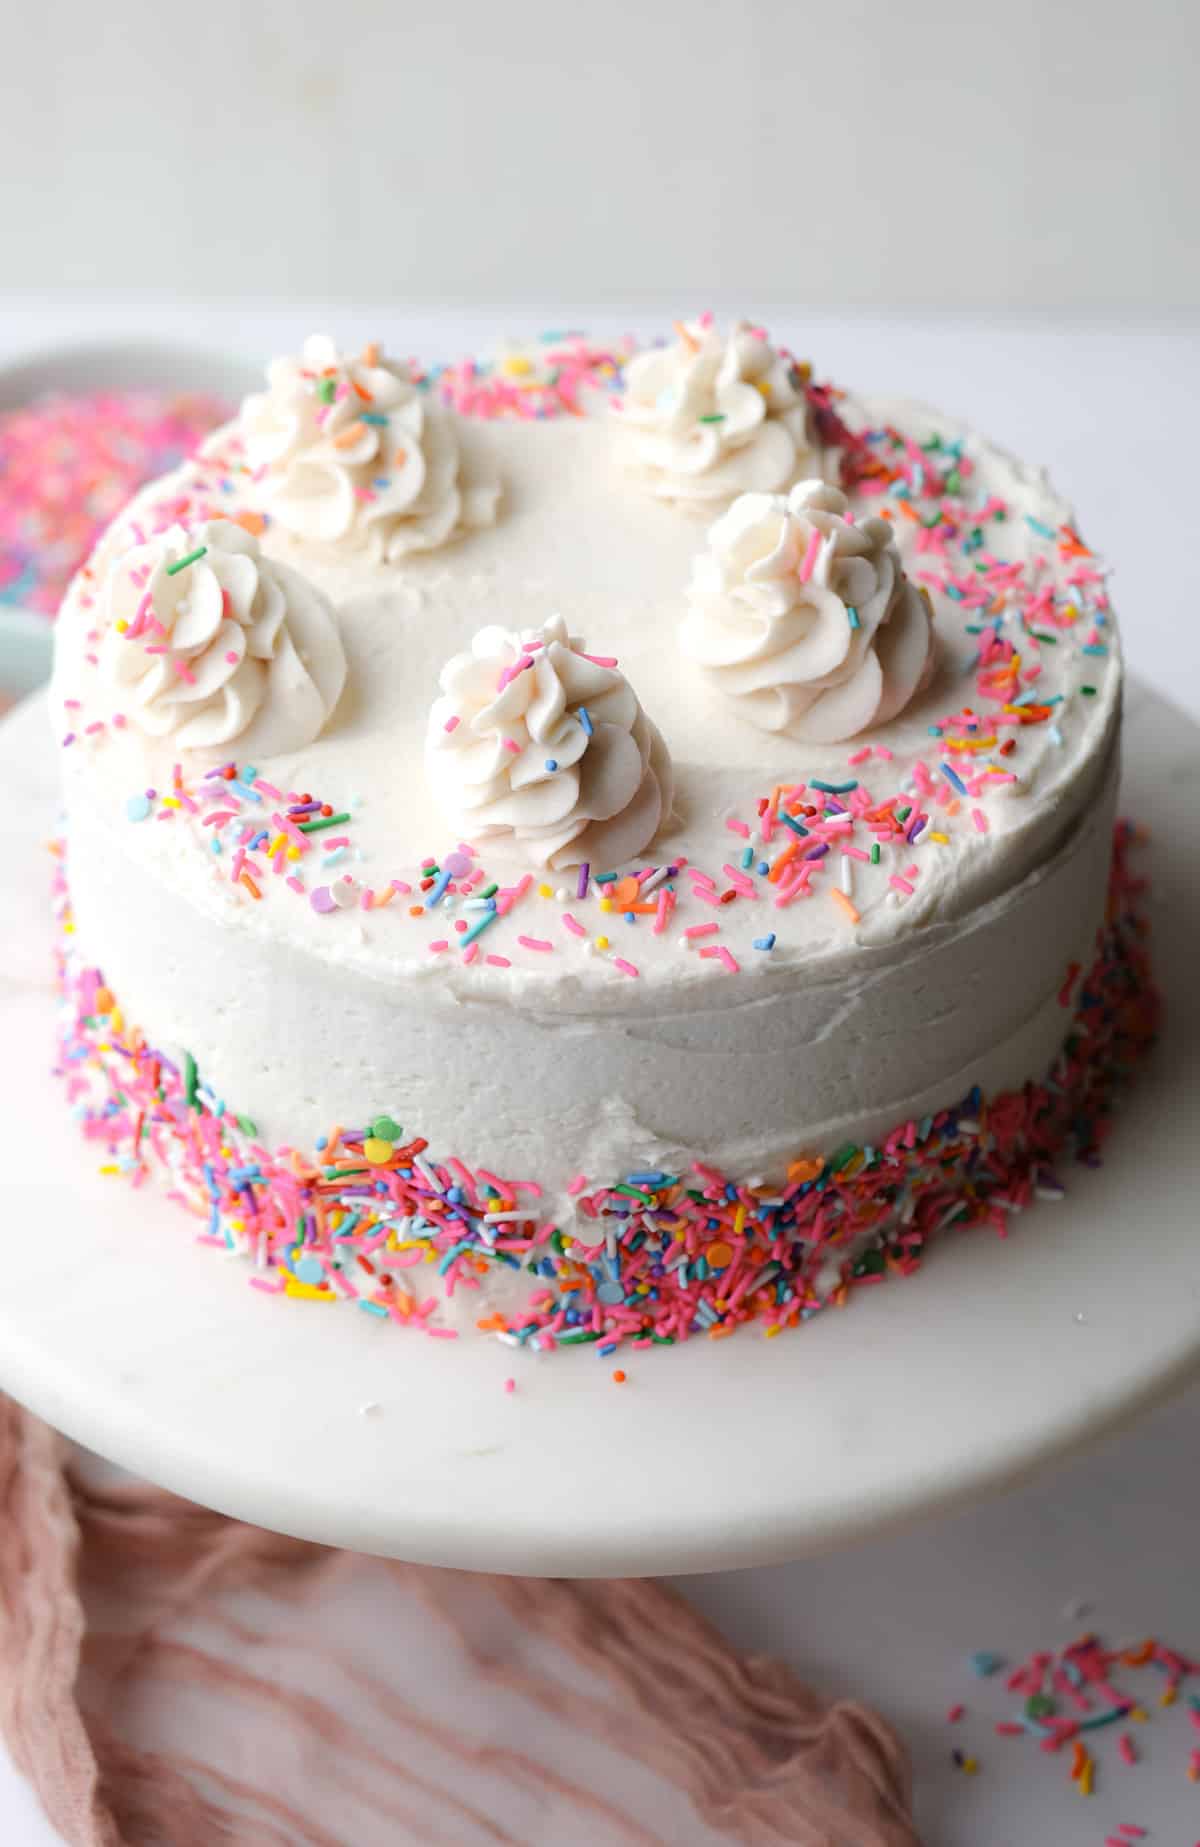
My Vegan Vanilla Cake is an extraordinary dessert that will ‘wow’ the vanilla lovers in your life. It’s moist and fluffy, has elegant vanilla flavors, and is paired with my Vanilla Vegan Frosting for just the right amount of sweetness.
With over 200 5-star reviews, this recipe is a proven favorite! Here’s what readers are saying:
“Love this cake recipe!! The best I’ve ever had!! The whole family loves it too.” – Melissa
“Absolutely amazing! Impressed all my non-vegan friends!!” – Brittany
“I have tried many cake recipes and this one is the best by far! It was perfect and the whole family loved it. I’m keeping this one. Thank you so much!” – Lauren
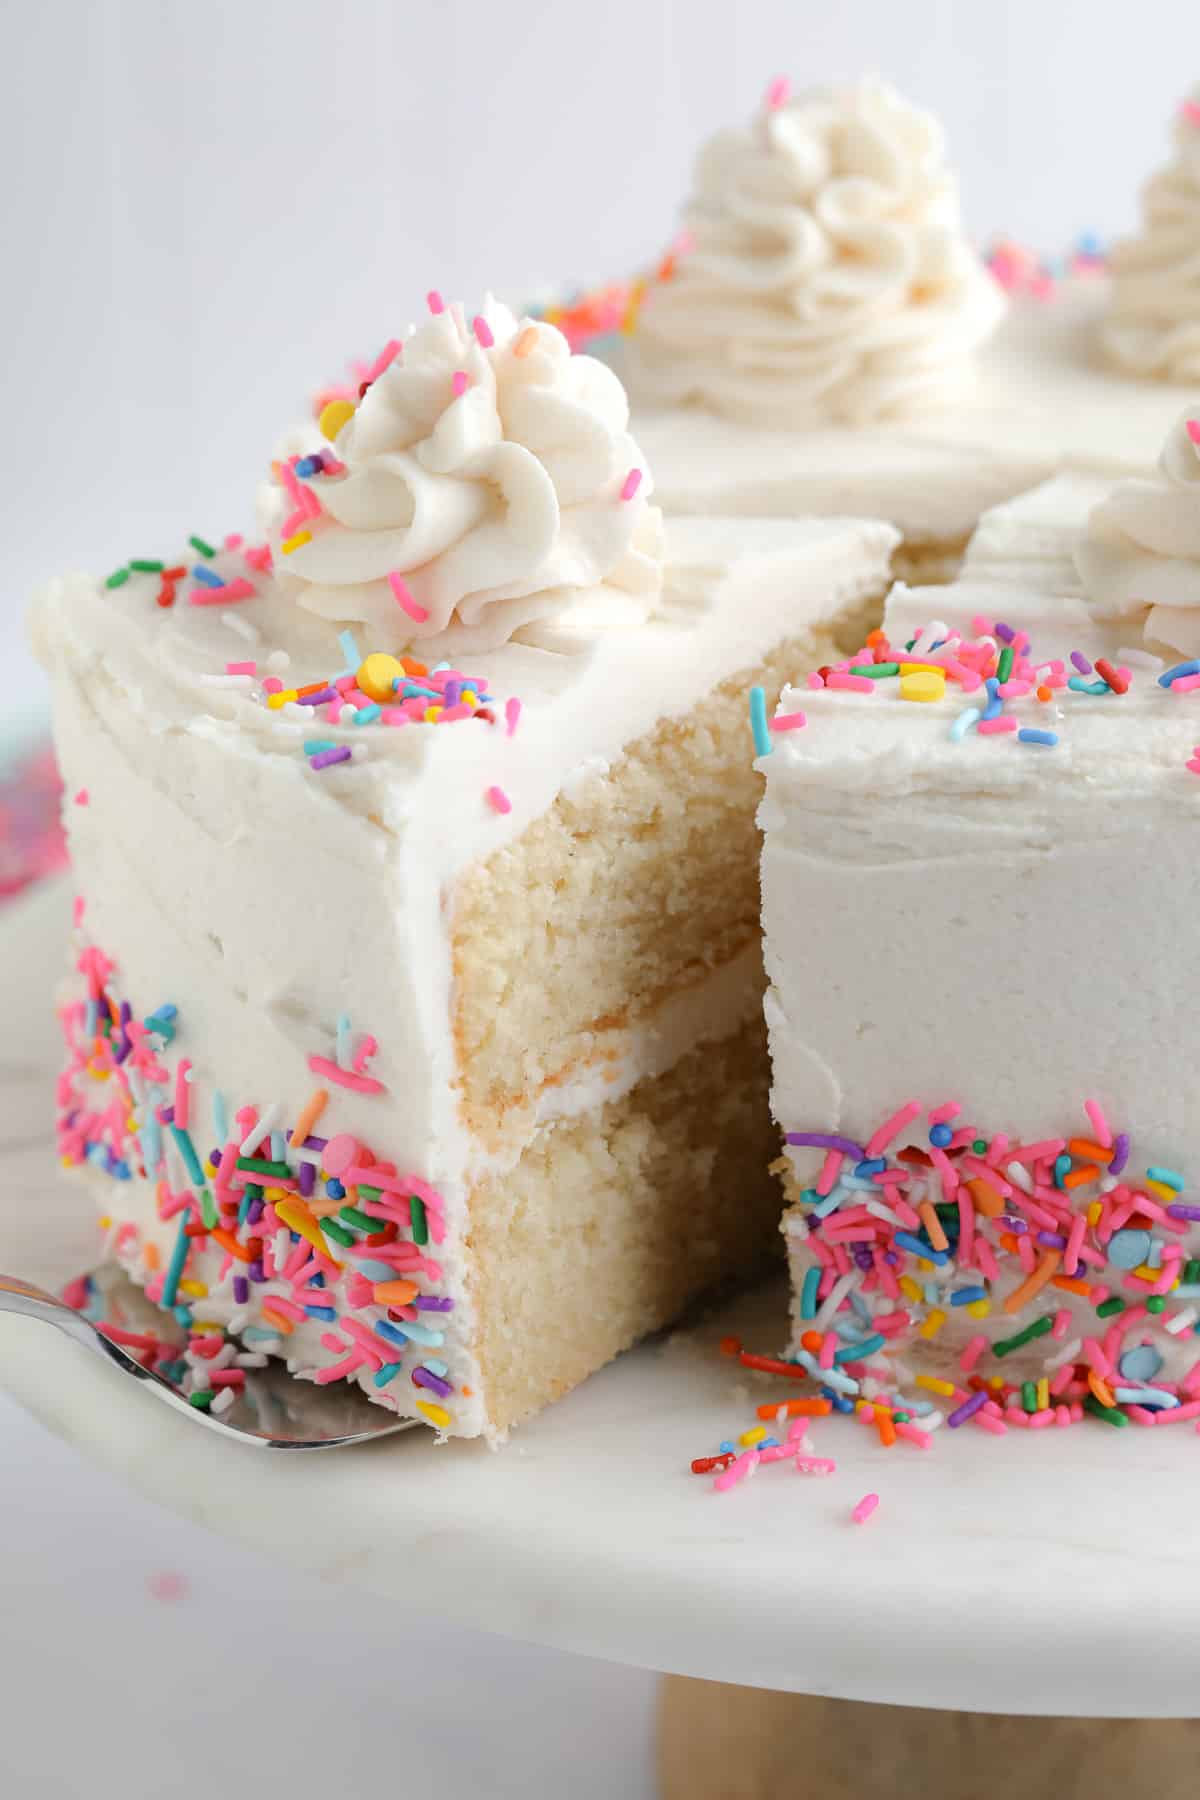
My favorite way to serve this moist vegan vanilla cake is with sprinkles on top, but you can use fresh fruit, vegan whipped cream, edible flowers, or any fun decorations you love. Bring it with you to the birthday party, bridal shower, or holiday party, and watch as everyone rushes to get a slice!
Why this is the best vegan vanilla cake
It’s the type of cake you dream about – This bakery-style vanilla cake has a wonderfully moist and fluffy crumb and an elegant vanilla flavor. The best part is that it’s made without eggs or dairy but you’d never know it!
Two secret ingredients – Aquafaba (the liquid from a can of chickpeas) and cake flour are solely responsible for this cake’s delicate, fluffy texture.
Perfect for any occasion – Decorate the cake with vegan buttercream frosting and sprinkles so it’s ready for birthday parties, baby showers, weddings, holidays, or any special occasion. You will also love my super easy Vegan Funfetti Cake for birthday parties!
How to make vegan vanilla cake
This is simply an overview with photos. For the complete, printable recipe, scroll down to the recipe card.
First, preheat your oven to 350 degrees F and grease 2 8-inch round cake pans. Place a round of parchment paper on the bottom for easy removal of the cakes later.
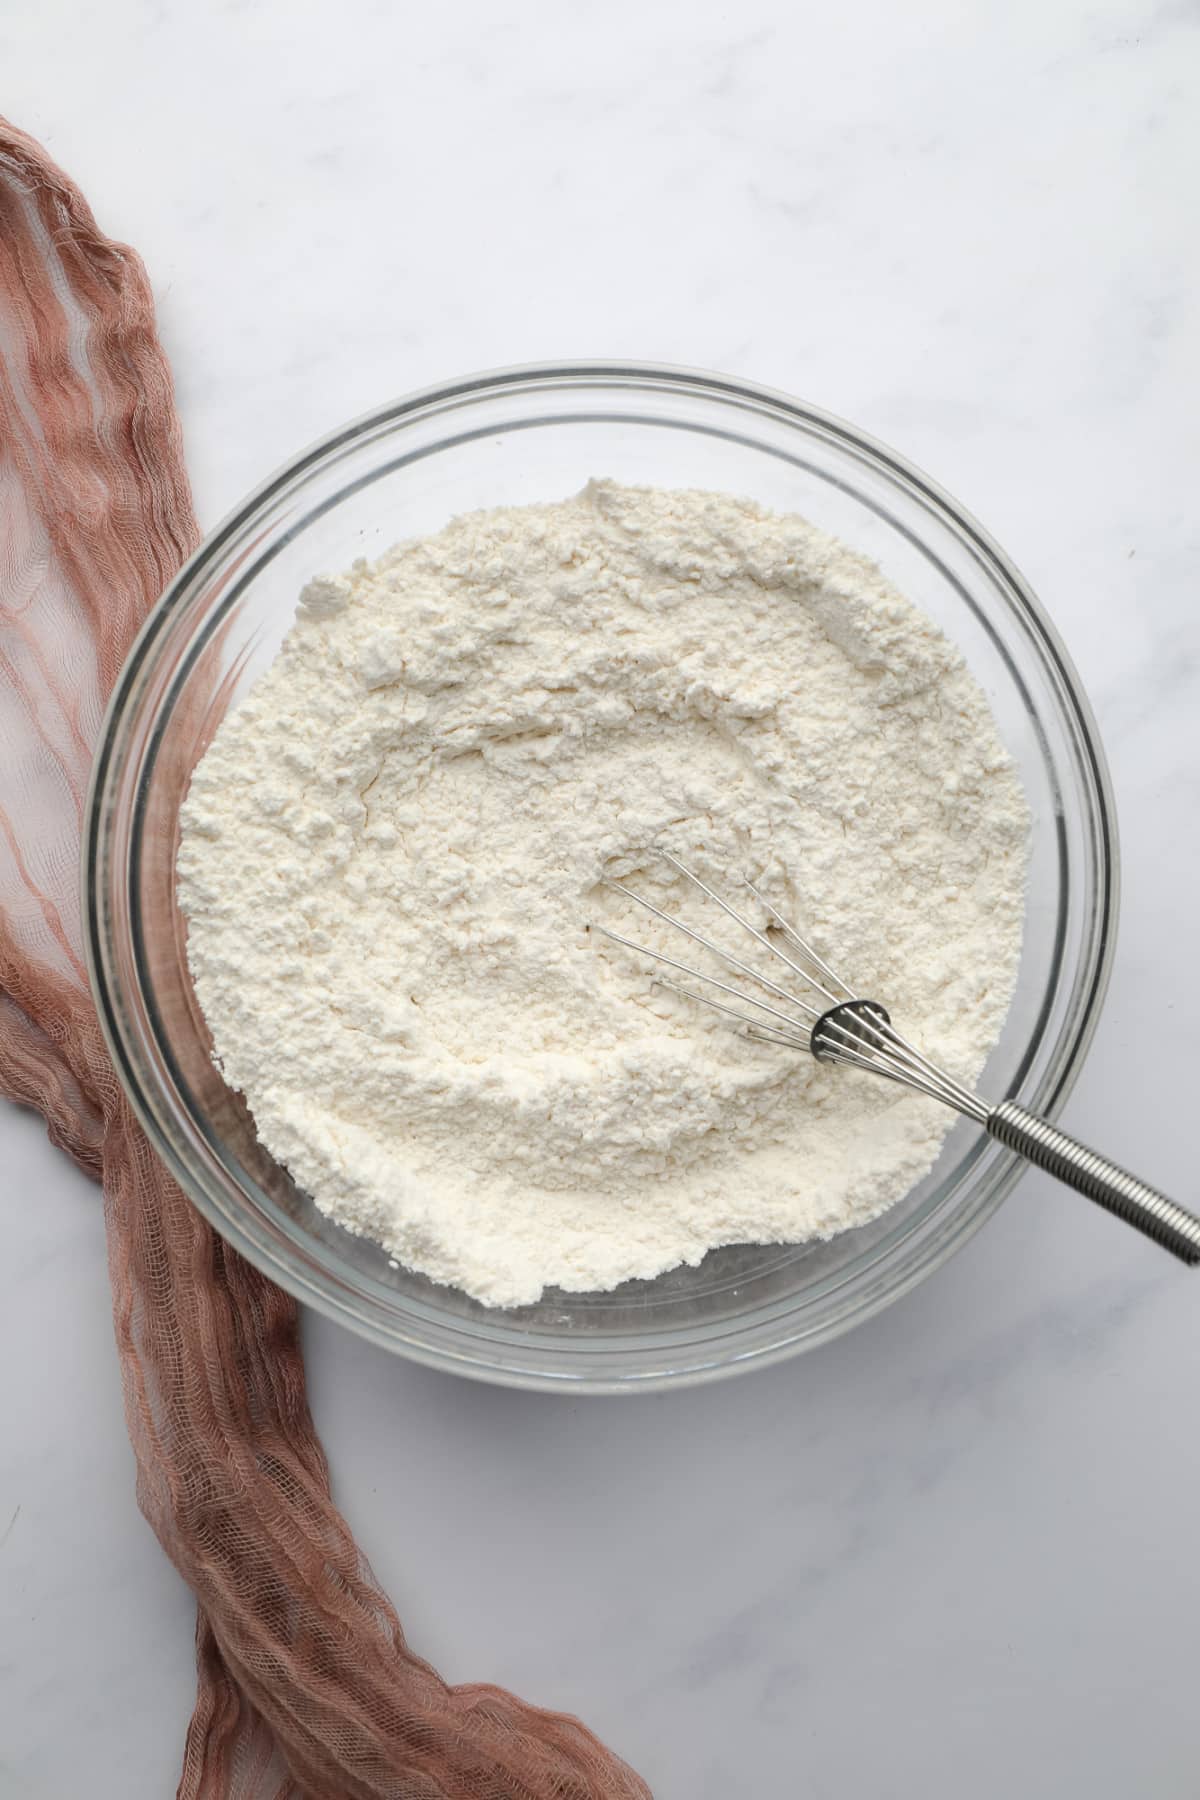
Whisk the flour, baking powder and salt in a medium-large bowl and set aside.
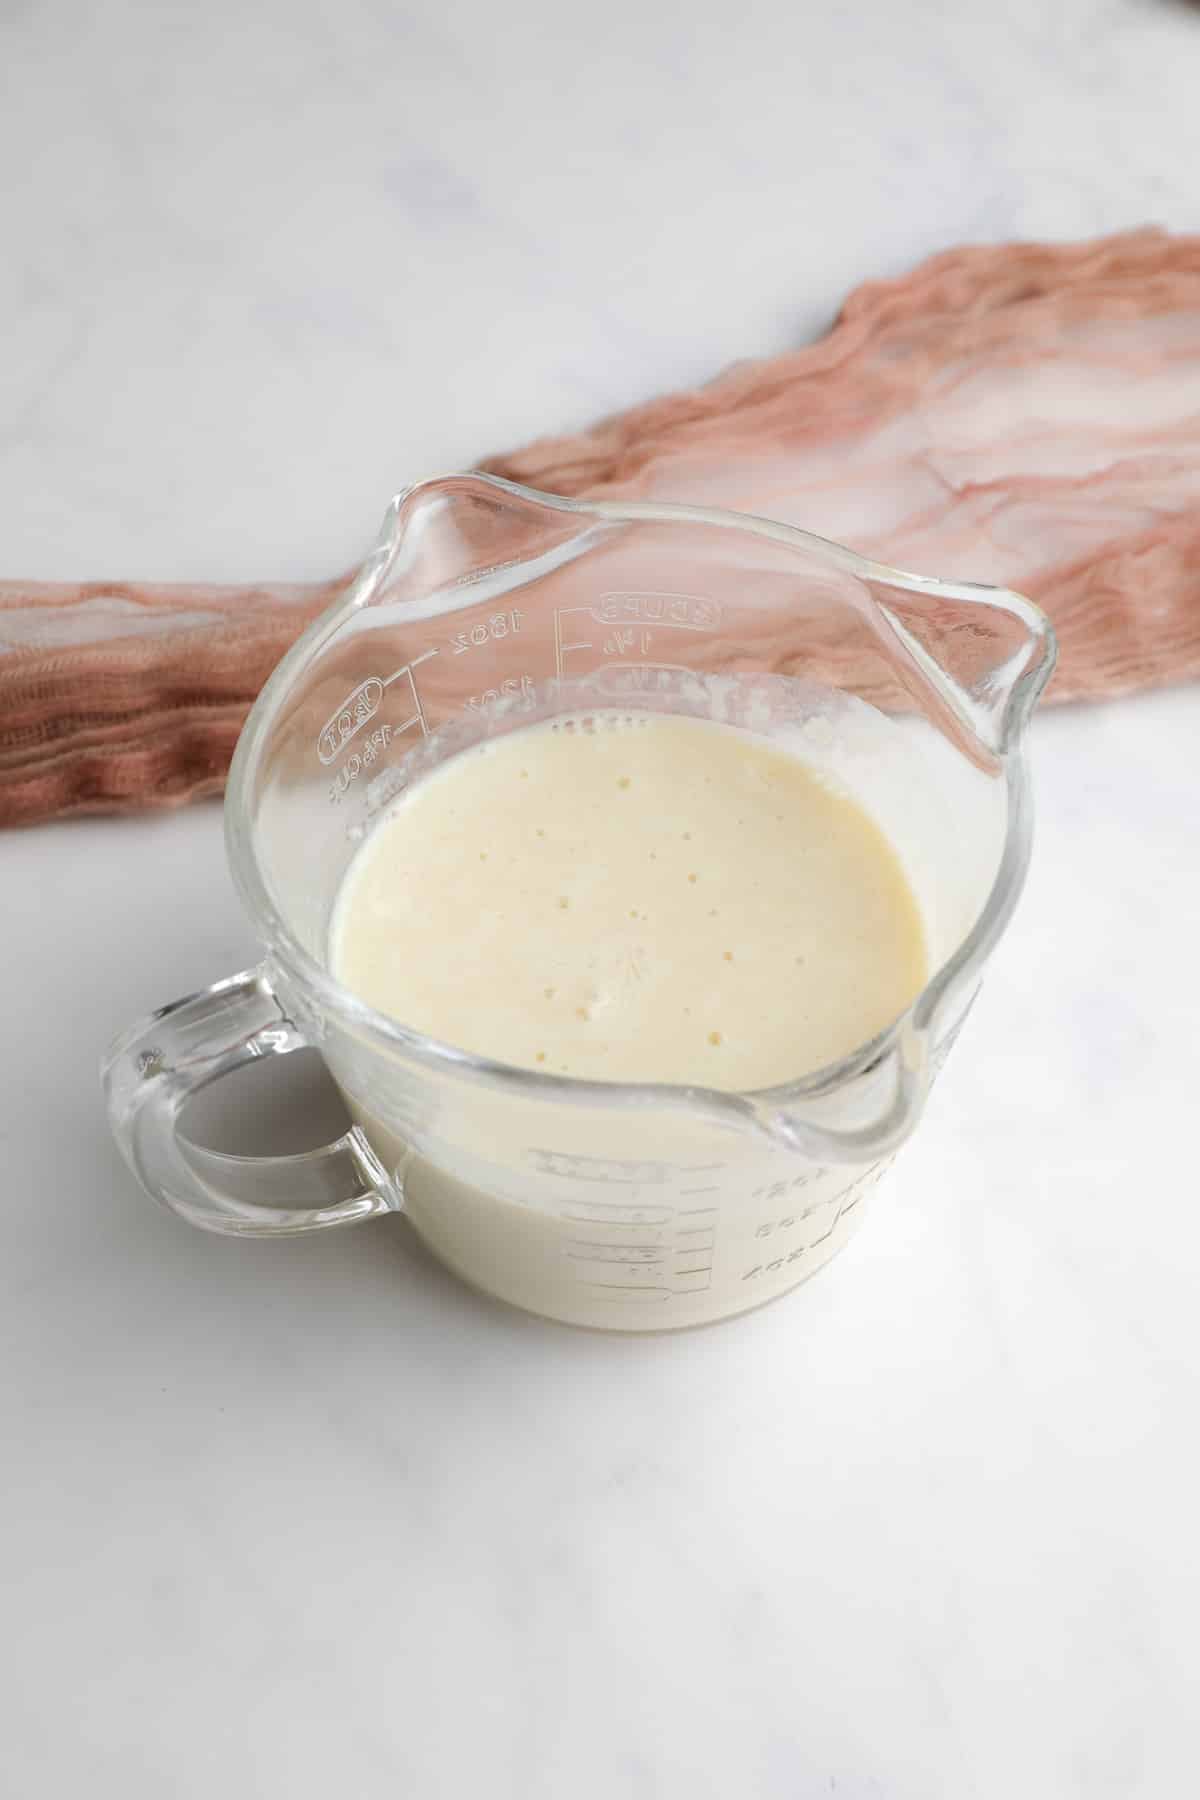
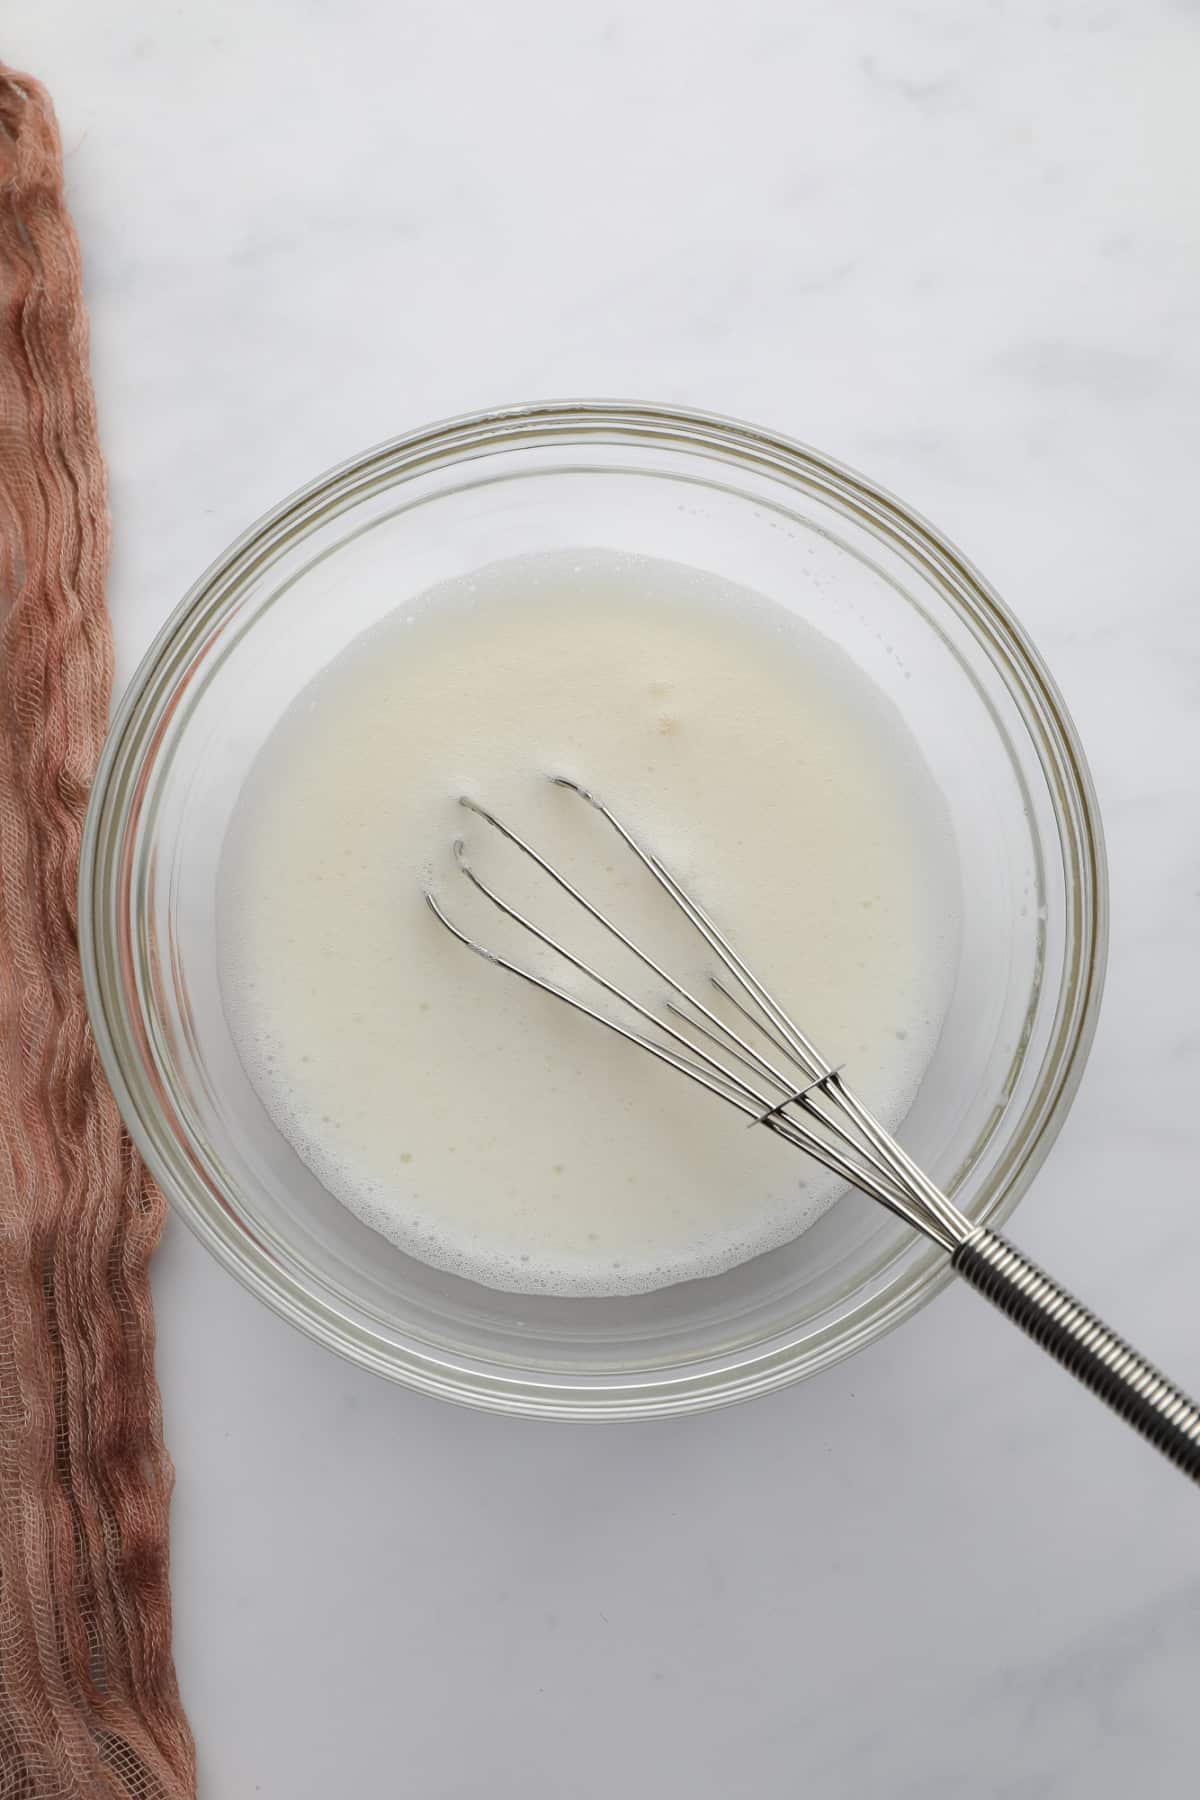
Make the vegan buttermilk by combining the milk and apple cider vinegar in a glass measuring cup. Stir a little, then set aside.
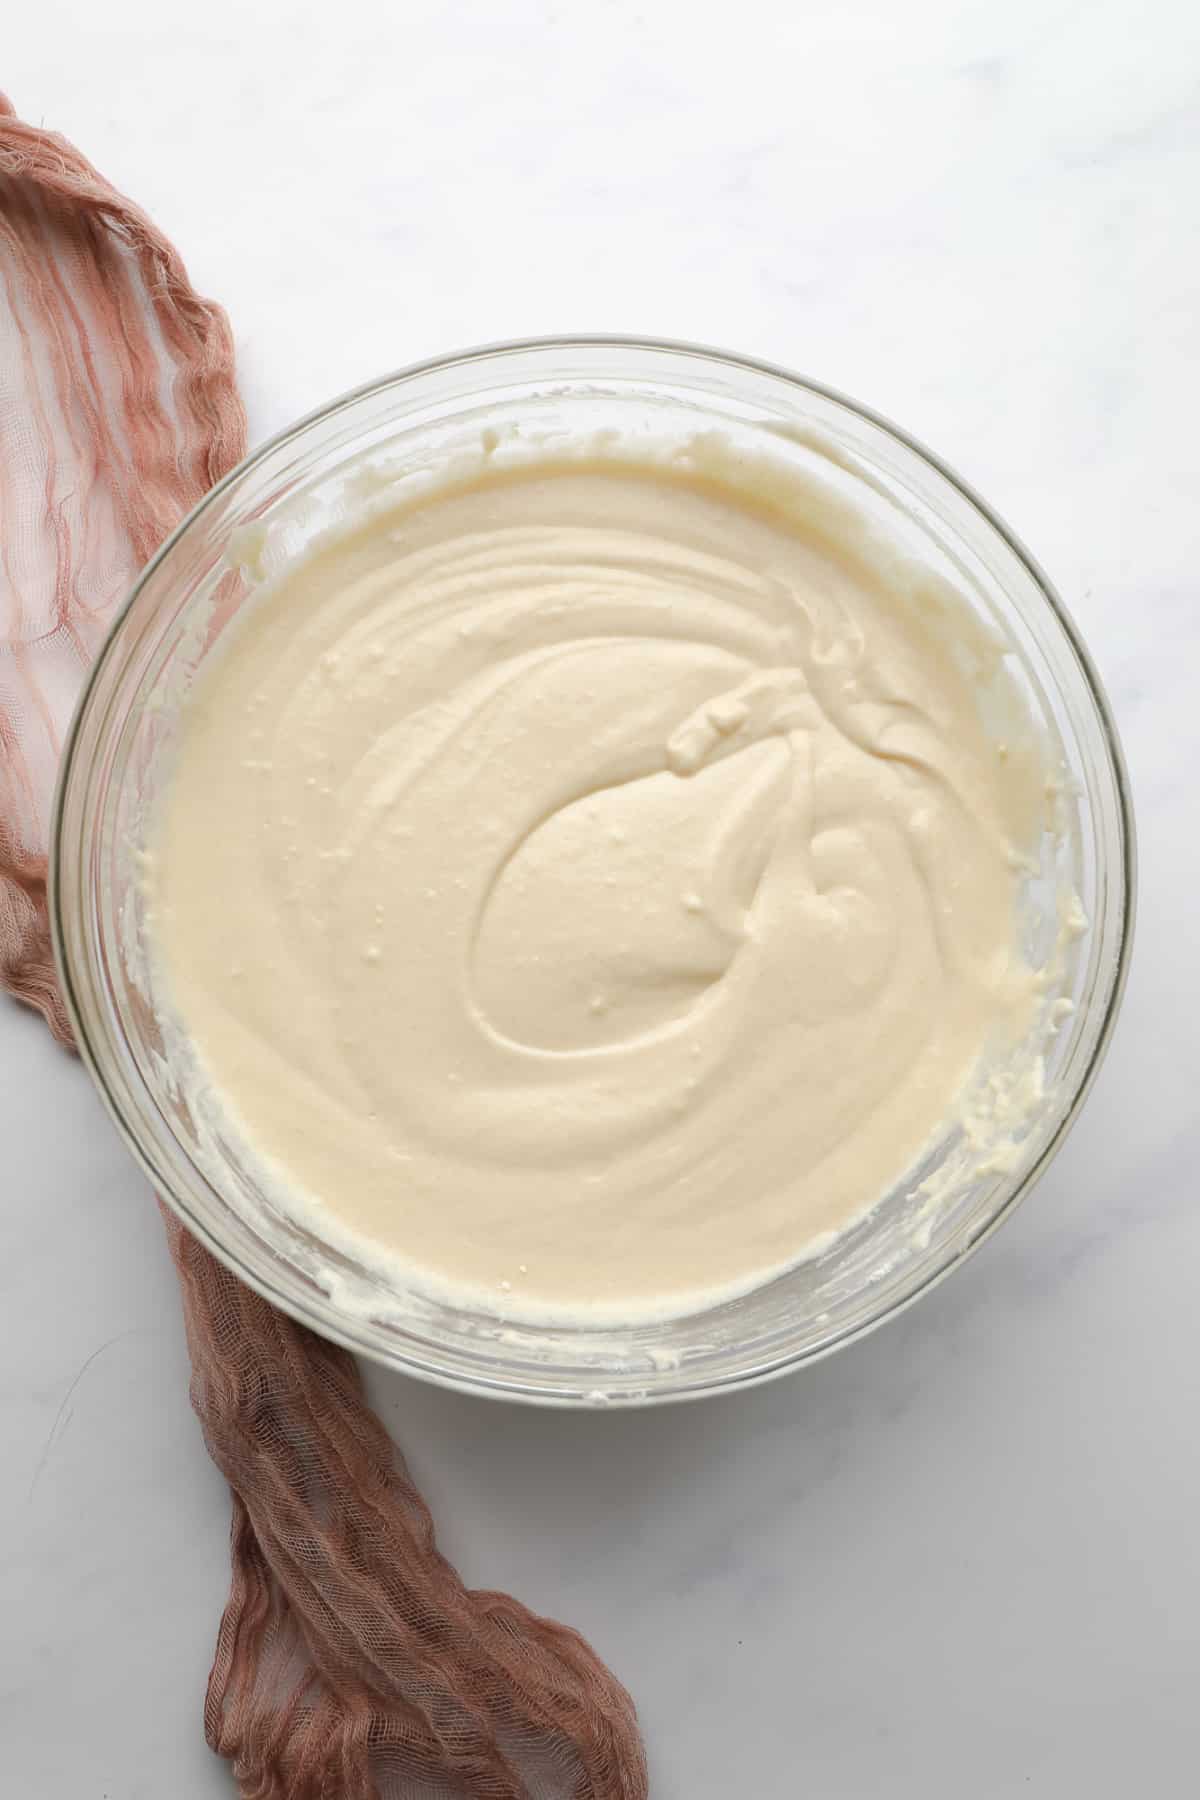
In a small bowl, whisk the aquafaba and cream of tartar vigorously until foamy, about 2 minutes. You don’t need this in stiff peaks, just get it a bit fluffy and foamy. OR, you can vegan yogurt, which works just as well!
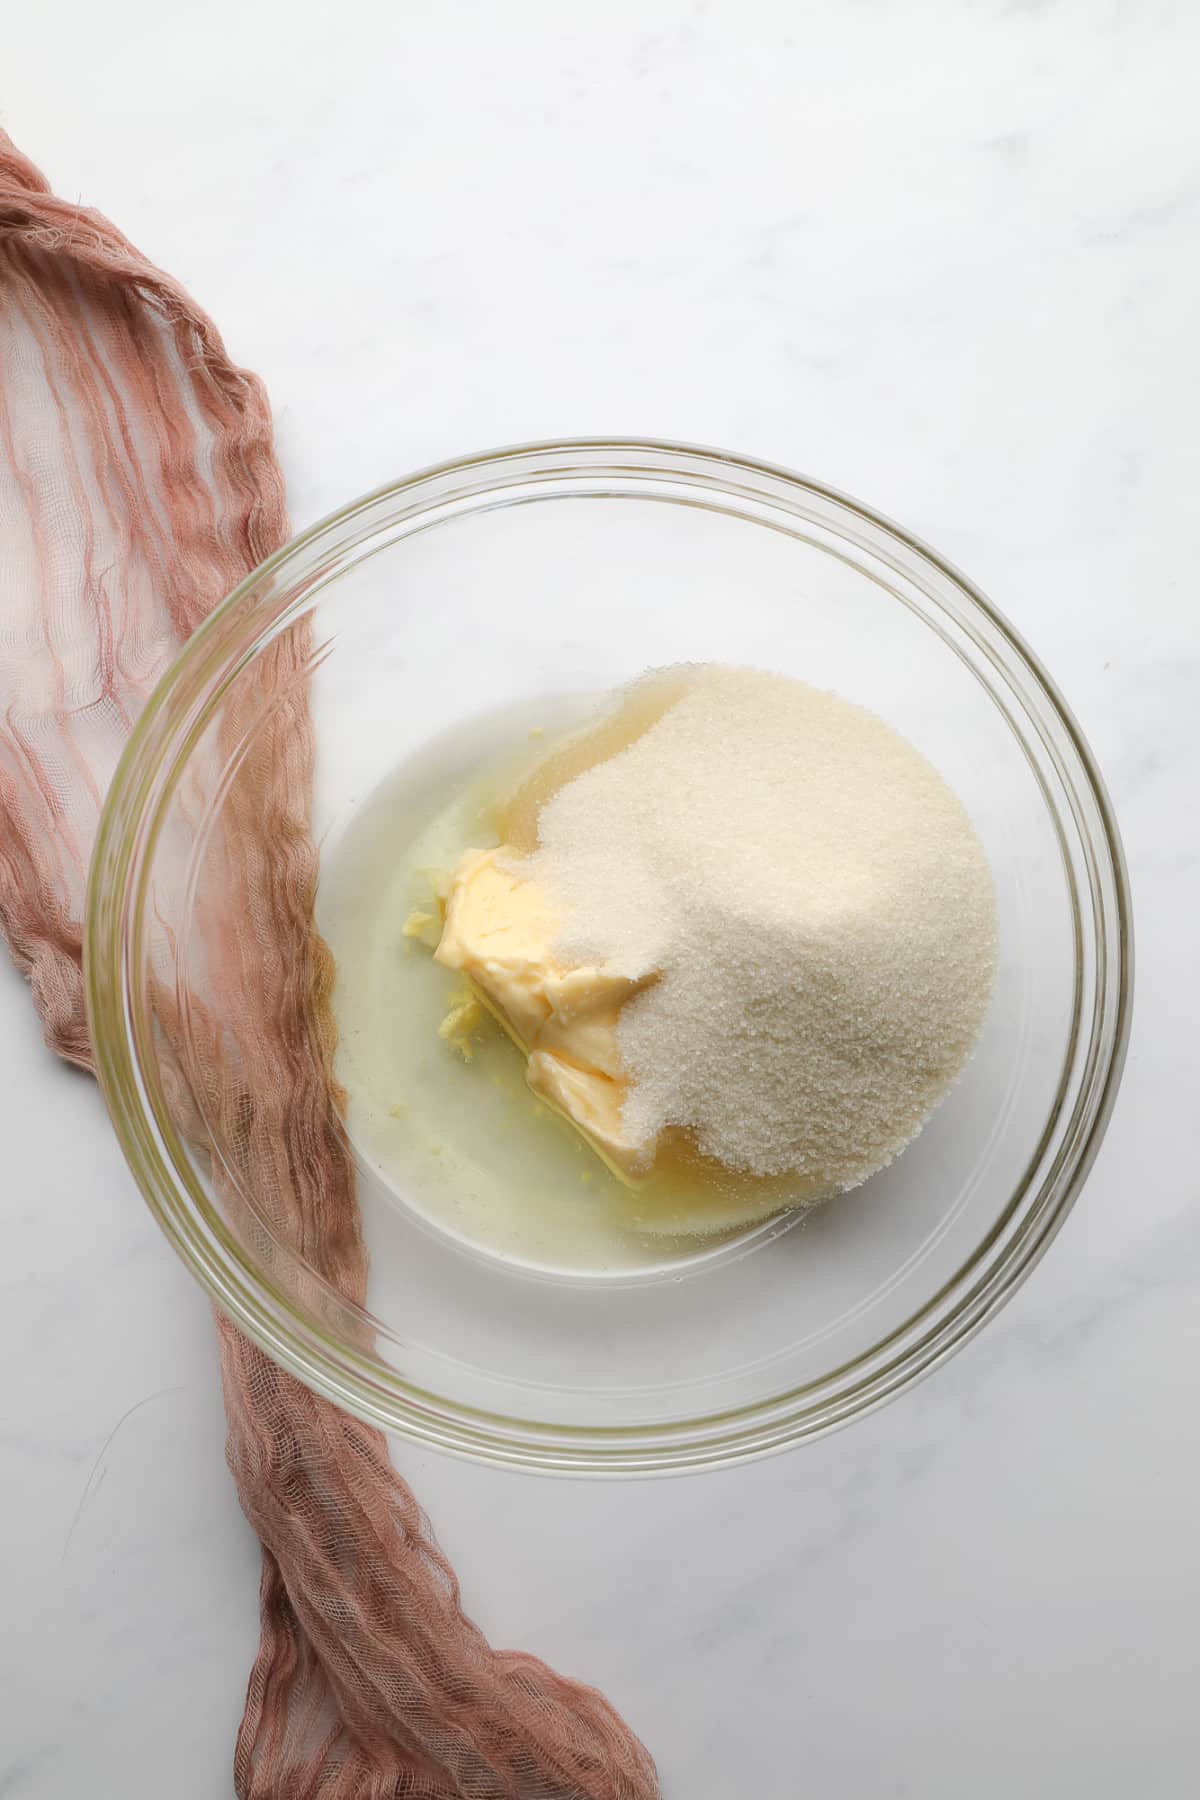
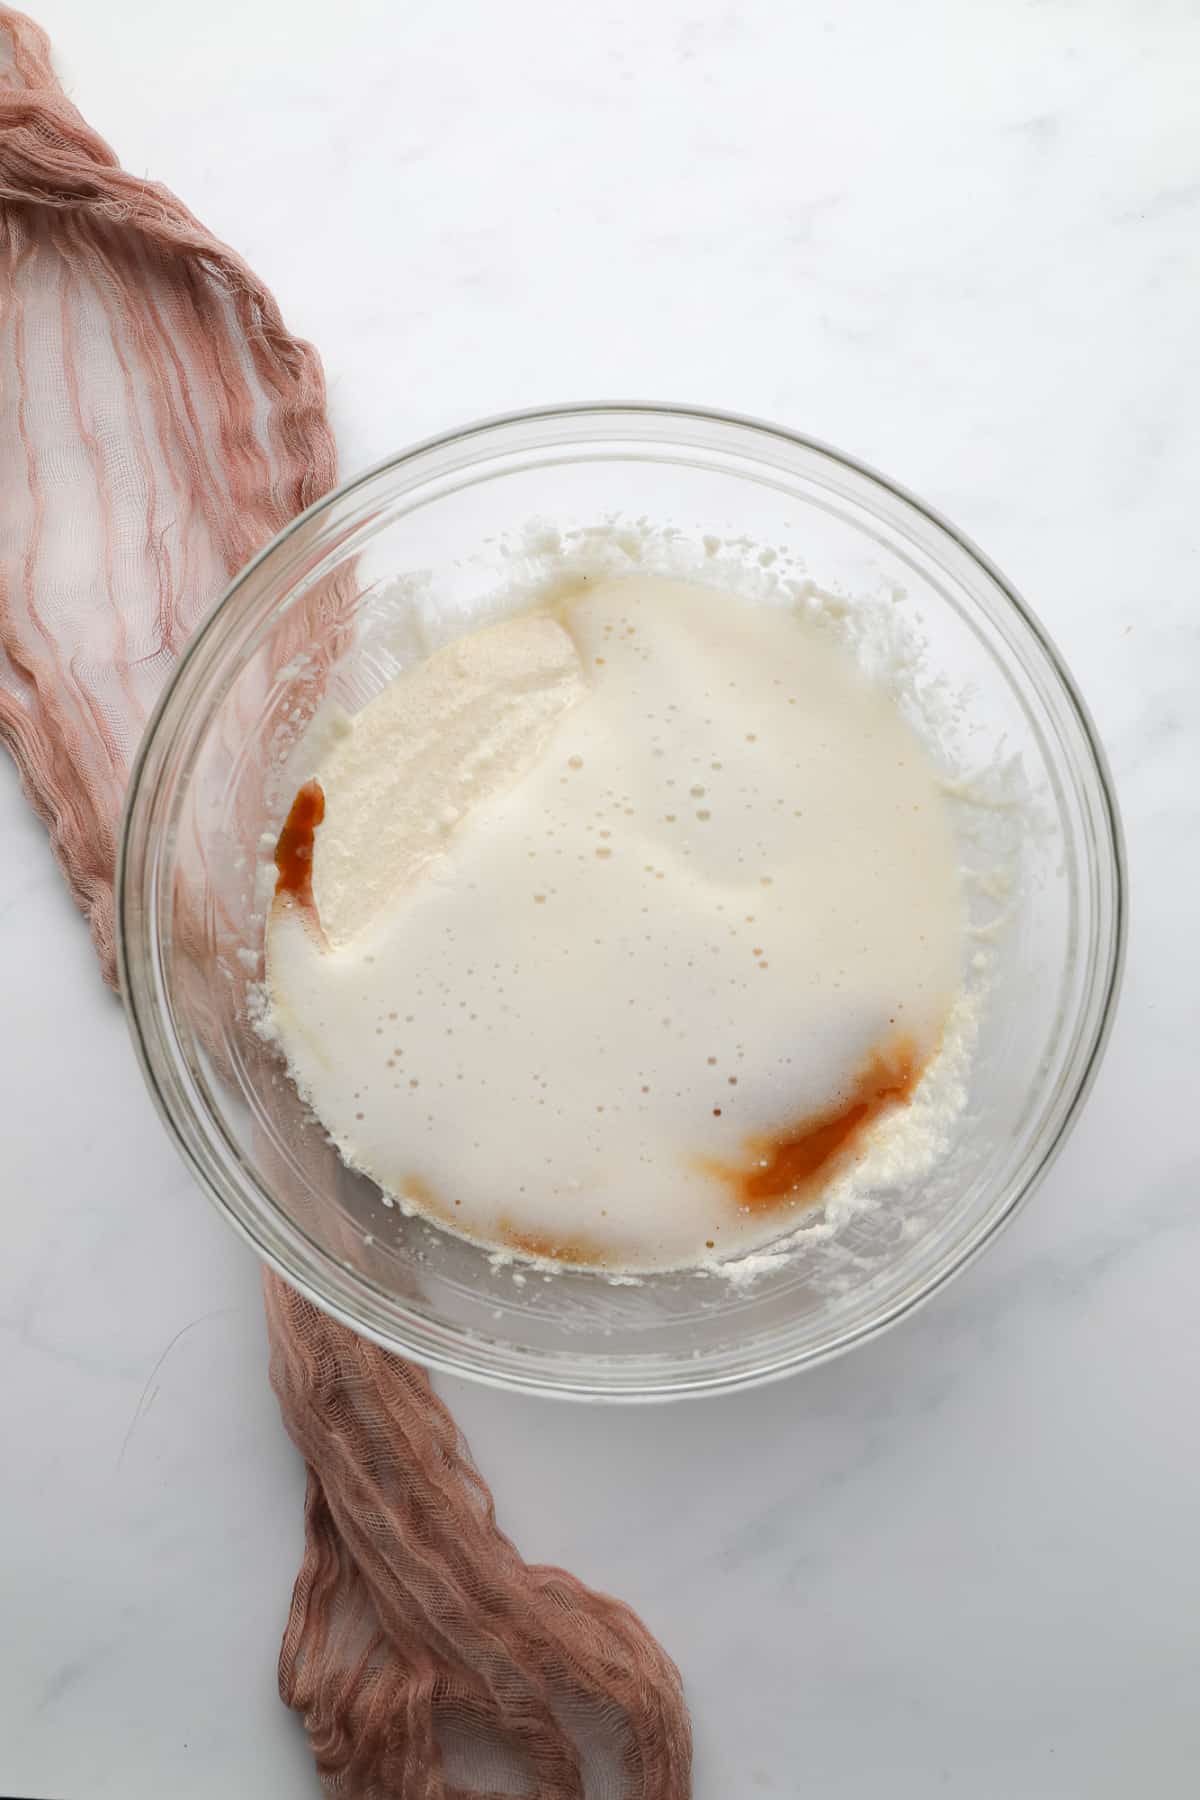
Cream the softened vegan butter, canola oil, and sugar together in a large bowl until creamy. Next, add the aquafaba to the bowl along with the vanilla extract. Beat until well combined.
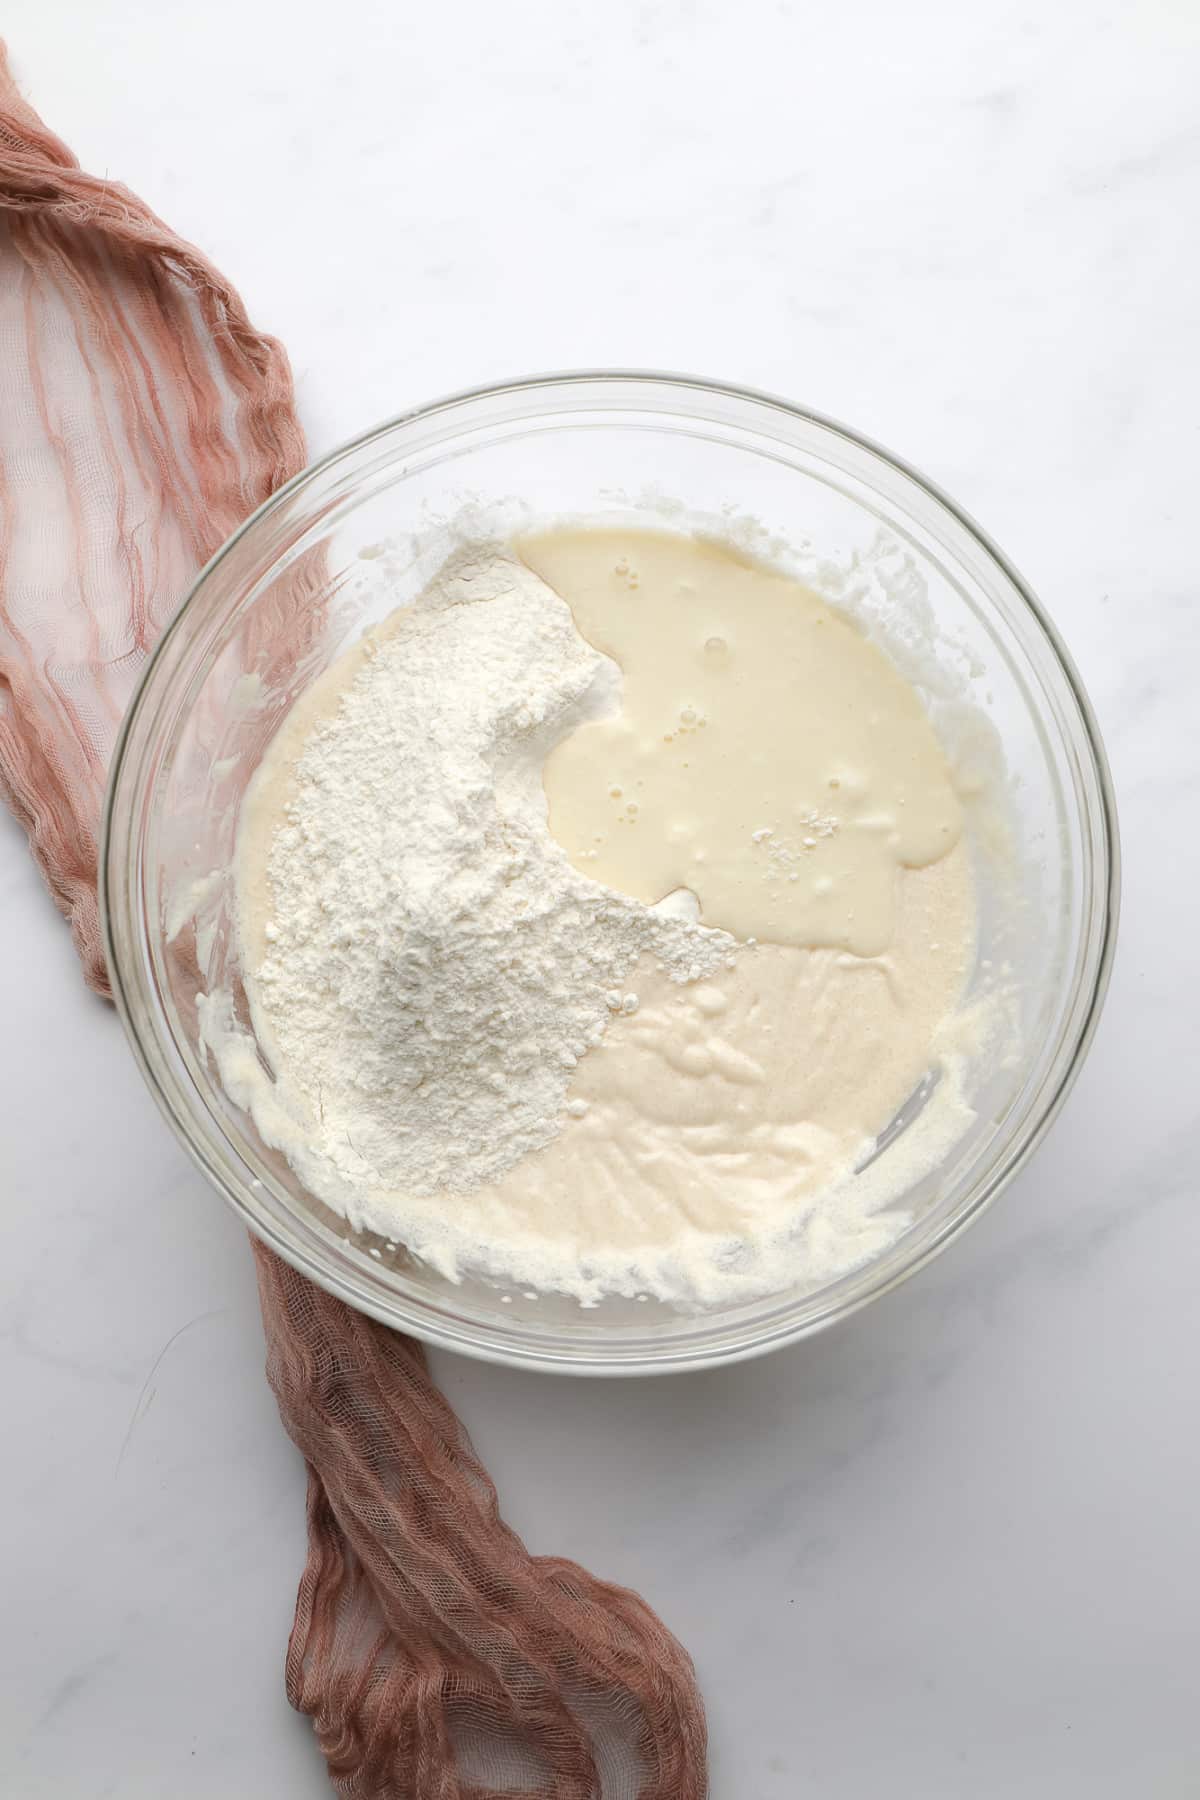
With your mixer on low speed, alternate between adding portions of the flour mixture and vegan buttermilk to the batter, mixing until just combined after each time.
Do not overmix the batter! The batter should be fairly smooth after everything has been incorporated. A few lumps left behind are okay.
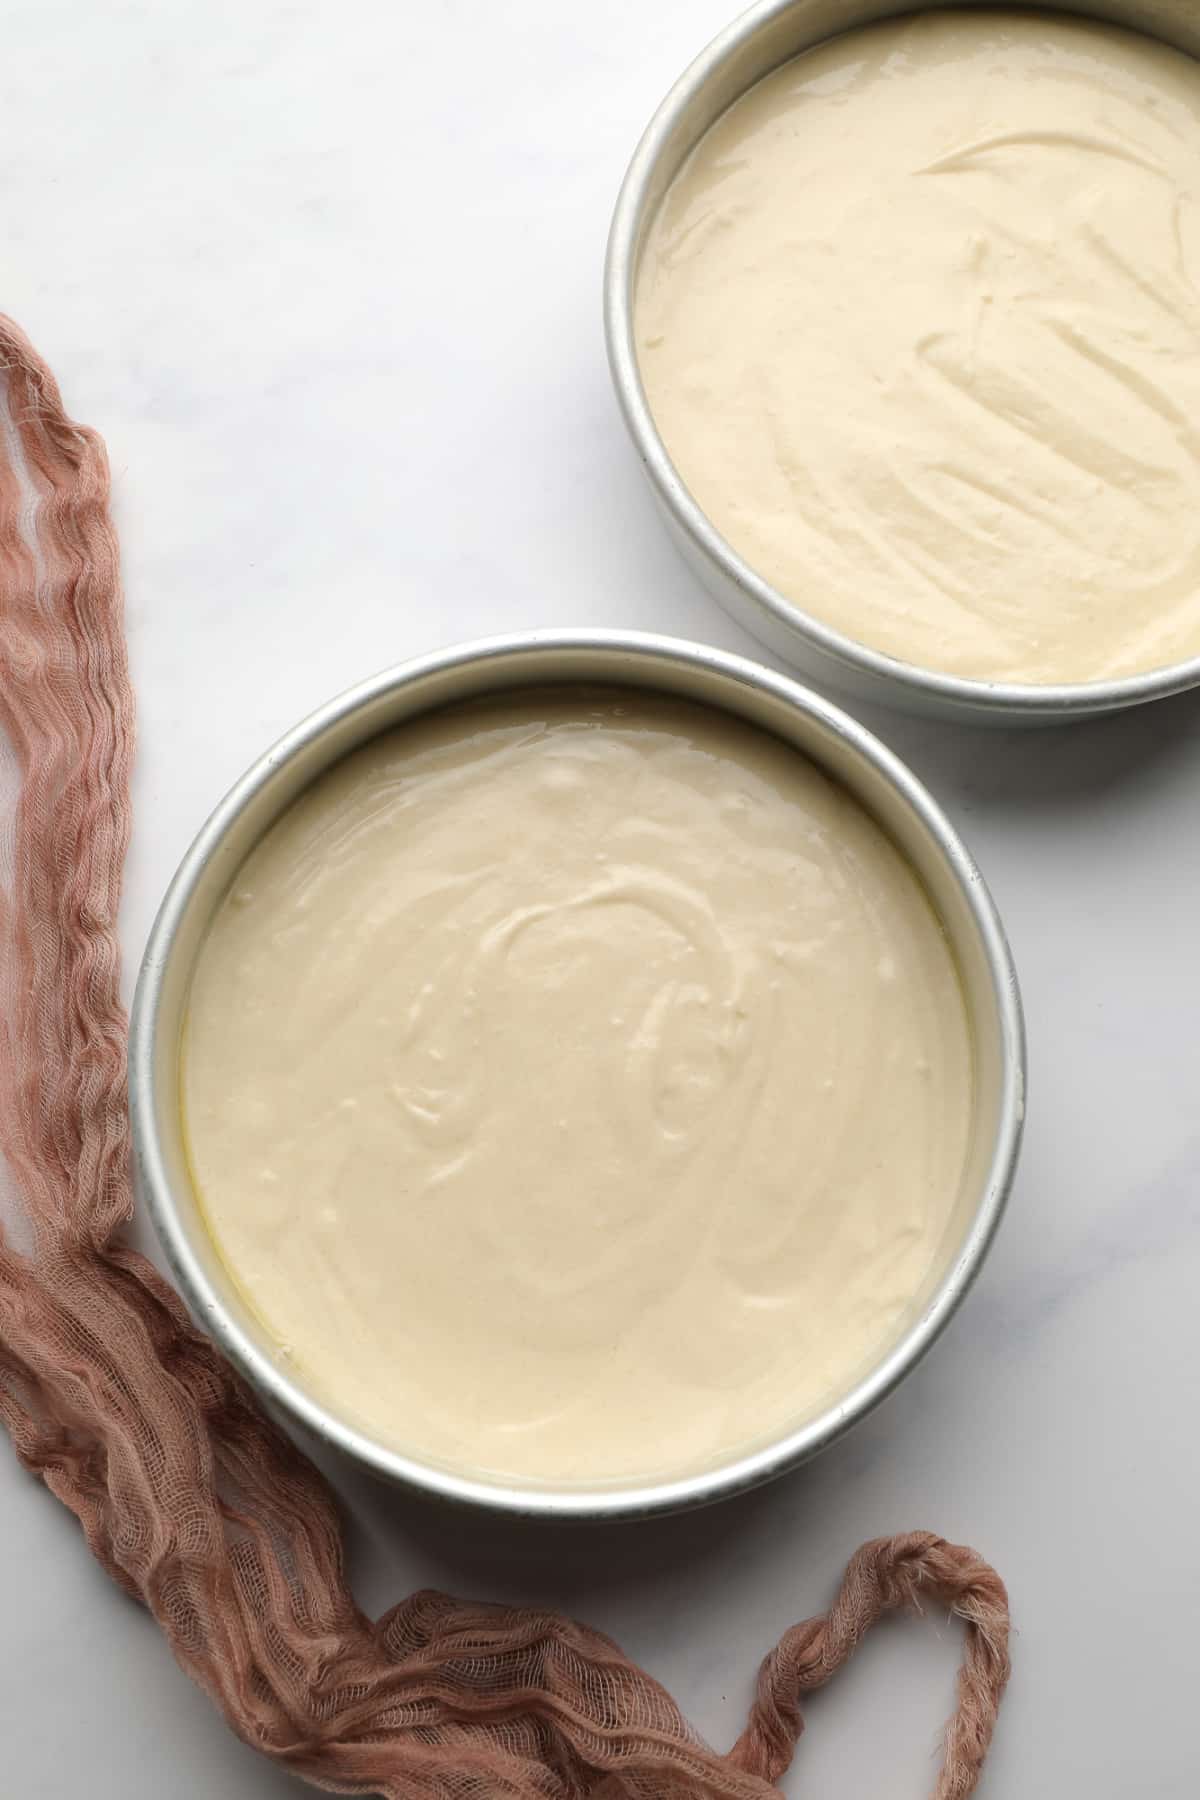
Pour the batter into your prepared cake pans and bake until a toothpick inserted in the middle comes out mostly clean.
Set the cakes aside to cool while you make the Vegan Buttercream Frosting, Chocolate Frosting, Vegan Cream Cheese Frosting or Swiss Meringue Buttercream.
Or consider making this incredible Vegan Whipped Cream (that tastes like dairy whipped cream!) and serve with berries.
Frost the vanilla cake when the layers are completely cooled. Add some sprinkles on top for fun, then slice and serve!
Frequently asked questions
I don’t have cake flour. What can I use instead?
Cake flour works the absolute best in this recipe but all purpose flour is fine, too. You can also make homemade cake flour by mixing all purpose flour and cornstarch together. Check out this Cake Flour Substitute Guide from Sally’s Baking Addiction to learn how it’s done.
Can it be made gluten free?
A quality gluten free flour mix, like Better Batter, will work as a substitute but just know that the cake will have a slightly different texture and it probably won’t be as fluffy and light.
What is aquafaba and what purpose does it serve in baking?
Aquafaba is simply the liquid, or juice, from a can of chickpeas. That’s it!
Like egg whites, it does amazing things when it’s whipped up, such as making vegan-friendly meringues, mousses, whipped cream, brownies, and more. It’s also a rockstar egg replacer in vegan baking, including this recipe. It gives the cake a fluffy and moist texture and a crisp white color (no brown bits from flaxseed eggs!).
To learn more about the magic of aquafaba, check out my guide, Aquafaba 101.
What can I use as a substitute for aquafaba?
I recently did some testing and discovered that the best substitute for aquafaba in this recipe is vegan yogurt! Use a higher protein/fat version that is unsweetened and unflavored for best results. You can also use 2 flax eggs, possibly JUST Egg or another egg replacer.
Can I make it in a different pan?
Sure. This recipe makes enough cake batter for a 9×13, 10, or 12-inch cake pan or a sheet pan. Remember to add an extra 10 to 15 minutes to the baking time when using a larger pan. Two 9-inch round pans work as well, but the cakes will be thinner.
How do you store vegan vanilla cake?
Wrap the baked and cooled cake layers in plastic wrap, then store them in the fridge for 4 to 5 days or in the freezer for up to 3 months.
I recommend keeping the frosted cake in an airtight container, like a cake carrier, in the fridge or counter (it will get rather dry quickly in the fridge). You can also lightly wrap it with plastic wrap, but it may ruin your designs. At room temperature, it will last about 5 days.
Want more incredible vegan cakes?
I love making vegan cake recipes that taste just as good, if not better than the usual dairy and egg filled versions! Make any of the following recipes and become a vegan cake connoisseur:
Vegan Strawberry Cake
Vegan Carrot Cake
Vegan Coconut Cake
Vegan Lemon Cake
Vegan Hummingbird Cake
And you can find even MORE cakes here! Vegan Cake Recipes. Happy baking!
Dry ingredients
3cupscake flour
1tablespoonbaking powder
1/2teaspoonsalt
Vegan buttermilk
1 1/4 cupsunsweetened soy milk
2teaspoonsapple cider vinegar
Aquafaba (or sub 1/2 cup vegan yogurt)
1/2cupaquafaba
1/4teaspooncream of tartar
The rest
1/2cupvegan butter softened to room temperature
1/2cupcanola oil
1 1/2cupssugar
1tablespoonvanilla extract
Preparation
Preheat the oven to 350 degrees F place the rack in the middle of the oven.
Grease 2 8-inch round cake pans with oil or vegan butter. Place a round of parchment paper on the bottom for easy removal later.
Combine dry ingredients
In a separate medium sized bowl, whisk together the flour, baking powder and salt. Set aside.
Prepare vegan buttermilk
Combine the soy milk and apple cider vinegar in a glass measuring cup or small bowl. Stir briefly, then set aside to curdle. This is your buttermilk.
Whip the aquafaba (or use yogurt instead)
In a small bowl, whisk together the aquafaba and cream of tartar vigorously until foamy, about 2 minutes. You don’t have to whip it into stiff peaks, just get it a bit fluffy and foamy. Set aside.
Finish the cake batter
Cream fats and sugars: In a large bowl using an electric hand mixer (or a stand mixer with a paddle attachment), cream together the softened vegan butter, canola oil and sugar until creamy and well combined, about 3 minutes, scraping the sides as needed.
Add aquafaba and vanilla: Add the aquafaba mixture to the bowl with the creamed butter/oil/sugar, along with the vanilla extract. Mix until well combined, about 1 minute.
Add flour and buttermilk: Alternate adding the flour mixture and vegan buttermilk in 3 parts, mixing until just combined each time. The batter should be fairly smooth (a few lumps are okay), but do not over mix.
Bake, cool and frost
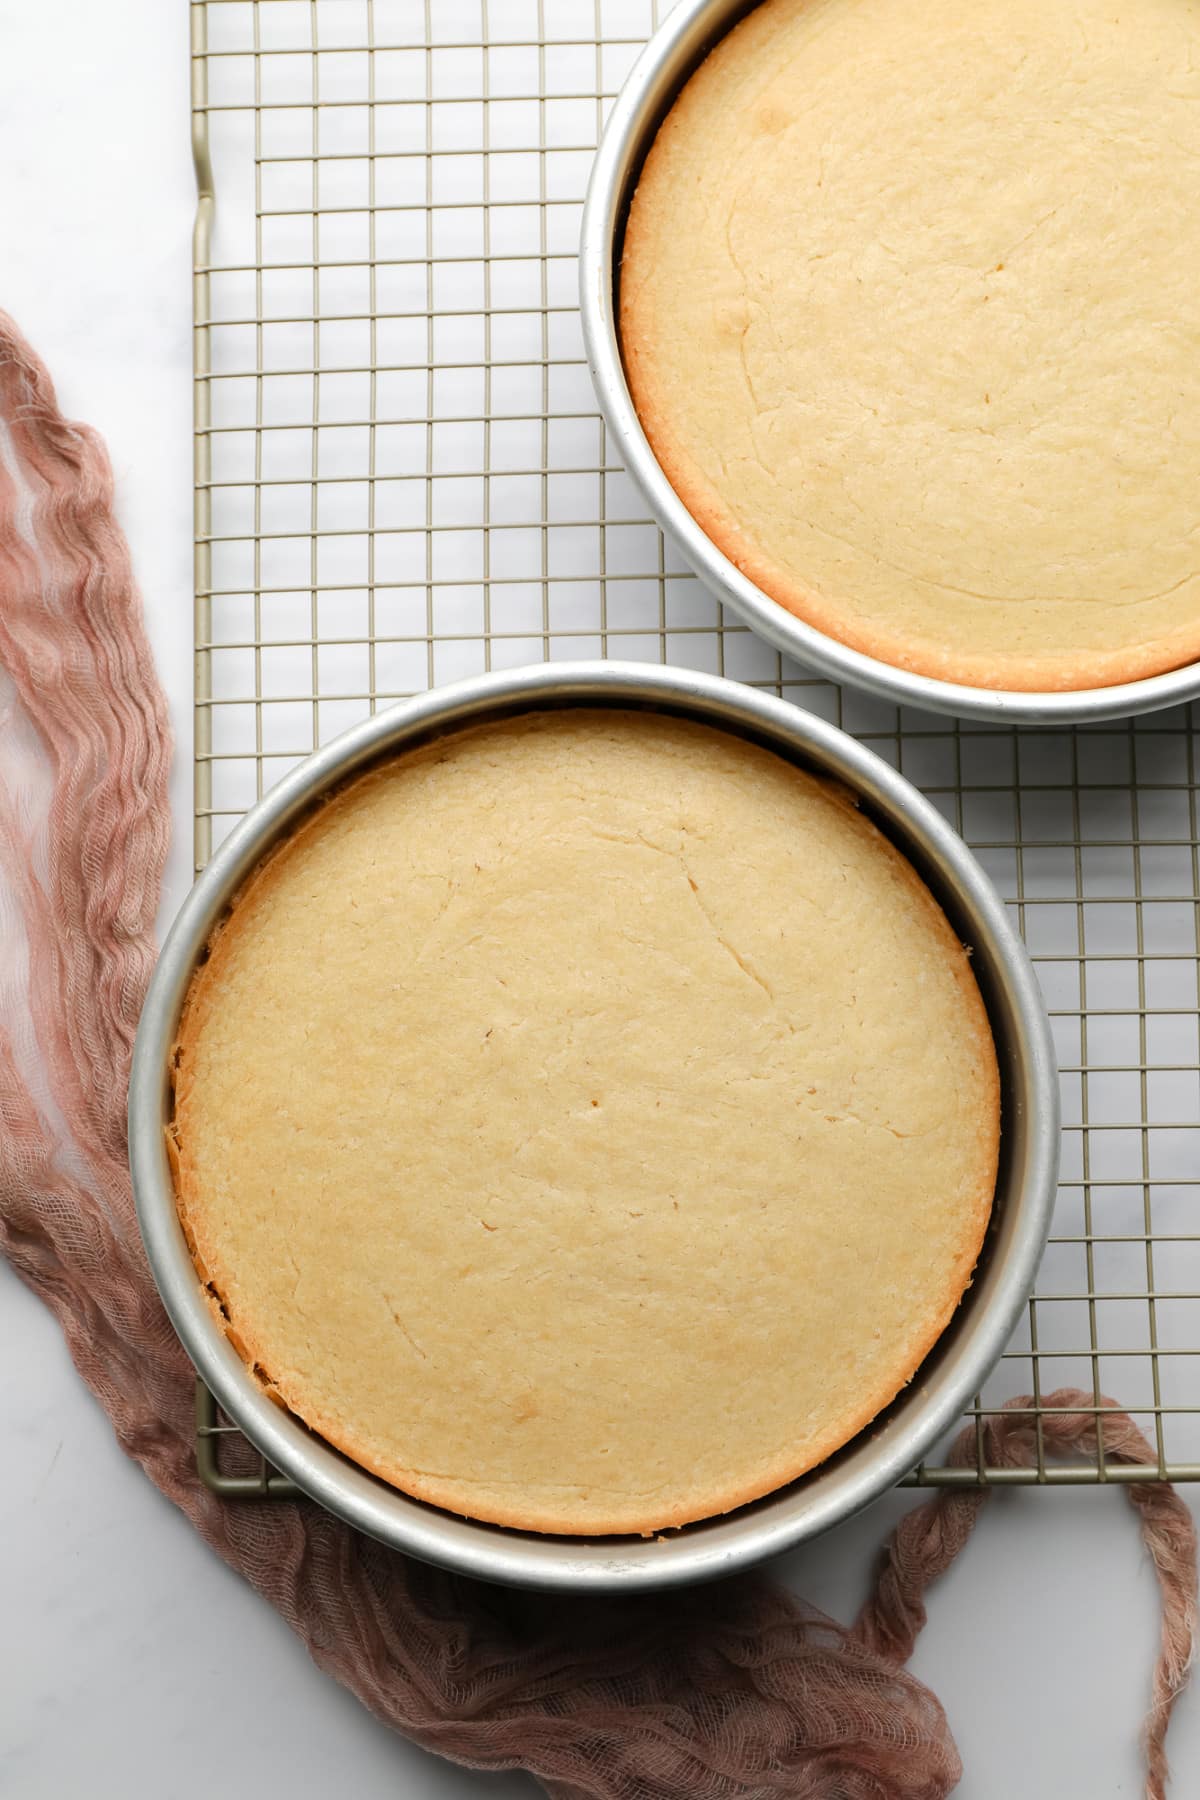
Pour the cake batter evenly into the prepared pans, and bake for 30-35 minutes, until the edges are golden brown, the surface looks and feels set, and a toothpick comes out mostly clean, with no wet batter. These cakes come out pretty flat, so there is no need to slice off the top like some other recipes.
Allow the cakes to cool in the pans for 15 minutes, then carefully invert them onto a cooling rack. Allow them to cool completely before frosting.
Cake flour will make the cake much lighter with a fine crumb, but all purpose works fine if you can’t find cake flour. Or make your own cake flour.
Gluten free? Try substituting a quality gluten free all purpose mix. I like Better Batter brand.
Soy milk works best because of the protein and fat content, but you can use another milk if needed. Hemp, oat, cashew or almond all work quite well.
If you can find it, unsweetened high fat or protein yogurt works well in place of the aquafaba.
For cupcakes, bake for 20-25 minutes until done and fill liners half full.
For a 9×13 inch cake, bake for 40-50 minutes, until done. Two 9 inch round pans will work, but the cakes will be thinner.
Animal Outlook is a national nonprofit 501(c)(3) animal advocacy organization based in Washington, DC. Working to end animal abuse since 1995, Animal Outlook exposes cruelty to farmed animals and promotes vegan eating. Our mission is to change the world for animals. Learn more


 I have been vegetarian most of my life and vegan for the past decade, so there are many dishes I have never tried because they have animal products in them. One of those recipes is the greek lemon soup, commonly known as avgolemono.