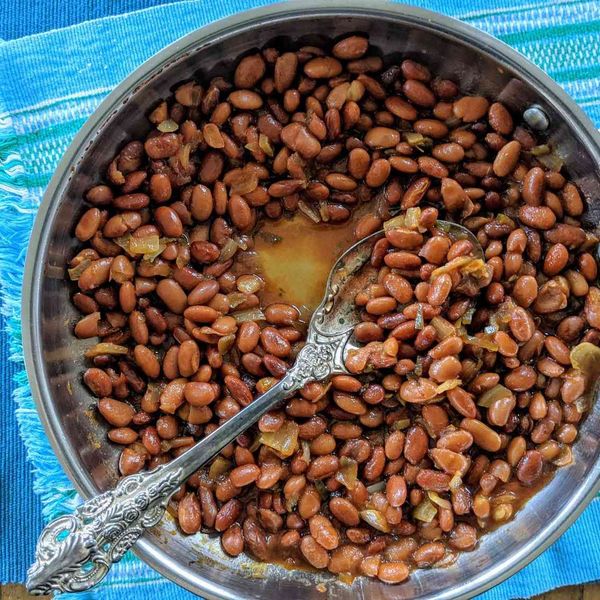
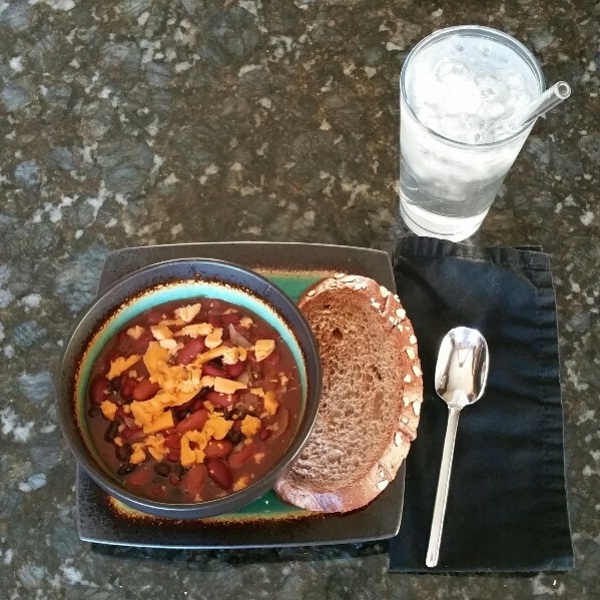
BBQ beans – a childhood favorite that’s easy to make vegan and sneaks in dill pickles as the secret ingredient. Serve with bread.
Submitted by Dory Gordon
Updated on April 12, 2021
Cook Mode (Keep screen awake)
Ingredients
Original recipe (1X) yields 4 servings
1tablespoonvegan margarine (such as Earth Balance®)
2cupscanned pinto beans, rinsed and drained
1 ½tablespoonschopped onion
¼cupsweet pickle relish
2tablespoonsdill pickle juice
2tablespoonsketchup
1tablespoonmolasses
1tablespoontomato paste
1tablespoonbrown sugar
¼teaspoonhot sauce (such as Tabasco®)
1dashliquid smoke flavoring
¼teaspoongarlic powder
¼teaspoonsalt-free seasoning blend
¼teaspoondry mustard
Directions
Preheat the oven to 375 degrees F (190 degrees C).
Melt vegan margarine in a skillet over medium heat. Add onion. Cook and stir until translucent, about 5 minutes. Mix together with beans in a casserole dish.
Stir relish, pickle juice, ketchup, molasses, tomato paste, brown sugar, hot sauce, liquid smoke, garlic powder, salt seasoning, and mustard together in a bowl. Add to the bean mixture and mix to coat.
Bake in the preheated oven until sauce is thick and casserole is heated through, about 1 hour.
Cook’s Note:
Use any beans you prefer.
Nutrition Facts (per serving)
187
Calories
4g
Fat
34g
Carbs
6g
Protein
Nutrition Facts
Servings Per Recipe 4
Calories 187
% Daily Value *
Total Fat
4g
5%
Saturated Fat
1g
5%
Sodium
765mg
33%
Total Carbohydrate
34g
12%
Dietary Fiber
6g
21%
Total Sugars
13g
Protein
6g
13%
Vitamin C
4mg
4%
Calcium
69mg
5%
Iron
2mg
13%
Potassium
453mg
10%
* Percent Daily Values are based on a 2,000 calorie diet. Your daily values may be higher or lower depending on your calorie needs.
** Nutrient information is not available for all ingredients. Amount is based on available nutrient data.
(-) Information is not currently available for this nutrient. If you are following a medically restrictive diet, please consult your doctor or registered dietitian before preparing this recipe for personal consumption.
Photos of Vegan BBQ Beans
Photo by Allrecipes Member
Photo by
Soup Loving Nicole
Simple and good. I really liked the added flavor of dill. I actually used half dill relish and half sweet relish out of personal preference and that was a nice mix. Overall good recipe and one I would make again.
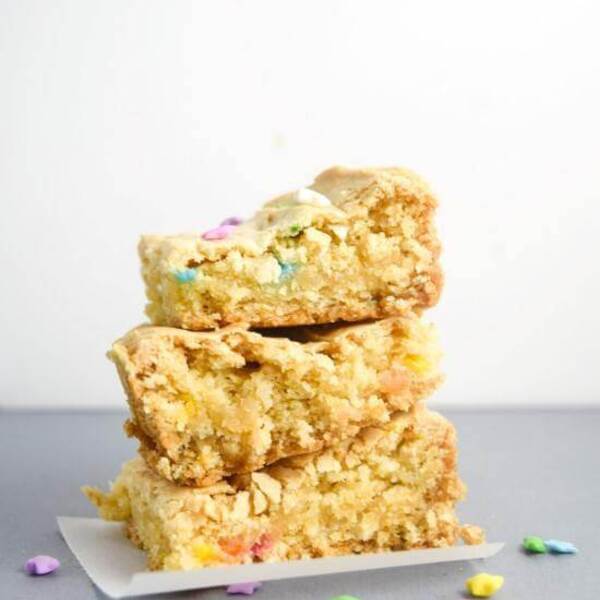
Ohhh yes. Vegan cake batter blondies. It can be done. These vegan blondies have crispy, crackly tops, a hint of vanilla flavor, and a chewy but tender interior.
PS: for my whole foods, non-processed, health-oriented readers… you may want to cover your eyes.
In my pregan days I loved a certain cake batter blondies recipe that was making the rounds on the internet. The recipe calls for only a few ingredients (if you turn a blind eye to what’s written on the back of the box…): boxed cake mix, oil, milk, and one egg.
To be fair, I loved any sort of blondie at all and I still do. Vegan blondies abound these days, I’ve had some pretty tasty versions that are made from peanut butter or almond butter, even some crazy gluten-free vegan blondies made with chickpeas. But today we are skipping the fancy vegan ingredients, even coconut oil, and going back to that delicious abomination that is Boxed Cake Mix. The only change is to make it egg free!
Obviously to turn that into vegan cake batter blondies, it’s pretty easy to substitute nondairy milk. While ingredients therein are questionable for other reasons, vegan boxed cake mixes are fairly easy to come by. And oil is already vegan-friendly.
The egg is the tricky part, and while a few times I had tasty results using cornstarch or extra nondairy milk, I finally hit the vegan cake batter blondies jackpot with a little help from aquafaba. If you’re not aware, aquafaba is the cooking liquid from beans and as an egg replacer in this blondie recipe, it yields the perfect chewy texture and crackly exterior. I mean just look at the pictures!
I hope you give these vegan cake batter blondies a try (although, maybe just on special occasions 😀 – I’m not about to recommend eating boxed cake mix regularly). They truly taste like cake batter while having the perfect blondie texture. It will remind you of your lost funfetti days of old, that’s for sure. And don’t even get me started about the uncooked batter. Oh my goodness it’s tasty.
For variations, stir in regular or white chocolate chips, chopped Oreos or similar (…hmm, I’m going to have to make that myself now!), or other candy pieces of your choice! Enjoy!
Vegan Cake Batter Blondies
These vegan cake batter blondies whip up in a flash, and taste exactly like cake batter while having a perfect chewy interior and crispy outside.
1box white or yellow cake mix(I used Duncan Hines French vanilla, which is vegan)
3tbspsprinkles(optional; look for brands that don’t use confectioner’s glaze, which isn’t vegan)
1/4cupneutral oil(I used safflower oil)
3tbspaquafaba(I used the liquid from a can of chickpeas)
5tbspplain, unsweetened non-dairy milkplus more as needed (I used soy milk)
Instructions
Preheat the oven to 350 degrees Fahrenheit and lightly grease an 8×8 dish, or 8- to 9-inch round pan.
In a mixing bowl, stir together the sprinkles and cake mix. Add the oil and aquafaba and stir to combine it as well as you can (it will be lumpy and dry, and that’s fine).
Add the nondairy milk and stir to mix it in well. Make sure to keep stirring to break up lumps; the batter should come together into a thick, frosting-like texture. Only if absolutely necessary, add more milk 1 tablespoon at a time to bring the batter together.
Use a spatula (you’ll need it – this batter is thick) to transfer the batter into the greased pan and spread it out evenly all the way to the edges.
Bake for 22 to 25 minutes, or until the edges are just starting to turn brown.
Let cool for AT LEAST thirty minutes before slicing in order to achieve the best texture.
Leftovers will store in an airtight container for a few days.
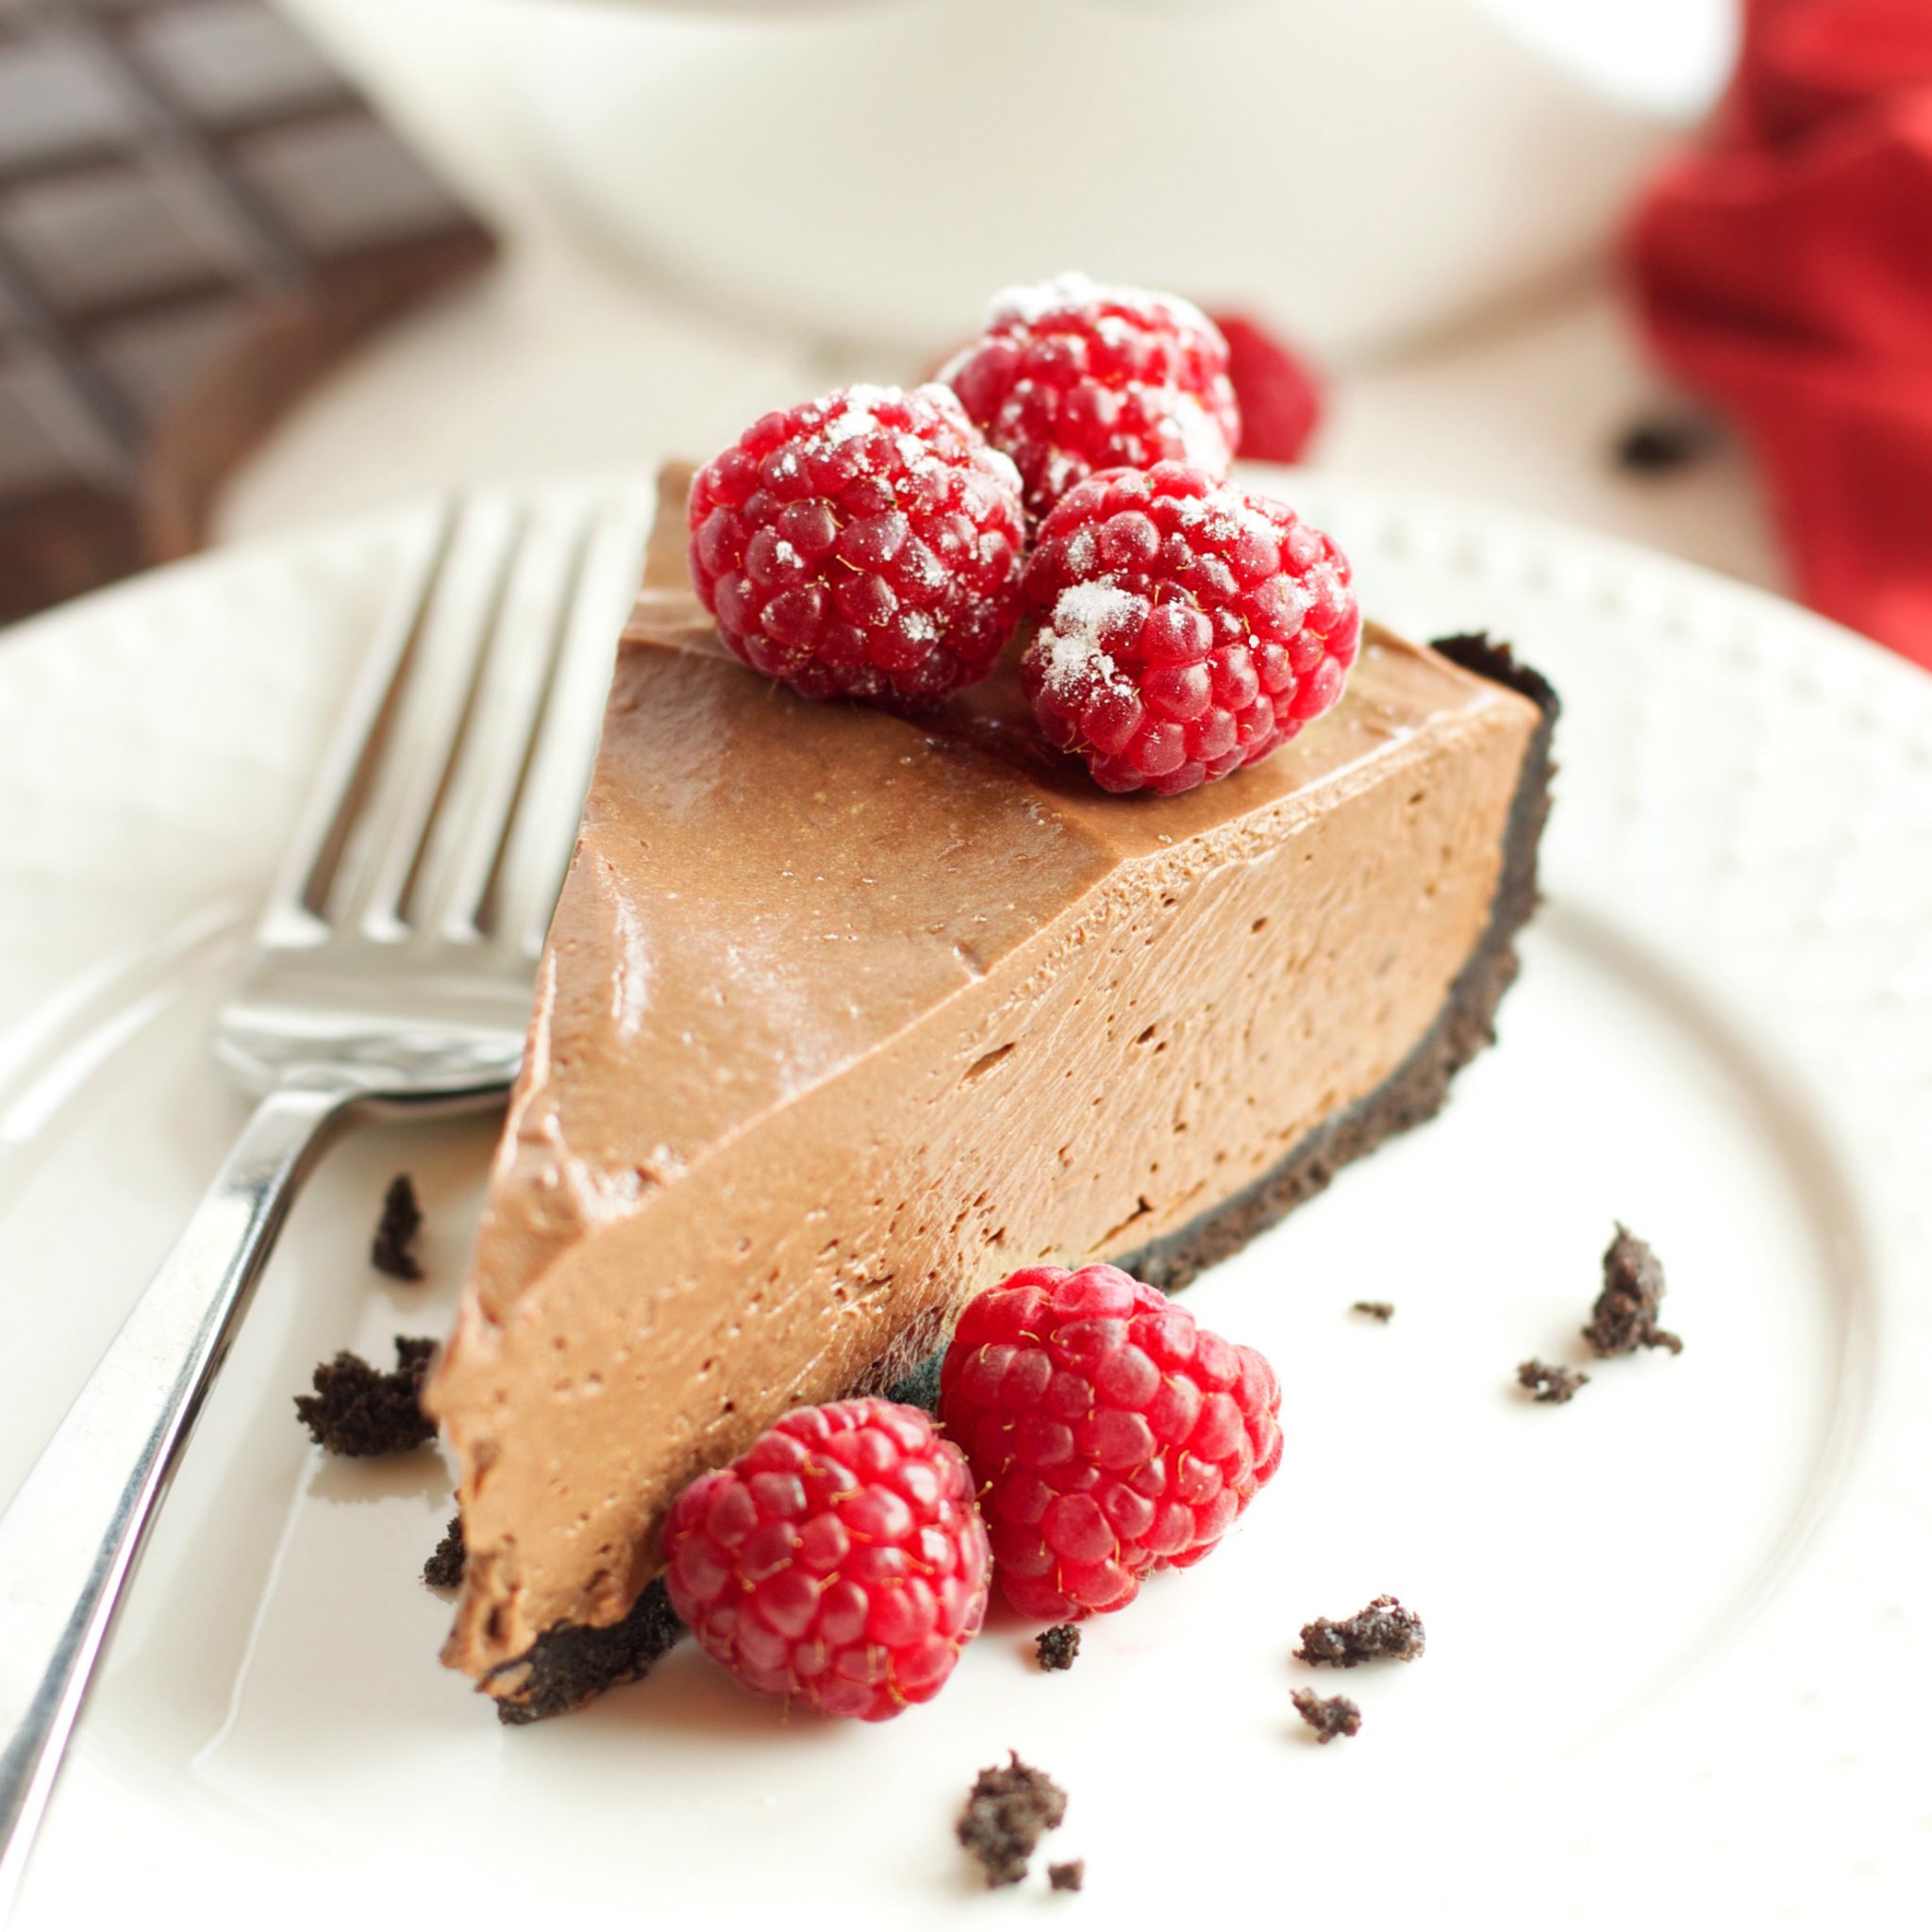
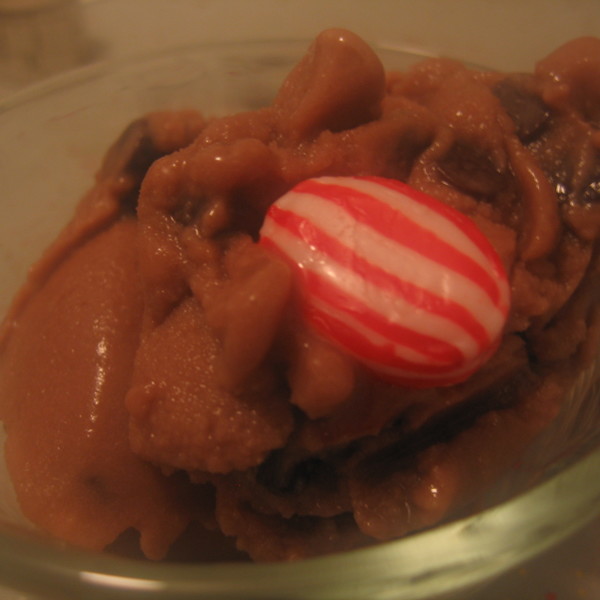
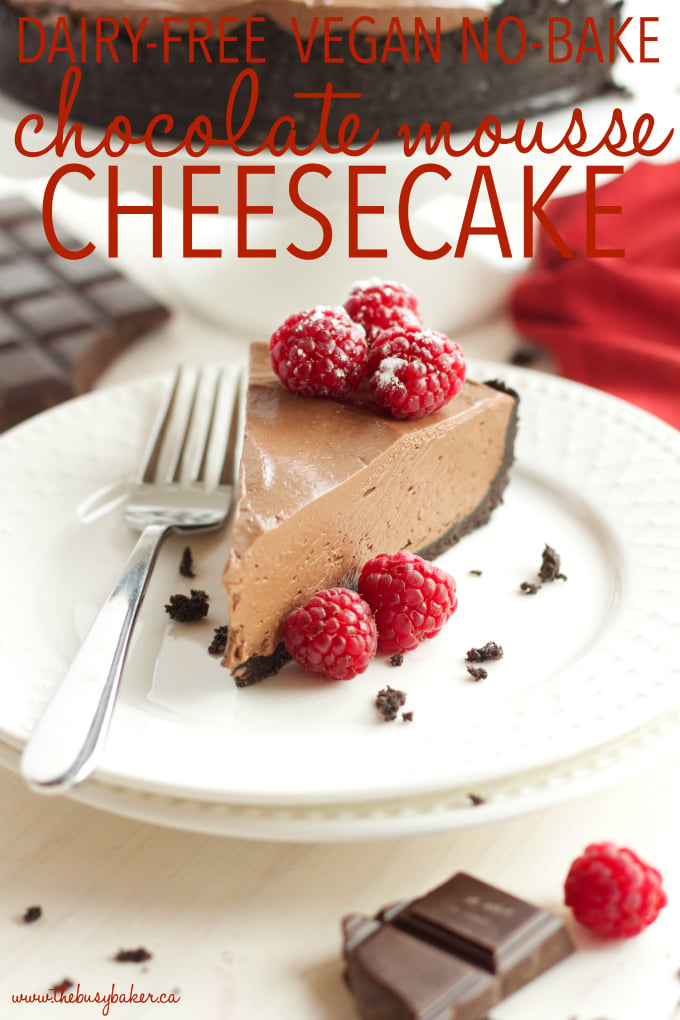
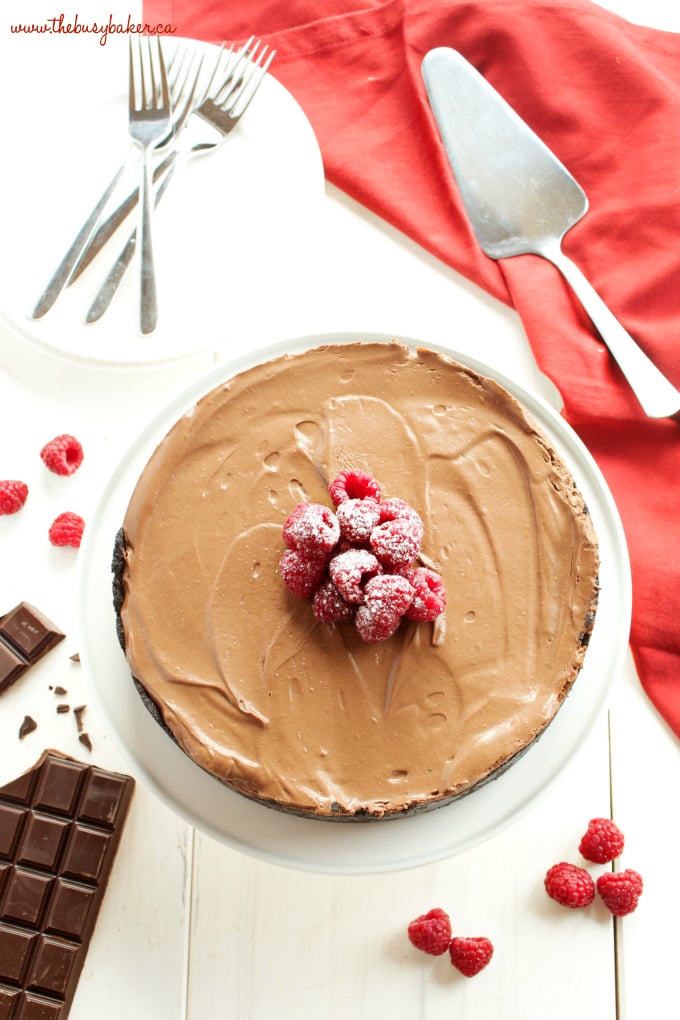
This No Bake Chocolate Mousse Cheesecake is vegan and dairy-free! It’s made with a secret ingredient that makes this cheesecake silky smooth, extra creamy and perfect for anytime you need a decadent dessert without the guilt!
NEVER MISS A POST! FOLLOW ME ON:
FACEBOOK | PINTEREST | INSTAGRAM | TWITTER
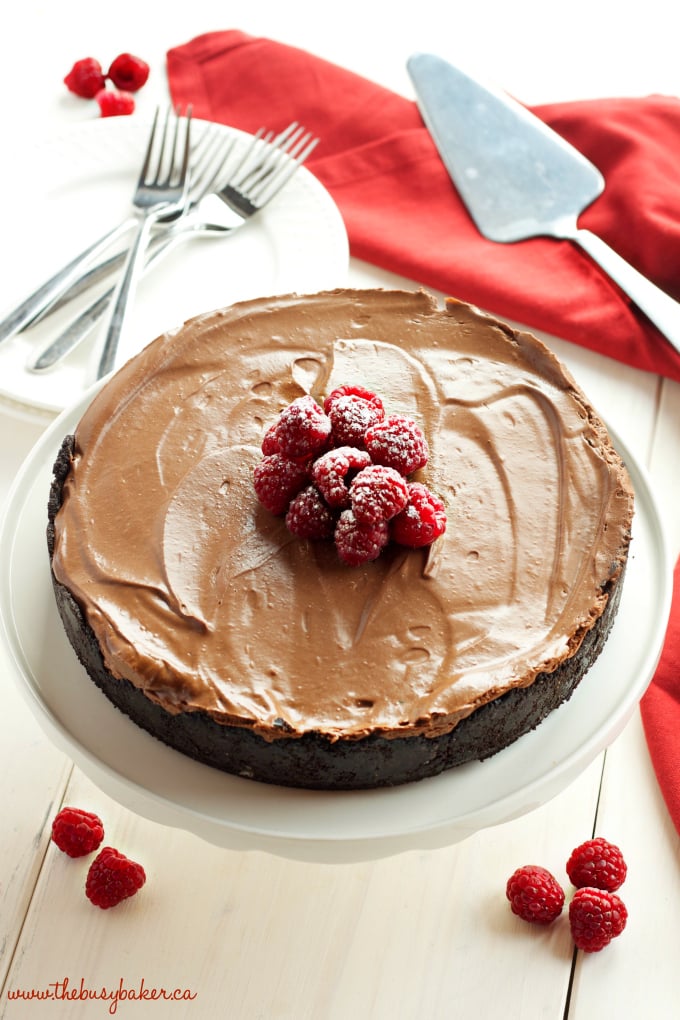
Friends, do I ever have an AMAZING recipe for you today!! I have been counting the days until I’ve been able to hit the publish button on this post and it is finally today! This No Bake Chocolate Mousse Cheesecake is the chocolate dessert of your dreams. It’s light, it’s oh so smooth, it’s totally decadent and best of all it’s made with mainly healthy ingredients making it VEGAN and DAIRY-FREE! Can you believe it?
No bake cheesecakes are absolutely a go-to dessert of mine, especially around the holiday season, and given my busy lifestyle as a work-at-home-mom of two, they’re kind of my default when I need an impressive dessert with not a lot of effort behind it. I’ve shared lots and lots of no bake cheesecakes with you before, like this No Bake Orange Creamsicle Cheesecake, or this No Bake Oreo Cheesecake, and even this Easy No Bake Mint Chocolate Chip Cheesecake, but I’m telling you – this No Bake Chocolate Mousse Cheesecake trumps them all. Seriously.
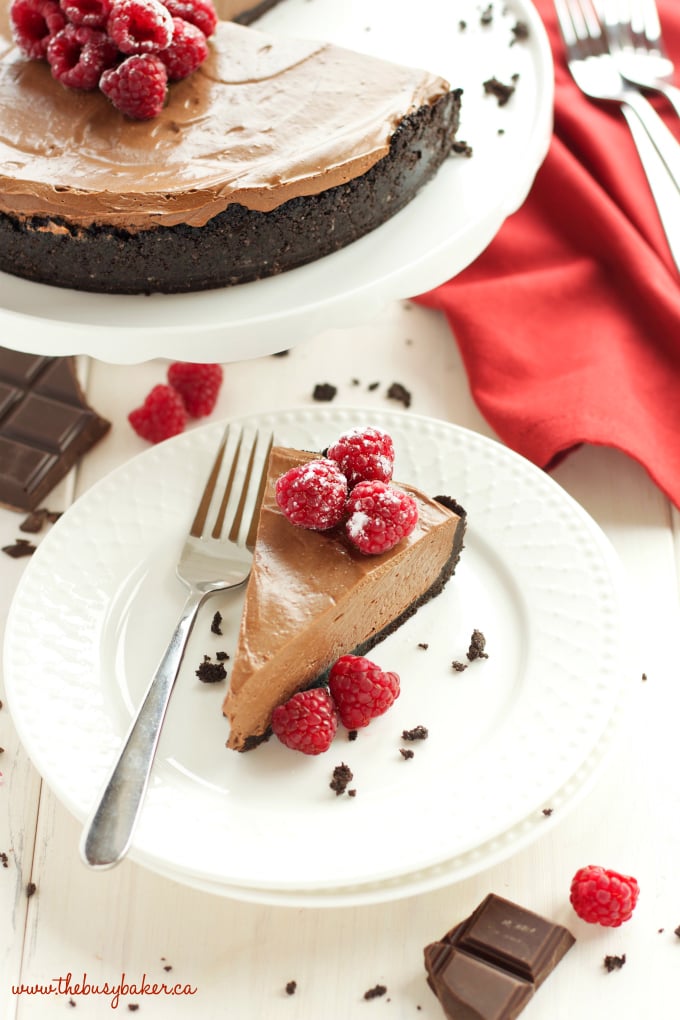
All you need for this recipe is a blender – here’s a link to my favourite one (affiliate link) – and a 9-inch spring form pan. That’s it! It’s as simple as making the 2-ingredient crust, chilling it while you make the filling, and then dumping the filling ingredients in the blender, blending until smooth, and then chilling everything for a few hours to set. Honestly, it’s more work to drive to the bakery and buy an already-made cheesecake than it is to make this one yourself at home!!
Now for all you skeptics and purists out there who can’t fathom a cheesecake without cheese, let me put your minds at ease. I was completely skeptical too. A lovely friend of mine passed this recipe on to me after she hosted our family for a dinner party recently. My husband follows a dairy-free diet, so because my friend is as sweet as can be she made a variation of this No Bake Chocolate Mousse Cheesecake for us for dessert because it was something we could all enjoy (my friend adapted this recipe from Baking Equals Love). Normally I’m a skeptic too, but her dessert was so beautiful I just couldn’t help but try a piece. After one bite I was completely sold. This may be, hands down, the best dessert I’ve ever, ever tasted. Period. And the filling is only 3 ingredients (4 if you add vanilla extract). Seriously.
LOOKING FOR MORE EASY STRESS-FREE HOLIDAY MEAL IDEAS AND RECIPES?
GET MY EASY NO-FAIL HOLIDAY MEALS E-COOKBOOK!
Looking for even more delicious no-bake cheesecakes? Try my No Bake Snickers Cheesecake or this delicious No Bake Nutella Cheesecake!
NEVER MISS A POST! FOLLOW ME ON:
FACEBOOK | PINTEREST | INSTAGRAM | TWITTER
I hope you enjoy this No Bake Chocolate Mousse Cheesecake as much as we do! Let me know in the comments below, what’s your favourite cheesecake flavour?
KITCHEN PRODUCTS I RECOMMEND:
Looking for even more deliciously decadent desserts? Before you grab this recipe check out these beauties!!
Best Ever Vegan Peppermint Chocolate Tart
Best Ever No Bake Chocolate Cheesecake
Easy No Bake Triple Chocolate Cheesecake
Easy No Bake After Eight Cheesecake
Classic No Bake Cheesecake
Easy No Bake Oreo Cheesecake
Easy No Bake Bailey’s Irish Cream Cheesecake
Easy No Bake Nutella Cheesecake
Easy No Bake Snickers Cheesecake
No Bake Mint Chocolate Chip Cheesecake
LOOKING FOR MORE EASY AND DELICIOUS CHEESECAKE RECIPES AND TIPS?
Get my Easy No-Bake Cheesecakes E-Cookbook!
Recipe Video
Watch the video below to see exactly how I make this tasty recipe. You can find more delicious recipe videos on my YouTube channel
If you made this, share a photo!
Are you trying this recipe? Use the comment form below to share your take; now with support for image uploads and comment voting!
Share a photo
No Bake Chocolate Mousse Cheesecake (Vegan and Dairy Free)
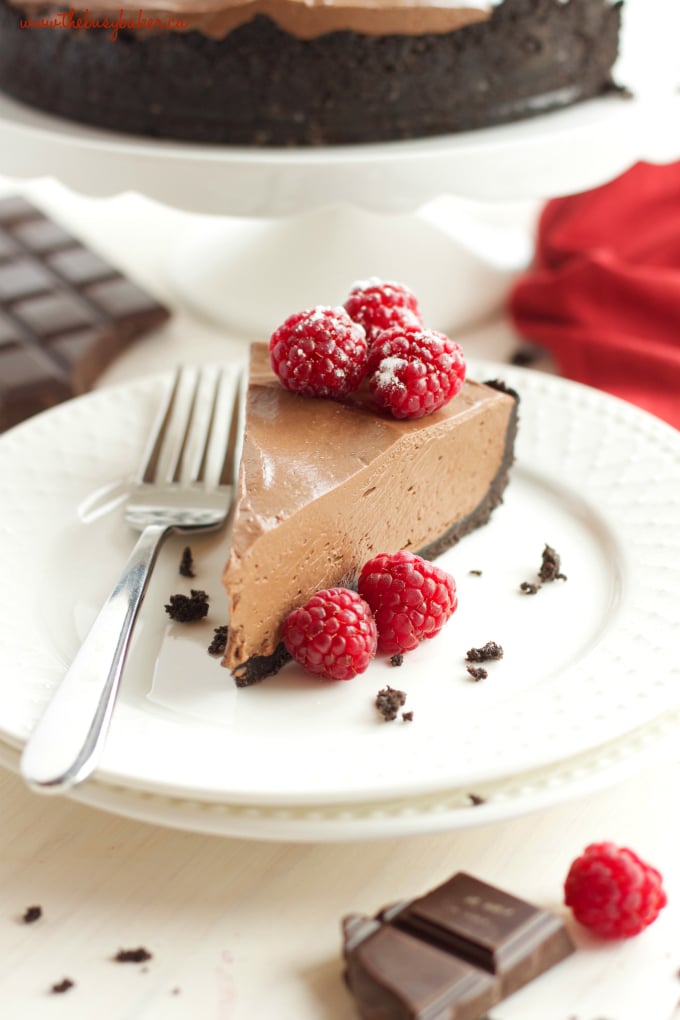
This No Bake Chocolate Mousse Cheesecake is the ultimate vegan and dairy-free chocolate dessert that’s so smooth and creamy, made with a secret ingredient!
Print
By Chrissie (thebusybaker.ca)
Yield 10
Prep 20 minutesmins
Total 20 minutesmins
Recipe: Ingredients
32chocolate sandwich cookies (Oreos are vegan, but there are many other brands that are vegan, dairy-free, and even gluten-free)
3tablespoonsmelted margarine (or other vegan butter)
fruit, powdered sugar, or vegan whipped cream for serving
Recipe: Instructions
Crush the chocolate sandwich cookies in your blender and add the melted margarine, pulsing to combine completely.
Press the cookie crumb mixture into the bottom and up the sides of a 9-inch spring form pan lined with parchment paper (for easy removal of the cheesecake later on!)
Chill the crust to set while you make the filling.
To a clean blender add the silken tofu, maple syrup, vanilla extract.
Melt the chocolate in a double-boiler over low heat, or melt it in the microwave at 50% power for 30-second increments until the chocolate is melted and smooth.
Let the chocolate cool slightly before adding it to the blender with the other ingredients. This will ensure a smooth texture.
Blend until very smooth, scraping down the sides of the blender if necessary.
Pour the filling into the chilled crust and smooth out the top with a rubber spatula.
Place the cheesecake in the fridge to chill for at least 6 hours, or overnight, before transferring to a plate to slice and serve.
Serve with fresh berries, powdered sugar, or your favourite vegan whipped cream.
Recipe: Nutrition
Nutrition Facts
No Bake Chocolate Mousse Cheesecake (Vegan and Dairy Free)
Amount Per Serving (1 serving)
Calories 528 Calories from Fat 270
% Daily Value*
Fat 30g46%
Saturated Fat 13g81%
Cholesterol 1mg0%
Sodium 229mg10%
Potassium 513mg15%
Carbohydrates 58g19%
Fiber 5g21%
Sugar 36g40%
Protein 8g16%
Vitamin A 166IU3%
Calcium 75mg8%
Iron 9mg50%
* Percent Daily Values are based on a 2000 calorie diet.
Notice: Nutrition is auto-calculated, using Spoonacular, for your convenience. Where relevant, we recommend using your own nutrition calculations.
There’s no simpler decadence than a doughnut. While it’s difficult to buy vegan doughnuts anywhere but at specialty bakeries, making them from scratch at home is a fun kitchen project. The glory of this treat lies in its sweetness and the delicate puffiness created by frying, so making doughnuts vegan is a shift that isn’t at all noticeable. Most people wouldn’t even suspect that there are no dairy or eggs in this version!
Some fried vegan doughnut recipes utilize aquafaba (whipped bean water) or vegan egg products; we didn’t find that either added anything important to the texture. If these were baked, you would want to use a vegan egg replacer. However, because the fluffiness is imparted by way of the hot oil’s reaction with the flour, you’re good to skip that ingredient here. The only swaps made from the usual method of doughnut-making were replacing butter with vegan butter or margarine and using non-dairy milk.
This recipe will make a dozen doughnuts, giving you plenty of space for every glaze, topping, and/or filling of your choosing. While they are made with a yeasted dough, the process is straightforward; the most vital element is to fry at the correct temperature. Use a thermometer to ensure you don’t over or undercook them and they’ll turn out great.
Neutral oil, such as avocado oil or vegetable oil, for frying
Gather the ingredients.
The Spruce / Haley Hazell
Heat milk on the stove or in the microwave until about 105 F, or warm to the touch.
The Spruce / Haley Hazell
Add the milk, 1 teaspoon of the sugar, and yeast to a stand mixer or mixing bowl. Let sit for 10 minutes, until the yeast is bubbly.
The Spruce / Haley Hazell
Add the remaining 1/4 cup of sugar, vegan butter, 3 1/2 cups of flour, and salt to the bowl. Mix on low speed or by hand until a soft dough is formed.
The Spruce / Haley Hazell
Continue to knead, in the bowl or by hand for 5 minutes, adding flour 1 tablespoon at a time if the dough is too wet. The dough should be softer and stickier than bread dough, but should have visible elasticity and hold together completely.
The Spruce / Haley Hazell
Transfer the dough to a greased or sprayed bowl and cover with plastic wrap or a damp tea towel. Let rise until doubled in volume, about 1 hour.
The Spruce / Haley Hazell
Roll out the dough on a lightly floured surface to 1/2-inch thickness. Alternately, you can press it out with your fingertips.
The Spruce / Haley Hazell
Cut the dough into the desired shape(s) and size(s) with doughnut or biscuit cutters. For leftover dough, re-roll and cut until all of the dough is used.
The Spruce / Haley Hazell
Transfer cut doughnuts to a parchment-lined baking sheet and allow to double in volume again, about 45 minutes.
The Spruce / Haley Hazell
Heat 1 1/2 to 2 inches of oil in a Dutch oven or deep skillet until a thermometer reads 350 F.
The Spruce / Haley Hazell
Add doughnuts to the oil one at a time, keeping space between and avoiding overcrowding.
The Spruce / Haley Hazell
Fry for about 1 1/2 minutes per side, until golden, then remove and drain on a paper-towel lined baking sheet or a cooling rack placed over a baking sheet. Repeat with the next batch until all doughnuts have been fried.
The Spruce / Haley Hazell
Allow to cool completely before glazing or filling. Serve and enjoy.
The Spruce / Haley Hazell
Tips
Yeasted doughs rise best in a warm place. The most consistent option in most kitchens is in the oven: Turn on the oven light for a little warmth and make sure no one turns the oven on while the dough is rising.
If you don’t have a deep-fry or candy thermometer, check the oil temperature with a wooden spoon. Popcorn kernels and even doughnut holes can help test the oil temperature before cooking the whole doughnuts.
Vegan doughnuts are best fresh and can be stored for up to two days at room temperature in a sealed container. Refrigerating the doughnuts can dry them out, though they can also be frozen for a couple of months.
What Are Good Fillings and Glazes for Vegan Doughnuts?
When making vegan doughnuts, the real fun comes with finishing them off with yummy glazes and fillings. That can be as simple as squirting some gelatin-free fruit jam inside. You can also adapt cream fillings by switching to dairy- and egg-free ingredients. Glazes are simple and versatile as well, and vegan versions use the same type of substitutions as this doughnut recipe. Pick up your favorite vegan chocolate for a dairy-free chocolate glaze, or use plant-based milk for a simple vanilla glaze. Maple syrup is a favorite option for vegan doughnut glazes, too.
Nutrition Facts (per serving)
336
Calories
19g
Fat
38g
Carbs
5g
Protein
×
Nutrition Facts
Servings: 12
Amount per serving
Calories
336
% Daily Value*
19g
24%
Saturated Fat 3g
13%
0mg
0%
135mg
6%
38g
14%
Dietary Fiber 1g
5%
Total Sugars 5g
5g
Vitamin C 0mg
0%
Calcium 9mg
1%
Iron 2mg
11%
Potassium 57mg
1%
*The % Daily Value (DV) tells you how much a nutrient in a food serving contributes to a daily diet. 2,000 calories a day is used for general nutrition advice.
(Nutrition information is calculated using an ingredient database and should be considered an estimate.)
Rate This Recipe
I don’t like this at all. It’s not the worst. Sure, this will do. I’m a fan—would recommend. Amazing! I love it! Thanks for your rating!
This post contains affiliate links and may earn commissions on recommended products. As an Amazon Associate, I earn from qualifying purchases.
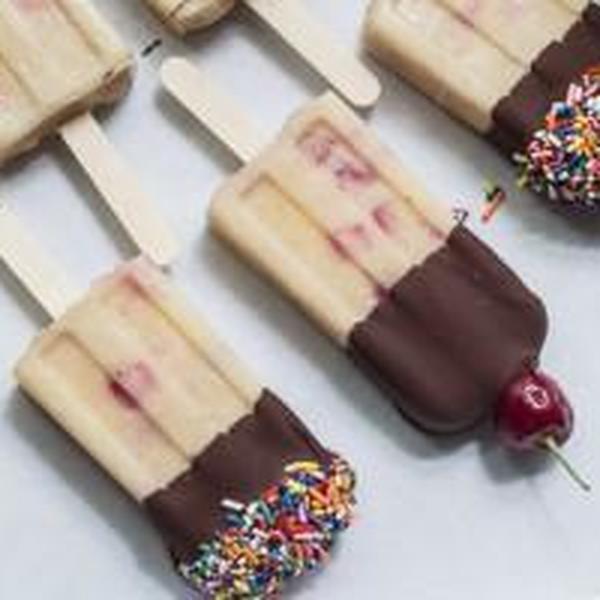
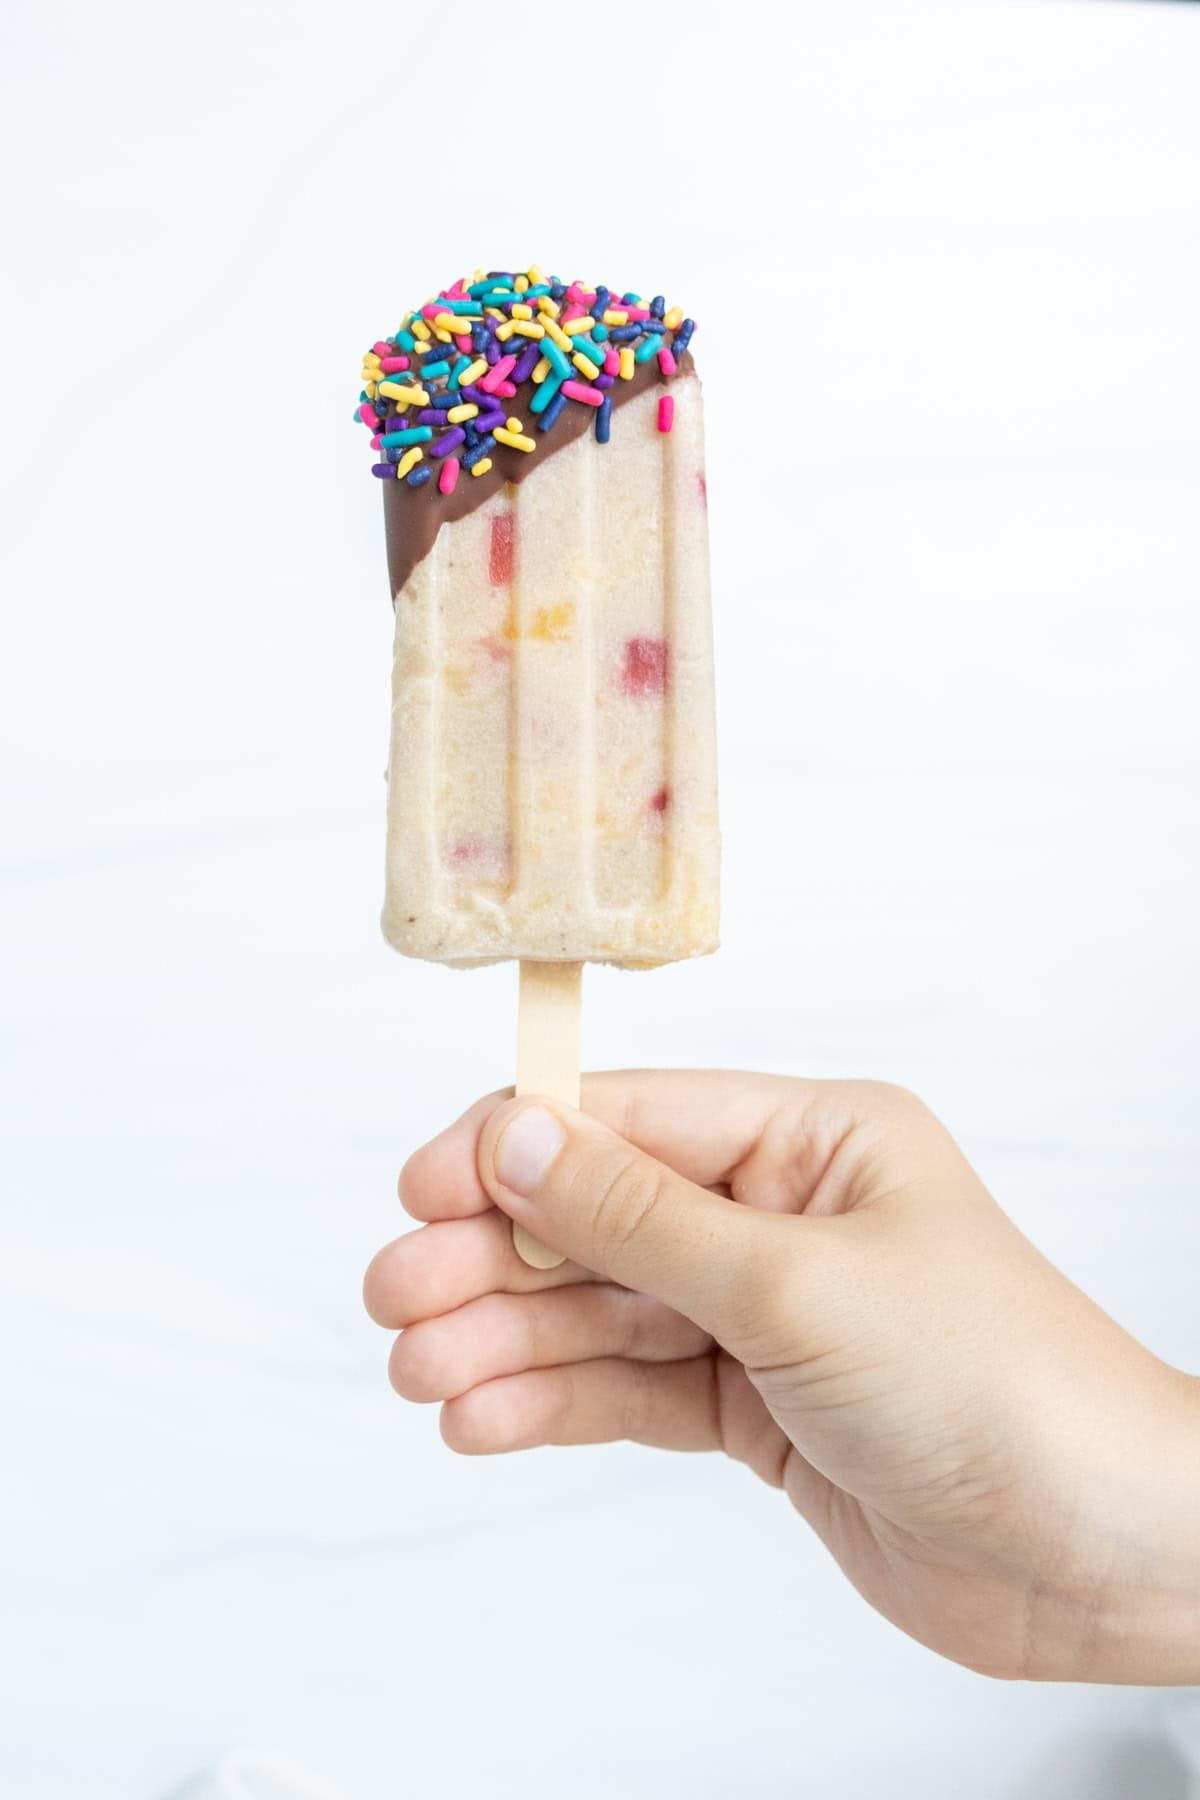
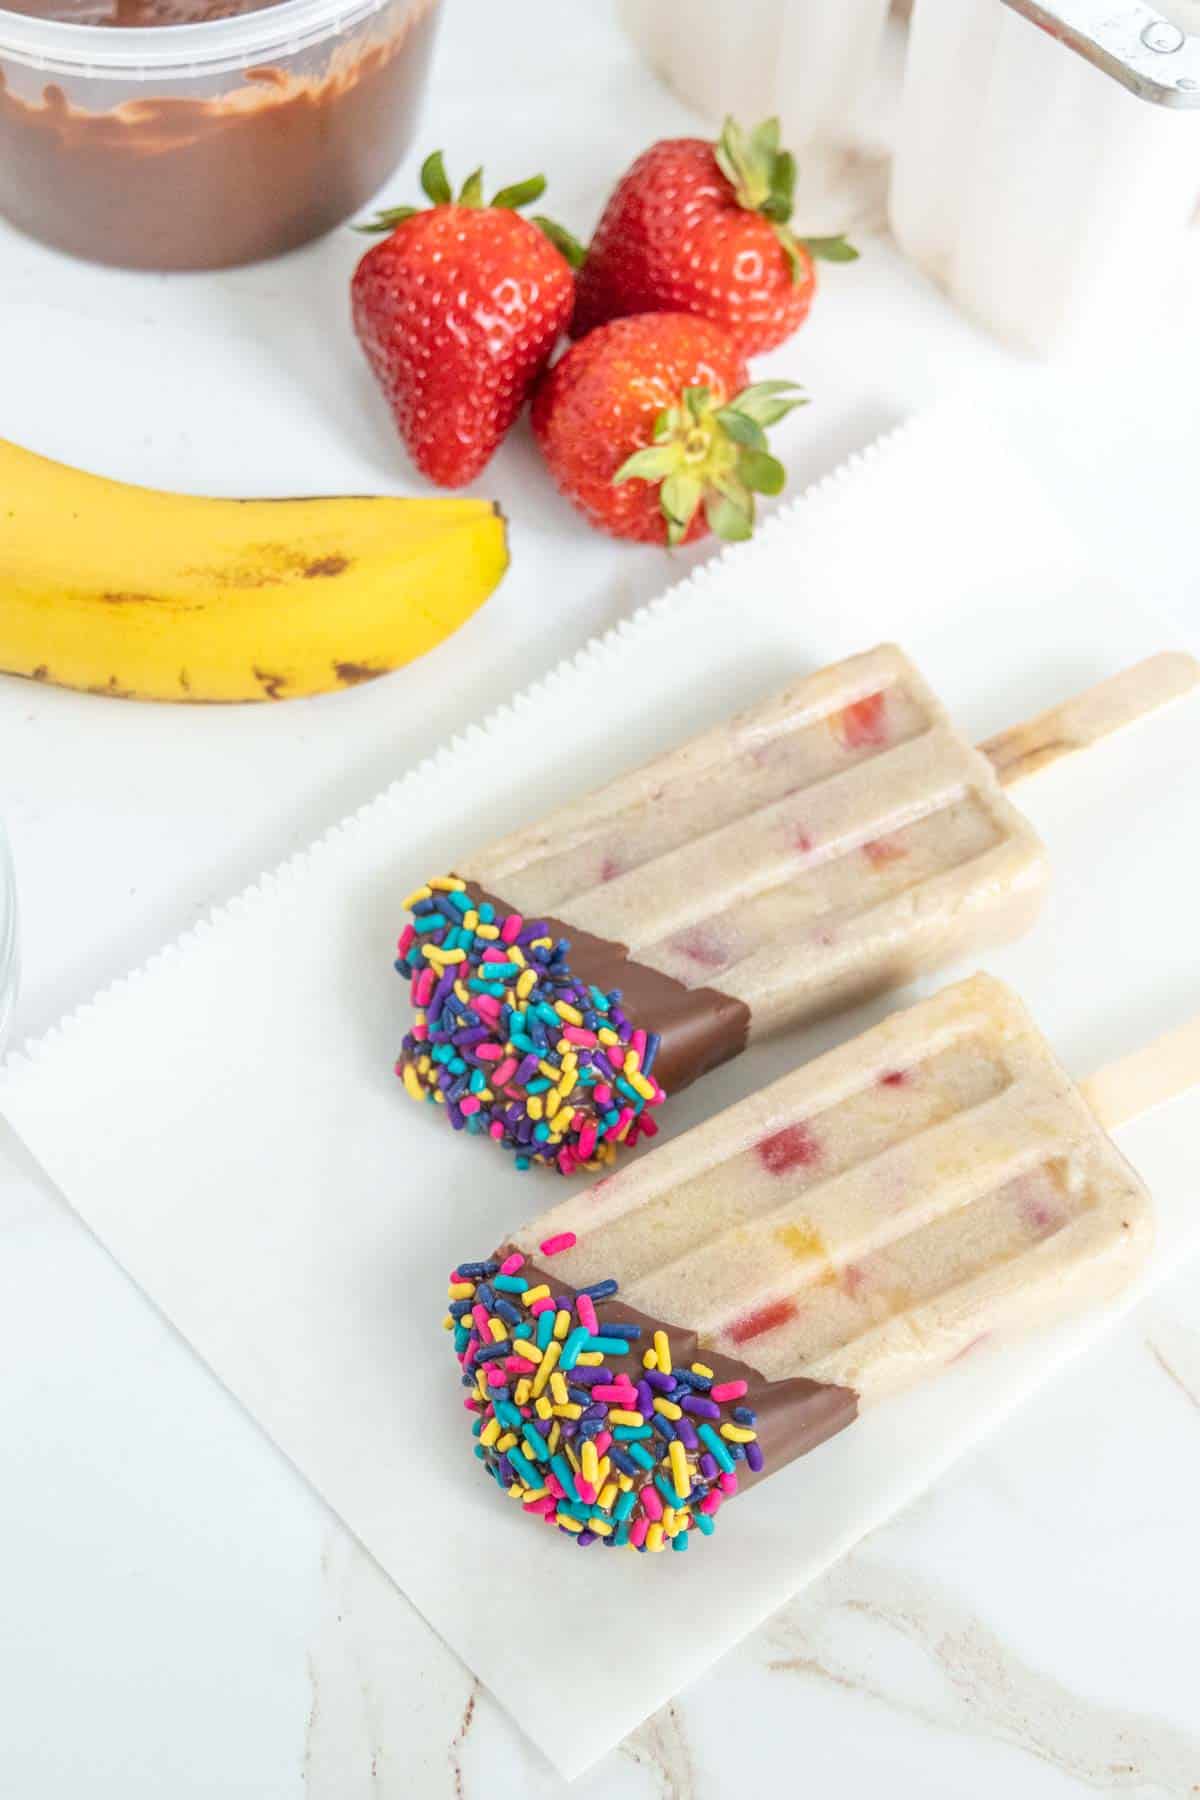
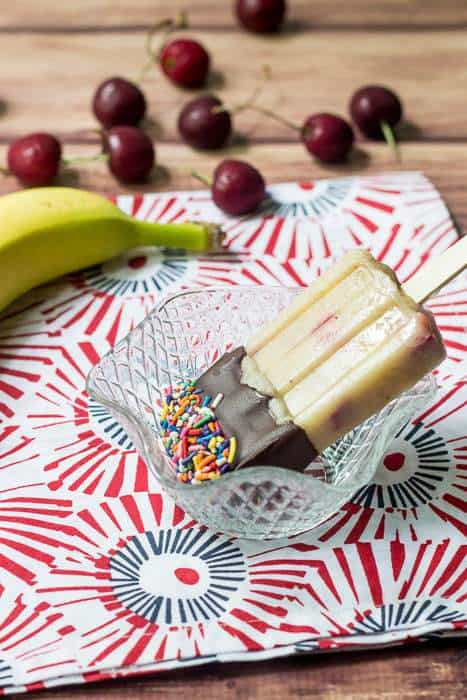
Made with coconut milk and fresh fruits, these banana popsicles are inspired by the classic banana split. Don’t forget the sprinkles!
When I was a kid I was always enchanted by the idea of a banana split, but I can’t remember ever eating one.
Still, the idea of them lives on, and that’s what inspired these banana popsicles. Blended banana and coconut milk are mixed with strawberries and pineapple for a creamy, refreshing, and fruit-filled treat.
Add on some homemade magic shell and sprinkles, and you’ve got a treat fit for any kid (or grown-up). They’re a great dairy free alternative to ice cream.
Make some space in your freezer to whip up these easy popsicles today!
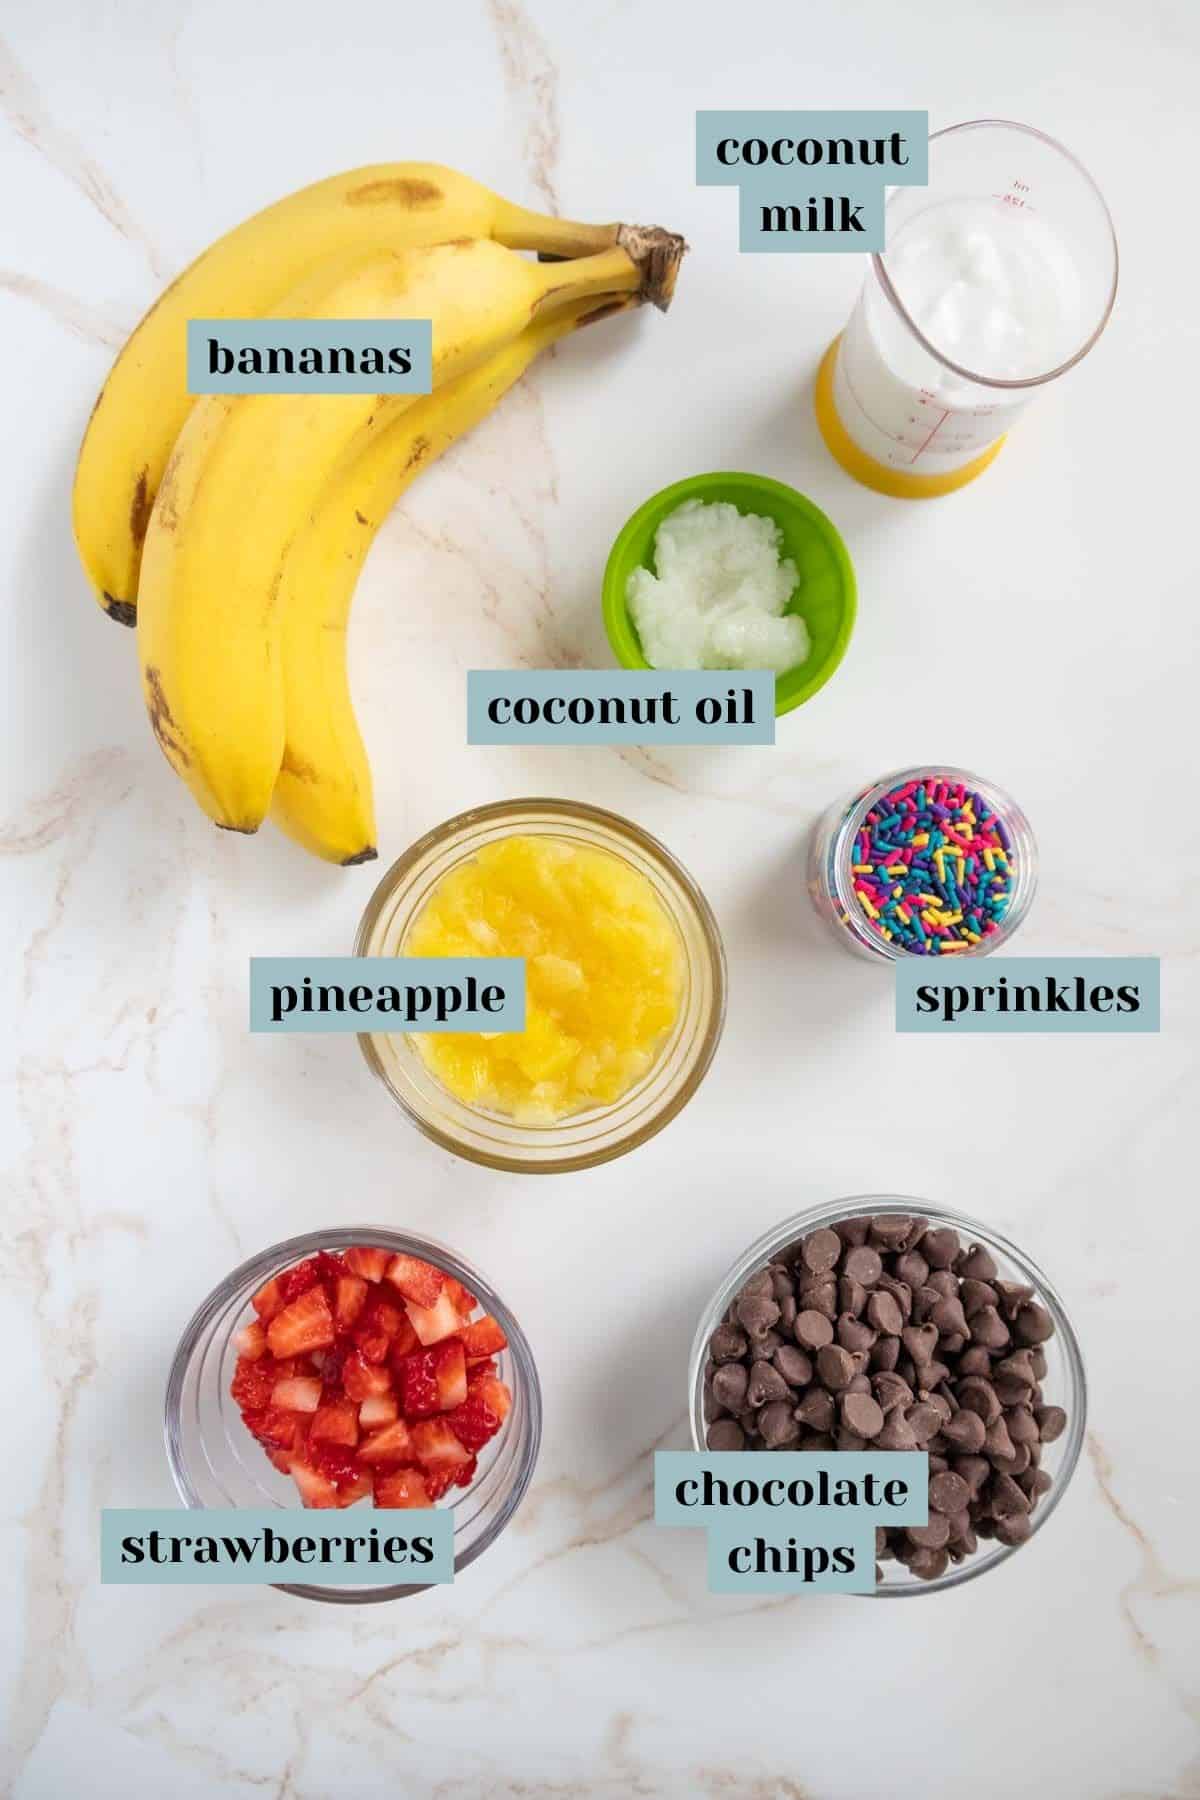
Ingredients for banana popsicles
Full list of ingredients including quantities is located in the recipe card.?
You’ll need:
Bananas – Make sure to use ripe bananas, but not ones that are getting too brown and soft.(Save those for banana bread!). Unripe bananas won’t blend as easily as ripe ones.
Coconut milk – This recipe uses canned coconut milk. I recommend using full-fat coconut milk, not lowfat. Don’t use the kind that is located in the dairy aisle; it’s not creamy enough. Make sure to shake the can before opening and measuring!
Strawberries – Chop the strawberries into small pieces.
Pineapple – I use crushed pineapple in this recipe. Make sure to drain the pineapple before adding it to the banana mixture.
Chocolate chips – Use vegan chips if you want to keep this recipe vegan. Dark chocolate chips are often naturally vegan, but check the label.
Coconut oil – The coconut oil helps turn the melted chocolate into magic shell.
Sprinkles – Optional but always a fun addition!
You’ll also need a popsicle mold and popsicle sticks (if your mold does not have built-in sticks).
How to make this recipe
Have your popsicle mold and sticks ready to go, as well as a place in the freezer for them to chill.
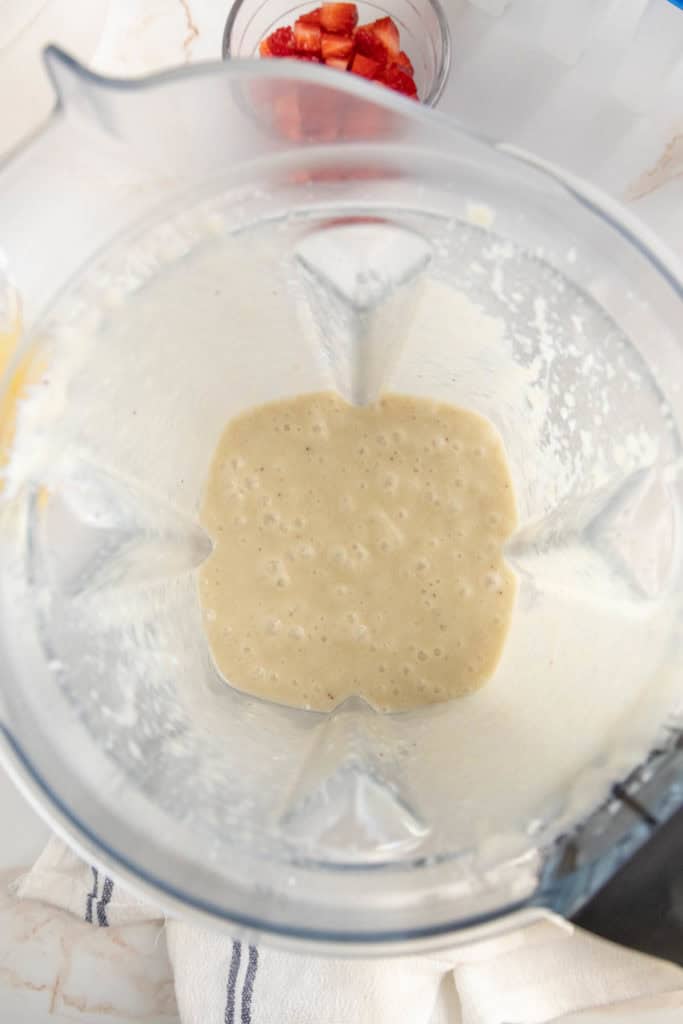
Peel the bananas and add to a blender or food processor. Add the coconut milk and blend together until completely smooth.
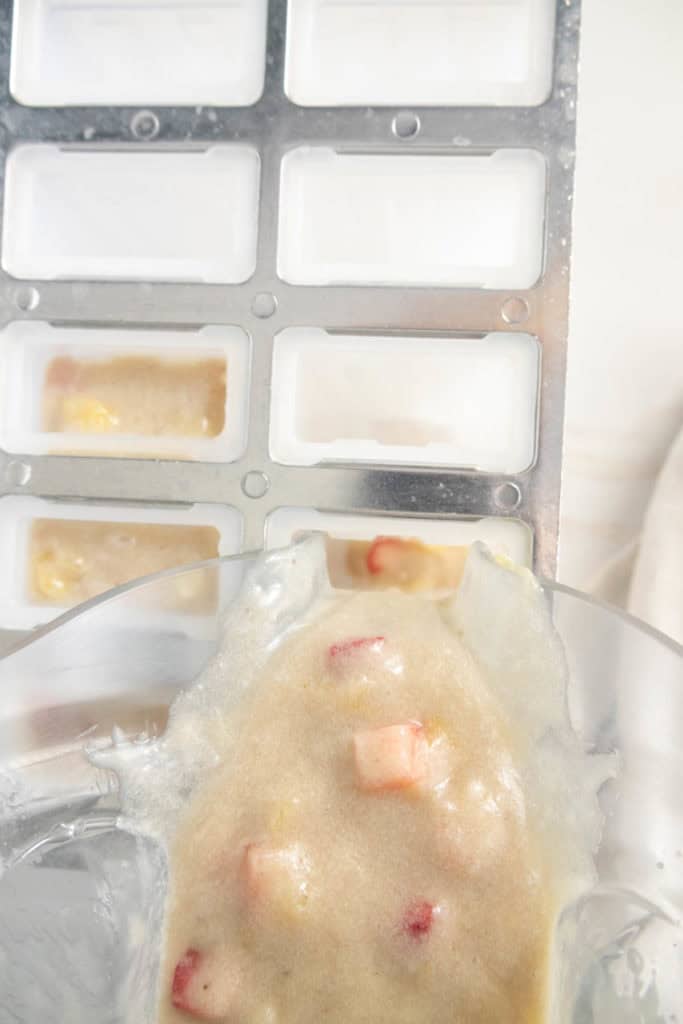
Stir in the chopped strawberries and crushed pineapple.
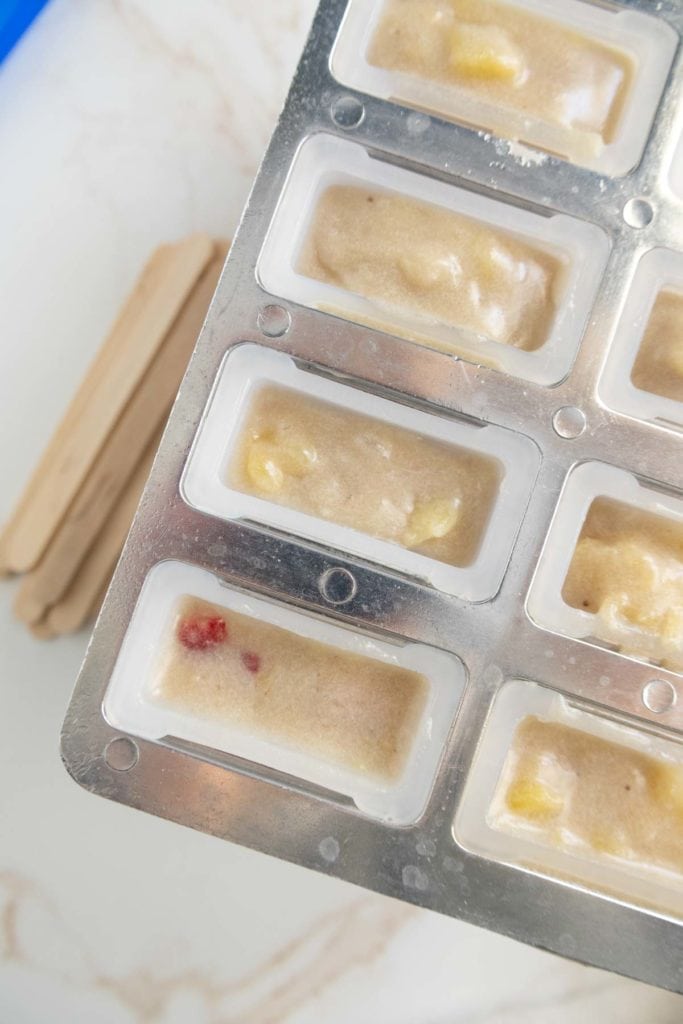
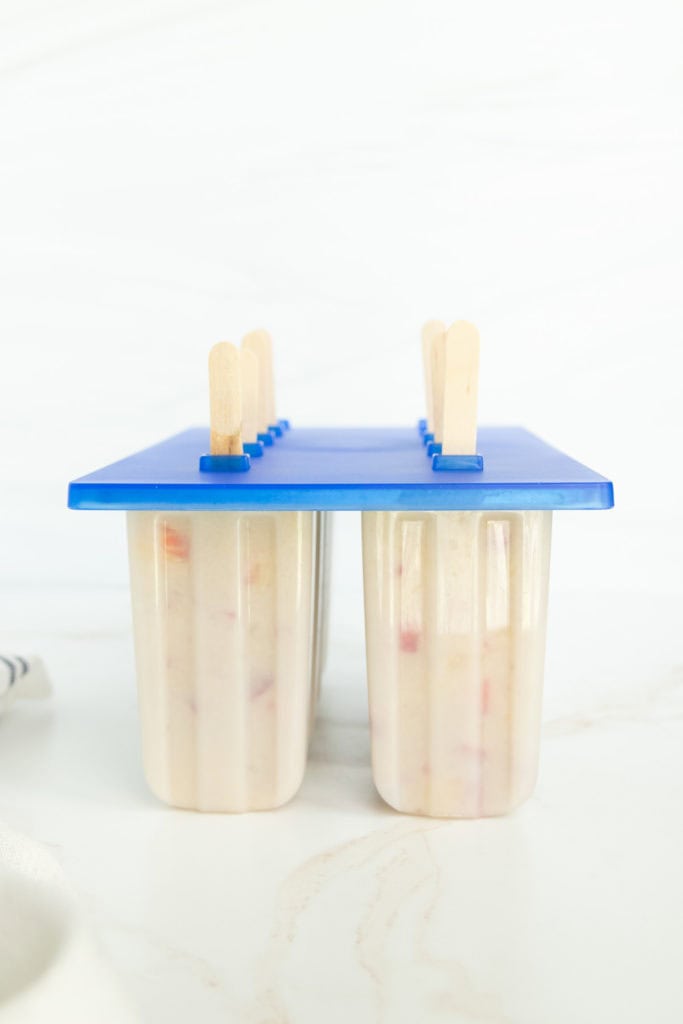
Carefully pour the fruit mixture into the popsicle molds, making sure to not overfill. The sticks will displace some of the liquid, so I recommend filling to just under the top.
Place the lid onto the mold and add the sticks, making sure to leave enough of the stick exposed to hold onto.
Freeze for at least 4 hours, or until solid.
Note that the number of popsicles will depend on the size of your molds as well as the size of the bananas used.
You can eat the popsicles as they are, or add the magic shell and sprinkles.
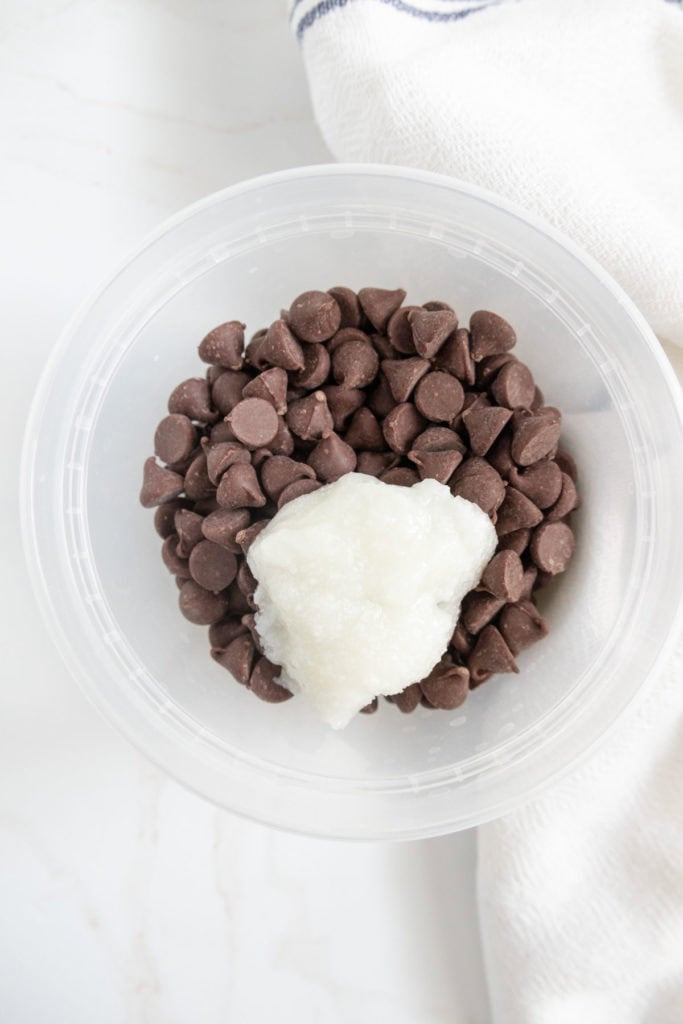
To make the magic shell, combine the chocolate chips and coconut milk in a microwave-safe bowl.
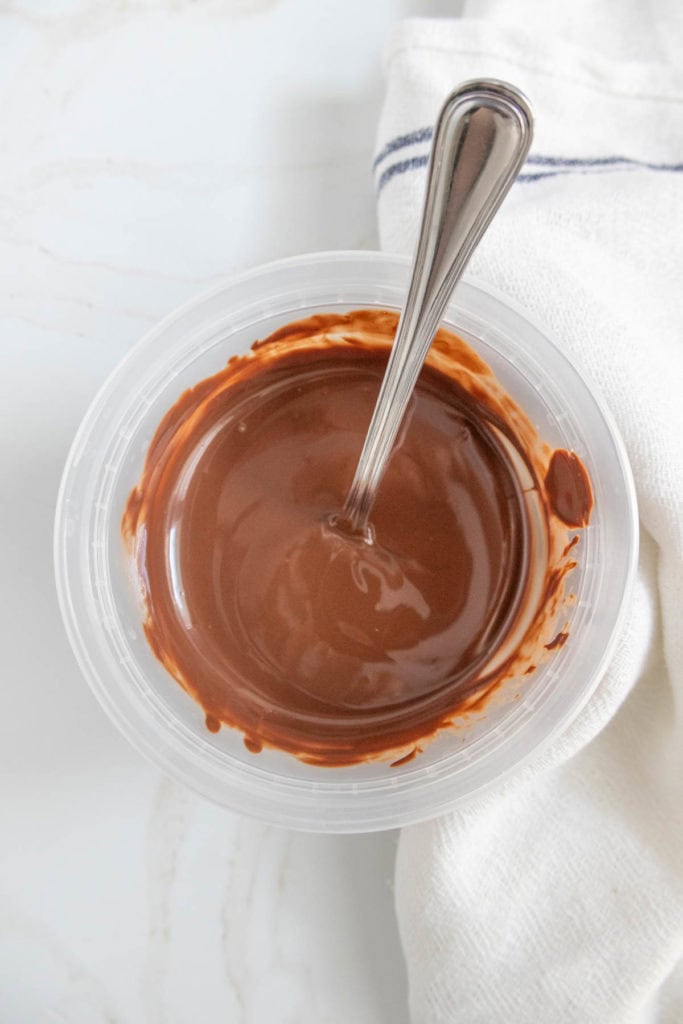
Microwave in 30-second increments, stirring after each time, until almost completely melted. Stir until melted and smooth. Let cool slightly.
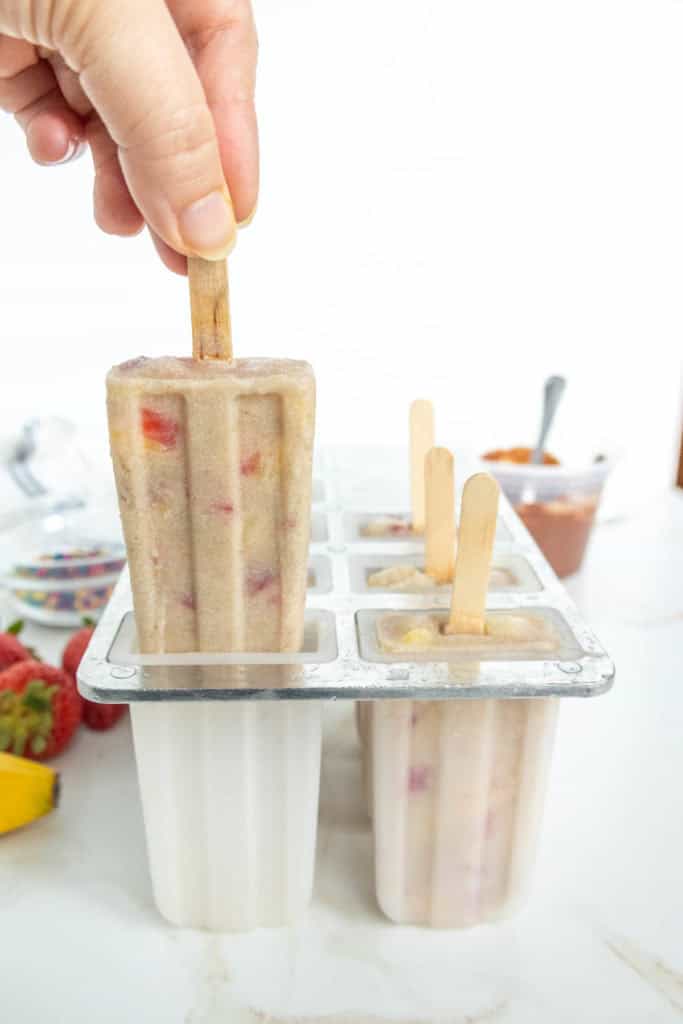
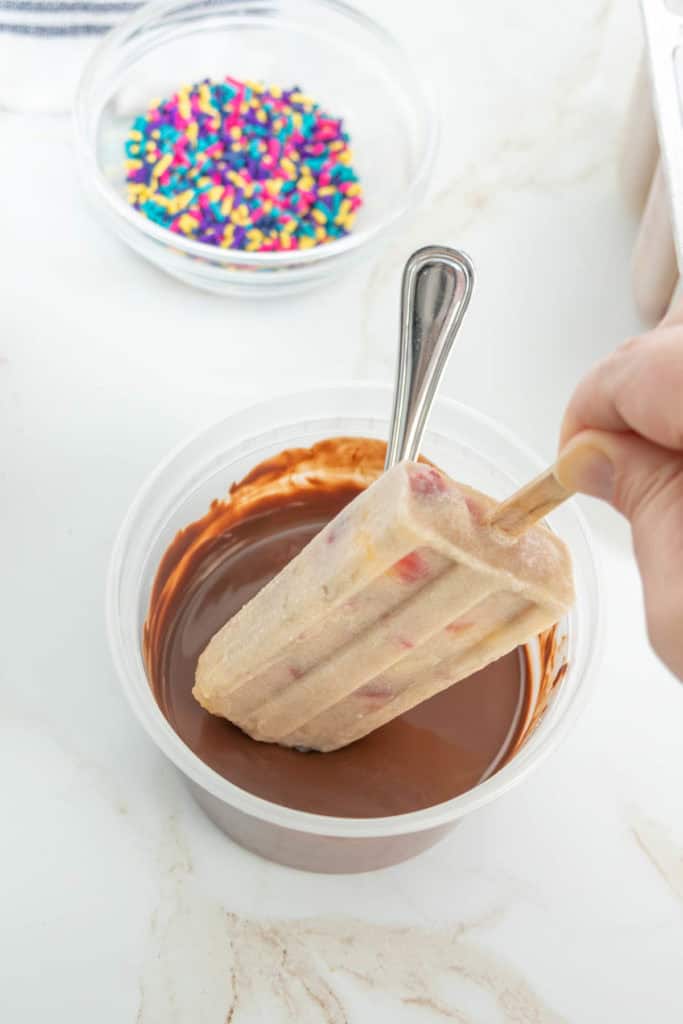
Remove popsicles from the freezer. Run the popsicle mold under warm water for about 30 seconds to help loosen. Carefully remove the popsicles.
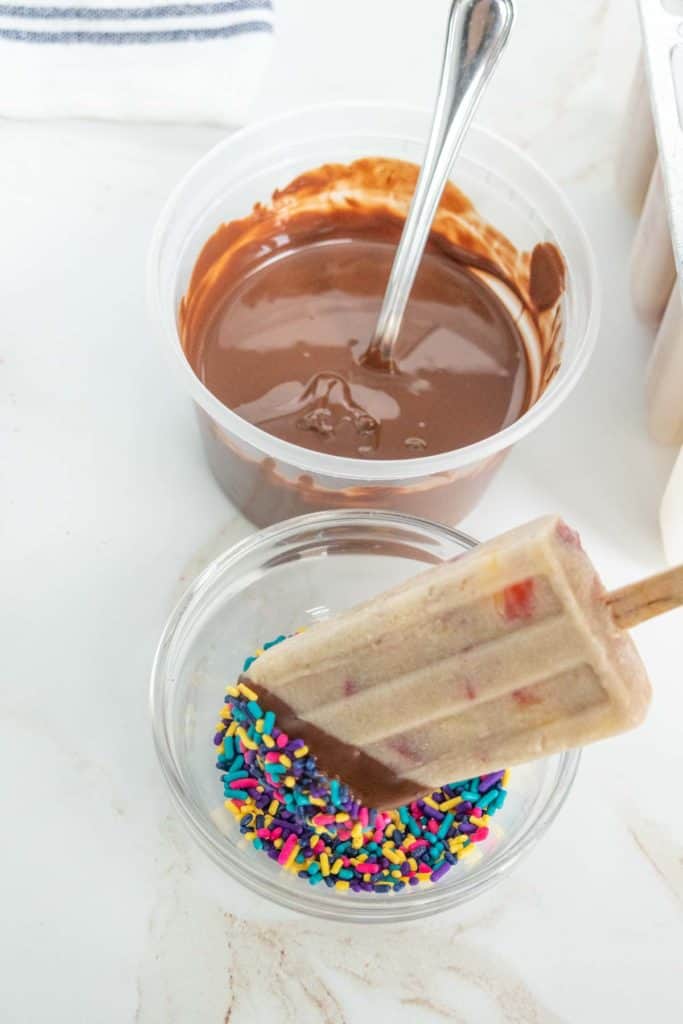
Dip each popsicle into the magic shell. Before it completely hardens, dip into the sprinkles.
Set the dipped popsicles onto a piece of parchment paper or waxed paper set on a cookie sheet to finish hardening.
Enjoy immediately, or return the popsicles to the freezer.
Recipe suggestions
You can try these banana popsicles with other fruit or flavor combinations. Instead of strawberries, use diced mango, or add in chopped cherries.
Swap the sprinkles for chopped peanuts or almonds.
Add a small amount of cocoa powder or peanut butter (or both!) to the banana mixture when blending.
Frozen banana will also work in this recipe and blend up beautifully.
You can also leave out the extra fruit and simply add a pinch of cinnamon or a drizzle of maple syrup for a wonderful banana-forward treat.
If you have extra magic shell left over, use it for dipping homemade pudding pops or drizzling on vanilla ice cream!
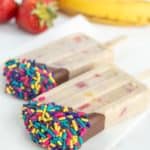
These banana split-inspired banana popsicles are a must-make summer dessert!
Love this recipe? Please leave a 5-star review below! It means so much when you enjoy my recipes, so let me know how it goes and leave a comment if you have any questions.
Prep Time 10 minutesmins
Freeze Time 4 hourshrs
Total Time 4 hourshrs10 minutesmins
Servings 8popsicles
Calories 242kcal
3ripe bananas
1/2cupcanned coconut milk
1/2cupchopped strawberries
1/2cupcrushed pineapple, drained
1cupchocolate chips
3tablespoonscoconut oil
Sprinkles or chopped nuts, for topping
Using a blender, immersion blender, or food processor, blend together bananas and coconut milk until smooth.
Stir in strawberries and pineapple, then divide mixture among popsicle molds. Freeze for at least 4 hours, until set.
When ready to coat popsicles, remove popsicle mold from the freezer and set in sink to thaw slightly.
Make the chocolate coating by melting chocolate and coconut oil together in the microwave, in 30-second increments, stirring after each time. When the chocolate is almost completely melted, stir until completely smooth. Pour sprinkles or chopped nuts, if using, into a bowl
Set a sheet of waxed paper on a cookie sheet. Remove popsicles from molds gently and carefully dip popsicle into chocolate, then immediately into sprinkles or nuts.
Enjoy immediately, or set finished popsicles onto waxed paper and freeze cookie sheet for 30 minutes, then remove popsicles to a freezer-safe container, with waxed paper between each popsicle.
Dark chocolate chips contain no milk, but check the label for vegan certification if you are concerned with cross-contamination. The melted chocolate will harden immediately when it comes in contact with the popsicle, so work quickly. Any leftover chocolate can be stored, covered, in the pantry, and reheated if it solidifies.
Nutrition information is provided as a courtesy and is an estimate based on online calculators. Any nutritional information found on Stetted should be used as a general guideline only.
Please leave a rating and comment below!
This recipe has been retested and updated since originally posting June 2015.
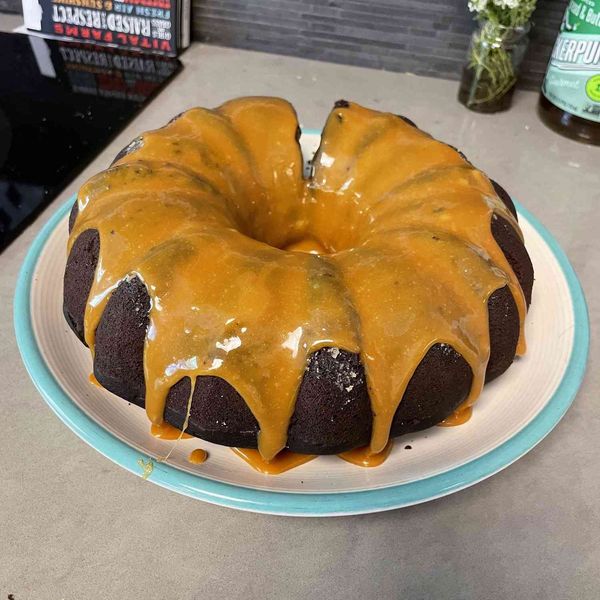
Rich, medium-dense vegan chocolate cake, perfectly moist. Adapted from Sue’s Vegan Chocolate Cake on this site.
Submitted by Julia Skala
Updated on January 14, 2022
Cook Mode (Keep screen awake)
Ingredients
Original recipe (1X) yields 8 servings
1 ½cupsall-purpose flour
1cupwhite sugar
¼cupcocoa powder
1teaspoonbaking soda
½teaspoonsalt
⅓cupcold vegan buttery spread (such as Earth Balance®)
½cupsoy milk
½cupbrewed coffee
1teaspoonapple cider vinegar
1teaspoonvanilla extract
Directions
Preheat the oven to 350 degrees F (175 degrees C). Grease and flour an 8-inch round cake pan.
Combine flour, sugar, cocoa powder, baking soda, and salt in a large bowl, whisking until smooth. Cut in buttery spread using a pastry cutter or 2 knives until it is the size of small peas and flour mixture is evenly coated.
Pour soy milk, coffee, vinegar, and vanilla extract into the bowl. Blend with an electric mixer until smooth; beat for 2 minutes more. Pour batter into the prepared pan.
Bake in the preheated oven until a toothpick inserted into the center comes out clean, 35 to 40 minutes. Cool in the pan for at least 10 minutes before inverting onto a wire rack or serving plate.
Cook’s Notes:
Substitute another vegan milk for the soy milk if preferred.
You can use another type of vinegar in place of apple cider vinegar.
Nutrition Facts (per serving)
266
Calories
8g
Fat
45g
Carbs
4g
Protein
Nutrition Facts
Servings Per Recipe 8
Calories 266
% Daily Value *
Total Fat
8g
11%
Saturated Fat
2g
12%
Sodium
386mg
17%
Total Carbohydrate
45g
17%
Dietary Fiber
2g
6%
Total Sugars
26g
Protein
4g
7%
Calcium
12mg
1%
Iron
2mg
9%
Potassium
93mg
2%
* Percent Daily Values are based on a 2,000 calorie diet. Your daily values may be higher or lower depending on your calorie needs.
** Nutrient information is not available for all ingredients. Amount is based on available nutrient data.
(-) Information is not currently available for this nutrient. If you are following a medically restrictive diet, please consult your doctor or registered dietitian before preparing this recipe for personal consumption.
Photos of Easy Vegan Chocolate Cake
Photo by Allrecipes Member
Photo by
Chef Mo
My world has changed! This cake is awesome! I have made very complex cakes in the past that don’t touch this rich and deep chocolate flavor! I topped it with a little powdered sugar, but it doesn’t need it! I will make this again!!
Photo by
Chef Mo
My world has changed! This cake is awesome! I have made very complex cakes in the past that don’t touch this rich and deep chocolate flavor! I topped it with a little powdered sugar, but it doesn’t need it! I will make this again!!
I’m an “ovo-vegan” and while some may find that restrictive, believe me, I don’t miss out on yummy food! I often would rather stay home and whip up something from whatever I have on hand than go out to restaurants.
I’m a student at a community college (although I may return to Columbia next year…I know, big difference!). I’m taking an environmental science course right now, which has seriously effected the way I view our world. Eating organically grown foods has suddenly become a priority for me!
If you want to do your part for our world, remember this: have NO MORE THAN TWO CHILDREN. I know, your first thought in response to that is “But ME in (America or other economically sound, technologically advanced, and highly educated country) in my station in society having kids isn’t the problem. MY children would (educated, spiritual, kind-hearted, beautiful…fill in your adjective here) and would be part of the solution to the problems!”
Well, yes, but it’s really not fair to your anyone, that child included. Every person you bring into the world will require an American/Western lifestyle, meaning drive cars, live in a comfortable home, require a job, use water…all of which taxes our earth’s resources to a ridiculous extent. (A whole lot more so than developing nations, who have their own set of woes–mainly living the way they are because someone else is restricting them to benefit people like us) People, we’re growing in numbers so fast and demanding more and more of our world, we’re going to crash. If not in the lifetime of your children or grandchildren, then in the generation after that. Is that fair to that/those children you have, ahem, more than two? With everyone having two kids only, at least we’ll level off our population.
Sigh.
Okay, so do the right thing, avoid mass-agriculture if you can while you cook, and enjoy our priveledged life without being selfish. 🙂
Published: · Modified: by Chuck Underwood · 4 Comments
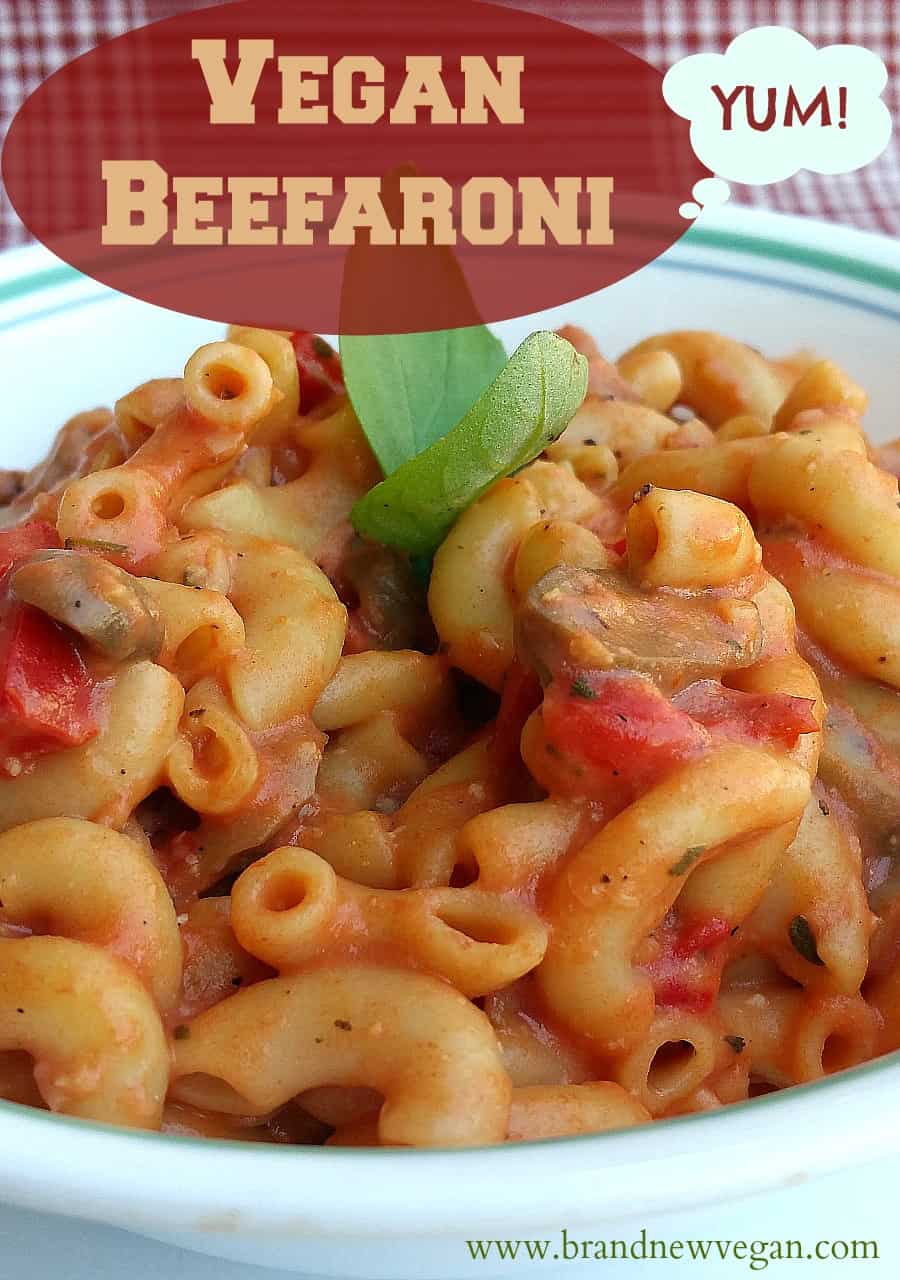
I don’t know about you, but when I was a kid I ate a ton of Chef Boyardee. You know…those little cans of Beefaroni and Ravioli? Basically just pasta in tomato sauce.
I know – not the healthiest – and pretty plain and boring maybe – but hey I was a kid ok? And this was the ultimate kid comfort food!
So last night as I was preparing dinner – pasta in garlic sauce – I added a can of Tomato Sauce and what do you know…..
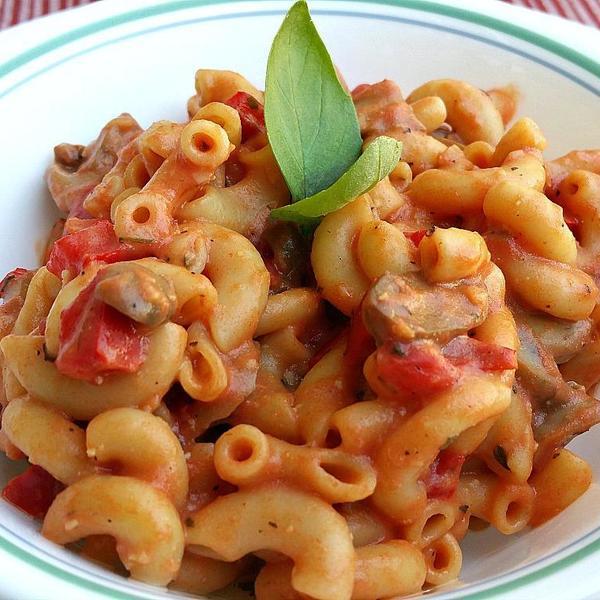
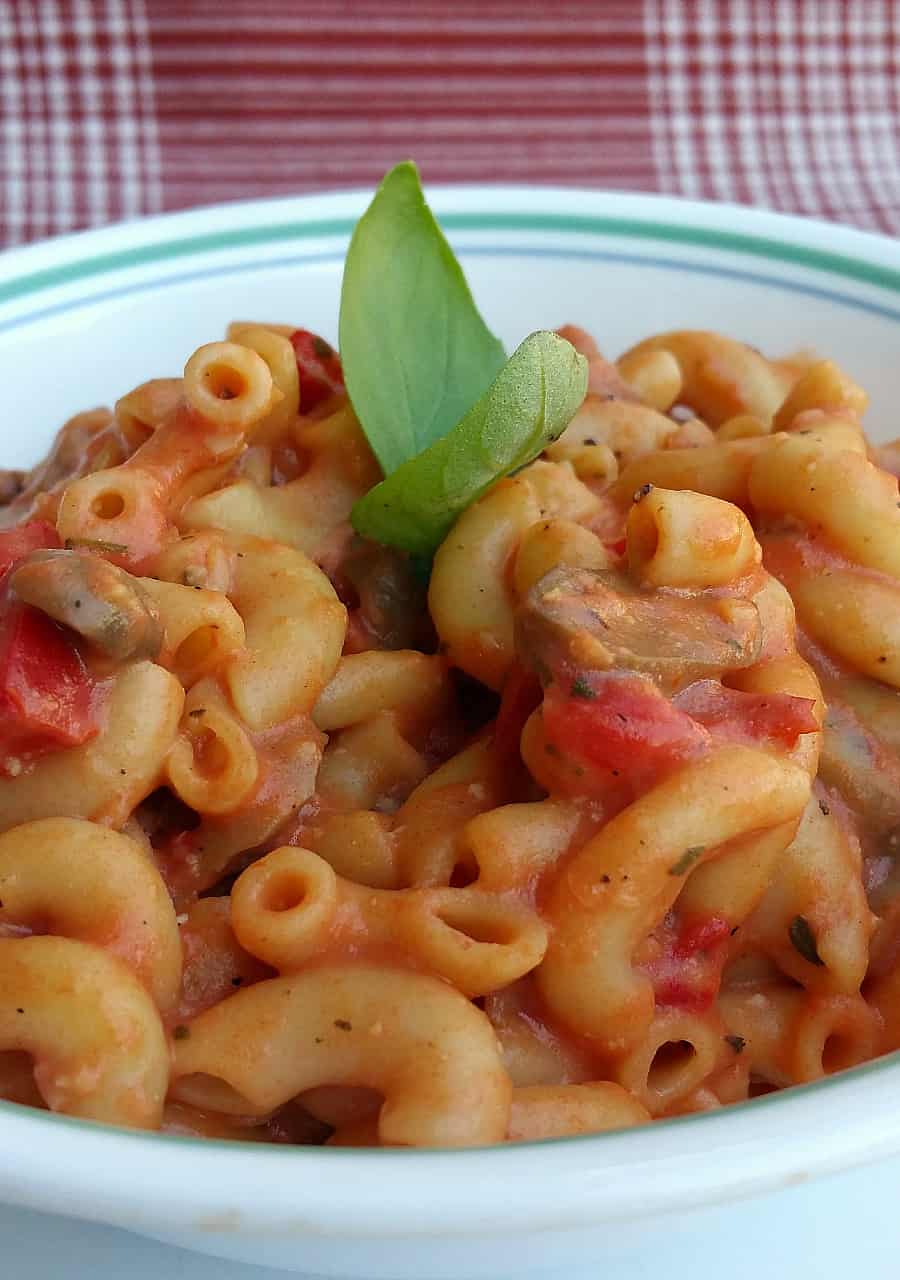
Vegan Beefaroni
Before I even get started – I know many people ask why us Vegans have to keep trying to imitate meals with meat.
Why do you call it Chicken and Dumplngs if there’s no chicken?
Why do you call it BBQ Beef if there’s no beef?
Vegan Beefaroni? WHERE’S THE BEEF? (loved that commercial)
COMFORT FOOD!
That what it all boils down to. I recreate the comfort foods I grew up eating. And I know for many people who are just beginning this lifestyle (all you Brand New Vegans) – that having your favorite comfort foods available while you’re transitioning will make the journey a whole lot easier.
That’s why. Now let’s get to it!
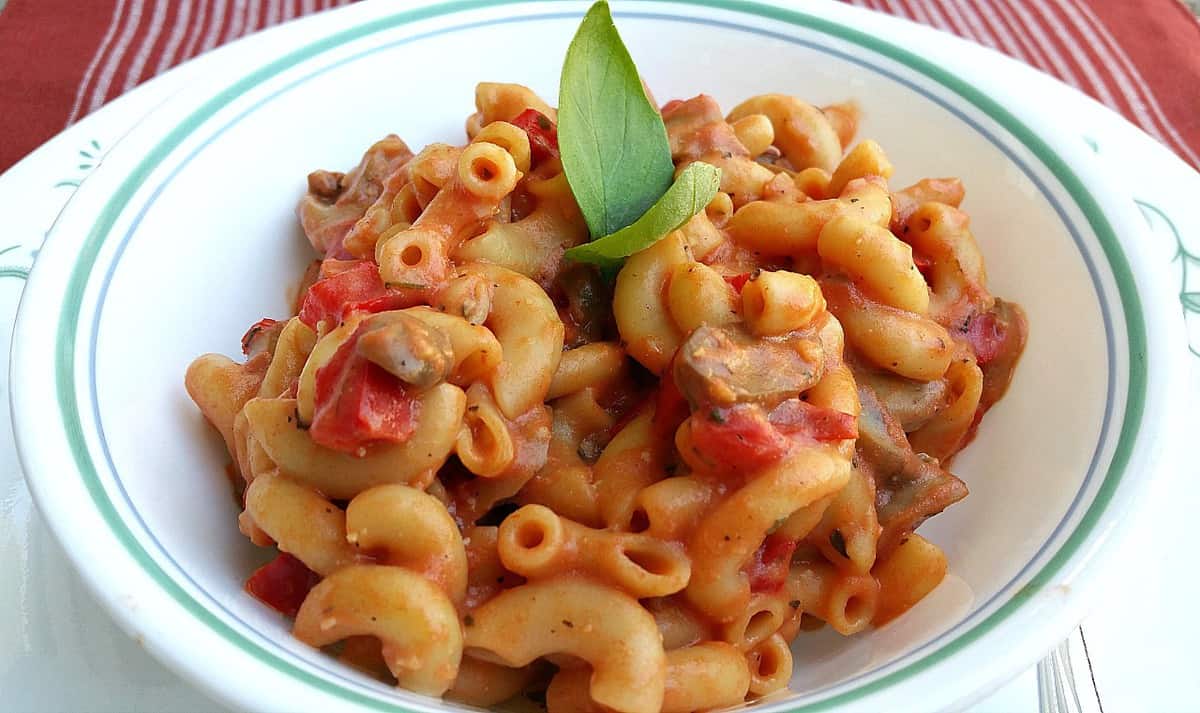
Vegan Beefaroni
Vegan Beefaroni – Brand New Vegan
So what exactly is Vegan Beefroni?
It starts by making a basic Garlic Sauce. Mince anywhere between 4-8 good-sized cloves of garlic and sauté them in about ¼ cup of veggie broth until softened. I used 8 but I REALLY like garlic.
After cooking for a few minutes, sprinkle on 4 Tbls of regular AP Flour to make a thick paste, adding additional Veggie Broth if necessary to keep it from becoming really gummy. Gluten Free folks feel free to try Spelt Flour or whatever you normally use as a thickener.
Let that brown for about a minute and then slowly whisk in 2 cups of unsweetened Almond Milk. Be sure and break up any clumps. Season this with ½ teaspoon of Onion Powder, and salt/pepepr to taste.
You can also add Vegan Parmesan – which is basically ground up Cashews and Nutritional Yeast. I think it really gives the sauce a good flavor, but some people cannot stand Nutritional Yeast – so it’s completely optional. If you do add some – I used about 2 Tbls.
Keep whisking over med-low heat until it starts to thicken. This may take a little while….just keep whisking..
Now add 1 Tbls of Pimentos, ½ chopped Red Bell Pepper, and 2 small 4oz cans of Mushrooms. Stir well until its nice and bubbly and is really begin to thicken.
If you haven’t already – begin cooking your pasta – about 8 oz. I recommend Whole Wheat Macaroni, but if you’re Gluten Free – use the pasta of your choice. When the pasta is done, drain well and add it to the garlic sauce.
Finally, fold in 1 can of drained diced Tomatoes and an 8oz can of Tomato Sauce, and ½ teaspoon each of dried Basil & Oregano.
Stir well to make sure all the macaroni is evenly coated.
Season with additional salt & pepper if necessary and garnish with fresh Basil.
YUM! Vegan Beefaroni. I bet your kiddos will love it.
Print
Vegan Beefaroni
5 Stars 4 Stars 3 Stars 2 Stars 1 Star 5 from 1 review
Author:Chuck Underwood
Prep Time:20 minutes
Cook Time:20 minutes
Total Time:40 minutes
Category:Main
Cuisine:American
Description
Remember Chef Boyardee? I ate a ton of this as a kid. So what happens if you add Tomato Sauce to Macaroni & Mushrooms in Garlic Sauce? Vegan Beefaroni!
8 oz Macaroni ((Whole Wheat or Gluten Free))
4–8 Cloves Garlic ((minced))
4 Tbls Flour ((All Purpose or Gluten Free))
2 ¼ cups Unsweetened Almond Milk ((divided))
2 Tbls Vegan Parmesan ((optional))
½ tsp Onion Powder
1 Tbls Pimentos
½ Red Bell Pepper ((chopped))
8 oz Sliced Mushrooms
1 can Diced Tomatoes ((15oz, drained))
1 can Tomato Sauce ((8oz))
½ tsp Oregano
½ tsp Basil
¼ tsp Salt
¼ tsp Pepper
Vegan Parmesan
¾ cup Ground Cashews
3 tbls Nutritional Yeast
¾ tsp Salt
¼ tsp Garlic Powder
Instructions
Cook pasta according to package instructions, drain
Saute garlic in ¼ cup Vegetable Broth until softened
Stir in flour until it makes a thick paste
Slowly whisk in Almond Milk and stir well to break up any clumps
Season with Onion Powder and keep whisking until it begins to thicken
Add in Pimentos, Bell Pepper, and Mushroom and continue to stir
Once it has thickened slightly, add in drained pasta and stir to coat
Fold in Diced Tomatoes and stir well
Add Tomato Sauce, Basil, and Oregano
Season with Salt and Pepper
Reader Interactions
This site uses Akismet to reduce spam. Learn how your comment data is processed.


 No bake cheesecakes are absolutely a go-to dessert of mine, especially around the holiday season, and given my busy lifestyle as a work-at-home-mom of two, they’re kind of my default when I need an impressive dessert with not a lot of effort behind it. I’ve shared lots and lots of no bake cheesecakes with you before, like this No Bake Orange Creamsicle Cheesecake, or this No Bake Oreo Cheesecake, and even this Easy No Bake Mint Chocolate Chip Cheesecake, but I’m telling you – this No Bake Chocolate Mousse Cheesecake trumps them all. Seriously.
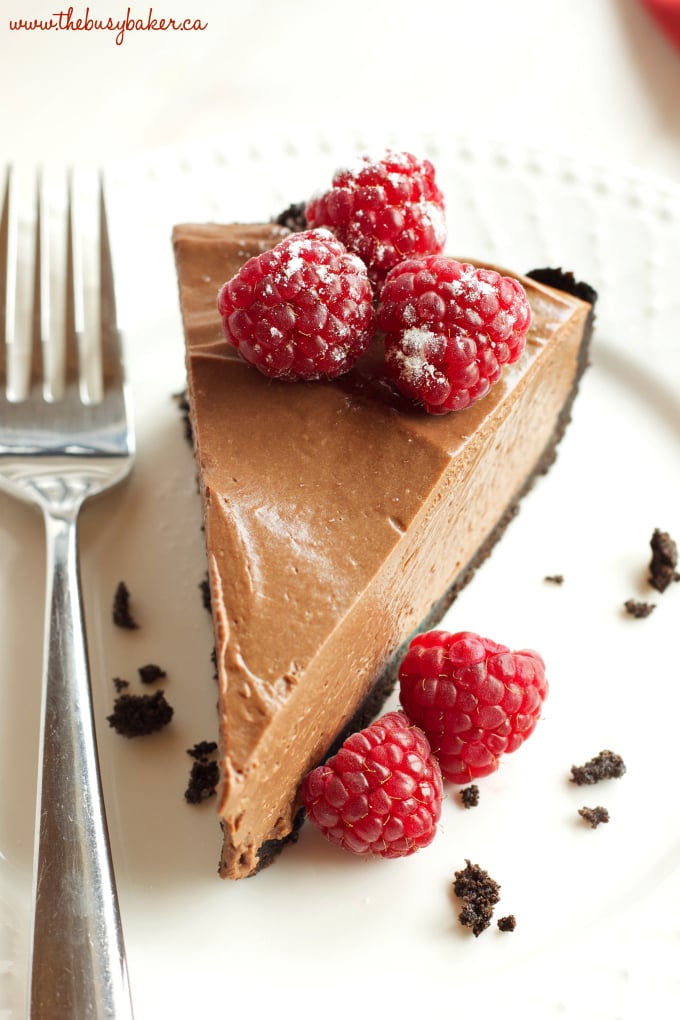 All you need for this recipe is a blender – here’s a link to my favourite one (affiliate link) – and a 9-inch spring form pan. That’s it! It’s as simple as making the 2-ingredient crust, chilling it while you make the filling, and then dumping the filling ingredients in the blender, blending until smooth, and then chilling everything for a few hours to set. Honestly, it’s more work to drive to the bakery and buy an already-made cheesecake than it is to make this one yourself at home!!
 Now for all you skeptics and purists out there who can’t fathom a cheesecake without cheese, let me put your minds at ease. I was completely skeptical too. A lovely friend of mine passed this recipe on to me after she hosted our family for a dinner party recently. My husband follows a dairy-free diet, so because my friend is as sweet as can be she made a variation of this No Bake Chocolate Mousse Cheesecake for us for dessert because it was something we could all enjoy (my friend adapted this recipe from Baking Equals Love). Normally I’m a skeptic too, but her dessert was so beautiful I just couldn’t help but try a piece. After one bite I was completely sold. This may be, hands down, the best dessert I’ve ever, ever tasted. Period. And the filling is only 3 ingredients (4 if you add vanilla extract). Seriously.
 I hope you enjoy this No Bake Chocolate Mousse Cheesecake as much as we do! Let me know in the comments below, what’s your favourite cheesecake flavour?